No time? No problem. Marinating this chicken takes no more than five minutes, and it yields incredibly flavorful meat, delicious on its own or well suited for chopping up and throwing into salads, wraps, sandwiches, and more.
A few years ago, I shared my updated recipe for making tacos , a recipe that evolved considerably from its origins , one that called for a few packets of taco seasoning, an ingredient I never imagined purchasing. Today, I make a double batch of those tacos every other week, and every time I tear open one of those little packets, I am so grateful for their existence.
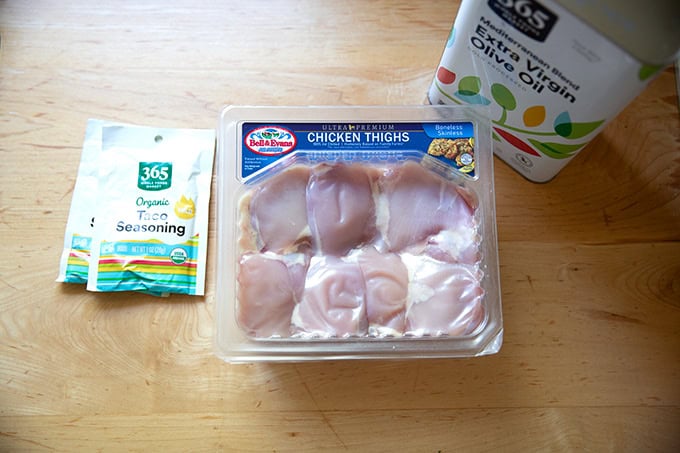
My latest favorite use for taco seasoning is this grilled chicken. Here’s my formula: 1 packet of chicken thighs (about 2 lbs.), 1 packet of taco seasoning, and a few tablespoons of olive oil. It takes no thought or time, and it produces perfectly seasoned meat, delicious on its own or great for chopping up and using in tacos, wraps, salads, sandwiches, etc. I usually marinate 2 packets of thighs at a time, and I use it over the course of two days.
When you find yourself pressed for time (or not) but want to make a flavorful meal for your friends or family, this is the recipe to reach for. Of course, its success relies on the quality of the taco seasoning, and I’ve included a few of my favorite brands as well as reader favorite brands in the recipe box below.
Three-Ingredient Grilled Chicken, Step by Step
Gather your ingredients: taco seasoning, chicken thighs, oil. You can use breasts, but I prefer thighs.
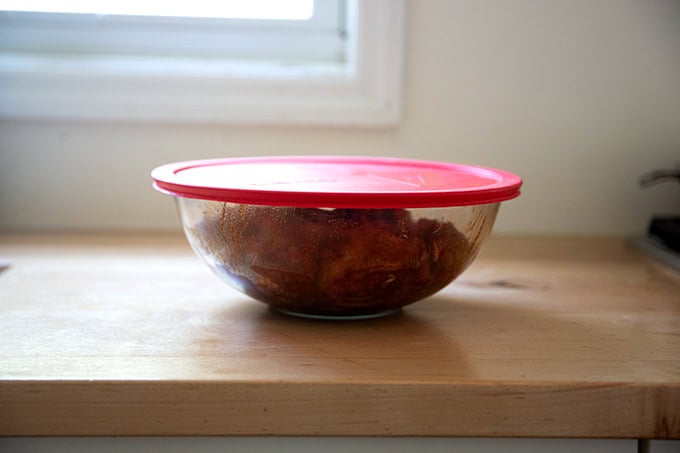
Place the chicken in a large bowl, sprinkle with taco seasoning: I use 1 packet of taco seasoning (about 3.5 tablespoons) per one package of thighs (roughly 2 lbs. of meat) and 3 tablespoons of olive oil.
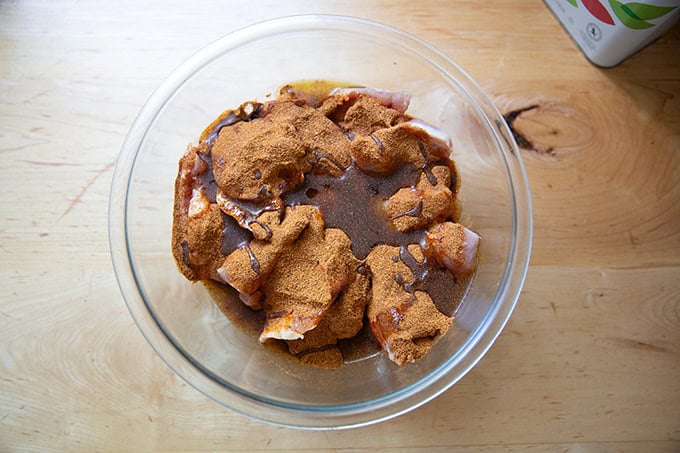
Toss to coat:
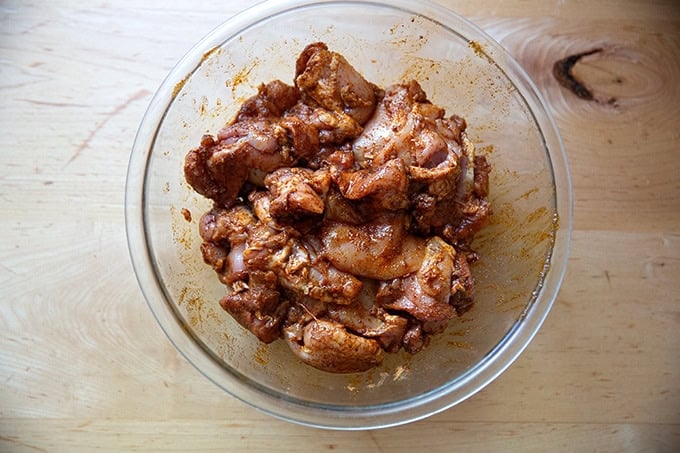
Cover the bowl and let marinate in the fridge for as short as 1 hour and as long as 48 hours:
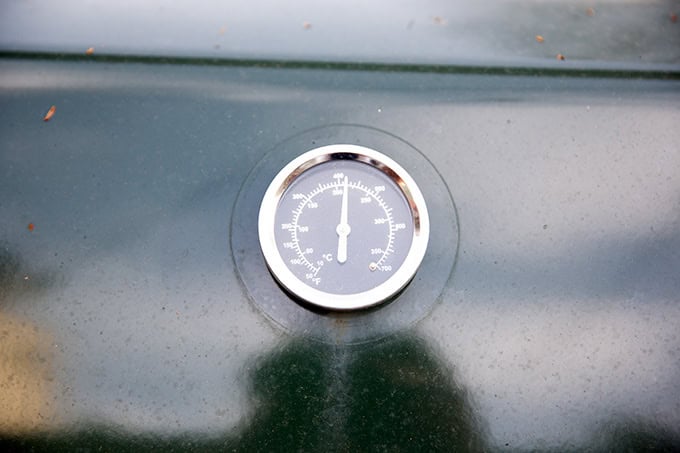
Preheat your grill. I preheat for roughly 20 minutes — you want it above 500ºF.

Clean your grates, then lay your chicken on them.
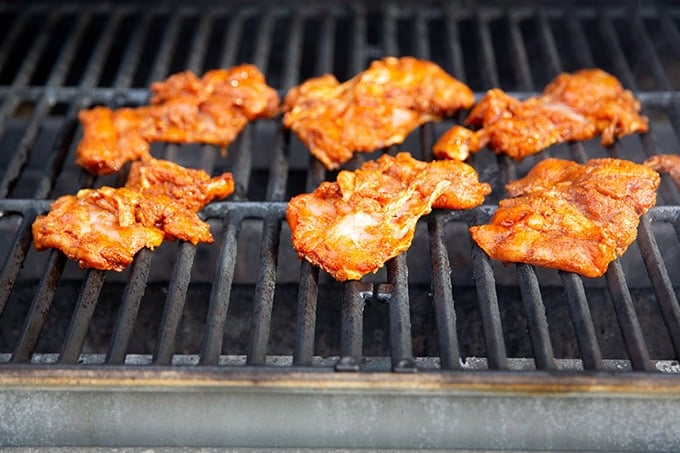
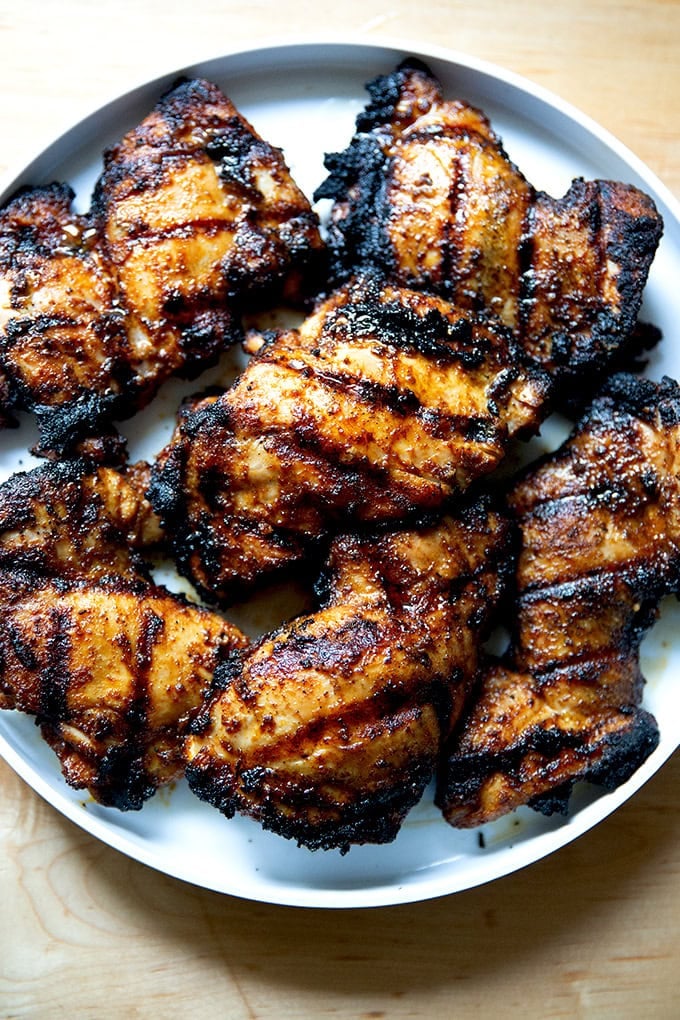
Close your grill… the temperature will have dropped. Grill for 4 to 5 minutes depending on the size of the thighs…
… then flip, cover, and grill for another 4 to 5 minutes a side.
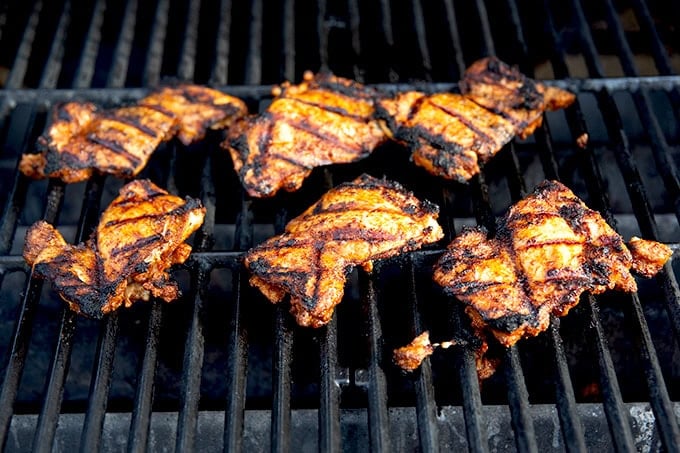
Transfer to a plate to cool for at least 5 minutes; then serve:
Description
Made with three ingredients — olive oil, taco seasoning, and chicken — this recipe comes together in no time, and is so incredibly flavorful.
Notes:
Taco Seasoning: My favorite is the Whole Foods 365 brand Mild, but I also love the Simply Organic brand. With the 365 brand, I don’t need to add any salt; with the Simply Organic brand, I finish with a little salt to taste — post grilling. It is important to experiment with various brands to learn their salt content — you may or may not need any salt depending on the brand. A few other Reader favorite taco seasoning brands suggested on this post include: The Spice House , Penzey’s , and Siete Foods .
Chicken : I prefer thighs, but you can use breasts if you prefer.
Recipe doubles well, so don’t be afraid to scale up as needed.
1 package of boneless, skinless chicken thighs (about 2 lbs.), see notes above
1 packet (1 ounce) of taco seasoning, see notes above
3 tablespoons of olive oil
- Marinate the chicken: Place the chicken in a large bowl. Sprinkle the taco seasoning and olive oil over it. Toss until the chicken is well coated. Cover the bowl and marinate in the fridge for 1-48 hours. You can also grill the chicken immediately if you are pressed for time.
- Grill the chicken: Preheat your grill to high for roughly 20 minutes — you want it to be at roughly 525ºF when you start. Clean your grates if you haven’t already, then re-cover the grill and let it get back up to at least 525ºF before proceeding. Lay the chicken on the grates, cover, and grill for 4 to 5 minutes. Uncover, flip the chicken, and grill for another 4 to 5 minutes or until cooked through. Remove the chicken, and let it rest for at least 5 minutes before serving. (Note: as noted above, depending on the brand of taco seasoning you are using, you may or may not need any salt. Taste the chicken post grilling and finish with a sprinkle of flaky sea salt if necessary.)
- Prep Time: 5 minutes
- Cook Time: 10 minutes
- Category: chicken
- Method: grill
- Cuisine: American
Find it online : https://alexandracooks.com/2025/05/24/three-ingredient-grilled-chicken/
Say hello to your new favorite summer salad dressing! Made with only 4 ingredients, this roasted red pepper is shockingly easy to prepare as the roasted peppers require no peeling. The peppers lend both a sweetness and smokiness to the dressing, and the vinegar provides a perfect acidic bite. Summer salads, let’s go!
After dining at Ops in Brooklyn several summers ago, I returned home dreaming about the salad, the sole salad on the menu, an artful arrangement of Little Gems and radicchio drizzled with a roasted red pepper dressing. Ops, I learned, uses a mix of peppers, several vinegars, and herbs in their dressing, and I worried recreating it at home would be a challenge.
Much to my surprise, it was not, thanks to the roasted red peppers , which lend so much depth of flavor on their own — both a sweetness and smokiness — as well as body and richness. I kept my version simple using one variety of pepper, one type of vinegar, olive oil, salt, and no herbs, and I couldn’t believe how only four ingredients could create such a tasty emulsion.
It quickly became one of my favorite summer dressings, and I shared the recipe early last year in a bonus recipe PDF to those who pre-ordered Pizza Night . And while I never imagined tinkering with it, recently, two other recipes inspired me to do just that.
The first was this romesco sauce , which calls for roasting red bell peppers at high heat with a few other ingredients before puréing them all in a blender. It is incredibly delicious and, straying from tradition, requires no peeling of the peppers.
The second was a recipe for a “fast n’ fresh harissa” from the recently released Tahini Baby , which not only calls for no peeling of the peppers but also no roasting of the peppers. It, too, is incredibly delicious.
How, I wondered, would the simple 4-ingredient roasted red pepper dressing fare if I skipped the pepper peeling part of the process?
Turns out: spectacularly!
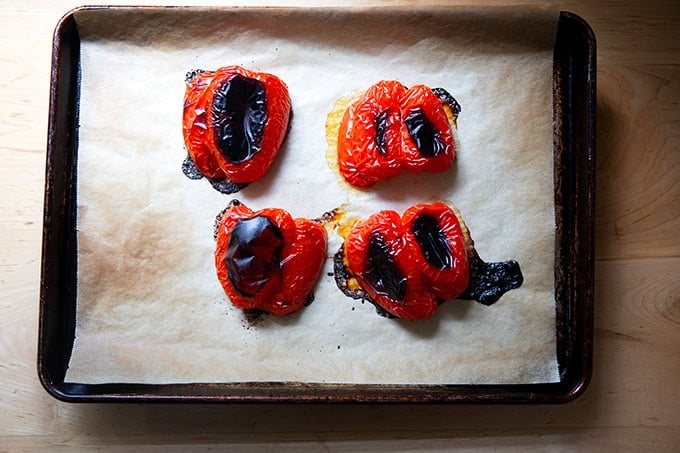
In my experiments, I tried roasting the peppers several ways, first as I always do, for roughly 40 minutes, until the skins completely blackened. Worrying, however, that some people might not like the idea of consuming all of that charred skin, in my next attempts, I roasted the peppers for a much shorter period of time, 20-25 minutes, just until the peppers charred in spots.
The result? Minimal blistering with the same great smoky, roasted flavor. Most important: the unpeeled peppers puréed just as smoothly as the peeled peppers. Win win.
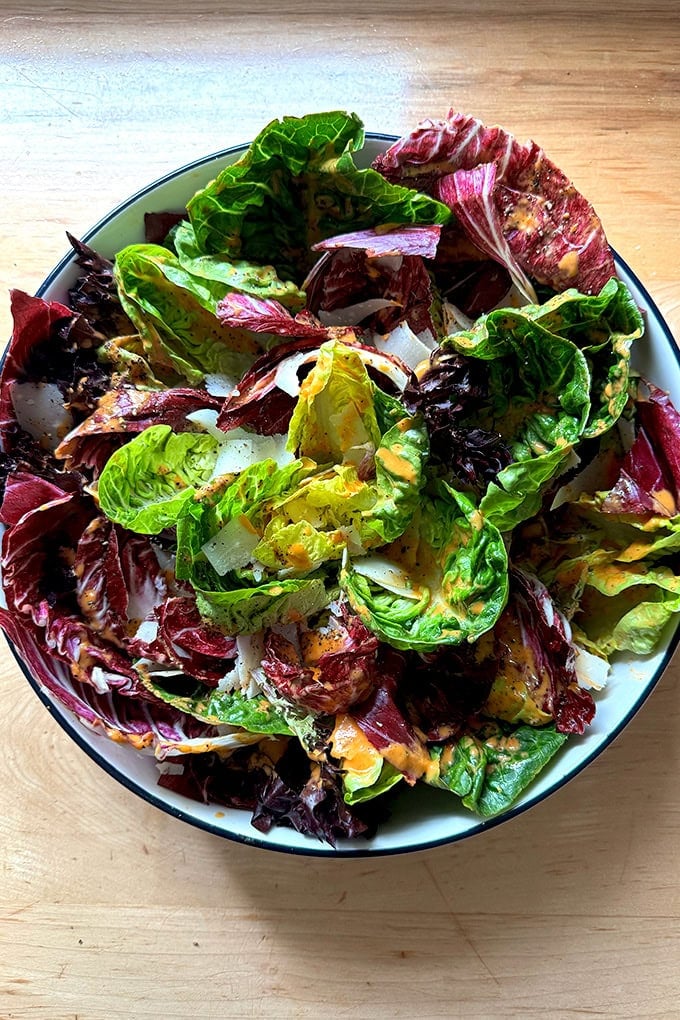
This dressing is perfect for heartier greens like Romaine, Little Gems, radicchio, and endive, but it’s the sort of thing you’ll want to drizzle over everything from grilled meats and fish to charred vegetables and more — if, that is, you can refrain from drinking it straight from the blender. No judgement here!
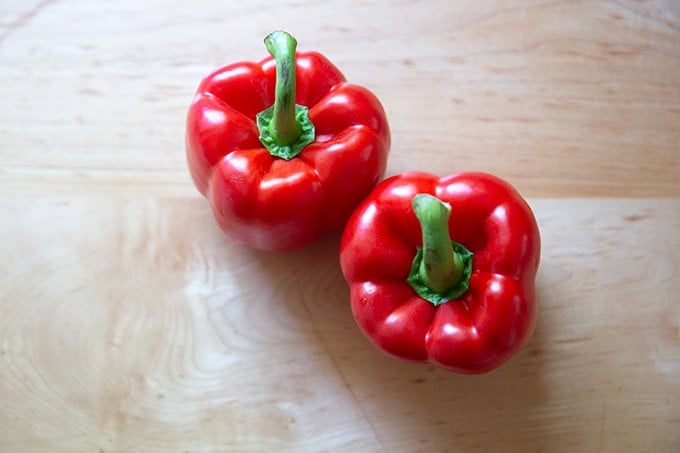
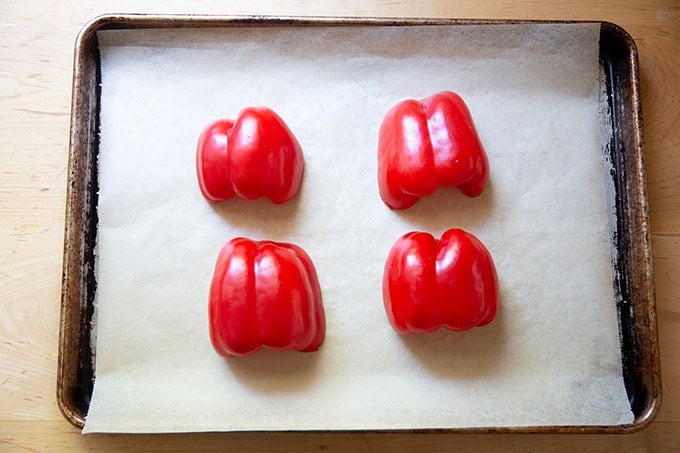
How to Make Roasted Red Pepper Dressing, Step by Step
First, you need two red bell peppers:
Halve them and place them cut-side down on a sheet pan:
Roast them @ 450ºF for 20-25 minutes or just until the skins blister in spots:
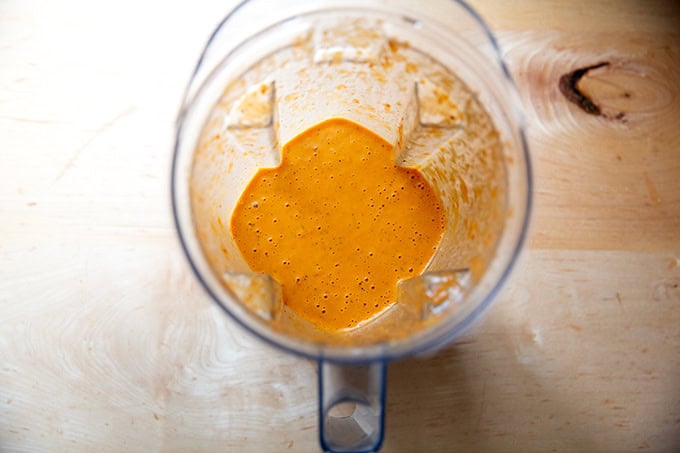
Let them cool for 10 minutes; then transfer to a blender with some salt and white balsamic vinegar.

Purée until smooth, then add the olive oil, and purée again until emulsified:
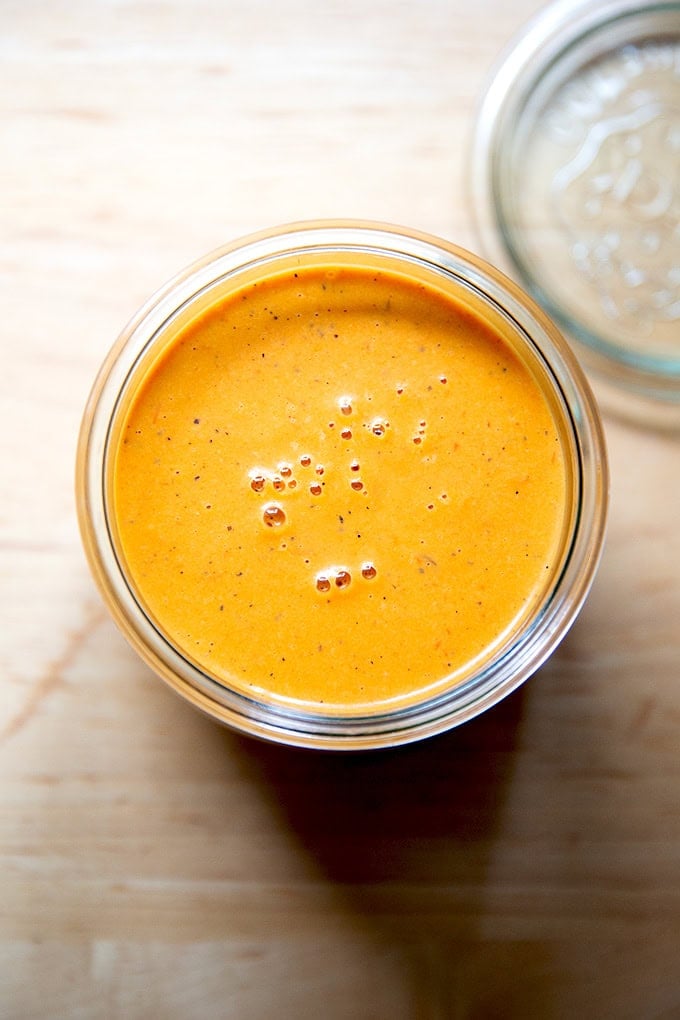
Transfer to a storage jar and store in the fridge for up to two weeks:

Description
Made with only 4 ingredients, this roasted red pepper is shockingly easy to prepare as the roasted peppers require no peeling. The peppers lend both a sweetness and smokiness to the dressing, and the vinegar provides a perfect acidic bite. Summer salads, let’s go!
Notes:
If you are concerned about the charring and prefer to use completely peeled peppers, do this: roast the peppers until they completely blacken, about 40 minutes, then transfer them to a bowl, cover it, and let stand for 20 minutes. Peel the peppers and discard the skin. Then proceed with the recipe. You may only need 1/2 cup olive oil when using completely peeled peppers, and you may only need 1/2 teaspoon of salt.
2 red bell peppers (about a pound)
3/4 teaspoon Diamond Crystal kosher salt (or half as much if using Morton or fine sea salt)
1/4 cup white balsamic vinegar
1/2 to 3/4 cup extra-virgin olive oil
- Preheat your oven to 450ºF. Line a sheet pan with parchment paper.
- Halve the peppers and rip out the seeds and stem. Place the peppers cut side down on the sheet pan then transfer to the oven for 20 to 25 minutes or until the peppers are blistered in spots, but not completely charred. Remove pan from the oven and let the peppers cool on the sheet pan for 10 minutes.
- Transfer the peppers to a blender with the salt and white balsamic vinegar.
- Puree the peppers, slowly at first, then at high speed until smooth, 30-45 seconds. Stop the machine, drizzle in 1/2 cup of the olive oil, then purée again, slowly at first, then at high speed for another 15 to 30 seconds or until emulsified. Stop the machine, taste, and add the remaining 1/4 cup olive oil if desired — I always do — and add more salt to taste. Purée one last time then transfer to a storage jar.
- Store the dressing in the fridge for as long as 2 weeks. Bring to room temperature before using.
- Prep Time: 10 minutes
- Cook Time: 20 minutes
- Category: Dressing
- Method: blender
- Cuisine: American
