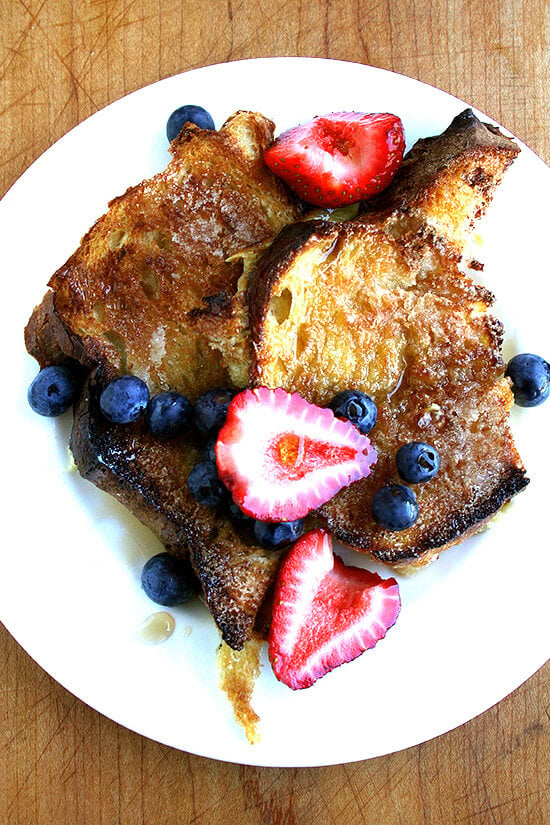
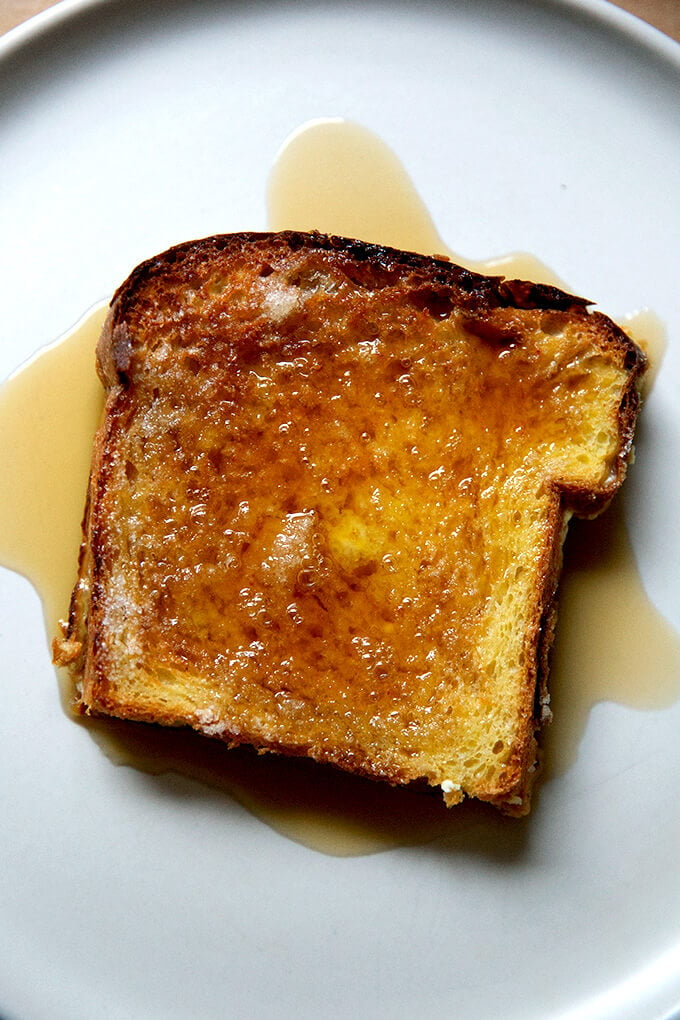
This is the easiest French toast you will ever make, and I believe it’s the best, too. It’s crisp on the exterior, moist on the interior, and emerges from the oven piping hot. Heaven!
I have a real weakness for any sort of breakfast carb, especially when I’m out to eat. Challah French toast. Lemon-ricotta pancakes. Blueberry-cornmeal hotcakes. You name it. If it’s floured, fried, and dripping in syrup, it has my name all over it.
These are dishes I rarely make at home. Laboring over a fickle griddle is one deterrent. Timing is another. It’s nearly impossible to get enough pancakes, French toast, and waffles out at once to serve everyone.
With the exception of French toast: if you bake it! And start it the night before. This is the easiest French toast you will ever make, and I believe it’s one of the best, too. It’s crisp on the exterior and moist but by no means soggy on the interior. It emerges from the oven piping hot yielding enough, at the very least, for four eaters.
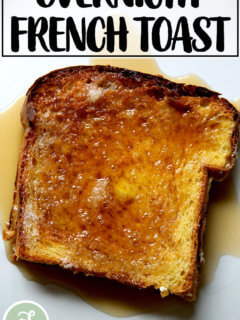
How to Make Overnight French Toast, Step by Step
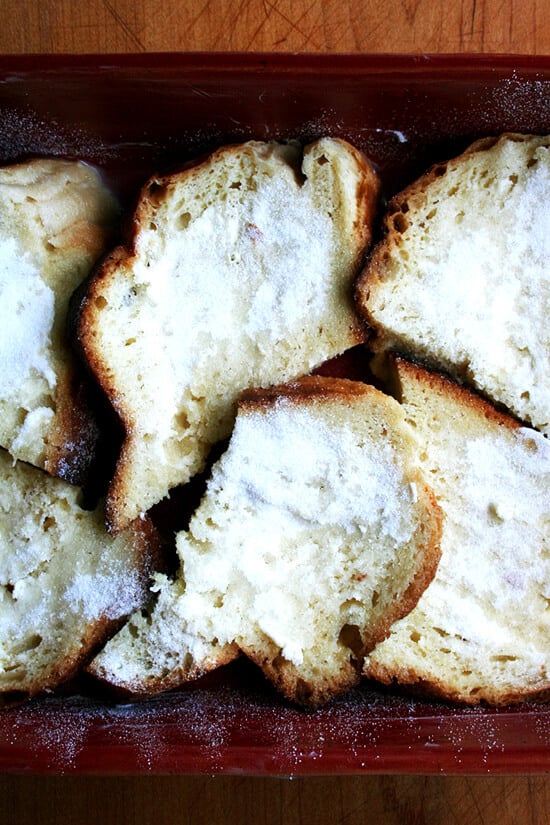
After a night in the fridge, the bread absorbs all of the liquid:
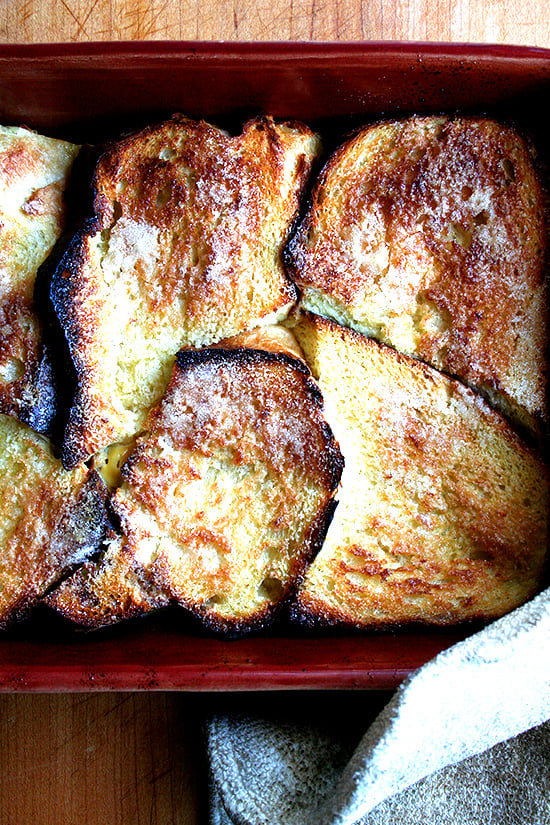
Just out of the oven, baked French toast:
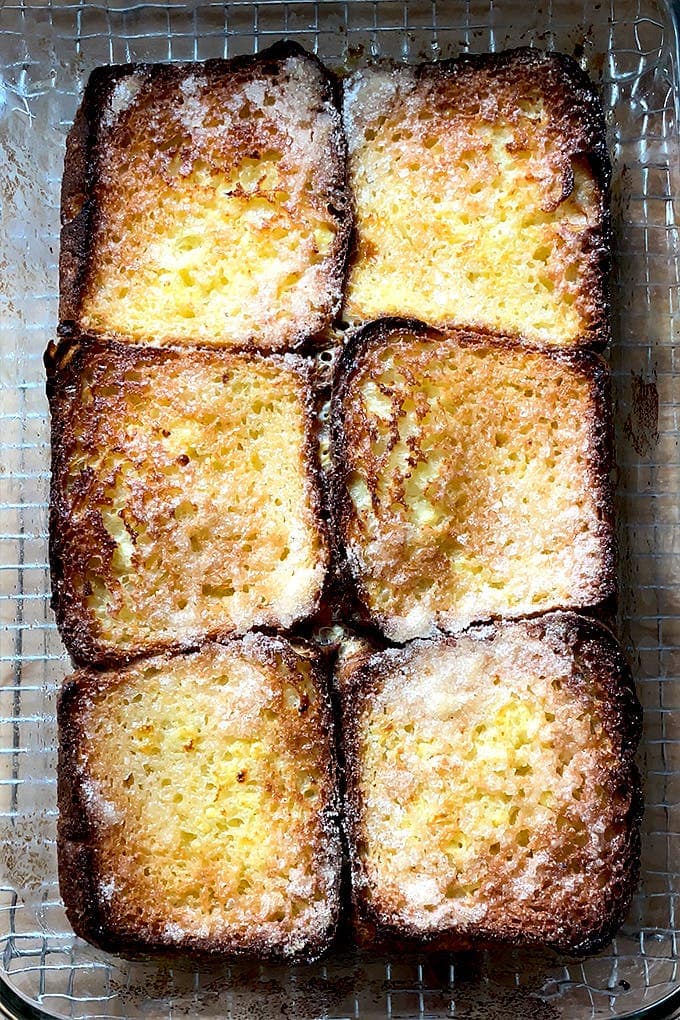
You can use various breads such as brioche :
Description
This is the easiest French toast you will ever make, and I believe it’s the best, too. It’s crisp on the exterior, moist on the interior, and emerges from the oven piping hot. Heaven!
From the November 2000 Gourmet .
Notes:
If you are up for making your own brioche , I find this turns out especially well when made with brioche. Challah is a great choice as well.
That said: my mom uses “Toasting White” (Pepperidge Farm). My aunt uses a dense bakery-style loaf of Italian bread.
- 1 (13- to 14-inch-long) loaf bread, see notes above
- 1/2 stick (1/4 cup) unsalted butter, softened
- 2 large eggs
- 1 2/3 cups whole milk
- 1 tsp . vanilla
- 1/4 tsp . kosher salt
- 3 tablespoons sugar
- maple syrup, berries, and powdered sugar, for serving, if desired
- Cut about six to eight — enough to fit your pan — one-inch-thick slices of bread.
- Generously butter one side of each slice and arrange slices, buttered sides up, in one layer in a buttered 13- by 9- by 2-inch baking dish, squeezing them slightly to fit if necessary.
- Whisk together eggs, milk, vanilla and salt until combined well, then pour evenly over bread. Chill, covered, until bread has absorbed all of custard, at least one hour and up to one day, depending on bread.
- Preheat oven to 425°F. Bring mixture to room temperature and sprinkle bread with sugar.
- Bake, uncovered, in middle of oven until bread is puffed and top is golden, 20 to 25 minutes, or longer — make sure it’s nice and golden on top or it will be soggy in the middle. Serve immediately with fruit and syrup and powdered sugar if desired.
- Prep Time: 10 minutes
- Cook Time: 25 minutes
- Category: Breakfast
- Method: Oven
- Cuisine: American
This is the easiest French toast you will ever make, and I believe it’s the best, too. It’s crisp on the exterior, moist on the interior, and emerges from the oven piping hot. Heaven!
I have a real weakness for any sort of breakfast carb, especially when I’m out to eat. Challah French toast. Lemon-ricotta pancakes. Blueberry-cornmeal hotcakes. You name it. If it’s floured, fried, and dripping in syrup, it has my name all over it.
These are dishes I rarely make at home. Laboring over a fickle griddle is one deterrent. Timing is another. It’s nearly impossible to get enough pancakes, French toast, and waffles out at once to serve everyone.
With the exception of French toast: if you bake it! And start it the night before. This is the easiest French toast you will ever make, and I believe it’s one of the best, too. It’s crisp on the exterior and moist but by no means soggy on the interior. It emerges from the oven piping hot yielding enough, at the very least, for four eaters.
How to Make Overnight French Toast, Step by Step
After a night in the fridge, the bread absorbs all of the liquid:
Just out of the oven, baked French toast:
You can use various breads such as brioche :
Description
This is the easiest French toast you will ever make, and I believe it’s the best, too. It’s crisp on the exterior, moist on the interior, and emerges from the oven piping hot. Heaven!
From the November 2000 Gourmet .
Notes:
If you are up for making your own brioche , I find this turns out especially well when made with brioche. Challah is a great choice as well.
That said: my mom uses “Toasting White” (Pepperidge Farm). My aunt uses a dense bakery-style loaf of Italian bread.
- 1 (13- to 14-inch-long) loaf bread, see notes above
- 1/2 stick (1/4 cup) unsalted butter, softened
- 2 large eggs
- 1 2/3 cups whole milk
- 1 tsp . vanilla
- 1/4 tsp . kosher salt
- 3 tablespoons sugar
- maple syrup, berries, and powdered sugar, for serving, if desired
- Cut about six to eight — enough to fit your pan — one-inch-thick slices of bread.
- Generously butter one side of each slice and arrange slices, buttered sides up, in one layer in a buttered 13- by 9- by 2-inch baking dish, squeezing them slightly to fit if necessary.
- Whisk together eggs, milk, vanilla and salt until combined well, then pour evenly over bread. Chill, covered, until bread has absorbed all of custard, at least one hour and up to one day, depending on bread.
- Preheat oven to 425°F. Bring mixture to room temperature and sprinkle bread with sugar.
- Bake, uncovered, in middle of oven until bread is puffed and top is golden, 20 to 25 minutes, or longer — make sure it’s nice and golden on top or it will be soggy in the middle. Serve immediately with fruit and syrup and powdered sugar if desired.
- Prep Time: 10 minutes
- Cook Time: 25 minutes
- Category: Breakfast
- Method: Oven
- Cuisine: American
Find it online : https://alexandracooks.com/2010/06/07/overnight-french-toast/


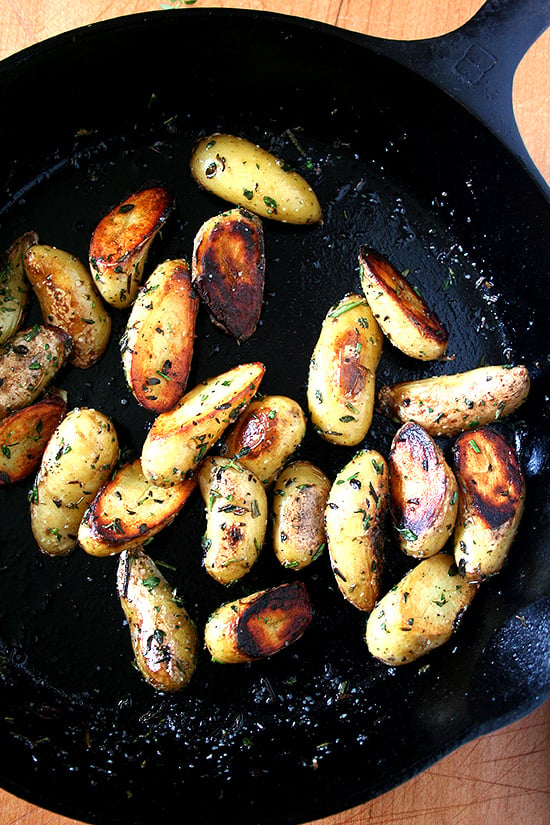
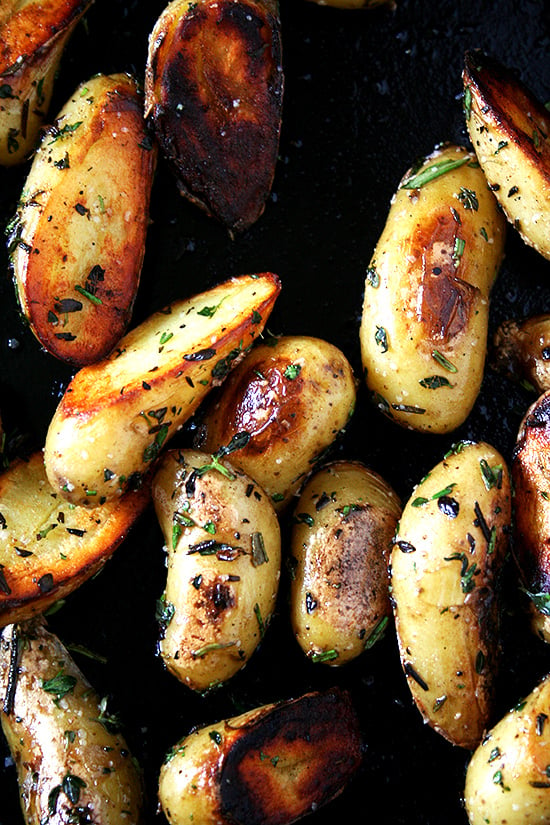
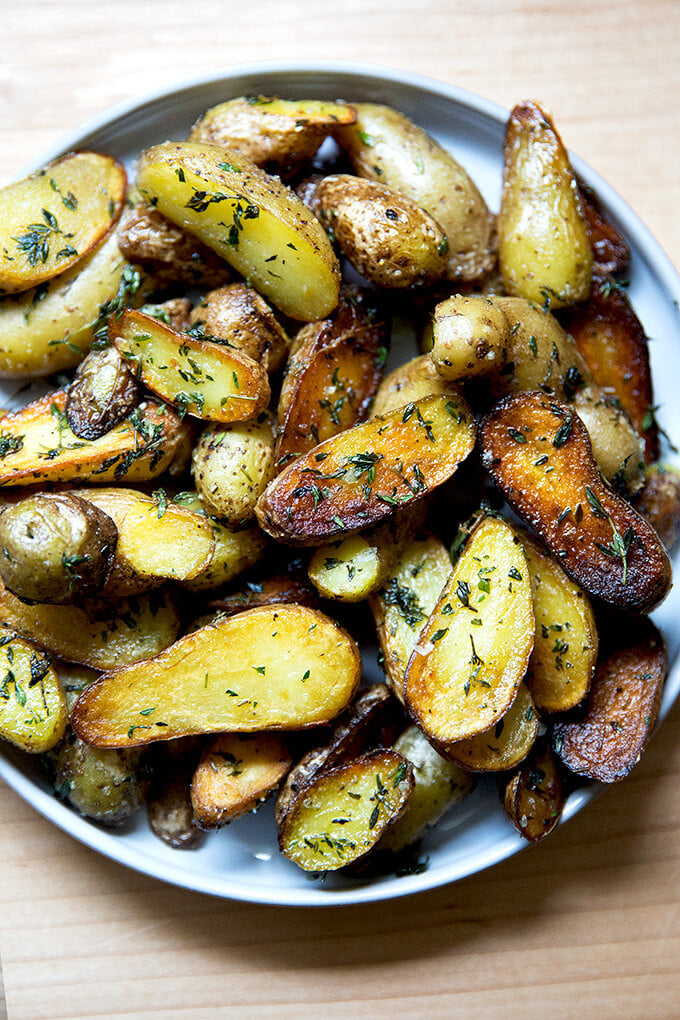
The key to perfectly cooked fingerlings? Boil first; then crisp them up in a skillet over high heat.
Potatoes in many a form — from creamy and mashed to cheese-crusted and hasselbacked — hold a dear place in my heart. But these crispy, herb-flecked fingerlings hands down are my favorite.
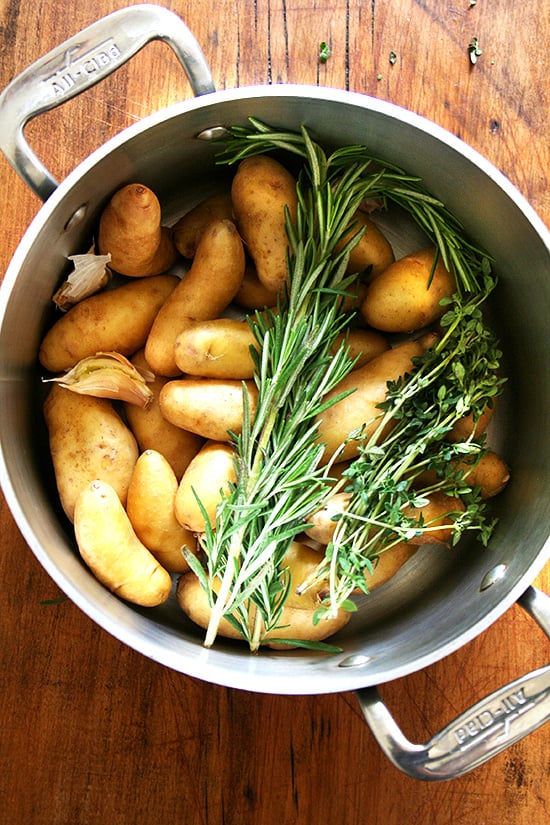
I learned how to make them by the caseload. By the caseload of salt, too. I was working at Fork in Philadelphia and gasped the first time I saw the chef unload a box — literally one 3-lb. box — of kosher salt into a pot, albeit a very large pot, filled with fingerling potatoes, water, many cloves of garlic and several bunches of rosemary and thyme.
Bring the water to a boil, he instructed, then turn off the heat. The potatoes, he ensured, would finish cooking as they cooled.
He was right. The potatoes were cooked perfectly, not the slightest bit overdone. And moreover, they were seasoned perfectly, not a bit too salty, and subtly infused with the flavors of rosemary, thyme, and garlic.
Often I eat these potatoes straight out of the pot without a bit of extra seasoning. And I love them sliced and tossed into salads.
But when I’m up for it, I crisp them up, as I learned at Fork, in a hot skillet with some olive oil, chopped rosemary and thyme, and a pinch more salt. It’s such a treat. I know you’ll love them, too.
PS: All the Potato Recipes right this way .
How to Cook Fingerling Potatoes in Two Steps
Place potatoes and seasonings — garlic, thyme, rosemary, and salt — in a large pot. Cover with cold water; then bring to a simmer. Depending on the pot you are using and the quantity of potatoes, times will vary, but the key is to turn off the burner as soon as the water boils. The potatoes will finish cooking as they cool in their cooking liquid.
Once cool, halve the potatoes on the bias; then crisp up in olive oil in a hot skillet until golden. Season with more rosemary, thyme, and salt.
Transfer to a platter and serve immediately.
Description
The key to perfectly cooked fingerlings? Boil first; then crisp them up over high heat.
I learned to cook potatoes this way while working at Fork in Philadelphia. The chef at the time cooked fingerlings as directed below, the keys being:
- Use a ton of salt.
- Bring the water to a boil, then shut it off. As the potatoes cool, they continue to cook, and they take on the seasonings of the herbs and salt. They are irresistible. Note: Best to use a pot with a narrow opening to ensure the cooking liquid does not cool down too quickly.
To cook the potatoes:
- 1 1/2 lbs. fingerling potatoes or other small potatoes
- 1/3 cup kosher salt
- several sprigs of rosemary and thyme
- 2 cloves garlic, smashed
To crisp the potatoes:
- olive oil
- kosher salt or flaky sea salt, such as Maldon
- a few more sprigs rosemary and thyme, leaves removed and minced
- Place fingerlings in a pot. Cover with approximately one inch of water. Add the salt, herbs and garlic. Bring the pot of water to a boil, then turn off the heat. Let the potatoes cool completely in their liquid before proceeding.
- Once cool, you can eat the potatoes as they are or you can brown them. These potatoes are wonderful to have on hand — they are truly delicious cooked as they are, sliced and tossed into salads or just eaten straight out of the refrigerator.
- If you want to crisp them up a bit, slice the potatoes in half on a bias (or leave them whole if they are really small). Then, heat a pan (preferably cast iron or carbon steel or stainless steel) over high heat. Add a thin layer of olive oil and swirl the pan to coat the bottom — the pan and oil should be very hot before adding the potatoes. Add the potatoes, shake the pan once and then let them be. Do not disturb them for a minute or two. Check one before trying to shake the pan or stir them with a spoon — you want that edge to get crispy and it won’t get crispy if you try to move them too quickly.
- Once the fingerlings are browning nicely, shake the pan, toss in the herbs and give them a pinch more of kosher salt. Serve immediately. I like to eat mine with Sriracha. Yum!
- Prep Time: 5 minutes
- Cook Time: 5 minutes
- Category: Side Dish
- Method: Stovetop
- Cuisine: American
