Two Tips for Crispy Roast Chicken
Let the chicken stand at room temperature uncovered for one hour before cooking.
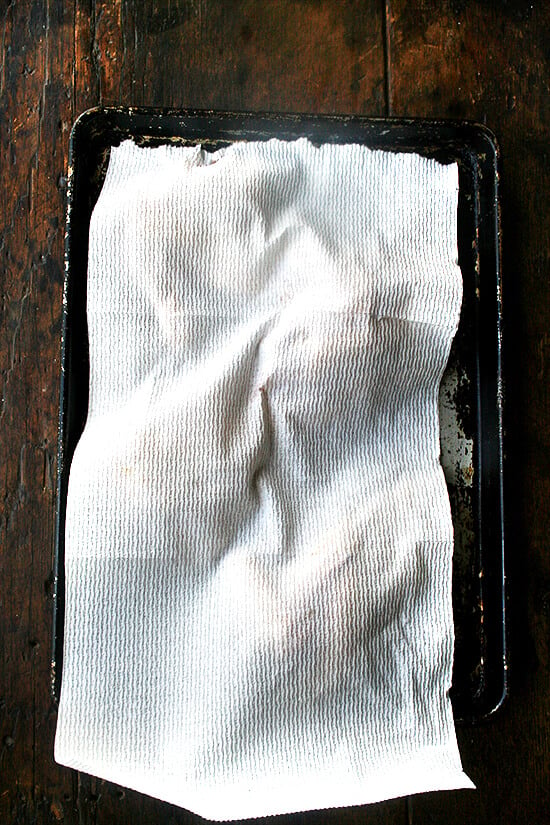
Pat chicken dry with paper towels so skin doesn’t steam in oven.
If you do these two things, in addition to letting the meat rest for 10 minutes before carving, your roast chicken will be divine — crispy skin, golden brown all around, juicy meat.
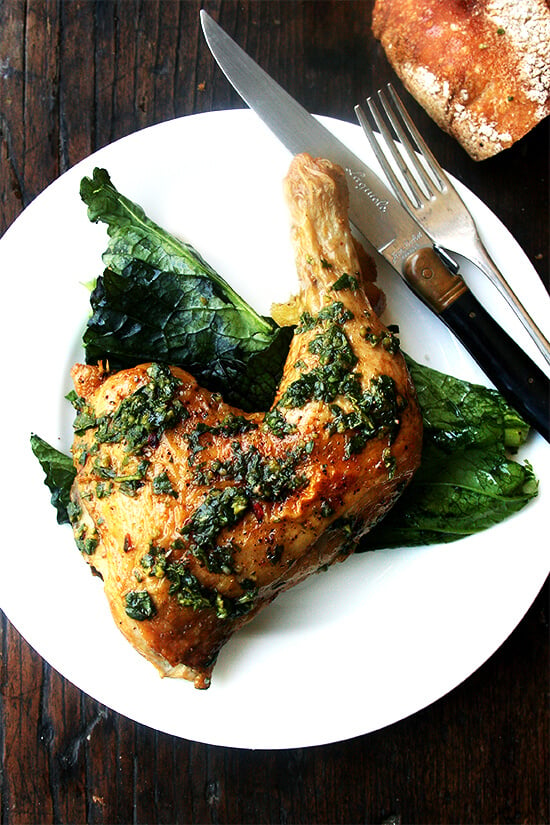
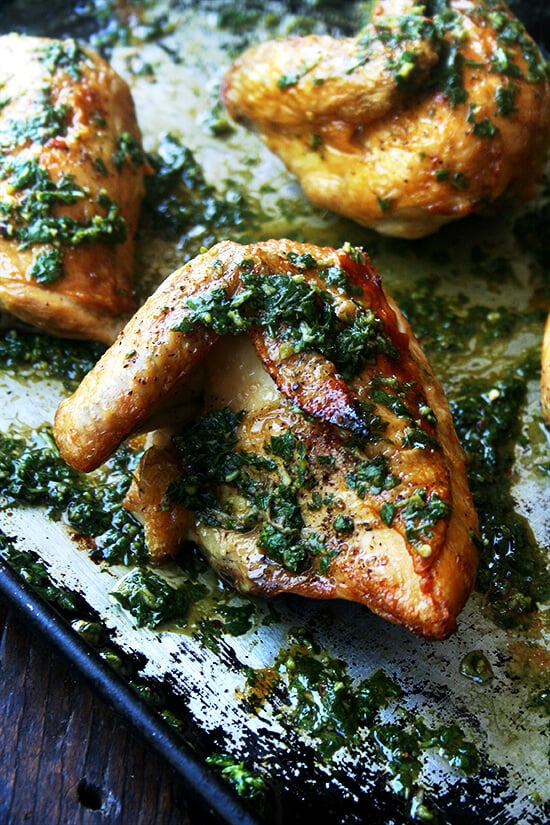
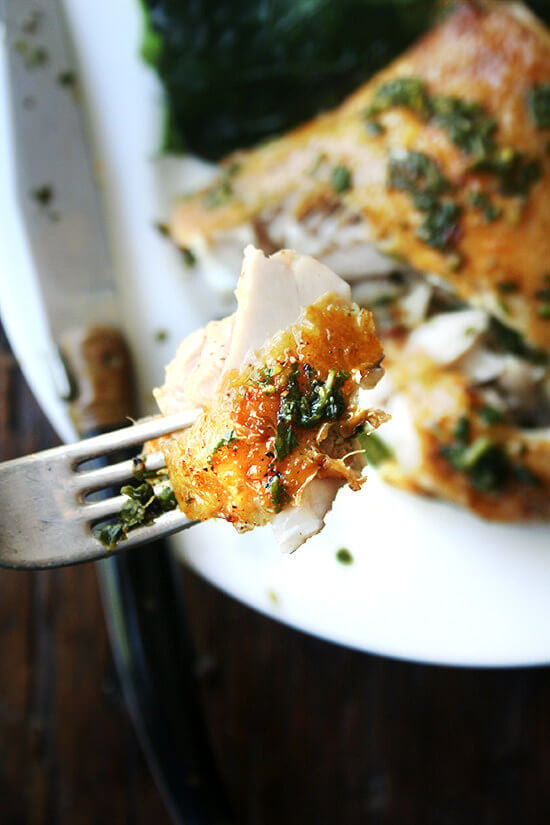
I love this chicken recipe not only for its crispy skin but also the sauce, which couldn’t be simpler to make. After the 30 minutes of roasting, you remove the chicken from the platter, and pour a mixture of basil, garlic, red pepper flakes and red wine vinegar over the sheet pan, which deglazes it, removing all of those flavorful crispy bits sticking to the bottom. The chicken then returns to the pan, where it rests for 10 minutes, during which time more juices release and mix with the herbs and vinegar.
That’s it — while the bird rests, the sauce materializes, and it couldn’t be more delicious. I’ve been serving this chicken with lightly dressed mustard greens and fresh bread. This meal — this sauce — demands it.
A Passage from The Dirty Life
A few weeks ago I mentioned I was reading The Dirty Life . Can we pretend we’re in a book club for a moment? I want to share a passage:
First, here’s the background: Author Kristin Kimball left New York City to interview a young farmer named Mark, fell in love, and shortly thereafter started a new life with him on a farm near Lake Champlain. The Dirty Life chronicles their first year at Essex Farm , which currently provides food year-round for over 200 families.
“When we would talk about our future in private, I would ask Mark if he really thought we had a chance. Of course we had a chance, he’d say, and anyway, it didn’t matter if this venture failed. In his view, we were already a success, because we were doing something hard, and it was something that mattered to us. You don’t measure things like that with words like success or failure, he said. Satisfaction comes from trying hard things and then going on to the next hard thing, regardless of the outcome. What mattered was whether or not you were moving in a direction you thought was right. This sounded fishy to me. This conversation played out many times, with me anxious, Mark calm, until once, as we sat together reviewing our expenses, I was almost in tears. I felt like we were teetering over an abyss. I wasn’t asking him to guarantee that we’d be rich. I just wanted him to assure me that we’d be solvent, that we’d be, as I put it, okay. Mark laughed. “What is the worst thing that could happen?” he asked. “We’re smart capable people. We live in the richest country in the world. There is food and shelter and kindness to spare. What in the world is there to be afraid of?”
I loved this. Isn’t it inspiring? Discuss.
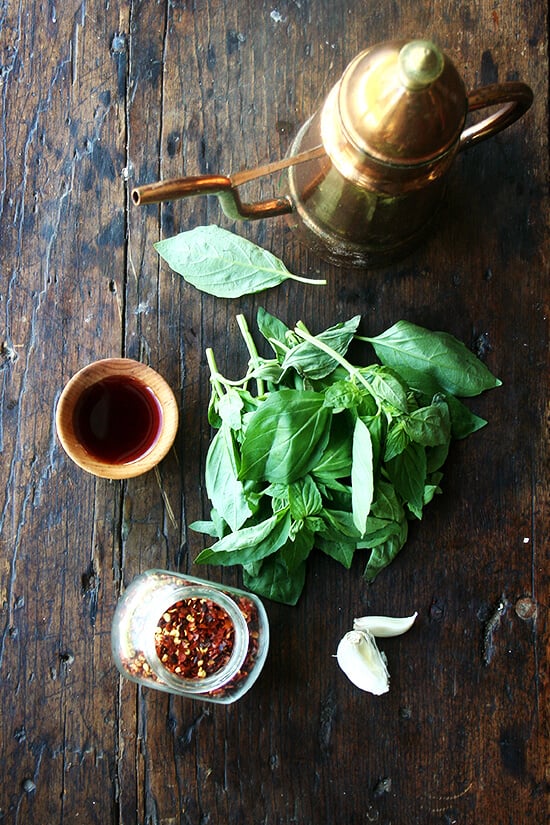
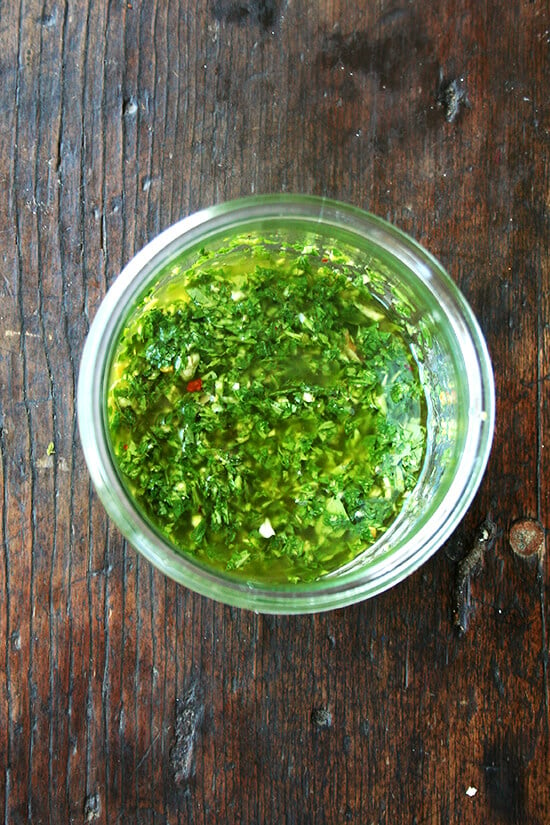
These are the sauce ingredients: olive oil, red wine vinegar, basil (or parsley or whatever herb you like), garlic and crushed red pepper flakes:
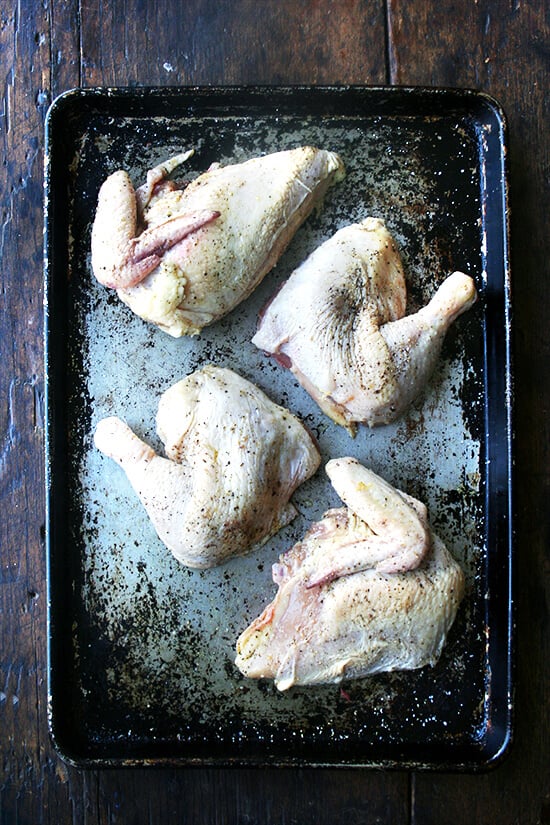
To get nice crisp skin and an even golden color, it’s important to dry off those chicken pieces really well:
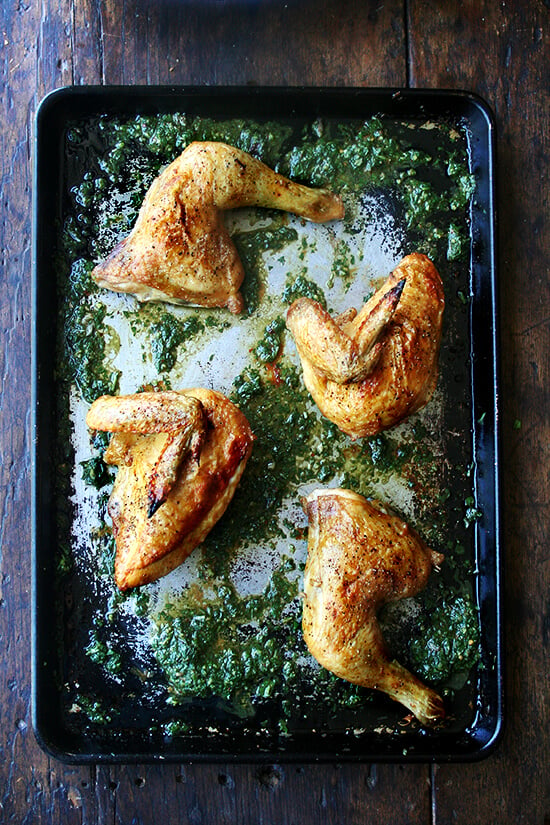
The chicken roasts with salt, pepper and 1 tablespoon of olive oil for 30 minutes at 450ºF.
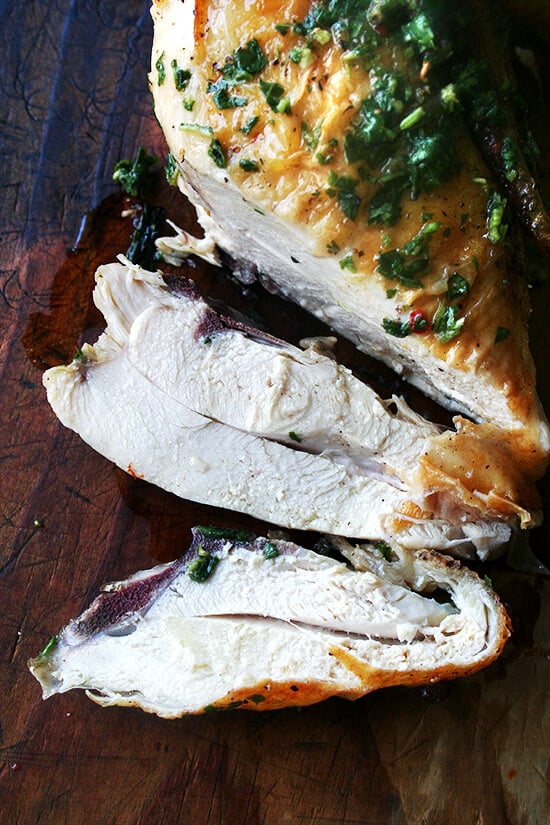
Even the breasts are juicy:
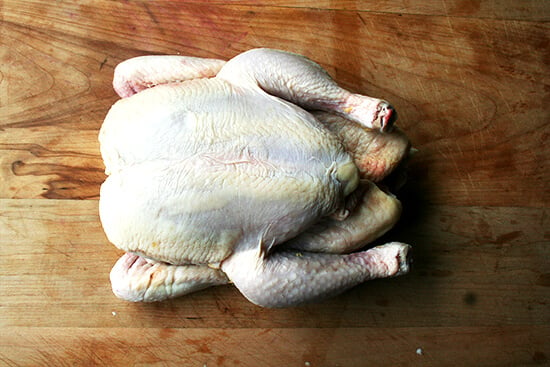
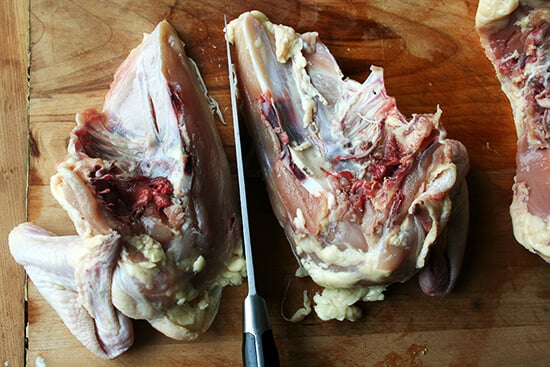
Here’s how to quarter a chicken:
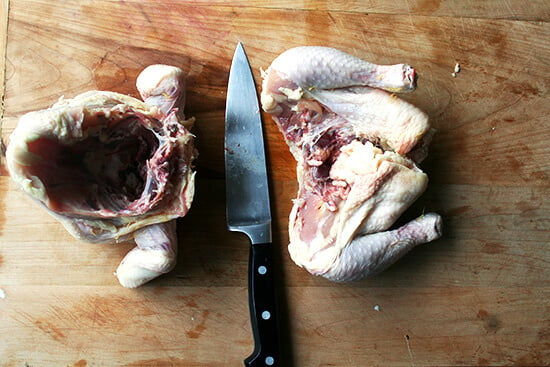
First, cut it in half:
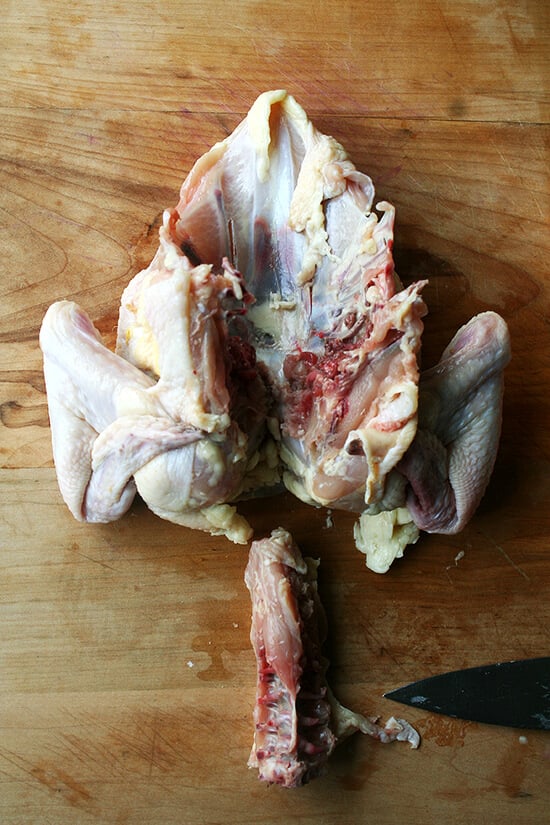
Then remove the backbone from the breastbone:
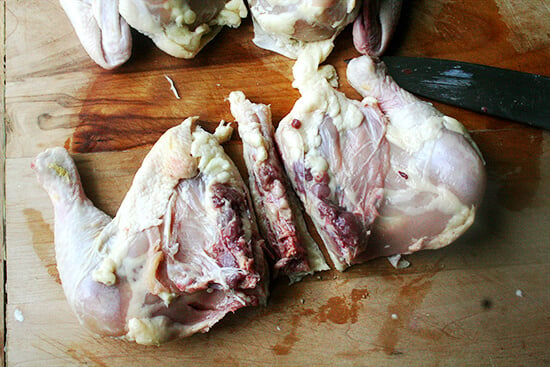
Then, split the breast in half:
Then, remove the backbone from the legs:
This video might offer some guidance, too, but you don’t have to separate the drumstick from the thigh, and you don’t remove the breast from the bone:
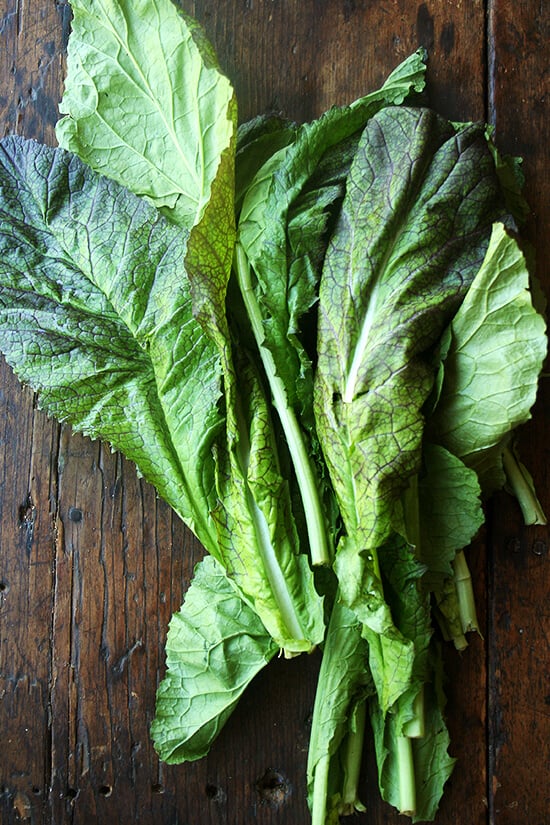
The Niskayuna Co-Op carries the most delicious mustard greens. They are so tender and barely require a dressing. For this meal, if I don’t feel like making a dressing, I just arrange the mustard greens on a serving platter, lay the pieces of chicken overtop, and pour all of the juices over everything. The heat of the chicken wilts the greens ever so slightly, and they are just delicious:
Description
Slightly adapted from Martha Stewart
Two Tips for Crispy Roast Chicken
Let the chicken stand at room temperature uncovered for one hour before cooking.
Pat chicken dry with paper towels so skin doesn’t steam in oven.
If you do these two things, in addition to letting the meat rest for 10 minutes before carving, your roast chicken will be divine — crispy skin, golden brown all around, juicy meat.
- 1 whole chicken (about 4 pounds), quartered and backb one removed, room temperature (see photos/video above for guidance)
- 1 tablespoon plus 1/4 cup (optional, see notes in recipe) extra-virgin olive oil
- kosher salt and freshly ground pepper
- 2 tablespoons red-wine vinegar
- 1 cup packed parsley or basil or tarragon (or whatever), chopped (or pulsed in food processor, see notes)
- 1/2 teaspoon minced garlic (or a couple of cloves, minced with herbs in the food processor)
- 1/2 teaspoon red-pepper flakes, or more or less to taste
- An hour before baking, remove chicken from fridge, quarter it (if you haven’t done so already), and let it rest on a cutting board or the rimmed sheetpan you will use to roast it on. Preheat oven to 450 degrees. I find my chicken gets the most evenly golden brown when I roast it on the highest rack. This definitely creates a more smokey oven, but it does work nicely.
- Pat chicken dry really well with paper towels and transfer to rimmed baking sheet (if it’s not already there). Rub chicken with 1 tablespoon oil; season liberally all over with salt and pepper. Arrange, skin-side up and roast until golden (or until a thermometer inserted into thickest part of breast (without touching bone) registers 160 degrees), about 30 minutes.
- Meanwhile, make the sauce. I use the food processor, and because I omit the 1/4 cup olive oil and use the pan juices in stead, (which amount to about 1/4 cup; see notes below for following original recipe), I simply pulse the basil with the garlic, red pepper flakes, and red wine vinegar, then pour this sauce over the sheetpan after the chicken finishes roasting. If you like this idea, when the chicken finishes roasting, transfer it to a plate for a second, pour sauce over the pan, scrape up those crispy bits, return chicken to pan and let it rest for 10 minutes. Just before serving, spoon the sauce over the chicken pieces. I find that waiting to pour the sauce overtop helps keep the skin crispy.
Notes
This is what the original recipe suggests: Transfer chicken to a plate. Pour off and discard fat from baking sheet; return chicken to pan. Whisk together remaining 1/4 cup oil, vinegar, parsley, garlic, and pepper flakes in a bowl. Season with salt. Spoon sauce over chicken and let stand 10 minutes before serving with accumulated pan juices and sauce.
Prep Time: 10 minutes
Cook Time: 30 minutes
Two Tips for Crispy Roast Chicken
Let the chicken stand at room temperature uncovered for one hour before cooking.
Pat chicken dry with paper towels so skin doesn’t steam in oven.
If you do these two things, in addition to letting the meat rest for 10 minutes before carving, your roast chicken will be divine — crispy skin, golden brown all around, juicy meat.
I love this chicken recipe not only for its crispy skin but also the sauce, which couldn’t be simpler to make. After the 30 minutes of roasting, you remove the chicken from the platter, and pour a mixture of basil, garlic, red pepper flakes and red wine vinegar over the sheet pan, which deglazes it, removing all of those flavorful crispy bits sticking to the bottom. The chicken then returns to the pan, where it rests for 10 minutes, during which time more juices release and mix with the herbs and vinegar.
That’s it — while the bird rests, the sauce materializes, and it couldn’t be more delicious. I’ve been serving this chicken with lightly dressed mustard greens and fresh bread. This meal — this sauce — demands it.
A Passage from The Dirty Life
A few weeks ago I mentioned I was reading The Dirty Life . Can we pretend we’re in a book club for a moment? I want to share a passage:
First, here’s the background: Author Kristin Kimball left New York City to interview a young farmer named Mark, fell in love, and shortly thereafter started a new life with him on a farm near Lake Champlain. The Dirty Life chronicles their first year at Essex Farm , which currently provides food year-round for over 200 families.
“When we would talk about our future in private, I would ask Mark if he really thought we had a chance. Of course we had a chance, he’d say, and anyway, it didn’t matter if this venture failed. In his view, we were already a success, because we were doing something hard, and it was something that mattered to us. You don’t measure things like that with words like success or failure, he said. Satisfaction comes from trying hard things and then going on to the next hard thing, regardless of the outcome. What mattered was whether or not you were moving in a direction you thought was right. This sounded fishy to me. This conversation played out many times, with me anxious, Mark calm, until once, as we sat together reviewing our expenses, I was almost in tears. I felt like we were teetering over an abyss. I wasn’t asking him to guarantee that we’d be rich. I just wanted him to assure me that we’d be solvent, that we’d be, as I put it, okay. Mark laughed. “What is the worst thing that could happen?” he asked. “We’re smart capable people. We live in the richest country in the world. There is food and shelter and kindness to spare. What in the world is there to be afraid of?”
I loved this. Isn’t it inspiring? Discuss.
These are the sauce ingredients: olive oil, red wine vinegar, basil (or parsley or whatever herb you like), garlic and crushed red pepper flakes:
To get nice crisp skin and an even golden color, it’s important to dry off those chicken pieces really well:
The chicken roasts with salt, pepper and 1 tablespoon of olive oil for 30 minutes at 450ºF.
Even the breasts are juicy:
Here’s how to quarter a chicken:
First, cut it in half:
Then remove the backbone from the breastbone:
Then, split the breast in half:
Then, remove the backbone from the legs:
This video might offer some guidance, too, but you don’t have to separate the drumstick from the thigh, and you don’t remove the breast from the bone:
The Niskayuna Co-Op carries the most delicious mustard greens. They are so tender and barely require a dressing. For this meal, if I don’t feel like making a dressing, I just arrange the mustard greens on a serving platter, lay the pieces of chicken overtop, and pour all of the juices over everything. The heat of the chicken wilts the greens ever so slightly, and they are just delicious:
Description
Slightly adapted from Martha Stewart
Two Tips for Crispy Roast Chicken
Let the chicken stand at room temperature uncovered for one hour before cooking.
Pat chicken dry with paper towels so skin doesn’t steam in oven.
If you do these two things, in addition to letting the meat rest for 10 minutes before carving, your roast chicken will be divine — crispy skin, golden brown all around, juicy meat.
- 1 whole chicken (about 4 pounds), quartered and backb one removed, room temperature (see photos/video above for guidance)
- 1 tablespoon plus 1/4 cup (optional, see notes in recipe) extra-virgin olive oil
- kosher salt and freshly ground pepper
- 2 tablespoons red-wine vinegar
- 1 cup packed parsley or basil or tarragon (or whatever), chopped (or pulsed in food processor, see notes)
- 1/2 teaspoon minced garlic (or a couple of cloves, minced with herbs in the food processor)
- 1/2 teaspoon red-pepper flakes, or more or less to taste
- An hour before baking, remove chicken from fridge, quarter it (if you haven’t done so already), and let it rest on a cutting board or the rimmed sheetpan you will use to roast it on. Preheat oven to 450 degrees. I find my chicken gets the most evenly golden brown when I roast it on the highest rack. This definitely creates a more smokey oven, but it does work nicely.
- Pat chicken dry really well with paper towels and transfer to rimmed baking sheet (if it’s not already there). Rub chicken with 1 tablespoon oil; season liberally all over with salt and pepper. Arrange, skin-side up and roast until golden (or until a thermometer inserted into thickest part of breast (without touching bone) registers 160 degrees), about 30 minutes.
- Meanwhile, make the sauce. I use the food processor, and because I omit the 1/4 cup olive oil and use the pan juices in stead, (which amount to about 1/4 cup; see notes below for following original recipe), I simply pulse the basil with the garlic, red pepper flakes, and red wine vinegar, then pour this sauce over the sheetpan after the chicken finishes roasting. If you like this idea, when the chicken finishes roasting, transfer it to a plate for a second, pour sauce over the pan, scrape up those crispy bits, return chicken to pan and let it rest for 10 minutes. Just before serving, spoon the sauce over the chicken pieces. I find that waiting to pour the sauce overtop helps keep the skin crispy.
Notes
This is what the original recipe suggests: Transfer chicken to a plate. Pour off and discard fat from baking sheet; return chicken to pan. Whisk together remaining 1/4 cup oil, vinegar, parsley, garlic, and pepper flakes in a bowl. Season with salt. Spoon sauce over chicken and let stand 10 minutes before serving with accumulated pan juices and sauce.
Prep Time: 10 minutes
Cook Time: 30 minutes
Find it online : https://alexandracooks.com/2014/05/14/the-crispiest-spring-chicken/


I’ve heard that trying to please everyone, as a general life strategy, may at best lead to disappointment and, at worst, failure. Eek.
But what if, say, without even trying, you just happen to please everyone? Hmm.
I thought about this on Sunday night as I sat at Pizza Buono, our favorite neighborhood spot not only for its delectable pizza and fresh-squeezed juices but also for its dining room, which is equipped with a well-stocked play kitchen for the kids.
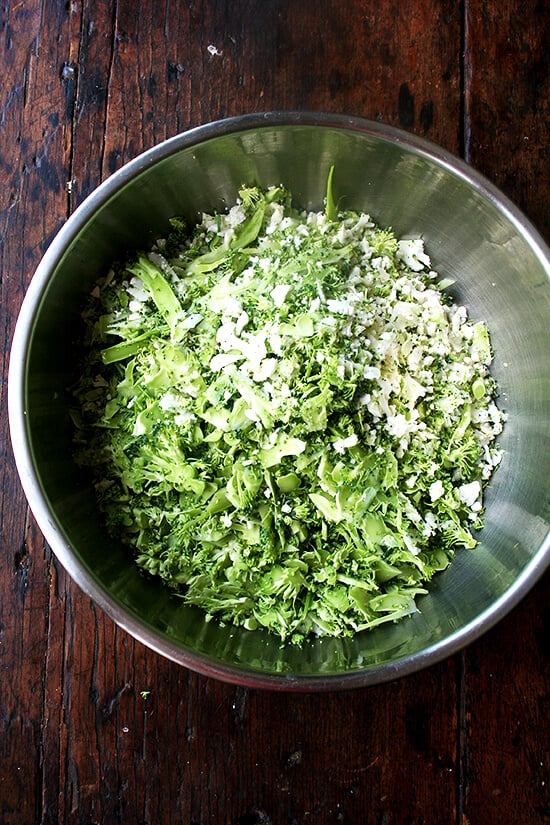
Ben and I had grabbed a salad, a pre-made sort-of slaw, to tide us over while our pizzas cooked. We ate it straight from its clamshell packaging, passing it back and forth every few bites. Lightly dressed, the raw shavings of cauliflower and broccoli tasted fresh and crisp, and with every bite, I kept thinking how this combination would make the perfect side dish for a summer bbq, the ideal salad to take camping.
And as I inspected the ingredients, I realized I had encountered a gold mine. It’s raw. It’s vegan. It’s gluten- and nut-free. And it happens to be delicious. Who would suspect that raw, shaved broccoli and cauliflower would pair so nicely with sesame seeds and pepitas?
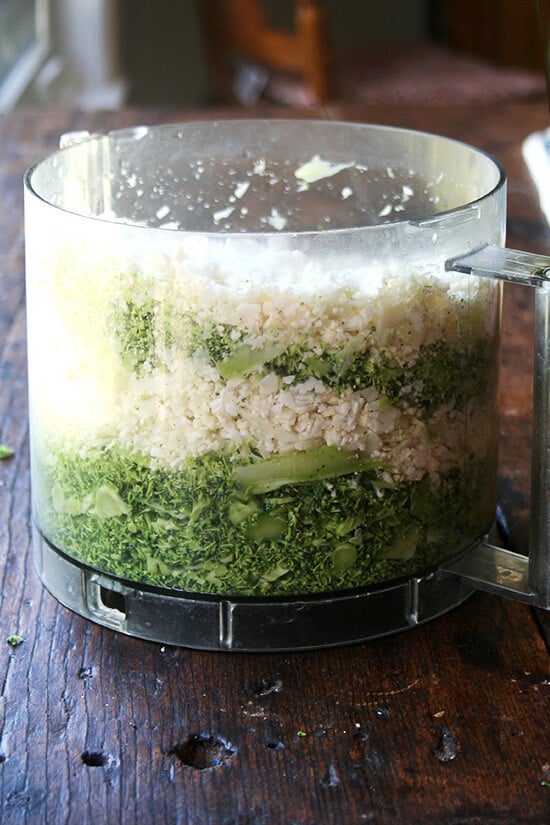
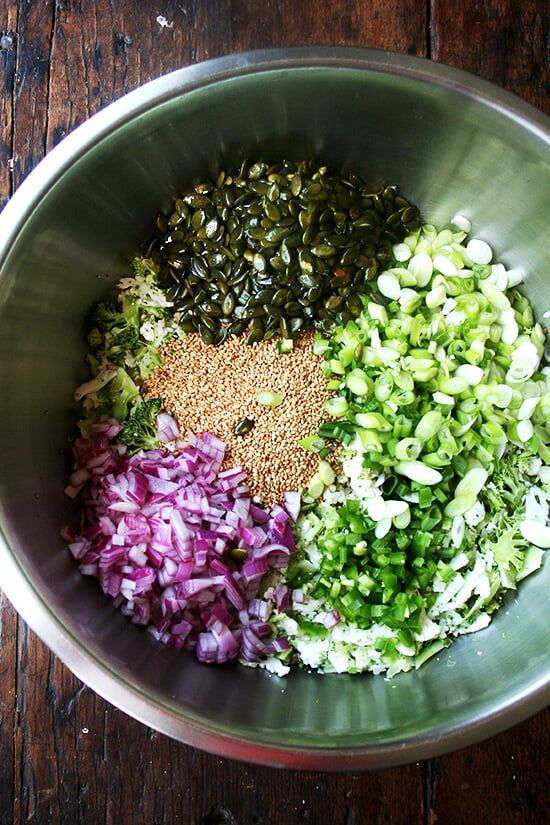
When I made the salad the next day at home, I added a few things I always add to these sorts of salads: a little heat (jalapeño and red pepper flakes), sliced scallions, red onion, and a little dried fruit (dates) for a touch of sweetness. For the first time ever, I used the slicer attachment to my Cuisinart and discovered that one head of broccoli and cauliflower yields an enormous salad, more than enough for one dinner and lunch the following two days. Bold statement: no salad in the history of the world better stands the test of time than this one. A no-mayo dressing, too, means it will be safe on that buffet table for hours.
Look, I’m not trying to foster any people-pleasing tendencies you might be wrestling with, but this salad might just be your ticket to bbq bliss all summer long.
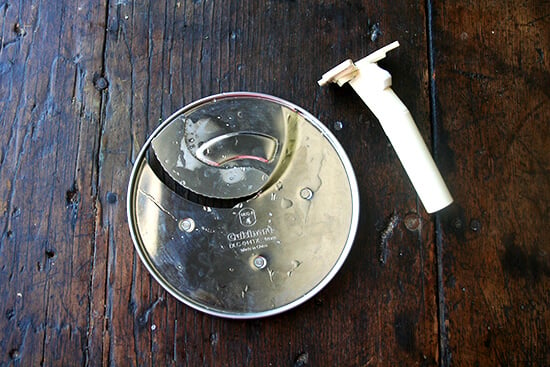
Slicer attachment to food processor:
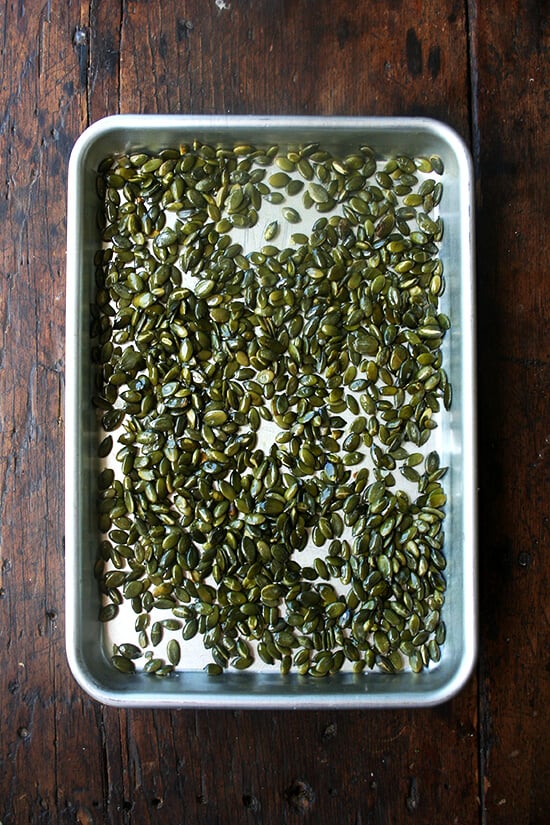
Pepitas, ready for the oven:

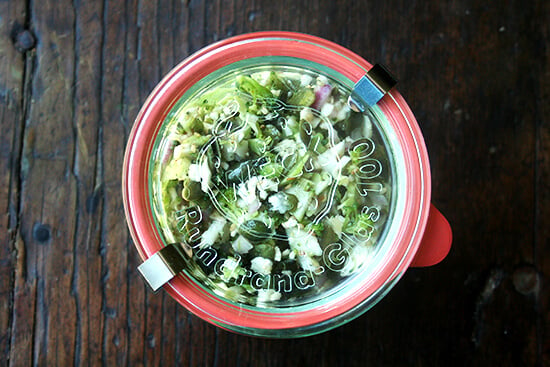
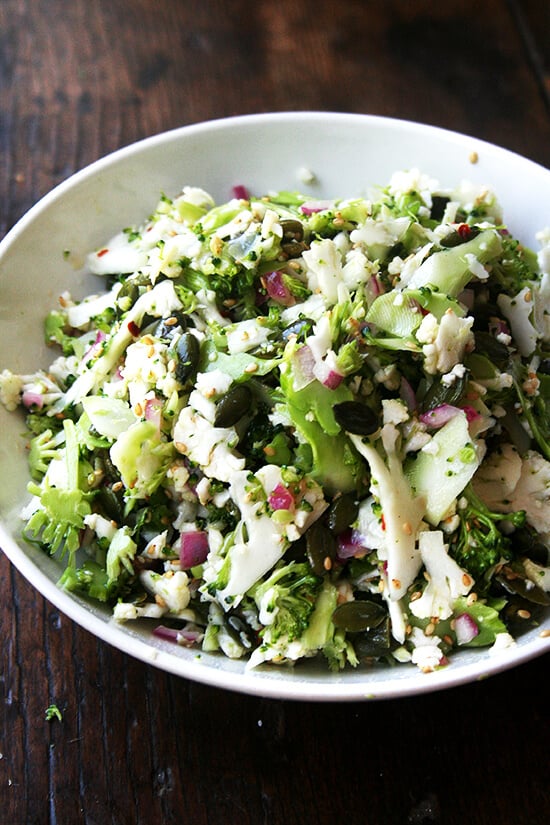
This salad packs so nicely:
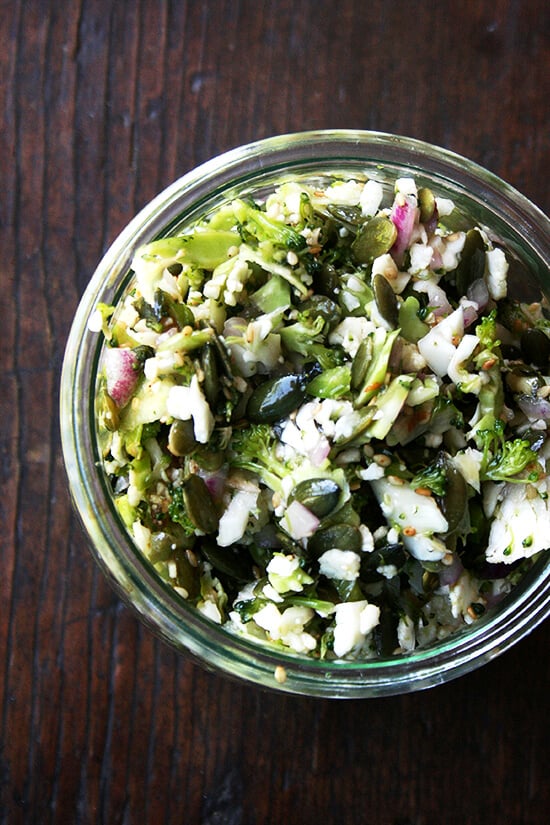
On day two, veggies are just as crisp, salad just as delicious:
Description
Inspired by a salad offered at a local restaurant, Pizza Buono.
Because the pepitas are toasted, this salad isn’t probably technically raw, so feel free to leave them raw if you are sticking to that sort of diet. And because sesame seeds can trigger allergic reactions, please check before serving this salad to those with nut allergies.
This salad keeps very well. Can be made a day in advance. Unfortunately, I can’t think of a great alternative to the slicer attachment of the food processor. A blender will likely turn the vegetables to mush; a mandoline (or a sharp knife) will work but will take forever.
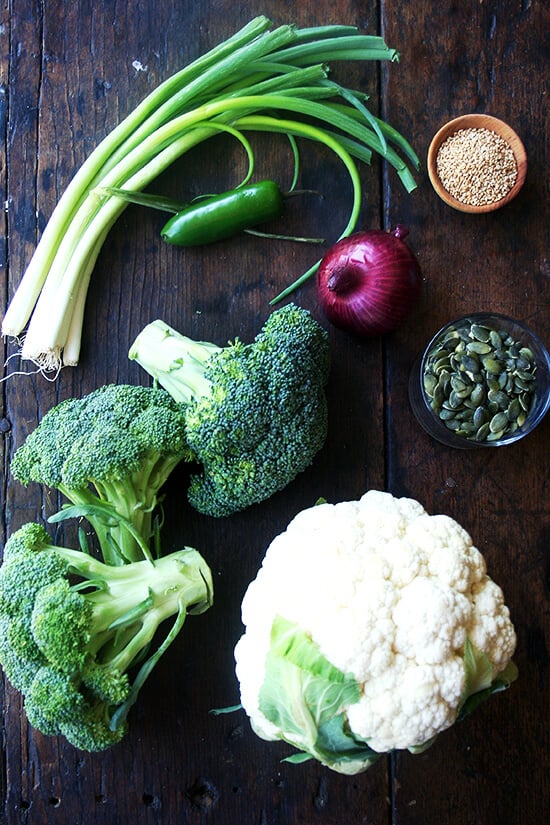
- 1 cup raw pepitas
- 1 tablespoon olive oil
- kosher salt or sea salt
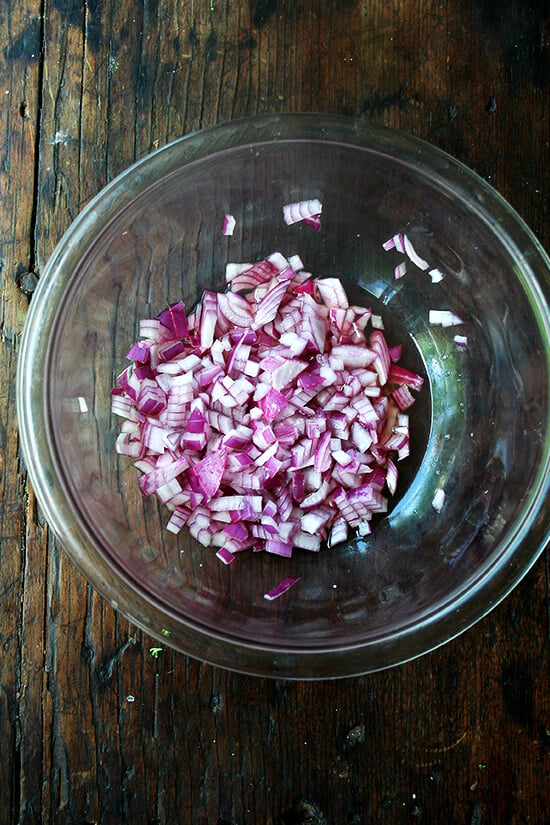
- 1 small red onion or a couple of shallots
- 3 to 4 tablespoons white balsamic vinegar
- 1 head cauliflower
- 1 head broccoli
- 1 bunch (about 6 stalks) scallions
- 1/4 cup sesame seeds, toasted or not
- 1 jalapeño or other hot chili, minced
- 2 to 3 Medjool dates, finely diced, or other dried fruit (golden raisins, dried cranberries)
- 1/3 cup extra virgin olive oil, plus a few more tablespoons to taste
- 1/2 to 1 teaspoon kosher salt
- red pepper flakes to taste (optional)
- Preheat the oven to 375ºF. Spread pepitas on a sheetpan, toss with 1 tablespoon (you could probably get away with using less) olive oil and a pinch of salt. Spread out and toast for 7 to 10 minutes or until you hear them starting to pop. Remove from oven and set aside to cool.
- Meanwhile, dice the onions or shallots and place in a small bowl. Cover with three tablespoons of vinegar and a pinch of salt. Set aside.
- Using the slicer attachment to your food processor, slice up the cauliflower and broccoli. I used almost the entire head each of cauliflower and broccoli and stopped forcing florets down the shoot once my food processor was loosely filled. The final yield was about 8 loosely packed cups.
- Place sliced cauliflower and broccoli in a large bowl. Thinly slice the scallions (white and light green parts) and add to the bowl. Add sesame seeds, minced jalapeño and diced dates to bowl. Add cooled pepitas and macerated onions (with the vinegar) to the bowl. Add olive oil to bowl. Season with 1/2 teaspoon salt and toss well. Taste. If the jalapeño has provided enough heat, omit the red pepper flakes; if not, add pepper flakes to taste. Add more salt if necessary. Add more olive oil and vinegar as necessary: I added two more tablespoons olive oil and one more tablespoon vinegar. I used a whole teaspoon of salt. Toss again and taste.
- Prep Time: 15 minutes
- Cook Time: 10 minutes
- Category: Salad
- Method: Toss
- Cuisine: American
