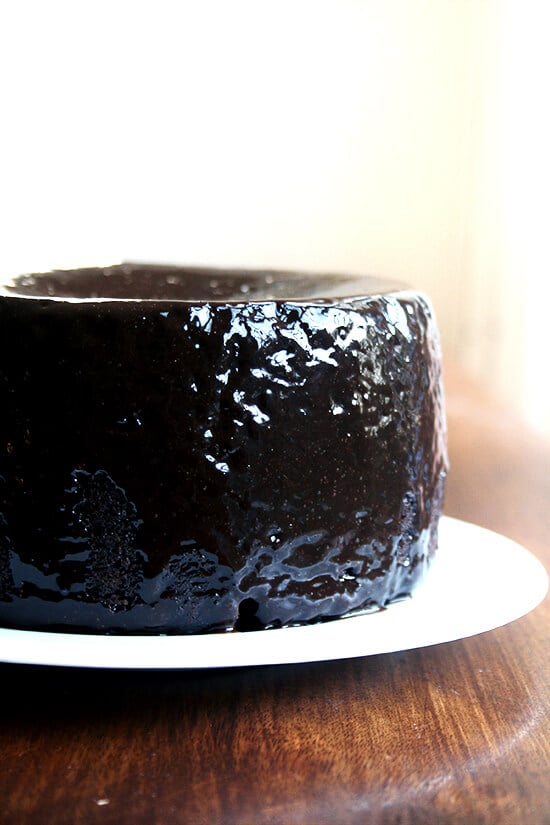
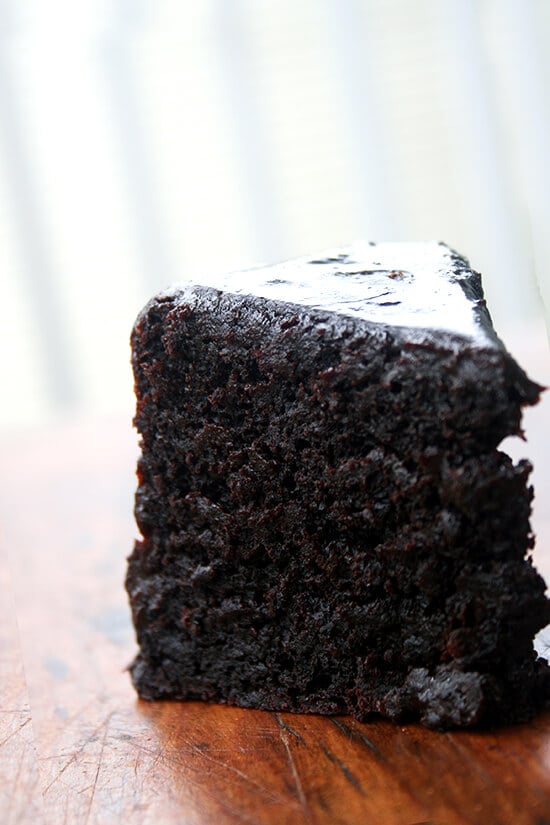
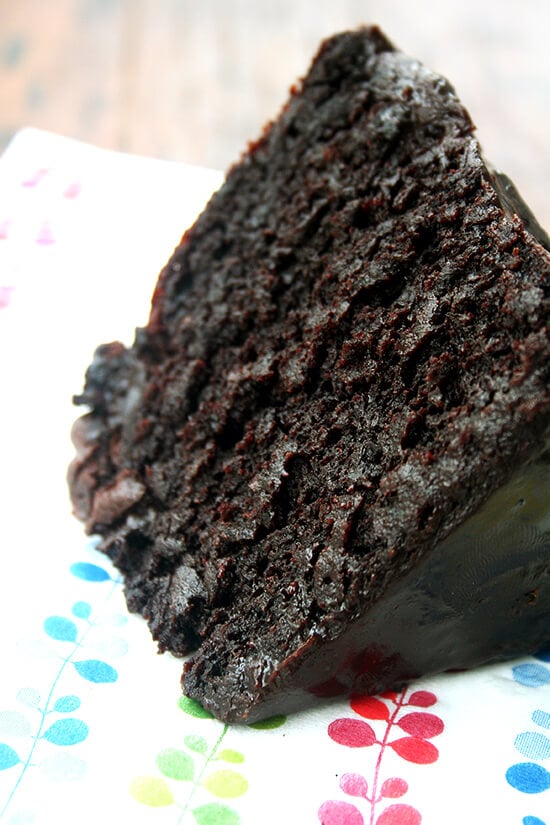
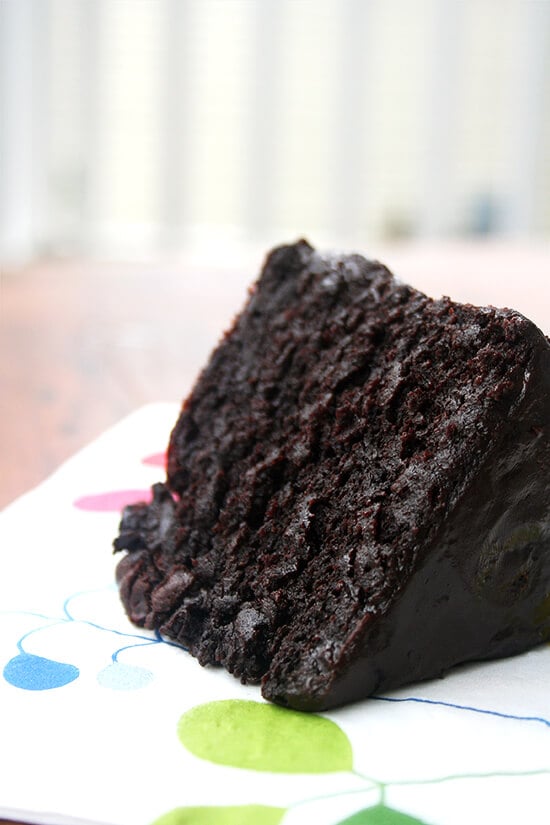
This double chocolate cake is everything a chocolate cake should be: fudgy, moist, intensely chocolaty. When assembled into layers with chocolate ganache slathered in between, as the original recipe instructs, this cake becomes the perfect birthday finale for any chocolate lover; when topped with black velvet icing, as pictured here, this cake becomes an elegant dessert, a perfect treat to enjoy with morning coffee or afternoon espresso.
Why Is This Cake So Good?
A few things:
- Unsweetened cocoa powder , which imparts a deep, intense chocolate flavor and a rich, fudgy texture.
- Buttermilk, the magic ingredient in many a cake, namely this buttermilk blueberry breakfast cake .
- Oil (as opposed to butter), which keeps cakes incredibly moist (read: The Case For Making Cakes with Oil as Opposed to Butter ).
The difference between Dutch-process and natural cocoa powder:
This info comes from Regan Daley’s In the Sweet Kitchen :
- Natural cocoa powder is produced if virtually all of the cocoa butter is removed from the cocoa liquor, leaving a dry cake that is then ground to a fine powder. Natural cocoa powder is quite acidic, so can be used as the necessary acid to activate baking soda in leavened baked goods, if present in sufficient quantity. Because of its high acidity and unpalatable bitterness, natural cocoa powder is best used only in baked or cooked desserts.
- Dutch-process cocoa (also called alkalized cocoa powder) has been treated with a small quantity of an alkaline solution to reduce the natural acidity. The process darkens the cocoa’s color, making it rich, often redder brown, and gives it a smoother, more mellow flavor.
- Both natural and Dutch-process cocoa have had about 75% of the cocoa fat removed.
- Although some recipes can be made with wither form of cocoa powder, many rely on the properties of one or the other. For this reason, be careful when substituting Dutch-process for natural and vice versa. In recipes for baked goods using baking soda as the leavener in which no other acid is present, Dutch-process cocoa is not appropriate as it does not contain sufficient acid to activate the baking soda. (You could use Dutch process for natural cocoa but an additional acid such as cream of tartar would need to be added.) Similarly, using natural cocoa powder in a recipe originally calling for Dutch process cocoa may cause the mixture to become overly acidic. Adding a small amount of baking soda, or increasing the amount already called for, will compensate for this.
- Natural cocoa is better for brownies, old-fashioned chocolate cakes and simple chocolate cookies. Dutch-process cocoa, more palatable than natural cocoa when raw, is good for icings, custards, creams and sauces that will not undergo further cooking. It has a more subtle, delicate flavor, one well suited to many to many elegant European-style cakes, biscuits, pastries and creams, and in any recipe where an overt, sharp chocolate flavor would overpower more delicate flavors. It is very good in nut cakes and ice creams, where a refined, un-bitter chocolate taste can complement the soft flavors of the other ingredients.
- If the cocoa will be tasted raw, as it is when dusted on cakes, cookies or truffles, opt for Dutch-processed. If the recipe is for a traditionally rich and fudgy baked good, use the stronger flavor of natural cocoa powder.
Description
Adapted from: Gourmet via Epicurious
Notes:
- The original recipe calls for making a chocolate ganache, which sounds heavenly, but I have always adored my grandmother’s chocolate glaze recipe — it’s called black velvet icing and it contains eggs, which is odd, but it’s so good — so that is the one I use. If you want to use Gourmet’s chocolate ganache, find it here.
- Some commenters have found the amount not to be enough for a full cake, so I’ve updated the quantities below to be a double batch, which should leave you with more than enough icing.
- If you want to make a half recipe, see this post: Gourmet’s Double Chocolate Cake, Revisited. I love these 6-inch cake pans for making half recipes of all sorts of cakes, namely this one. You need two.
for the cake:
- 3 ounces ( 85 g ) fine-quality semisweet chocolate
- 1 1/2 cups hot brewed coffee
- 3 cups ( 648 g ) sugar
- 2 1/2 cups ( 320 g ) all-purpose flour
- 1 1/2 cups ( 144 g ) unsweetened cocoa powder
- 2 teaspoons baking soda
- 3/4 teaspoon baking powder
- 1 1/4 teaspoons salt
- 3 large eggs
- 3/4 cup vegetable oil
- 1 1/2 cups well-shaken buttermilk
- 3/4 teaspoon vanilla
for the black velvet icing (*updated to a double recipe April 2020, see notes above):
- 8 oz semi-sweet chocolate
- a heaping 1/2 cup of confectioners’ sugar
- 6 eggs, well beaten
- 8 tablespoons butter, room temperature
- Make the cake: Preheat oven to 300°F. and grease two 9- or 10-inch by 2-inch round cake pans with unsalted butter or nonstick spray. Line bottoms with rounds of parchment paper. Finely chop chocolate and in a bowl combine with hot coffee. Let mixture stand, stirring occasionally, until chocolate is melted and mixture is smooth.
- Into a large bowl sift together sugar, flour, cocoa powder, baking soda, baking powder, and salt. In another large bowl with an electric mixer, beat eggs until thickened slightly and lemon colored (about 3 minutes with a standing mixer or 5 minutes with a hand-held mixer). Slowly add oil, buttermilk, vanilla, and melted chocolate mixture to eggs, beating until combined well. Add sugar mixture and beat on medium speed until just combined. Divide batter between pans (being sure not to fill pans higher than 2/3 full—they will overflow if you do; it’s not worth it) and bake in the middle of oven until a tester inserted in center comes out clean, 1 hour to 1 hour and 10 minutes.
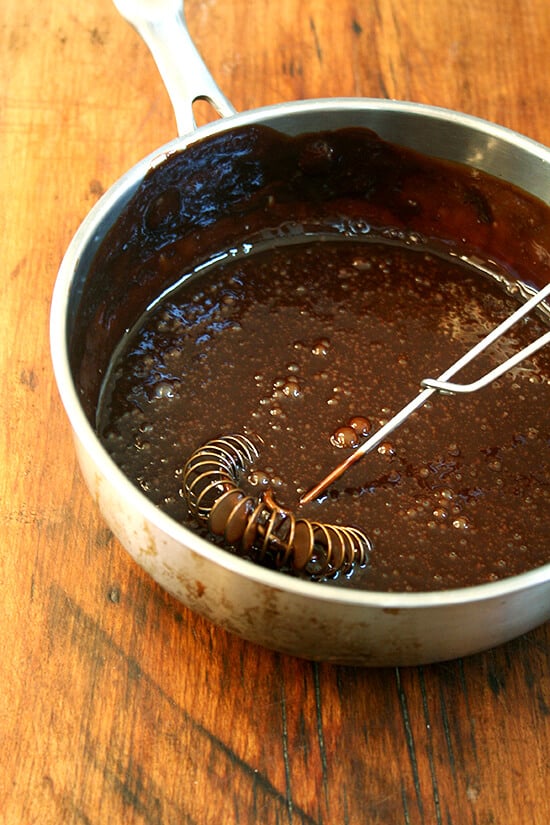
- Meanwhile, make the icing: Because several commenters have had trouble, with the icing, I am suggesting you use a double boiler. If you know how to set up a double boiler, do so; otherwise, fill a pot with an inch of water. Place a medium bowl over top. Turn the heat to medium. Place the chocolate in the bowl. Once it has melted, stir in the confectioners’ sugar, whisking until smooth. Stir in the eggs a little at a time, whisking vigorously after each addition — a flat-bottomed whisk is good for this. (I use a whisk until the ingredients are blended and then switch to a heat-proof spatula.) Cook over low to medium-low until thick. Stir in the butter one tablespoon at a time. Set aside to cool. Transfer to a glass measuring cup with a spout for easy pouring or store in whatever vessel you wish.
- Cool layers completely in pans on racks. Run a thin knife around edges of pans and invert layers onto racks. Remove parchment paper. Cake layers may be made 1 day ahead and kept, wrapped well in plastic wrap, at room temperature.
- If you are making a layer cake, halve each cake round crosswise to create 4 layers. Spread icing over one cake layer. Top layer with other cake layer. Repeat until all layers are stacked. Pour icing on top of top layer and with an off-set spatula (if you have one) spread it all over the sides. Cake keeps, covered and chilled, 3 days. Bring cake to room temperature before serving. (I keep mine at room temperature always…there’s never space in the fridge.)
- Prep Time: 30 minutes
- Cook Time: 60 minutes
- Category: Dessert
- Method: Oven
- Cuisine: American
This double chocolate cake is everything a chocolate cake should be: fudgy, moist, intensely chocolaty. When assembled into layers with chocolate ganache slathered in between, as the original recipe instructs, this cake becomes the perfect birthday finale for any chocolate lover; when topped with black velvet icing, as pictured here, this cake becomes an elegant dessert, a perfect treat to enjoy with morning coffee or afternoon espresso.
Why Is This Cake So Good?
A few things:
- Unsweetened cocoa powder , which imparts a deep, intense chocolate flavor and a rich, fudgy texture.
- Buttermilk, the magic ingredient in many a cake, namely this buttermilk blueberry breakfast cake .
- Oil (as opposed to butter), which keeps cakes incredibly moist (read: The Case For Making Cakes with Oil as Opposed to Butter ).
The difference between Dutch-process and natural cocoa powder:
This info comes from Regan Daley’s In the Sweet Kitchen :
- Natural cocoa powder is produced if virtually all of the cocoa butter is removed from the cocoa liquor, leaving a dry cake that is then ground to a fine powder. Natural cocoa powder is quite acidic, so can be used as the necessary acid to activate baking soda in leavened baked goods, if present in sufficient quantity. Because of its high acidity and unpalatable bitterness, natural cocoa powder is best used only in baked or cooked desserts.
- Dutch-process cocoa (also called alkalized cocoa powder) has been treated with a small quantity of an alkaline solution to reduce the natural acidity. The process darkens the cocoa’s color, making it rich, often redder brown, and gives it a smoother, more mellow flavor.
- Both natural and Dutch-process cocoa have had about 75% of the cocoa fat removed.
- Although some recipes can be made with wither form of cocoa powder, many rely on the properties of one or the other. For this reason, be careful when substituting Dutch-process for natural and vice versa. In recipes for baked goods using baking soda as the leavener in which no other acid is present, Dutch-process cocoa is not appropriate as it does not contain sufficient acid to activate the baking soda. (You could use Dutch process for natural cocoa but an additional acid such as cream of tartar would need to be added.) Similarly, using natural cocoa powder in a recipe originally calling for Dutch process cocoa may cause the mixture to become overly acidic. Adding a small amount of baking soda, or increasing the amount already called for, will compensate for this.
- Natural cocoa is better for brownies, old-fashioned chocolate cakes and simple chocolate cookies. Dutch-process cocoa, more palatable than natural cocoa when raw, is good for icings, custards, creams and sauces that will not undergo further cooking. It has a more subtle, delicate flavor, one well suited to many to many elegant European-style cakes, biscuits, pastries and creams, and in any recipe where an overt, sharp chocolate flavor would overpower more delicate flavors. It is very good in nut cakes and ice creams, where a refined, un-bitter chocolate taste can complement the soft flavors of the other ingredients.
- If the cocoa will be tasted raw, as it is when dusted on cakes, cookies or truffles, opt for Dutch-processed. If the recipe is for a traditionally rich and fudgy baked good, use the stronger flavor of natural cocoa powder.
Description
Adapted from: Gourmet via Epicurious
Notes:
- The original recipe calls for making a chocolate ganache, which sounds heavenly, but I have always adored my grandmother’s chocolate glaze recipe — it’s called black velvet icing and it contains eggs, which is odd, but it’s so good — so that is the one I use. If you want to use Gourmet’s chocolate ganache, find it here.
- Some commenters have found the amount not to be enough for a full cake, so I’ve updated the quantities below to be a double batch, which should leave you with more than enough icing.
- If you want to make a half recipe, see this post: Gourmet’s Double Chocolate Cake, Revisited. I love these 6-inch cake pans for making half recipes of all sorts of cakes, namely this one. You need two.
for the cake:
- 3 ounces ( 85 g ) fine-quality semisweet chocolate
- 1 1/2 cups hot brewed coffee
- 3 cups ( 648 g ) sugar
- 2 1/2 cups ( 320 g ) all-purpose flour
- 1 1/2 cups ( 144 g ) unsweetened cocoa powder
- 2 teaspoons baking soda
- 3/4 teaspoon baking powder
- 1 1/4 teaspoons salt
- 3 large eggs
- 3/4 cup vegetable oil
- 1 1/2 cups well-shaken buttermilk
- 3/4 teaspoon vanilla
for the black velvet icing (*updated to a double recipe April 2020, see notes above):
- 8 oz semi-sweet chocolate
- a heaping 1/2 cup of confectioners’ sugar
- 6 eggs, well beaten
- 8 tablespoons butter, room temperature
- Make the cake: Preheat oven to 300°F. and grease two 9- or 10-inch by 2-inch round cake pans with unsalted butter or nonstick spray. Line bottoms with rounds of parchment paper. Finely chop chocolate and in a bowl combine with hot coffee. Let mixture stand, stirring occasionally, until chocolate is melted and mixture is smooth.
- Into a large bowl sift together sugar, flour, cocoa powder, baking soda, baking powder, and salt. In another large bowl with an electric mixer, beat eggs until thickened slightly and lemon colored (about 3 minutes with a standing mixer or 5 minutes with a hand-held mixer). Slowly add oil, buttermilk, vanilla, and melted chocolate mixture to eggs, beating until combined well. Add sugar mixture and beat on medium speed until just combined. Divide batter between pans (being sure not to fill pans higher than 2/3 full—they will overflow if you do; it’s not worth it) and bake in the middle of oven until a tester inserted in center comes out clean, 1 hour to 1 hour and 10 minutes.
- Meanwhile, make the icing: Because several commenters have had trouble, with the icing, I am suggesting you use a double boiler. If you know how to set up a double boiler, do so; otherwise, fill a pot with an inch of water. Place a medium bowl over top. Turn the heat to medium. Place the chocolate in the bowl. Once it has melted, stir in the confectioners’ sugar, whisking until smooth. Stir in the eggs a little at a time, whisking vigorously after each addition — a flat-bottomed whisk is good for this. (I use a whisk until the ingredients are blended and then switch to a heat-proof spatula.) Cook over low to medium-low until thick. Stir in the butter one tablespoon at a time. Set aside to cool. Transfer to a glass measuring cup with a spout for easy pouring or store in whatever vessel you wish.
- Cool layers completely in pans on racks. Run a thin knife around edges of pans and invert layers onto racks. Remove parchment paper. Cake layers may be made 1 day ahead and kept, wrapped well in plastic wrap, at room temperature.
- If you are making a layer cake, halve each cake round crosswise to create 4 layers. Spread icing over one cake layer. Top layer with other cake layer. Repeat until all layers are stacked. Pour icing on top of top layer and with an off-set spatula (if you have one) spread it all over the sides. Cake keeps, covered and chilled, 3 days. Bring cake to room temperature before serving. (I keep mine at room temperature always…there’s never space in the fridge.)
- Prep Time: 30 minutes
- Cook Time: 60 minutes
- Category: Dessert
- Method: Oven
- Cuisine: American
Skip to Recipe
I never imagined an eighth of a cow taking so long to polish off. Seven months after packing our freezer with meat, we have finally made a considerable dent, two pounds of ground beef, one liver, and a few soup bones being all that remain. We have eaten more burgers and tacos than we ever thought possible, and while it has been wonderful having such amazing beef on hand, Ben and I are thinking about our next move.
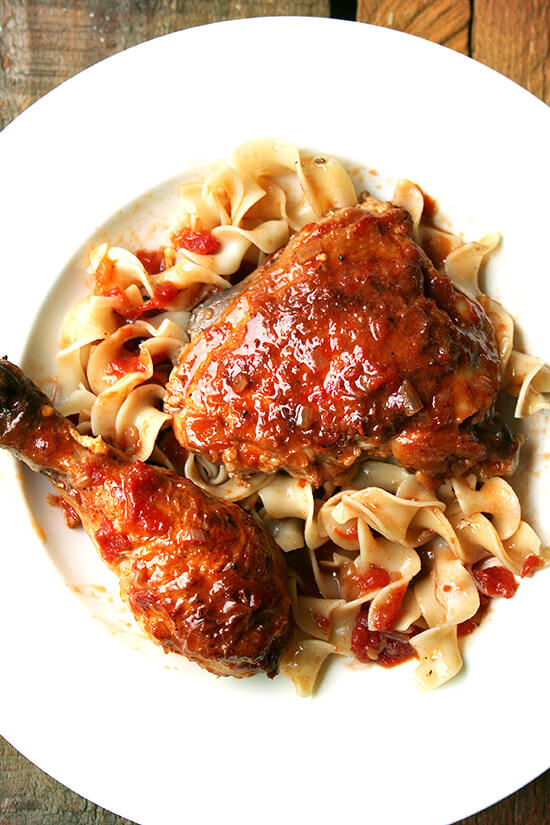
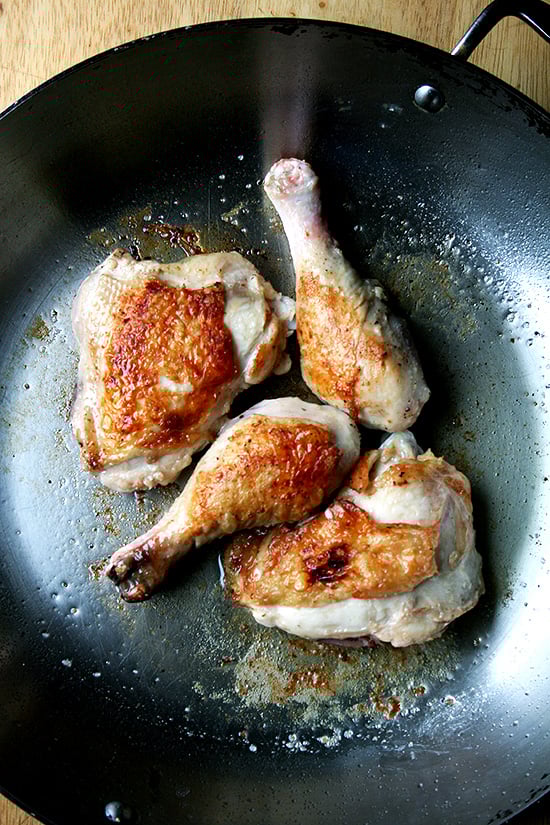
The thing is is that I miss chicken. I have been spoiled by modern living, by endless variety, by not having to have to buy meat by the quarter animal. This time of year I crave my mother’s chicken kapama (Greek red chicken) and these chicken legs baked with white wine and parmesan and the braised chicken pictured here, chicken au vinaigre , another favorite from Sally Schneider’s A New Way to Cook .
Subscribing to one of those meat shares that offer lamb, pork, chicken, goat and various other meats would be the ideal. But alas, you can’t always get what you want, and I would again be willing to sacrifice variety for grass-fed, local, incredibly delicious beef. It’s hardly a tradeoff, really.
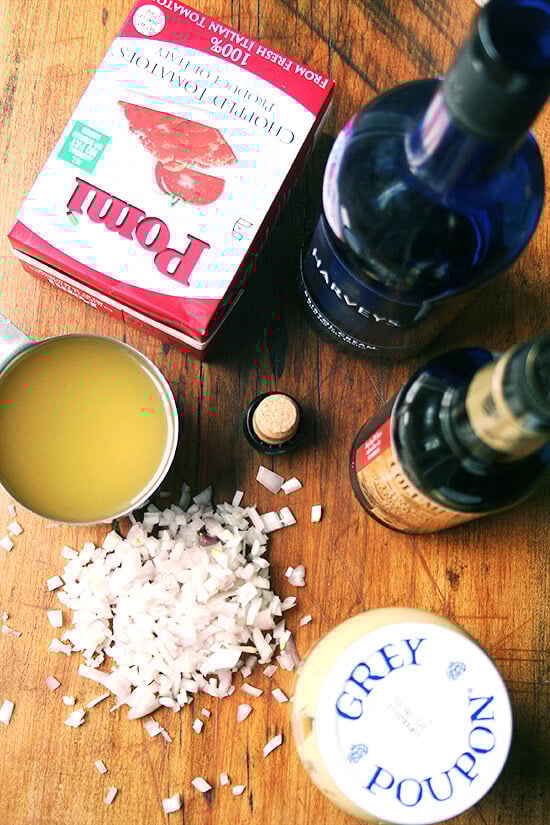
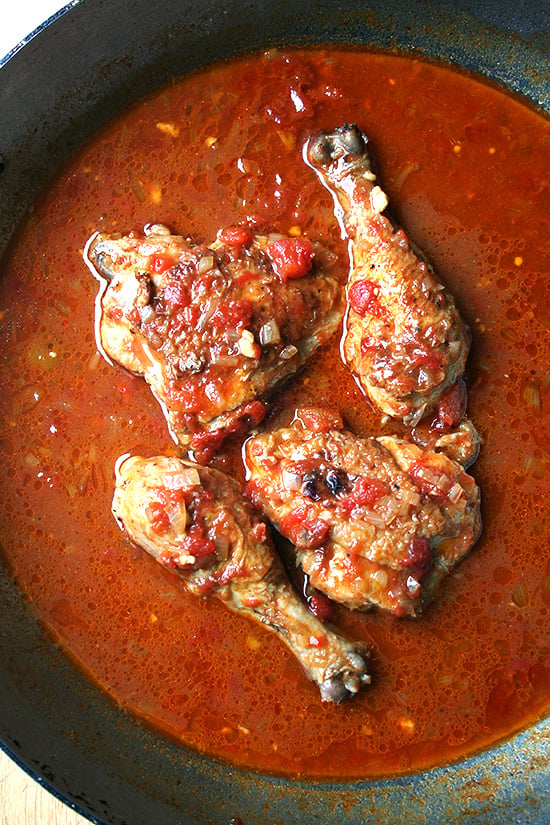
Now, back to the chicken. This dish, a classic French preparation, is all about the sauce, a rich concentration of shallots, crushed tomatoes, mustard and reduced sherry and sherry vinegar. As with my mother’s chicken kapama, I love serving it with egg noodles, which soak up the delicious sauce so nicely, but a natural (perhaps even more delicious) alternative to the noodles is a hunk of bread. That time of year has certainly arrived, when cleaning dinner plates with crusty bread is more than acceptable.
Lake Champlain Chocolates Giveaway update: Thank you all for sending along so many wonderful ideas regarding recipes calling for unsweetened cocoa powder. I have updated the Double Chocolate Cake post with a list of many of your cocoa-recipe suggestions — so many of which I cannot wait to try — and I have also added a brief explanation on the difference between Dutch-process and natural cocoa powder, which, embarrassingly, is something I had not paid much attention to up until this point. Knowing the difference is something every baker should know — it helped me understand why it was actually OK to use Dutch-process cocoa in that double chocolate cake when the recipe specifically said, “not Dutch-process cocoa powder.” The explanation, I believe, is that Dutch-process cocoa (which contains less acid than natural cocoa powder) is OK to use in this recipe because there is enough buttermilk (also an acid) to activate the baking soda — when recipes call for baking soda, there needs to be an acid present to activate it.
Finally, the box of Dark Chocolate Sea Salt Caramels is going to Emily Teel. And the tin of LCC Fair Trade Unsweetened Cocoa is going to Jolene. I have contacted you both for your mailing addresses.
As you know, buying a chicken whole is much more cost effective than buying separate chicken parts (as cheap as you can find chicken these days.) I’m repeating myself , but one chicken can produce two meals for two plus 1.5 quarts of chicken stock (at the very least) plus 3 little snacks — 2 chicken tenders and a liver. Also, I posted a video awhile ago about cutting up a whole chicken, but the angle of the camera makes it kind of hard to see, so I’ve added a new one below. A couple things to remember:
• A sharp knife makes all the difference — this one was freshly sharpened.
• Set up your station before you begin: Have a stock pot nearby for the backbone, breast bones (if you remove the breast from the bone), neck and wings (kind of wasteful, I know, but my wings often go to the stockpot). Also, clean your sink — when you’re finished cutting up your chicken, it’s nice to be able to wash your board right away without having to worry about splattering raw chicken over dirty cups and plates.
• Have an open ziplock with the top rolled over for easy access.
• Step 1: Remove the legs from the rest of the bird — this is pretty straight forward. Make slits in the skin that connect the legs to the whole bird. Then, using both hands, fold the bird in half to make it easier to cut through the backbone. Cut through the backbone. Note: smaller chickens (closer to 3 lbs.) are easier to cut up than larger ones. I always look for birds that are as close to 3 lbs as possible.
• Step 2: Remove the legs from the backbone: On both sides of the backbone there is a soft spot — it takes a little bit of practice finding it, but once you do, it’s easy. If you nail it on the first whack down, you can remove the leg in one swipe. Careful of your fingers when removing the second leg.
• Step 3: Removing the thighs from the drummies. You can see in the video that there is a white piece of skin/tissue/fat (?) that marks where the thigh and drumstick connect. If you run your knife through this piece, you will make a clean cut.
• Step 4: Remove the wings — pretty straight forward.
• Step 5: Separate the breasts: With the breasts resting on the board, make a slit on either side of the connecting bone. Add it to the stock pot. Using your hands, break the breast gently to allow it to lay flat and to help you with chopping it in two pieces.
Step 6: Remove breasts from bone if desired. Run your knife as close to the breast bone as possible while gently pulling the breast away from the bone.
Step 7: Start your stock . Freeze your liver — if you freeze about 6 you’ll be able to make paté for the holidays. Seal your ziplock bag and store it in the fridge. Make this chicken or these baked legs with white wine and parmesan for dinner. Make broiled tarragon breasts tomorrow night — I’m so boring, still have only one recipe for chicken breasts.
Description
- 3 lb chicken, cut into 8 pieces
- kosher salt, plus more to taste
- freshly cracked pepper, plus more to taste
- 3 tbsp flour
- 1 tbsp + 1 tsp olive, grapeseed or peanut oil
- 1/4 cup + 2 tbsp shallots, finely chopped
- 2/3 cup medium-sweet sherry (I use Harvey’s Bristol Cream dry sherry)
- 1/3 cup sherry vinegar
- 1 – 1-1/2 tsp sugar
- 2 cups chicken stock
- 1 cup drained and coarsley chopped peeled plum tomatoes (I like Pomi Chopped Tomatoes — see photo)
- 1 tbsp dijon mustard
- Season chicken all over with salt and pepper. Dredge chicken in flour and shake off excess.
- Heat 2 tsp oil in a skillet and sear chicken until golden on each side. Add more oil as needed waorking in batches.
- Reduce heat and sauté shallots, covered until softened; uncover and sauté until golden brown. Add sherry and deglaze; reduce by half. Add vinegar and sugar and reduce by half. Add chicken stock, tomatoes, mustard, salt and pepper. Add chicken thighs and legs, partially cover and cook 7 mins. Add breasts and wings (if using), cover and simmer 20 mins or until chicken is cooked through. Remove chicken to a plate.
- Simmer sauce 10 mins or until slightly thickened and flavors are rich and mellow. Return chicken to pan and heat through.
- Prep Time: 5 minutes
- Cook Time: 45 minutes
