Do you have friends who text you recipes that cause you to at once drop everything, head to the store, and obliterate any cooking plans you had on the horizon?
Many of you do this to me. (Thank you.) My friend Michelle does so as well. She’s pointed me to so many good recipes over the years, most notably to Ruth Reichl’s roasted balsamic-eggplant sandwiches and most recently to David Lebovitz’s strawberry sorbet.
The recipe comes from The Perfect Scoop , which I’ve owned and loved for years. Every summer, I open it to find new inspiration, something I’ve missed in previous years, but somehow this one has escaped me, which is such a shame because, like homemade 3-ingredient real frozen yogurt, it’s so simple: toss strawberries with sugar, let them sit for an hour, purée with fresh lemon juice and sea salt, chill, churn, freeze.
I worried the sorbet would taste great on day one or immediately after churning, but then harden to a block of ice crystals the next day, which has been my experience with homemade ice creams and sorbets in the past. This didn’t happen. The longest I’ve stored this particular sorbet has been three days, and as long as it sits at room temperature for a good chunk of time — sometimes for as long as 20 minutes — before serving, it scoops up beautifully, with a texture as smooth and as creamy as when freshly churned.
Hooray!
This sorbet tastes like pure summer to me, and what I’ve loved about it the few times I’ve made it is that it’s found purpose for past-prime strawberries, which would have otherwise ended up in the freezer destined for a smoothie somewhere down the line. Not a terrible way to salvage the local berries, but when their season is so fleeting, and when they taste SO good, it’s nice to put them to use in a recipe in which they really shine. This one fits the bill. (As does this one. )
Almond Butterscotch Cookie Cups + A Lesson!
First: the lesson.
I made these almond-butterscotch cookie cups, another recipe from The Perfect Scoop , a million years ago to serve with this crème fraîche sorbet , then didn’t make them for years. While flipping through the TPS most recently, I saw a recipe for lemon-poppyseed cookie cups that I thought would pair so nicely with the strawberry sorbet.
I mixed up the batter, dropped it onto a parchment-lined baking sheet, baked them for 10 minutes, and then … disaster! I couldn’t get the cookies to release from the parchment paper. I chalked it up to the recipe being a flop. But when I attempted to make these almond-butterscotch cookie cups — tried and true! — to replace the others, and they too stuck to the paper, I realized I was mistaken.
It was the parchment paper! My recent bread experiments had been sticking as well.
I started over using a different brand of parchment paper and had no issue, which makes me want to revisit the lemon poppyseed cookie cup recipe immediately, because doesn’t that sound so good: strawberry sorbet + lemon poppyseed cookies?
I will keep you posted.
In sum:
- Almond butterscotch cookie cups are easy to make.
- They look fancy — so lacy and delicate — but they require no skill. They are delicious, too.
- Parchment or a silicon baking mat is essential.
- Not all parchment paper is created equally.
- This is such a festive summer dessert.
I hope you’ll give it a go.
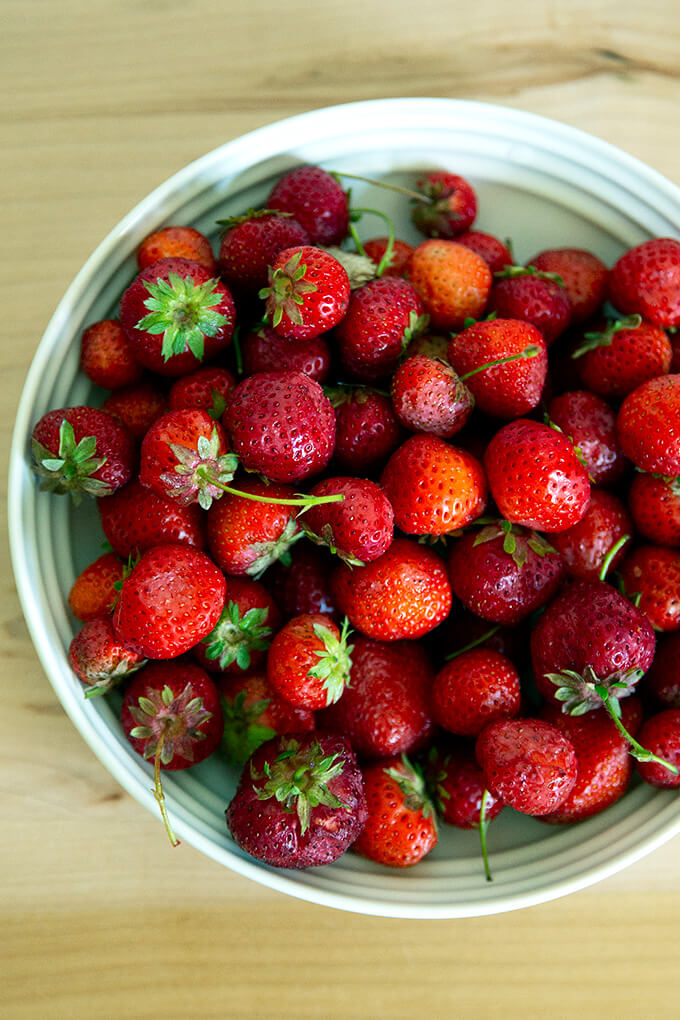
Here’s the play-by-play: Hull 1 -1.5 lbs. strawberries.

These weighed about 1.25 lbs. post hulling.
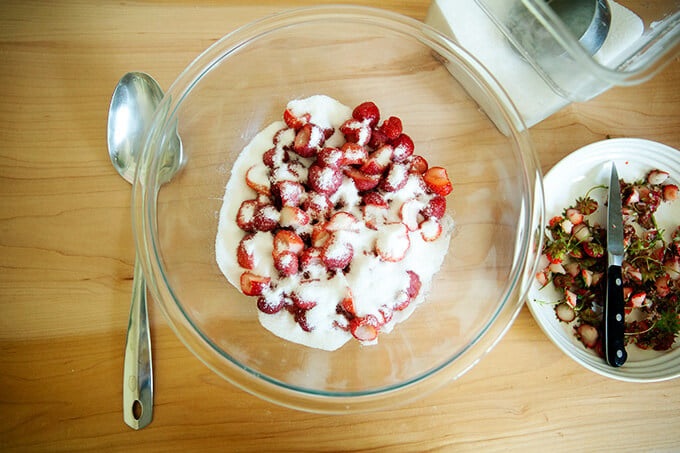
Toss with sugar until the sugar …
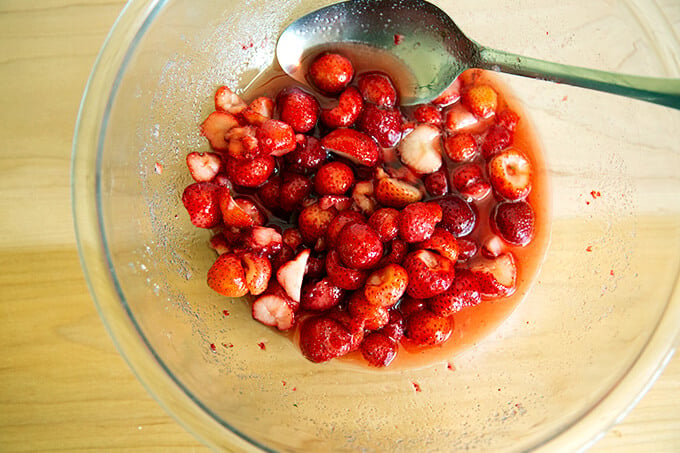
… becomes liquidy. Let sit for 1 hour, stirring occasionally.
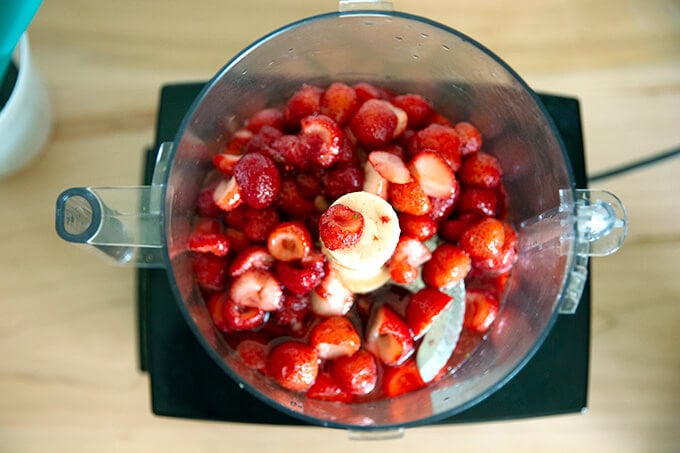
Transfer mixture to a food processor.
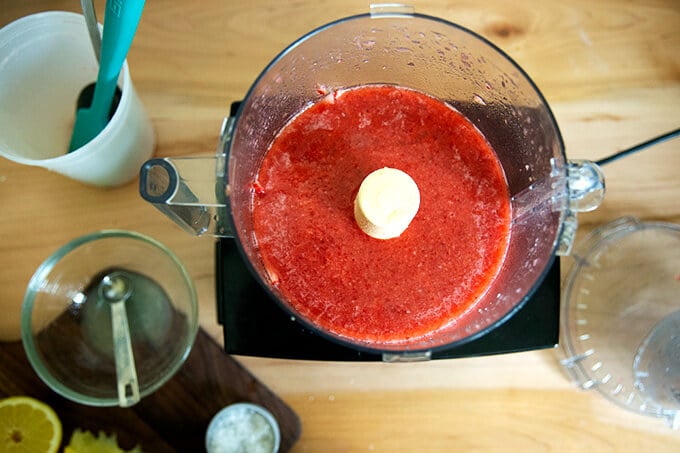
Purée until smooth, then add fresh lemon and sea salt.
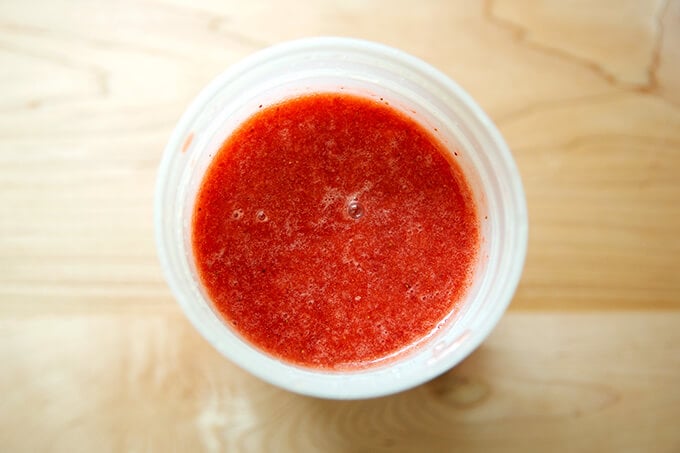
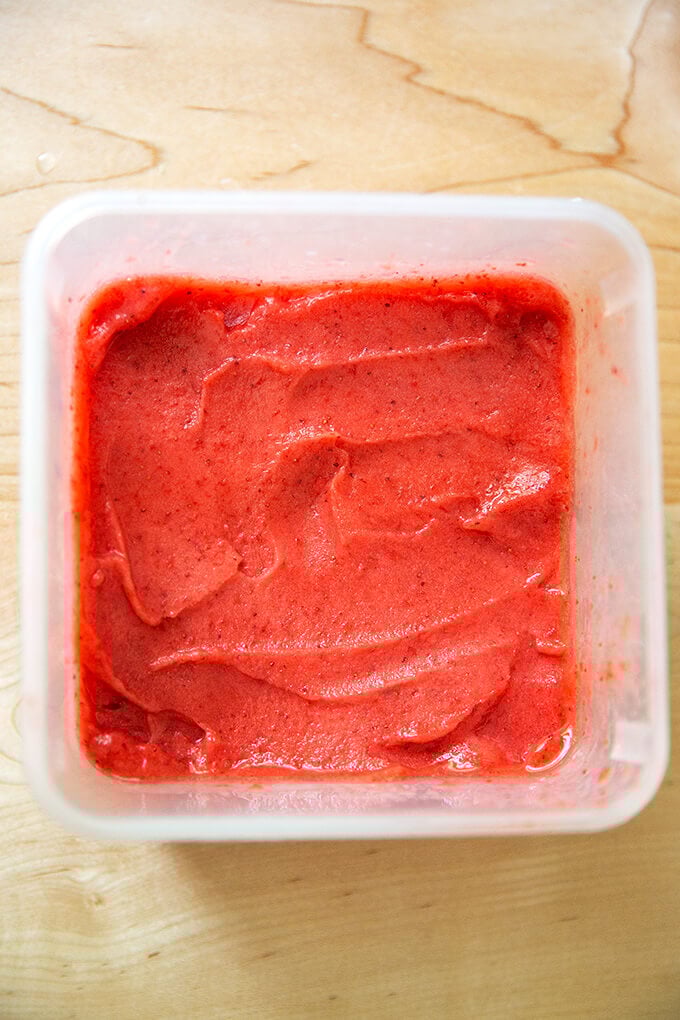
Transfer to a storage container (love these … so versatile) and chill until cold, at least one hour.
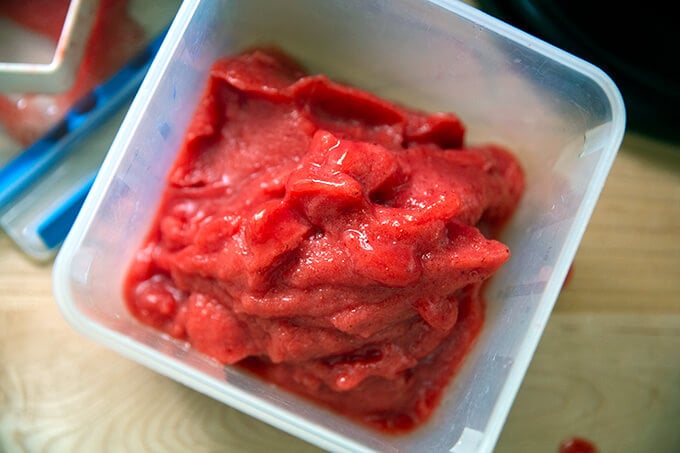
Churn in an ice cream maker. (I have the Kitchen Aid ice cream maker attachment .) Then freeze for at least another hour before serving.
Bring to room temperature before serving … this may take as long as 20 minutes.
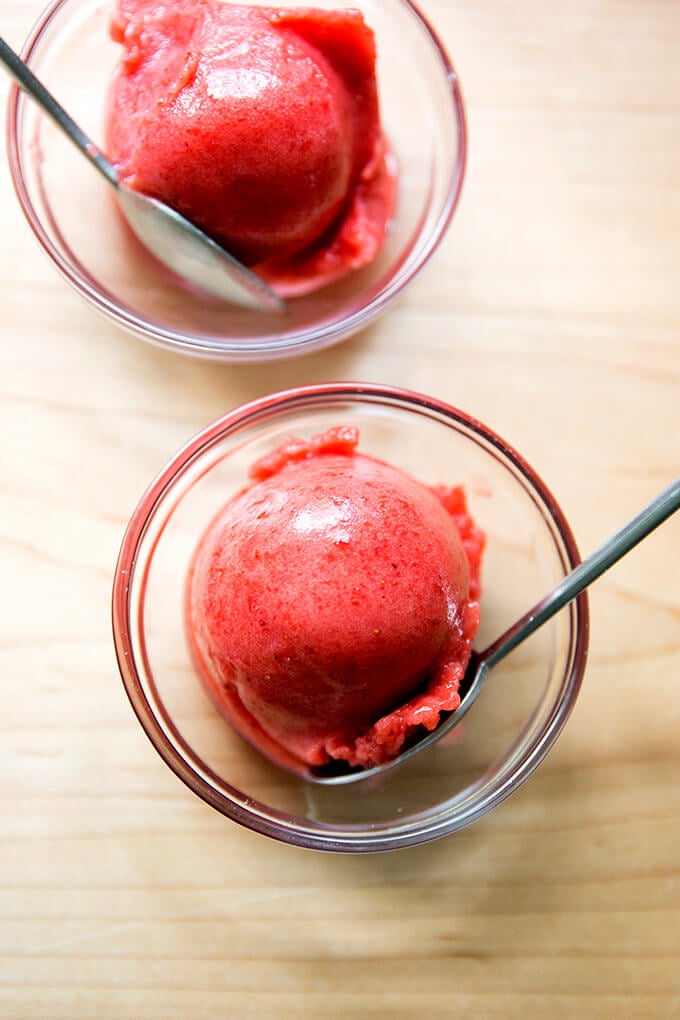
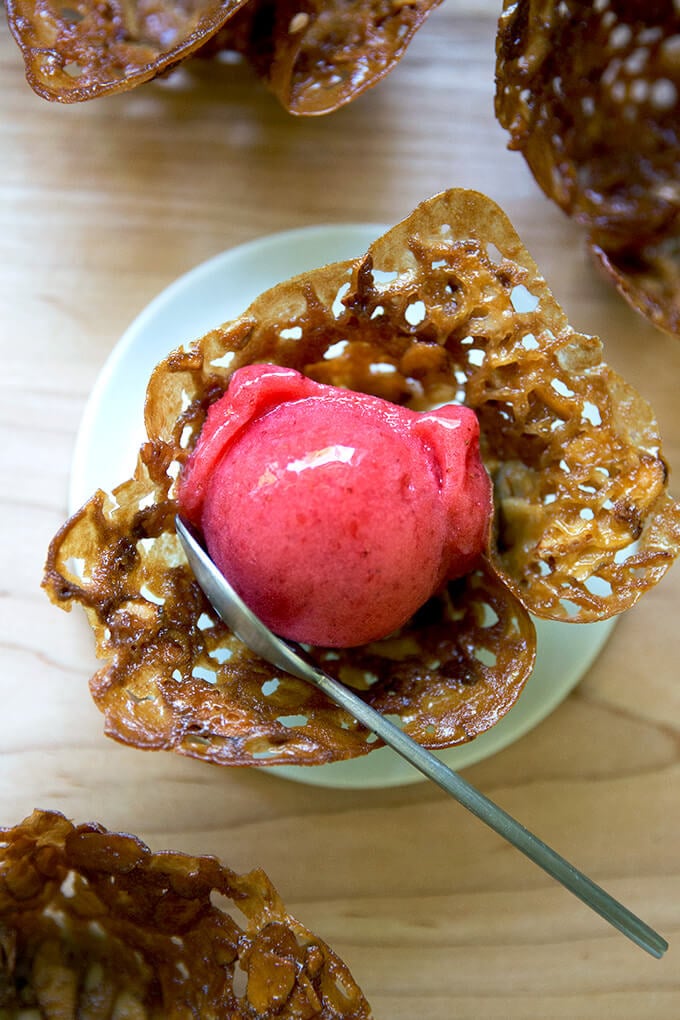
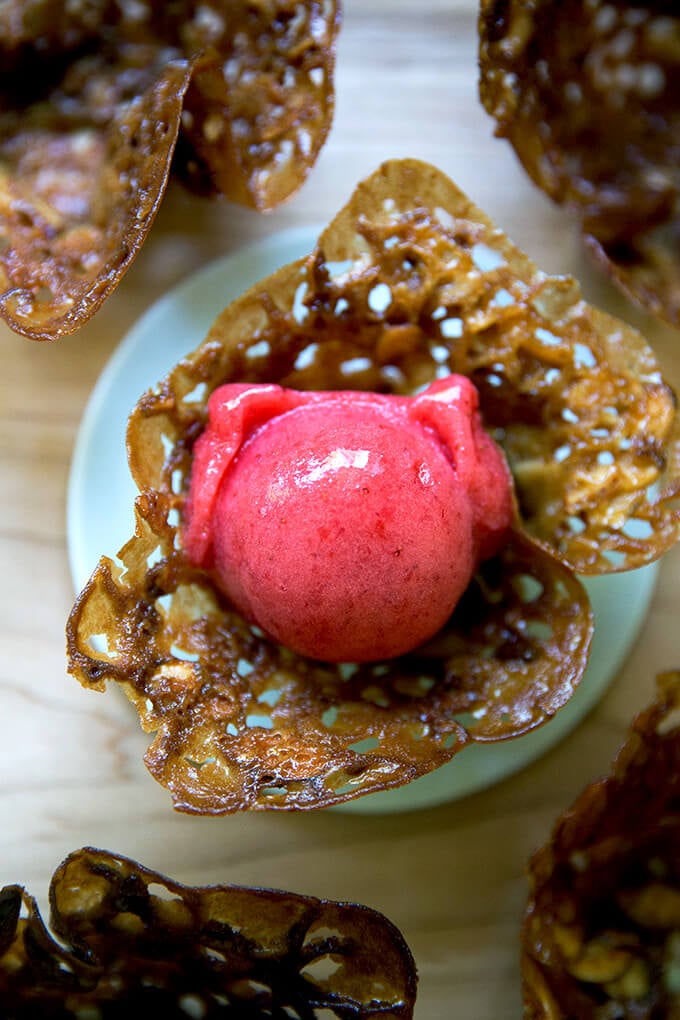
You can serve it straight up, or …
… make these almond butterscotch-cookie cups.

So festive.
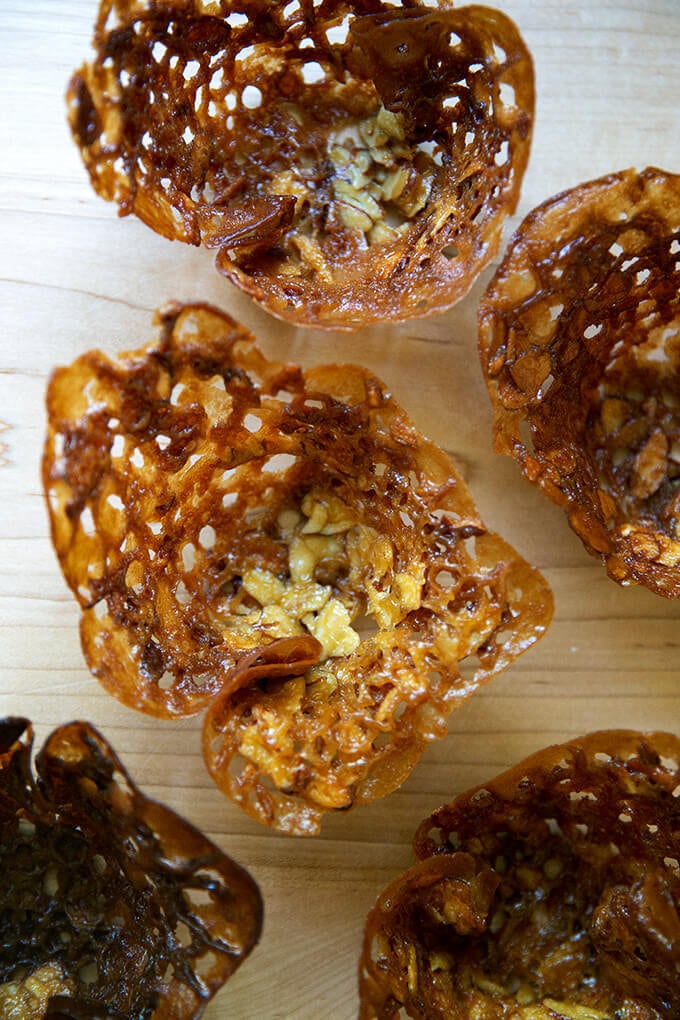
And delicious.
Description
From David Lebovitz’s The Perfect Scoop
A few notes:
- Recipe calls for a pound of strawberries. I think you can definitely use a range here. Most recently, I weighed my strawberries post hulling, it was about 1.25 lbs., so I likely started with something closer to 1.5 lbs.
- I like to use about a tablespoon of fresh lemon juice, but add to taste.
- I like to a few big pinches of sea salt — add to taste.
- Almond Butterscotch Cookie Cup recipe is below.
- I think the key with so many homemade ice creams and sorbets is allowing them to come to room temperature for a good chunk of time before serving. Don’t be afraid to let this sorbet sit for 20 minutes (checking often, depending on where you live) before serving.
1 – 1.5 lbs. strawberries, washed, hulled, and chopped 3/4 c. sugar 1 to 3 teaspoons fresh lemon juice Pinch of sea salt, such as Maldon
- Combine sugar with chopped strawberries and stir until sugar begins to dissolve. Allow to stand for about an hour, covered, stirring frequently. Blend strawberries in your blender or food processor until smooth. Add lemon juice and salt to taste (see notes above), blend again, and adjust with more salt or lemon to taste. Transfer to a storage container, and chill for at least an hour or until cold.
- Freeze according to your ice cream manufacturer’s instructions. Transfer to a storage vessel and freeze again for 1 – 2 more hours.
- Before serving, let sit at room temperature for 10 minutes or until it begins to soften. I find this can take as long as 20 minutes. I like to stir/swoosh the sorbet with a back of a spoon to help soften it before serving.
- Prep Time: 20 minutes
- Category: Ice Cream
- Method: Freeze
- Cuisine: American
Description
From David Lebovitz’s The Perfect Scoop
I recently made these with maple syrup as opposed to corn syrup, and it worked beautifully, so I’ve adjusted the recipe accordingly.
- 4 tablespoons butter, unsalted or salted
- 1/4 cup maple syrup
- 1/4 cup packed light brown sugar
- 1/2 cup sliced almonds
- 6 tablespoons ( 60 g ) flour
- pinch sea salt, such as Maldon
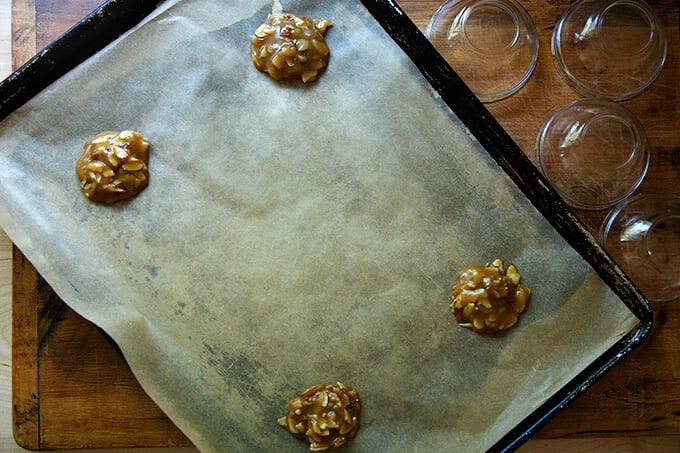
- Preheat the oven to 350ºF. Line a baking sheet with parchment paper. Have ready 4 teacups or custard cups or small bowls.
- Melt the butter in a small saucepan with the maple syrup and brown sugar. Stir in the almonds, flour, and salt.
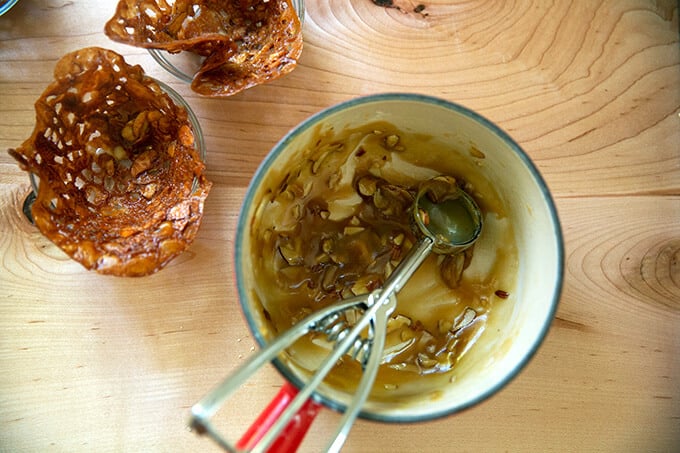
- Drop 4 slightly rounded tablespoons of batter (don’t be tempted to use more batter), evenly spaced, on the baking sheet. Bake the cookies for 9 to 12 minutes, until they’re golden brown. Let rest for 30 to 45 seconds, then lift each cookie off the baking sheet with a flexible metal spatula and flip it into your teacup or bowl. (If the cookies get too firm to shape, return the pan to the oven for 30 seconds to soften them.) Let the baking sheet cool, then repeat with the remaining batter.
- Prep Time: 10 minutes
- Cook Time: 20 minutes
- Category: Cookie
- Method: Oven
- Cuisine: American
Description
From David Lebovitz’s The Perfect Scoop
A few notes:
- Recipe calls for a pound of strawberries. I think you can definitely use a range here. Most recently, I weighed my strawberries post hulling, it was about 1.25 lbs., so I likely started with something closer to 1.5 lbs.
- I like to use about a tablespoon of fresh lemon juice, but add to taste.
- I like to a few big pinches of sea salt — add to taste.
- Almond Butterscotch Cookie Cup recipe is below.
- I think the key with so many homemade ice creams and sorbets is allowing them to come to room temperature for a good chunk of time before serving. Don’t be afraid to let this sorbet sit for 20 minutes (checking often, depending on where you live) before serving.
1 – 1.5 lbs. strawberries, washed, hulled, and chopped 3/4 c. sugar 1 to 3 teaspoons fresh lemon juice Pinch of sea salt, such as Maldon
- Combine sugar with chopped strawberries and stir until sugar begins to dissolve. Allow to stand for about an hour, covered, stirring frequently. Blend strawberries in your blender or food processor until smooth. Add lemon juice and salt to taste (see notes above), blend again, and adjust with more salt or lemon to taste. Transfer to a storage container, and chill for at least an hour or until cold.
- Freeze according to your ice cream manufacturer’s instructions. Transfer to a storage vessel and freeze again for 1 – 2 more hours.
- Before serving, let sit at room temperature for 10 minutes or until it begins to soften. I find this can take as long as 20 minutes. I like to stir/swoosh the sorbet with a back of a spoon to help soften it before serving.
- Prep Time: 20 minutes
- Category: Ice Cream
- Method: Freeze
- Cuisine: American
Find it online : https://alexandracooks.com/2019/07/18/strawberry-sorbet-in-almond-butterscotch-cookie-cups/

Description
From David Lebovitz’s The Perfect Scoop
I recently made these with maple syrup as opposed to corn syrup, and it worked beautifully, so I’ve adjusted the recipe accordingly.
- 4 tablespoons butter, unsalted or salted
- 1/4 cup maple syrup
- 1/4 cup packed light brown sugar
- 1/2 cup sliced almonds
- 6 tablespoons ( 60 g ) flour
- pinch sea salt, such as Maldon
- Preheat the oven to 350ºF. Line a baking sheet with parchment paper. Have ready 4 teacups or custard cups or small bowls.
- Melt the butter in a small saucepan with the maple syrup and brown sugar. Stir in the almonds, flour, and salt.
- Drop 4 slightly rounded tablespoons of batter (don’t be tempted to use more batter), evenly spaced, on the baking sheet. Bake the cookies for 9 to 12 minutes, until they’re golden brown. Let rest for 30 to 45 seconds, then lift each cookie off the baking sheet with a flexible metal spatula and flip it into your teacup or bowl. (If the cookies get too firm to shape, return the pan to the oven for 30 seconds to soften them.) Let the baking sheet cool, then repeat with the remaining batter.
- Prep Time: 10 minutes
- Cook Time: 20 minutes
- Category: Cookie
- Method: Oven
- Cuisine: American
Find it online : https://alexandracooks.com/2019/07/18/strawberry-sorbet-in-almond-butterscotch-cookie-cups/
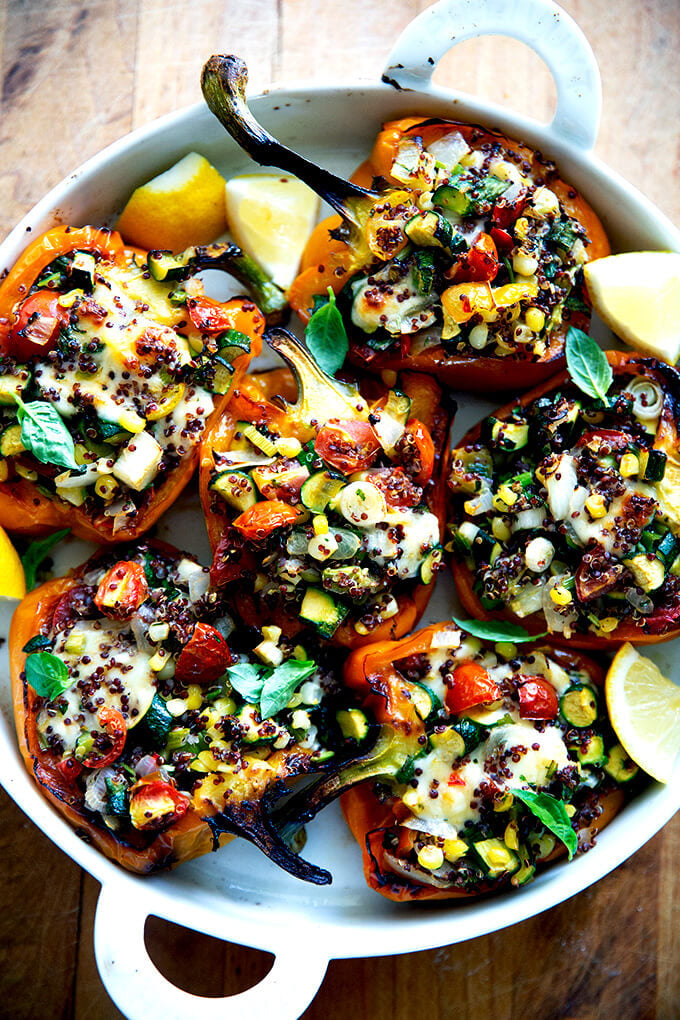
This is my go-to summer vegetarian entrée. These roasted stuffed peppers are loaded with sautéed vegetables and herbs: onions, corn, zucchini, tomatoes, scallions, and cilantro. Quinoa and Monterey Jack cheese give them a hardiness. Super summery and delicious, these peppers are loved by meat-eaters and vegetarians alike!
How to feed vegetables to a crowd?
This is a question I’ve found myself asking often in recent weeks. I’ve been on the road, first in Lake George, then in Connecticut, each for a week-long trip with extended family.
When it has been my turn to make dinner, I’ve found myself wanting to make something vegetarian — like a big, chopped salad with chickpeas and cubed cheese — but worrying about two things:
- How would it be received? and
- Would it be substantial enough?
This time of year, when the produce is nearing its peak, it’s easy to throw together a big green salad or to steam a dozen ears of corn or to chop up a bunch of tomatoes and call the side dish done.
But how to make something vegetable-based for the main course when eight adults and eight children are sitting around the table? And how do you do this without spending three days chopping?
Here’s one answer: vegetarian stuffed peppers. I made these peppers three times this past week, and while I didn’t even attempt to serve them to the children, the adults raved.
The Beauty of Veggie-Loaded Stuffed Bell Peppers:
- Loaded with a mix of sautéed zucchini, corn, and tomatoes, and bulked up with cooked quinoa and Monterey Jack cheese, these peppers feel substantial and satisfying, while also summery and light.
- Make ahead-able: You can prepare this dish ahead of time a number of ways. My favorite way is to stuff the partially roasted peppers with the filling, then stash them in the fridge or leave at room temperature until I am ready to pop them in the oven for their final bake.
- They reheat beautifully .
- Adaptable: The vegetables can be swapped, spices can be added, any number of grains could be used in place of the quinoa, and any number of good melting cheeses could be used in place of Monterey Jack. Last fall, I made a variation with blistered poblano peppers, quinoa, and corn .
These peppers are not something I would suggest you whip up on a weeknight, but they won’t keep you locked up in the kitchen chopping for days either.
How long to bake stuffed peppers?
These stuffed peppers bake for a total of 25 minutes. The peppers first bake alone at 475ºF for about 15 minutes or until their surfaces blister; then, once stuffed, they bake for another 5 to 10 minutes or until the cheese melts.
How to Make Stuffed Bell Peppers:
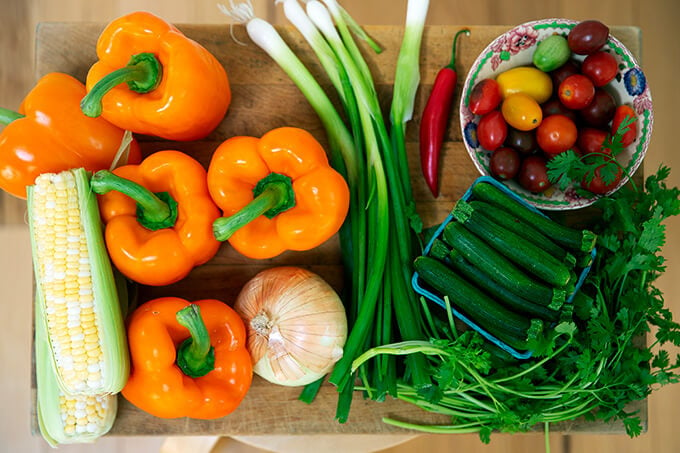
Here’s the play-by-play: Gather your ingredients. Heat the oven to 475ºF convection roast.
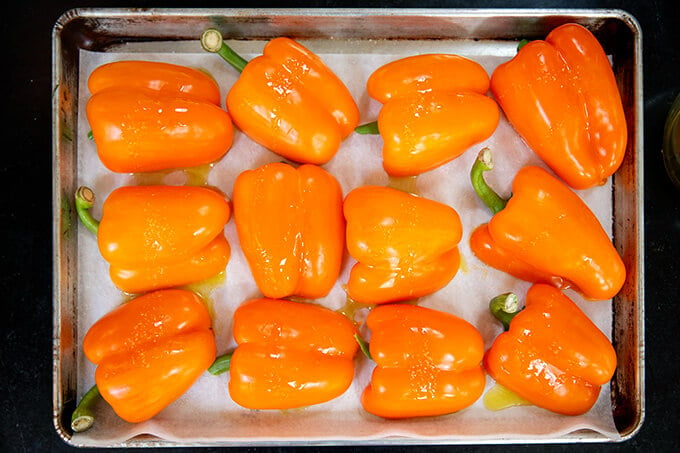
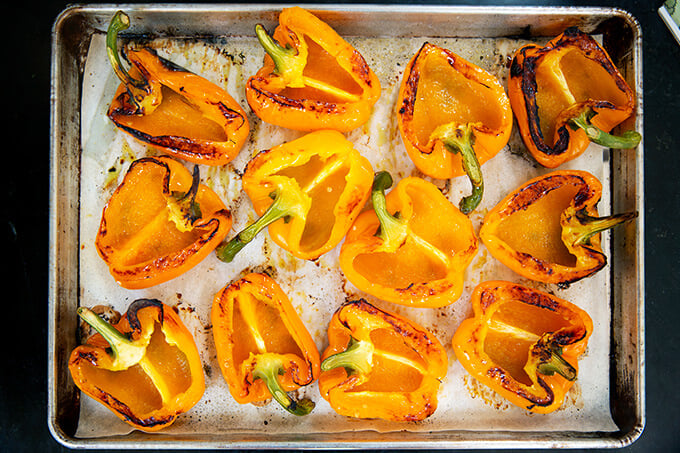
Halve and core bell peppers, leaving their stems intact. Drizzle with olive oil and salt, place them cut-side down on a sheet pan, and transfer to the oven for 20 minutes.
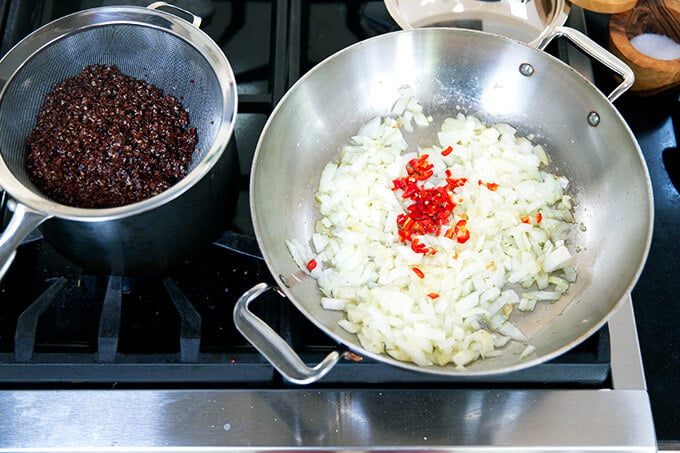
Meanwhile, cook 1/2 cup quinoa in salted water for 9 to 12 minutes or until it is done; then sauté an onion with a hot chili until it is soft, about 5 minutes.
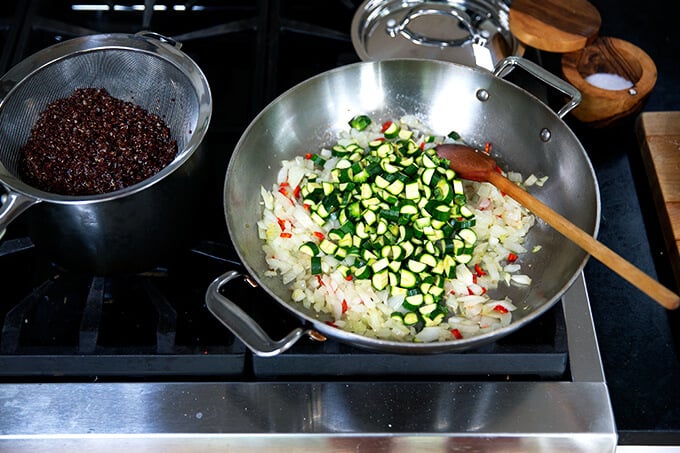
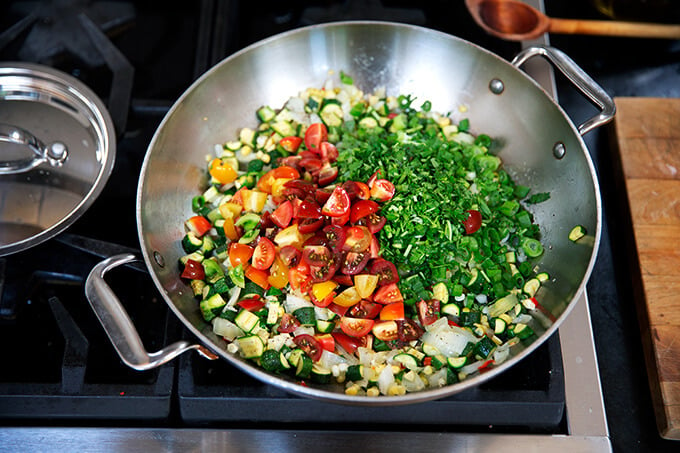
Add the diced zucchini, and sauté for a minute or two more.
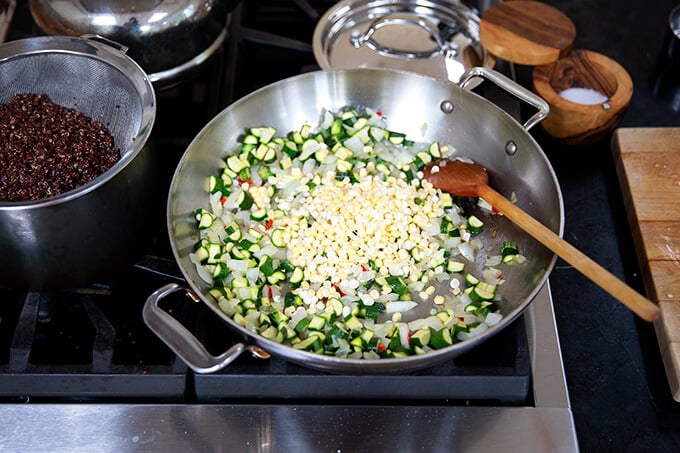
Next add the corn and sauté for a minute more.
Add the tomatoes, scallions, and cilantro, and turn off the heat.
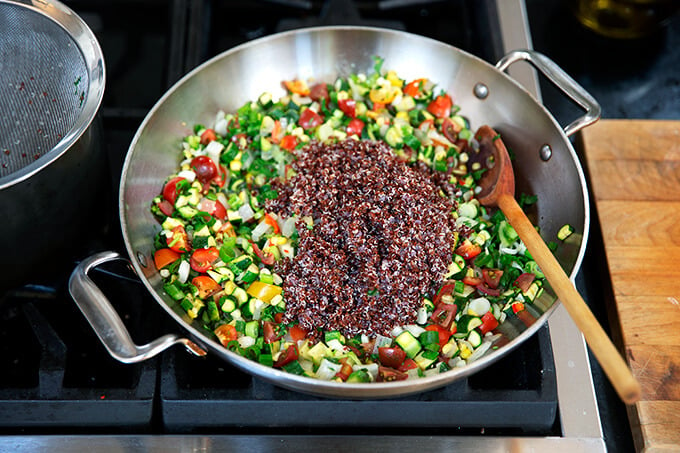
Next add the quinoa and stir to combine.
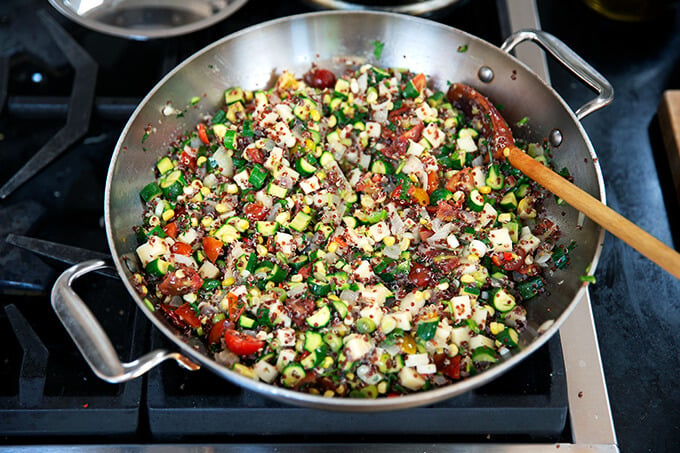
Add cubed Monterey Jack (or other cheese) and stir to combine.
Remove bell peppers from the oven.
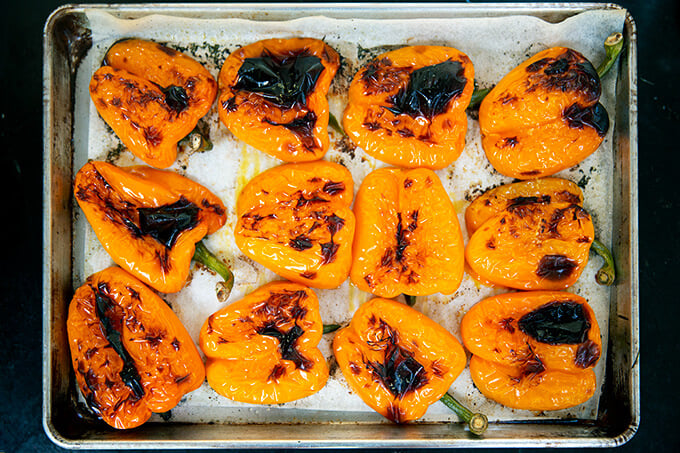
Flip them over.
Stuff the peppers with the quinoa-vegetable filling.
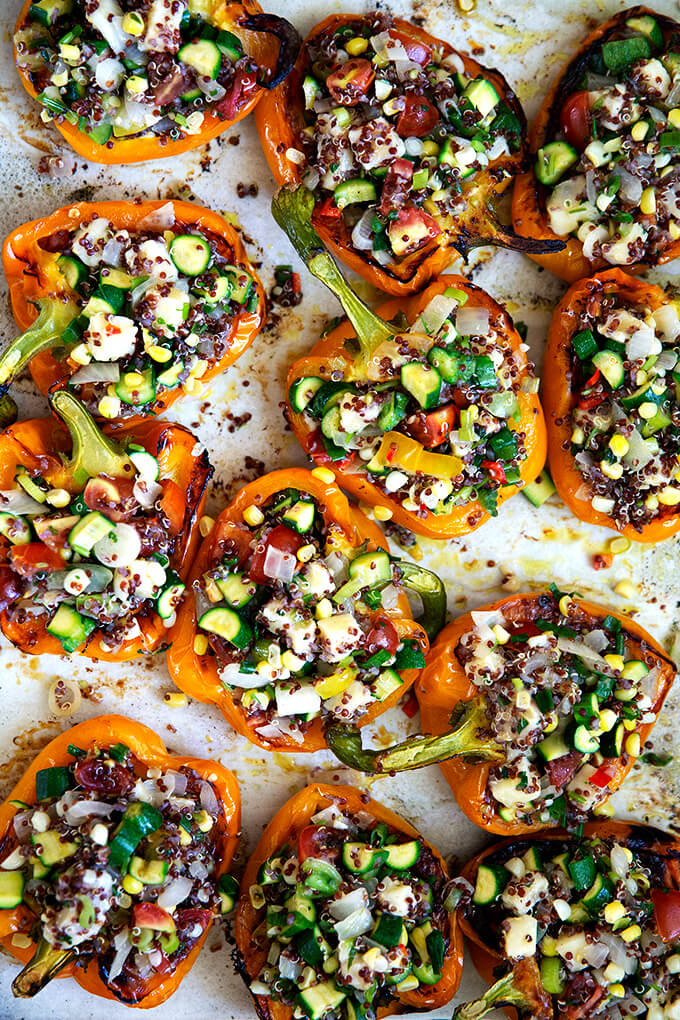
Stuffed peppers in the oven.
Transfer pan to the oven (or transfer a few of the peppers to a smaller roasting pan) and bake for another 10 minutes or until the cheese melts.
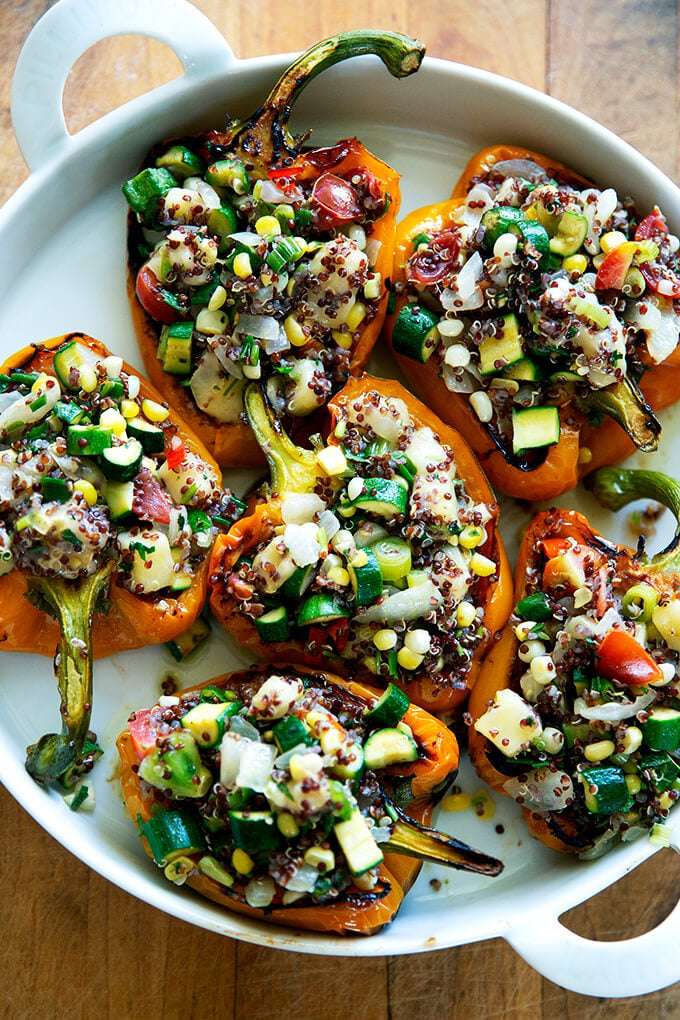
Garnish with fresh basil out of the oven and serve with lemon, if you wish.
Description
Inspired by a recipe I made last fall for blistered poblano peppers stuffed with corn and quinoa from Leigh Belanger’s My Kitchen Chalkboard .
Scale this recipe up or down as needed. In the video, I make a half recipe, which yields 6 pepper halves.
- 6 large bell peppers, halved and cored, leaving the stems intact (if you wish)
- 2 tablespoons olive oil plus more for drizzling
- kosher salt
- 1/2 cup quinoa
- 1 onion, finely diced
- 1 hot chili, optional, finely minced
- kosher salt
- 1 or 2 zucchini, small diced, to yield about 2 cups
- 2 ears corn, kernels removed
- 1 cup cherry tomatoes, quartered
- 6 scallions, finely sliced
- 1 bunch cilantro, finely chopped to yield about a cup
- 12 ounces Monterey Jack cheese, cubed
- basil or chives, chopped finely, for garnish, optional
- lemon for garnish, optional
- Heat the oven to 475ºF convection roast. Place the peppers cut side down on a sheet pan lined with parchment paper. Drizzle with oil. Season with salt. Transfer pan to the oven and cook for 15 to 20 minutes or until the peppers begin to blister. Remove from the oven. Turn peppers over. Set aside.
- Meanwhile, fill a medium pot with water, and bring to a simmer. Add a big pinch of kosher salt. Cook quinoa 9-12 minutes or until the quinoa is done. Drain through a fine-mesh sieve. Set aside.
- Meanwhile, heat the 2 tablespoons of olive oil in a large skillet over high heat. When it shimmers, add the diced onion and chili, immediately lower the heat to medium, season with a pinch of salt, and stir. Cook for about 5 minutes, stirring occasionally, until the onion softens and begins turning translucent.
- Add the diced zucchini and cook for 2 minutes, just until the zucchini loses its rawness — you don’t want the zucchini to turn to mush; it’s nice when it has some texture here. Add the corn and cook for a minute more. Turn off the heat. Add the tomatoes, scallions, and cilantro.
- Add the quinoa and stir to combine. Taste. Add salt and pepper until it tastes well seasoned. Fold in the cubed Monterey Jack.
- Spoon filling into the cavities of the peppers. Don’t be afraid to really, really pack them full — it’s OK if the filling is heaped in a mound in each pepper. These peppers are meant to feel substantial. You may have a little extra filling on hand; it’s delicious on its own. Save it for another day or eat it.
- Transfer peppers to the oven and cook for about 10 minutes more until the cheese begins melting and the vegetables begin browning.
- Remove from oven. Garnish with fresh basil, if you wish. Serve with a squeeze of lemon, if you wish.
- Prep Time: 20 minutes
- Cook Time: 30 minutes
- Category: Dinner
- Method: Oven
- Cuisine: American
