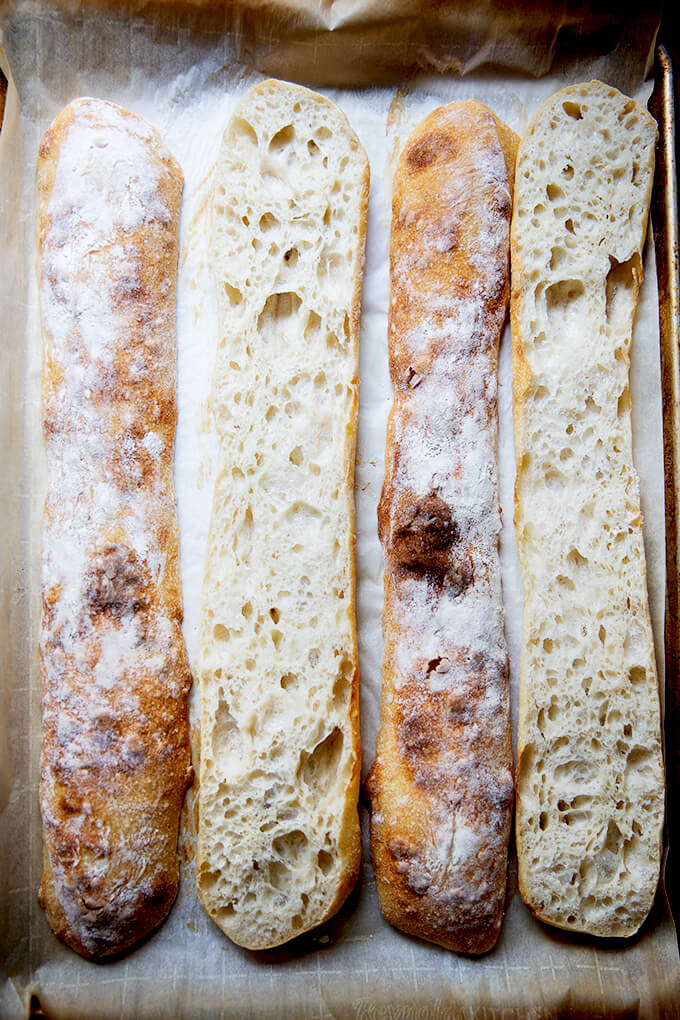
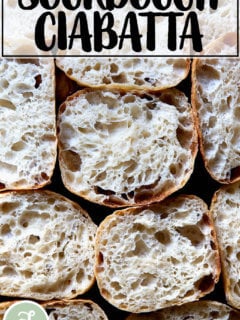
Made with four ingredients, this sourdough ciabatta has a crisp crust, a beautiful honeycomb crumb, and a lovely lightness and chew. The process is truly simple, and the ciabatta is so tasty, perfect for sandwiches of all kinds, for dunking into soup, or transforming into bruschetta.
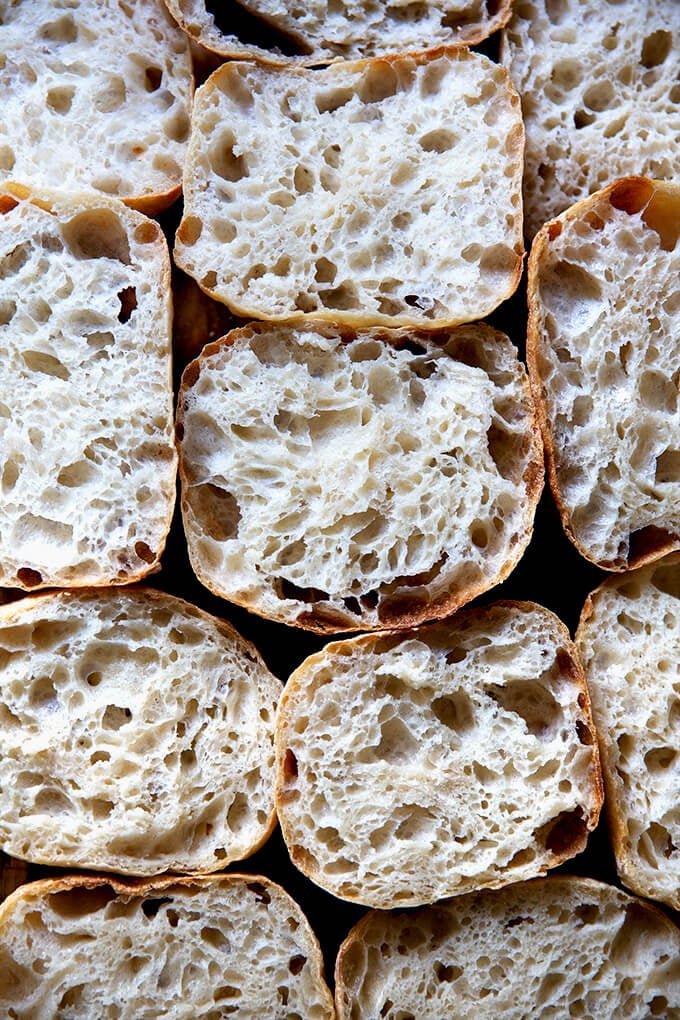
Originating from the Lake Como region of northern Italy, ciabatta means “slipper” in Italian. Traditional ciabatta is characterized by its slipper shape and extremely porous, light texture, created with a biga (a preferment), a high-hydration dough, and a long, slow rise.
A biga is made with a small amount of yeast, flour, and water. In this recipe, I’ve replaced the biga with a sourdough starter, but kept the remaining elements the same: the high-hydration dough is made with four ingredients and requires a long, slow rise, which produces a crisp crust, a beautiful honeycomb crumb, and a lovely lightness and chew. This ciabatta is perfect for sandwiches.
Best of all: the process is truly simple. The dough does not require an autolyse, a preheated Dutch oven, or a baking stone. If you have a sheet pan, you’re good to go. What’s more, there’s no shaping, scoring, or balling up dough. After the bulk fermentation, you turn the dough out onto a floured work surface, pat it into a rectangle, and divide it into 8 pieces. You then transfer those pieces, irregularly shaped and all, to a sheet pan, and bake them one hour later.
Can I tell you the most exciting part? This dough makes an excellent baguette! Unscored and flour-dusted, it has a crumb and flavor better than any other I’ve attempted previously. See photos below.
PS: If sourdough isn’t your thing, please try this yeast-leavened ciabatta bread recipe .
How to Make Sourdough Ciabatta, Step by Step
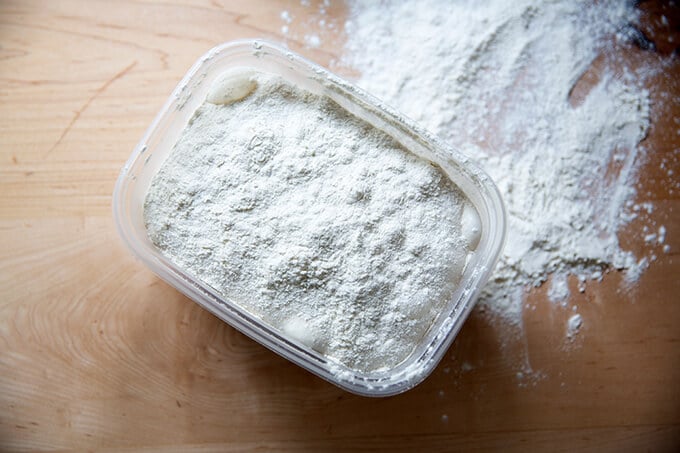
Gather your ingredients: bread flour, water, salt, and a sourdough starter . I am a proponent of buying a starter (see recipe box for sources), but if you are up for it, you can build a starter from scratch in just about 1 week .
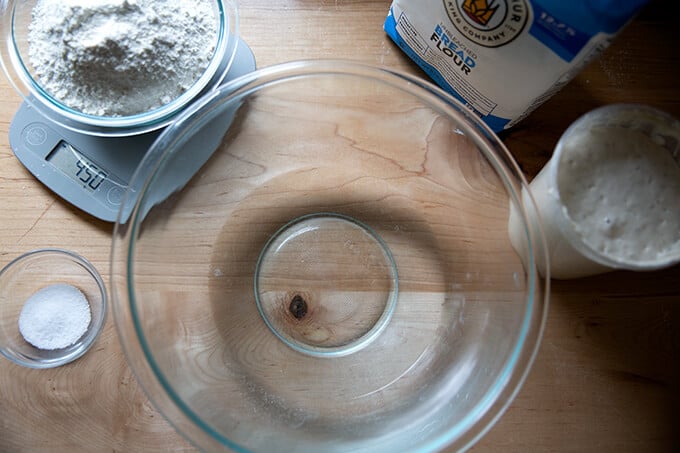
For this recipe, you’ll need: 100 grams sourdough starter, 360 grams water, 450 grams flour, and 12 grams salt. It’s 80% hydration.
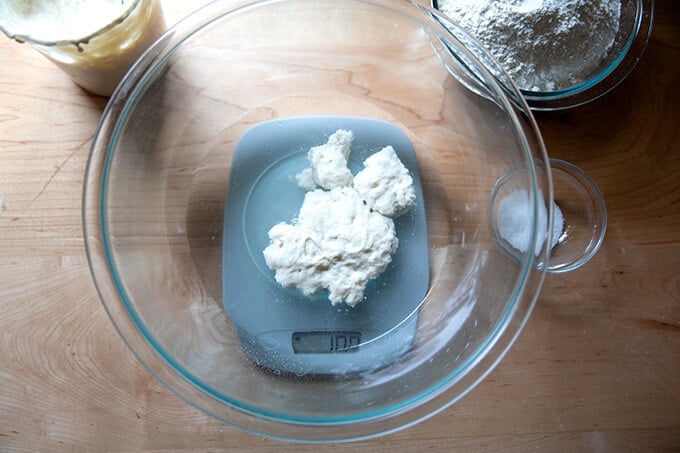
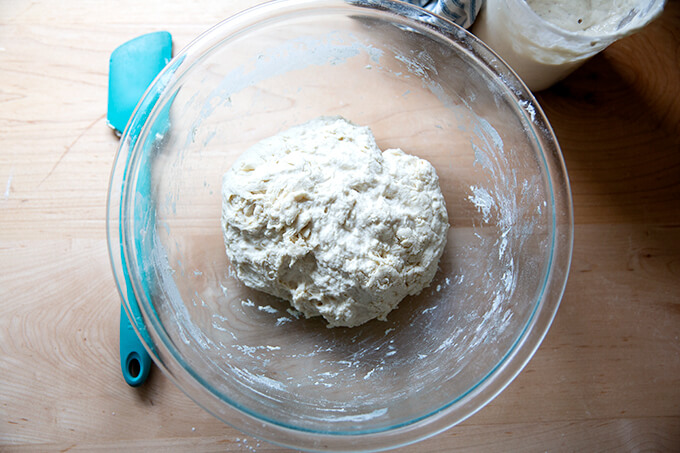
Mix together the water, sourdough starter, and salt.
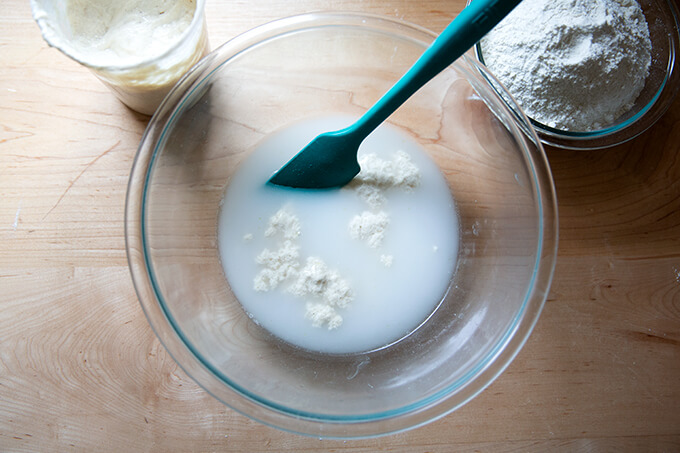
Add the flour and mix to form a sticky dough ball.
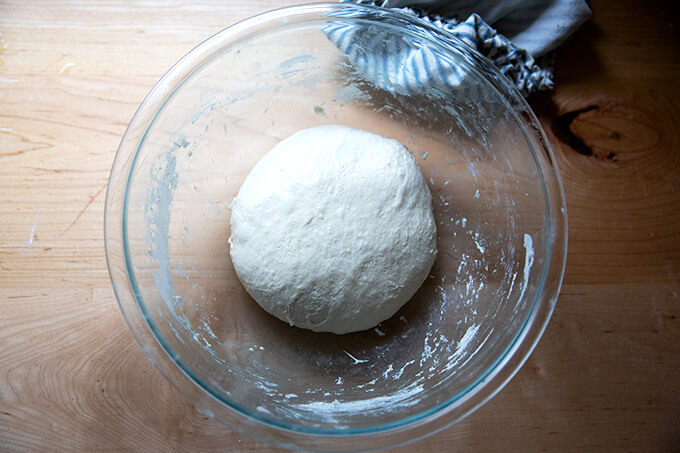
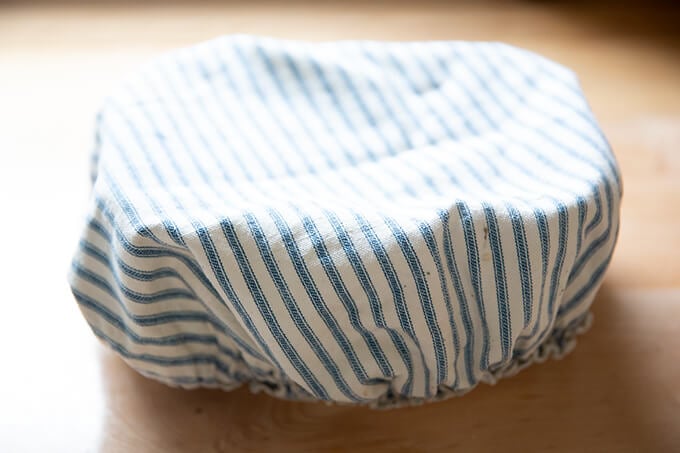
Cover the bowl and let rest for 30 minutes. Then perform a set of stretches and folds. See the video above or in the recipe box for guidance. This is what the dough will look like after one set of stretches and folds.
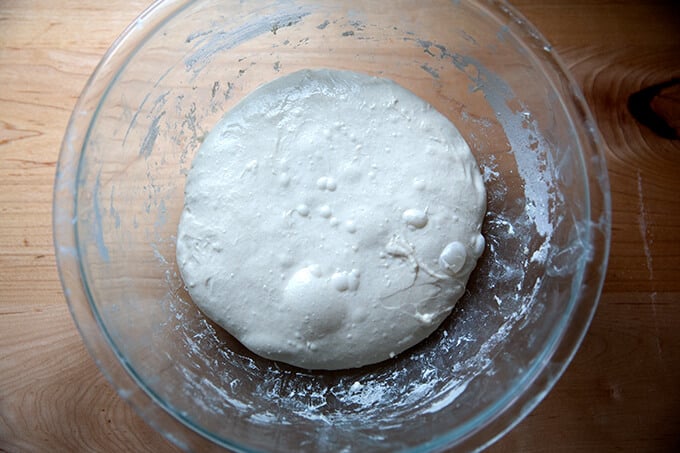
This is what the dough will look like after 4 sets of stretches and folds.
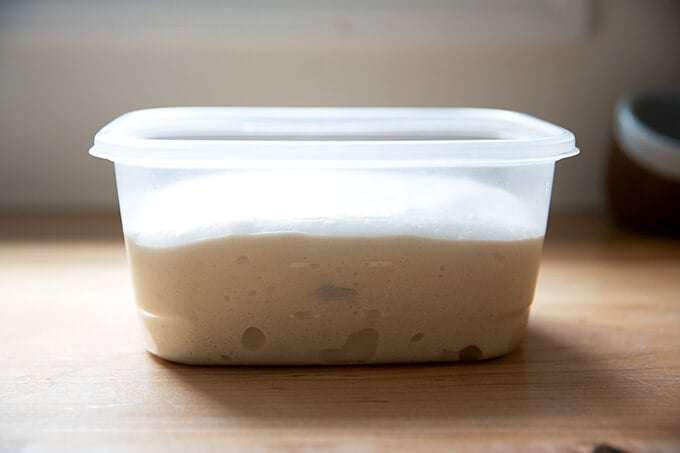
Transfer dough to a straight-sided vessel (this one is 8 cups, but anything similarly sized will do) for the bulk fermentation (the first rise):
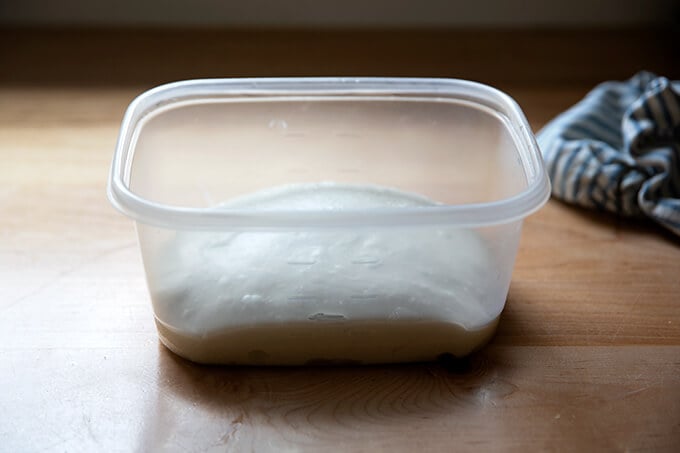
Mark the height of the dough on the vessel, cover the vessel, and let the dough rise until it increases in volume by roughly 75%.
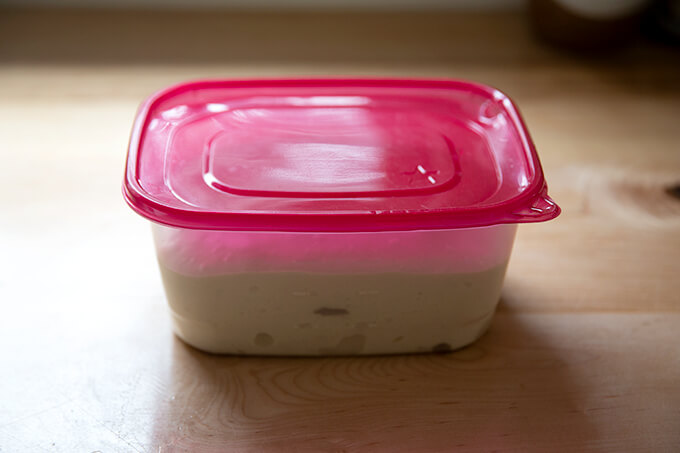
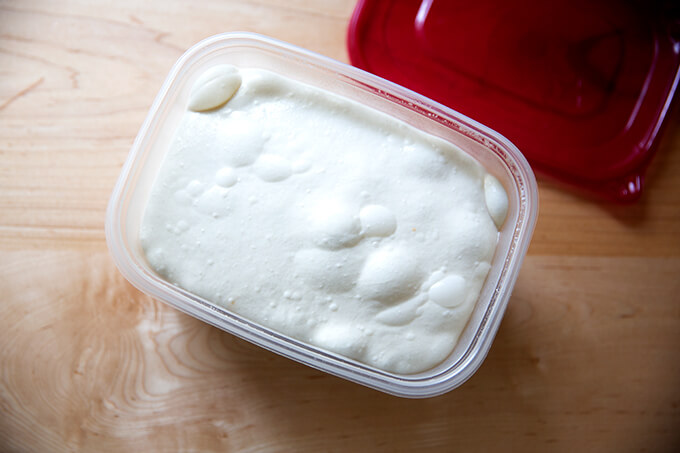
When the dough has increased by 75% (roughly), place a lid on the vessel, and transfer it to the fridge for 12-24 hours.
When ready to bake, remove the vessel from the fridge.
Dust the top of the dough liberally with flour. Dust a work surface liberally with flour, too.
Turn the dough out onto the prepared work surface.
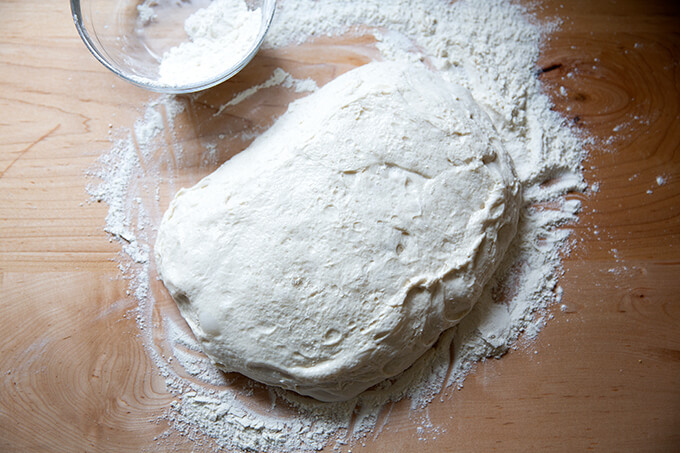
Pat the dough into a rectangle.

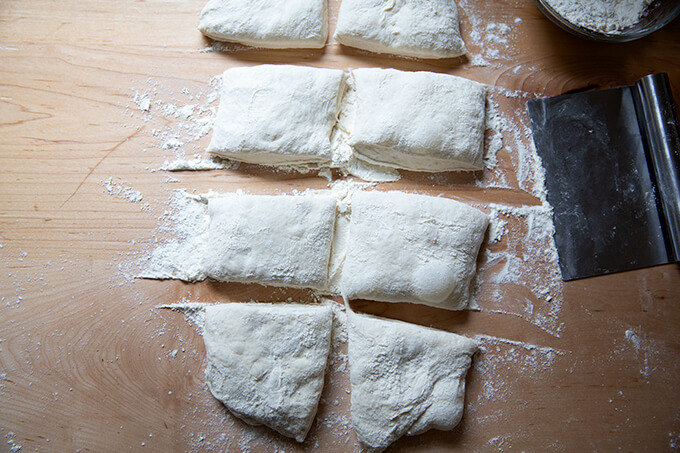
Cut the rectangle into 8 roughly equal portions.
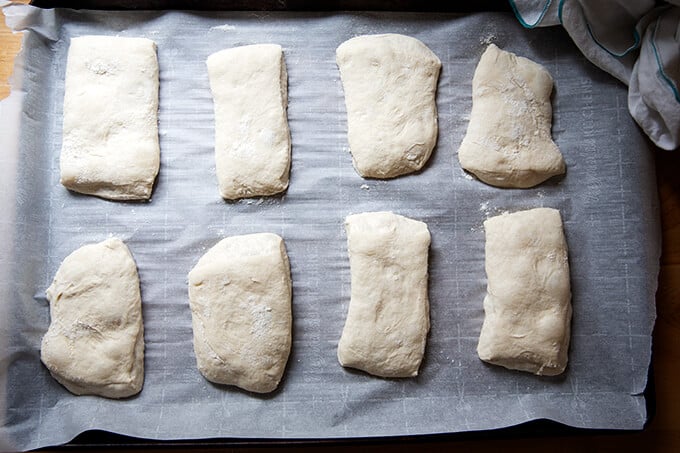
Transfer the portions to a parchment-lined sheet pan. Let rest for 1 hour. Then transfer to a 475ºF oven for 10 minutes. Lower the heat to 450ºF and bake for 10 minutes more.
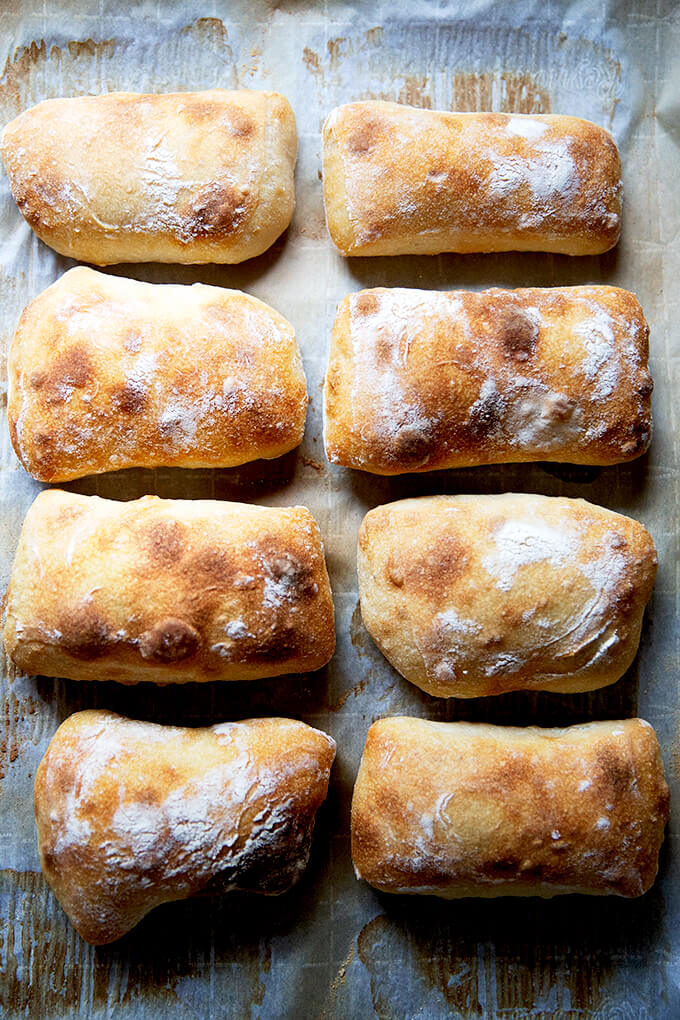
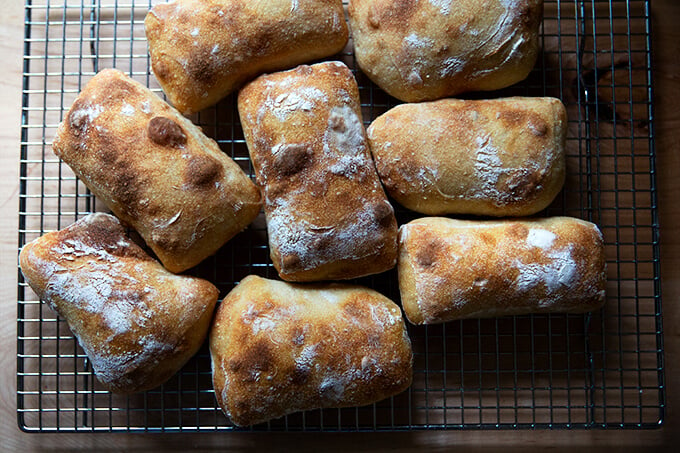
Transfer the rolls immediately to a cooling rack, and let cool for at least 20 minutes before cutting.
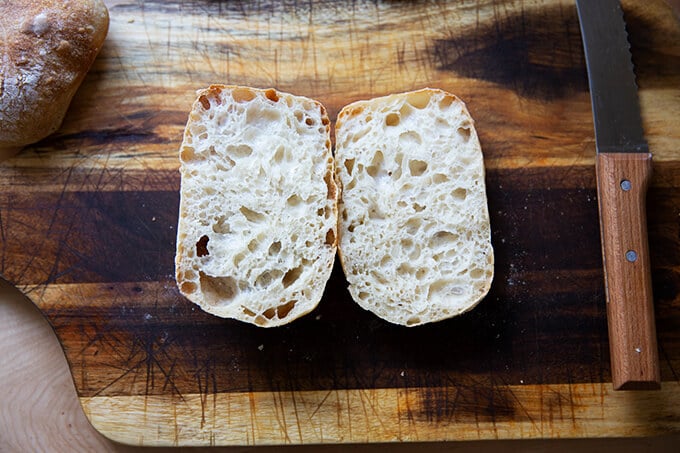
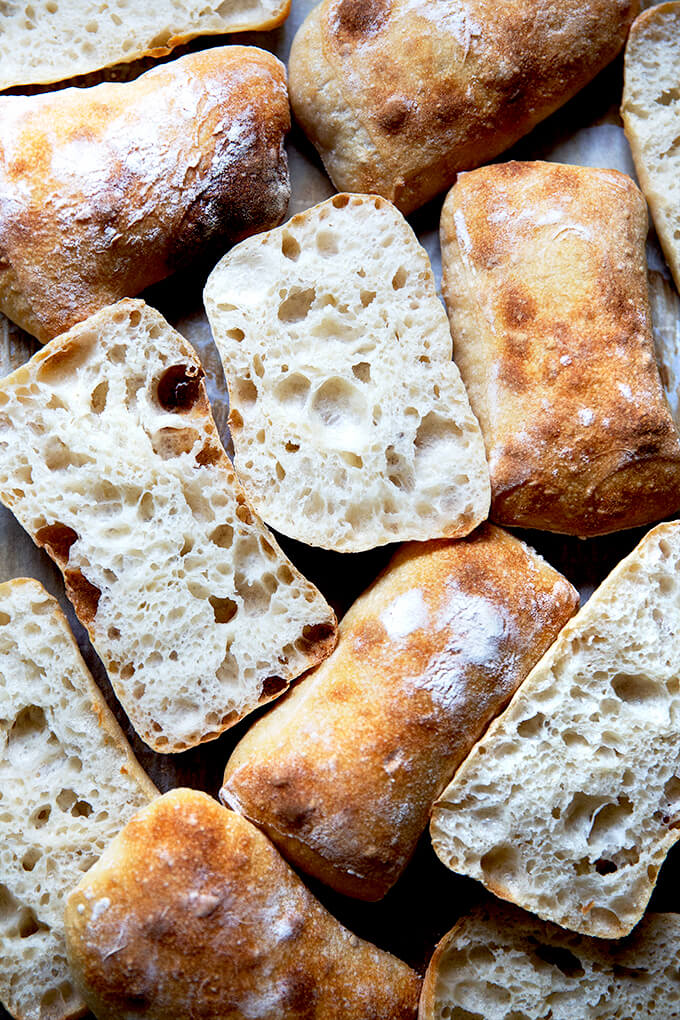
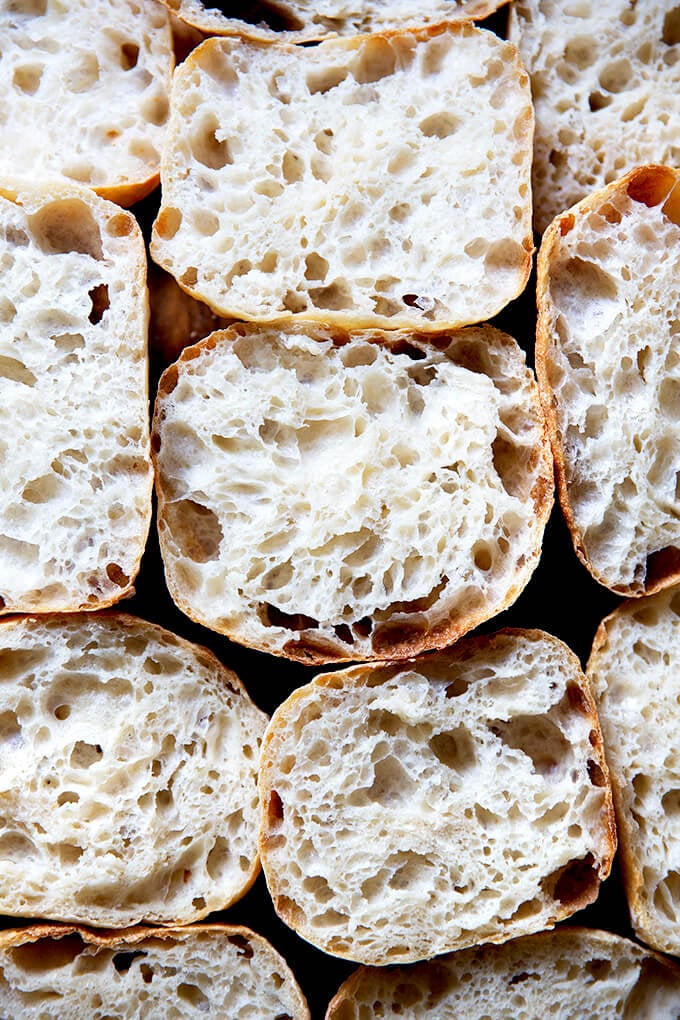
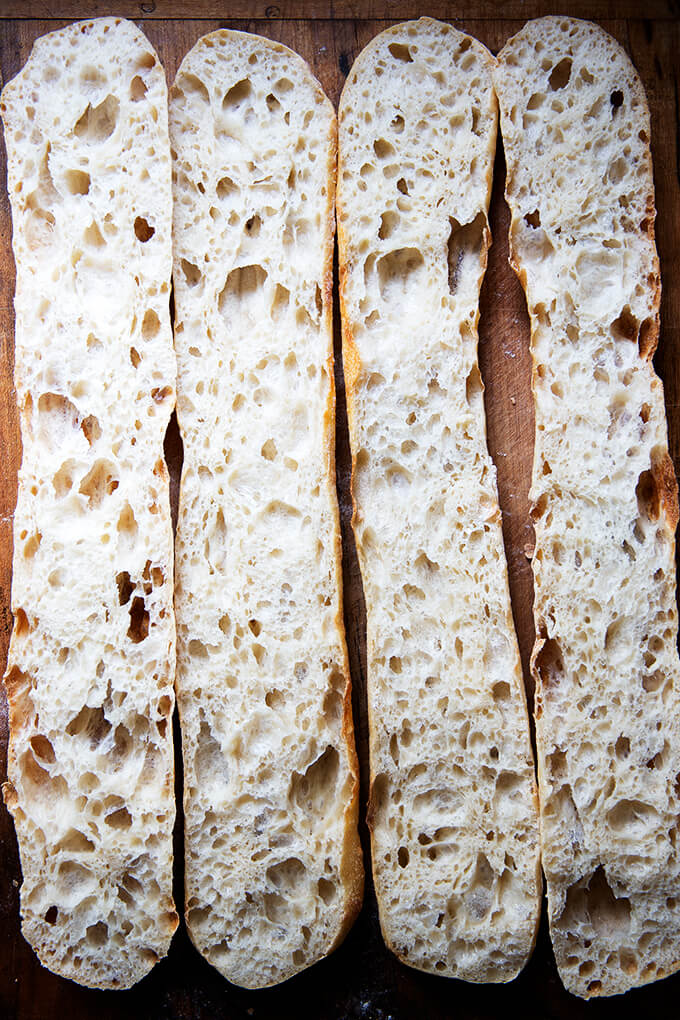
How pretty is that crumb?
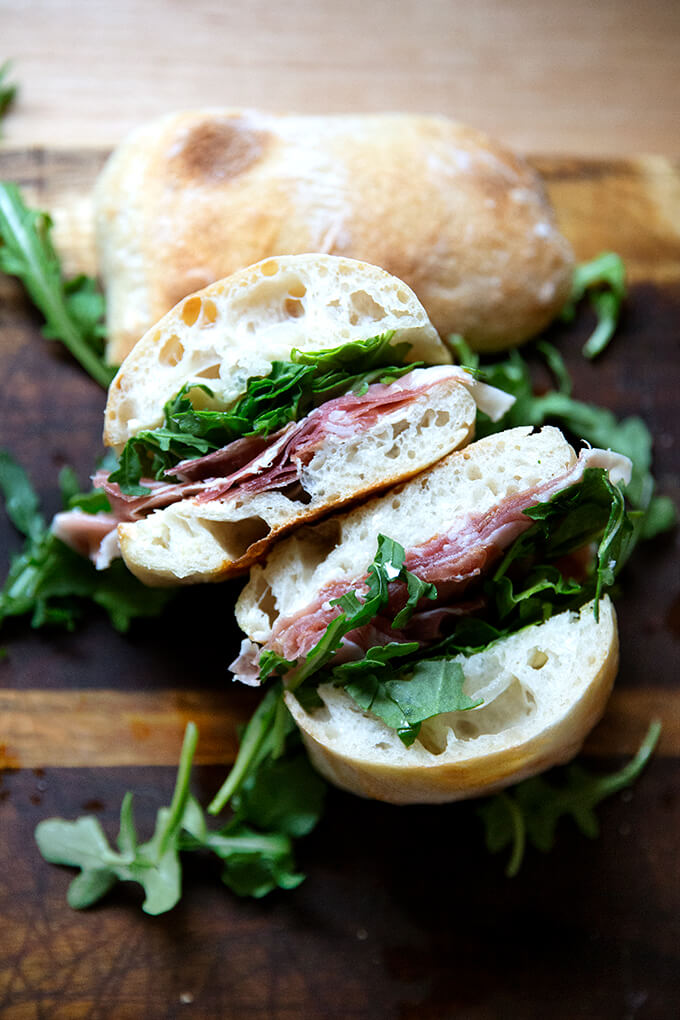
Ciabatta sandwich: This recipe is inspired by Gabrielle Hamilton’s Blood, Bones, and Butter . In short, the success of the sandwich relies on a delicate balance: “the perfection of three fats together — butter, olive oil, and the white fat from prosciutto or lardo.” To make it, spread good bread with “cool waxy butter,” top with prosciutto (more than you think), and arugula. Drizzle it all with good olive oil.
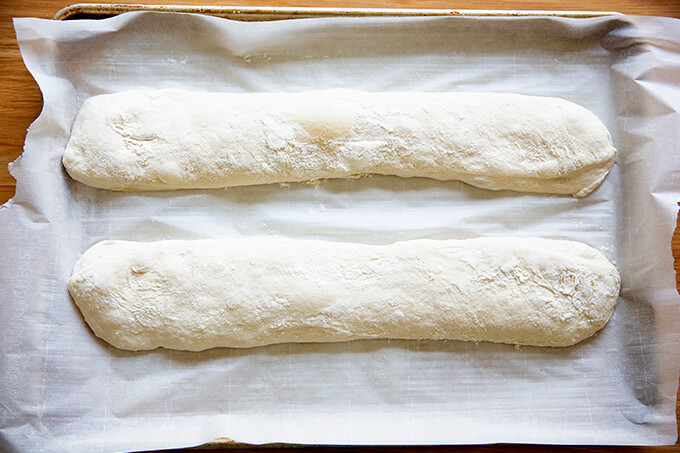
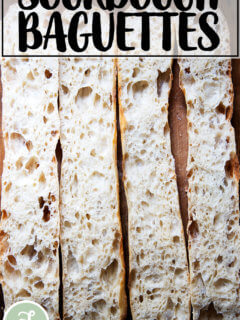
Sourdough Ciabatta “Baguettes” 🥖🥖🥖
To make baguettes, follow the same process, but instead of dividing the rectangle of dough into 8 portions, divide it into two. I find an extra-large sheet pan to be necessary to bake both baguettes at the same time. If you don’t have an extra-large sheet pan, I would bake one baguette at a time, and orient it at a diagonal angle from one corner to another.
Bake the baguettes at the same temperature and for the same amount of time as the rolls.
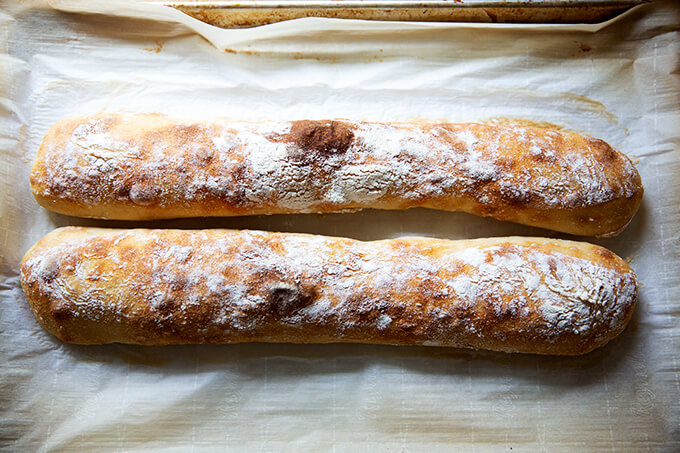
Not bad for the effort, right?
These ciabatta “baguettes” would be great vessels for giant sandwiches.
Description
Made with four ingredients, this sourdough ciabatta has a crisp crust, a beautiful honeycomb crumb, and a lovely lightness and chew. The process is truly simple, and the ciabatta is so tasty, perfect for sandwiches of all kinds, for dunking into soup, or transforming into bruschetta.
Notes:
- You need an active sourdough starter. You can build a starter from scratch in just about 1 week . But I am a huge proponent of buying a starter. Here are two sources: King Arthur Flour Breadtopia
- As always, I highly recommend investing in a digital scale before beginning any bread baking adventure.
Flour: I have had success using all-purpose flour, but if you can get your hands on bread flour, that is ideal, especially if you live in Canada or abroad. Moreover, if you live in Canada or abroad, you may need to reduce the water amount. Consider holding back some of the water during the mixing process to ensure you don’t end up with a soupy mess.
Straight-Sided Vessel:
The vessel I use in this recipe, similar to this one , is 8 cups. Most grocery stores carry storage vessels similarly sized.
Using a straight-sided vessel for the bulk fermentation will help prevent over-fermentation because it allows you to see when the dough has truly increased by 75% (or slightly more or less) in volume.
360 grams (about 1.5 cups ) water
12 grams (about 2 teaspoons ) salt
100 grams (about 1/2 cup ) active sourdough starter, see notes above
450 grams (about 3.5 cups ) bread flour, see notes above
- Mix the dough: Place the water in a large bowl. Add the salt and stir briefly. Add the starter and stir briefly to incorporate. Add the flour, and stir until you have a wet, sticky dough ball. Knead briefly with your hands if necessary to incorporate the flour. Cover with a tea towel or cloth bowl cover and let sit for 30 minutes.
- Stretches and folds : With wet hands, grab one side of the dough, and pull up and to the center. Rotate the bowl a quarter turn, and repeat the grabbing and pulling. Do this until you’ve made a full circle. (Watch the video for more guidance. I do a few more pulls and turns in the video.) Cover the bowl. Repeat this process three more times at 30-minute intervals for a total of 4 sets of stretches and folds over the course of two hours. (In the video, I switch to coil folds for the last two sets of stretches and folds.)
- Bulk fermentation: Transfer the dough to a straight-sided vessel. Cover the vessel with a towel. Let rise at room temperature until the dough nearly doubles in volume (shoot for a 75% increase in volume). Times will vary depending on your environment and the strength of your starter. Recently, this has taken about 4 hours for me, but don’t worry if it takes longer for you. Cover vessel with a lid (ideally) or a towel (if you are using a towel, slick the top of the dough with oil to prevent it from drying out.) Transfer to fridge for 12-24 hours.
- Shape: Remove vessel from fridge. Remove lid. Sprinkle top of dough liberally with flour. Turn dough out onto a floured work surface. Pat dough into a rectangle. Sprinkle top with flour. Use a bench scraper to cut the dough in half vertically. Then make three cuts equally spaced in each half to create 8 small rectangles.
- Line a sheet pan with parchment paper. With floured hands, transfer each rectangle to the prepared pan, gently pulling outward. Cover the pan with a towel. Let stand for one hour.
- Bake: Heat oven to 475ºF. Transfer pan to oven and bake for 10 minutes. Lower heat to 450ºF, rotate pan, and bake for 10 minutes more. Remove pan from oven. Transfer ciabatta rolls to a cooling rack. Let cool for 20 to 30 minutes before slicing.
- Prep Time: 24 hours
- Cook Time: 20 minutes
- Category: Bread
- Method: Oven
- Cuisine: American, Italian
Made with four ingredients, this sourdough ciabatta has a crisp crust, a beautiful honeycomb crumb, and a lovely lightness and chew. The process is truly simple, and the ciabatta is so tasty, perfect for sandwiches of all kinds, for dunking into soup, or transforming into bruschetta.
Originating from the Lake Como region of northern Italy, ciabatta means “slipper” in Italian. Traditional ciabatta is characterized by its slipper shape and extremely porous, light texture, created with a biga (a preferment), a high-hydration dough, and a long, slow rise.
A biga is made with a small amount of yeast, flour, and water. In this recipe, I’ve replaced the biga with a sourdough starter, but kept the remaining elements the same: the high-hydration dough is made with four ingredients and requires a long, slow rise, which produces a crisp crust, a beautiful honeycomb crumb, and a lovely lightness and chew. This ciabatta is perfect for sandwiches.
Best of all: the process is truly simple. The dough does not require an autolyse, a preheated Dutch oven, or a baking stone. If you have a sheet pan, you’re good to go. What’s more, there’s no shaping, scoring, or balling up dough. After the bulk fermentation, you turn the dough out onto a floured work surface, pat it into a rectangle, and divide it into 8 pieces. You then transfer those pieces, irregularly shaped and all, to a sheet pan, and bake them one hour later.
Can I tell you the most exciting part? This dough makes an excellent baguette! Unscored and flour-dusted, it has a crumb and flavor better than any other I’ve attempted previously. See photos below.
PS: If sourdough isn’t your thing, please try this yeast-leavened ciabatta bread recipe .
How to Make Sourdough Ciabatta, Step by Step
Gather your ingredients: bread flour, water, salt, and a sourdough starter . I am a proponent of buying a starter (see recipe box for sources), but if you are up for it, you can build a starter from scratch in just about 1 week .
For this recipe, you’ll need: 100 grams sourdough starter, 360 grams water, 450 grams flour, and 12 grams salt. It’s 80% hydration.
Mix together the water, sourdough starter, and salt.
Add the flour and mix to form a sticky dough ball.
Cover the bowl and let rest for 30 minutes. Then perform a set of stretches and folds. See the video above or in the recipe box for guidance. This is what the dough will look like after one set of stretches and folds.
This is what the dough will look like after 4 sets of stretches and folds.
Transfer dough to a straight-sided vessel (this one is 8 cups, but anything similarly sized will do) for the bulk fermentation (the first rise):
Mark the height of the dough on the vessel, cover the vessel, and let the dough rise until it increases in volume by roughly 75%.
When the dough has increased by 75% (roughly), place a lid on the vessel, and transfer it to the fridge for 12-24 hours.
When ready to bake, remove the vessel from the fridge.
Dust the top of the dough liberally with flour. Dust a work surface liberally with flour, too.
Turn the dough out onto the prepared work surface.
Pat the dough into a rectangle.
Cut the rectangle into 8 roughly equal portions.
Transfer the portions to a parchment-lined sheet pan. Let rest for 1 hour. Then transfer to a 475ºF oven for 10 minutes. Lower the heat to 450ºF and bake for 10 minutes more.
Transfer the rolls immediately to a cooling rack, and let cool for at least 20 minutes before cutting.
How pretty is that crumb?
Ciabatta sandwich: This recipe is inspired by Gabrielle Hamilton’s Blood, Bones, and Butter . In short, the success of the sandwich relies on a delicate balance: “the perfection of three fats together — butter, olive oil, and the white fat from prosciutto or lardo.” To make it, spread good bread with “cool waxy butter,” top with prosciutto (more than you think), and arugula. Drizzle it all with good olive oil.
Sourdough Ciabatta “Baguettes” 🥖🥖🥖
To make baguettes, follow the same process, but instead of dividing the rectangle of dough into 8 portions, divide it into two. I find an extra-large sheet pan to be necessary to bake both baguettes at the same time. If you don’t have an extra-large sheet pan, I would bake one baguette at a time, and orient it at a diagonal angle from one corner to another.
Bake the baguettes at the same temperature and for the same amount of time as the rolls.
Not bad for the effort, right?
These ciabatta “baguettes” would be great vessels for giant sandwiches.
Description
Made with four ingredients, this sourdough ciabatta has a crisp crust, a beautiful honeycomb crumb, and a lovely lightness and chew. The process is truly simple, and the ciabatta is so tasty, perfect for sandwiches of all kinds, for dunking into soup, or transforming into bruschetta.
Notes:
- You need an active sourdough starter. You can build a starter from scratch in just about 1 week . But I am a huge proponent of buying a starter. Here are two sources: King Arthur Flour Breadtopia
- As always, I highly recommend investing in a digital scale before beginning any bread baking adventure.
Flour: I have had success using all-purpose flour, but if you can get your hands on bread flour, that is ideal, especially if you live in Canada or abroad. Moreover, if you live in Canada or abroad, you may need to reduce the water amount. Consider holding back some of the water during the mixing process to ensure you don’t end up with a soupy mess.
Straight-Sided Vessel:
The vessel I use in this recipe, similar to this one , is 8 cups. Most grocery stores carry storage vessels similarly sized.
Using a straight-sided vessel for the bulk fermentation will help prevent over-fermentation because it allows you to see when the dough has truly increased by 75% (or slightly more or less) in volume.
360 grams (about 1.5 cups ) water
12 grams (about 2 teaspoons ) salt
100 grams (about 1/2 cup ) active sourdough starter, see notes above
450 grams (about 3.5 cups ) bread flour, see notes above
- Mix the dough: Place the water in a large bowl. Add the salt and stir briefly. Add the starter and stir briefly to incorporate. Add the flour, and stir until you have a wet, sticky dough ball. Knead briefly with your hands if necessary to incorporate the flour. Cover with a tea towel or cloth bowl cover and let sit for 30 minutes.
- Stretches and folds : With wet hands, grab one side of the dough, and pull up and to the center. Rotate the bowl a quarter turn, and repeat the grabbing and pulling. Do this until you’ve made a full circle. (Watch the video for more guidance. I do a few more pulls and turns in the video.) Cover the bowl. Repeat this process three more times at 30-minute intervals for a total of 4 sets of stretches and folds over the course of two hours. (In the video, I switch to coil folds for the last two sets of stretches and folds.)
- Bulk fermentation: Transfer the dough to a straight-sided vessel. Cover the vessel with a towel. Let rise at room temperature until the dough nearly doubles in volume (shoot for a 75% increase in volume). Times will vary depending on your environment and the strength of your starter. Recently, this has taken about 4 hours for me, but don’t worry if it takes longer for you. Cover vessel with a lid (ideally) or a towel (if you are using a towel, slick the top of the dough with oil to prevent it from drying out.) Transfer to fridge for 12-24 hours.
- Shape: Remove vessel from fridge. Remove lid. Sprinkle top of dough liberally with flour. Turn dough out onto a floured work surface. Pat dough into a rectangle. Sprinkle top with flour. Use a bench scraper to cut the dough in half vertically. Then make three cuts equally spaced in each half to create 8 small rectangles.
- Line a sheet pan with parchment paper. With floured hands, transfer each rectangle to the prepared pan, gently pulling outward. Cover the pan with a towel. Let stand for one hour.
- Bake: Heat oven to 475ºF. Transfer pan to oven and bake for 10 minutes. Lower heat to 450ºF, rotate pan, and bake for 10 minutes more. Remove pan from oven. Transfer ciabatta rolls to a cooling rack. Let cool for 20 to 30 minutes before slicing.
- Prep Time: 24 hours
- Cook Time: 20 minutes
- Category: Bread
- Method: Oven
- Cuisine: American, Italian
Find it online : https://alexandracooks.com/2021/04/25/simple-sourdough-ciabatta-bread/
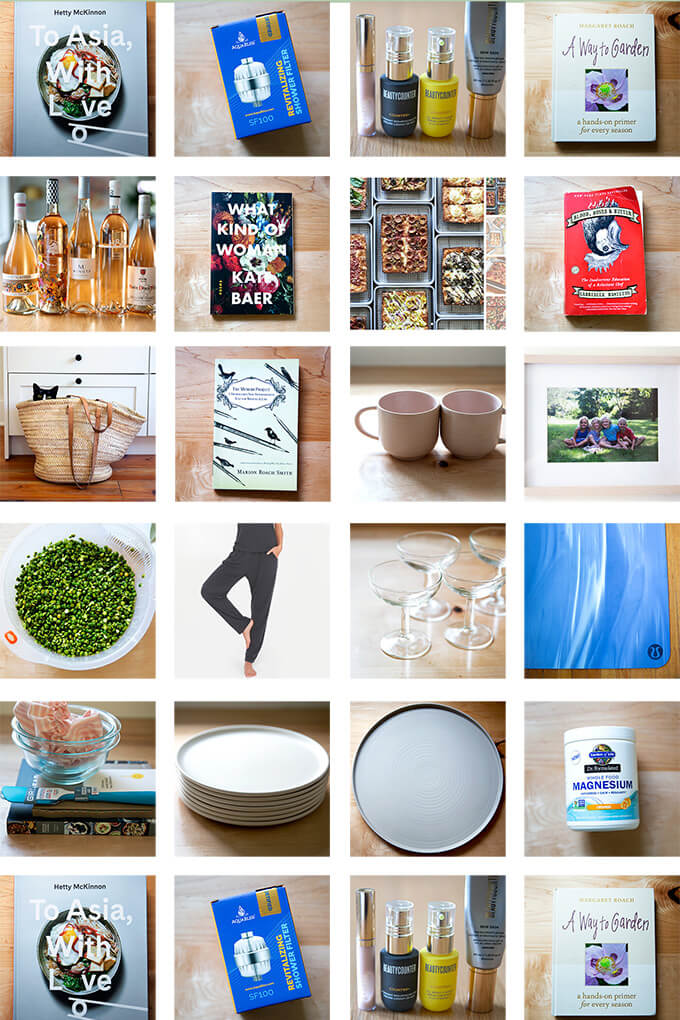
My perennial favorites can be found in the shop . This post is organized as follows:
- Books
- Health, Beauty & Wellness
- Kitchen
- Food & Wine
- Home
PS: Holiday Gift Guide 2020 | Mother’s Day Gift Guide 2020
Books
Kate Baer’s What Kind of Woman
Like many, I learned about Kate Baer via Cup of Jo , fell in love with her Instagram posts , and bought her book of poems . I keep it on the coffee table, where it’s at the ready to pick up while sipping my coffee or anytime I can find a quiet moment throughout the day. The poems are short, easy to understand, and so relatable.

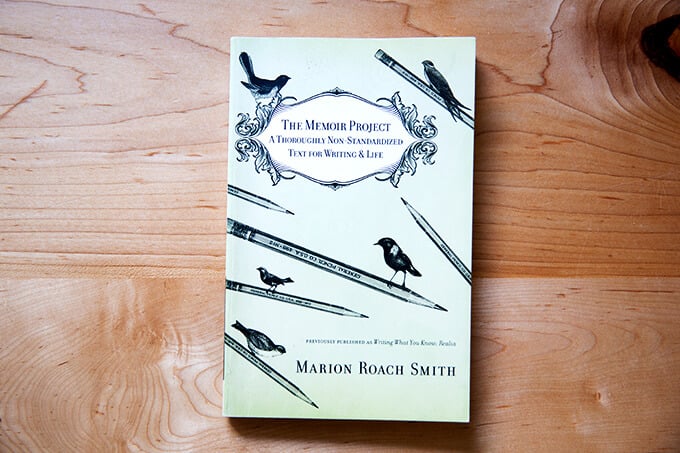
Marion Roach’s The Memoir Project
Most of you likely know the brilliant Margaret Roach , but you might not know her sister, Marion Roach , equally brilliant, who is a memoir coach. After listening to a conversation with her and David Leite at the Hillsdale General Store several years ago, I bought her book, which is about memoir writing and which feels very meta — I’m never sure I’m using that word correctly, but The Memoir Project teaches you how to write memoir while also being part memoir itself. (Meta, right?) That said, it’s so much more than a book about how to write a memoir — it’s a practical guidebook on how to write well or how to, as Marion says, “write with intent.”
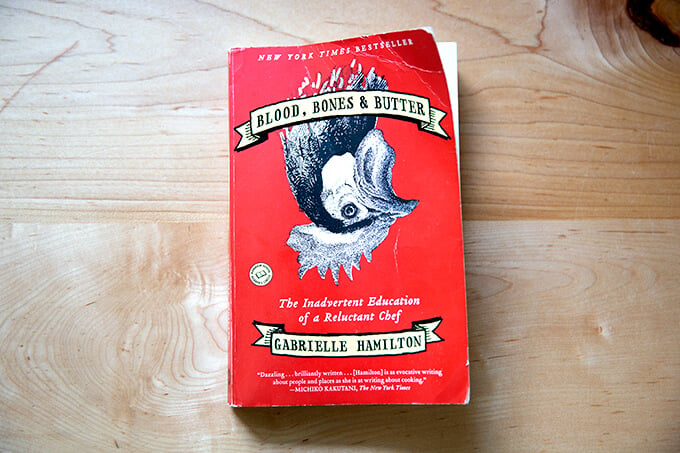
Gabrielle Hamilton’s Blood, Bones & Butter
Speaking of memoir, this one is my favorite. I’m re-reading it now. Here’s a passage I love relating to mothers:
“Until this moment, more or less, I sat in her lap after dinner every single night. For a period I was too young for after-dinner chores—clearing, washing, drying—and possibly too favored, and so I eagerly crawled up and took my place in her lap, barefoot and drowsy. I leaned back into her soft body and listened to the gurgling as she chewed and swallowed. I breathed in her exhale: wine, vinaigrette, tangerines, cigarette smoke. While all of the others were excused from the table, I got to sit, alone with my mother and father as they finished. I watched her oily lips, her crooked teeth, and felt the treble of her voice down my spine while she had adult conversation and gently rested her chin on the top of my head. She cracked walnuts from the Perigord and picked out the meats, extinguished her occasional cigarette in the empty broken husks, shifted my weight on her lap; she squeezed the tangerine peel into the candle flame and we watched the oils ignite in yellow and blue sparks. I sat in that woman’s aproned lap every single night of my young life, so close to the sounds and smells of her that I still know her body as if it were my own.”
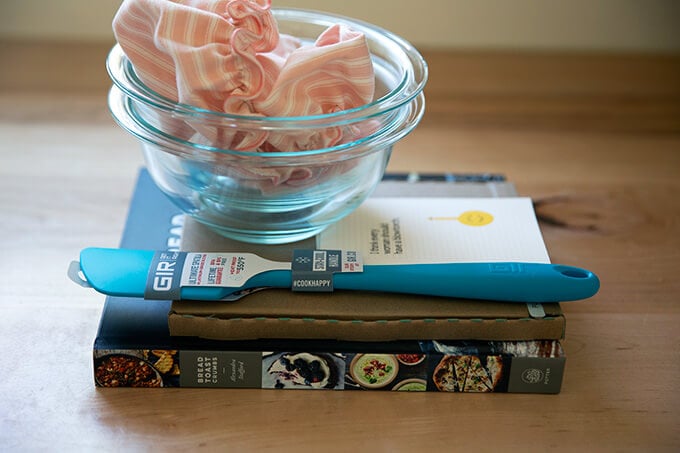
Bread Toast Crumbs
Of course, I’m always honored when you gift my book to anyone you think might enjoy learning how to bake simple bread. I also sell these peasant bread kits , which include all the peasant bread baking essentials: two 1-qt Pyrex bowls, a pink Dot and Army cloth bowl cover, a GIR spatula, a digital scale, a signed copy of Bread Toast Crumbs , and a Julia Child quotation notecard: “I think every woman should have a blowtorch.” There’s a “blue” kit as well.
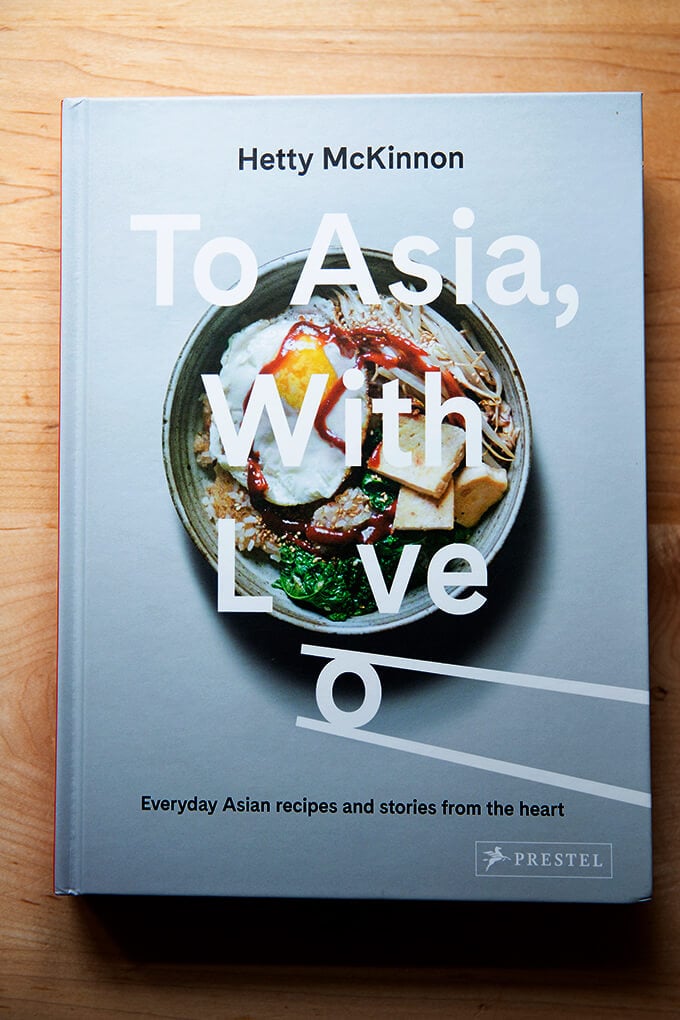
Hetty McKinnon’s To Asia with Love
I recently wrote about Hetty’s latest book , which is “full of everyday Asian recipes made with simple ingredients (many of which you will already have in your pantry) along with personal stories of growing up in a Chinese household in Sydney.” It’s beautiful.
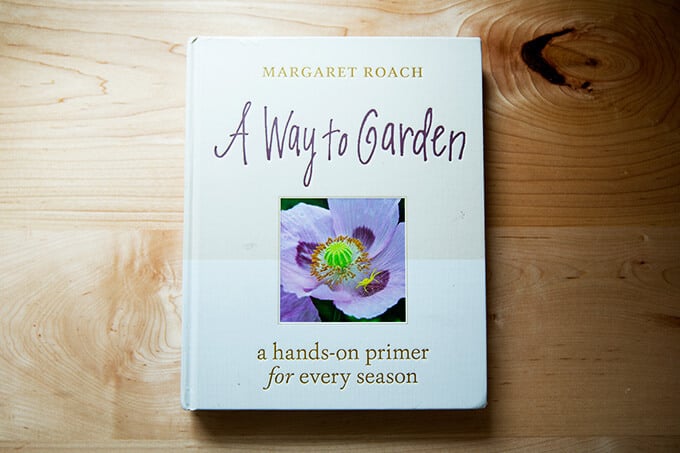
A Way to Garden
Health, Beauty, Wellness
Anything from Beauty Counter
I love Beauty Counter products for both their quality and their standards: they ban the use of over 1,800 ingredients in their formulations. A go-to gift for my sister and soon-to-be sister-in-law is either a lip gloss or tinted moisturizer — I love this dew skin .
The lovely Bridget Hunt, who has a wonderful blog and Instagram , and who is a Beauty Counter consultant, has introduced me to a few other products I am loving, namely the overnight resurfacing peel and the bright side c serum . She also highly recommends this cleansing balm , which she describes as a “Swiss army knife of skincare products.” I bought one for my mom, and I’m tempted to try it out myself.
PS: Beauty Counter is currently offering 15% off everything … the sale ends today, April 28th, at midnight.

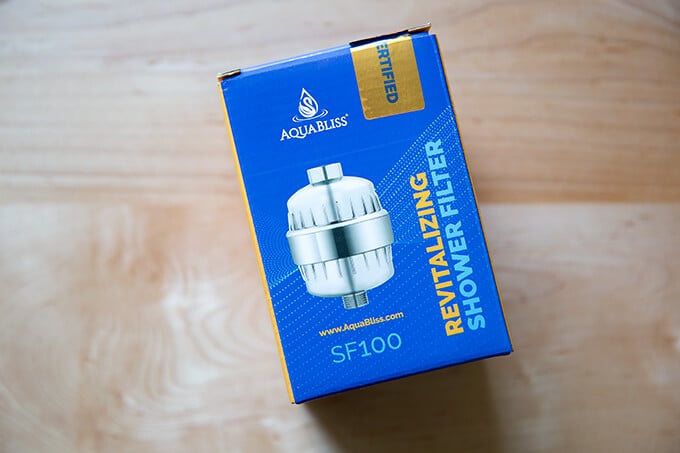
A Shower Filter
I learned about shower filters from Liz Moody’s Instagram . I bought this one a few months ago, and, incredibly, installed it myself — it took 5 minutes. I truly notice a difference in my hair, but apparently, a shower filter also can benefit your skin and nails, because chlorinated, chemical-ridden water can be the cause of itchy skin, dandruff, eczema, dry hair, and brittle nails.
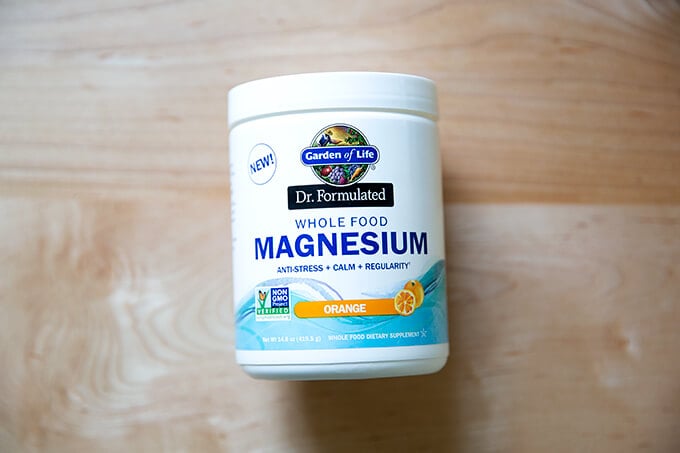
A tub of Magnesium
This is another product I learned about from Liz Moody, but from her Healthier Together podcast . I don’t remember which episode it was, but I think it was one of her “ask the doctor” episodes about gut health. I stir a teaspoon of it into a very large glass of water and begin every day with it. I love it mostly because it helps me drink water — I am a terrible water drinker — so I start the day feeling hydrated. Apparently, it also supports relaxation and helps with sleep, stress, and regularity. As I remember, the doctor in that episode recommended taking it in the evening — I think for its calming benefits — so that’s an option, too, if you find winding down difficult.
Incidentally, I really love all of Liz’s “ask the doctor” podcast episodes. There’s one on skincare, hormones, anxiety, and aging, to name a few. Liz asks great questions, and I always learn a lot from each episode. Also: this is a favorite salad from her cookbook Healthier Together . )
A New Yoga Mat
I recently replaced my many-years old yoga mat with this one, which I bought at Studio 4 Hot Yoga (in Schenectady if you are local), and it makes such a difference! I am a sweater, and so I slip around a lot on my mat, but not anymore! Isn’t it pretty, too?
Incidentally, if you live locally, Michelle, the owner of Studio 4, has a lot of cute tie-dye cut-off shirts in stock right now. A gift card to Studio 4 (or to your local yoga studio) would also make a great gift.

Sleep pants or shorts from Mate the Label
Do you know Mate the Label ? As with Vuori , Mate the Label came into my life via well-targeted Instagram ads. I was drawn to their neutral colors and purchased a pair of their sleep pants and sleep shorts this winter — I love them! They’re so soft and comfortable.

Kitchen
A Set of Champagne Coupes
I discovered Elsie Green sometime this winter and instantly fell in love with their vintage furniture and decor. I bought a set of champagne coupes , the shape of which I love — so much more practical than a flute, which I inevitably knock over and break after one glass of chapagne.

New Dinner Plates
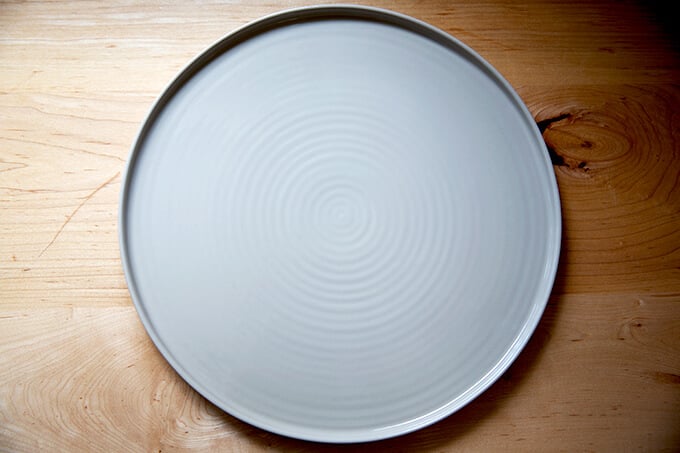
I bought these plates from Food52 in early March of 2020 in anticipation of a large Easter dinner, which, of course, never happened. Having owned these plates for over a year now, I can say with certainty I absolutely love them. I love the matte finish, and I love the flat surface. Food looks very pretty on them, they have a nice weight, and they wash up beautifully.

A New Serving Platter
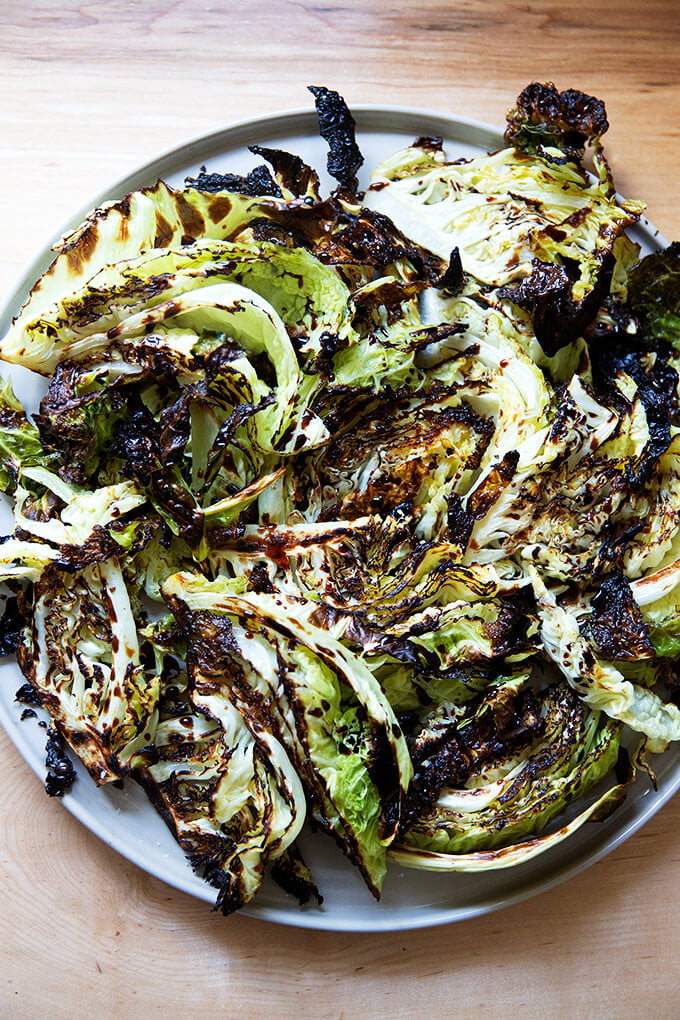
I have a few large circular platters, and every time I plate something on them on Instagram stories , people message me asking where I got them. This is one I use a lot. It’s from Hawkins New York.
Here it is topped with roasted cabbage. This is essentially this recipe but without the salsa — it’s basically roasted cabbage drizzled with reduced balsamic out of the oven, and it’s so tasty.
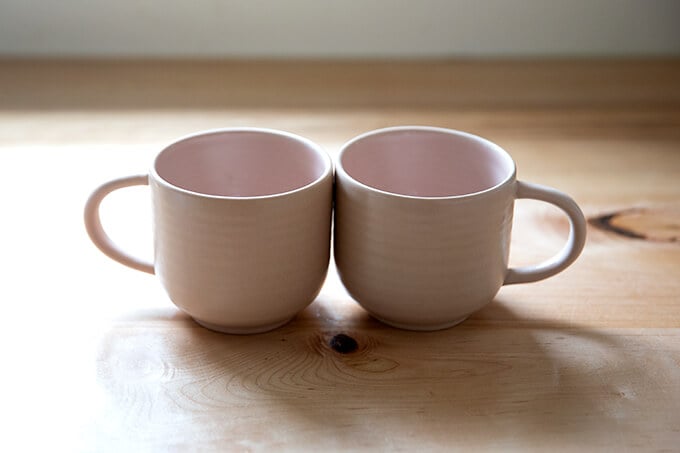
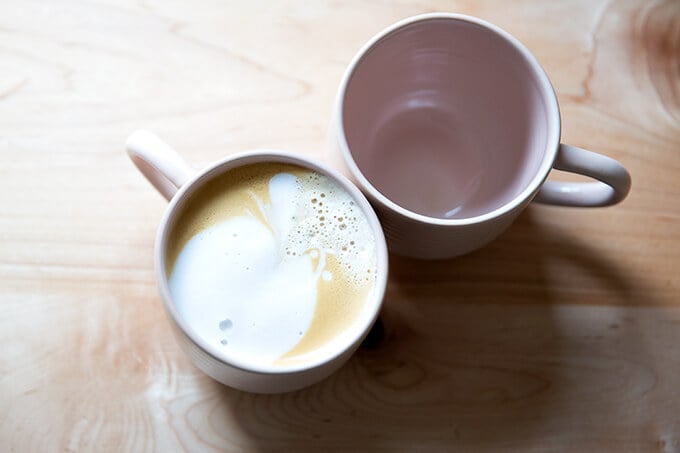
A New Mug
Your mother likely needs a new mug about as badly as she needs a new robe , but hear me out. I have a drawer filled with mugs, only one of which I truly truly love. It’s from Crate and Barrel, and it was something I got for my wedding. It’s the perfect size (for me), and it’s made of bone china, so its edge is nice and thin. Unfortunately, it’s no longer in production, and I hadn’t been able to find anything I like quite as much, until I found these mugs from Hawthorn New York. Note: these are not thin like bone china, but the edge is thin enough for me, and the size is just right — not too big, not too small.
Inomata Japanese Rice Washing Bowl
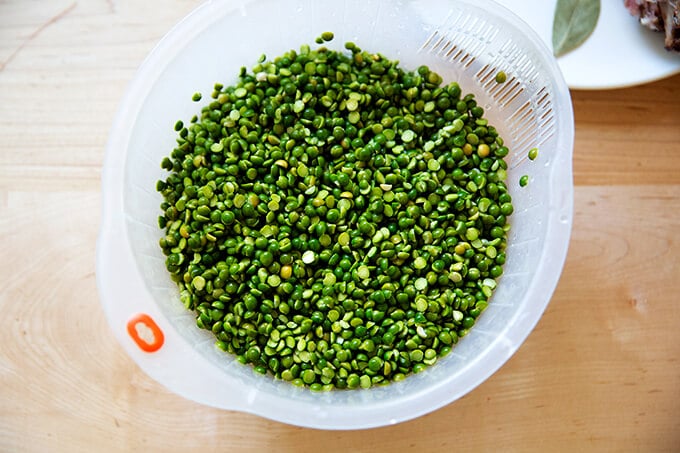
One of you recommended this Inomata Japanese Rice Washing Bowl , and I use it all the time . Love it. Thank you. It’s pictured below with split peas , but I mostly use it for this coconut rice recipe .
Food & Wine
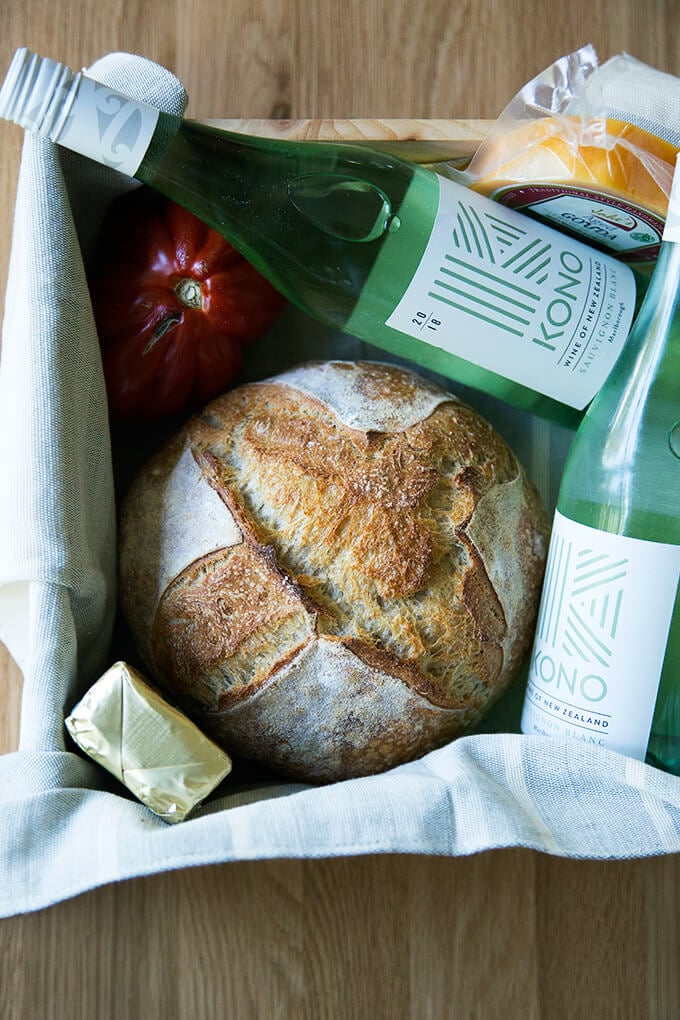
Rosé All Day 🍷🍷🍷🍷🍷
It’s almost rosé season, and I think a bottle of it (or your favorite wine) would make a lovely gift. I really like the H&B rosé. Maybe make some homemade crackers and buy some stinky cheeses to pair with it? I love this aged gouda as well.

Or bake some bread and buy some good butter to gift with it?
A gift card to Goldbelly
Like many people at the height of the lockdown last year, I found myself both worrying about favorite restaurants and longing to visit them. When I learned about Goldbelly , which ships food from renowned restaurants nationwide, I immediately ordered a 3-Pack of Emmy Squared Detroit Style Pizza. The pizzas baked up beautifully, and it was a really fun night — it felt more special than the usual takeout. I ordered the vodka, roni supreme, and the Emmy (white), and we all loved them all.
In addition to offering food, they offer cooking classes. How fun does this pizza-making class sound?
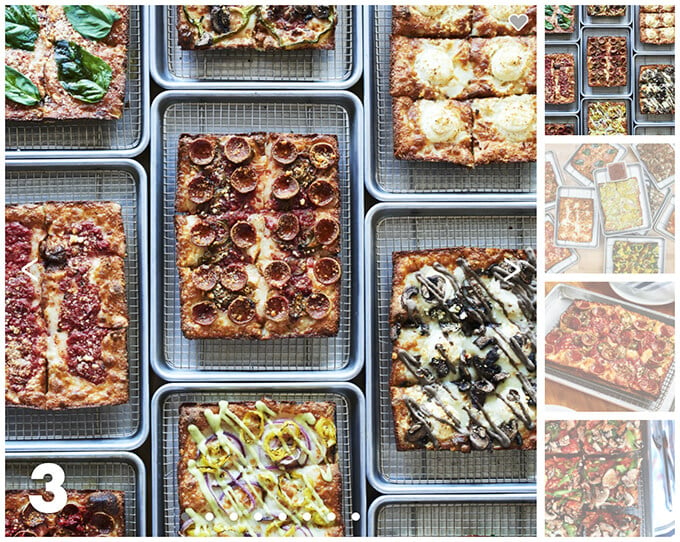
Photo via Goldbelly
Home + Other
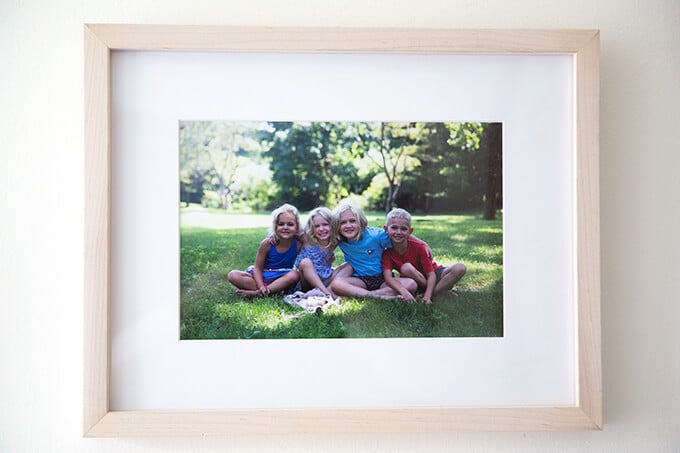
A framed photo or piece of art from Framebridge
Every year for Christmas but often for Mother’s Day and Father’s Day, too, I frame a photo of the kids for my parents and in-laws. Framebridge always does a beautiful job, and they’re fast, too. My favorite frame is the bleached maple (pictured below). Use code alexandracooks15 to receive 15% off.
A Moroccan Tote
I bought this one from the Vischer Ferry General Store , which, if you are local, is a great spot for both gifts and food, and I use it all the time. I’m not sure if they have any in stock at the moment. Call to see: 518-579-0195. Elsie Green sells a similar Moroccan tote.

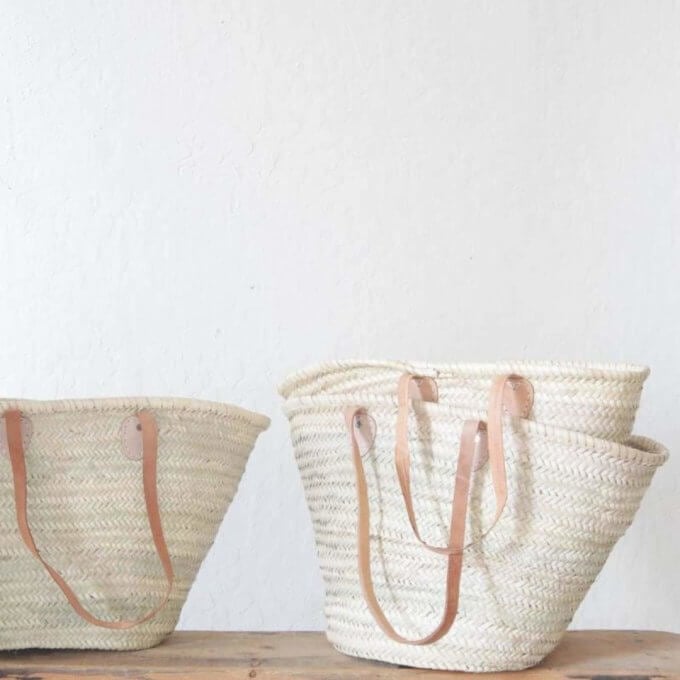
Photo via Elsie Green
In addition to the items above, here are a few more thoughts:
- Gift certificate to a local restaurant, such as The Vischer Ferry General Store or Arthur’s Market .
- Dates + almond butter is a favorite.
- Anything from Bloomscape , Dot & Army , Food52 , Milk Street , or Burlap & Barrel .
Friends, what are your current favorite items to gift?
