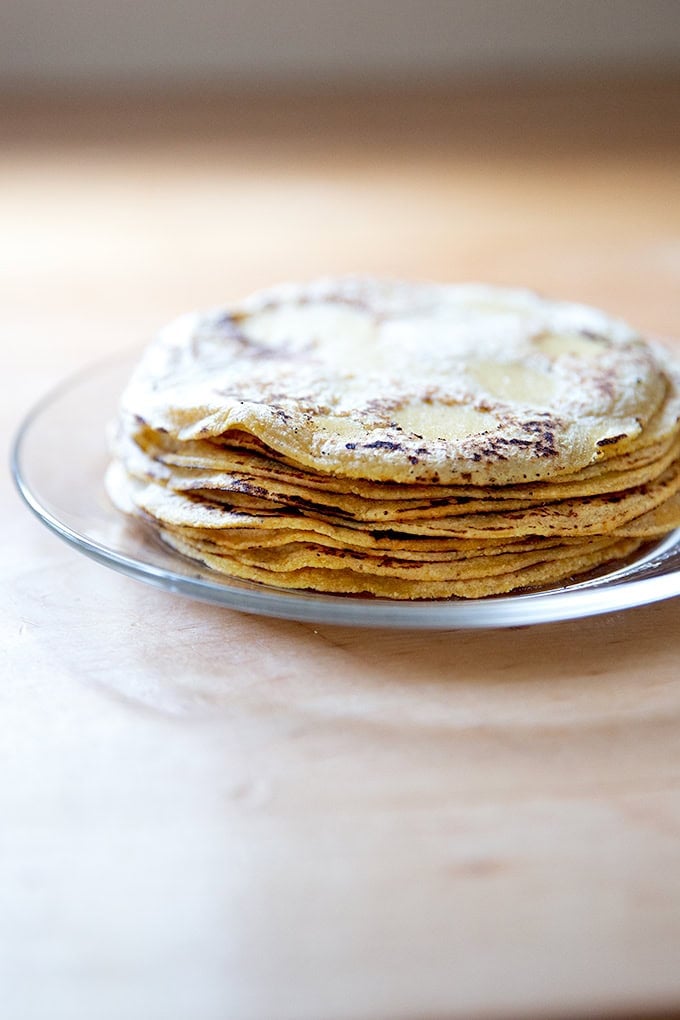
Made with 3 ingredients, corn tortillas are incredibly easy to make at home. These are soft, pliable, and well-seasoned, perfect for tacos of all kinds!
My first taste of really good corn tortillas was at the Primavera stand at the San Francisco Ferry Building Farmers Market. After a little research, I learned that Primavera uses fresh masa, which yields tortillas with deep corn flavor and a pleasing texture. Making fresh masa, I also learned, requires soaking dried corn in a lime solution, then grinding it into a dough.
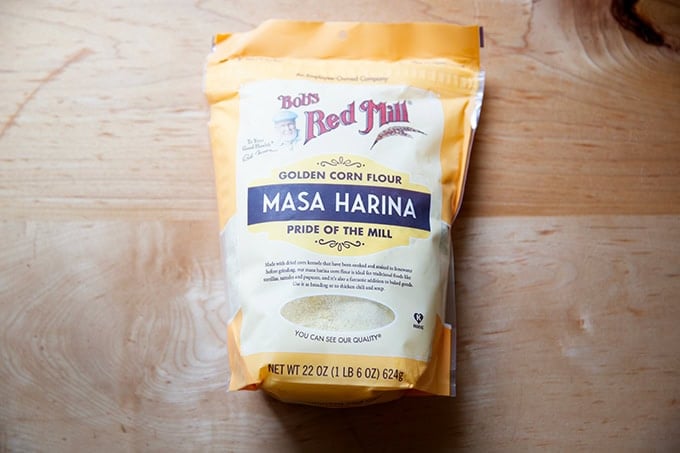
As this is a project I am unwilling to tackle, I am grateful for the alternative: masa harina, readily available, finely ground flour that requires only water to “activate.” Two brands I love are Masienda and Bob’s Red Mill.
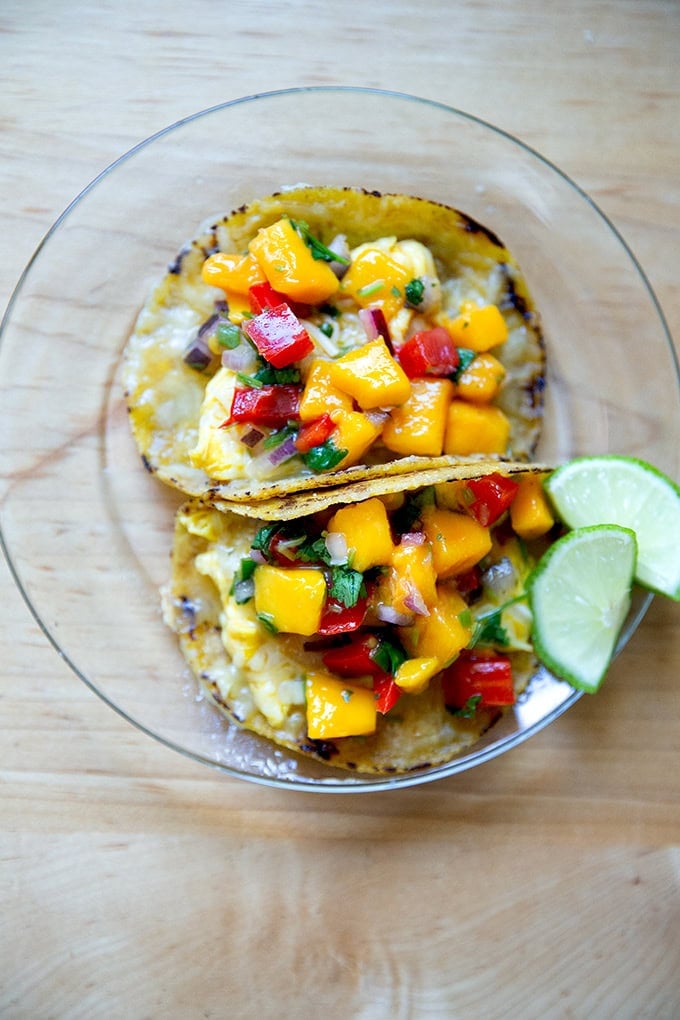
The recipe below is simple, requiring only three ingredients and just a little bit of time. Once your tortilla dough is made, you can crank out a dozen homemade tortillas in less than 15 minutes. We enjoy these tortillas with breakfast tacos (see below), simple fish tacos, and our favorite weeknight tacos .
How to Make Soft Corn Tortillas, Step by Step
First, you’ll need some good corn masa harina. You can find Bob’s Red Mill at many supermarkets:
You can also order it online from shops like Masienda :

Once you have masa harina on hand, all you need is water and salt:
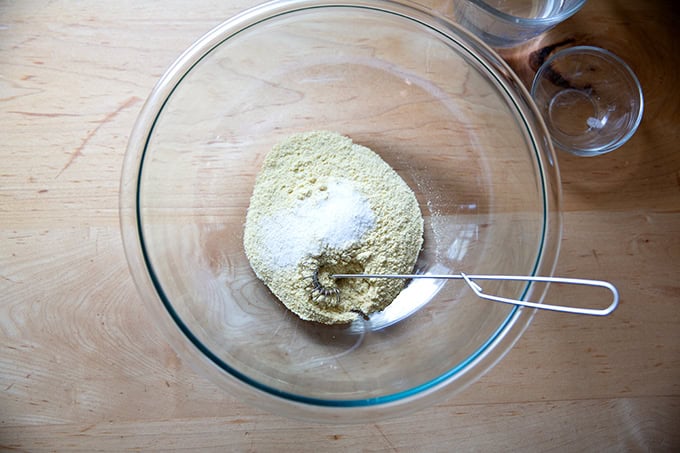
Whisk together the masa harina and salt:
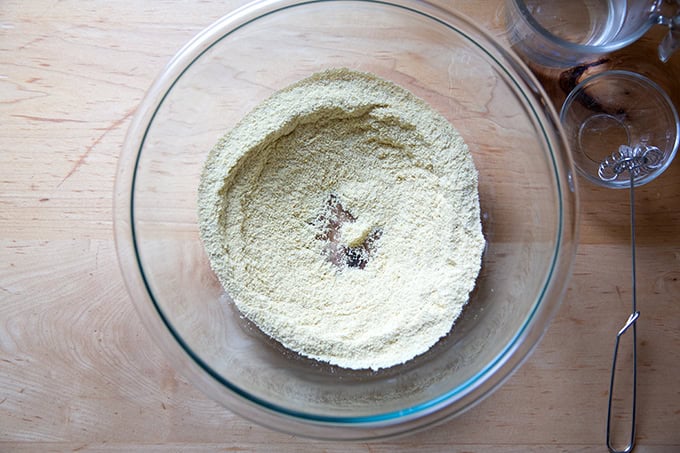
Then add the water:
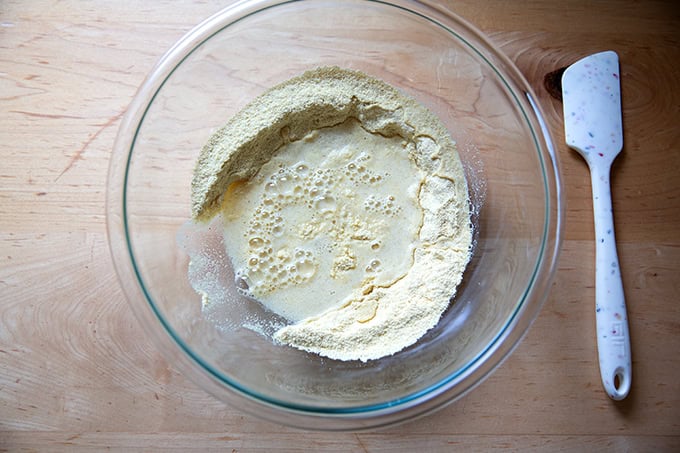
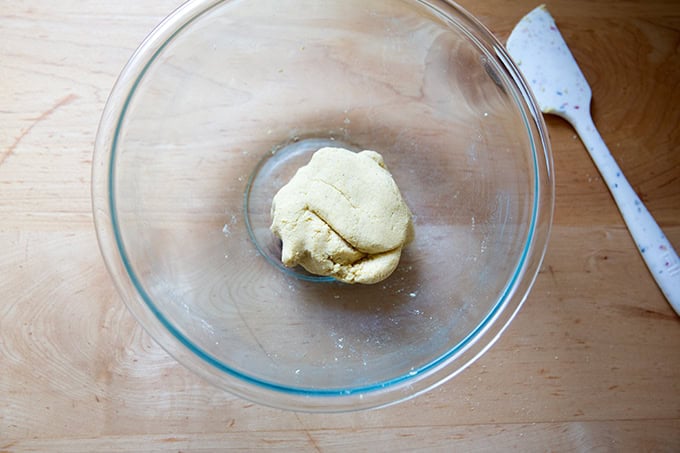
Mix until you have a cohesive ball: it should feel like the texture of Play-Doh, damp but not so moist that it sticks to your hands when pressed:
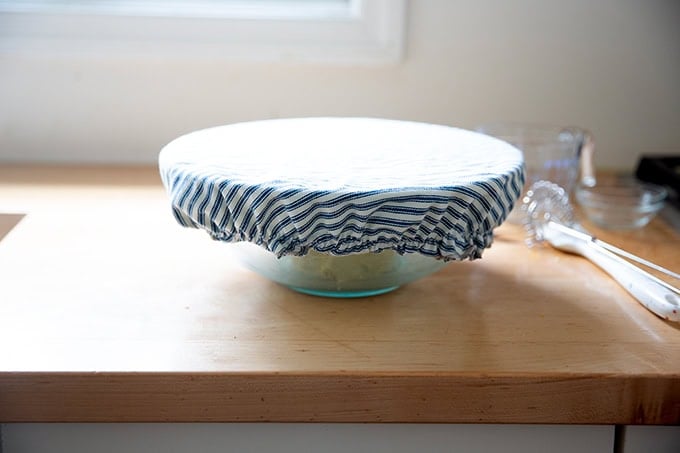
Cover the bowl and let the dough rest for 30 minutes.
Before you portion the dough into smaller balls, you’ll want to make a tester tortilla to ensure the dough is not too moist. Pull off a 25-gram (scant 2 tablespoons) portion:

Then press it using a tortilla press lined with parchment paper. (Alternatively, you could roll it out using a rolling pin, or you could use two heavy books.)
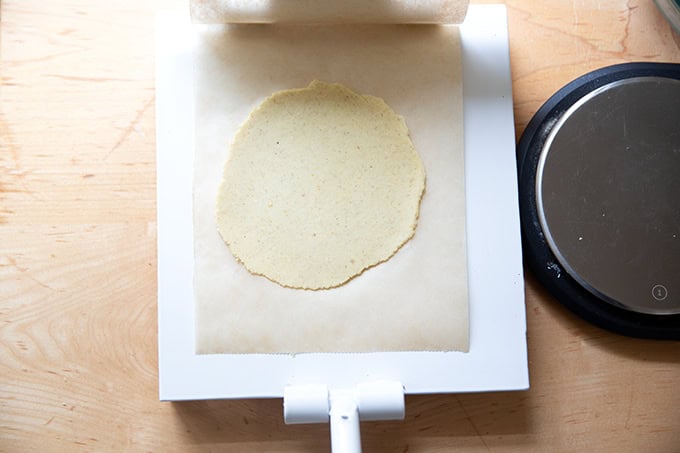
If you are able to release the tortilla from the parchment paper easily without any sticking at all, you’re in business. If the tortilla sticks to the parchment upon peeling it away, scrape it back into the bowl with the remaining dough, press it back together and add more masa by the tablespoon, repeating the testing process outlined above until you have a tortilla that releases easily from the parchment paper. Portion the dough into 25-gram portions.
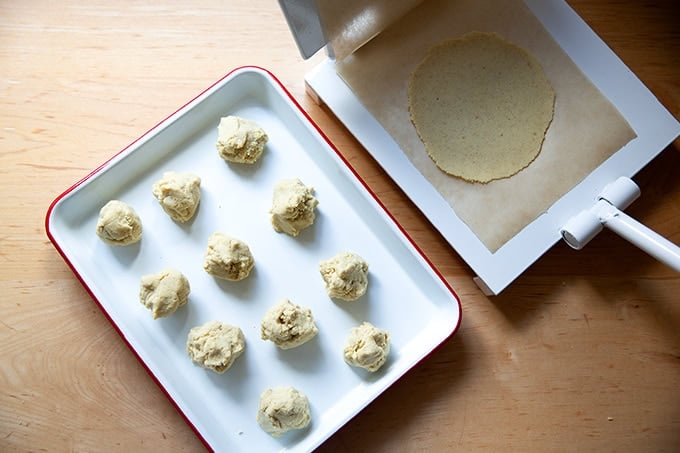
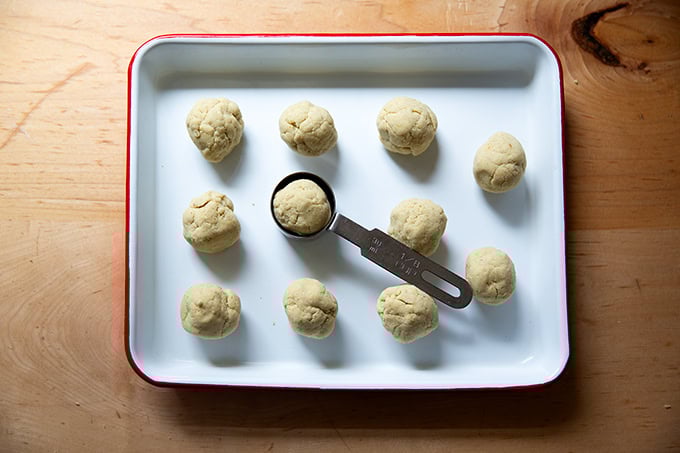
If you don’t have a scale, you can use a 2-tablespoon measure to portion. Ball them up.
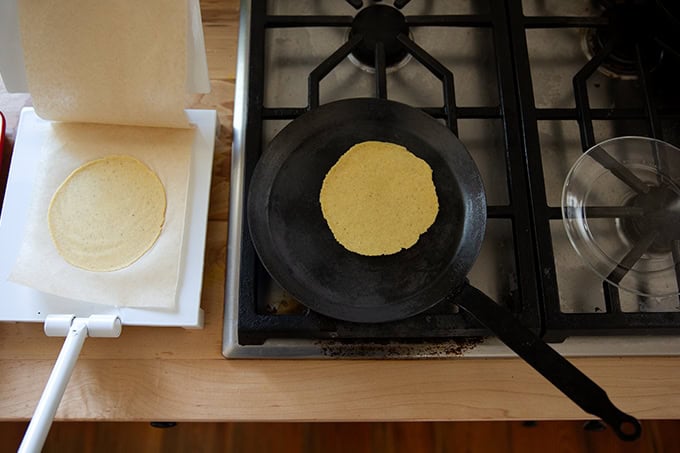
Set up your pressing/cooking station:
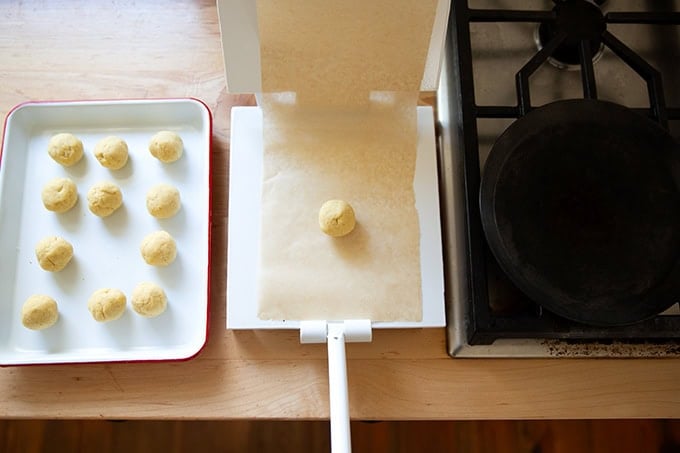
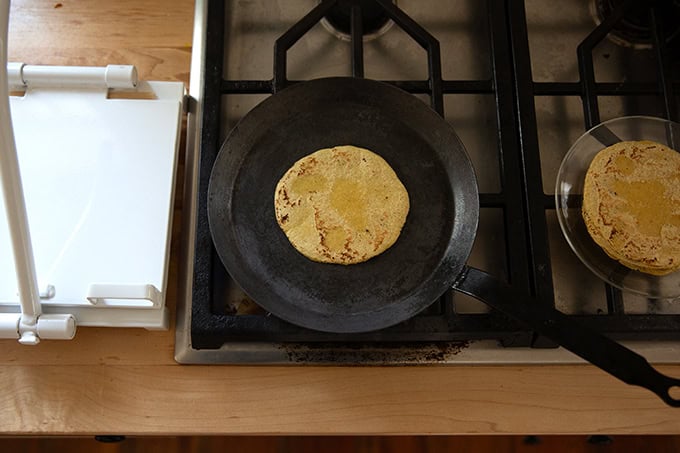
You want your skillet over high heat.
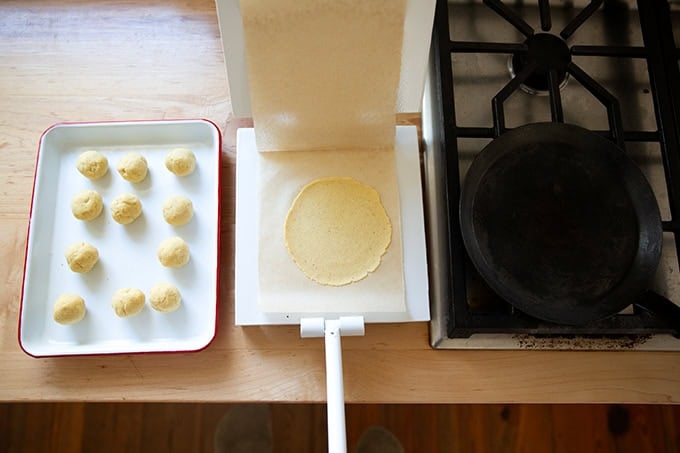
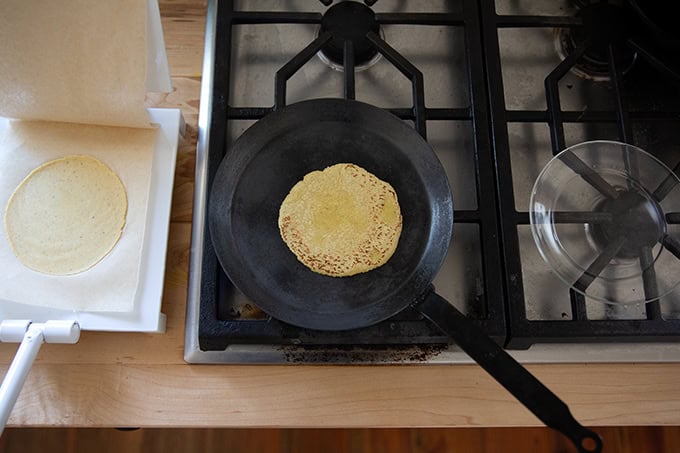
I use a small skillet, and I cook one tortilla at a time. While one tortilla is cooking, I press another dough ball. Cook the tortilla for roughly 30 seconds on one side:
When the tortilla begins lifting from the surface of the skillet…
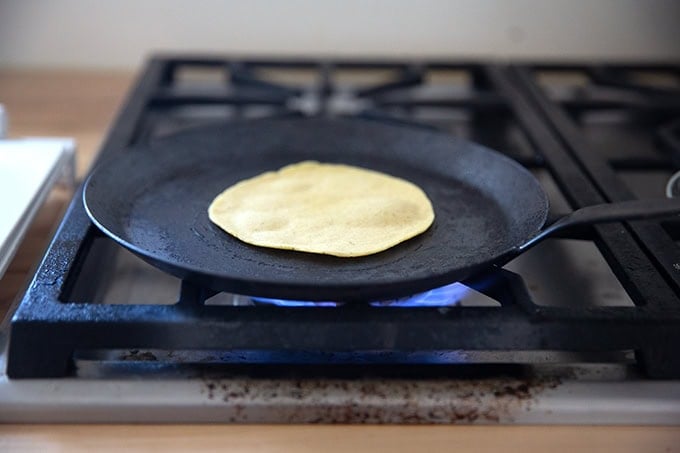
… flip it and cook for another 30 seconds.
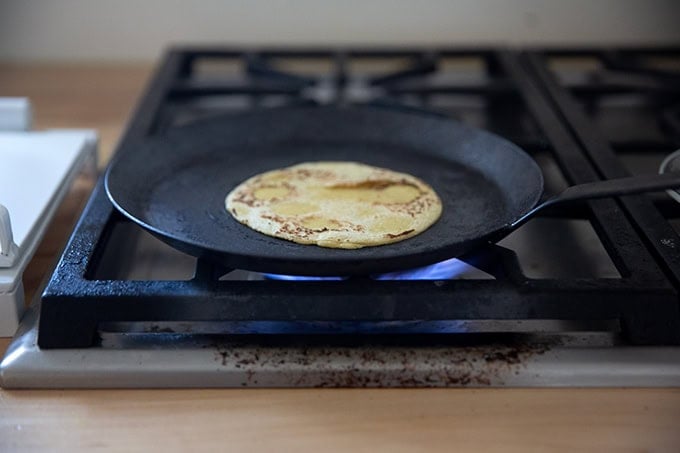
The whole process of cooking 12 tortillas should take roughly 15 minutes.
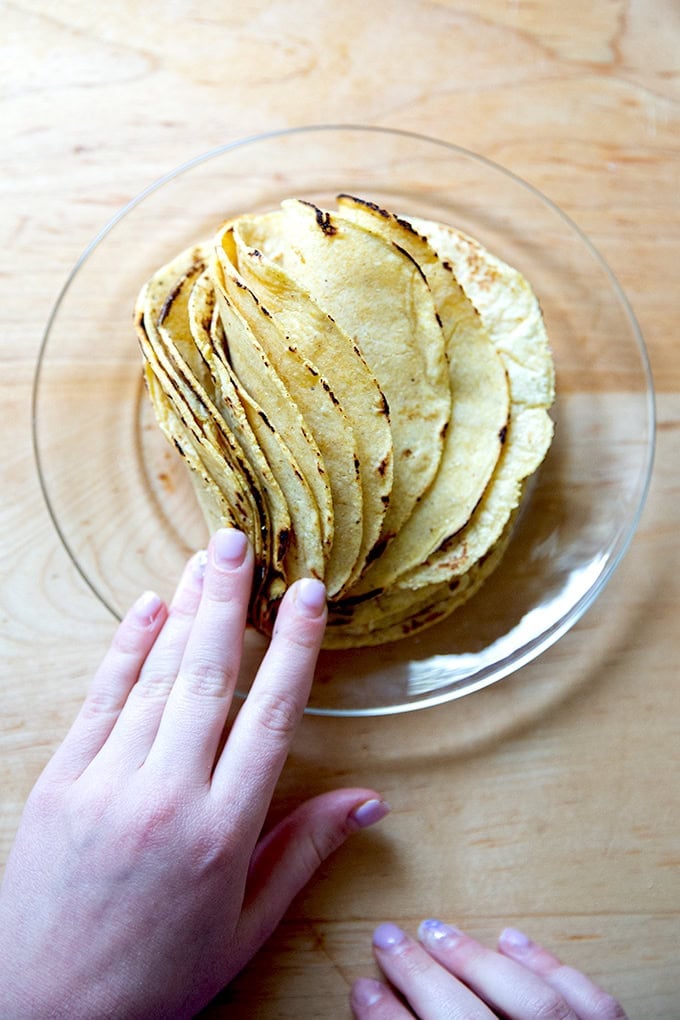
Serve them immediately with your tacos of choice, topped with salsa of choice …
Or stack them into a dish and cover with a towel…
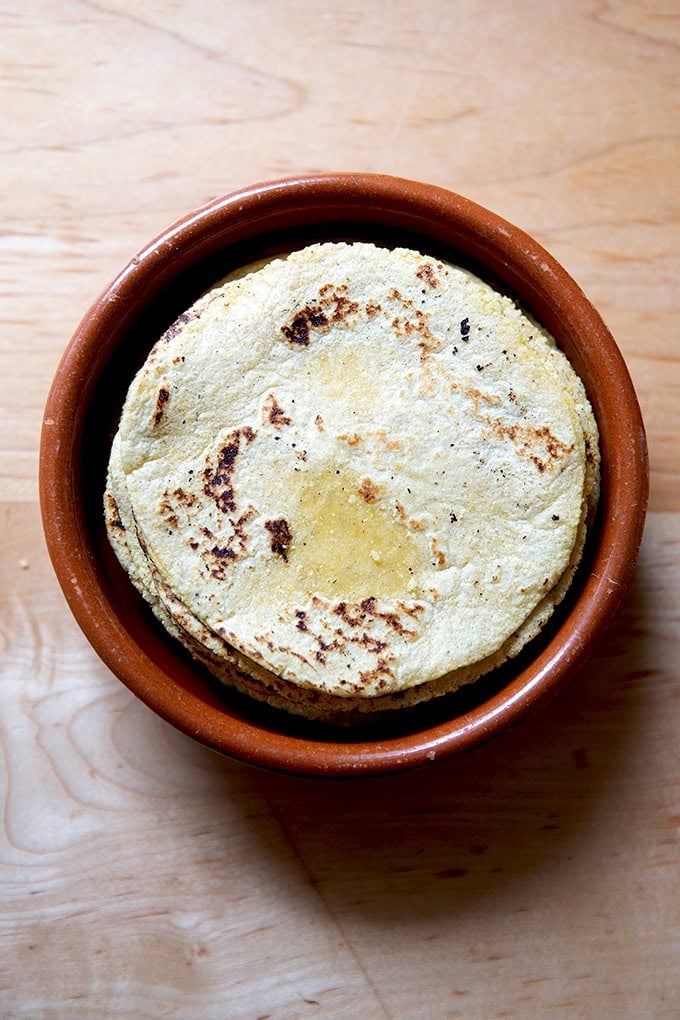
… or keep them warm in a tortilla warmer .
Description
Made with 3 ingredients, corn tortillas are incredibly easy to make at home. These are soft, pliable, and well-seasoned, perfect for tacos of all kinds!
Notes:
Scale: As always, for best results use a scale to measure. I love this Ooni scale for its precision, especially when measuring smaller quantities of salt and yeast.
Masa Harina: Good masa harina makes a difference. I love Bob’s Red Mill brand , which is widely available, and I love this Masienda heirloom yellow corn masa harina. Just as all wheat flours absorb water a little differently, all masa harinas will absorb water differently. I find for this recipe, you’ll need 135 grams of Bob’s Red Mill or 125 grams of Masienda. Depending on your environment, you may need to add more masa or more water. There are notes in the recipe on how to do so.
Salt: If you are using a scale to measure, use 4 grams regardless of the brand you are using. If you are using measuring spoons, use 1/2 teaspoon if you are using Morton brand kosher salt or if you are using fine sea salt.
Water: I use roughly 50% boiling water (using my electric kettle) and 50% cold water to create warm water for this recipe.
Tortilla press: A tortilla press is helpful. I have this one and love it.
Nice to have: A tortilla warmer will keep your tortillas warm off the skillet. It is important to place the cooked tortillas in a basket covered with a towel or a warmer so that they stay soft and pliable.
125 to 135 grams masa harina (about a heaping cup), see notes above
4 grams salt (heaping teaspoon of Diamond Crystal) , see notes above
175 grams (about ¾ cup ) warm water, see notes above
- Make the dough: Whisk together the masa harina and salt. Add the water and mix using a spatula until the dough comes together into a crumbly mass. Then, use your hand to knead the dough into a cohesive ball. By the end of the kneading, which should about a minute, the dough should be the texture of playdough, damp but not so moist that it sticks to your hands when pressed.
- Cover the bowl and let the dough rest for 30 minutes.
- Make a tester tortilla: Pull off a 25-gram (scant 2 tablespoons) portion of dough. Roll it into a ball, then press it using a tortilla press lined with parchment paper. (Alternatively you could roll it out using a rolling pin, or you could use two heavy books.) If you are able to release the tortilla from the parchment paper easily without any sticking at all, you’re in business. If the tortilla sticks to the parchment upon peeling it away, scrape it back into the bowl with the remaining dough, press it back together, and add more masa by the tablespoon, repeating the testing process outlined above until you have a tortilla that releases easily from the parchment paper. If the dough feels dry and crumbly, add more water a teaspoon at a time until you have a dough that resembles play-doh in texture. Reference the video and photos for textural guidance.
- Portion and ball up the dough. Portion the dough into 25-gram portions — you should have 12 total. If you don’t have a scale, you can use a 2-tablespoon measure to portion. Using your two hands, ball up each portion.
- Prepare your pressing/cooking work station. Place a cast iron or carbon steel skillet or griddle over high heat. I like to cook one tortilla at a time: while one tortilla is cooking, I press another dough ball. This is my pressing process: press the tortilla, open the presser, peel away the top layer of parchment, re-cover it, then press again. Once the skillet is hot, lay the tortilla into the skillet and cook for 25 to 30 seconds — when the edges of the tortillas begin to curl up and release from the skillet, flip it. I use a fork to do this. Cook the tortilla for 25-30 seconds more. Remove the tortilla to a tortilla warmer (see above) or a bowl and cover with a tea towel. Repeat this process until all tortillas are cooked. The whole process of cooking 12 tortillas should take roughly 15 minutes.
- Use immediately as you wish or store for a future use.
- To store: Store the tortillas in an airtight bag or container at room temperature for up to 3 days or in the freezer for up to 3 months.
- To reheat : There are various ways you can reheat tortillas, such as in a toaster oven or regular home oven if you need to reheat many at one time. If you are reheating just a few at a time, reheat the tortillas in a dry skillet set over medium-high heat, turning every 30 seconds until they are warmed through. Another less traditional way is to heat a small amount of olive oil in a skillet and heat the tortillas in the oil so they crisp up slightly — this is my preferred method.
- Prep Time: 45 minutes
- Cook Time: 15 minutes
- Category: Bread
- Method: stovetop
- Cuisine: Mexican, American
Find it online : https://alexandracooks.com/2025/03/29/simple-soft-corn-tortillas-3-ingredients/
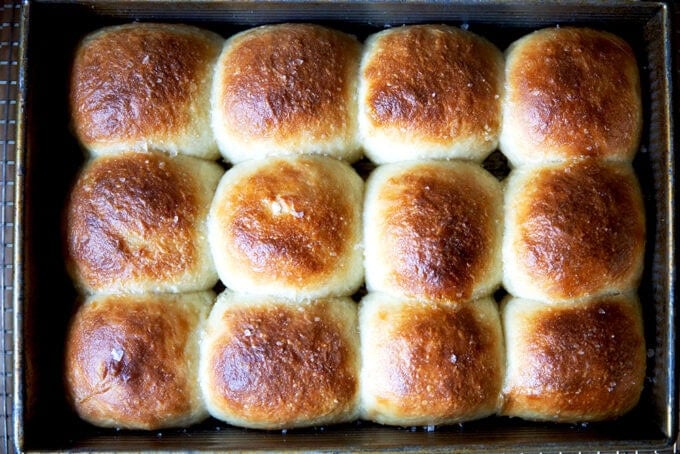
Below you will find my favorite Easter recipes, from this simple baked ham with the best mustard sauce to rack of lamb with tzatziki . On the side, you can’t go wrong with scalloped potatoes or this showstopping hasselback potato gratin . There is nothing like a buttermilk pull-apart roll on the holiday table, though focaccia is easy and festive as well. Orange and olive oil cake and Chez Panisse almond torte are two favorite, easy, crowd-pleasing desserts. Find many more ideas below.
Finally, don’t forget to prep your hot cross buns a few days before Good Friday for an effortless morning. This post is organized as follows:
Hot Cross Buns
Easy-To-Peel Hard-Boiled Eggs
Easter Brunch Punch
Easter Brunch (Sweet)
Easter Brunch (Savory)
Easter Dinner
Potatoes
Salads
Dessert
Bread
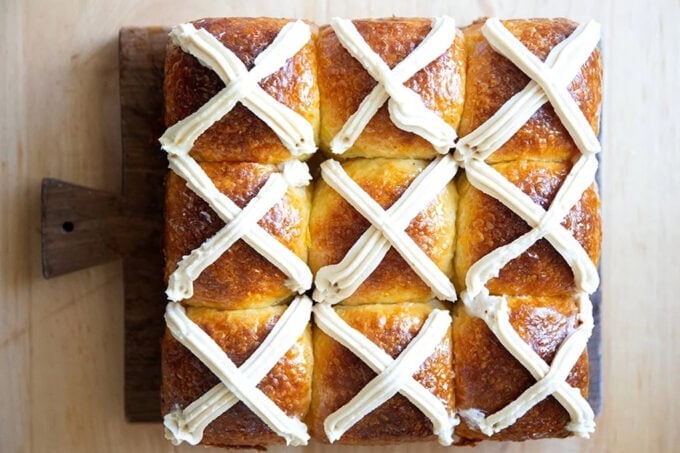
Hot Cross Buns
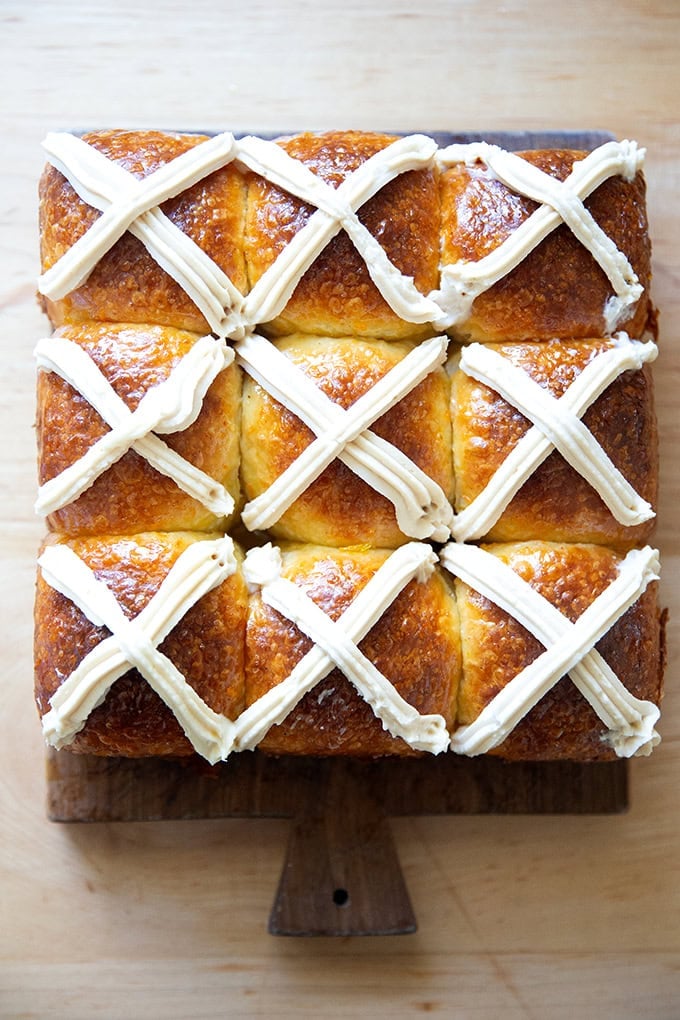
Spiced with a dash of nutmeg and freshly grated orange zest, these hot cross buns are perfectly sweet and such a treat! Find step-by-step instructions in the post for making hot cross buns from scratch two ways: same day or days beforehand.
Easy-Peel Hard-Cooked Eggs
If you’re dyeing eggs for Easter and are dreading the peeling process, dread no more! Here are two easy-to-peel egg-cooking methods: stovetop and Instant Pot . In both, the eggs are steamed, which makes the shells slip right off. While I love my instant pot, more and more I favor the stovetop steaming method, which I use in this deviled eggs recipe and this egg salad sandwich .
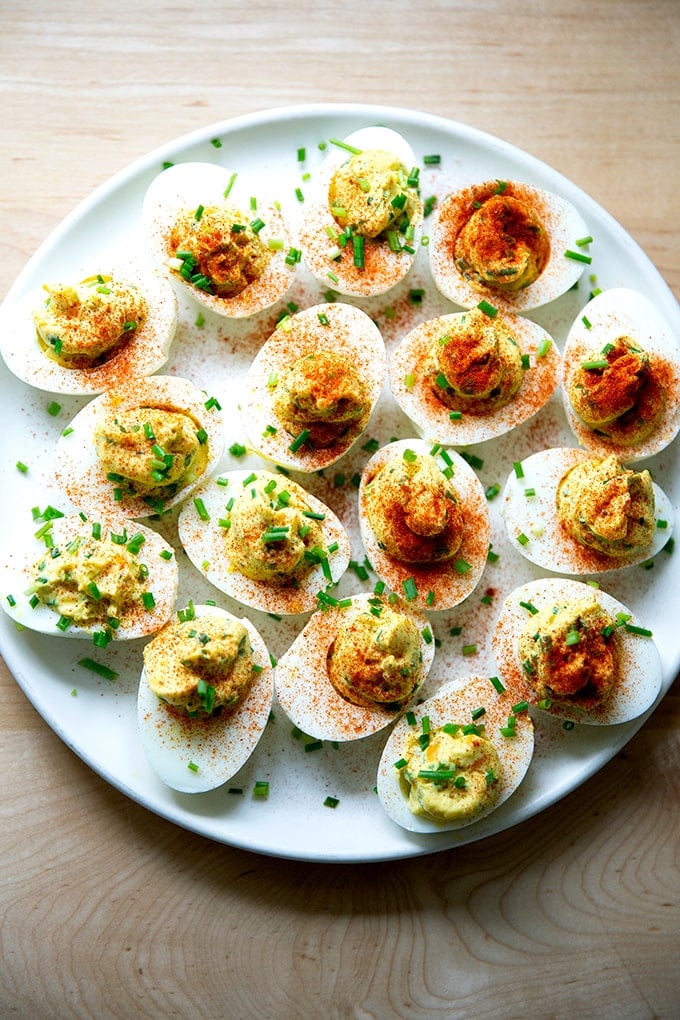
Classic Deviled Eggs
Easter Brunch Punch
If you’ve never made a “house” punch, I highly recommend it, and I highly recommend this one: Philadelphia Fish House Punch , a mix of brandy, cognac, rum, fresh lemon juice, and simple syrup.

Brunch (Sweet)
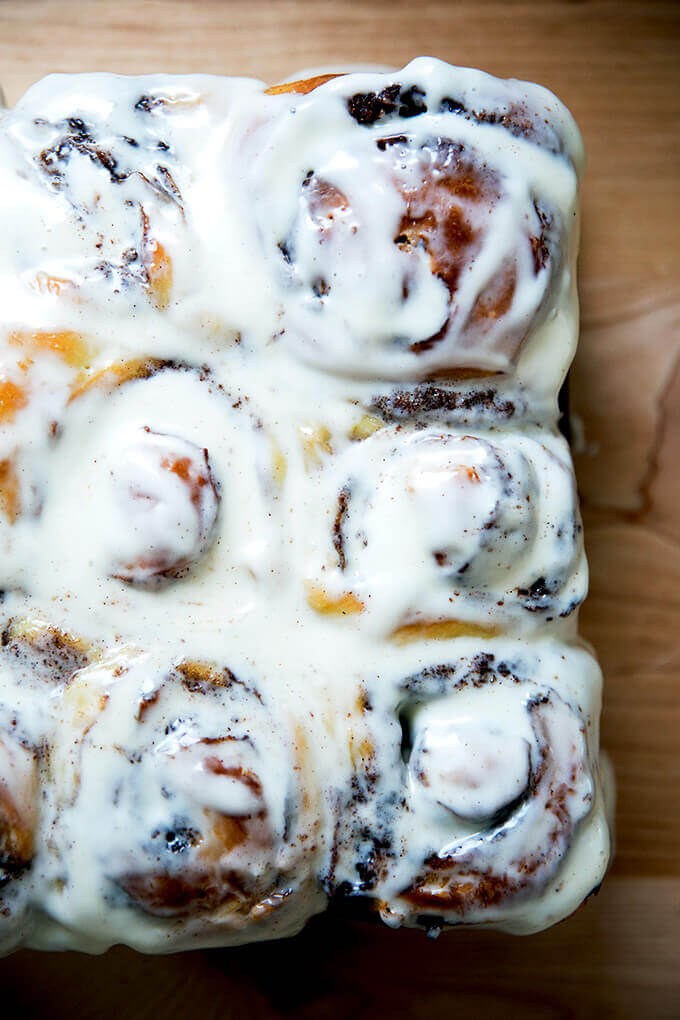
Brioche Cinnamon Buns
Prep these buns on Easter Eve. Rise to frosted brioche bliss … (and to very happy humans).
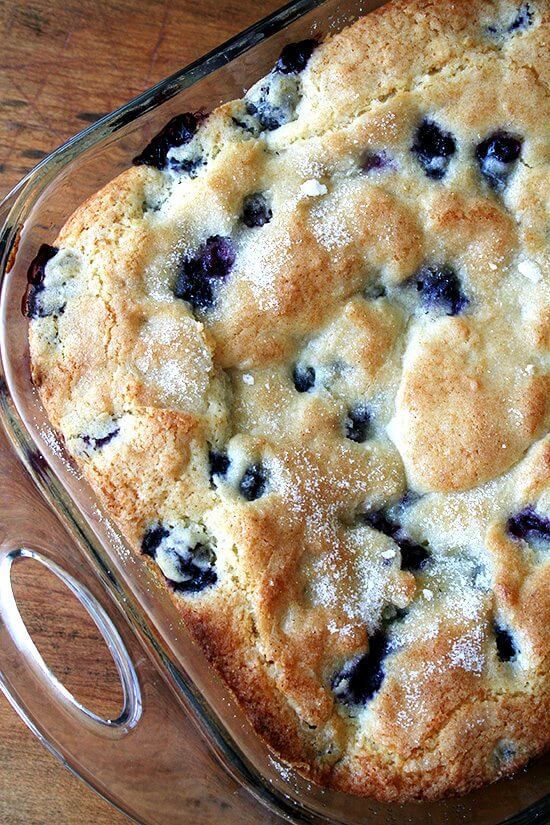
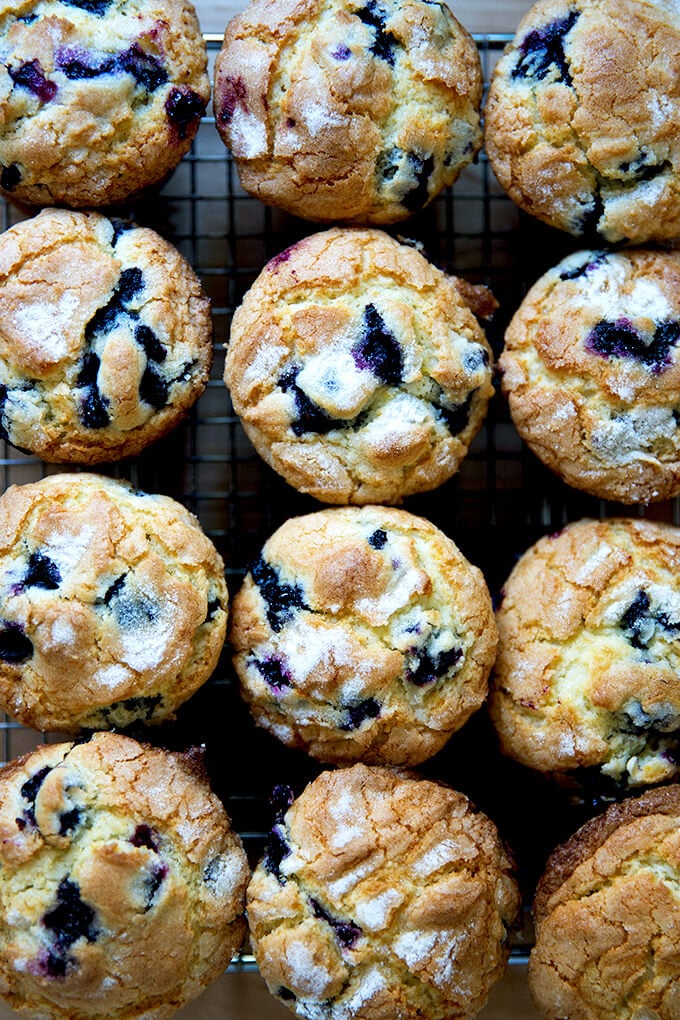
Buttermilk Blueberry Breakfast Cake
Ten years after posting this recipe, buttermilk blueberry breakfast cake continues to be one of the most popular recipes on the site:
Overnight French Toast
This is the easiest French toast you will ever make, and I believe it’s one of the best, too. It’s crisp on the exterior and custardy on the interior. It emerges from the oven piping hot, ready for syrup, fruit, powdered sugar, or all three. Recently I made it with homemade brioche , and it was exceptional.
Blueberry Scones, Blueberry Muffins
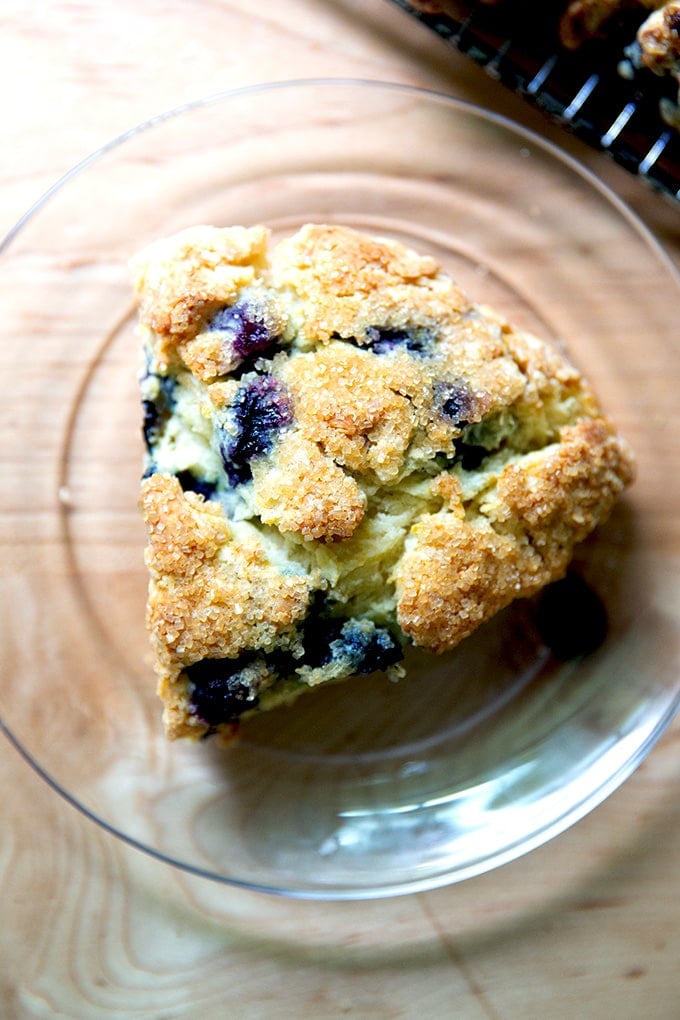
Fresh Lemon-Blueberry Scones
The Best Lemon-Blueberry Muffins
Baked Steel Cut Oatmeal, Oatmeal Muffins
Baked Steel Cut Oatmeal
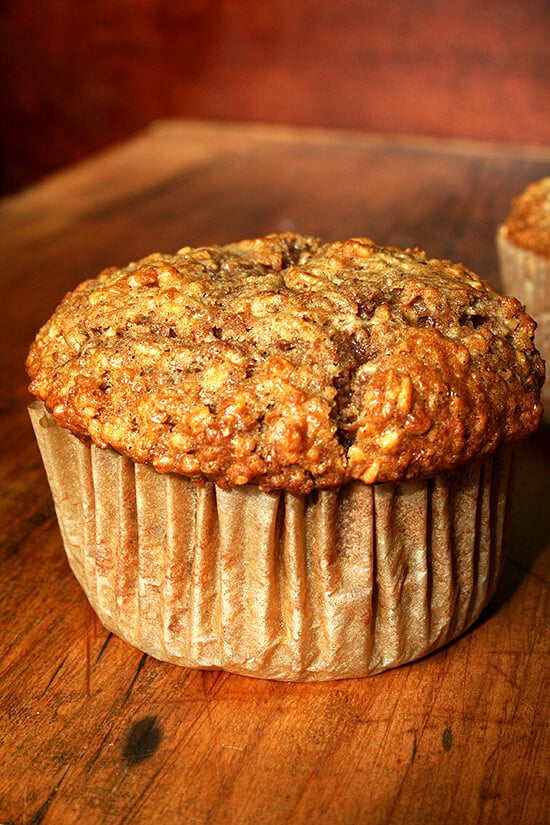
Oatmeal Muffins
Brunch (Savory)
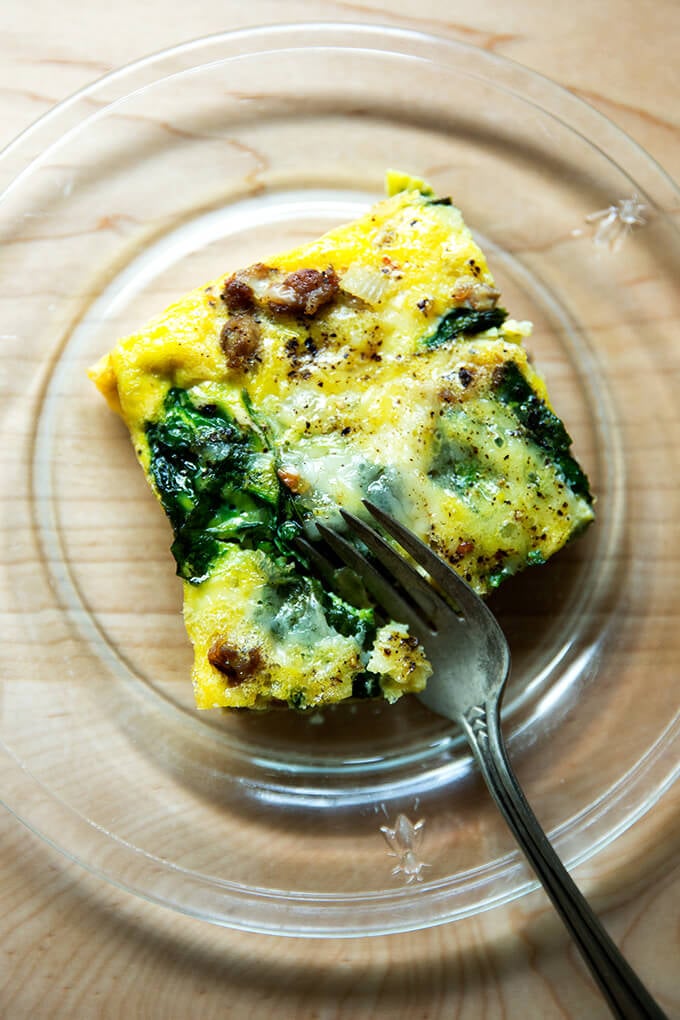
Sausage, Egg, and Cheese Casserole with Spinach
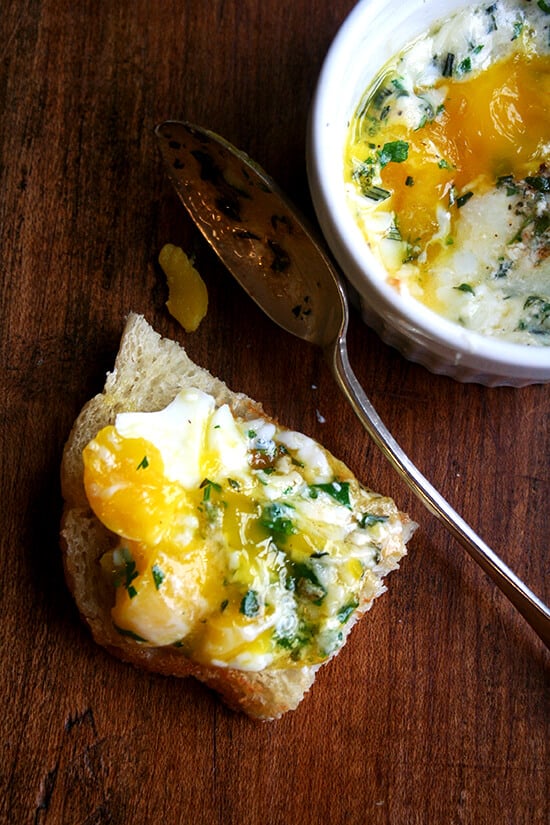
Herb and Gruyère-Topped Baked (Shirred) Egg
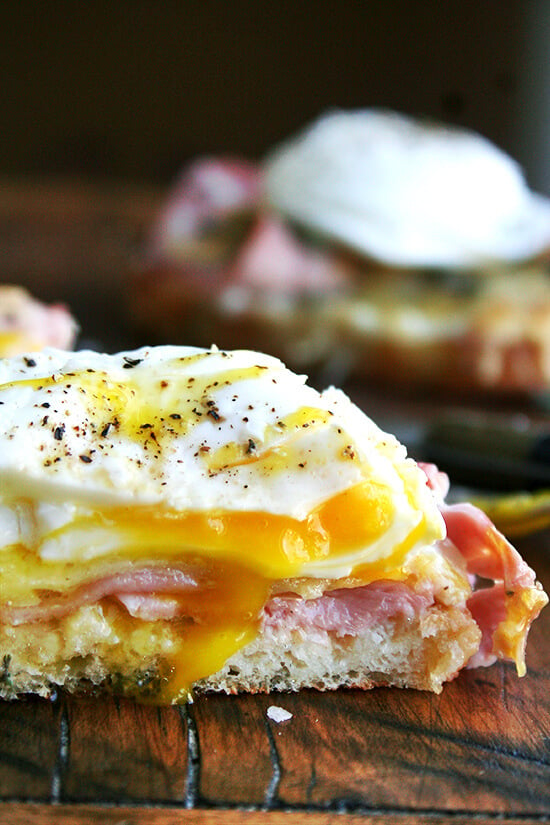
How to Make Croque Monsieur and Croque Madame
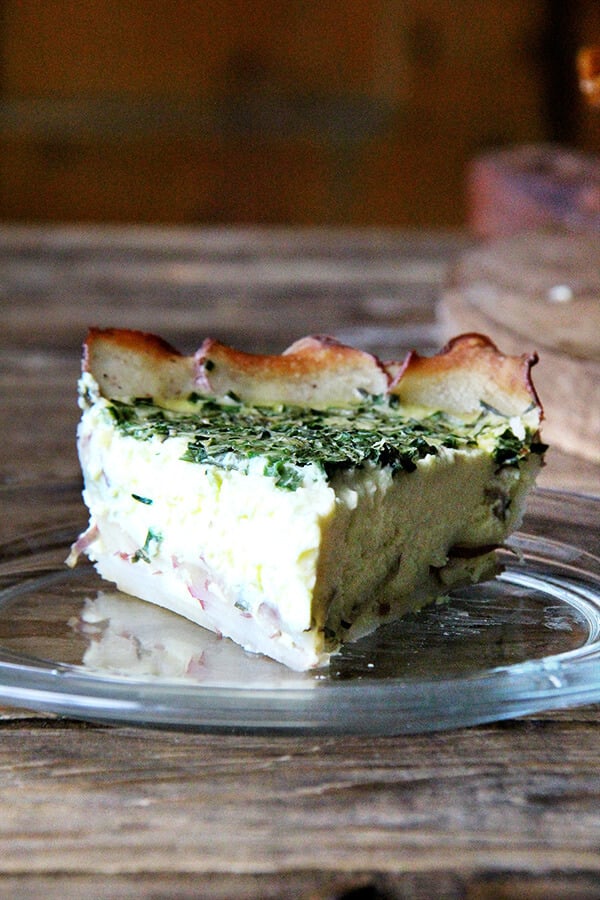
Tartine’s Quiche, Potato Crusted
Dinner
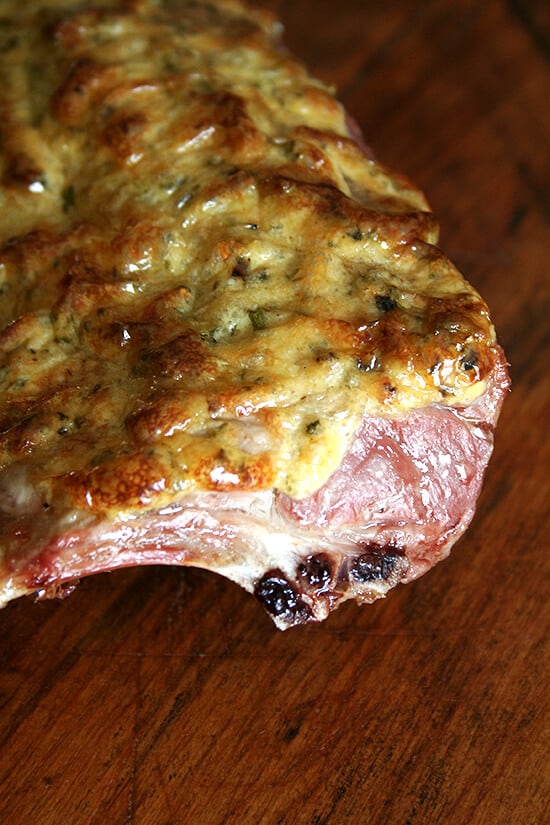
If you’ve ever toiled over a roast turkey — from the brining to the basting to the carving — a baked ham feels like a complete dream. For one, there’s no marinating or brining. Second, you can’t overcook it, because it’s already cooked! You’re simply heating it through. Find all of my baked ham tips here .
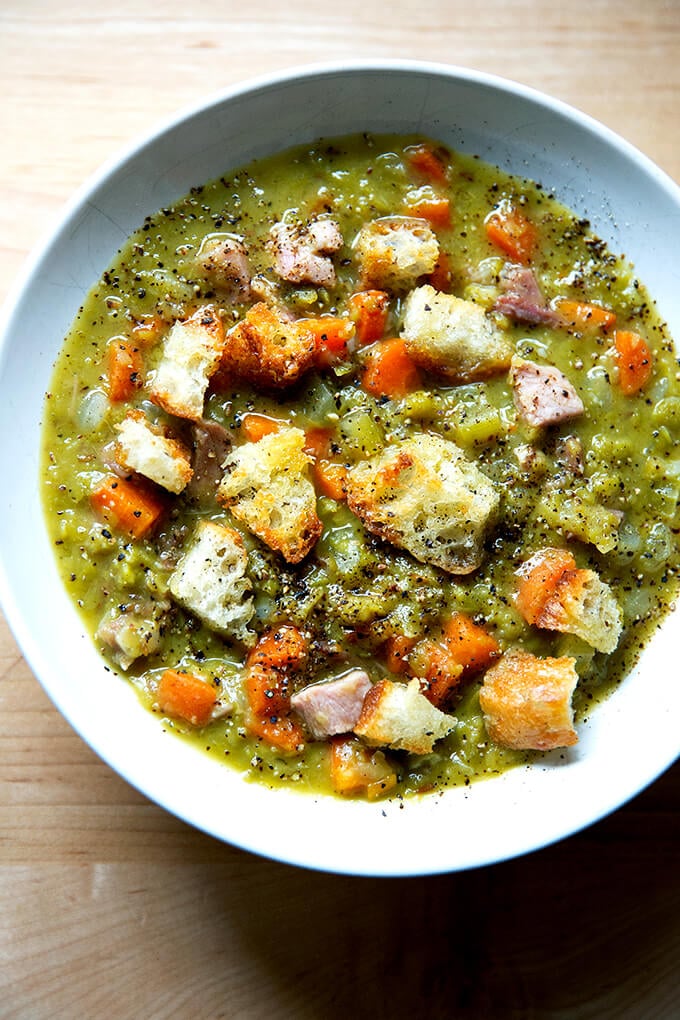
We’ll be baking a brown sugar glazed ham this year and serving it aside my grandmother’s mustard sauce (the best). If you make a ham, be sure to save the bone and make this split pea and ham soup with it afterward.
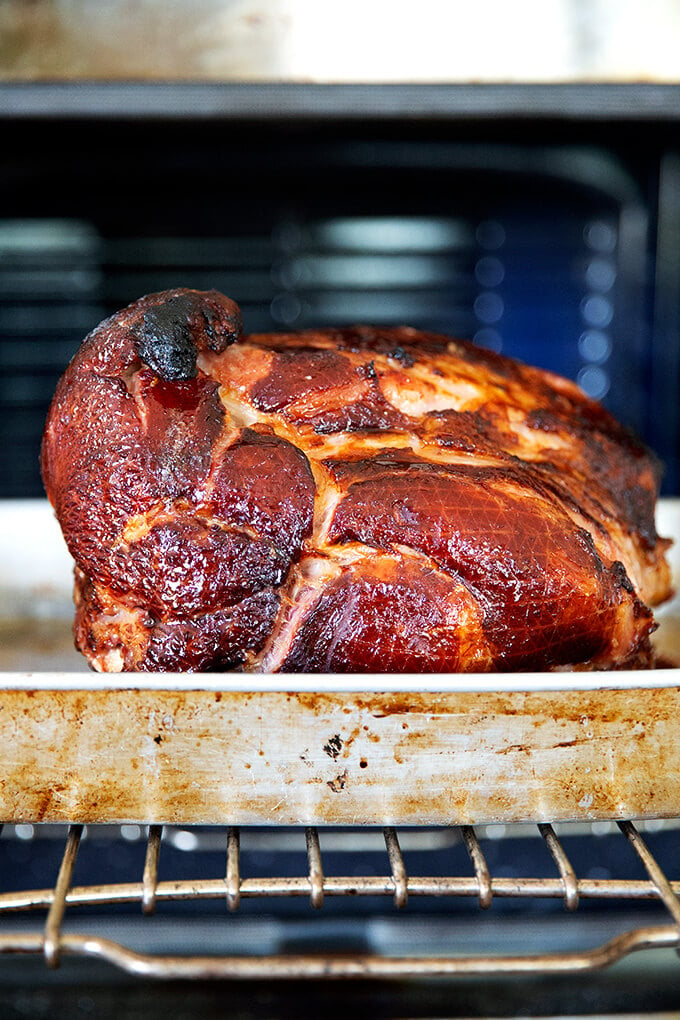
Simple Baked Ham Recipe with Brown Sugar Glaze
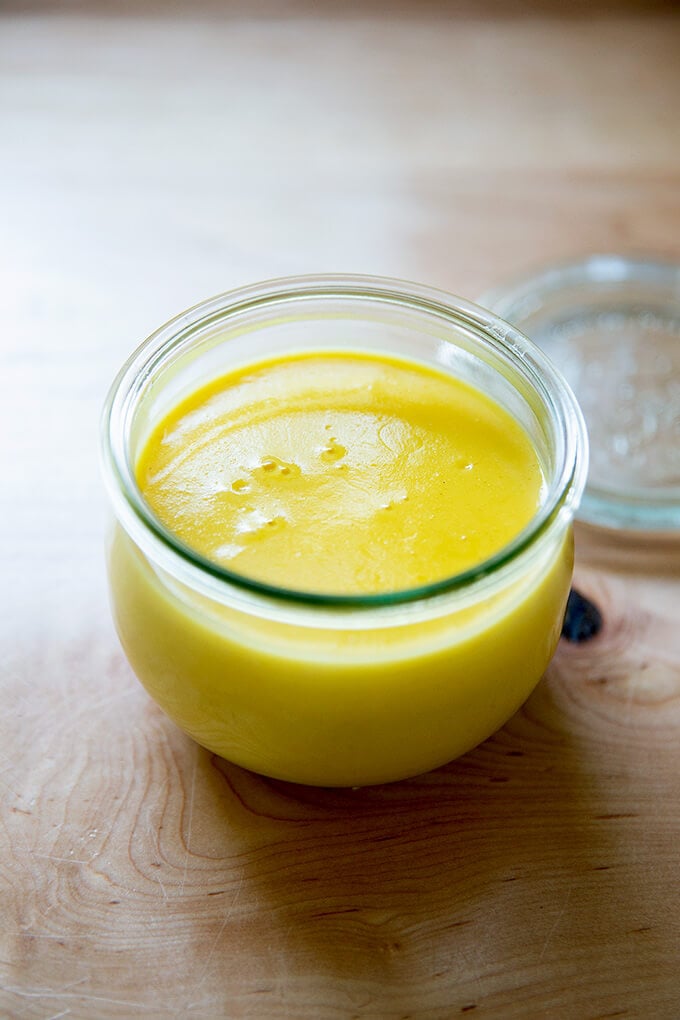
My Grandmother’s Mustard Sauce (AKA: “The Ham Sauce”)
Split Pea and Ham Soup made with the ham bone and leftover ham:
Easiest Rack of Lamb
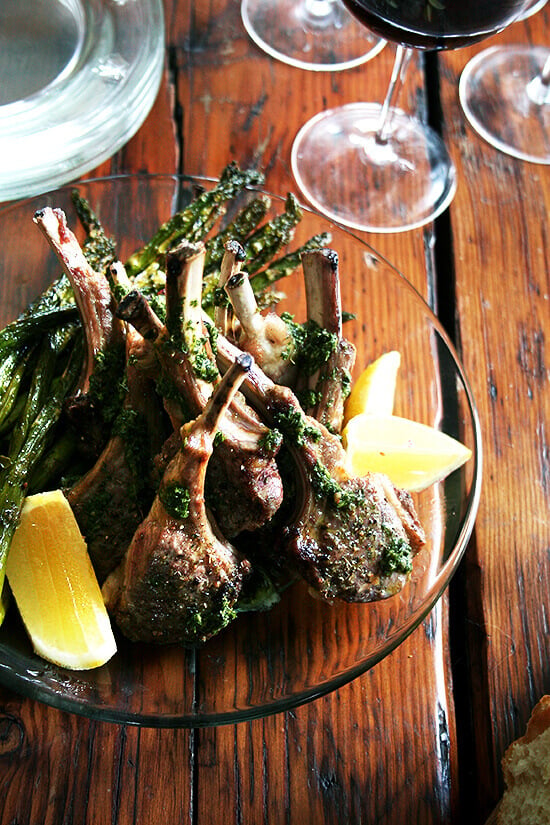
Broiled Lamb Chops with Nigella’s Mint Sauce & Roasted Asparagus
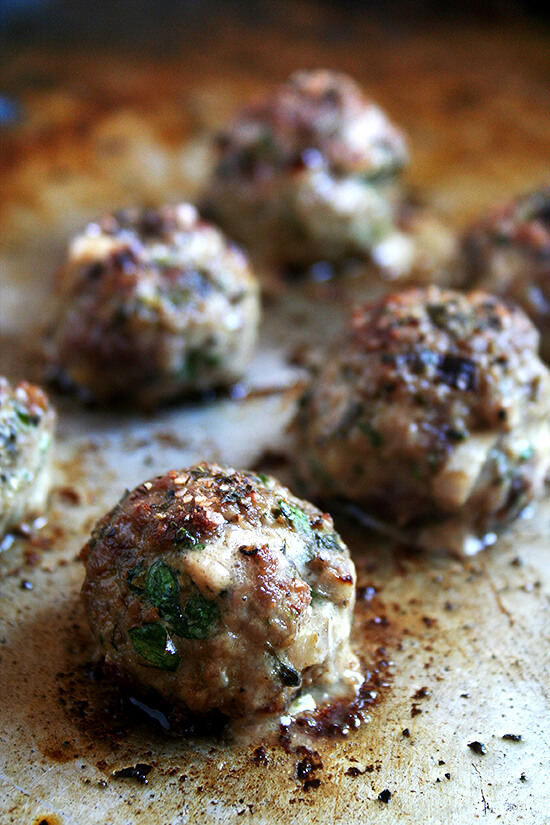
Keftedes (lamb meatballs) & Roasted Cabbage
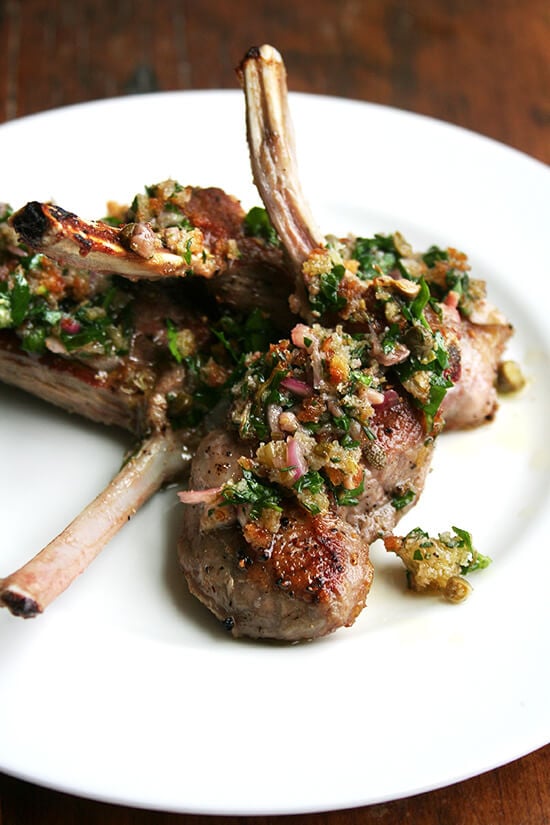
Pan-Seared Lamb Chops with Toasted Bread Crumb Salsa
If you’re making lamb, here are two nice condiments:
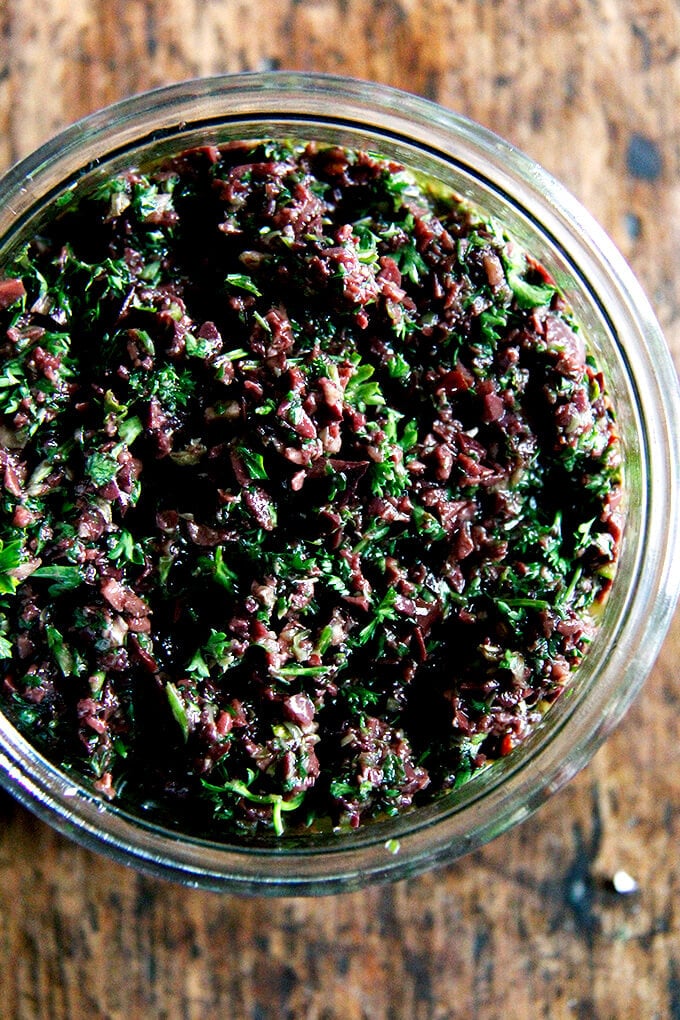
Olive Tapenade with Capers & Parsley
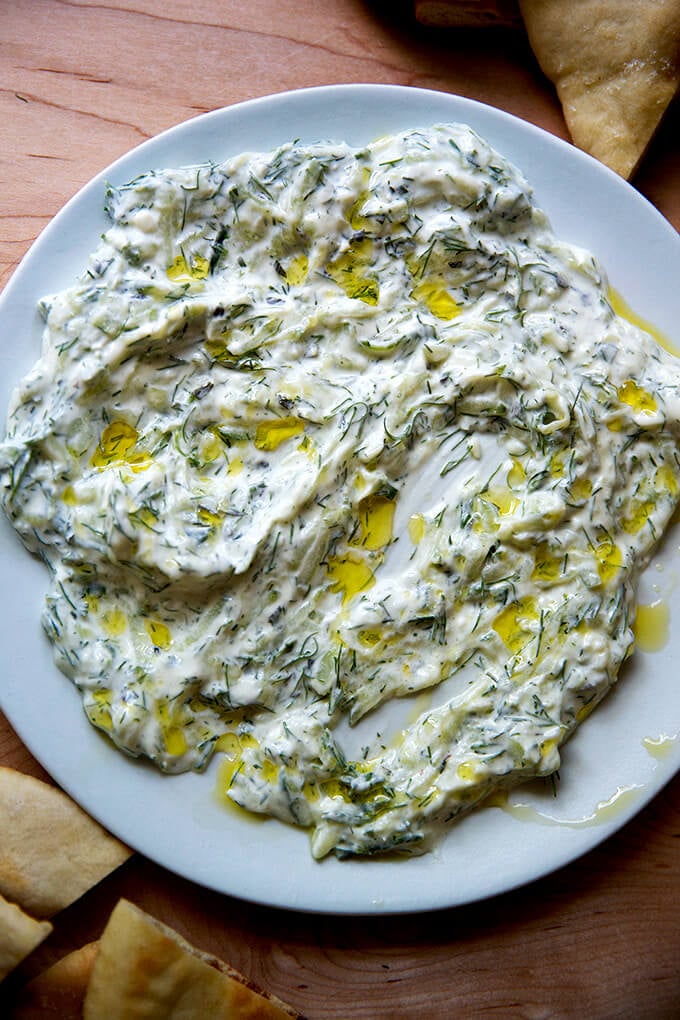
Tzatziki (Greek Cucumber-Yogurt Sauce)
And if you’d like to keep it simple but festive, here are two great chicken options:
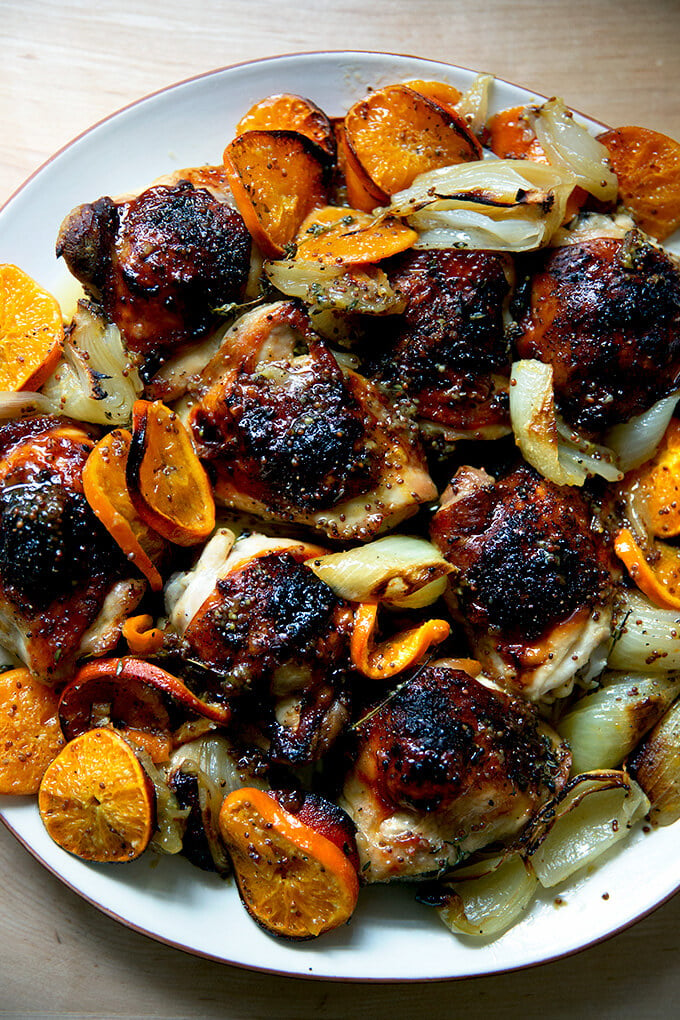
Roasted Chicken with Clementines
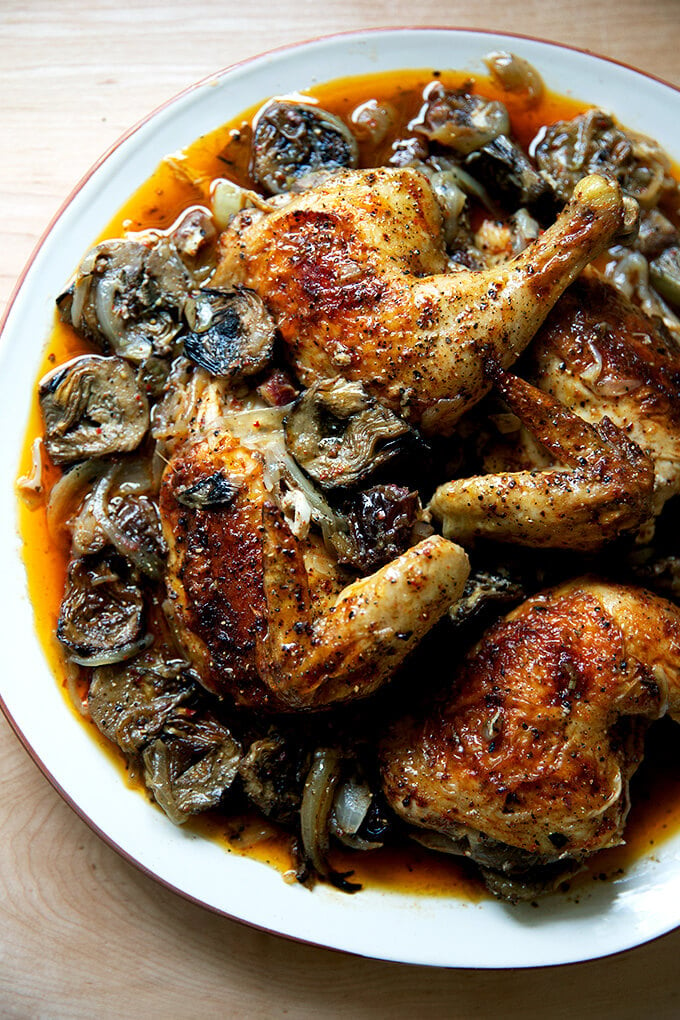
Spatchcocked Roast Chicken with Dates & Artichoke Hearts
Potatoes
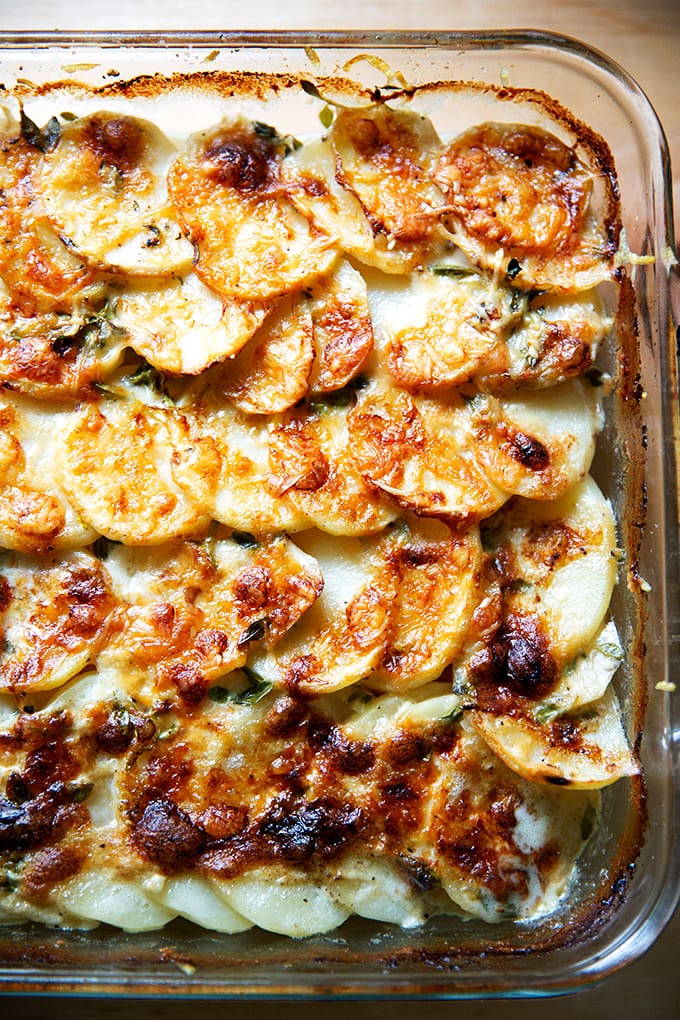
Alice Waters’s Potato Gratin
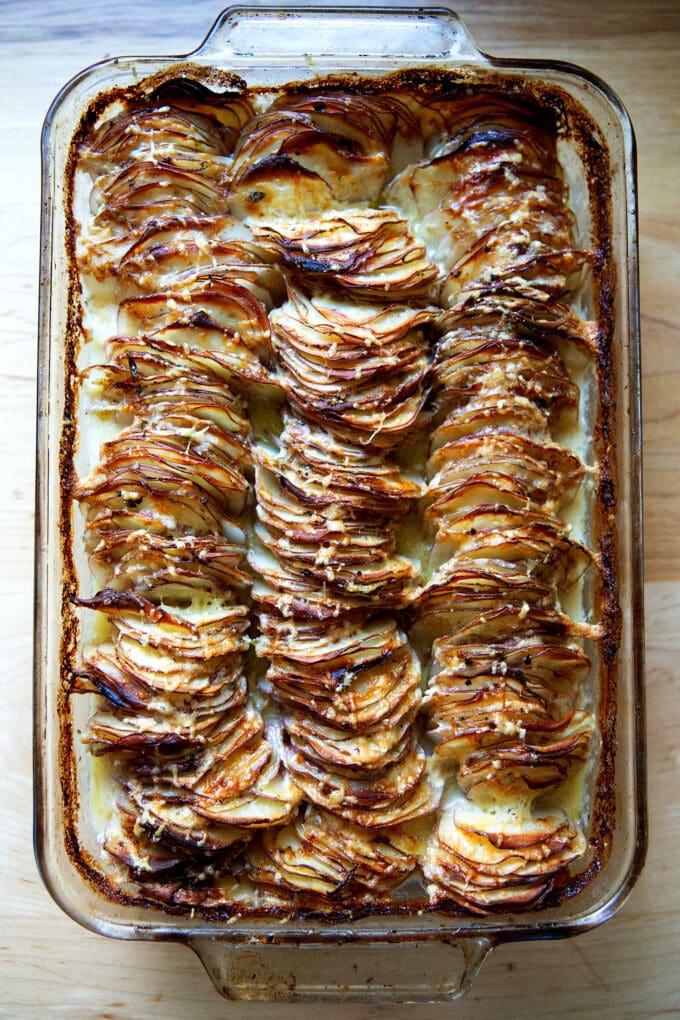
Hasselback Potato Gratin (No-Peel, Make Ahead)
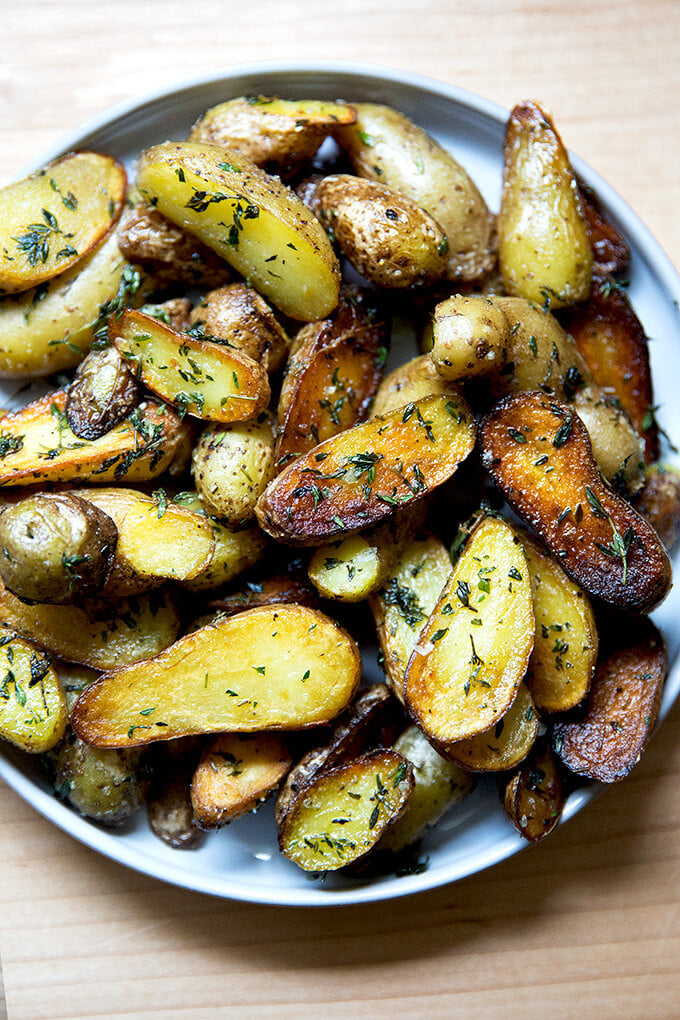
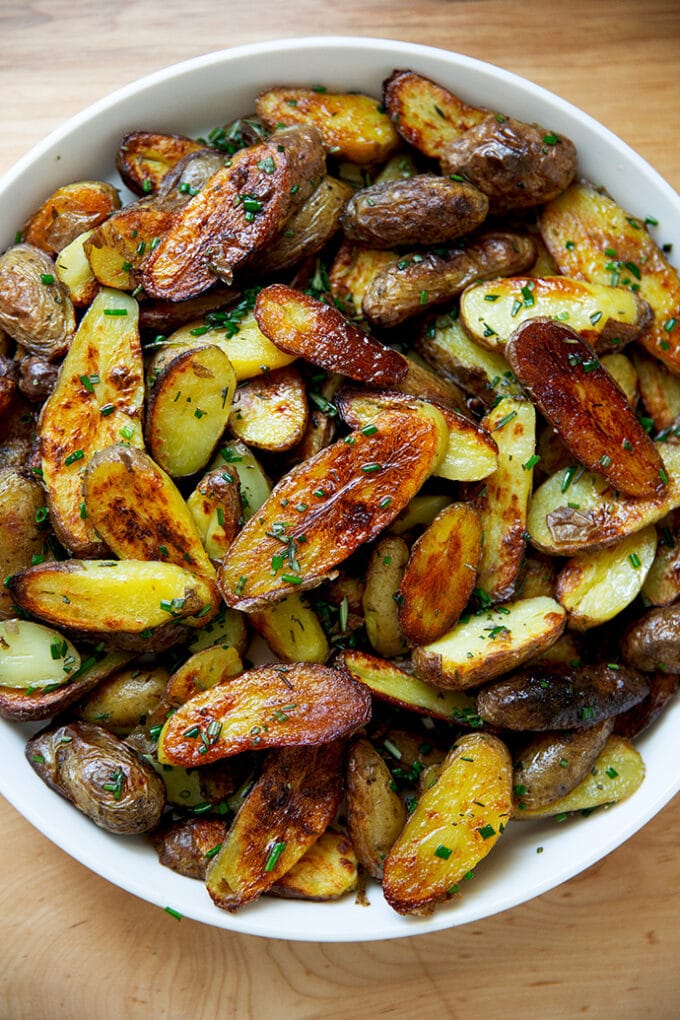
Crispy Pan-Seared Fingerling Potatoes
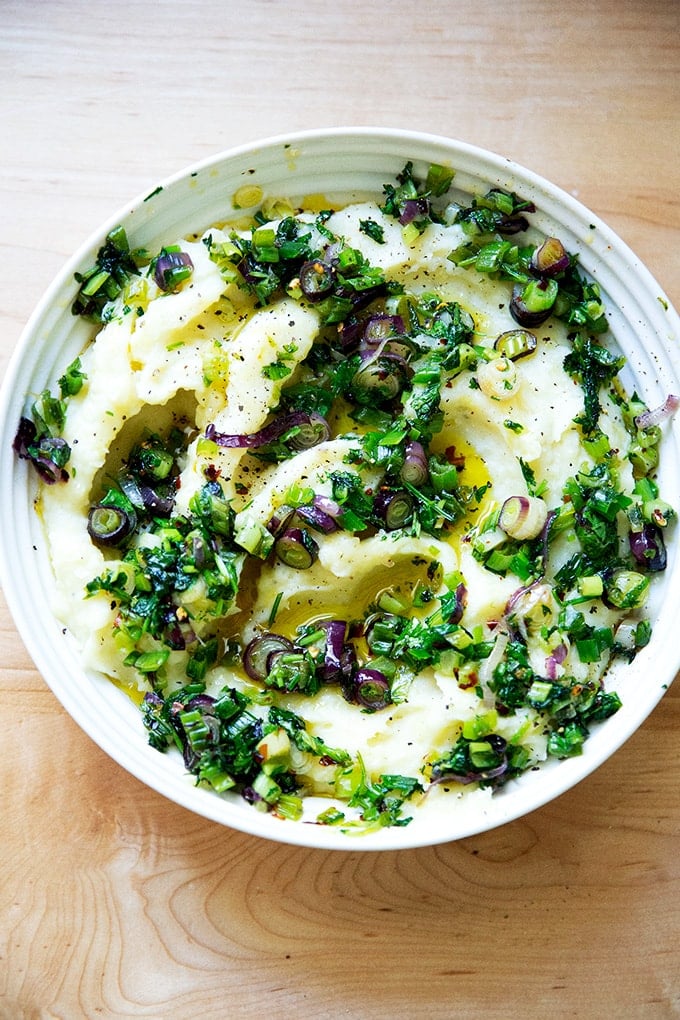
Creamy (No-Cream) Buttermilk Mashed Potatoes
Crispy Roasted Fingerling Potatoes
Salads & Sides
With so many rich foods on the Easter table, a simple green salad on the side is nice. I love this lemon vinaigrette , which is light and bright, and which I use to dress simple salads composed of tender spring greens, shaved carrots, radishes, feta, and walnuts. Here are two other favorites:
If you’re looking for a heartier salad or vegetable side dish, here are a few more ideas:
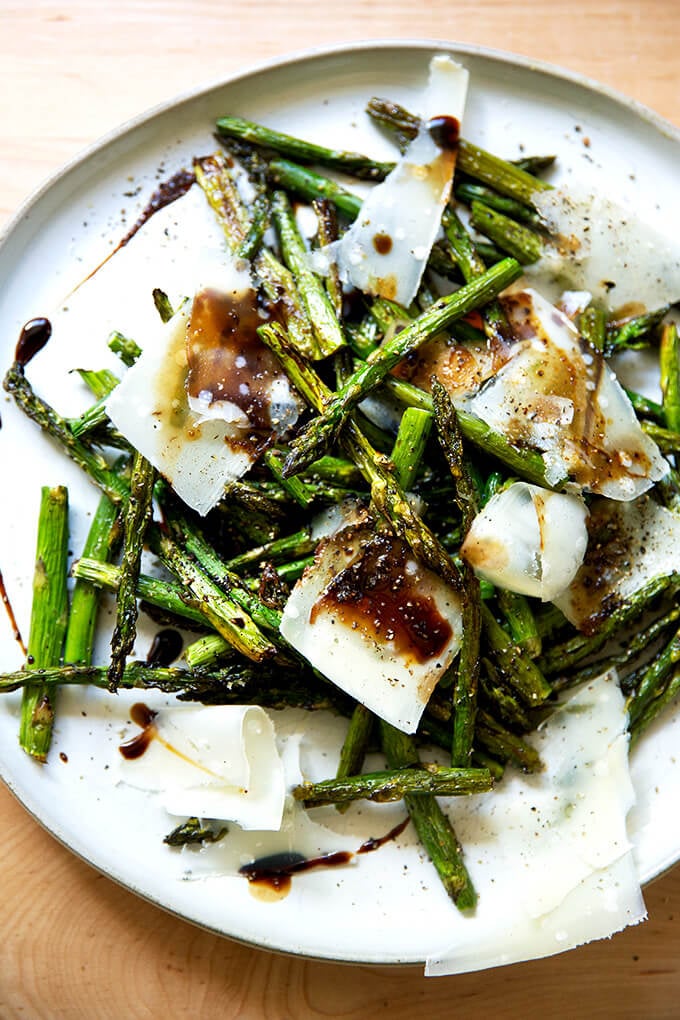
Simple Roasted Asparagus with Balsamic and Parmesan
Dessert

The Ultimate Carrot Cake
I recently revisited an old carrot cake recipe , which I have long loved but which has gotten lost in the archives. I added weight measurements, simplified the mixing process, baked it in a 9×13-inch pan (as opposed to two 8-inch pans), and I frosted it with my favorite whipped cream-cream cheese frosting, which I use in this one-bowl birthday cake recipe. This carrot cake was just as delicious as I remember, and the family devoured it. Highly recommend!
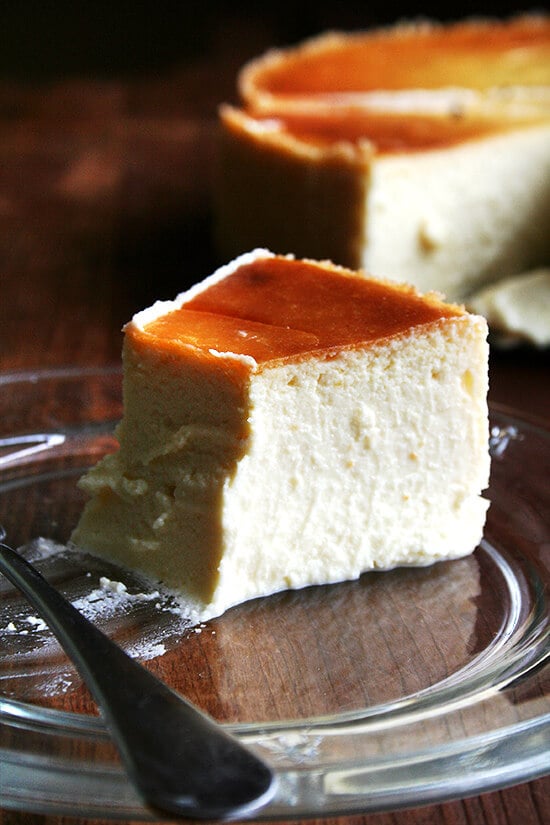
Lemon-Ricotta Cheesecake
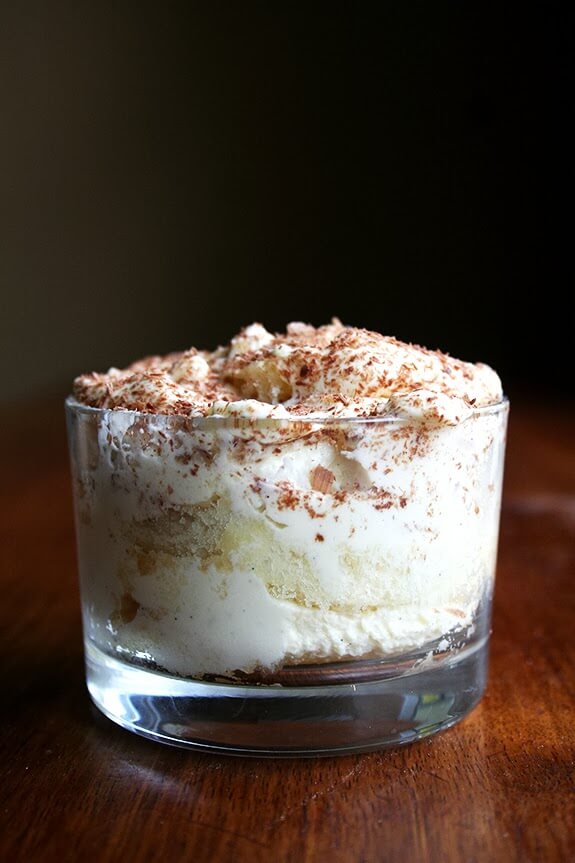
Tiramisu
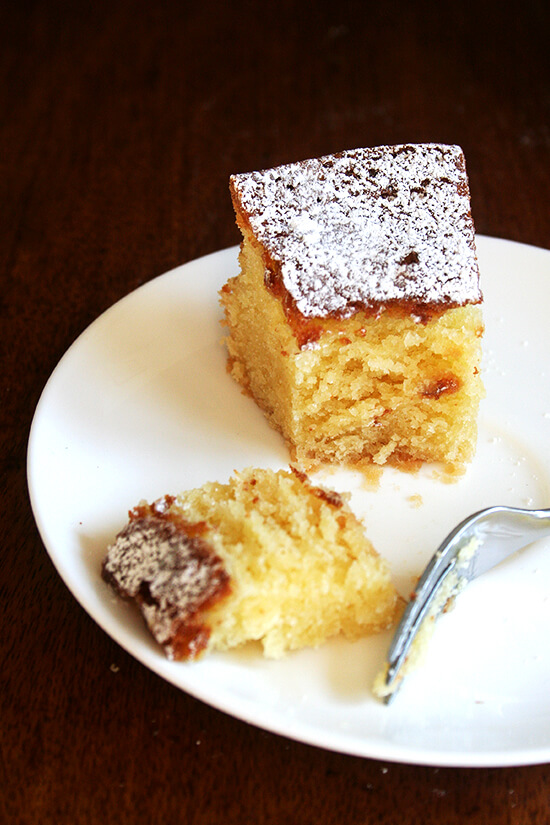
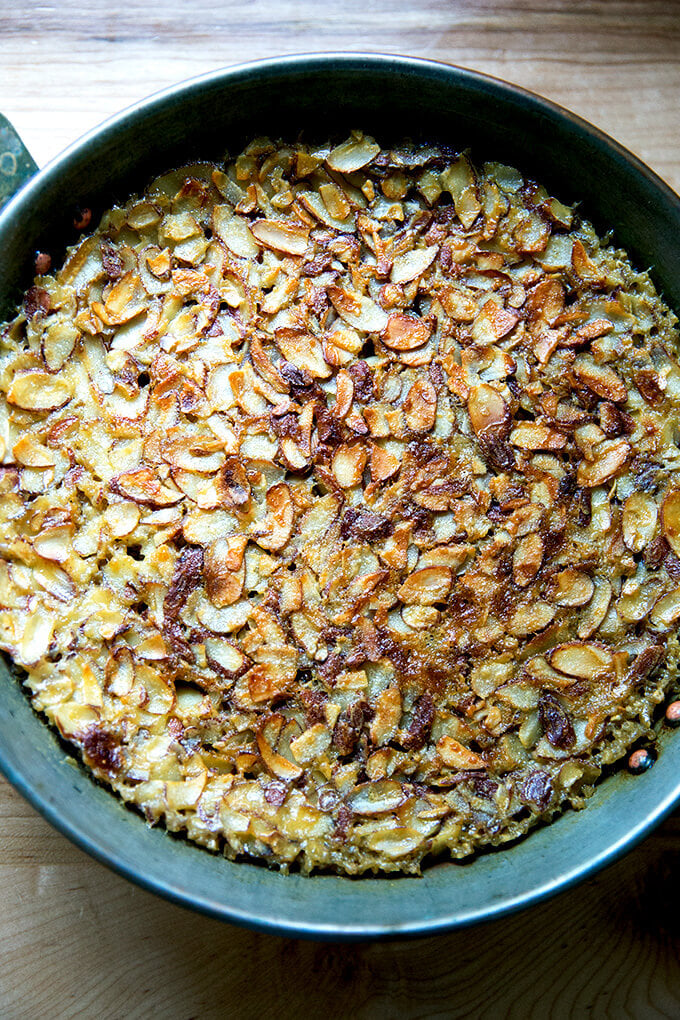
Chez Panisse Almond Torte
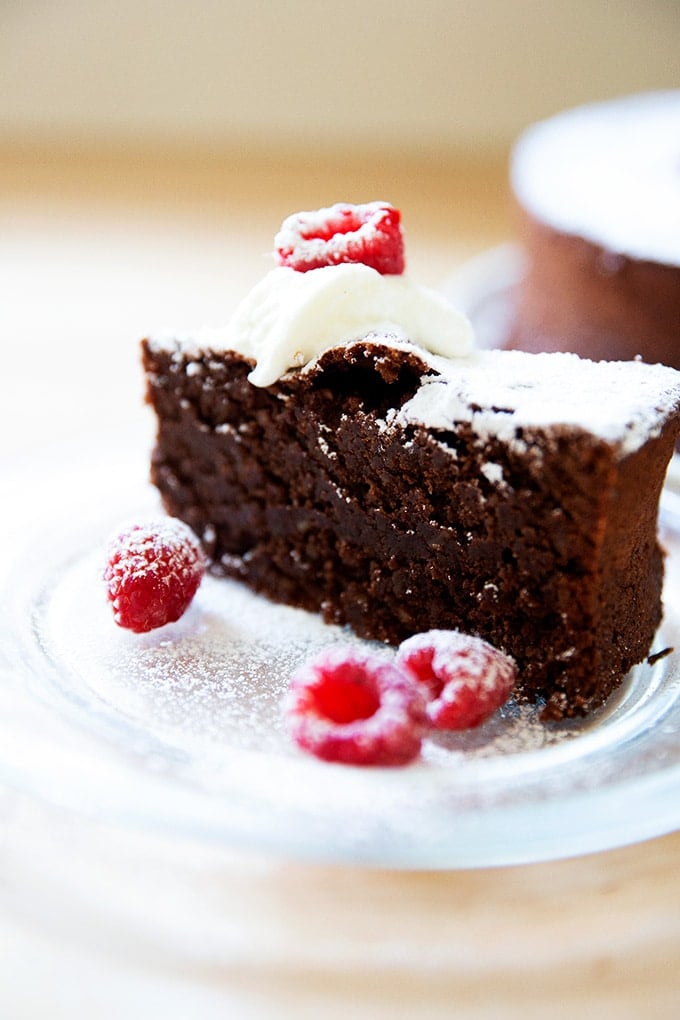
Flourless Chocolate Cake
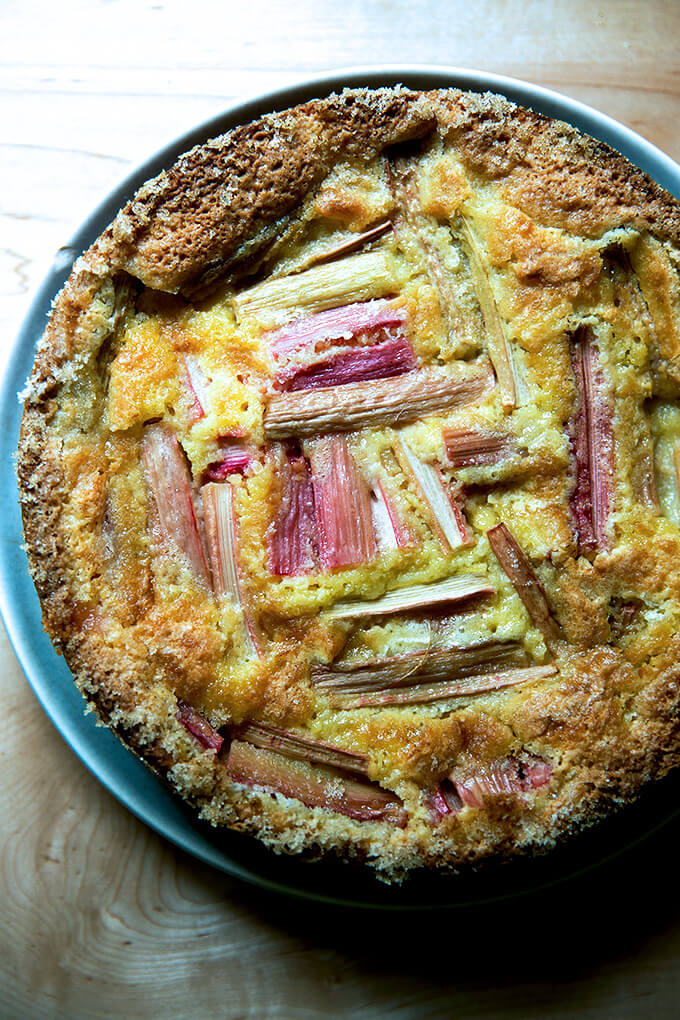
Rhubarb Custard Cake
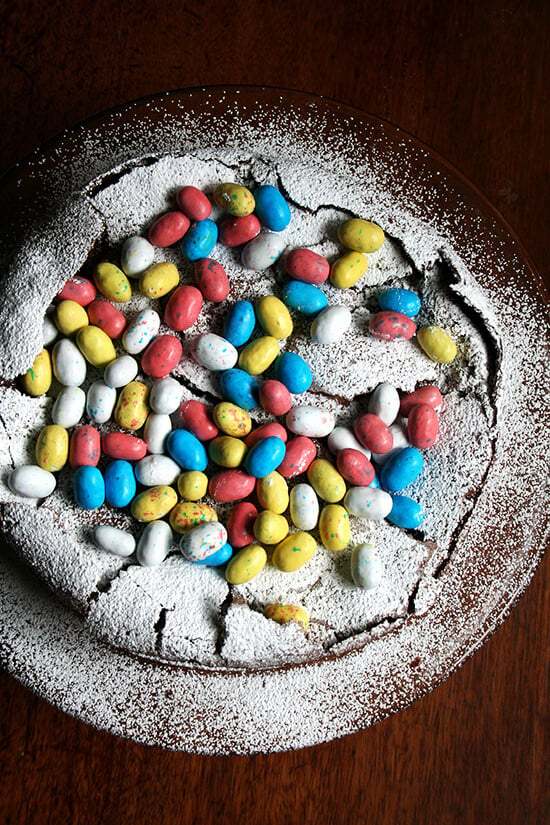
Flourless Chocolate-Almond Cake (Torta Caprese)
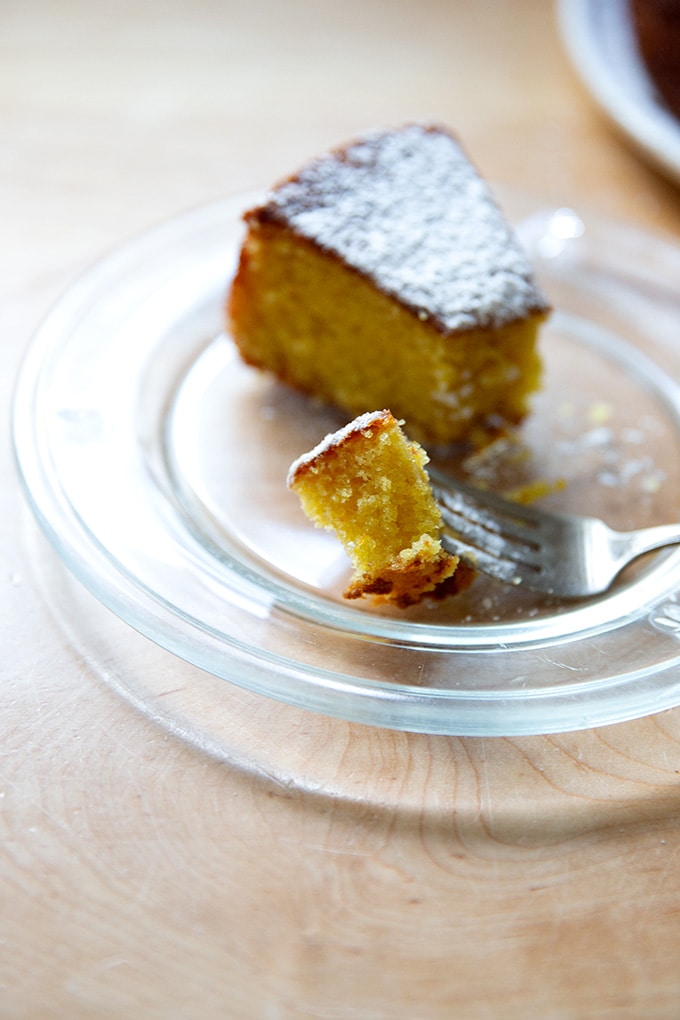
Orange and Olive Oil Cake
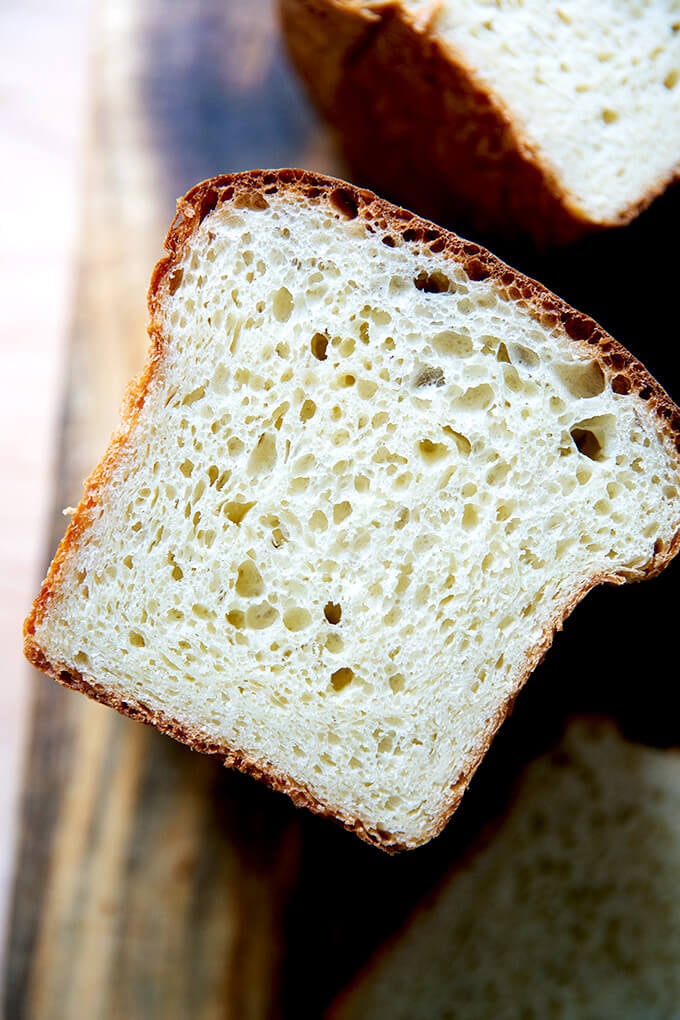
Bread
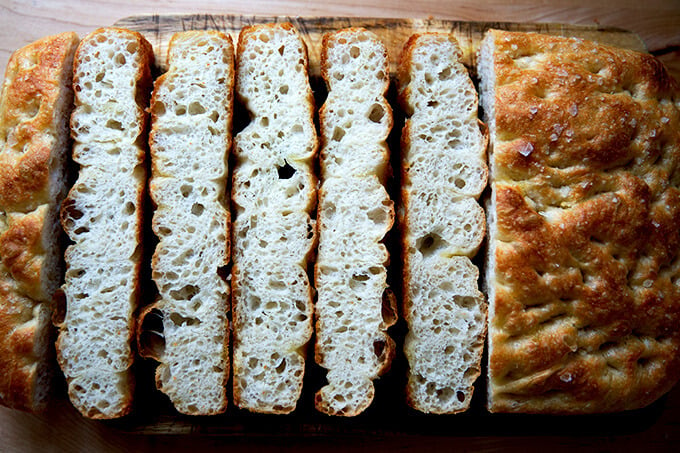
Though I am partial to rolls on the holiday table, it’s hard to beat this overnight, refrigerator focaccia in terms of effort-to-reward ratio. It’s truly so easy and so delicious.
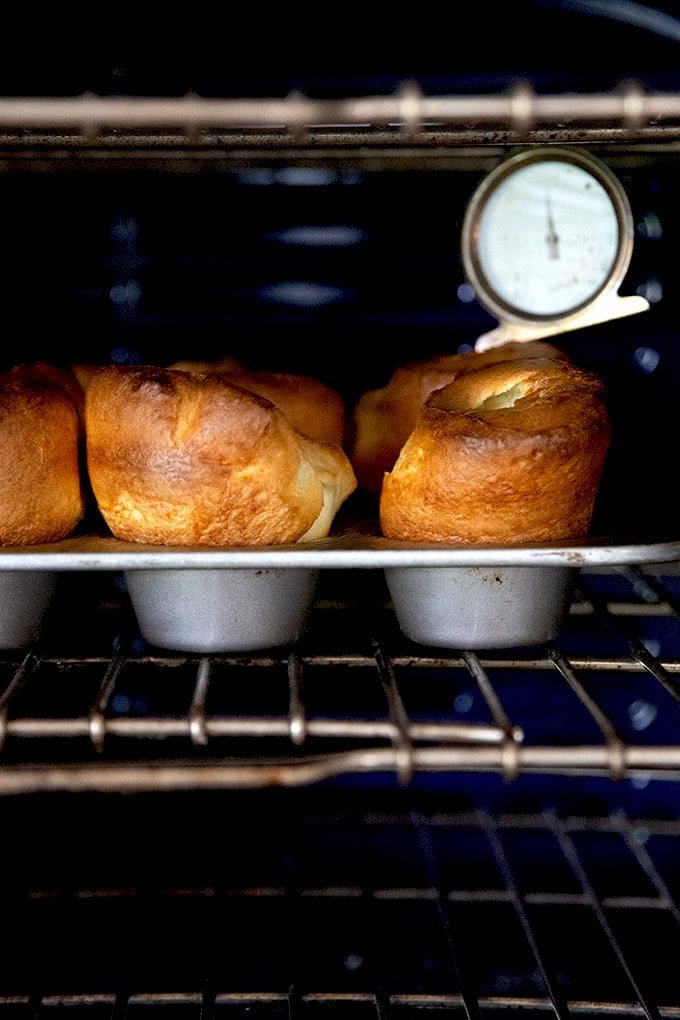
But if you’re up for making rolls, both of the recipes below are no-knead, and each dough can be made ahead of time and stashed in the fridge until you are ready to bake. And if you are yeast averse altogether, enter: popovers … so easy, so festive, so delicious.
Find a few more ideas below and here → Favorite Bread Recipe
Popovers 🎉
Rolls 🎉
Biscuits 👏
Focaccia 🎉
If making rolls is a page-turner for you, you could make a batch of this no-fuss focaccia . The beauty of this recipe is that it’s best made the day or two days before and tucked in the fridge — on Easter morning, you would just let it rise at room temperature for 3 to 4 hours. You can bake it whenever the oven is free. Here’s a sourdough version .
No-Knead Bread 🍞
