In his latest cookbook, Snacks for Dinner , Lukas Volger gives us permission to make meals out of all of the nibbles we’ve long relegated as ‘starters.’ Why shouldn’t dinner be a union of creamy, dilly white beans, charred radicchio with burrata, and a hunk of focaccia? Now it can.
I was immediately drawn to the dips chapter, which includes recipes for eggplant and chickpea whip, charred allium and labneh dip, and this elemental guacamole.
In the intro to the recipe, Lukas notes: “Guacamole is one of those things I’ve always made without a recipe. It feels like it ought to be intuitive since it’s just about embellishing a few good ripe avocados. And yet I always get asked for one when I serve it, so here it is.”
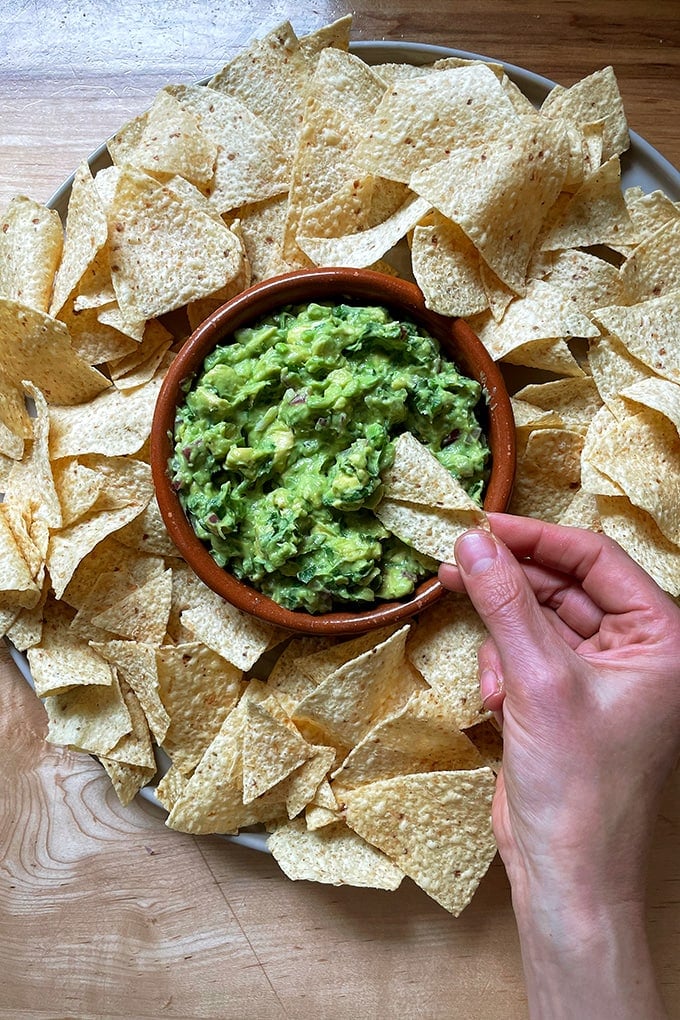
I’m so glad Lukas felt compelled to include his guacamole recipe in the book because it is outstanding. My husband, who rarely throws around superlatives, declared it the best guacamole he’s ever tasted. My children said it was “better than Chipotle’s”… high praise!
Friends, I imagine many of you fall into the no-recipe guacamole camp. And if you do, I encourage you to try Lukas’s recipe even so. It has a few tricks up its sleeve.
The first, and the one that distinguishes it from other guacamole recipes I’ve seen, is that it calls for letting the red onion soak in freshly squeezed lime juice for 5 to 10 minutes. This is something I often do when making dressings , but I’ve never thought to employ the method for guacamole, and I really love the effect: as the onions soak, they soften, losing a bit of their bite. They also pickle ever so slightly.
The next trick is more common but important nonetheless: salt properly. So often, says Lukas, “homemade versions [of guacamole] are underseasoned.” As always, it’s important to taste as you go, and to add salt as needed. With that in mind, Lukas suggests tasting the guacamole with the chips you plan on serving to ensure you are salting the dip properly. Smart!
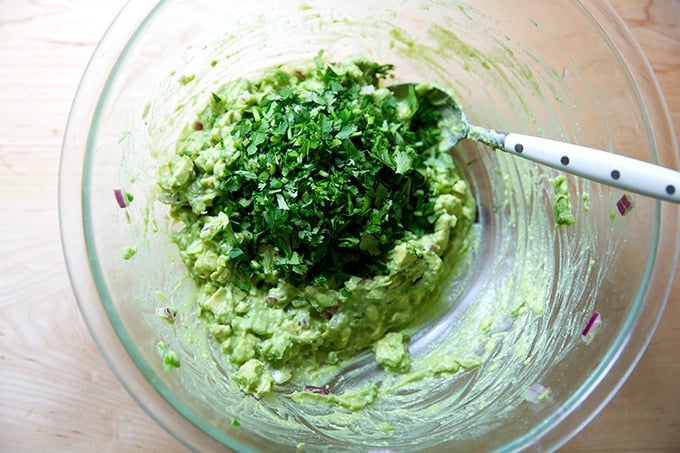
Finally, Lukas encourages you to leave plenty of texture in the guacamole by using a spoon to mix, noting a “sauciness” will form if the avocados are properly ripe. Each time I’ve made this, I’ve needed to gently mash the avocados with the back of my spoon, but I am taking more care to not over mash, and I am loving the coarse texture of the finished dip.
To wrap up the guacamole revelations, I think the reason I love this guacamole so much is not only for everything Lukas includes, but also for what he leaves out: most notably tomatoes but also dried spices such as cumin and cayenne as well as other ingredients you sometimes see in guacamole recipes: hot sauce, garlic, Worcestershire. The simplicity of flavors here makes it taste especially fresh and bright.
Friends, as you might gather, to me this guacamole is heaven, a perfect balance of salt, fat, acid, and — wait for it — heat! Sa min , no doubt, would approve. That said, when I make this for my children, I do omit the chilies and tone down the cilantro a bit.
How to Pit an Avocado Safely
For years I used my knife to remove pits from avocados. It works but it’s not safe. Here’s a safe, just as effective way to remove a pit from an avocado:
How to Buy and Store Avocados
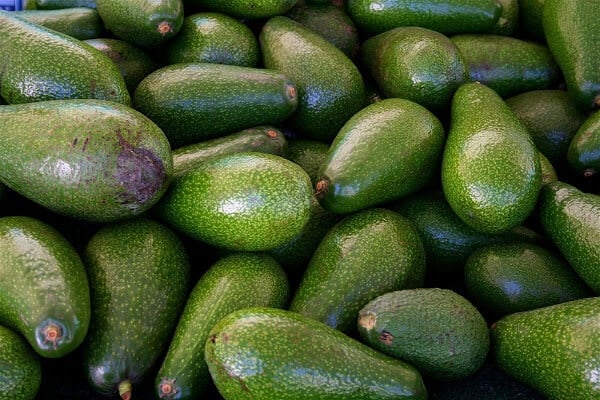
Unless I am in a real pinch and need ripe avocados immediately, I prefer to buy rock-hard avocados and let them ripen at room temperature on my countertop. Why? The ripe avocados at the grocery store often are overripe and bruised. It’s crushing to cut into expensive avocados only to find brown spots and mushy flesh.
To test for ripeness, press gently on the very top of the avocado where it was stemmed: it should yield slightly to the pressure of your finger. Once the avocados are ripe, transfer them to the fridge to ensure they don’t overripen on your counter.
How to Ripen Avocados Faster
If you want to expedite the ripening process of an avocado, tuck it into a paper bag with an apple or a banana, close the bag, and let it sit at room temperature for 1 to 3 days. Why does this work? Because the plant hormone ethylene found in apples and bananas triggers the ripening process, and trapping the ethylene gases in a paper bag, hastens the process.
Lukas Volger’s Snacks for Dinner : I know I said this already, but isn’t the cover cute?
How to Make Guacamole, Step by Step
Gather your ingredients.
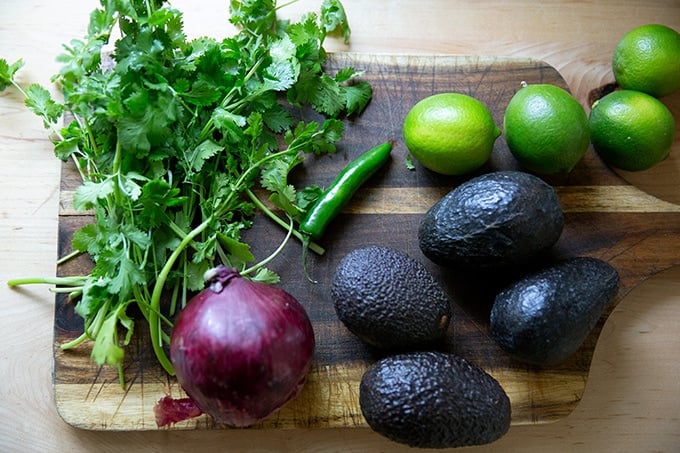
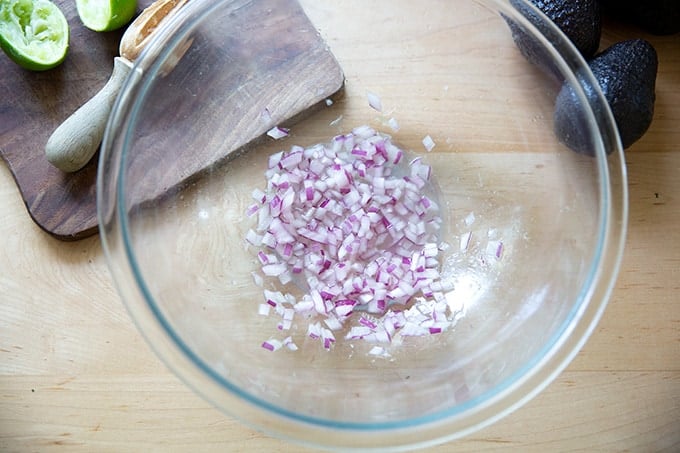
Finely dice the red onion. You’ll need about 1/3 cup for this recipe.

Season the onion with a few big pinches of salt; then squeeze the juice of one lime over the top.
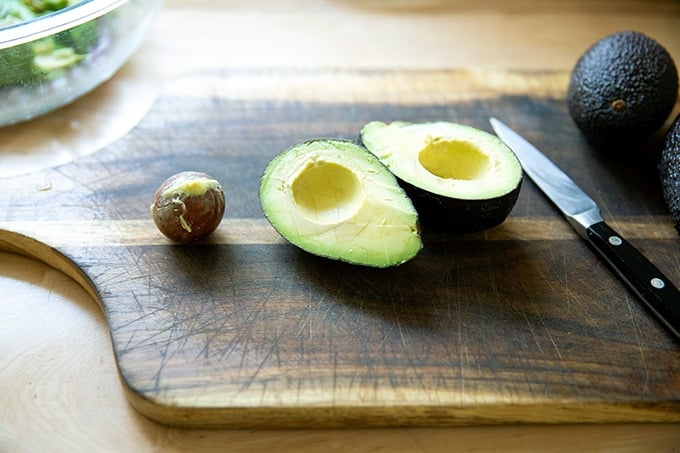
Halve and pit each avocado. Then use a knife to make a crosshatch pattern through the flesh.
Scoop the avocado into the bowl over the onions.
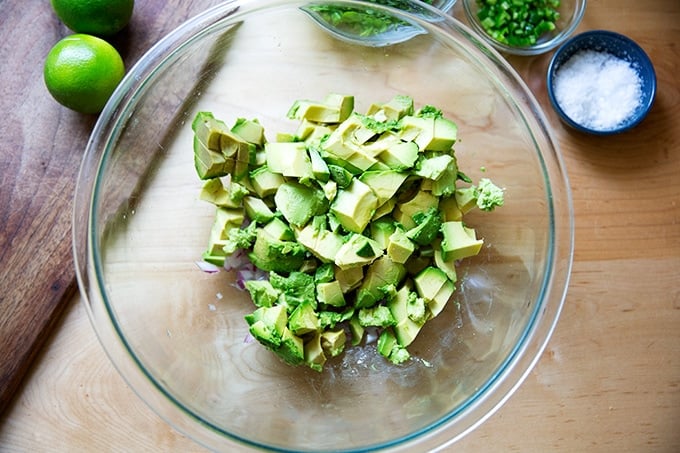
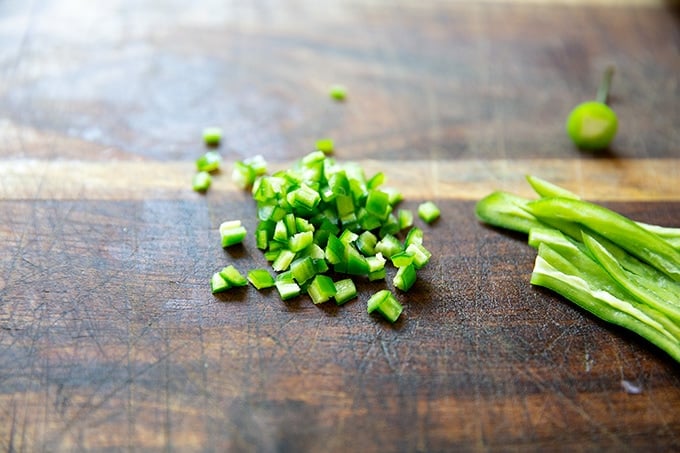
Mince one to two hot chilies, such as serrano, jalapeño, or cubanelle.
Add it to the bowl and stir to combine. Taste. Adjust with more salt and lime juice to taste. Finally, fold in the cilantro.
Serve immediately or…
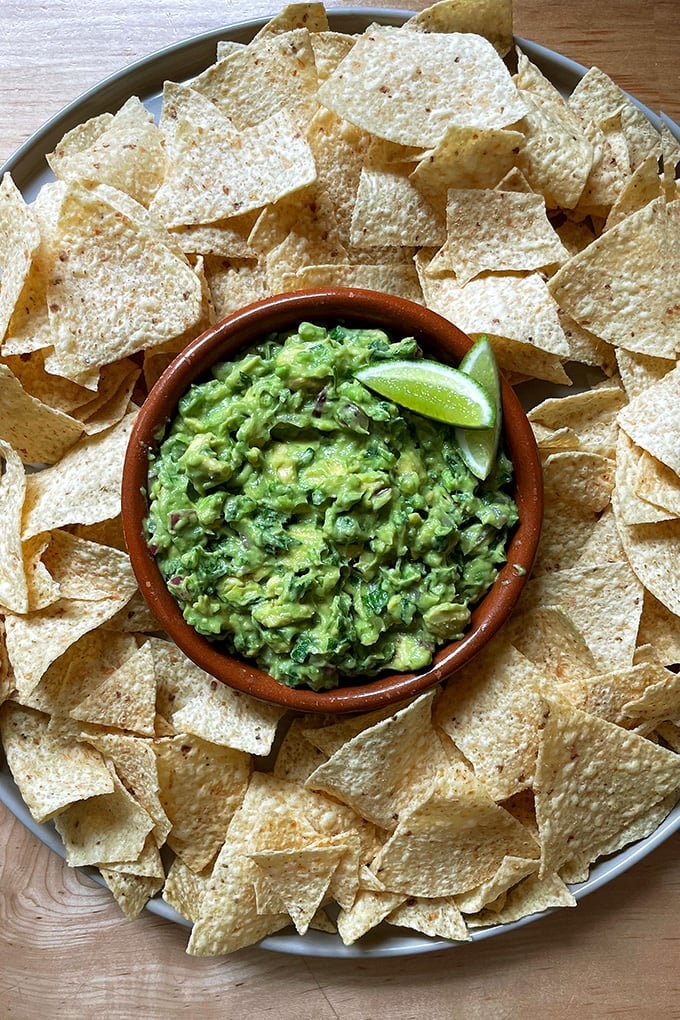
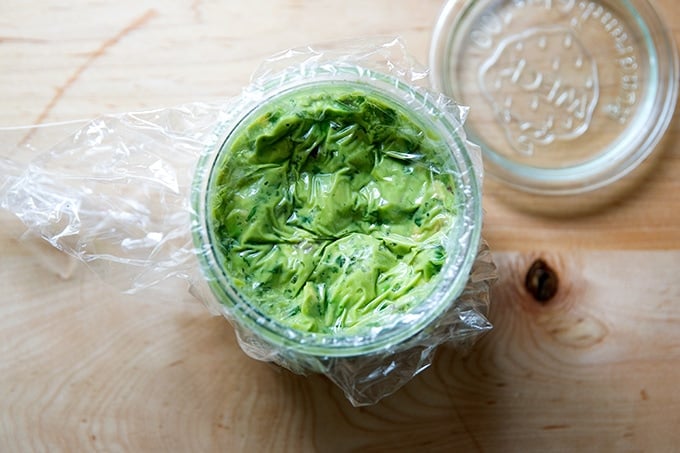
… store in the fridge for several hours ahead of time. To prevent browning, cover the guacamole with a sheet of plastic wrap.
Description
From Lukas Volger’s Snacks for Dinner
Notes:
When I make this for my children, I omit the minced hot chilies, and it’s still delicious. I also reduce the amount of cilantro.
If you hate cilantro, you can omit it. Lukas also likes using basil in place of cilantro here.
1/3 cup finely minced red onion
kosher salt or flaky sea salt
1 – 2 limes
4 ripe avocados
1 or 2 serrano chilies, seeded and finely diced, see notes above
2/3 cup chopped cilantro, see notes above
- Place the minced onion in a large bowl. Sprinkle with two big pinches of salt and the juice of one lime. Stir to combine, then let stand 5 to 10 minutes so the onion ever so slightly pickles.
- Cut each avocado in half and remove the pit. Score a crosshatch pattern into each avocado half using your knife, then scoop out the flesh into the bowl with the onions using a spoon. Season the avocados with salt. Add the chilies, if using.
- Stir everything together. If your avocados are ripe, a “sauciness” will form as you stir the mixture, and you won’t necessarily need to mash it. If necessary, however, use the back of a fork or a pastry cutter to gently mash the avocado cubes. Taste for acidity and salt. I’ve been adding more salt to taste and the juice of one more lime, but I tend to like things on the acidic side, so add lime to taste. Lukas’s Note: It’s a good idea to taste the guacamole with the chips you plan to serve alongside, so as to make sure to salt the dip properly.
- Last, stir in the cilantro. Serve immediately.
- To store, transfer to a storage vessel. Lay a sheet of plastic wrap over the surface of the guacamole, pressing it flush against the surface to create a barrier from the air. Store in the fridge for 4 to 5 hours or until ready to serve.
- Prep Time: 15 minutes
- Category: Dips
- Method: Stir
- Cuisine: Mexican, American
Description
From Lukas Volger’s Snacks for Dinner
Notes:
When I make this for my children, I omit the minced hot chilies, and it’s still delicious. I also reduce the amount of cilantro.
If you hate cilantro, you can omit it. Lukas also likes using basil in place of cilantro here.
1/3 cup finely minced red onion
kosher salt or flaky sea salt
1 – 2 limes
4 ripe avocados
1 or 2 serrano chilies, seeded and finely diced, see notes above
2/3 cup chopped cilantro, see notes above
- Place the minced onion in a large bowl. Sprinkle with two big pinches of salt and the juice of one lime. Stir to combine, then let stand 5 to 10 minutes so the onion ever so slightly pickles.
- Cut each avocado in half and remove the pit. Score a crosshatch pattern into each avocado half using your knife, then scoop out the flesh into the bowl with the onions using a spoon. Season the avocados with salt. Add the chilies, if using.
- Stir everything together. If your avocados are ripe, a “sauciness” will form as you stir the mixture, and you won’t necessarily need to mash it. If necessary, however, use the back of a fork or a pastry cutter to gently mash the avocado cubes. Taste for acidity and salt. I’ve been adding more salt to taste and the juice of one more lime, but I tend to like things on the acidic side, so add lime to taste. Lukas’s Note: It’s a good idea to taste the guacamole with the chips you plan to serve alongside, so as to make sure to salt the dip properly.
- Last, stir in the cilantro. Serve immediately.
- To store, transfer to a storage vessel. Lay a sheet of plastic wrap over the surface of the guacamole, pressing it flush against the surface to create a barrier from the air. Store in the fridge for 4 to 5 hours or until ready to serve.
- Prep Time: 15 minutes
- Category: Dips
- Method: Stir
- Cuisine: American, Mexican
Find it online : https://alexandracooks.com/2022/05/08/simple-homemade-guacamole/
Made with only 5 ingredients — lemon juice, tahini, salt, chickpeas, and ice water — this smooth and creamy hummus comes together in 5 minutes and will make you swear off store-bought for good. No need to peel the chickpeas here: grab a can, drain them, and start blending!
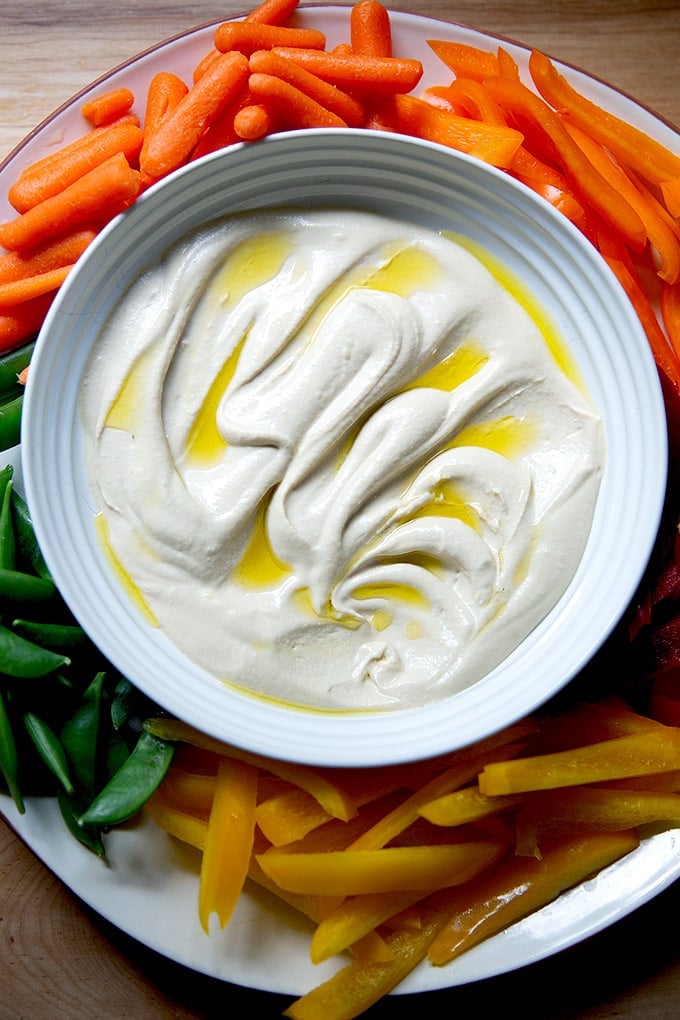
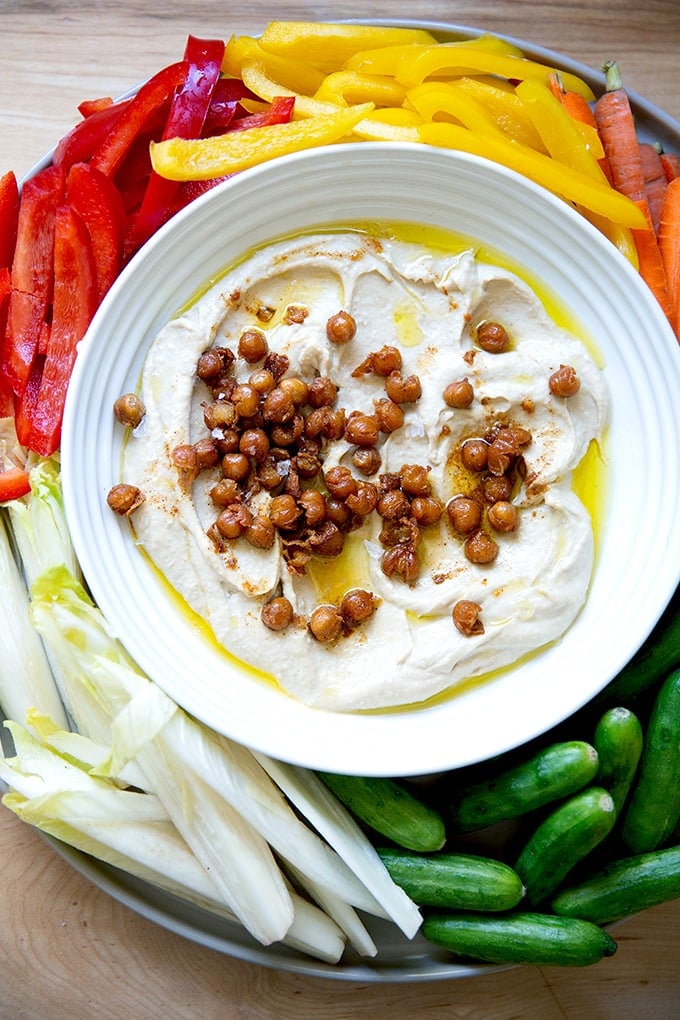
This is how I get my children to eat vegetables daily: every day around 4 o’clock pm, I set out a platter of raw vegetables, often some combination of sliced bell peppers, baby carrots (yes, the smooth-edged pellets sold in the wet bag), snap peas, cherry tomatoes, and spears of salted cucumbers. The selection will vary seasonally, but those are the mainstays.
I don’t announce to the family the vegetables have arrived, I simply set out the veggies with a bowl of hummus on the side, and before long, the children gravitate toward the table and start munching.
I learned this “trick” from my friend Vicki, who pointed out a twofold benefit: 1. If your kid is picky (or likes control), this allows the kid to choose what he or she likes. And 2. If you don’t get around to making a vegetable for dinner, whatever vegetables remain on the platter stay on the table for dinner.
For me, it’s removed a lot of the stress of making dinner, because I know vegetables are already on the table.
For years, I served the vegetables with Sabra hummus, which everyone in my family loves. Then I discovered Hope hummus, which everyone loved even more. And then the pandemic arrived and finding tubs of our favorite hummus became a chore.
Several months ago, when all I could find was a tub of roasted red pepper hummus, which the children turned their noses at, I decided to make my own. And while I can’t say “I’ll never buy hummus again,” homemade hummus has just about ruined storebought for me.
I’ve been using the recipe from Michael Solomonov’s Israeli Soul . Michael’s recipe has a higher ratio of tahini to chickpeas than many others I’ve seen, and his method is interesting, too: it calls for making a tehina sauce first, a purée of tahini, fresh lemon juice, garlic, cumin, salt, and ice water. Then you add the chickpeas and purée until the mixture is emulsified and smooth.
I have found I like my hummus a little more lemony than suggested in the recipe and without any cumin, but you, as always, should adapt this recipe to your tastes with more or less lemon, garlic, and spices.
How to Make Exceptionally Creamy Hummus
In the notes preceding the hummus recipe, Michael writes: “When we cook chickpeas for hummus from scratch, we deliberately overcook them until they turn to mush. This is the secret to ultra-creamy hummus (that, and a $15,000 food processor).”
But in the recipe, he calls for using canned chickpeas noting “canned chickpeas in a home food processor will never make hummus quite as smooth as what we make at Dizengoff, but it will taste every bit as delicious.”
Using my food processor, the result with either canned or from-scratch cooked chickpeas is just as Michael describes: creamy and delicious though not completely silky smooth.
But can I tell you what will make exceptionally smooth hummus? A Vitamix. I hate that such a pricey gadget is what works, but it does (see the photo comparisons below). The truth is that I prefer the experience of making the hummus in the food processor more than in the Vitamix — it’s easier to stream water through the narrow chute of a food processor than the gaping hole of the Vitamix lid, and it’s easier to clean, too: I find removing whatever I’ve puréed in a Vitamix to be a complete pain.
But for creamy dreamy hummus, it’s worth it. I hope you’ll agree.
How to Make Hummus, Step by Step
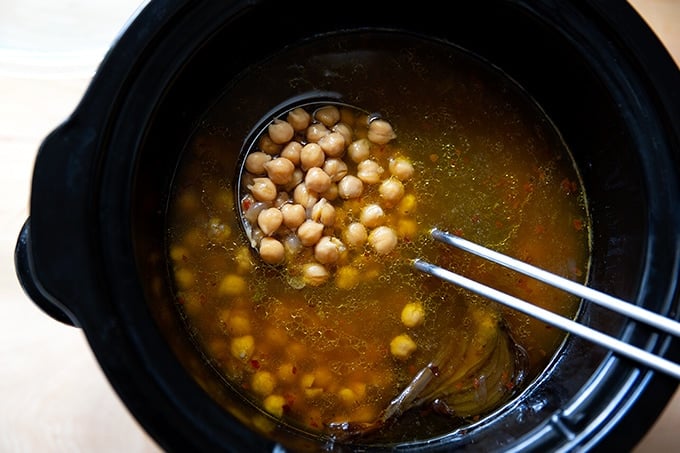
You need 1.5 cups cooked chickpeas. This is my favorite method for cooking chickpeas: simple slow cooker chickpeas . If you don’t have a crockpot, you can use the stovetop or Instant Pot . Or simply drain and rinse one 15-ounce can. Canned truly work just fine here.
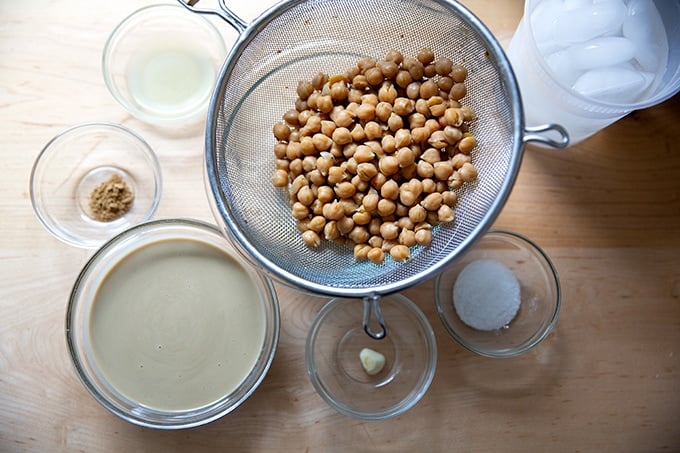
Gather your ingredients: tahini, cooked chickpeas, lemon juice, salt, and ice water. The original recipe calls for garlic and cumin, but I always omit them now. See the recipe notes if you would like to add them.
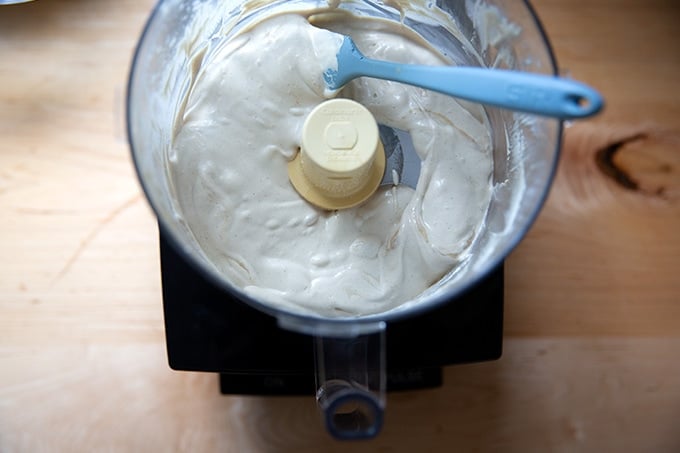
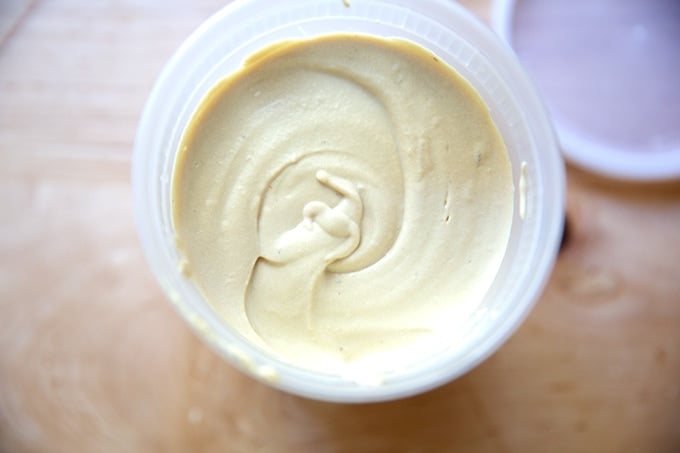
You’ll need a food processor or a blender or, ideally, a Vitamix for this recipe. A Vitamix makes for an especially smooth and creamy hummus. Starts by blending the tahini, salt, lemon juice, and cumin (if using) until…
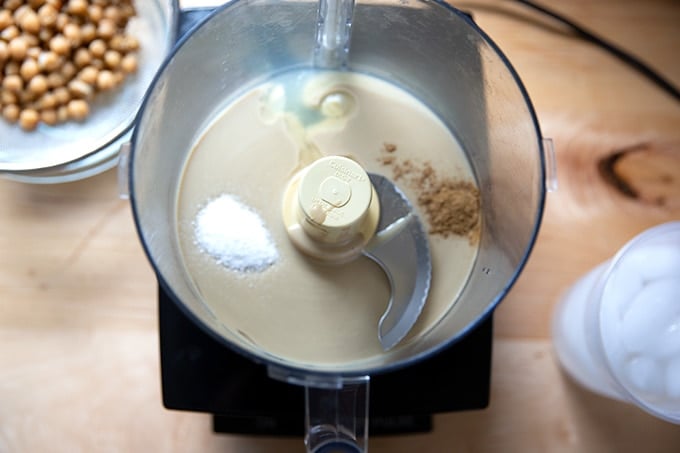
… the mixture resembles peanut butter.
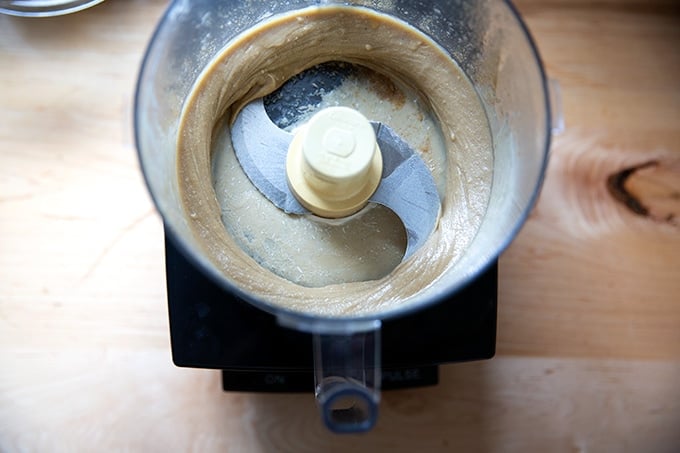
Then, stream in the ice water, and blend until the sauce is emulsified, thick, and creamy.
Add the chickpeas and purée again, scraping down the sides once or twice, until…
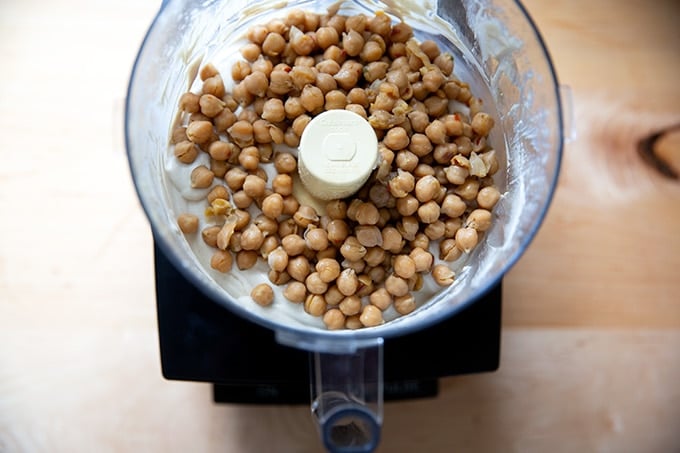
… the texture is smooth and creamy. Taste. Add more salt and lemon to taste.
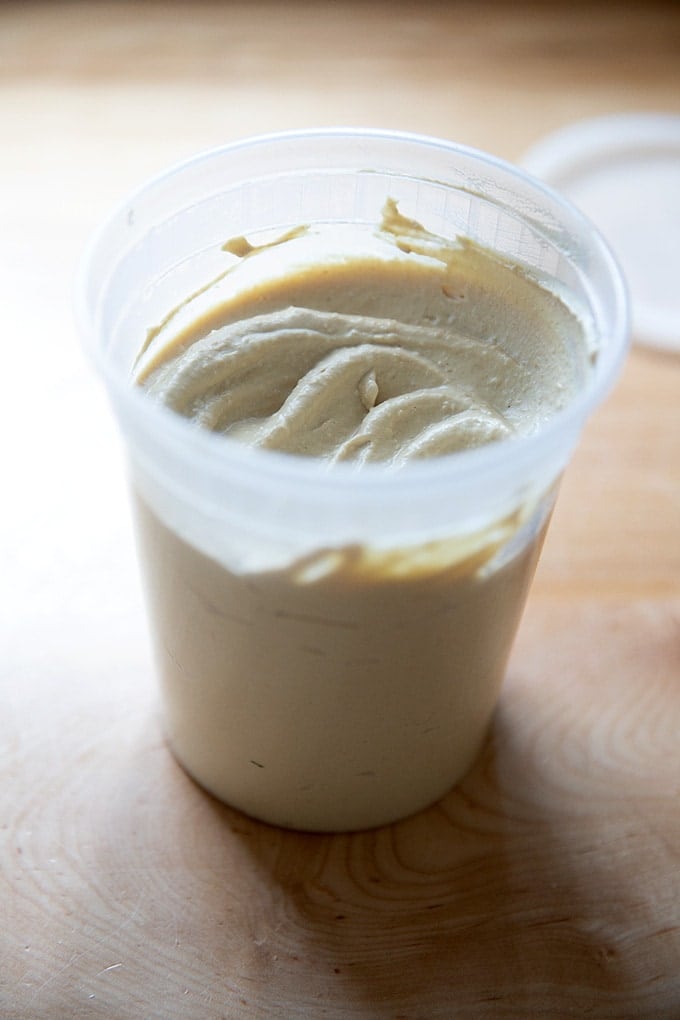
This recipe will yield 3 cups of hummus and will keep in the fridge for 2 weeks.
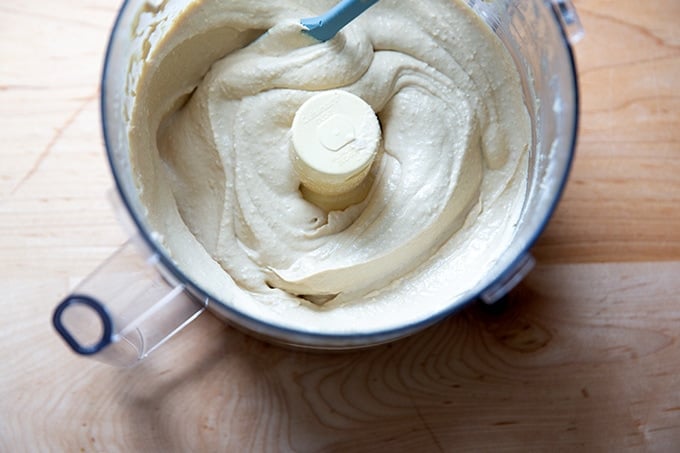
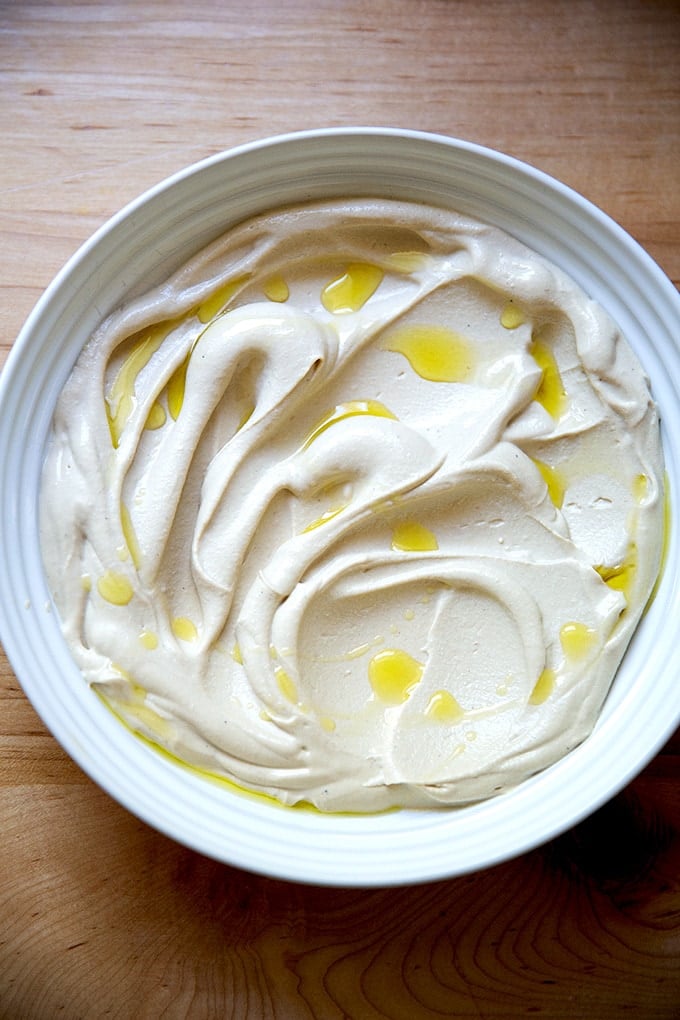
This is the batch made in the Vitamix: can you see how creamy it is?
Food Processor batch:
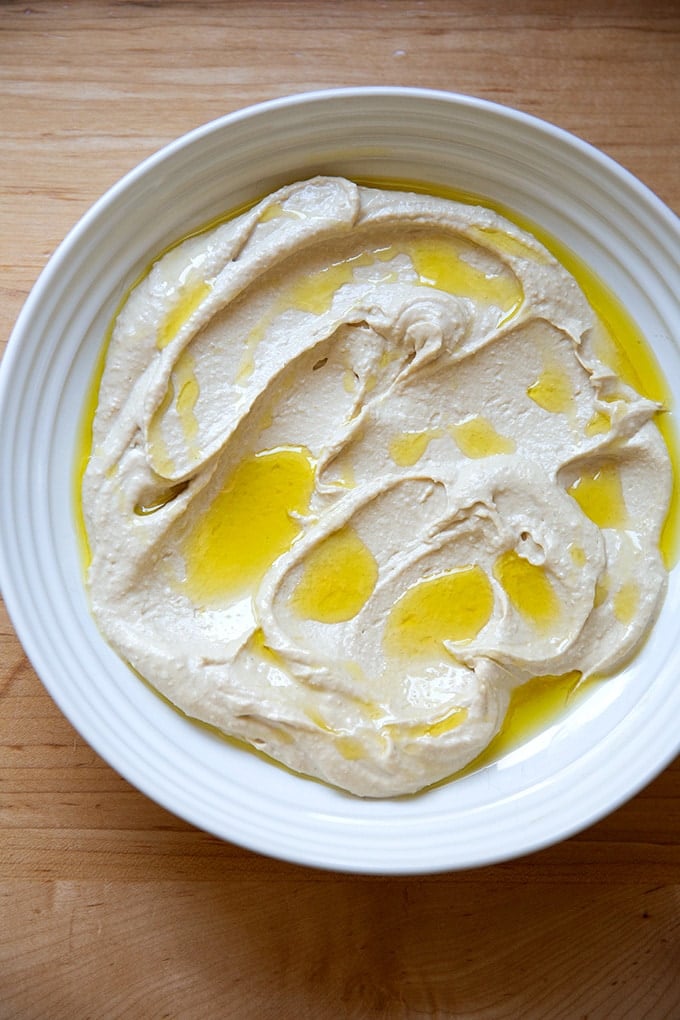
Vitamix batch:
Optional: crispy chickpeas garnish: crisp 1/2 cup cooked chickpeas in 3 tablespoons of olive oil until golden; remove with a slotted spoon; then add some spices.
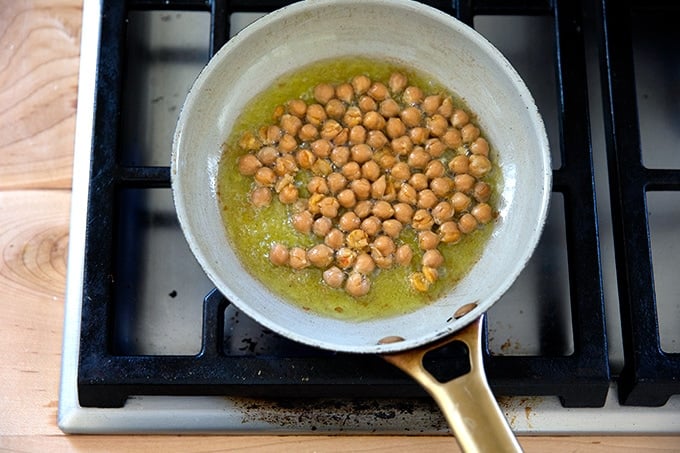
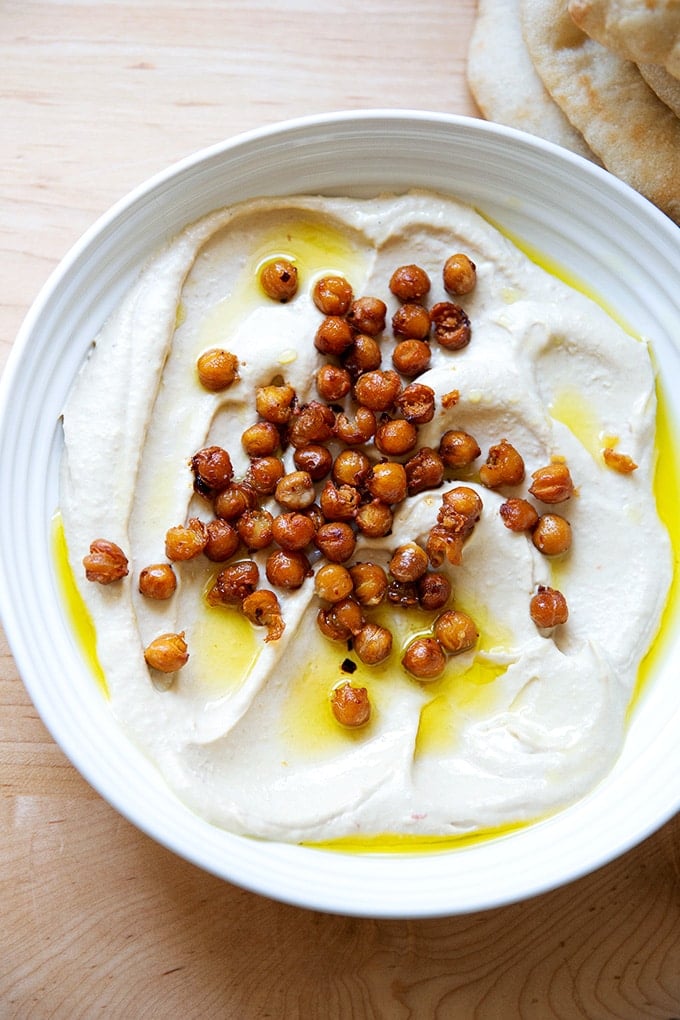
My kids don’t give a hoot about crispy chickpeas, but if you are serving the hummus to adults, the chickpeas are a pretty and tasty garnish.
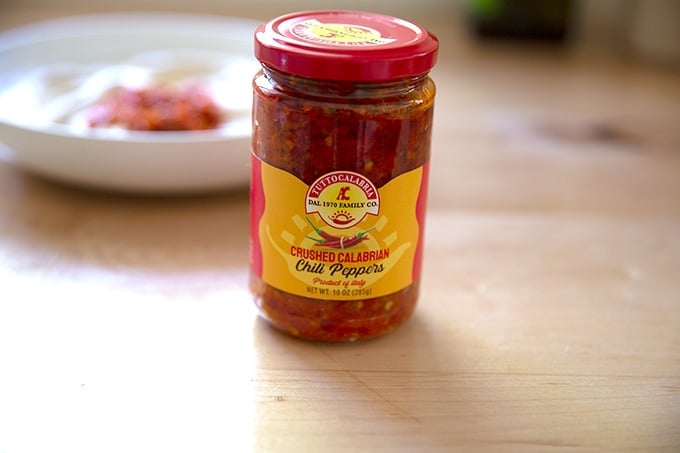
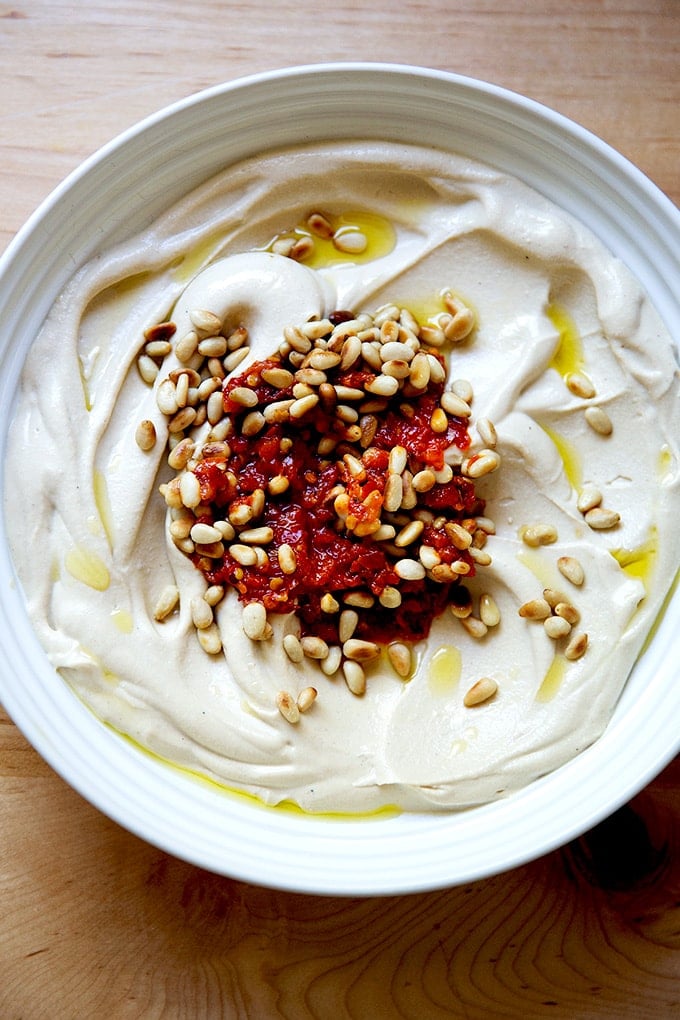
Another fun garnish: Calabrian chili paste + toasted pine nuts.
Description
Adapted from Israeli Soul . This is a half recipe from the one in the book with a few small changes.
Notes:
As noted in the post above, if you have a Vitamix , now is the time to break it out — it makes for an especially creamy hummus. If you don’t, a food processor works very well, too.
The original recipe calls for a tiny amount of garlic and some cumin, too. If you would like to add these ingredients, go for it: 1/4 clove of garlic or more to taste, and 1/2 teaspoon cumin.
I have made this with a variety of tahini, and it always works out.
I have made this with both cooked-from-scratch (often this recipe or this one ) and canned chickpeas. Don’t be afraid to use the can — it works beautifully.
2 tablespoons fresh lemon juice, plus more to taste (I always start with 3 tablespoons now)
1 cup ( 227 g ) well-stirred tahini
1 – 1.5 teaspoons ( 4 to 6 g) kosher salt
3/4 cup ( 178 g ) ice water
1.5 cups ( 295 g ) cooked chickpeas or one 15-oz can chickpeas, drained and rinsed
flaky sea salt to taste
Optional garnish:
- 3 tablespoons olive oil
- 1/2 cup cooked chickpeas, dried very well
- 3/4 teaspoon spices such as cayenne, smoked paprika, or cumin, etc.
- Make the hummus: Place the lemon juice, tahini, and salt (start with 1 teaspoon salt if you are sensitive), in a food processor or blender. Process until the mixture looks like peanut butter, about 1 minute. (Note: I find the key with the Vitamix is to start at the lowest speed and stay there until the mixture really comes together — otherwise the blades will spin too quickly and the motor will start overheating.)
- Stream in the ice water with the motor running. Process the mixture, stopping to scrape the sides of the container once, until it is smooth and creamy and lightens to the color of dry sand.
- Add the chickpeas and process, scraping the sides again as needed, until the chickpeas are completely blended and the hummus is smooth and uniform in color.
- Taste. Adjust with sea salt to taste. Add more lemon if you wish. Note: If the texture of the hummus is loose, this is OK because it will continue to thicken as it cools and sets in the fridge. The hummus will keep in the fridge for at least one week.
- To make the crispy chickpeas: Heat the 3 tablespoons of olive oil with the chickpeas in a small skillet over medium heat. When the chickpeas begin sizzling and taking on some color, remove them from the skillet with a slotted spoon, transfer to a bowl, toss with the spices, and sea salt to taste.
- Prep Time: 15 minutes
- Category: Appetizer
- Method: Blender, Food Processor
- Cuisine: Middle Eastern
