To say that the move north — from the weeks of packing to the two-day drive to the week of unpacking — has taken a toll on the children’s diet would be an understatement. There has been too much takeout, too many salty snacks, too many drive-thru visits. And I fear there has been irreparable damage: A few days ago when I pointed to a bunch of carrots in one of Graham’s favorite books, he, with complete confidence, identified them as, “hotdogs.”
Oiy. In this season of vegetable bounty, there is no excuse. I immediately set to work making a pasta sauce — sauce counts as a vegetable, right? — I learned years ago from The Tra Vigne Cookbook , a recipe Michael Chiarello learned from Jacques Pèpin. In the book, Chiarello pairs the sauce with stuffed chicken thighs and notes that any leftover sauce can be used to poach fish roulades, no doubt a suggestion made by Pèpin.
3-Step Red Pepper Tomato Sauce
There are three distinct phases that occur when making this sauce, and once you can identify them, you’ll never need to refer to this recipe again:
- In phase one, diced tomatoes and peppers simmer with a small amount of water.
- In phase two, the peppers and tomatoes release their juices and the ratio of liquid to solids increases dramatically.
- In phase three, the peppers and tomatoes become meltingly tender and begin sticking to the bottom of the pan as the last bit of liquid evaporates.
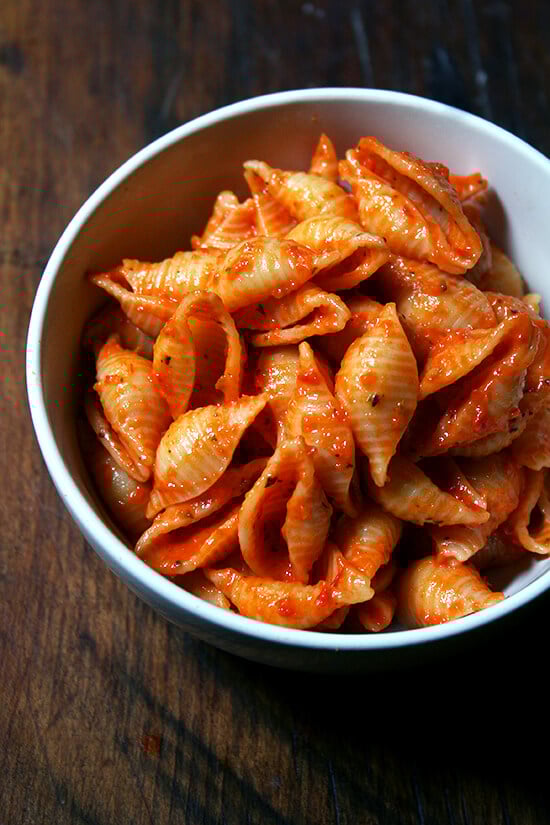
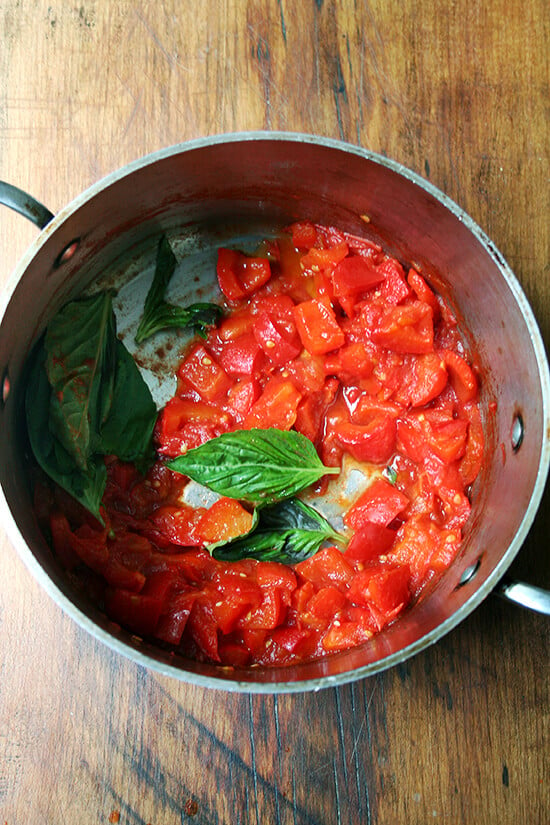
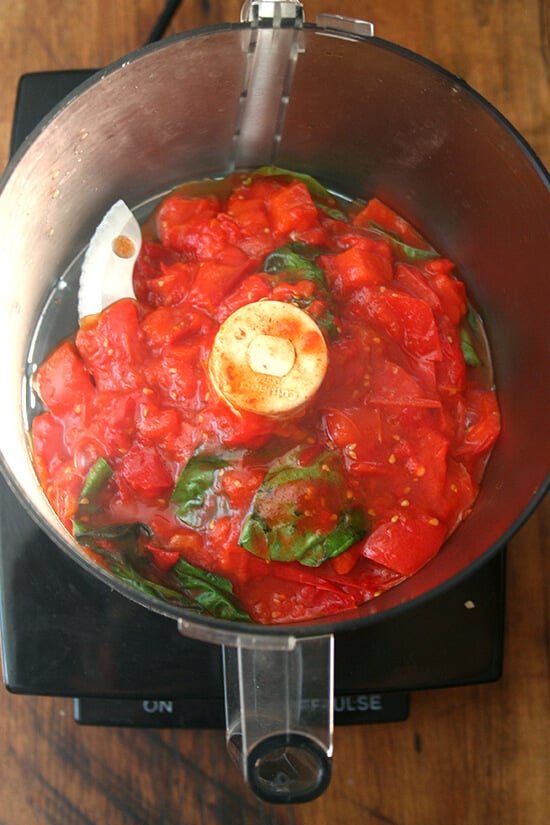
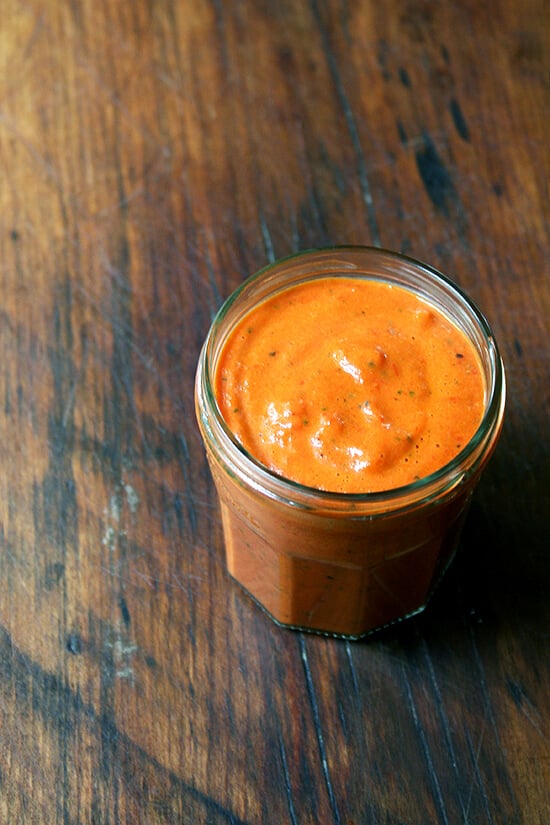
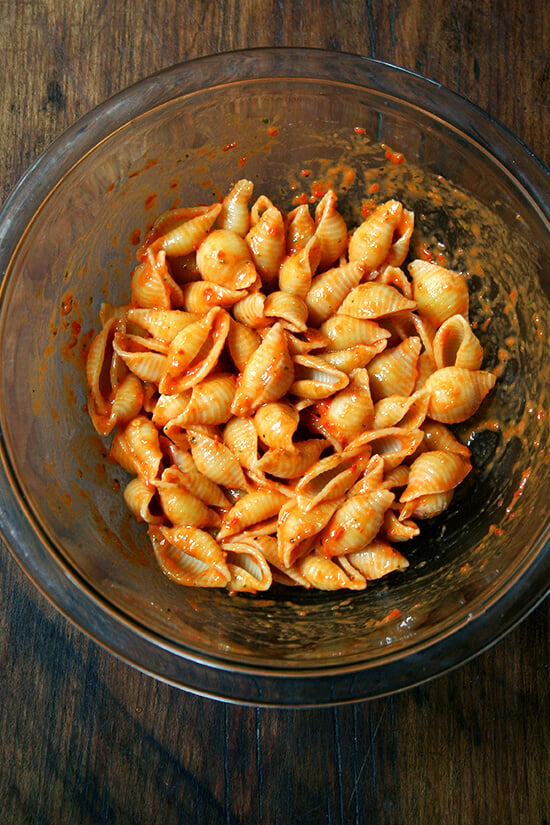
After this transformation, which takes about 25 minutes, into the blender go the vegetables along with a handful of basil, a dab of butter and a drizzling of olive oil. Whizzed into a light orange purée, the finished sauce can be used on anything from pizza to eggplant involtini to simple shells garnished with shaved Pecorino, a dish adored by picky children and agreeable adults alike.
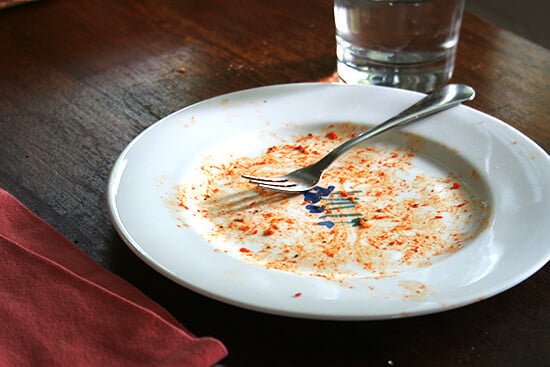
To me this sauce is the essence of summer, and while I can’t promise it will work miracles on your toddler’s vocabulary, it might help make strides. Last night, when I pointed to a tomato in the same favorite book, Graham exclaimed, “Apple!” I’ve never been so proud.
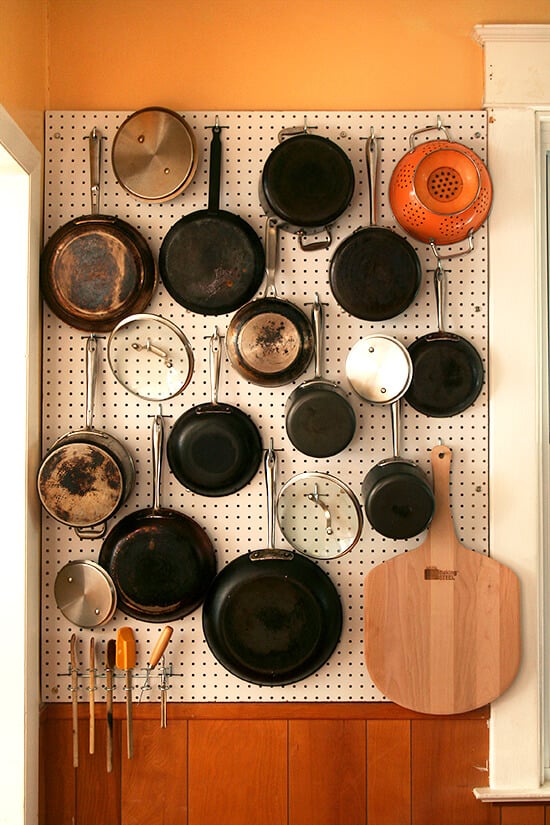
Finally, I just want to thank you all so much for your kind words in regard to the last post . Also, we, or Ben I should say, added another panel of pegboard to one of our kitchen walls. While it is a relatively simple project, I wrote up a rough how-to guide in case any of you are interested and need a little direction:

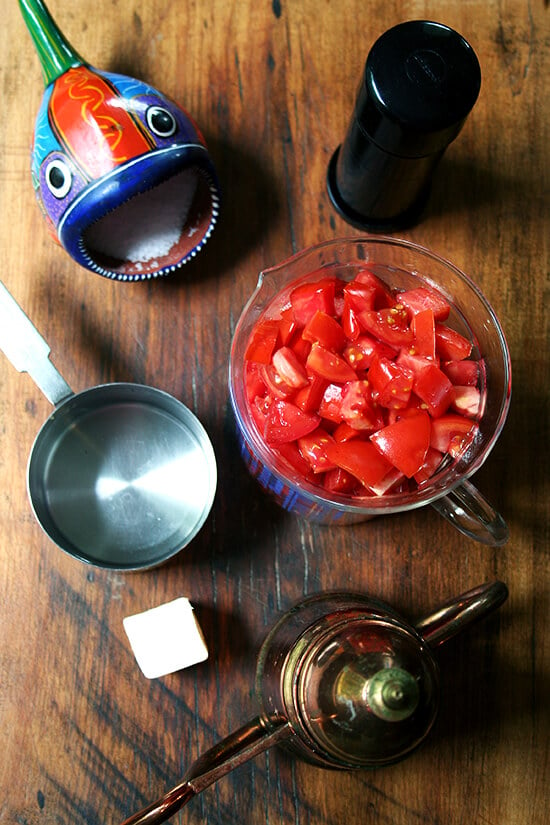
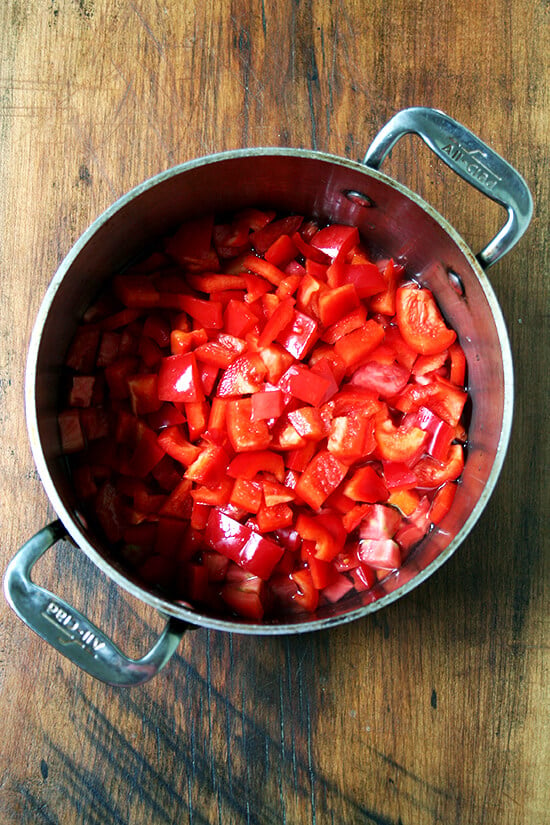
Pot filled with 2 cups tomatoes, 2 cups bell peppers, and 1/2 cup water:
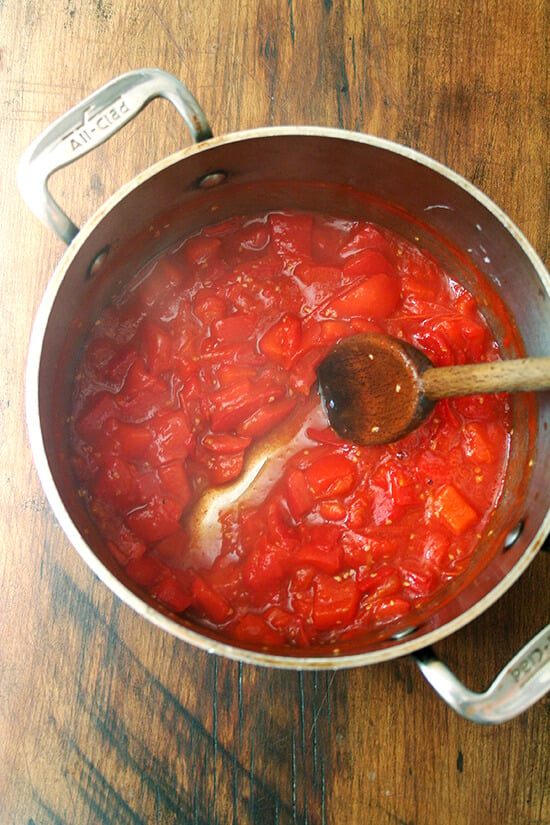
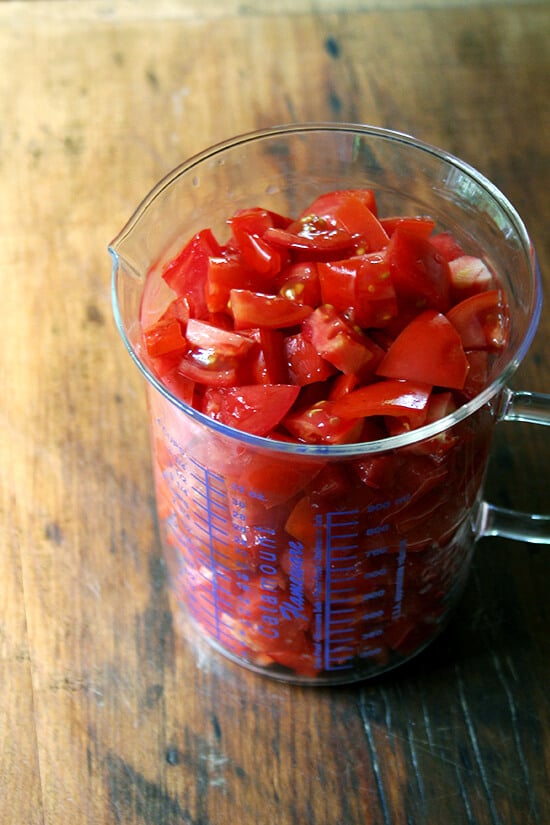
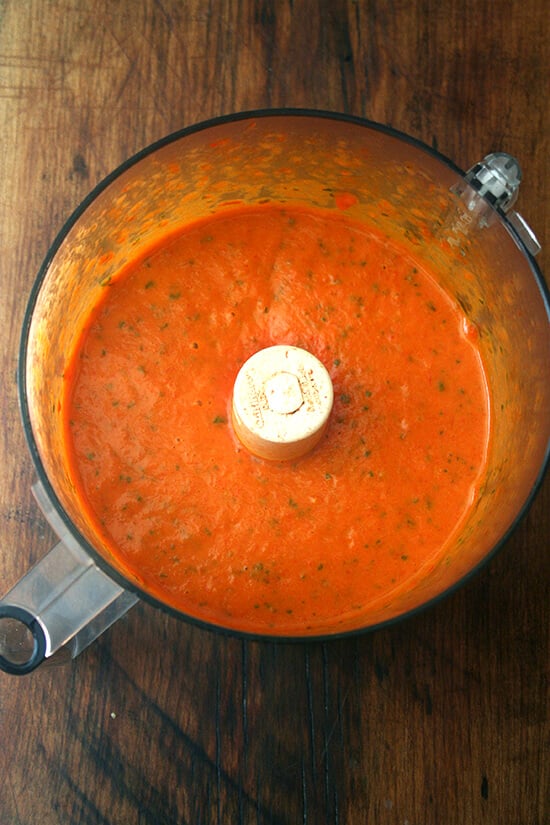
After about 25 minutes of simmering, the sauce will start looking like this. It’s almost ready for the blender at this point:
Now it’s ready:

Description
Inspired by a red pepper tomato sauce in The Tra Vigne Cookbook , the book that introduced me to summer squash spaghetti , another favorite recipe this time of year.
- 2 red bell peppers, stemmed and seeded, diced to yield about 2 cups
- 2 beefsteak tomatoes, diced to yield about 2 cups
- kosher salt and pepper to taste
- 1/4 cup loosely packed fresh basil leaves
- 2 tablespoons butter, room temperature
- 2 tablespoons olive oil
- Place peppers and tomatoes in a medium-sized saucepan or pot. Pour in 1/2 cup water and turn heat to high. Season with 1 teaspoon kosher salt and pepper to taste. Bring to a simmer, then turn heat down to medium high. Set a timer for 25 minutes.
- After about five minutes, the tomatoes and peppers will begin to release their juices, and the whole mixture should be bubbling. Adjust the heat if necessary so that the mixture stays at a constant bubble — medium to medium-high should do it. Stir every five minutes or so to make sure the tomatoes and peppers are not sticking to the bottom of the pan. If they are, add water by the 1/4 cup.
- When the peppers and tomatoes are tender and nearly all of the liquid has evaporated and the tomatoes and peppers are beginning to stick to pot, add the basil, butter, and oil to the pot, give it a stir, then transfer the contents of the pot to a food processor or blender. Blend until smooth. Taste. Adjust seasoning with more salt and pepper as necessary.
- Prep Time: 5 minutes
- Cook Time: 25 minutes
To say that the move north — from the weeks of packing to the two-day drive to the week of unpacking — has taken a toll on the children’s diet would be an understatement. There has been too much takeout, too many salty snacks, too many drive-thru visits. And I fear there has been irreparable damage: A few days ago when I pointed to a bunch of carrots in one of Graham’s favorite books, he, with complete confidence, identified them as, “hotdogs.”
Oiy. In this season of vegetable bounty, there is no excuse. I immediately set to work making a pasta sauce — sauce counts as a vegetable, right? — I learned years ago from The Tra Vigne Cookbook , a recipe Michael Chiarello learned from Jacques Pèpin. In the book, Chiarello pairs the sauce with stuffed chicken thighs and notes that any leftover sauce can be used to poach fish roulades, no doubt a suggestion made by Pèpin.
3-Step Red Pepper Tomato Sauce
There are three distinct phases that occur when making this sauce, and once you can identify them, you’ll never need to refer to this recipe again:
- In phase one, diced tomatoes and peppers simmer with a small amount of water.
- In phase two, the peppers and tomatoes release their juices and the ratio of liquid to solids increases dramatically.
- In phase three, the peppers and tomatoes become meltingly tender and begin sticking to the bottom of the pan as the last bit of liquid evaporates.
After this transformation, which takes about 25 minutes, into the blender go the vegetables along with a handful of basil, a dab of butter and a drizzling of olive oil. Whizzed into a light orange purée, the finished sauce can be used on anything from pizza to eggplant involtini to simple shells garnished with shaved Pecorino, a dish adored by picky children and agreeable adults alike.
To me this sauce is the essence of summer, and while I can’t promise it will work miracles on your toddler’s vocabulary, it might help make strides. Last night, when I pointed to a tomato in the same favorite book, Graham exclaimed, “Apple!” I’ve never been so proud.
Finally, I just want to thank you all so much for your kind words in regard to the last post . Also, we, or Ben I should say, added another panel of pegboard to one of our kitchen walls. While it is a relatively simple project, I wrote up a rough how-to guide in case any of you are interested and need a little direction:
Pot filled with 2 cups tomatoes, 2 cups bell peppers, and 1/2 cup water:
After about 25 minutes of simmering, the sauce will start looking like this. It’s almost ready for the blender at this point:
Now it’s ready:
Description
Inspired by a red pepper tomato sauce in The Tra Vigne Cookbook , the book that introduced me to summer squash spaghetti , another favorite recipe this time of year.
- 2 red bell peppers, stemmed and seeded, diced to yield about 2 cups
- 2 beefsteak tomatoes, diced to yield about 2 cups
- kosher salt and pepper to taste
- 1/4 cup loosely packed fresh basil leaves
- 2 tablespoons butter, room temperature
- 2 tablespoons olive oil
- Place peppers and tomatoes in a medium-sized saucepan or pot. Pour in 1/2 cup water and turn heat to high. Season with 1 teaspoon kosher salt and pepper to taste. Bring to a simmer, then turn heat down to medium high. Set a timer for 25 minutes.
- After about five minutes, the tomatoes and peppers will begin to release their juices, and the whole mixture should be bubbling. Adjust the heat if necessary so that the mixture stays at a constant bubble — medium to medium-high should do it. Stir every five minutes or so to make sure the tomatoes and peppers are not sticking to the bottom of the pan. If they are, add water by the 1/4 cup.
- When the peppers and tomatoes are tender and nearly all of the liquid has evaporated and the tomatoes and peppers are beginning to stick to pot, add the basil, butter, and oil to the pot, give it a stir, then transfer the contents of the pot to a food processor or blender. Blend until smooth. Taste. Adjust seasoning with more salt and pepper as necessary.
- Prep Time: 5 minutes
- Cook Time: 25 minutes
Find it online : https://alexandracooks.com/2013/08/22/shells-with-red-pepper-tomato-sauce-also-more-pegboard/
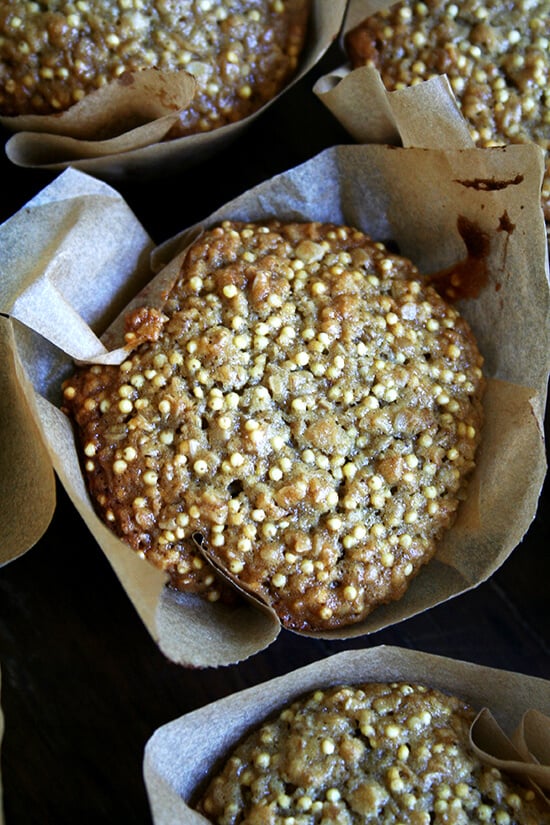
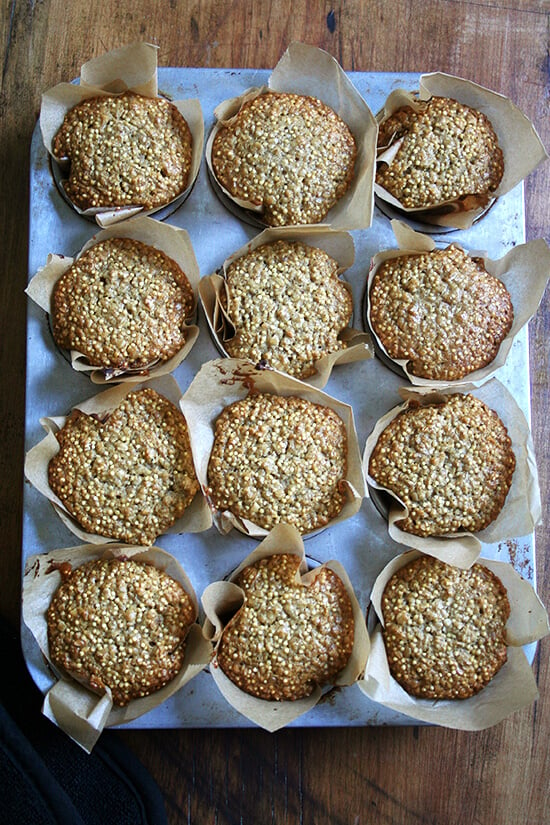
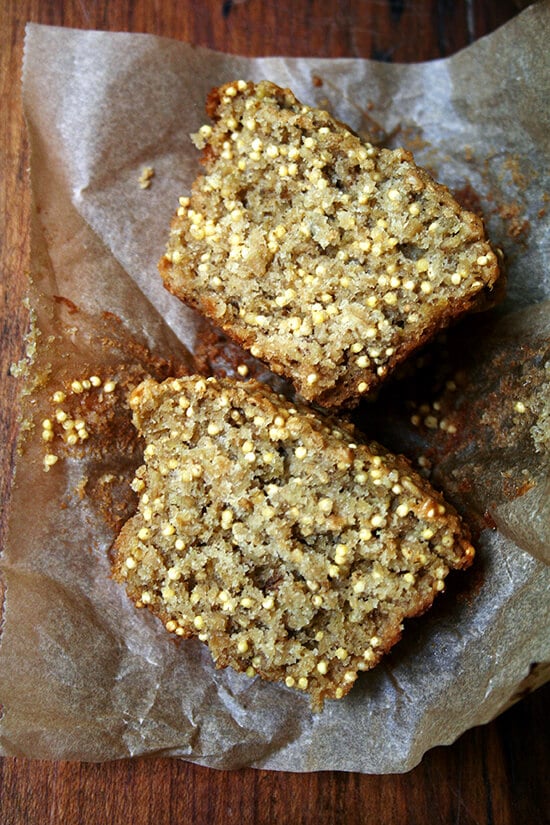
Every time I visit Philadelphia, I have high hopes of hitting up all of my favorite spots: La Colombe for a cappucino, Cafe Lutecia for a croissant, Ding Ho for fresh rice noodles , Reading Terminal Market for a soft pretzel, Fork for brioche French toast and Metropolitan Bakery for a millet muffin.
But on a recent overnight visit I had time for neither a coffee nor a croissant, and I returned home craving all of my favorite carbs but most of all a brown-sugar, millet-studded muffin.
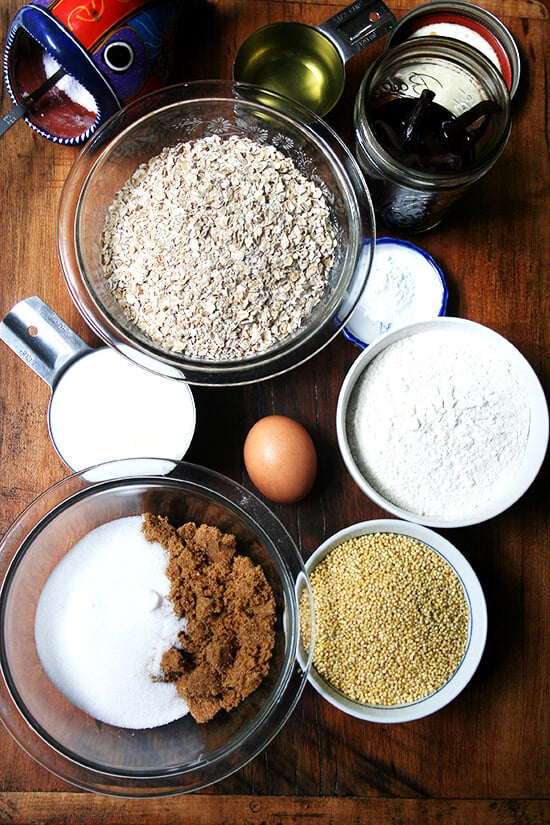
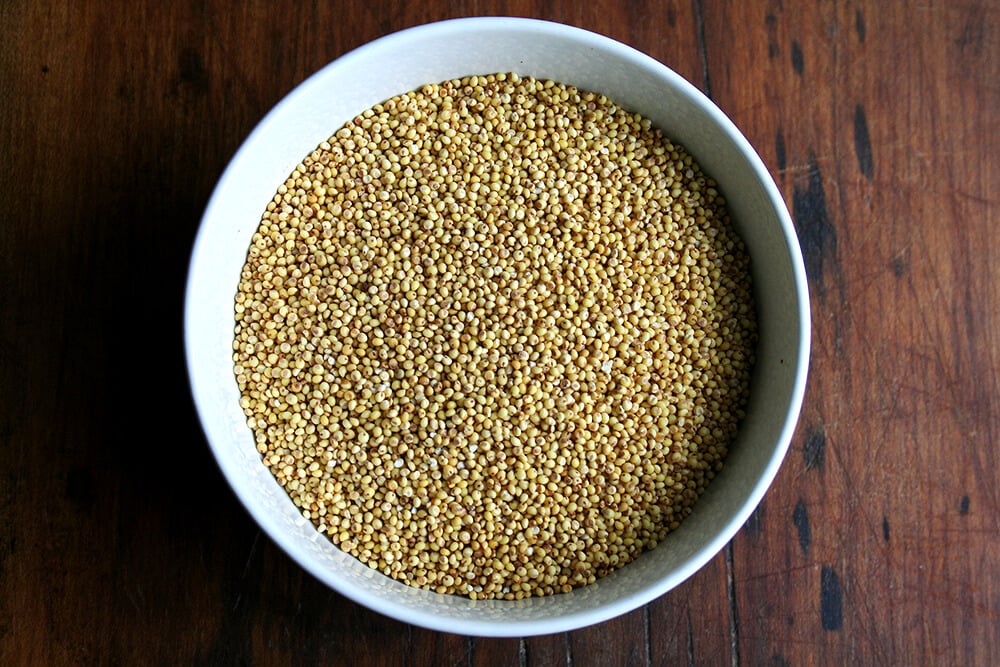
Having tried unsuccessfully in the past to make these muffins at home, I knew I had my work cut out for me. And to be polite to you, I’ll spare you the details of all of the various rounds and focus on the end product: a one-bowl, hand-mixed batter, made with oil not butter, a mix of brown sugar and white, buttermilk, and an astonishing amount of oats and millet, a seed that offers a delightful crunch and nutty flavor.
The inspiration for the makeup of this batter comes from Tazzaria’s oatmeal muffin , an all-time favorite and one that happens to be, as far as muffins go, on the healthy side.
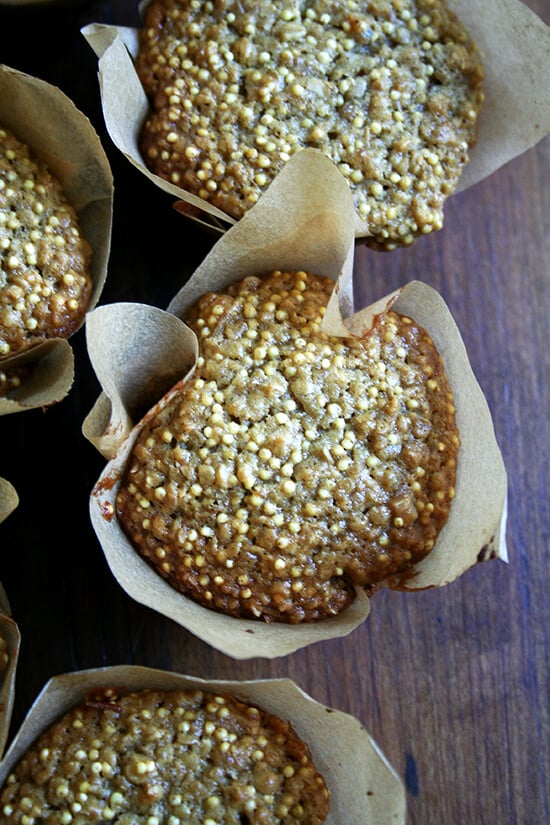
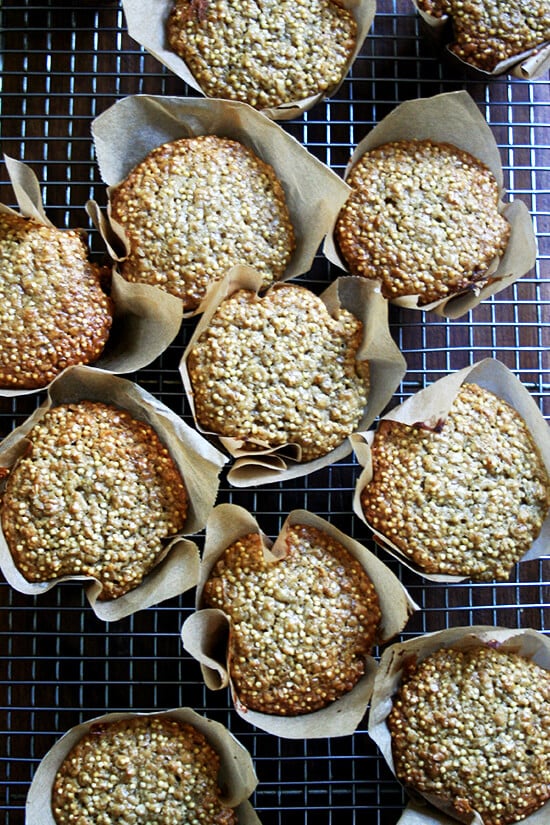
In the end, the millet muffins here resemble Metropolitan’s mostly by way of the ratio of millet in each bite: a full cup of raw millet goes into a standard 12-cup recipe.
If you’ve never experienced a baked good loaded with millet, you’ll likely be suspicious. I promise you, however, one bite of these seedy muffins will convince you that these teensy pearls should be relegated to the birds no more. Happy Baking!
Millet Notes
- Where to buy? Millet can be hard to come by if you don’t live near a health food market or a Whole Foods or something of the like, and it is often located in the bulk section of these places.
- Gluten Free. Millet is gluten free, and because oats (when noted) are also gluten free, this recipe can easily be made gluten free: just substitute one cup of your favorite gluten-free flour mix (homemade or otherwise: I’ve had success with Hodgson Mill and C4C ) for the one cup of flour and be sure to use gluten-free oats

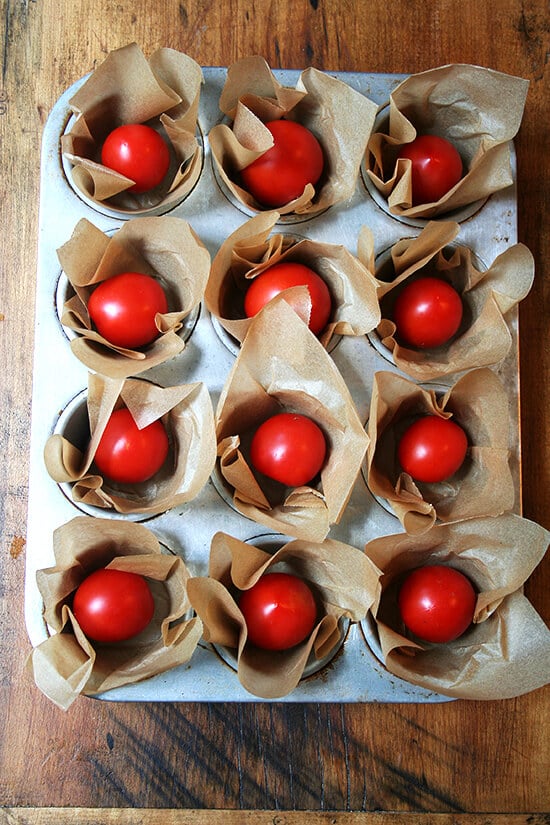
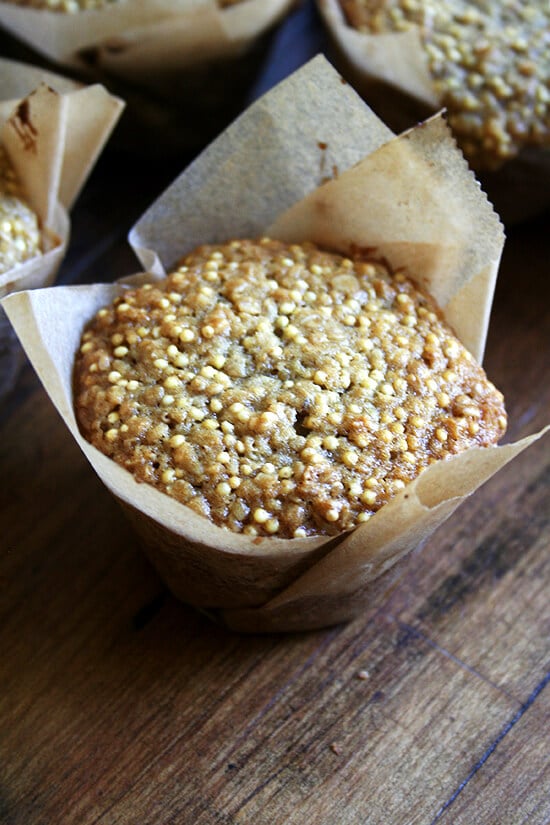
If you find yourself without muffin liners, you can make them out of parchment paper. Filling these liners is easier if you make them before you mix up your batter and weigh them down with a tomato or anything that fits in the cup:
Description
Inspired by this recipe in Bon Appetit
Original recipe hails from Tazzaria
Notes:
• If you don’t have millet, make these oatmeal muffins , the recipe that inspired this one and one of my all-time favorites.
• This muffin batter can be made ahead of time and baked off as you wish: the muffins taste as good on day 8 as on day 1.
• If you do want to bake off the whole recipe in one go, use a quarter cup measuring cup to fill your standard pan. You’ll have some leftover batter, likely enough for 1 jumbo muffin or a few small muffins. Try to refrain from dividing that leftover batter among the filled cups — the muffins bake more evenly when they are not over filled, and you can always bake off the remaining batter in a greased or lined ramekin.
• You can make your own liners by cutting sheets of parchment paper approximately into 5×5-inch squares. It’s kind of a pain to do this, but they look pretty, and they work remarkably well. As noted in the photo above, it’s helpful to make the liners before you mix up the batter and to weigh down each one with anything that will fill in the cup. I also love these liners .
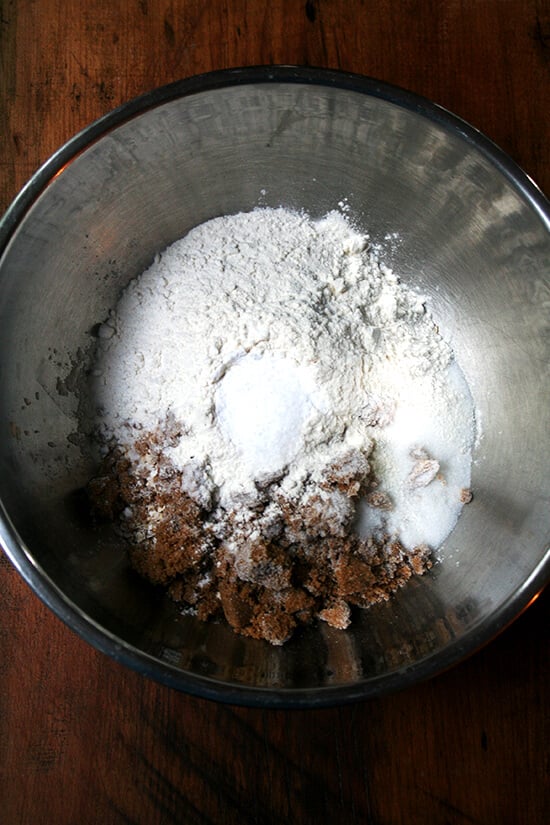
- 2 1/3 cups ( 230g ) quick-cooking oats*
- 1 cup ( 136g ) all-purpose flour or gluten-free flour if you are making gluten-free muffins
- 1/2 cup ( 114g ) packed, dark brown sugar (light would probably be just fine)
- 1/2 cup ( 116g ) sugar
- 1 1/2 teaspoons baking soda
- 1 teaspoon kosher salt
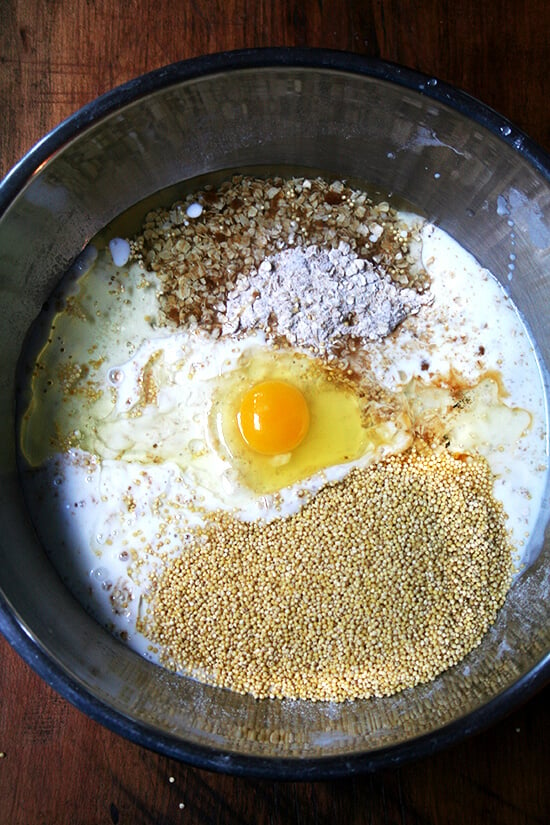
- 1 cup buttermilk
- 1/2 cup canola oil
- 1 large egg
- 1 teaspoon vanilla extract
- 1 cup millet
- 1/3 cup boiling water
*I have the best results using the 1-minute Quaker Oats but rolled oats work just fine, too. And although I haven’t tried this, I bet you could quickly pulse rolled oats in a food processor to make them behave more like quick-cooking oats. If you want to make gluten-free muffins, make sure to buy gluten-free oats.
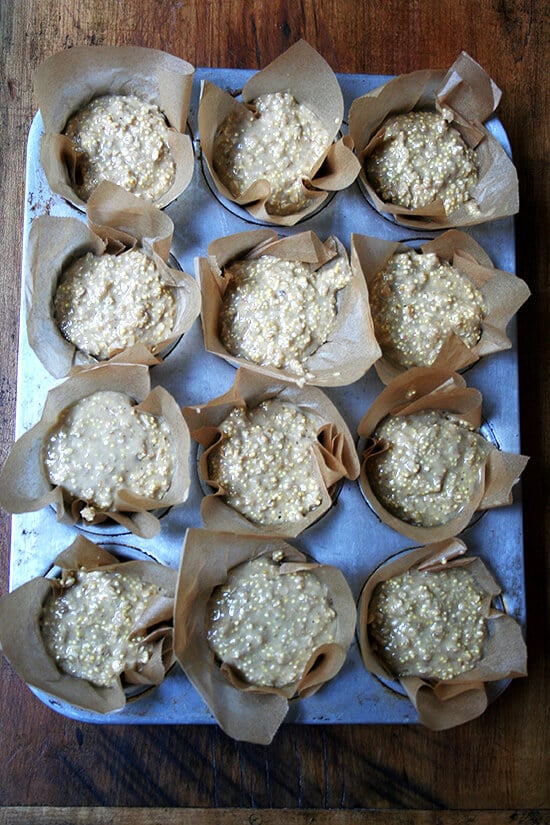
- Preheat oven to 375°F. Spray a standard muffin pan (12-cup) with nonstick spray or line them with paper muffin liners. Whisk oats, flour, sugars, baking soda and salt together. Add buttermilk, oil, egg, vanilla and millet. Whisk to blend. Stir in 1/3 cup boiling water and let stand 5 minutes. Batter will be on the wet side. Divide batter among prepared muffin cups, filling each one no more than 3/4 full.
- Bake muffins until tester inserted into center comes out clean, 25 to 30 (maybe as many as five minutes longer) minutes. Cool 10 minutes. Turn muffins out onto rack; cool. Serve warm or at room temperature.
- Prep Time: 10 minutes
- Cook Time: 30 minutes
- Category: Muffin
- Method: Bake
- Cuisine: American
