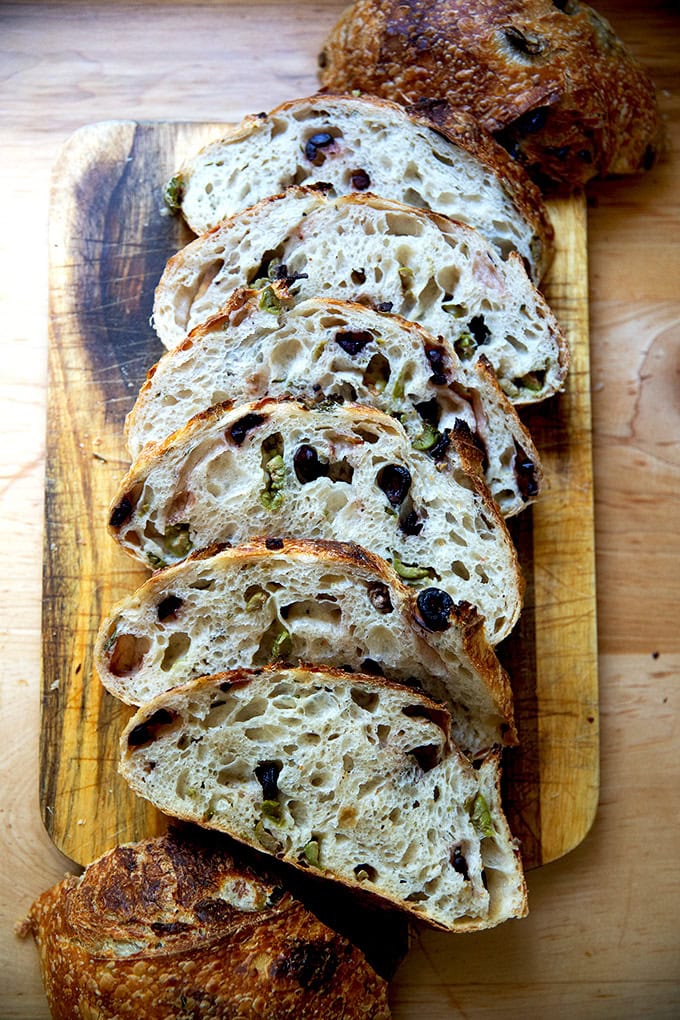
Loaded with olives, scented with rosemary, this sourdough loaf is so flavorful and fragrant, perfect for serving with good olive oil or, of course, with dinner. This recipe employs a lamination method to incorporate the olives and rosemary into the dough, which helps them disperse evenly throughout the baked loaf.

Recently, I saw a recipe for an olive sourdough bread recipe that employs a different technique: lamination. Lamination calls for spreading the dough into a thin rectangle, scattering the inclusions over the top, then folding the dough envelope-style from right to left, then top to bottom.
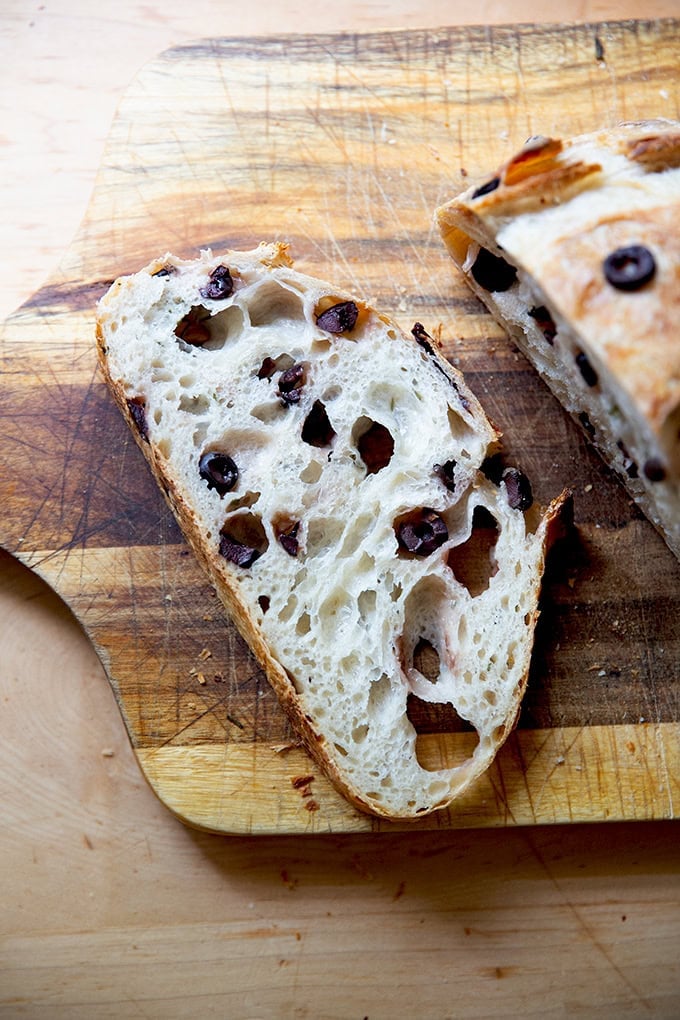
I tried the method using this simple sourdough recipe and was astonished to find the method not only to be easier than it looked but also easier than stretching and folding. Moreover, it was more effective than the stretch-and-fold method: it more evenly dispersed the olives through the crumb of my baked loaf of bread.
Find a recipe for a rosemary-olive loaf below, but use the method as you wish and laminate away with jalapeños and cheddar, dried cranberries and walnuts, or any combination your heart desires. Step-by-step instructions and video guidance follow 🫒🍞

How to Make Rosemary-Olive Sourdough Bread, Step by Step
The base of this recipe is this simple sourdough bread recipe , which requires four ingredients: water, salt, sourdough starter, and bread flour:
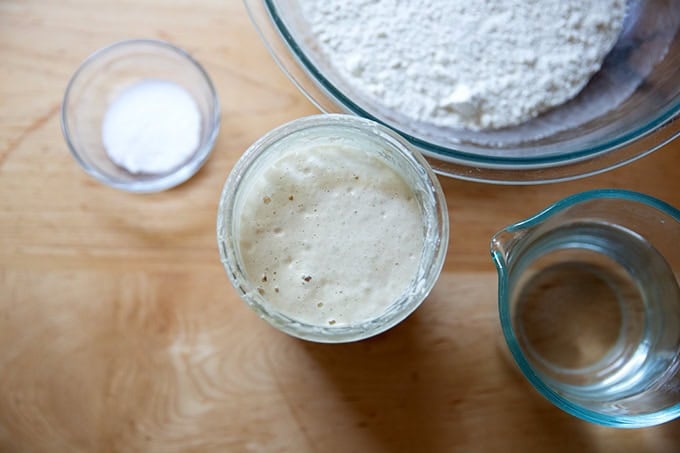
Start by stirring the salt and sourdough starter into the water in a large bowl:
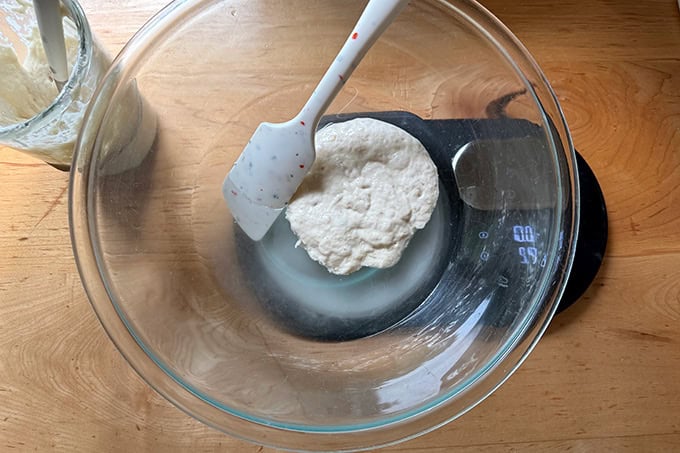
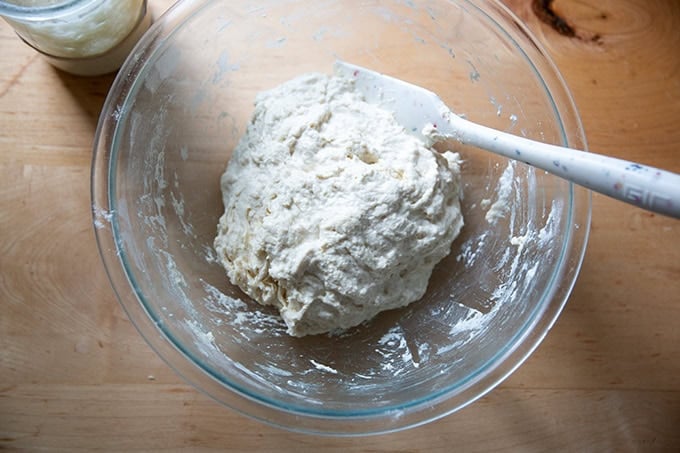
Then add the flour and…
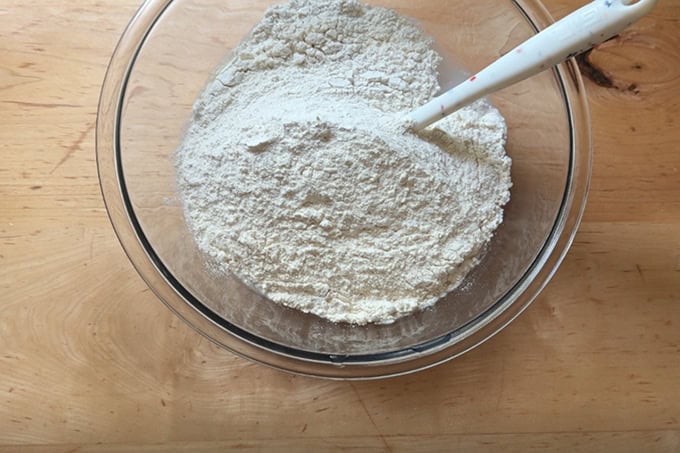
… stir until you have a sticky dough ball:
Let the dough rest for 30 minutes…
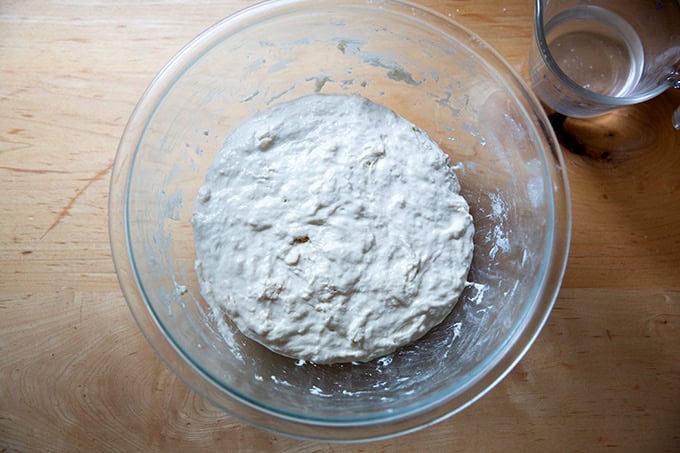
… then stretch and fold it:
Let it rest for one hour…
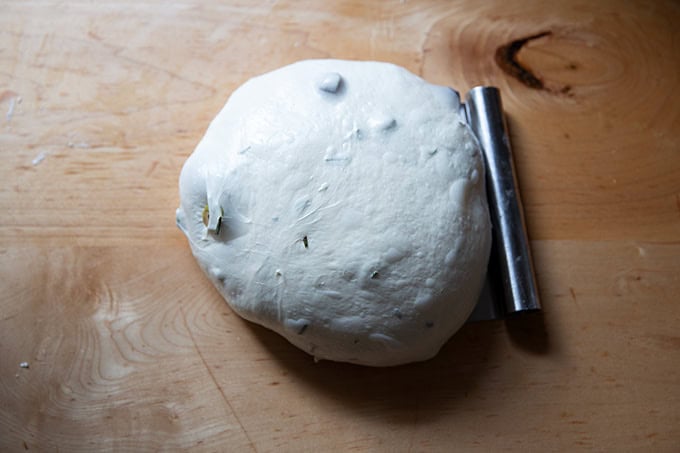
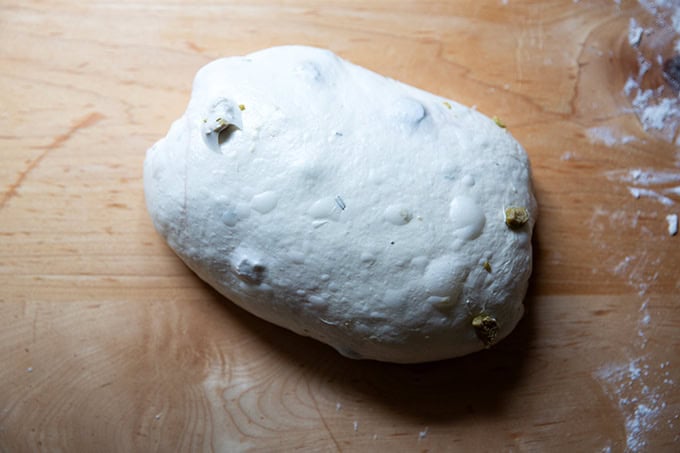
… then turn it out onto a lightly oiled work surface:
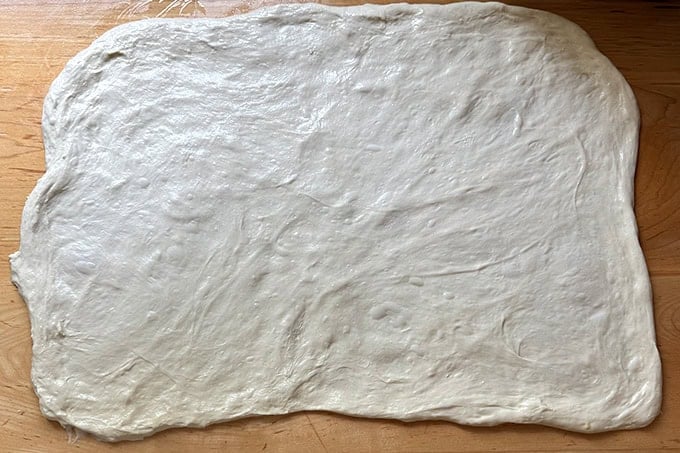
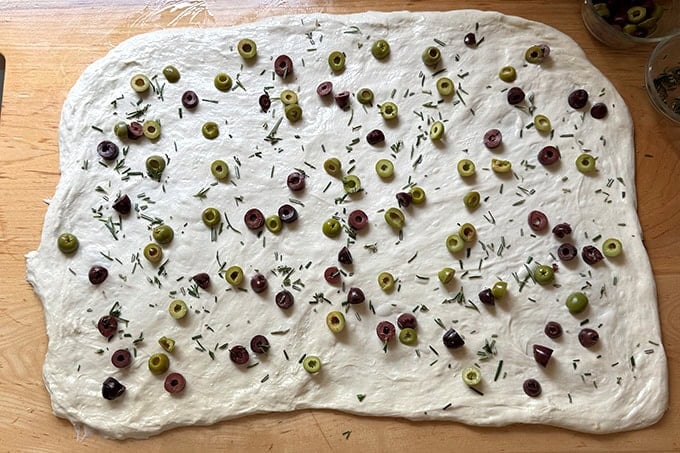
Sprinkle olives and rosemary over the dough, reserving a small portion of them for the next step…
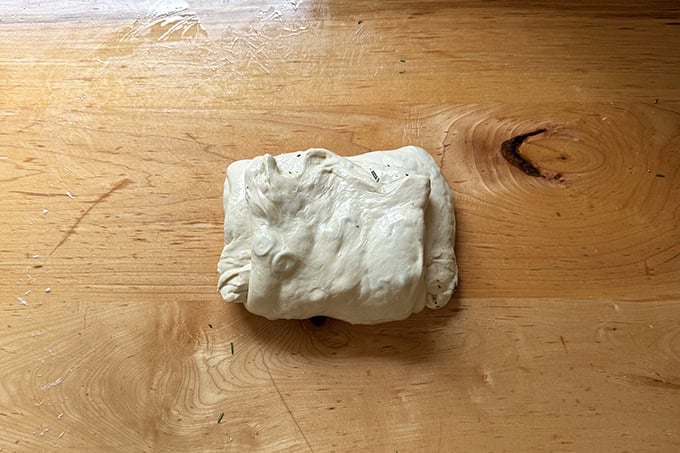
Fold the dough envelope style, starting at one of the short ends:

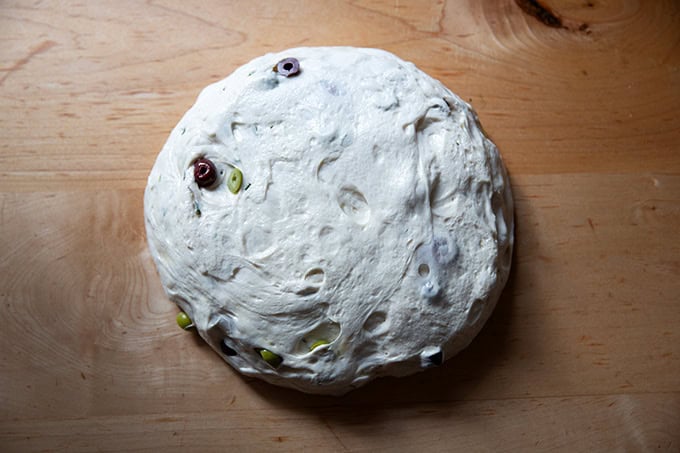
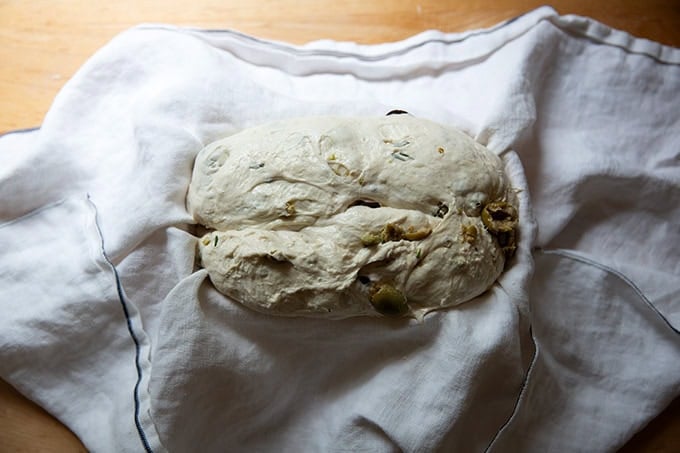
Sprinkle the remaining olives over the bottom two-thirds of the dough, then…

…fold the dough envelope-style again, starting from the top.
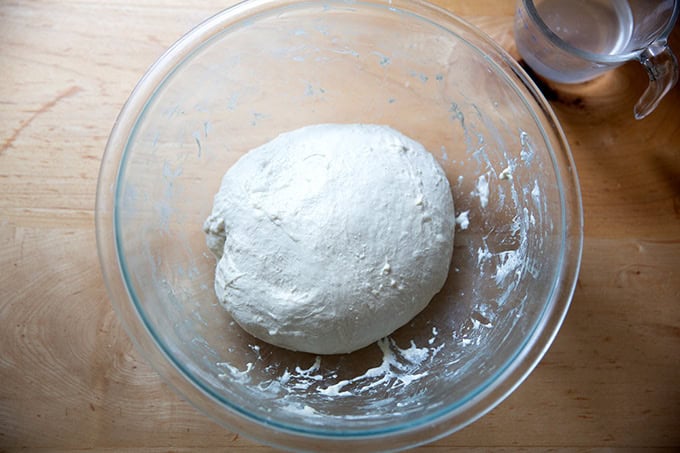
Return your folded bundle to your bowl, cover it, and let it rest …
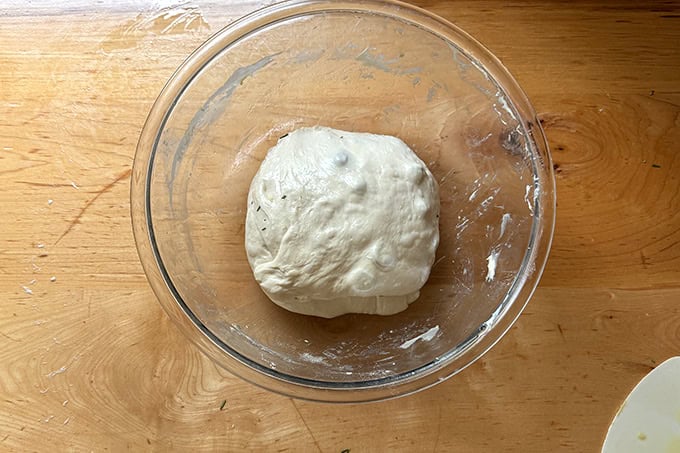
… for one hour:
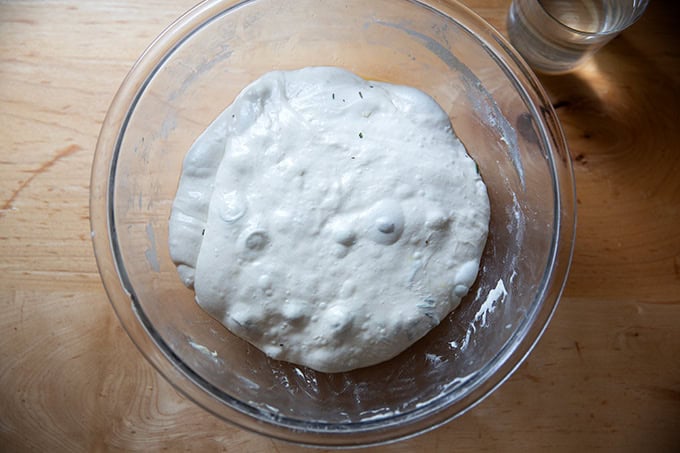
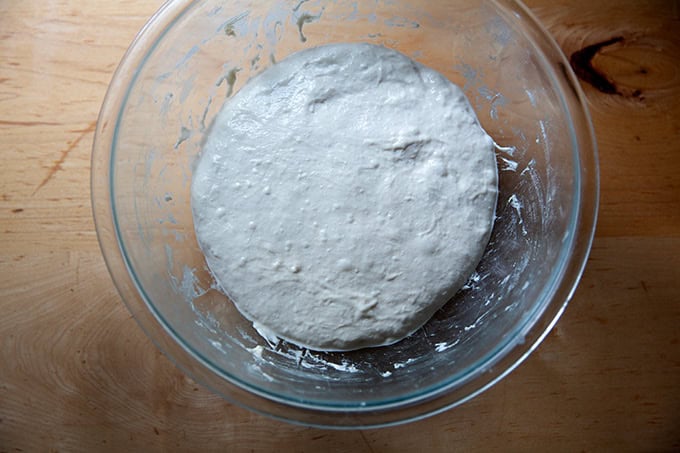
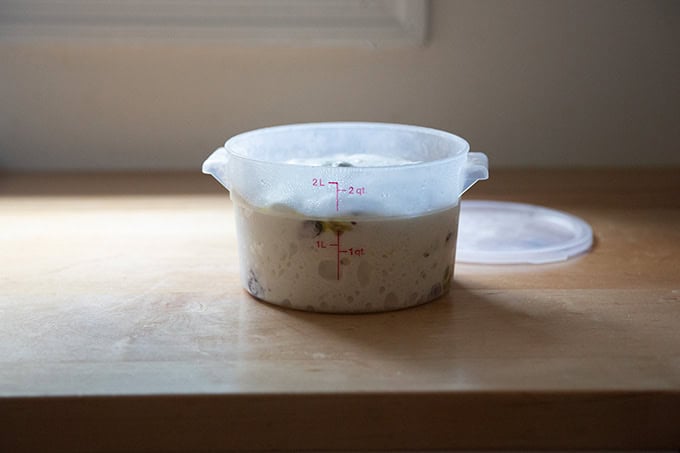
Transfer the dough to a straight-sided vessel and let it rise until…
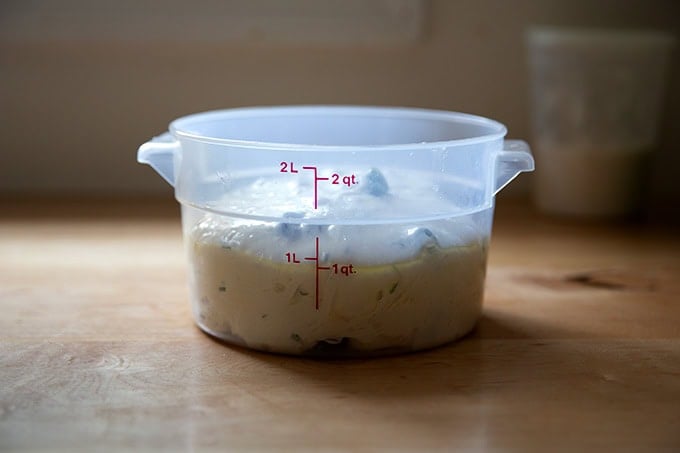
… it has increased in volume by 50-75%.

Turn the dough out onto a work surface, and shape it into a ball.
Let it rest seam-side up for 30 to 60 minutes.
Then shape it into a ball or a batard. I find I get a much more open crumb when I shape my sourdough loaves into a batard. Watch this video for guidance:
Place your shaped loaf, seam-side up into a flour sack lined banneton. Pinch the seam closed…
… then fold the towel over the dough to cover it:
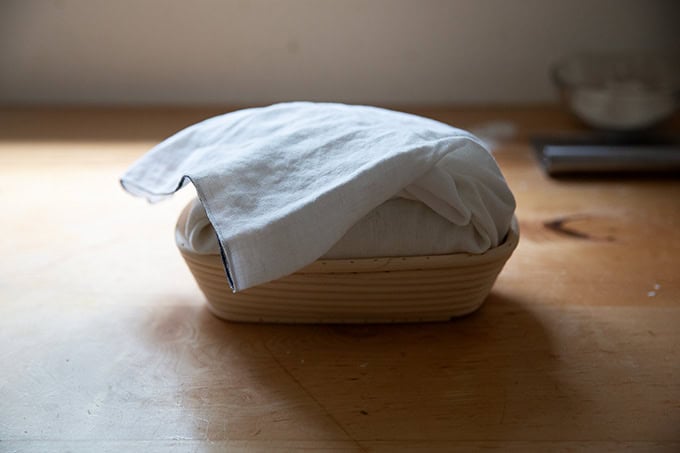
Tuck the whole bundle into an airtight bag and transfer to the fridge for 24-48 hours.

Remove the loaf from the fridge…
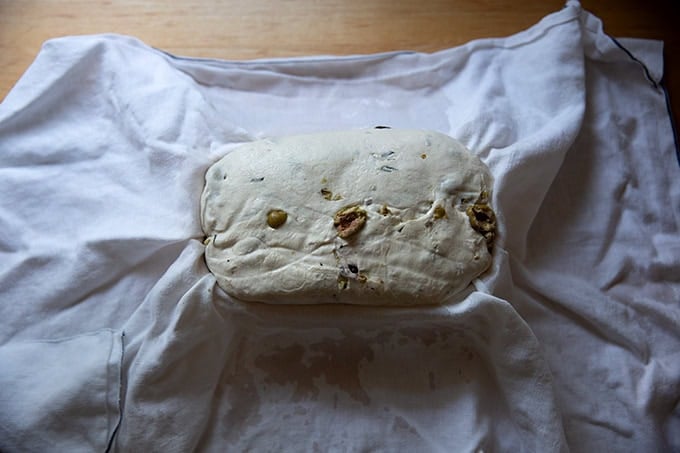
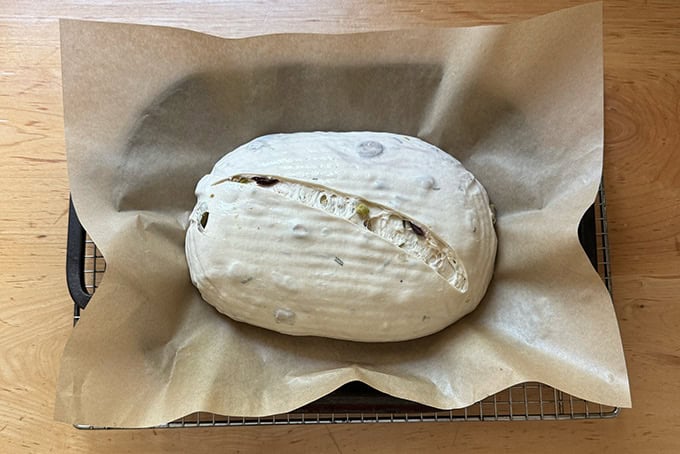
…. and turn it out onto a sheet of parchment paper.

Score it and transfer it to a preheated Dutch Oven:
Bake it as directed in the recipe below, covered for 30 minutes, then…
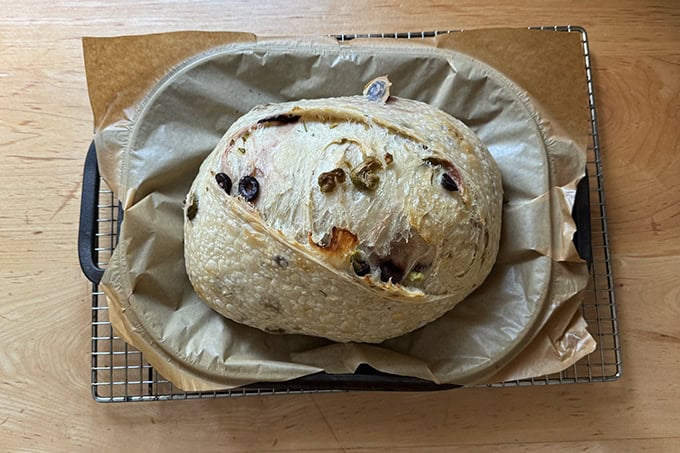
… uncovered for 15 minutes more or until browned to your liking.
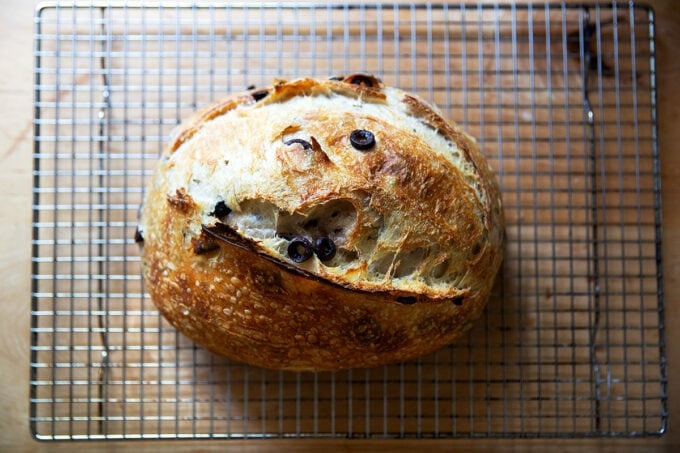
Nice ear:
<img loading=“lazy” src=“https://alexandracooks.com/wp-content/uploads/2025/08/ear_alexandraskitchen.jpg" onerror=“this.onerror=null;this.src=‘https://blogger.googleusercontent.com/img/a/AVvXsEhe7F7TRXHtjiKvHb5vS7DmnxvpHiDyoYyYvm1nHB3Qp2_w3BnM6A2eq4v7FYxCC9bfZt3a9vIMtAYEKUiaDQbHMg-ViyGmRIj39MLp0bGFfgfYw1Dc9q_H-T0wiTm3l0Uq42dETrN9eC8aGJ9_IORZsxST1AcLR7np1koOfcc7tnHa4S8Mwz_xD9d0=s16000';" alt=“A close-up shot of the “ear” on a loaf of just-baked sourdough bread. - 32”>
Nice open crumb, with olive dispersed throughout:
Description
Loaded with olives, scented with rosemary, this sourdough loaf is so flavorful and fragrant, perfect for serving as an appetizer alongside good olive oil or, of course, with dinner. This recipe employs a lamination method to incorporate the olives and rosemary into the dough, which helps them disperse evenly.
Method adapted from What’s Stephanie Baking?
Notes:
For best results, please use a scale to measure.
Salt: The rule of thumb with bread is that the weight of the salt should be 2 to 3% the weight of the flour. For this recipe, the amount is 10 to 15 grams. I find 12 grams of salt here to be perfect, given that the olives lend a bit of saltiness to the loaf. Finally, I always use Diamond Crystal kosher salt, but you can use fine sea salt or whatever salt you like.
Sourdough Starter: You need an active sourdough starter. You can make one from scratch or you can buy one. I have had success activating starters from: King Arthur Flour Breadtopia
I loved these two-quart vessels for the bulk fermentation.
This is the Dutch Oven I use for sourdough bread. I used this Dutch oven for years, and it’s a great one, too.
I love these Flour Sack Towels.
For proofing, I use an oval banneton . You need something roughly 10 inches in length. You can use a circle one, too, if you are shaping your loaf into a round.
Sharp knife: This one is reasonably priced.
375 g (about 1 1/2 cups ) room temperature water
12 g ( 2.5 teaspoons ) salt, see notes above
100 g ( 1/2 cup ) bubbly, active starter, see notes above
500 g ( 4 cups plus 2 tbsp ) bread flour
extra-virgin olive oil, for drizzling
5 ounces pitted olives, any variety (I use a mix of Castelvetrano and Kalamata), sliced
2 tablespoons fresh rosemary
- Make the dough: Place the water in a large bowl. Stir in the salt followed by the sourdough starter, using a spatula to incorporate — it’s OK if the starter is not fully incorporated. Add the flour and mix with a spatula until you have a sticky dough ball. Cover the bowl and let the dough rest for 30 minutes.
- Stretch and fold: Using a wet hand, grab a corner of the dough and pull it up and into the center. Repeat until you’ve performed this series of folds 8 to 10 times with the dough. As you stretch and fold, you should feel the dough transform from shaggy and rough to smooth and elastic. Slapping and folding the dough helps here, too. (Watch the video for guidance.) Cover the bowl and let the dough rest for one hour.
- Laminate the dough: Lightly oil a large area of a work surface. Uncover the bowl and drizzle oil around the edge of the dough. Use a flexible bench scraper, if you have one, to release the dough from the sides of the bowl, turning it out onto your prepared work surface, reserving the bowl. (Use your hands if you do not have a scraper.) Spread the dough, using lightly oiled hands if necessary to prevent sticking, into a large thin rectangle, roughly 15×20 inches. Spread 4 ounces of the olives over the surface of the dough, followed by 1.5 tablespoons of the rosemary. Gently press the rosemary and olives into the dough, then fold the dough envelope-style style starting from the right shorter edge: fold the right edge of the dough toward the left to cover two-thirds of the dough; then fold the left edge of the dough to the right to cover it completely. Sprinkle the remaining olives and rosemary over the bottom two-thirds of the dough, then fold it again envelope-style, starting from the top edge: fold it down to cover two-thirds of the dough, then fold the bottom edge over to completely cover the top. Lift up your folded bundle and return it to the bowl. Cover the bowl and let the dough rest for one more hour.
- Stretch and Fold one last time: Using two wet hands, gently lift the dough up from the center stretching it long, allowing the edges to fold underneath it. (See video for guidance.) Fold the dough in half once or twice more, again see video for guidance, ultimately forming the dough into a rough ball.
- Bulk Fermentation (first rise): Transfer the dough to a straight-sided vessel to rise. Cover the vessel and let the dough rise at room temperature until it has increased by 50% to 75% in volume, has a few bubbles on the surface, and jiggles when you move the bowl from side to side. Depending on the time of year and the temperature of your kitchen, this will take more or less time (anywhere from 5 to 10 hours). Rely on the visual cues as opposed to the hours it has risen.
- Shape and Rest: Coax the dough onto a clean work surface — I prefer to do this without flour, but lightly flour the work surface if the dough is sticking to it or your hands. Gently shape the dough into a round: fold the top down to the center, turn the dough, fold the top down to the center, turn the dough; repeat until you’ve come full circle. If you have a bench scraper, use it to push and pull the dough to create tension. Lightly flour part of your work surface, if you haven’t already, and let the dough rest seam side up for 30 to 60 minutes.
- Proof the dough: Line a 10-inch banneton, see notes above, with a flour sack towel. If you are not using a flour sack towel and are worried the dough might stick, lightly dust it with flour or rice flour. If you are shaping your dough into a round, using a bench scraper or your hands, shape it again as described in step 6. Place the round into your lined bowl, seam side up. If you are shaping it into a batard, please watch this video . Once your shaped loaf is in your banneton with the seam side up, using lightly floured hands, pinch the seam closed as best you can, then fold the towel over the dough to cover it. Place the whole bundle into an airtight bag (such as a produce bag or a 2-gallon ziptop bag), and transfer it to the fridge, ideally for at least 24 hours or for as long as 48 hours. You can get away with less time in the fridge if necessary.
- Prepare the oven: Forty-five minutes before you plan on baking, place a Dutch oven in your oven, and preheat it to 450°F. Cut a piece of parchment to fit the size of your loaf/baking pot.
- Score: Remove your bundle from the fridge, unwrap the towel, and place the parchment paper over the dough, securing it with your hand. Invert the banneton to release the dough onto the parchment paper and onto your countertop. Using the tip of a small knife or a razor blade, score the dough however you wish — a simple slash is always nice. Use the parchment to carefully transfer the dough into the preheated baking pot.
- Bake: Bake the loaf for 30 minutes, covered. Remove the lid, lower the temperature to 400ºF, and continue to bake for 10 – 15 minutes more or until the loaf is browned to your liking. Cool on a wire rack for 30 minutes before slicing.
- Store the bread: This loaf will stay fresh up to 3 days stored at room temperature in an airtight plastic bag or container. It freezes beautifully, too.
- Prep Time: 2 days
- Cook Time: 45 minutes
- Category: Bread
- Method: Sourdough/Natural Leavening
- Cuisine: American
Find it online : https://alexandracooks.com/2025/08/16/rosemary-olive-sourdough-bread-a-better-way-to-add-inclusions-to-your-sourdough-bread/
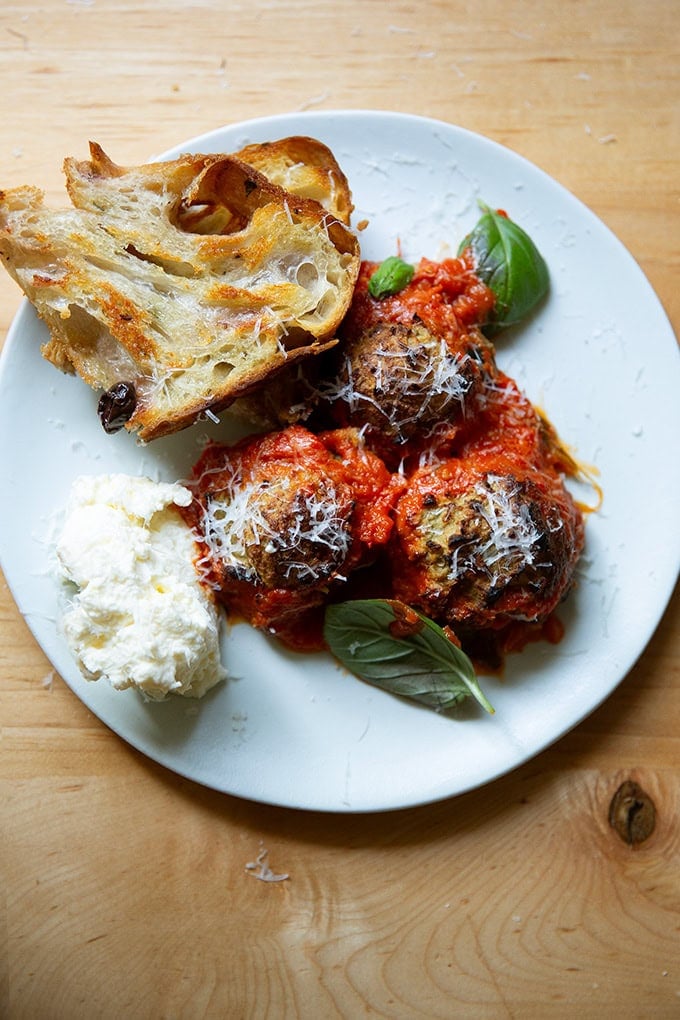
Made with just 6 ingredients, these eggplant meatballs are roasted not fried, making the process wonderfully hands-off. Simmered in sweet, fresh tomato sauce and served alongside ricotta and toasty bread, these meatless balls make a delicious and summery vegetarian meal.
A few weeks ago, my daughter and I dined at a local restaurant whose menu featured eggplant meatballs with Hazan tomato sauce and housemade ricotta . I ordered them, loved them, and began experimenting with various recipes in the days that followed.
One method called for sautéing diced eggplant, skin and all, before puréing the flesh with seasonings and binders; another called for roasting the eggplant whole before doing the same. One method called for pan-frying the shaped meatballs, another called for roasting.
Ultimately, I preferred the roasting method at both phases, which makes the process more hands-off overall. To make these meatballs, in sum, you’ll roast a few eggplants whole, drain the flesh briefly, then purée it with garlic, Parmigiano Reggiano, and an egg, before folding in breadcrumbs. Then you’ll form the purée into balls and roast them, before simmering them briefly in tomato sauce.
To be clear: there is no meat in these meatballs! They taste like little bombs of eggplant parm and make a nice little side dish or a great vegetarian meal on their own aside healthy dollops of fresh ricotta and good, olive oil-toasted bread . I hope you love them, Friends! 🍆🍅🎉
Roasted Eggplant Meatballs, Step by Step
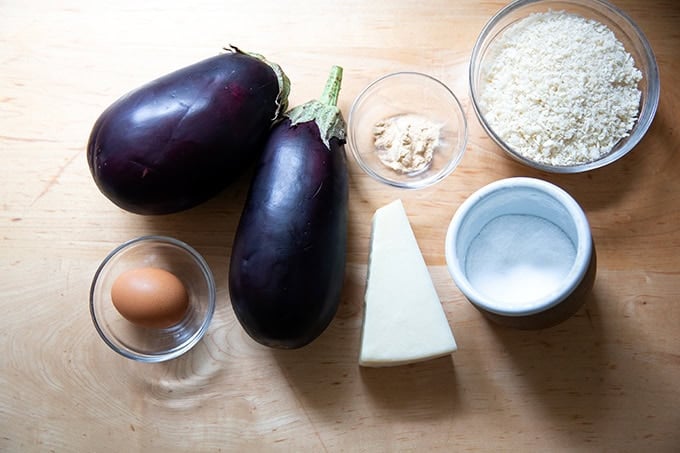
First, gather your ingredients: eggplants, egg, salt, bread crumbs, parmesan, and garlic powder or fresh garlic.
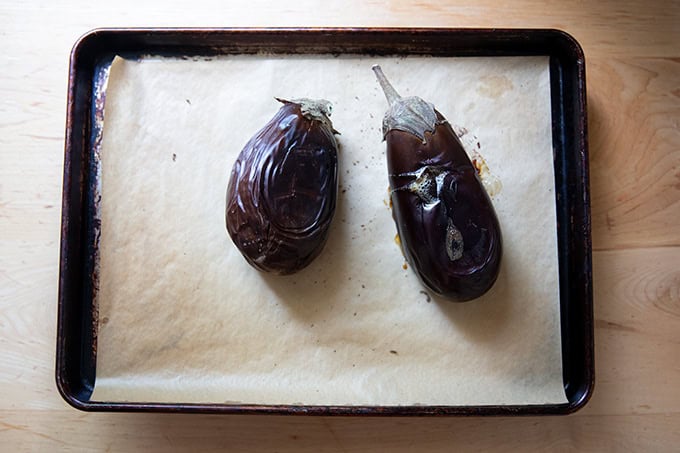
To start, make some slits in the eggplant and roast for 45 minutes, flipping halfway, until the eggplant is charred all around:
When the eggplant is cool enough to handle, peel away the skin …
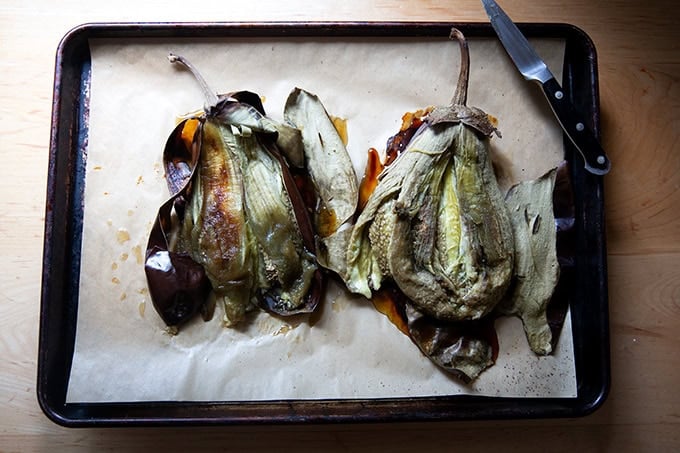
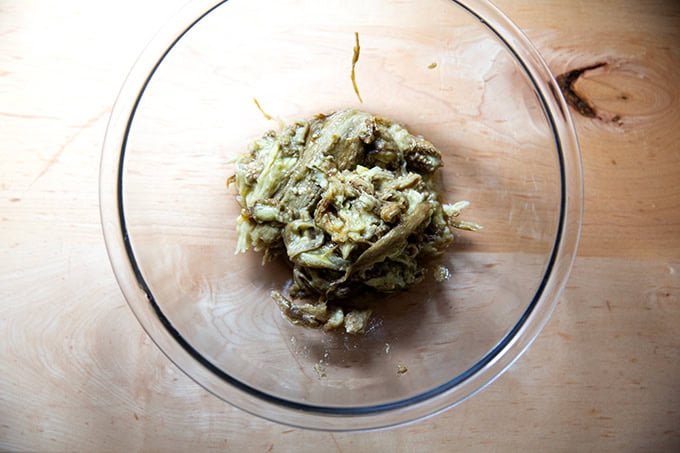
… then transfer the flesh to a colander to drain for at least 30 minutes.
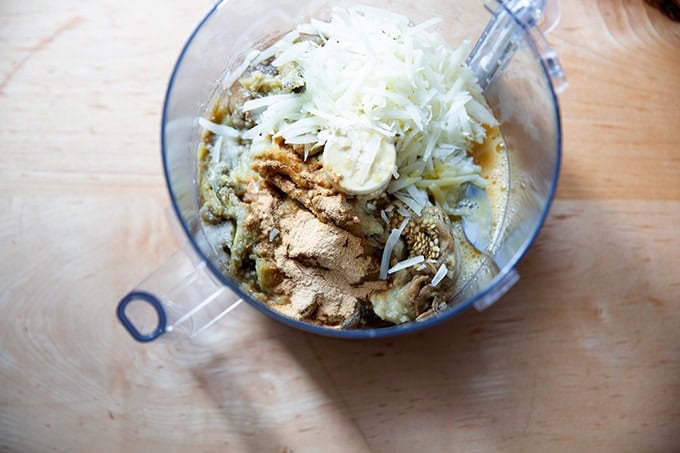
Transfer the eggplant flesh to a food processor with the egg, salt, garlic, and parmesan:
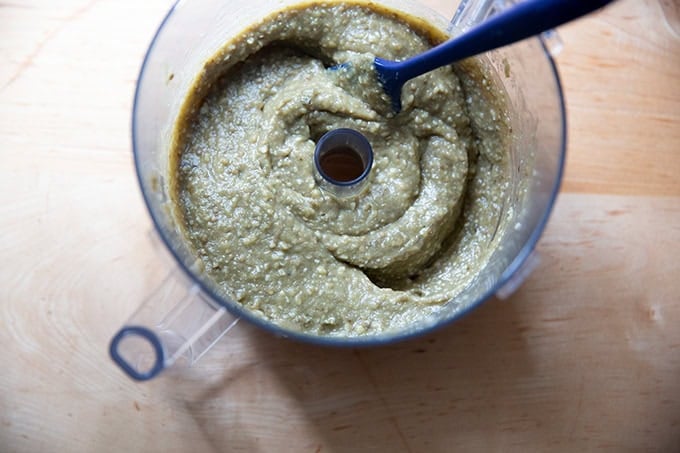
Purée until smooth:
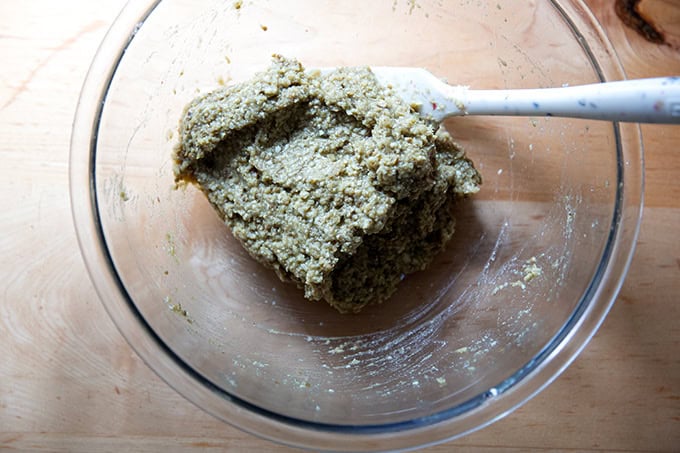
Transfer the flesh to a large bowl and stir in the bread crumbs:
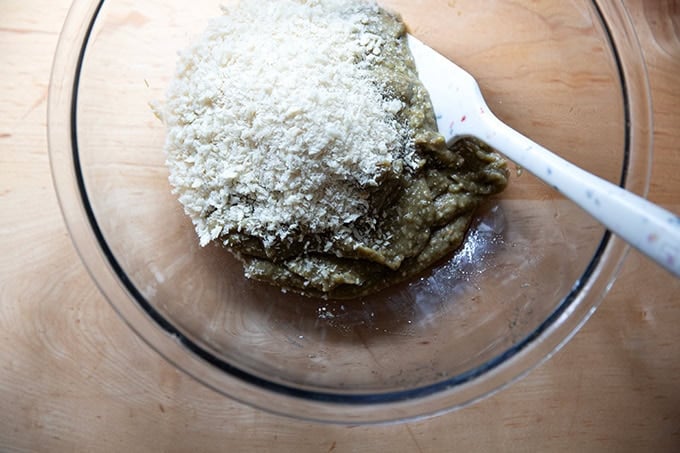
You should have a wet but workable paste.
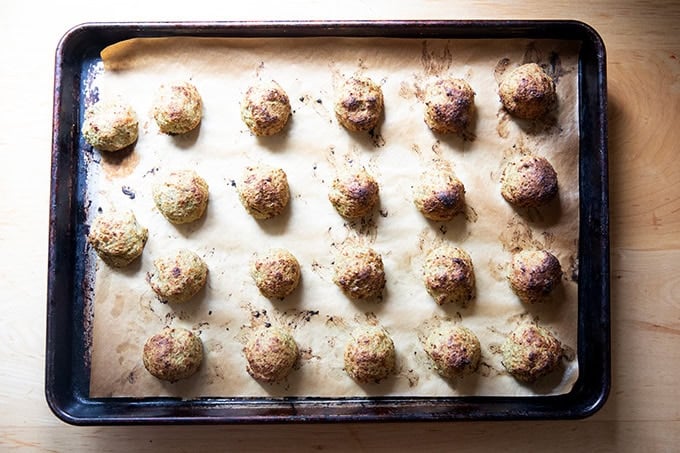
Using a small scoop, portion the mixture onto a sheet pan:
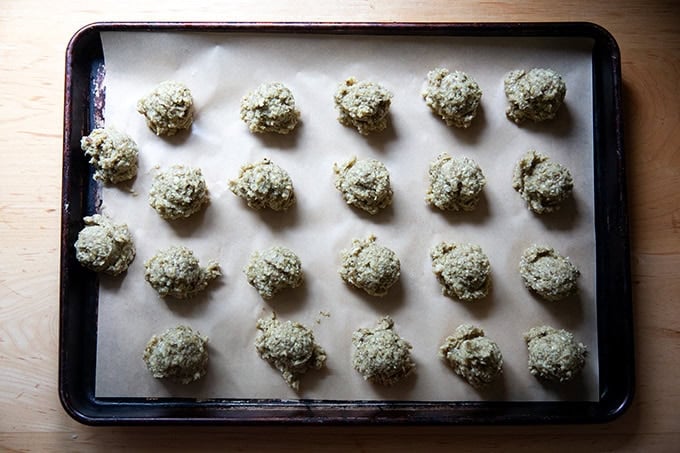
Then, using lightly oiled hands, rub each into a smooth ball:
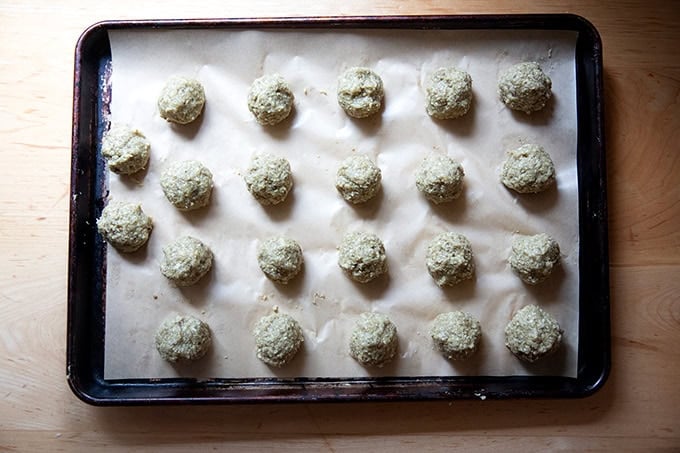
Roast for 10 to 12 minutes or until the meatballs are evenly browned:
When ready to serve, heat some tomato sauce on the stove top, transfer your meatballs to the sauce, and simmer for 5 minutes.
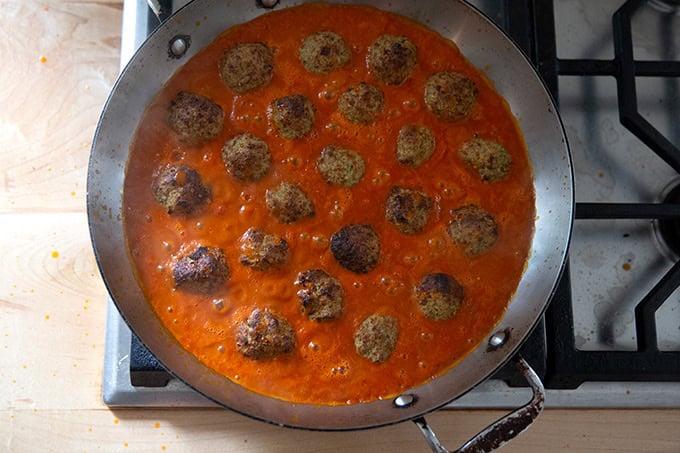
Garnish with fresh basil and parmesan


Description
Made with just 6 ingredients, these eggplant meatballs are roasted not fried, making the process wonderfully hands-off. Simmered in sweet, fresh tomato sauce and served alongside ricotta and toasty bread, these meatless balls make a delicious and summery vegetarian meal.
I used two recipes as inspiration: this one from Skinny Taste and this one from Memorie di Angelina .
Notes:
- A small scoop such as a #50 is helpful for portioning the purée into small balls.
For the meatballs:
- 2 to 3 eggplants, roughly 2.5 lbs. total
- 1 teaspoon Diamond Crystal kosher salt (or half as much if using Morton or fine sea salt)
- 1 egg
- 1 finely minced clove of garlic or 1 teaspoon garlic powder
- 1 cup of grated Parmigiano Reggiano or Pecorino Romano (about 2.5 ounces | 70 grams ), plus more for garnish
- 1 cup ( 1.75 ounces | 50 grams ) panko breadcrumbs, plus more as needed
For serving:
- 4 cups tomato sauce, such as this one or this one, or your favorite jarred sauce
- fresh basil
- toasted bread, such as this one or this one
- fresh ricotta, homemade if you’re up for it
- Heat your oven to 425ºF. Line a sheet pan with parchment paper. Make 6 to 8 small slits in each eggplant, and place the eggplant on the prepared sheet pan. Transfer the pan to the oven, and roast for 45 minutes, flipping the eggplants halfway.
- Remove the pan from the oven, and let the eggplant rest until cool enough to handle. Using a knife, peel away the skin and scoop the flesh into a colander or sieve to drain for at least 30 minutes. (For reference, the weight of the eggplant flesh post-draining should be roughly 480-500 grams. If it isn’t, don’t worry, you’ll just possibly need fewer breadcrumbs in step 4.)
- Transfer the eggplant flesh to a food processor. Add the salt, egg, garlic, and parmesan. Purée until smooth.
- Transfer the eggplant purée to a large bowl and stir in the breadcrumbs. The mixture should be wet but workable: if you scoop or spoon a small portion into your palm, you should be able to squeeze it into a ball, with minimal sticking. If the mixture is too wet, stir in more breadcrumbs. Note: The goal is to use as few breadcrumbs as possible to prevent the baked meatballs from tasting too bready/mushy.
- Preheat the oven to 550ºF convection roast or as hot as it will go. Line a sheet pan with parchment paper.
- Using a small scoop (I use a #50 scoop) or spoon, portion the mixture into 20 to 22 small balls evenly spaced on the sheet pan. Using lightly oiled hands, rub each portion into a smooth ball. Transfer the pan to the oven and roast for 10 to 12 minutes or until the meatballs are evenly browned.
- Meanwhile, heat the tomato sauce in a large skillet on the stovetop over low heat, just until it begins to simmer. When the meatballs finish roasting, transfer them to the sauce and simmer for 5 minutes. Garnish with fresh basil and shave parmesan over the meatballs to taste.
- Prep Time: 30 minutes
- Cook Time: 55 minutes
- Category: Side Dish
- Method: oven, stovetop
- Cuisine: American, Italian
