Made with turkey wings, carrots, onions, and celery, this roasted turkey stock will give you 6+ quarts of rich, golden stock to have on hand for the holidays ahead. Use it immediately in your favorite stuffing, potato gratin, and gravy recipes, or store it in the freezer for up to 3 months.
Last year, after a many-year hiatus, I brought back Gourmet’s roasted turkey stock recipe . It was originally published in the October 2006 issue, which I still have somewhere, and I made it every Thanksgiving for many years. Why I stopped I do not know, but I’m so happy it’s back.
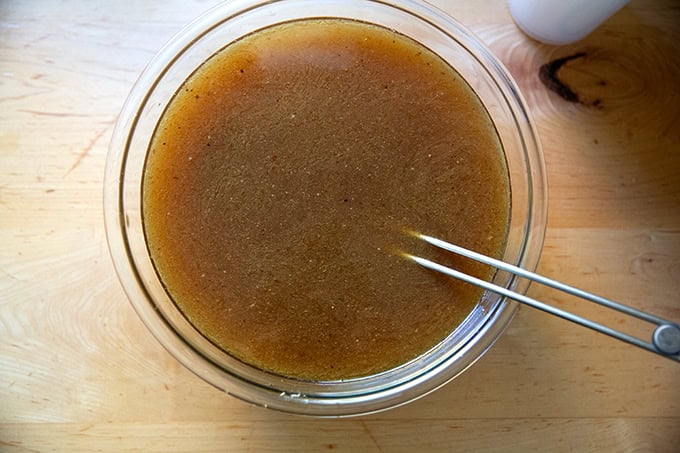
The recipe calls for roasting turkey wings (or drumsticks or thighs) followed by some vegetables (onions, carrots, celery), deglazing the pan to release the fond (see below), then transferring the contents to a pot, covering them with water, and simmering them for 3 hours. The exercise will make your house smell like Thanksgiving and, as you ladle your rich, golden, aromatic stock into storage vessels, you will feel so accomplished, so inspired, and so ready to tackle the holiday season ahead.
Last year I used this stock in my stuffing recipes ( this one and this one ), in my potatoes ( Alice Waters Potato Gratin and Hasselback Potato Gratin ), and in this gravy , all of which can be made ahead.
Why Roasted Turkey Stock is More Flavorful
In short because: browning = flavor and aroma. Let’s go deeper: the reason roasted turkey stock is more flavorful than a non-roasted stock comes down to two things: the Maillard reaction and fond.
The Maillard reaction, if you are unfamiliar, is a chemical reaction that occurs between proteins and sugars when food is cooked at high temperatures. You know and love foods that have undergone the Maillard reaction: think the edges of a seared steak, the crust of a loaf of sourdough , caramelized onions, etc.
In the context of roasted stock, the maillard reaction takes place when the turkey parts and vegetables roast in the oven. Moreover, this roasting creates a “fond”: a layer of concentrated juices and browned bits stuck to a pan. By deglazing the roasting pan and incorporating those browned bits into the stock, you are loading it with flavor compounds giving it incredible depth of flavor.
Roasted Turkey Stock, Step by Step
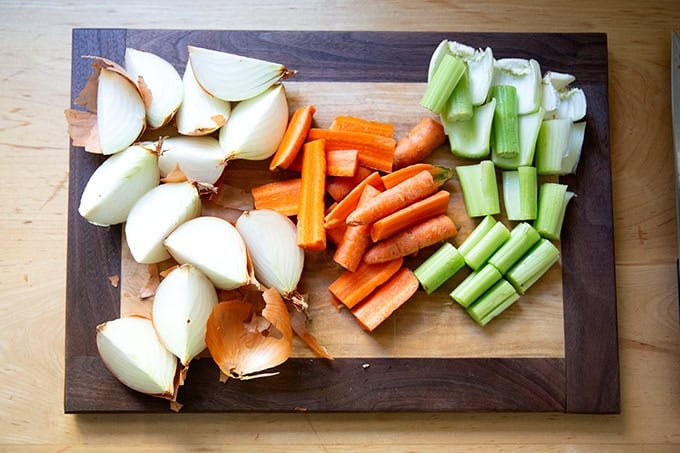
Gather your ingredients: carrots, onions, celery, parsley, a bay leaf, peppercorns, salt, and…
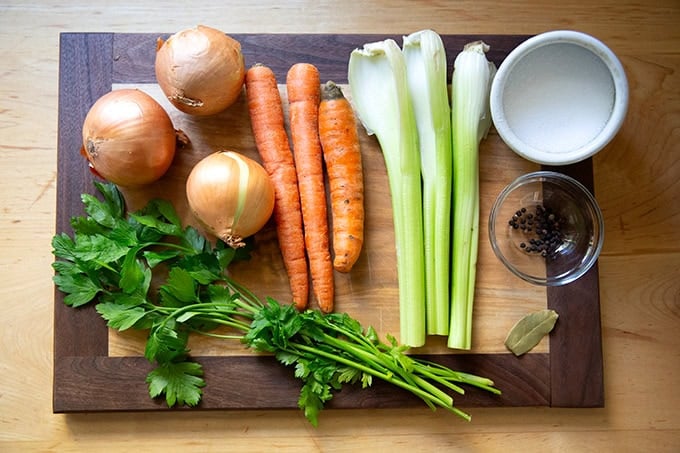
… turkey wings!
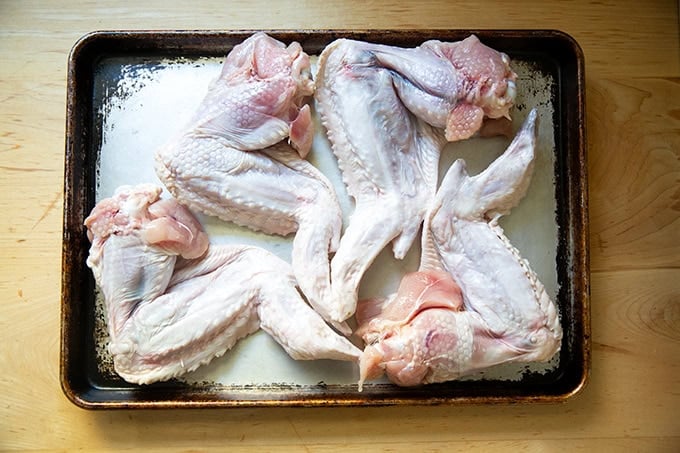
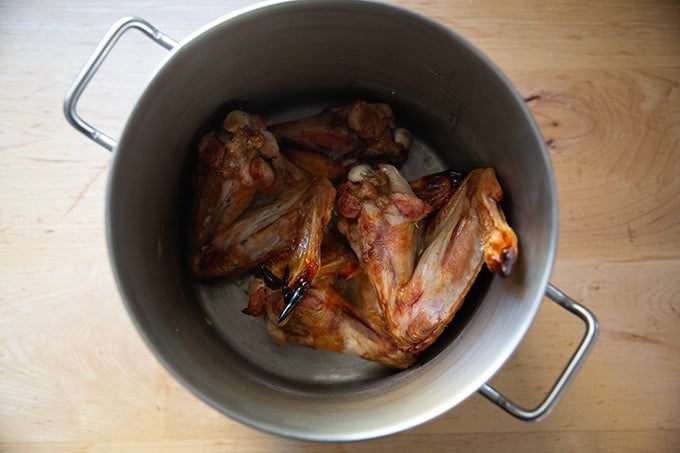
You’ll start by roasting the wings seasoned with salt at high heat:
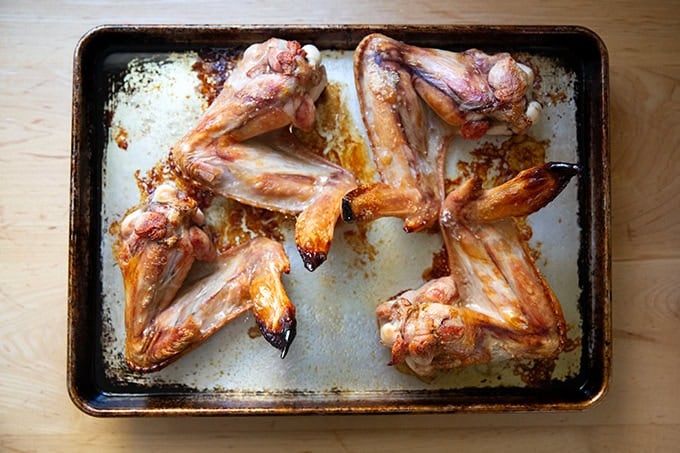
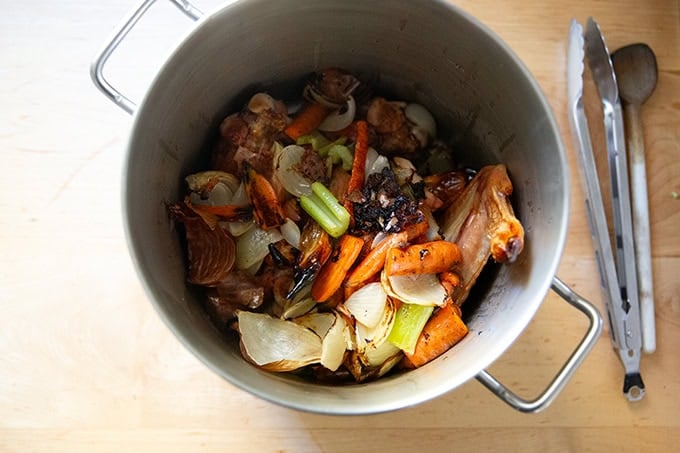
Then you’ll transfer them to a pot reserving your sheet pan:
To the sheet pan, add your chopped vegetables:
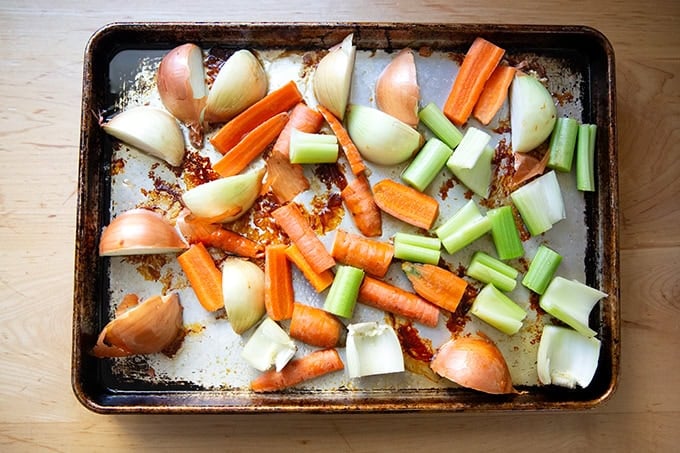
Then transfer them to the oven:
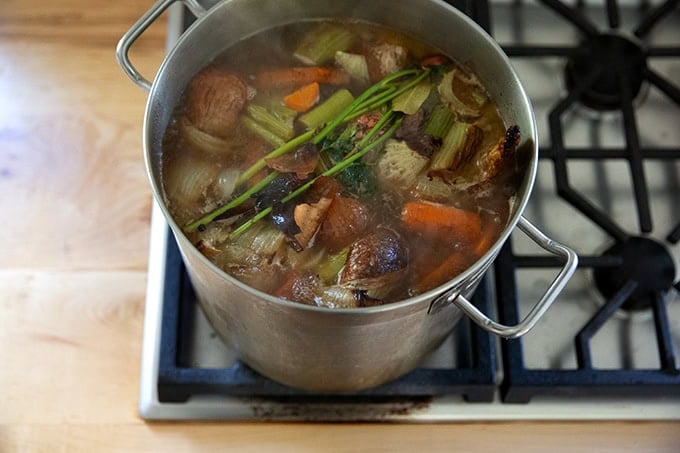
Add the vegetables to the pot:
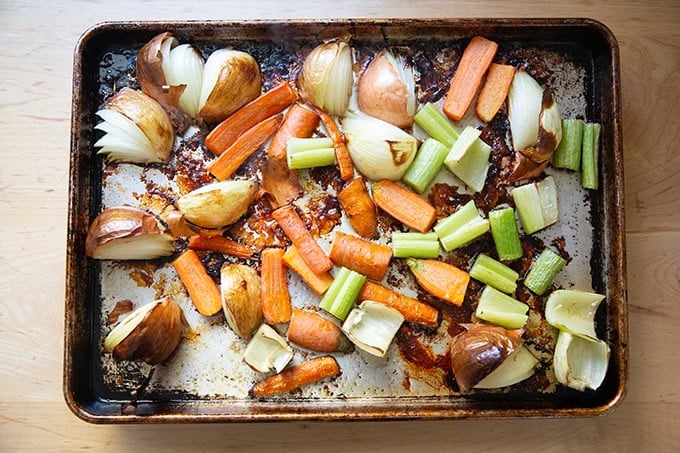
Then straddle your sheet pan across two burners and add some water:
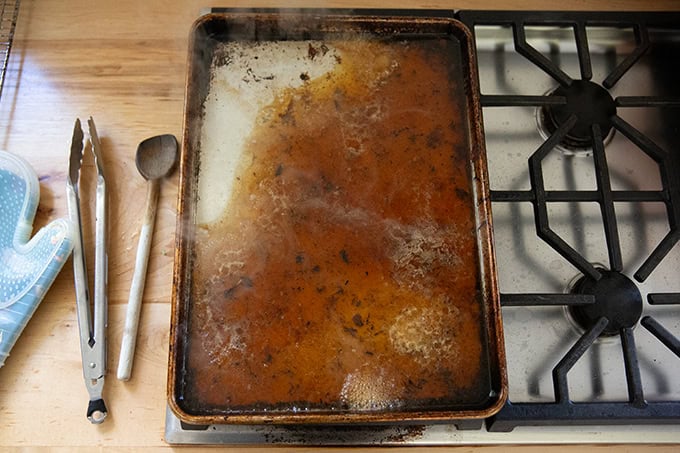
Use a wooden spoon to scrape up the fond and any stuck bits on the sheet pan; then transfer to the pot:
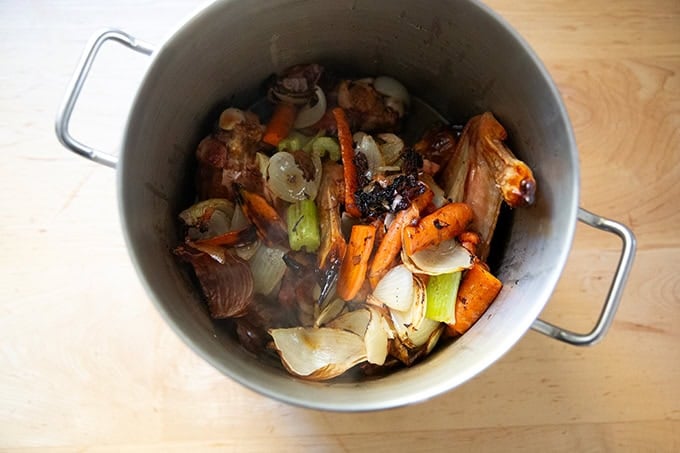
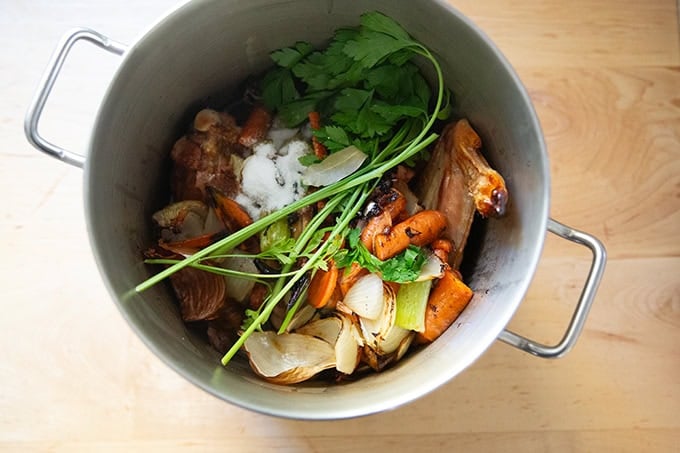
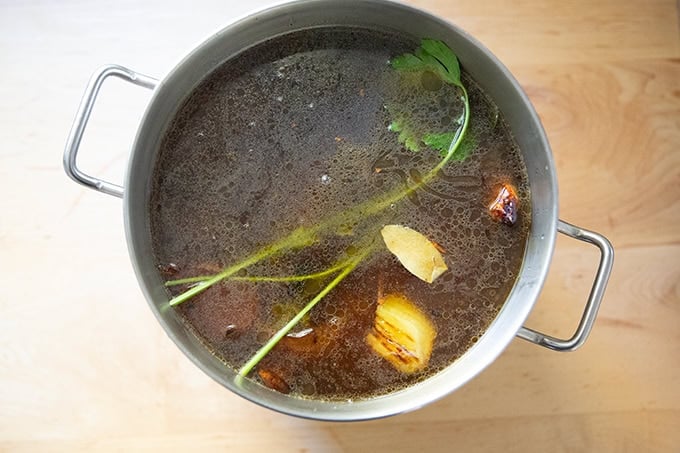
Add the parsley, bay leaf, salt, and peppercorns:
Then cover with 6 to 7 quarts of water depending on the size of your pot:
Transfer to your stovetop:
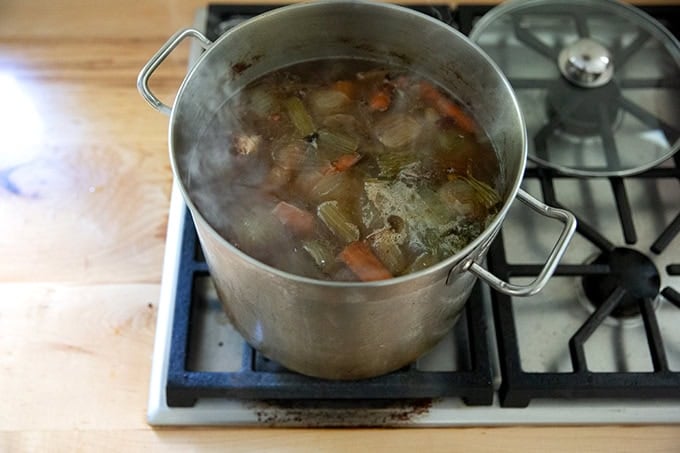
And simmer for 3 to 4 hours:
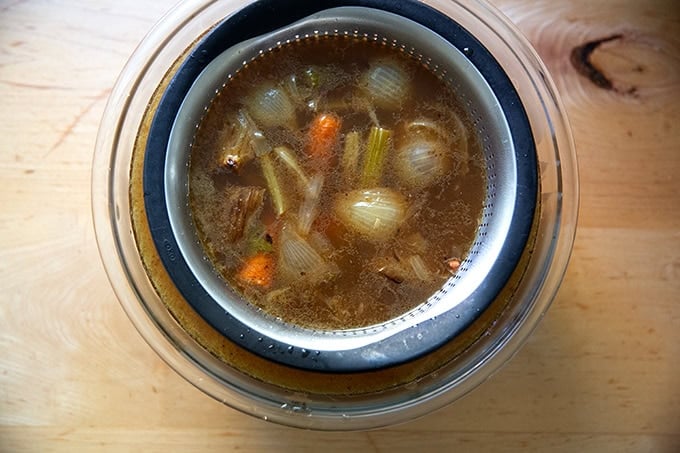
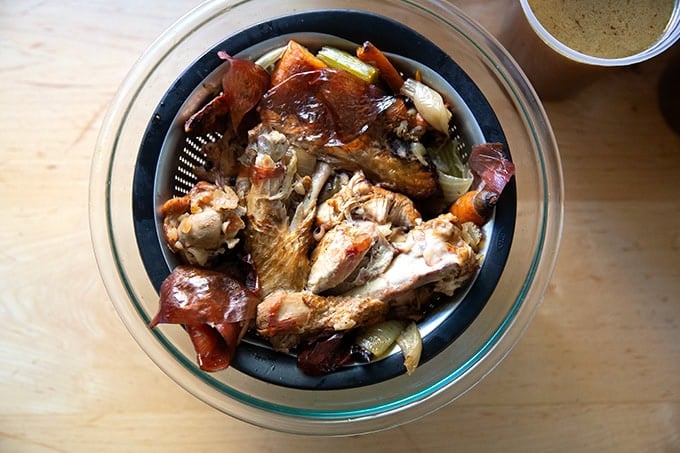
Strain the stock in batches:
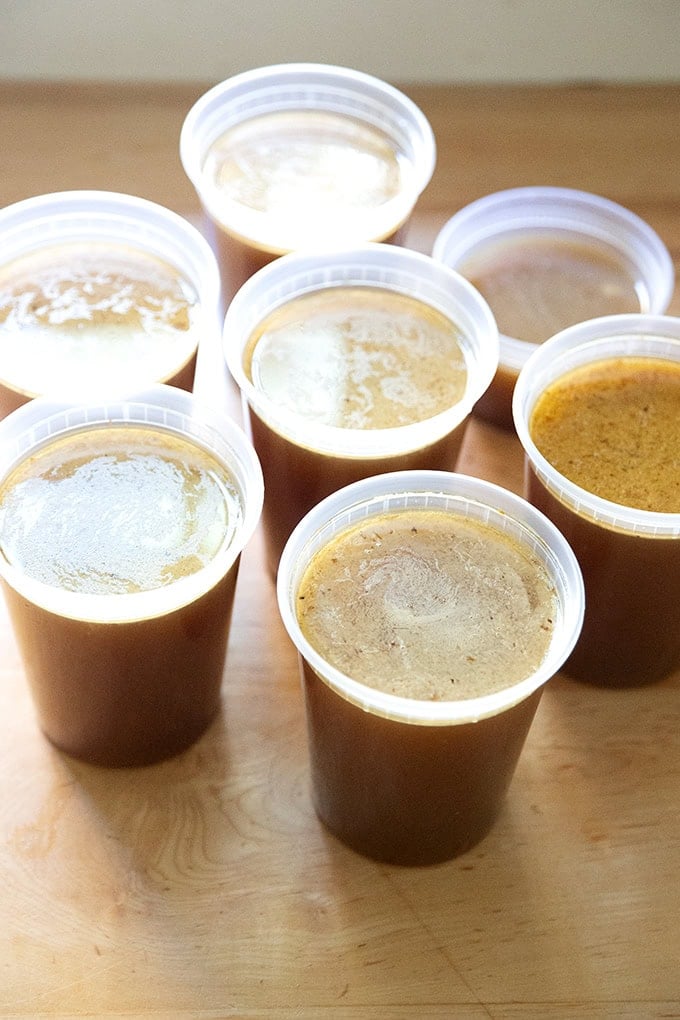
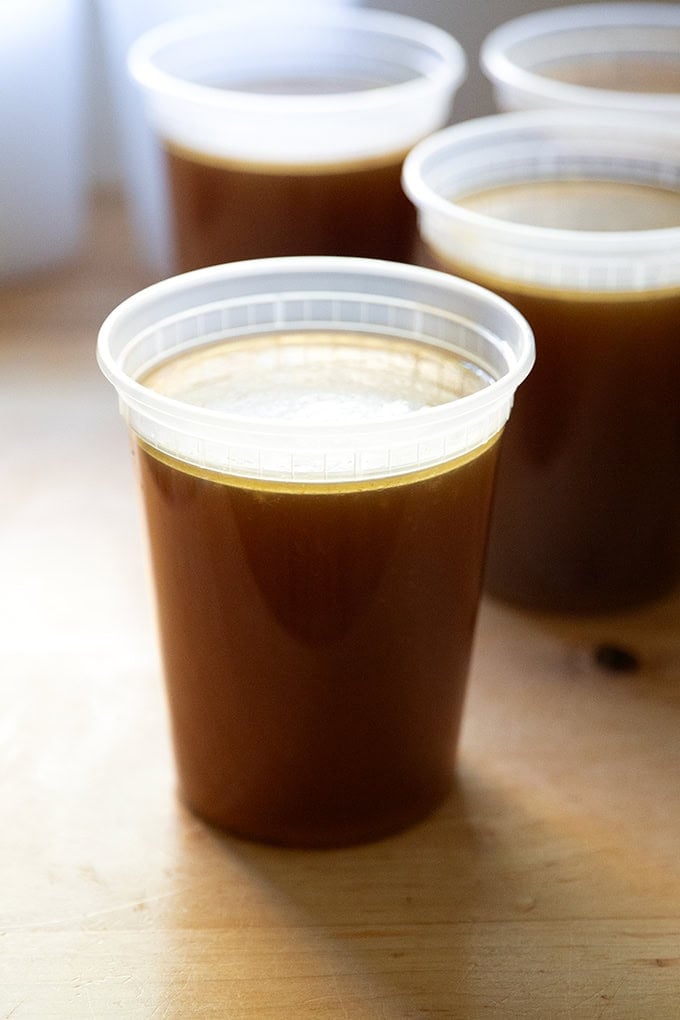
When the stock has cooled, transfer it to storage vessels: these are so handy to have on hand this time of year:

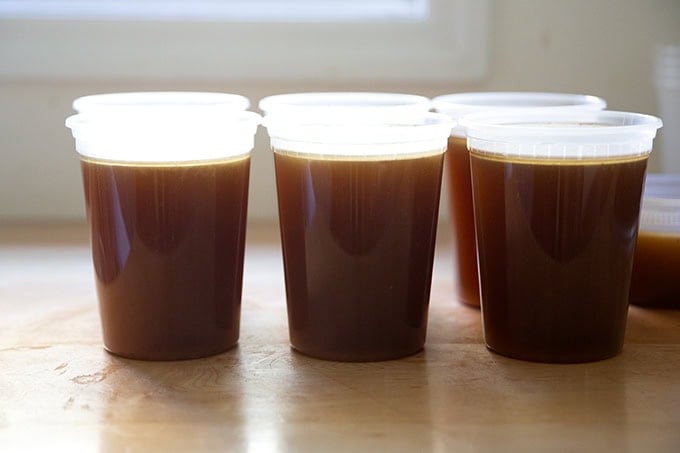
It is the best feeling having 6+ quarts of rich, roasted turkey stock on hand:
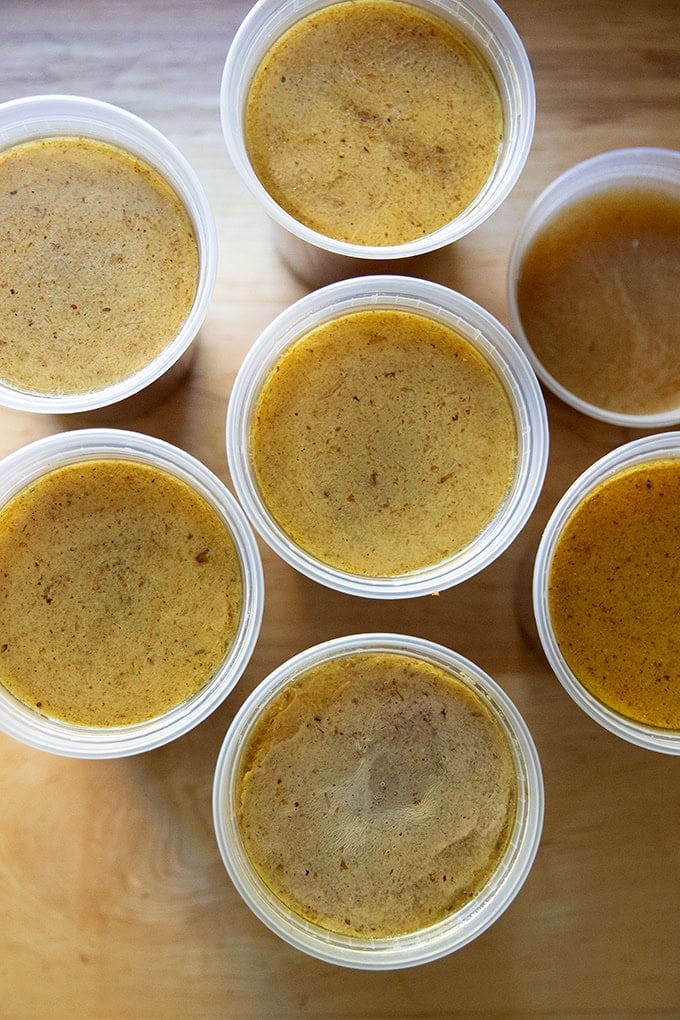
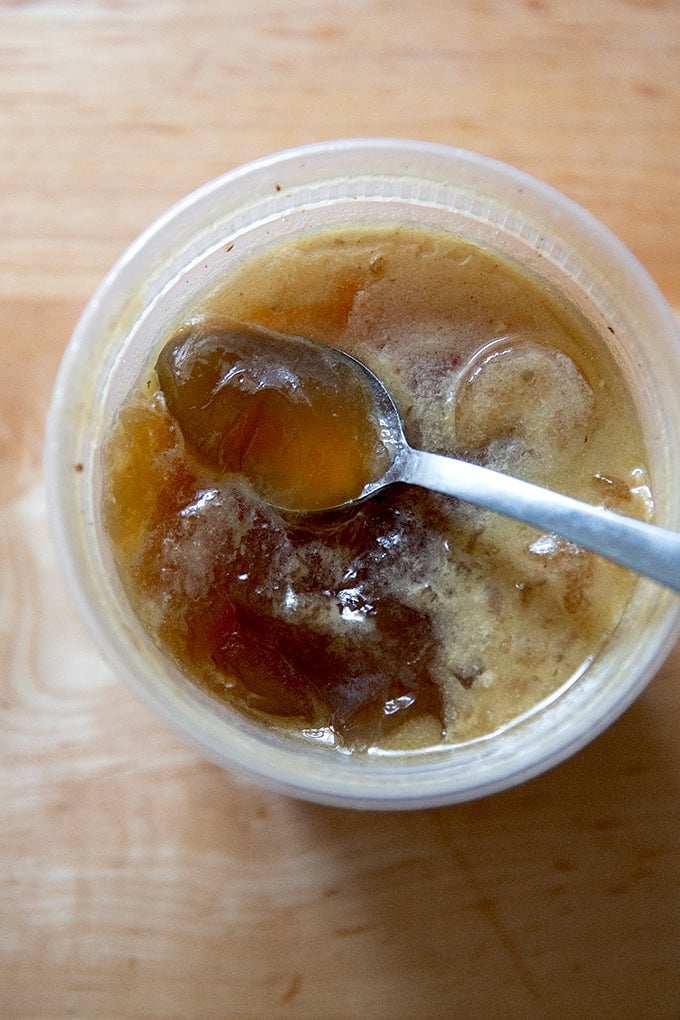
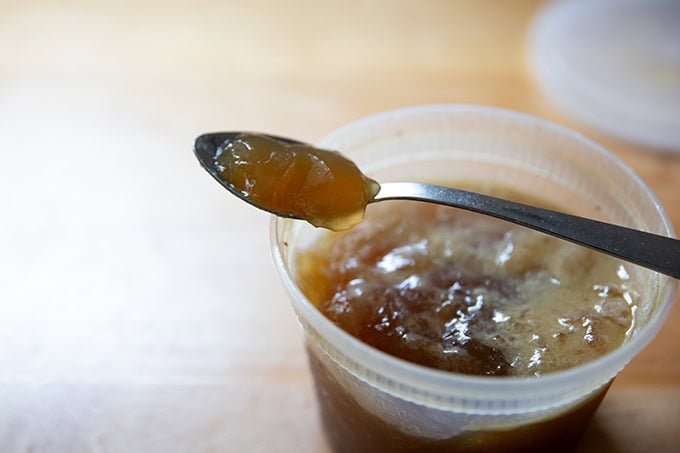
You can freeze the stock for up to 3 months or store in the fridge for 1 week.
A beautiful sight:
Description
Adapted from this old Gourmet recipe.
Storage vessels: These deli containers are so great to have on hand this time of year: I love this set of mixed sizes . And this set of quart sizes is great, too.
- 5 to 6 pounds turkey wings
- kosher salt
- 3 medium yellow onions, unpeeled, quartered
- 3 celery ribs, cut into 2-inch lengths
- 3 carrots, unpeeled, quartered
- 6 to 7 quarts of water
- 4 to 5 sprigs of parsley
- 1 bay leaf
- 10 black peppercorns
- Preheat the oven to 500°F. Place the turkey wings skin side down on a rimmed sheet pan. Season generously with kosher salt. Transfer to the oven and roast until well browned, about 45 minutes. Transfer to an 8- to 10-quart stockpot, reserving the sheet pan.
- Add the onions, celery, and carrots to the pan. Transfer to the oven and roast until golden, about 20 minutes more. Add vegetables to the stockpot.
- Straddle the sheet pan across 2 burners, then carefully add 2 cups of water and deglaze by boiling, stirring, and scraping up the brown bits, about 1 minute. Carefully add the deglazing liquid to the stockpot, then add the parsley, bay leaf, peppercorns, and 1 tablespoon of kosher salt (Diamond Crystal brand; use half as much if you are using Morton). Cover with 6 to 7 quarts of water depending on the size of your stock pot.
- Bring to a simmer over high heat; then reduce the heat to allow the stock to gently simmer. Simmer for 3 hours.
- Strain the stock in batches — I do this by setting a collander over a large bowl. Discard the solids. Once cool, transfer to storage vessels (see notes above). I like to chill my stock in the fridge for a day. This allows the fat to solidify on the top. If a lot of fat rises to the top, scrape it off. If it doesn’t, just leave it. At this point, transfer the stock to the freezer for up to 3 months. Or keep it in the fridge for 1 week.
- Prep Time: 20 minutes
- Cook Time: 4 hours
- Category: Sauce
- Method: oven, stovetop
- Cuisine: American
Made with turkey wings, carrots, onions, and celery, this roasted turkey stock will give you 6+ quarts of rich, golden stock to have on hand for the holidays ahead. Use it immediately in your favorite stuffing, potato gratin, and gravy recipes, or store it in the freezer for up to 3 months.
Last year, after a many-year hiatus, I brought back Gourmet’s roasted turkey stock recipe . It was originally published in the October 2006 issue, which I still have somewhere, and I made it every Thanksgiving for many years. Why I stopped I do not know, but I’m so happy it’s back.
The recipe calls for roasting turkey wings (or drumsticks or thighs) followed by some vegetables (onions, carrots, celery), deglazing the pan to release the fond (see below), then transferring the contents to a pot, covering them with water, and simmering them for 3 hours. The exercise will make your house smell like Thanksgiving and, as you ladle your rich, golden, aromatic stock into storage vessels, you will feel so accomplished, so inspired, and so ready to tackle the holiday season ahead.
Last year I used this stock in my stuffing recipes ( this one and this one ), in my potatoes ( Alice Waters Potato Gratin and Hasselback Potato Gratin ), and in this gravy , all of which can be made ahead.
Why Roasted Turkey Stock is More Flavorful
In short because: browning = flavor and aroma. Let’s go deeper: the reason roasted turkey stock is more flavorful than a non-roasted stock comes down to two things: the Maillard reaction and fond.
The Maillard reaction, if you are unfamiliar, is a chemical reaction that occurs between proteins and sugars when food is cooked at high temperatures. You know and love foods that have undergone the Maillard reaction: think the edges of a seared steak, the crust of a loaf of sourdough , caramelized onions, etc.
In the context of roasted stock, the maillard reaction takes place when the turkey parts and vegetables roast in the oven. Moreover, this roasting creates a “fond”: a layer of concentrated juices and browned bits stuck to a pan. By deglazing the roasting pan and incorporating those browned bits into the stock, you are loading it with flavor compounds giving it incredible depth of flavor.
Roasted Turkey Stock, Step by Step
Gather your ingredients: carrots, onions, celery, parsley, a bay leaf, peppercorns, salt, and…
… turkey wings!
You’ll start by roasting the wings seasoned with salt at high heat:
Then you’ll transfer them to a pot reserving your sheet pan:
To the sheet pan, add your chopped vegetables:
Then transfer them to the oven:
Add the vegetables to the pot:
Then straddle your sheet pan across two burners and add some water:
Use a wooden spoon to scrape up the fond and any stuck bits on the sheet pan; then transfer to the pot:
Add the parsley, bay leaf, salt, and peppercorns:
Then cover with 6 to 7 quarts of water depending on the size of your pot:
Transfer to your stovetop:
And simmer for 3 to 4 hours:
Strain the stock in batches:
When the stock has cooled, transfer it to storage vessels: these are so handy to have on hand this time of year:
It is the best feeling having 6+ quarts of rich, roasted turkey stock on hand:
You can freeze the stock for up to 3 months or store in the fridge for 1 week.
A beautiful sight:
Description
Adapted from this old Gourmet recipe.
Storage vessels: These deli containers are so great to have on hand this time of year: I love this set of mixed sizes . And this set of quart sizes is great, too.
- 5 to 6 pounds turkey wings
- kosher salt
- 3 medium yellow onions, unpeeled, quartered
- 3 celery ribs, cut into 2-inch lengths
- 3 carrots, unpeeled, quartered
- 6 to 7 quarts of water
- 4 to 5 sprigs of parsley
- 1 bay leaf
- 10 black peppercorns
- Preheat the oven to 500°F. Place the turkey wings skin side down on a rimmed sheet pan. Season generously with kosher salt. Transfer to the oven and roast until well browned, about 45 minutes. Transfer to an 8- to 10-quart stockpot, reserving the sheet pan.
- Add the onions, celery, and carrots to the pan. Transfer to the oven and roast until golden, about 20 minutes more. Add vegetables to the stockpot.
- Straddle the sheet pan across 2 burners, then carefully add 2 cups of water and deglaze by boiling, stirring, and scraping up the brown bits, about 1 minute. Carefully add the deglazing liquid to the stockpot, then add the parsley, bay leaf, peppercorns, and 1 tablespoon of kosher salt (Diamond Crystal brand; use half as much if you are using Morton). Cover with 6 to 7 quarts of water depending on the size of your stock pot.
- Bring to a simmer over high heat; then reduce the heat to allow the stock to gently simmer. Simmer for 3 hours.
- Strain the stock in batches — I do this by setting a collander over a large bowl. Discard the solids. Once cool, transfer to storage vessels (see notes above). I like to chill my stock in the fridge for a day. This allows the fat to solidify on the top. If a lot of fat rises to the top, scrape it off. If it doesn’t, just leave it. At this point, transfer the stock to the freezer for up to 3 months. Or keep it in the fridge for 1 week.
- Prep Time: 20 minutes
- Cook Time: 4 hours
- Category: Sauce
- Method: Stovetop, Oven
- Cuisine: American
Find it online : https://alexandracooks.com/2024/10/26/roasted-turkey-stock-wings-make-ahead/
Made with a mix of fresh lemon juice and vinegar, this Caesar dressing has the perfect balance of acidity and richness . Make it in a large or small batch and store in the fridge for up to 2 weeks. Having a stash of dressing on hand is the best feeling when the dinner hour rolls around.
A few times in the past few months, I’ve had to entertain for a large-ish number of people, first for family, then for my daughter’s soccer team. For the first I made a bunch of pan pizzas , for the second I made a bunch of baked penne (more on this soon), and for both I made a very large Caesar salad, which was not only well received, but also easy.
Unlike other salads I love for entertaining — such as this Greek salad or this chopped salad , both of which require a fair amount of chopping — Caesar salad requires very little. And if you make it as suggested here, which is inspired by the one served at Speedy Romeo in Brooklyn, the chopping amounts to cutting heads of Romaine or other lettuces in half — in other words, the lettuce leaves are kept on the large side, and the salad is served with a fork and knife.
I love the large size not only because it’s visually appealing, but it also holds up a little bit better — the leaves don’t wilt as quickly upon being dressed. Using a mix of Romaine and chicories also helps in the longevity department: radicchio or Treviso, if you can find it, as well as Belgian endive are a little sturdier than Romaine, and I love the bitterness they lend, a perfect complement to the sweet Romaine and lemony dressing.
Incidentally, I recently spotted at the grocery store this mix of Romaine and Treviso, which I love but can never find. Treviso, if you are unfamiliar, is a variety of radicchio and looks like a cross between Belgian endive and radicchio:

A Few More Notes:
- Where are the croutons? Because I am so often serving Caesar salad aside pizza or pasta, I rarely include any crouton or bread crumbs. If you wish to add these, see this post for the crumbs and this post for the croutons .
- Egg Yolks: If using raw egg yolks makes you nervous, you can use mayonnaise in its place. See the recipe box for details.
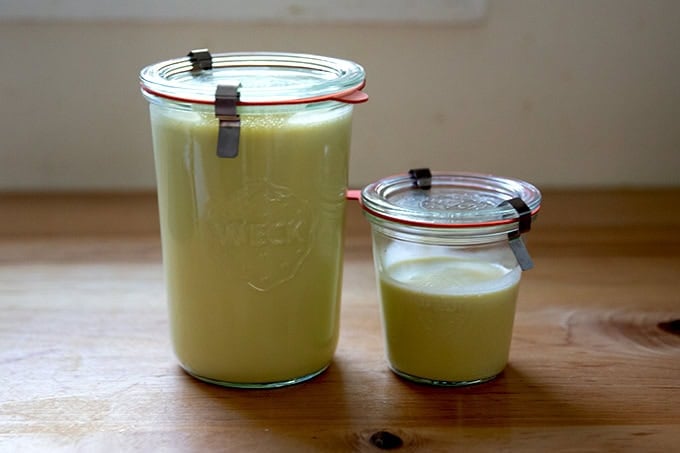
- Large Batch: Once you start making salad dressing in large batches (see this large-batch tahini dressing and this large-batch shallot vinaigrette ), it’s hard to go back, because it requires the same amount of work and leaves you with double the product. The large batch recipe below calls for a whole tin (2 ounces) of anchovies, which is so nice — I hate storing opened tins of anchovies. Salad dressing lasts a long time in the fridge, and it is such a gift to have on hand when the dinner hour rolls around.
Below you will find step-by-step instructions for making both Caesar salad and Caesar dressing.
How to Make Caesar Dressing, Step by Step
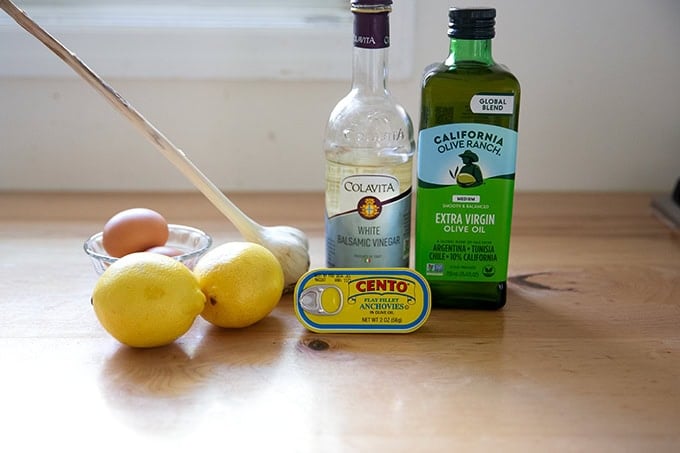
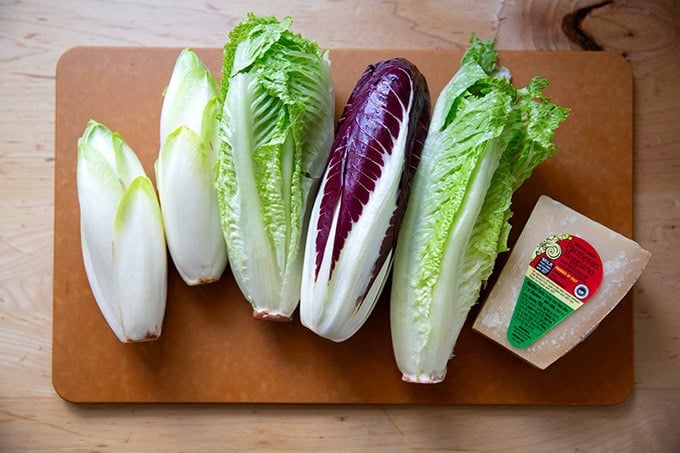
Gather your ingredients: lemons, anchovies, garlic, egg yolks, vinegar, and extra-virgin olive oil. If using raw egg yolks worries you, you can replace each yolk with 1 tablespoon of mayonnaise.
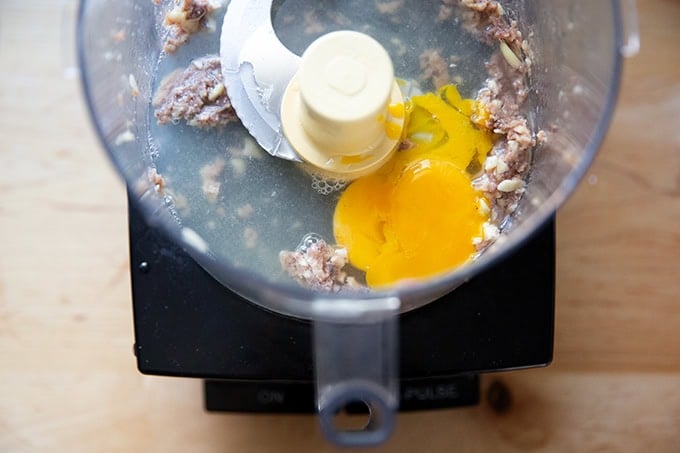
Place the garlic and anchovies along with a pinch of flaky sea salt into a food processor or blender.

Purée until smooth, scrape down, then add the fresh lemon juice, vinegar, and egg yolks.
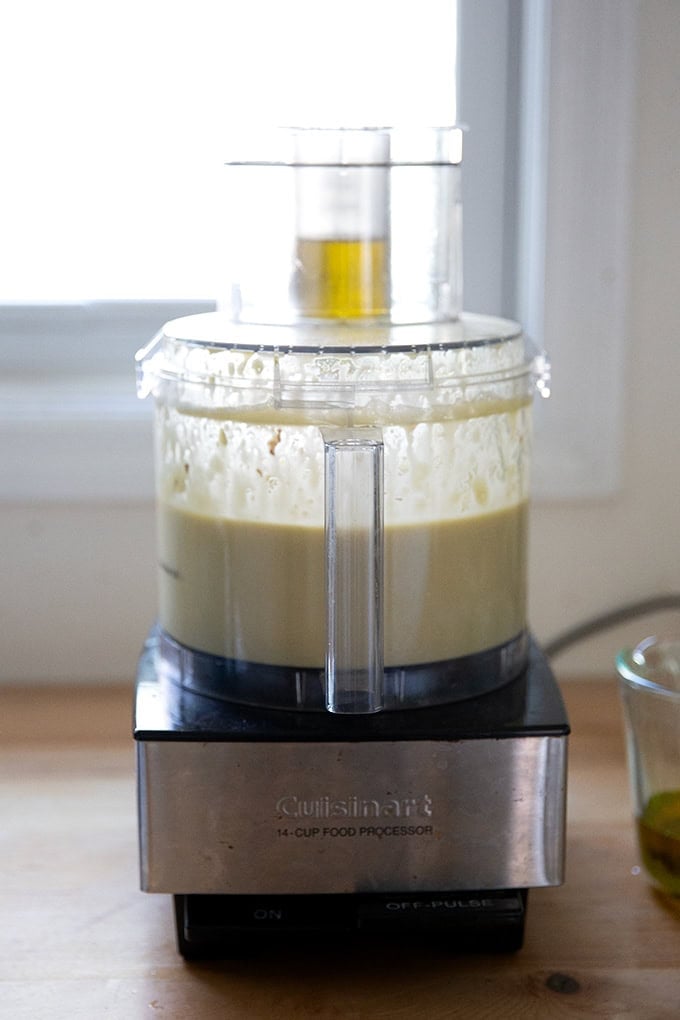
Purée until blended.

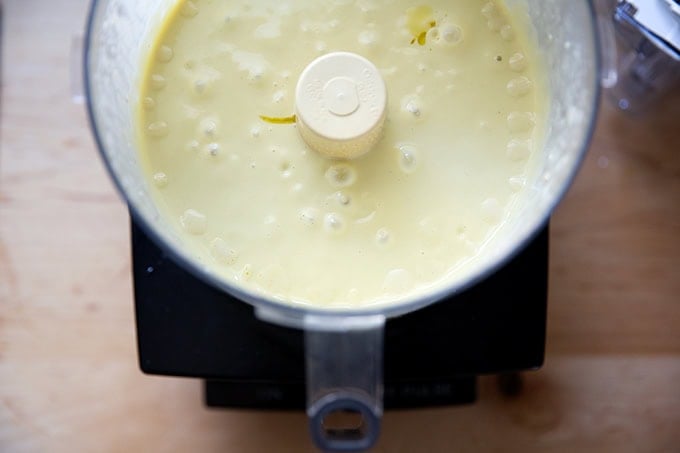
With the machine running, stream the oil slowly through the food chute — if you have a Cuisinart , stream the oil through the food pusher insert, where it will enter the machine through the teensy pin hole located at the bottom of the insert.
Taste, and adjust to taste with more salt and lemon to taste. Thin with a few tablespoons of water or until the dressing is a pourable consistency.
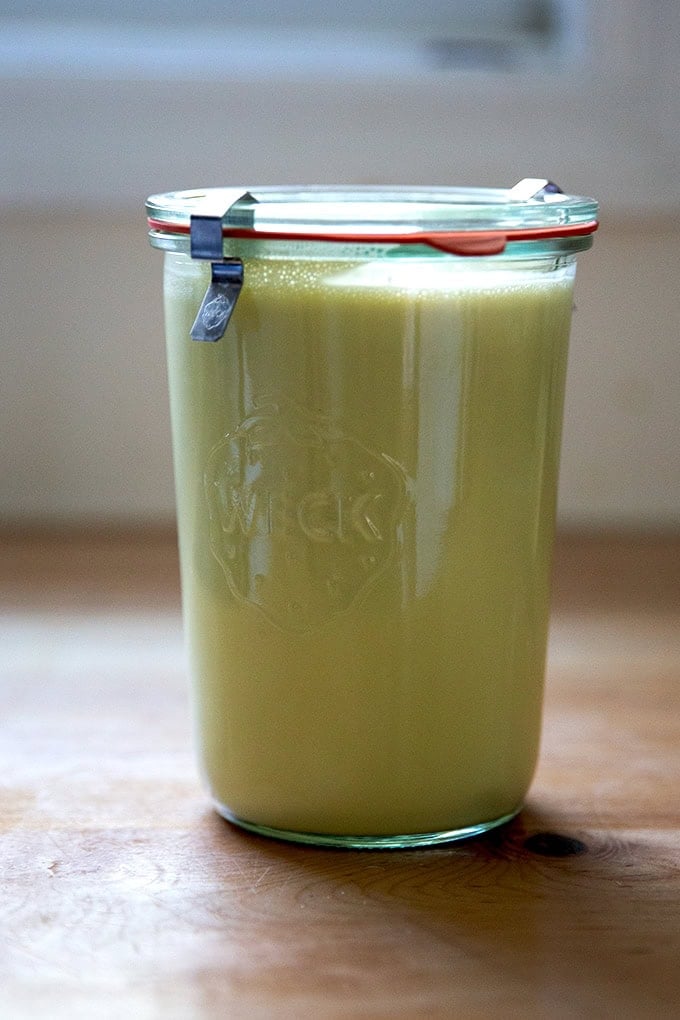
Transfer to storage vessels and store in the fridge for up to 2 weeks.
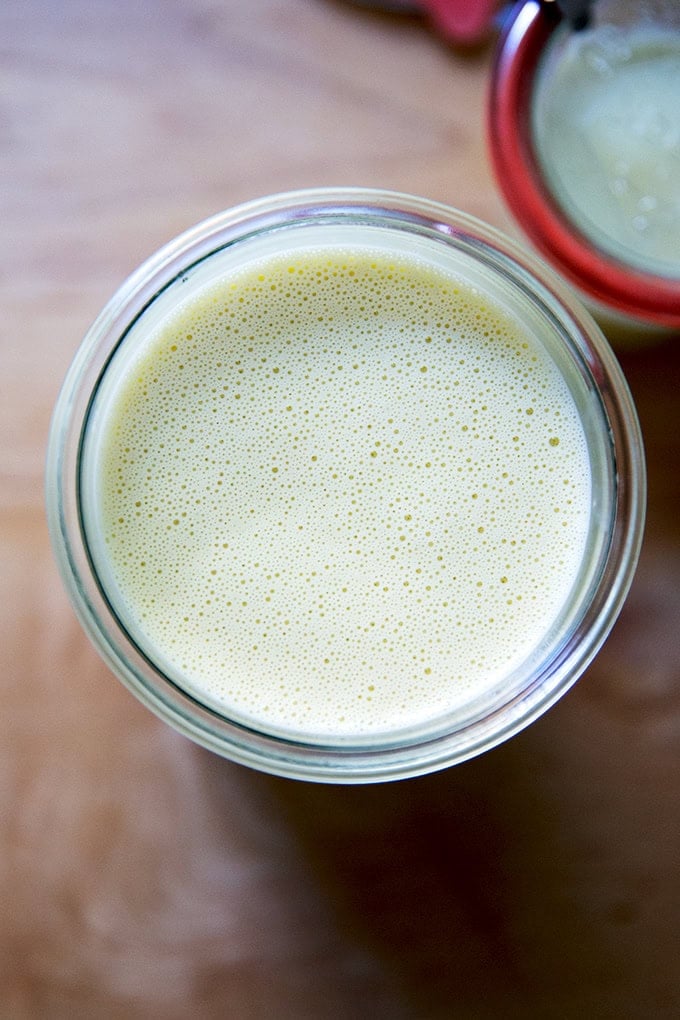
I love these Weck Jars.
How to Make a Caesar Salad, Step by Step
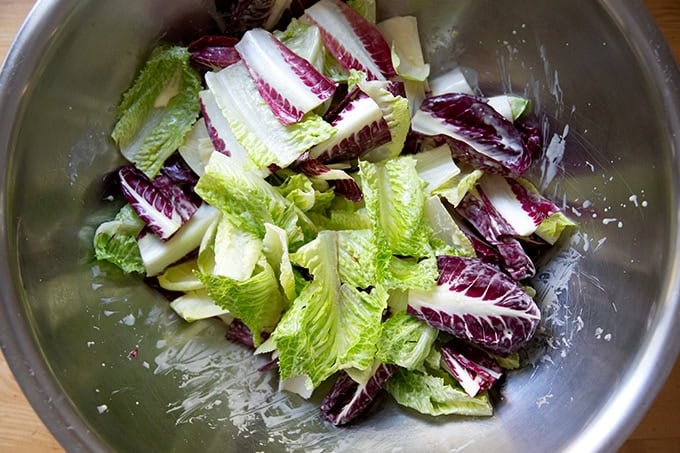
Gather your greens. I love using a mix of Romaine and some sort of chicory like endive or radicchio. You’ll also need some Parmigiano Reggiano.
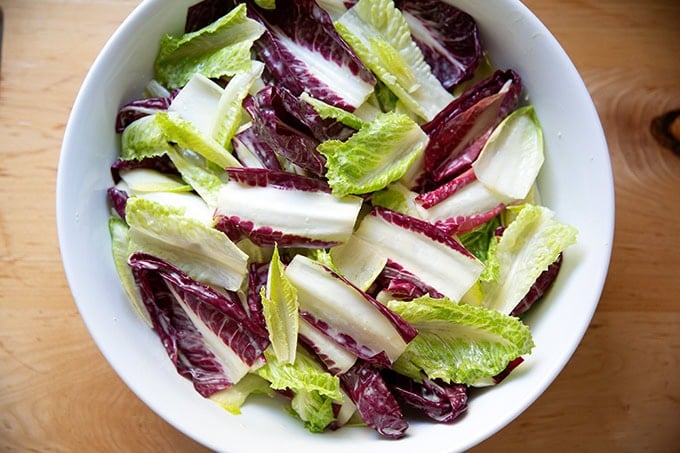
I like to cut my greens into large pieces, and I serve the salad with a fork and knife. Dress the greens lightly with the Caesar dressing and a pinch of flaky sea salt. Love this large bowl .
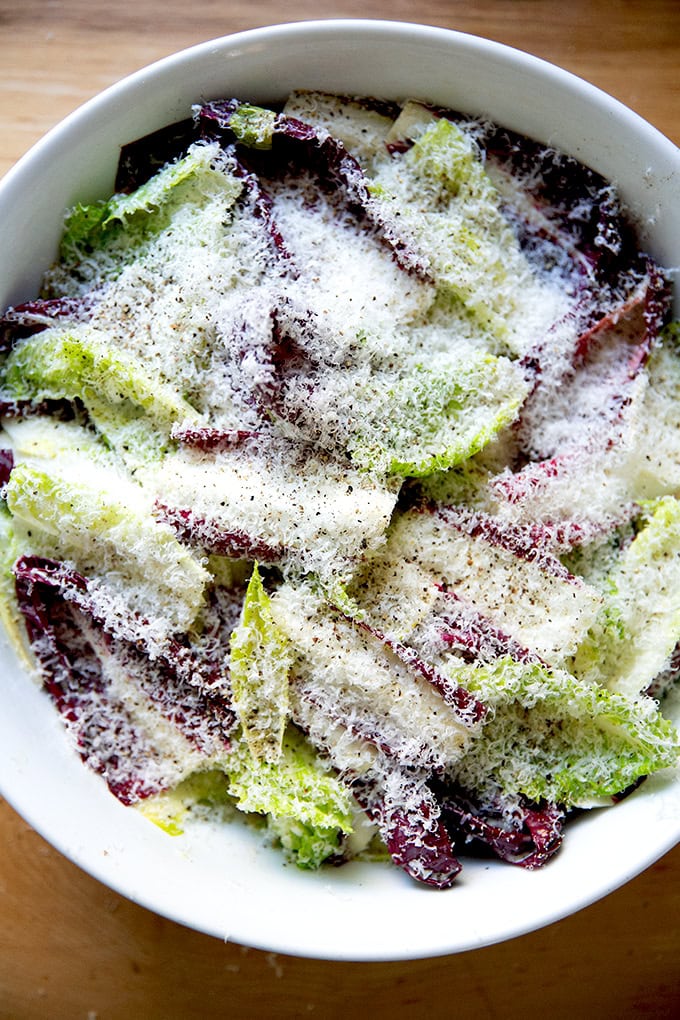
Transfer to a serving bowl then…
… shower it with shaved parmesan. The leaves should look as though they are blanketed in snow. A microplane grater is handy/essential for this.
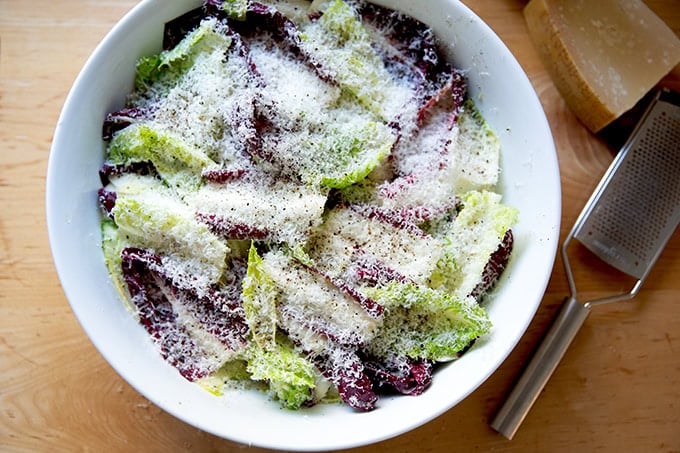
Season with pepper to taste.
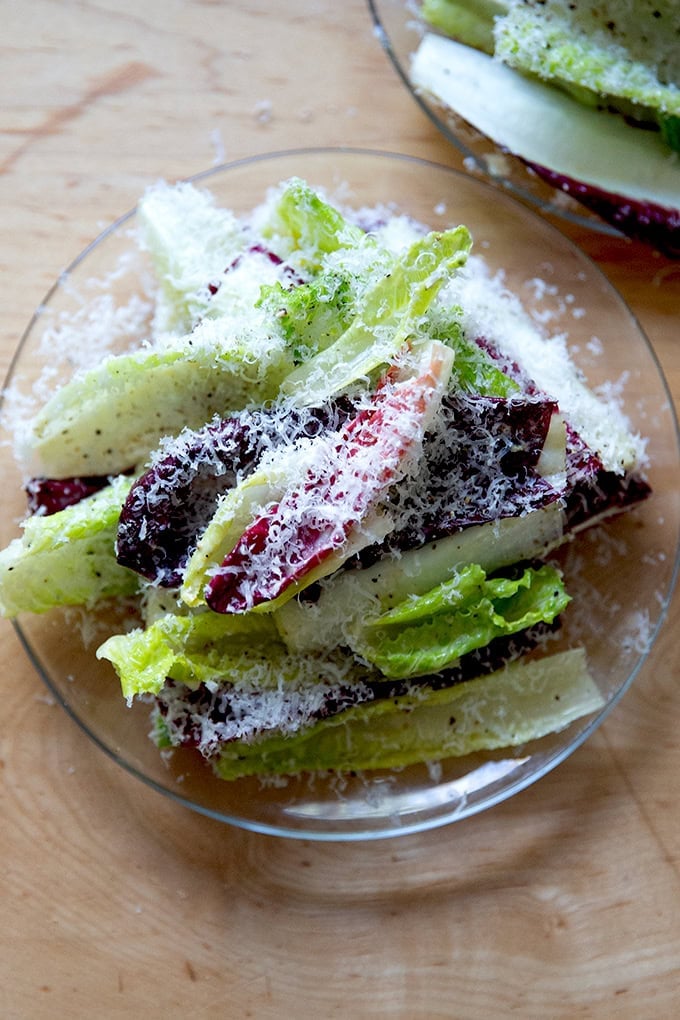
Transfer to serving plates and shave more parmesan and crack more pepper over the top.
Description
Adapted from my cookbook, Pizza Night .
If you don’t have a food processor, you can use a knife/whisk to make the dressing: To make by hand, use a knife to mince the garlic and anchovies until very finely chopped. Transfer to a medium bowl, then whisk in the egg yolk (or mayonnaise), vinegar, and lemon juice until smooth. Very slowly stream in the olive oil, whisking constantly until emulsified. Taste and adjust with more salt and/or lemon. Thin the dressing with 2 to 4 tablespoons of water if needed.
Two Tools I love:
- Microplane Grater for the Parmigiano Reggiano
- 14-Cup Food Processor
For a small batch, use these proportions:
3 garlic cloves
6 olive oil–packed anchovy fillets
1 large egg yolk or 1 tablespoon mayonnaise
2 tablespoons white balsamic vinegar
2 tablespoons fresh lemon juice, plus more to taste
1 cup extra-virgin olive oil
3 garlic cloves
a 2 -ounce tin of anchovies, drained (roughly 12 olive oil–packed anchovy fillets
Flaky sea salt or kosher salt
2 large egg yolks or 2 tablespoons mayonnaise
1/4 cup white balsamic vinegar
1/4 cup fresh lemon juice, plus more to taste
2 cups extra-virgin olive oil
3 to 4 tablespoons water
- In a food processor or blender, combine the garlic, anchovies, and a pinch of salt and puree until smooth, about 15 seconds. Add the egg yolks (or mayonnaise), vinegar, and lemon juice and puree again until smooth, another 15 seconds.
- With the machine running, stream in the oil very slowly until emulsified. ( Note: If you have a Cuisinart, stream the oil through the food pusher insert of the food chute… there is a teensy hole at the bottom that will allow the oil to stream in very slowly.) Taste and adjust with more salt and/or lemon juice. If necessary, with the machine running, thin the dressing with 3 to 4 tablespoons of water.
- Transfer the dressing to a jar and store in the fridge for up to 2 weeks.
- Prep Time: 10 minutes
- Category: Dressing
- Method: Food processor
- Cuisine: Amerian
