Making popovers couldn’t be simpler: the 5-ingredient batter comes together in seconds, and 30 minutes later, they’re done! Read on to learn the tips for making foolproof popovers every time.
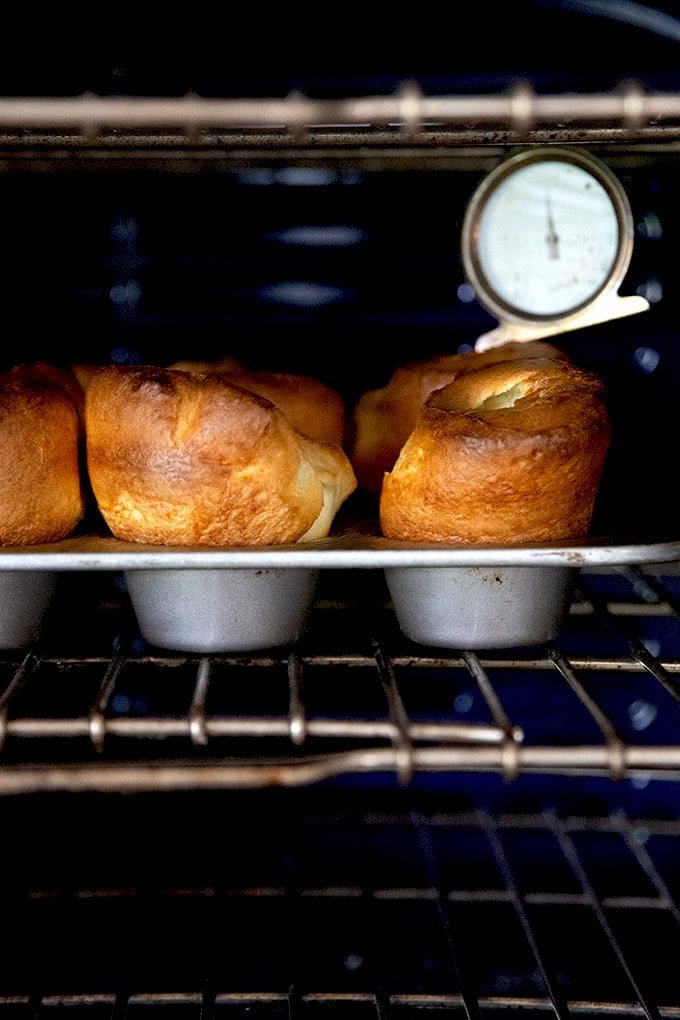
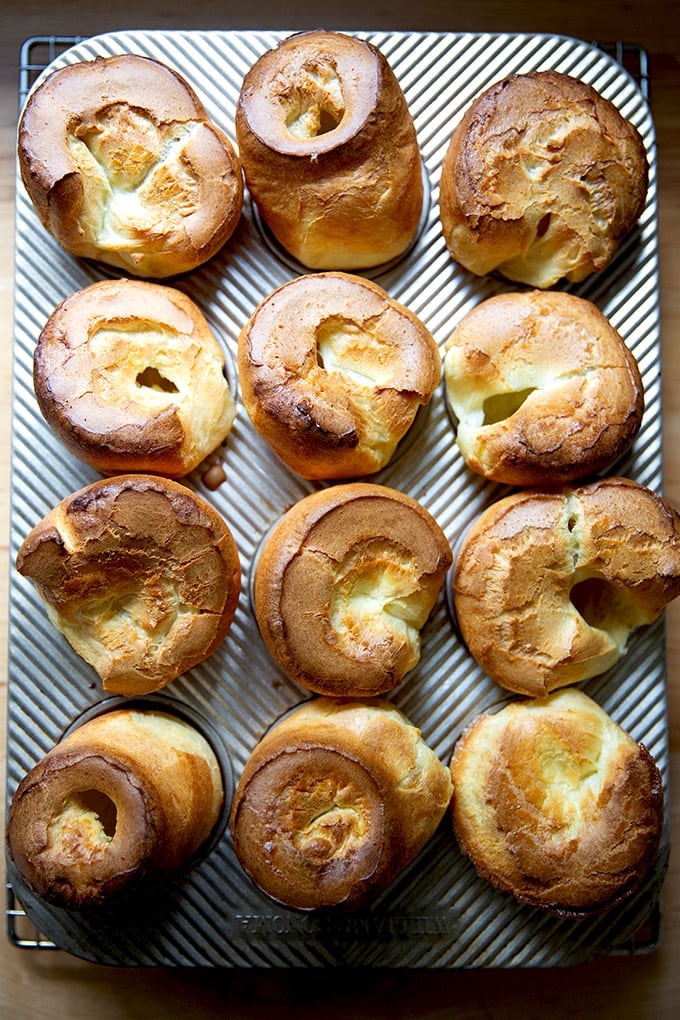
There is nothing more festive than pulling a pan of lofty popovers (also known as Yorkshire pudding*) from the oven just as everyone is gathering around the table to eat. Piping hot and light as air with custardy centers begging for pats of butter, popovers are a treat to behold.
Having made many batches of popovers over the years, I’ve learned how to achieve lofty popovers every time: room temperature ingredients + a hot oven = popover success. This is because popovers rely on steam — as opposed to baking powder, baking soda, or yeast — to rise. This King Arthur Flour article says it best: “The warmer your batter going into the oven, the more quickly it’ll produce steam: simple as that.”
Final tip? Use the right flour. For especially lofty popovers, bread flour is your gal! I achieve great loft with all-purpose flour as well, but I achieve the greatest heights when I use bread flour.
How to Make Lofty Popovers, Step by Step
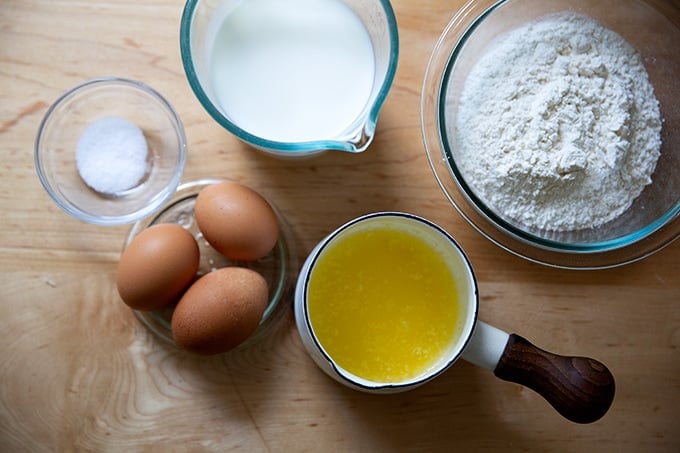
Gather your ingredients: eggs, milk, melted butter, flour, and salt. You want your eggs and milk at room temperature — see the recipe box for tips if you forget to leave them out before getting started.
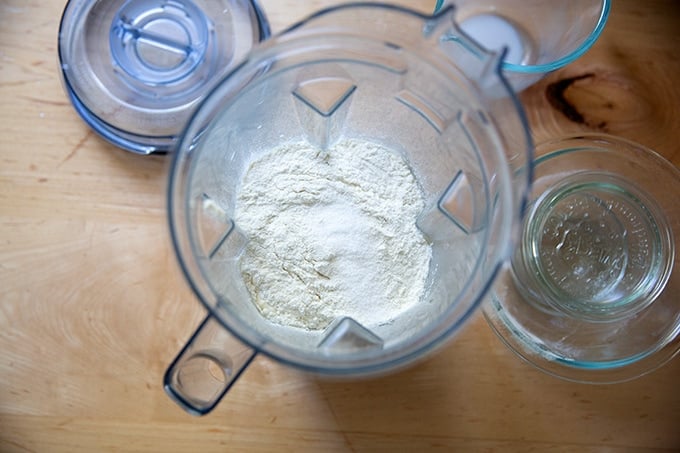
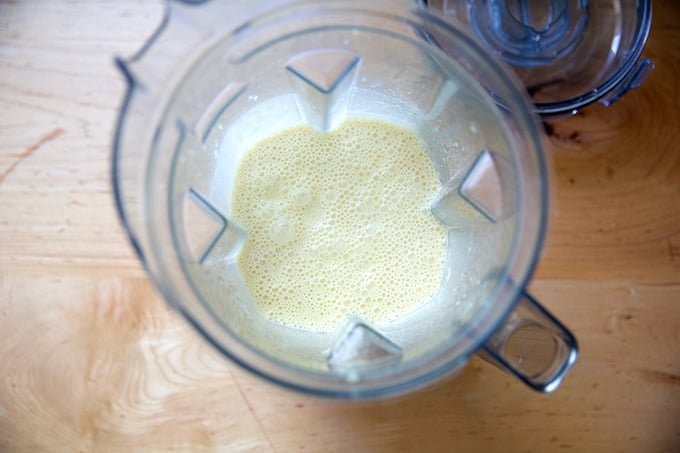
Combine the eggs (room temperature), milk (room temperature or slightly warmed), salt, and flour in a blender. Blend for 30 seconds until combined. Alternatively, whisk the ingredients together by hand. I find using the blender ensures a smooth batter, which is what you want here.
Add the melted butter and blend again for 15 to 20 seconds.
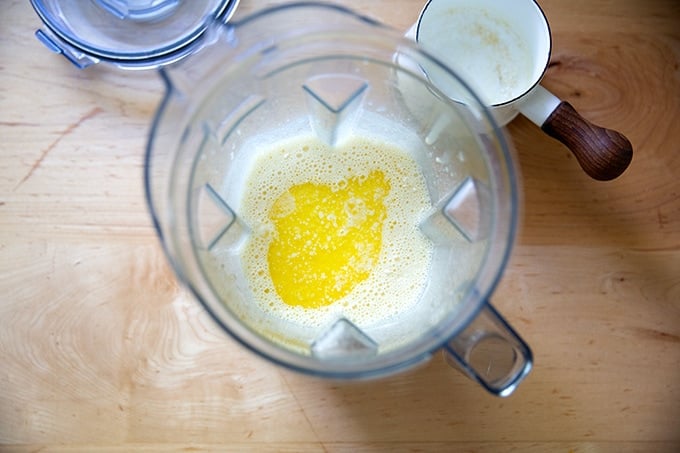
The batter should be smooth:
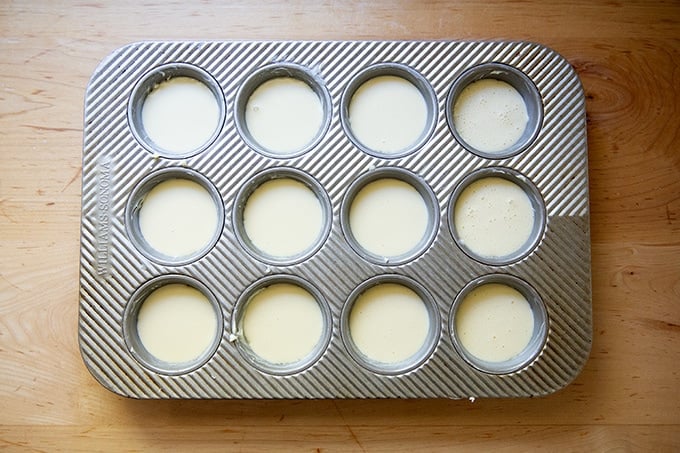
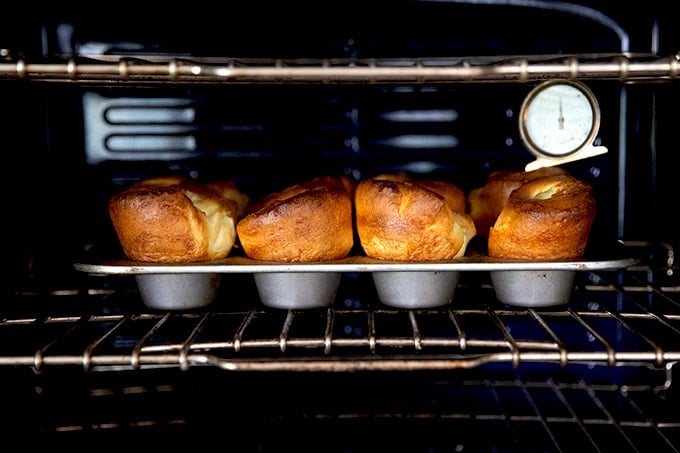
Transfer the batter to a buttered muffin tin, then place in the oven and bake at 425ºF for 20 minutes and 350ºF for 10 minutes:
Ta-da! How fun are they?
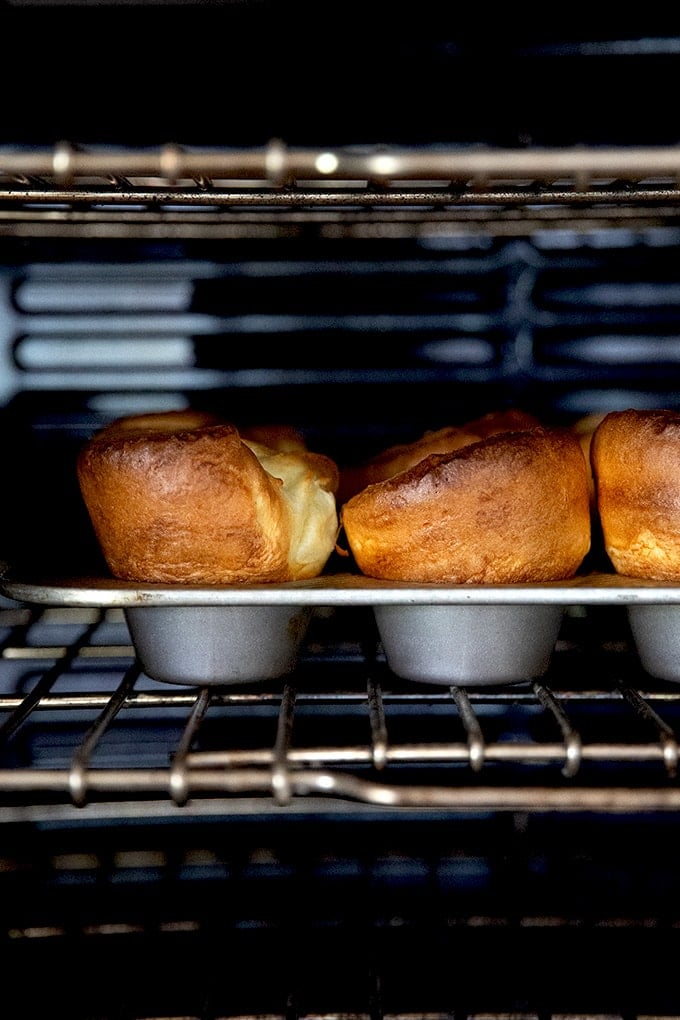
Remove from the oven and admire your work…
… briefly! I’m not even sure why I turned these out onto a cooling rack because…

… the one rule of popovers is: Eat Immediately! Transfer them to a bowl and pass around the table.

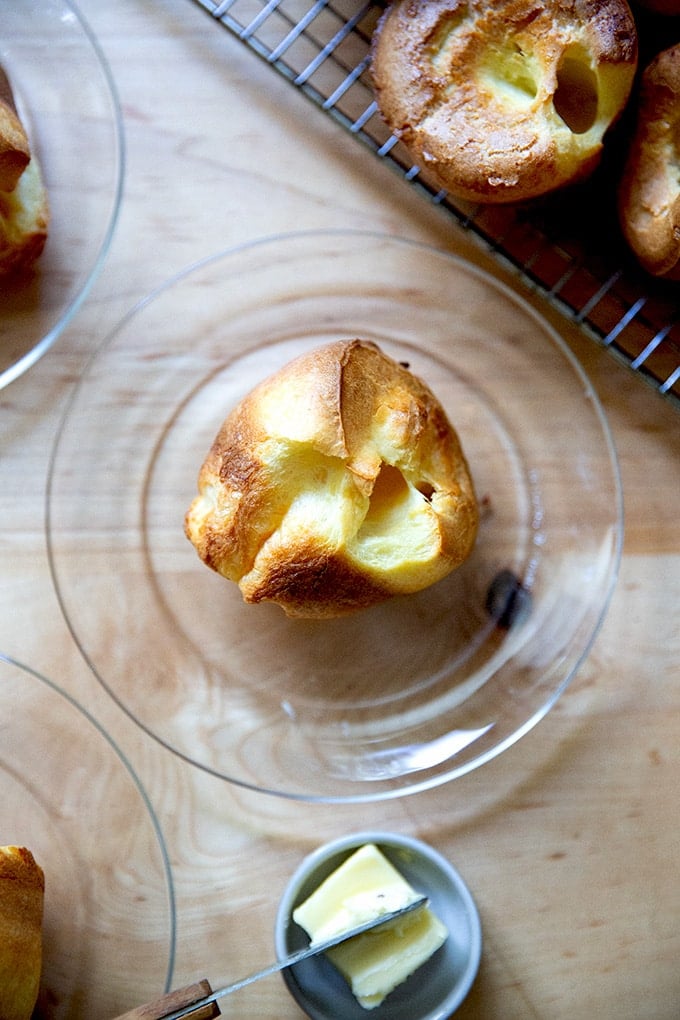
Serve with butter on the side.
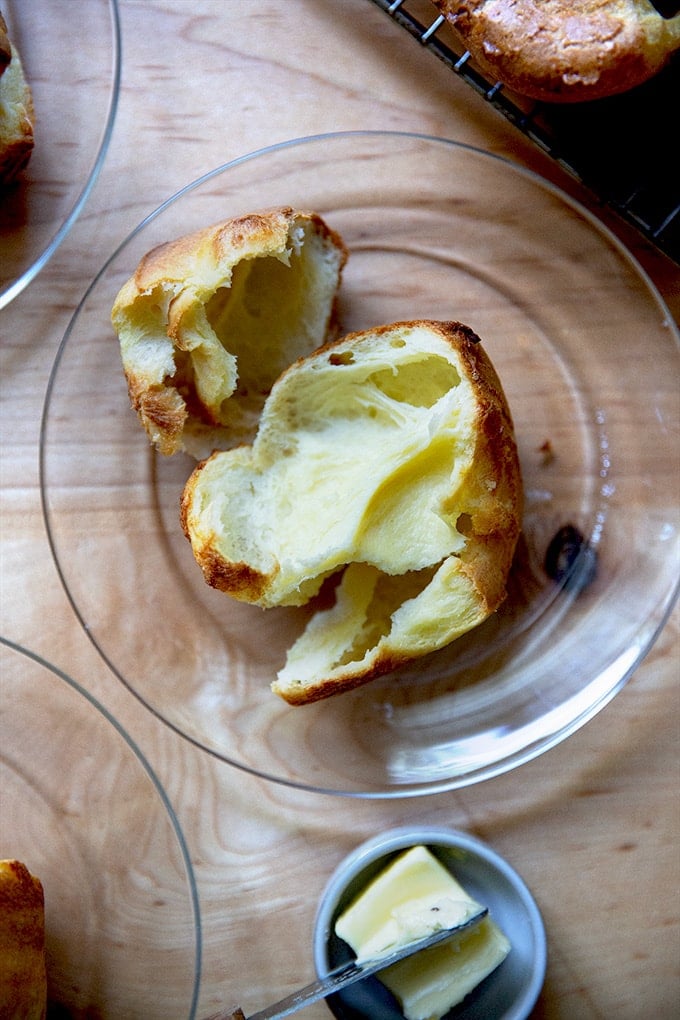
Heaven.

Description
Making popovers couldn’t be simpler: the 5-ingredient batter comes together in seconds, and 30 minutes later, they’re done! Read on to learn the tips for making foolproof popovers every time.
Notes:
Most popover recipes are basically the same — if you compare recipes, you’ll find they differ slightly in the number of eggs and quantities of milk and flour, but you’ll also see that the basic ratio of flour to milk to eggs is roughly the same.
*Another name for popovers is Yorkshire pudding, the only difference being the baking method. Yorkshire pudding calls for preheating the pan with meat drippings before pouring the batter over the top.
This is essentially 1.5 times my mother’s recipe, with influences from both King Arthur Flour and America’s Test Kitchen , both of which emphasize using room-temperature or slightly warmed ingredients. In sum, the keys to success here are:
- Use a scale to measure — it’s the only way to measure accurately.
- Use room-temperature eggs . If you forget to bring your eggs to room temperature, you can plunge them into a bowl of hot tap water for 10 minutes. Truly: I don’t think I’ve ever used room-temperature eggs when a recipe has called for it, and I’ve never noticed a difference. With popovers, I have.
- Use room-temperature milk . If you forget to bring your milk to room temperature, you can heat it briefly in the microwave or on the stovetop — just until it’s warm to the touch, 75ºF or so.
- Hot oven . You’ll want to start with your oven at 425ºF at a minimum. Some recipes call for 450ºF, but I find in my oven that temperature browns the popovers a little too much for my liking. Every oven is different, however, so you may find 450ºF works better for you.
- Bread flour : for especially loft popovers, bread flour is your gal! I have achieved great loft with all-purpose flour as well, but I did achieve the greatest heights when I used bread flour.
A note on salt: If you are using Morton kosher salt or fine sea salt use 1/2 teaspoon.
The pan: I love this USA muffin pan . You can use a traditional 6-well popover pan, too, but I prefer the results when the batter is spread among 12 wells. My batter stuck in my popover pan, too, which made for mangled popovers upon removing them. I highly recommend simply using a metal muffin pan for best results here.
- softened butter, for greasing, plus more for serving
- 3 large eggs, room temperature (see recipe if you forget to take your eggs out ahead of time)
- 1 1/2 cups ( 375 grams ) room-temperature milk — I’ve been using 2% (see recipe if you forget to leave your milk out ahead of time)
- 1 1/2 cups ( 192 grams ) bread flour or all-purpose flour
- 1 teaspoon ( 3 grams ) kosher salt, I use Diamond Crystal brand, see notes above
- 3 tablespoons ( 43 grams ) melted butter — I use salted, but unsalted is fine
- Preheat the oven to 425ºF with a rack in the center. Grease a 12-cup muffin tin with the softened butter.
- If your eggs are not at room temperature, place them in a bowl and cover with hot tap water. Let stand for 10 minutes, then remove.
- Place your milk in the microwave for 1 minute. Remove. It should be roughly 75ºF, but slightly warmer is fine, too. I have also used milk that I’ve left at room temperature for several hours, and that has worked great, but I think you’ll find you’ll get even more loft if you warm the milk slightly. You can do this on the stovetop, too — just heat it until it is warm to the touch.
- Place the eggs, milk, flour, and salt in a blender and blend to combine, roughly 30 seconds. I use my Vitamix, and I blend at speed 5. You want a smooth batter here, and using a blender ensures your batter will be smooth.
- Add the melted butter and blend for another 15 to 20 seconds. (Alternatively, whisk by hand: whisk together the eggs, milk, and salt first; add the flour and whisk until combined and smooth; add the butter and whisk again until smooth.)
- Pour the batter into the prepared muffin tin, aiming to fill each well halfway with the batter. Once you’ve filled each well, divide any remaining batter as evenly as possible among the wells.
- Transfer to the oven immediately and bake for 20 minutes. Lower the heat to 350ºF and bake for 10 minutes more.
- Remove, transfer to a serving bowl, and eat immediately! Serve with softened butter on the side.
- Prep Time: 15 minutes
- Cook Time: 30 minutes
- Category: Bread
- Method: Oven
- Cuisine: Amerian
Making popovers couldn’t be simpler: the 5-ingredient batter comes together in seconds, and 30 minutes later, they’re done! Read on to learn the tips for making foolproof popovers every time.
There is nothing more festive than pulling a pan of lofty popovers (also known as Yorkshire pudding*) from the oven just as everyone is gathering around the table to eat. Piping hot and light as air with custardy centers begging for pats of butter, popovers are a treat to behold.
Having made many batches of popovers over the years, I’ve learned how to achieve lofty popovers every time: room temperature ingredients + a hot oven = popover success. This is because popovers rely on steam — as opposed to baking powder, baking soda, or yeast — to rise. This King Arthur Flour article says it best: “The warmer your batter going into the oven, the more quickly it’ll produce steam: simple as that.”
Final tip? Use the right flour. For especially lofty popovers, bread flour is your gal! I achieve great loft with all-purpose flour as well, but I achieve the greatest heights when I use bread flour.
How to Make Lofty Popovers, Step by Step
Gather your ingredients: eggs, milk, melted butter, flour, and salt. You want your eggs and milk at room temperature — see the recipe box for tips if you forget to leave them out before getting started.
Combine the eggs (room temperature), milk (room temperature or slightly warmed), salt, and flour in a blender. Blend for 30 seconds until combined. Alternatively, whisk the ingredients together by hand. I find using the blender ensures a smooth batter, which is what you want here.
Add the melted butter and blend again for 15 to 20 seconds.
The batter should be smooth:
Transfer the batter to a buttered muffin tin, then place in the oven and bake at 425ºF for 20 minutes and 350ºF for 10 minutes:
Ta-da! How fun are they?
Remove from the oven and admire your work…
… briefly! I’m not even sure why I turned these out onto a cooling rack because…
… the one rule of popovers is: Eat Immediately! Transfer them to a bowl and pass around the table.
Serve with butter on the side.
Heaven.
Description
Making popovers couldn’t be simpler: the 5-ingredient batter comes together in seconds, and 30 minutes later, they’re done! Read on to learn the tips for making foolproof popovers every time.
Notes:
Most popover recipes are basically the same — if you compare recipes, you’ll find they differ slightly in the number of eggs and quantities of milk and flour, but you’ll also see that the basic ratio of flour to milk to eggs is roughly the same.
*Another name for popovers is Yorkshire pudding, the only difference being the baking method. Yorkshire pudding calls for preheating the pan with meat drippings before pouring the batter over the top.
This is essentially 1.5 times my mother’s recipe, with influences from both King Arthur Flour and America’s Test Kitchen , both of which emphasize using room-temperature or slightly warmed ingredients. In sum, the keys to success here are:
- Use a scale to measure — it’s the only way to measure accurately.
- Use room-temperature eggs . If you forget to bring your eggs to room temperature, you can plunge them into a bowl of hot tap water for 10 minutes. Truly: I don’t think I’ve ever used room-temperature eggs when a recipe has called for it, and I’ve never noticed a difference. With popovers, I have.
- Use room-temperature milk . If you forget to bring your milk to room temperature, you can heat it briefly in the microwave or on the stovetop — just until it’s warm to the touch, 75ºF or so.
- Hot oven . You’ll want to start with your oven at 425ºF at a minimum. Some recipes call for 450ºF, but I find in my oven that temperature browns the popovers a little too much for my liking. Every oven is different, however, so you may find 450ºF works better for you.
- Bread flour : for especially loft popovers, bread flour is your gal! I have achieved great loft with all-purpose flour as well, but I did achieve the greatest heights when I used bread flour.
A note on salt: If you are using Morton kosher salt or fine sea salt use 1/2 teaspoon.
The pan: I love this USA muffin pan . You can use a traditional 6-well popover pan, too, but I prefer the results when the batter is spread among 12 wells. My batter stuck in my popover pan, too, which made for mangled popovers upon removing them. I highly recommend simply using a metal muffin pan for best results here.
- softened butter, for greasing, plus more for serving
- 3 large eggs, room temperature (see recipe if you forget to take your eggs out ahead of time)
- 1 1/2 cups ( 375 grams ) room-temperature milk — I’ve been using 2% (see recipe if you forget to leave your milk out ahead of time)
- 1 1/2 cups ( 192 grams ) bread flour or all-purpose flour
- 1 teaspoon ( 3 grams ) kosher salt, I use Diamond Crystal brand, see notes above
- 3 tablespoons ( 43 grams ) melted butter — I use salted, but unsalted is fine
- Preheat the oven to 425ºF with a rack in the center. Grease a 12-cup muffin tin with the softened butter.
- If your eggs are not at room temperature, place them in a bowl and cover with hot tap water. Let stand for 10 minutes, then remove.
- Place your milk in the microwave for 1 minute. Remove. It should be roughly 75ºF, but slightly warmer is fine, too. I have also used milk that I’ve left at room temperature for several hours, and that has worked great, but I think you’ll find you’ll get even more loft if you warm the milk slightly. You can do this on the stovetop, too — just heat it until it is warm to the touch.
- Place the eggs, milk, flour, and salt in a blender and blend to combine, roughly 30 seconds. I use my Vitamix, and I blend at speed 5. You want a smooth batter here, and using a blender ensures your batter will be smooth.
- Add the melted butter and blend for another 15 to 20 seconds. (Alternatively, whisk by hand: whisk together the eggs, milk, and salt first; add the flour and whisk until combined and smooth; add the butter and whisk again until smooth.)
- Pour the batter into the prepared muffin tin, aiming to fill each well halfway with the batter. Once you’ve filled each well, divide any remaining batter as evenly as possible among the wells.
- Transfer to the oven immediately and bake for 20 minutes. Lower the heat to 350ºF and bake for 10 minutes more.
- Remove, transfer to a serving bowl, and eat immediately! Serve with softened butter on the side.
- Prep Time: 15 minutes
- Cook Time: 30 minutes
- Category: Bread
- Method: Oven
- Cuisine: Amerian
Find it online : https://alexandracooks.com/2023/10/21/lofty-popovers-yorkshire-pudding/
Seasoned simply with olive oil and salt, these roasted green beans emerge from the oven in just about 20 minutes, crisp-tender in texture with blistered edges. Here they’re topped with caramelized shallots, and the savory-sweet combination is irresistible.

My youngest child has fallen in love with gymnastics. With several of her weekday practices running late into the evening, our post-practice routine has become to stop by Stewart’s for fuel: for milkshakes or ice cream or, recently, for Funyuns.
I have no idea where she learned of them, but on one stop last month, she pulled a bag off the shelf as casually as I pull milk from the cooler and threw them on the checkout counter. On the drive home, she insisted I taste a few. They’re so good , Mom , she said. You have to have some.
She was not wrong. They are addictively delicious, and as she continued to hand me fistfuls of Funyuns, I couldn’t help but wish our family Thanksgiving tradition included some sort of green bean casserole topped with crispy fried onions or, better: Funyuns!
Don’t worry. This is not a post about DIY Funyuns or elevated green bean casserole. I have never experienced an authentic green bean casserole so I wouldn’t know where to begin.
But I do love green beans. And I do love the idea of green beans on the Thanksgiving table. And I do love the idea of those green beans being topped with crispy fried onions.
The recipe below is the result of several endeavors to create a green bean-ish casserole topped with crispy fried onions without actually having to fry the onions. Spoiler: it didn’t work. I couldn’t get the onions (or shallots) really crisp without using a fair amount of hot oil, and I just don’t love that process.
But what I don’t mind doing, especially in the name of a holiday side dish, is to slowly cook shallots on the stovetop until they turn deep amber in hue, become meltingly tender in texture, and taste as sweet as candy. These caramelized shallots pair so well with roasted green beans, which emerge from the oven in just about 20 minutes, crisp-tender in texture with blistered edges.
I find this savory-sweet combination irresistible and while I had low expectations of my children enjoying them, two of them have, my son especially. The first time I served them, he took one bite, then, commenting on their sweetness, scooped another hefty portion onto his plate.
Friends, these beans hold well at room temperature and will make their debut on my family’s holiday table this Thanksgiving , which somehow is less than two weeks away. I’ve added some notes in the recipe box below should you wish to add them to your menu. I hope all of your holiday plans are going well!
PS: 25+ Thanksgiving Side Dishes
Roasted Green Beans with Caramelized Shallots, Step by Step
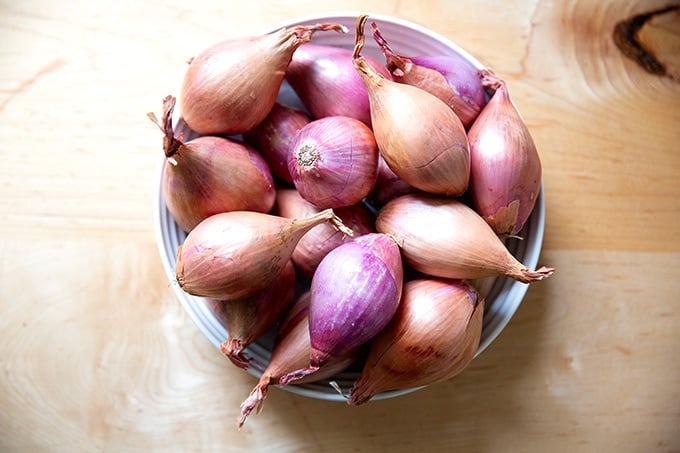
First, gather some shallots.
Peel them.
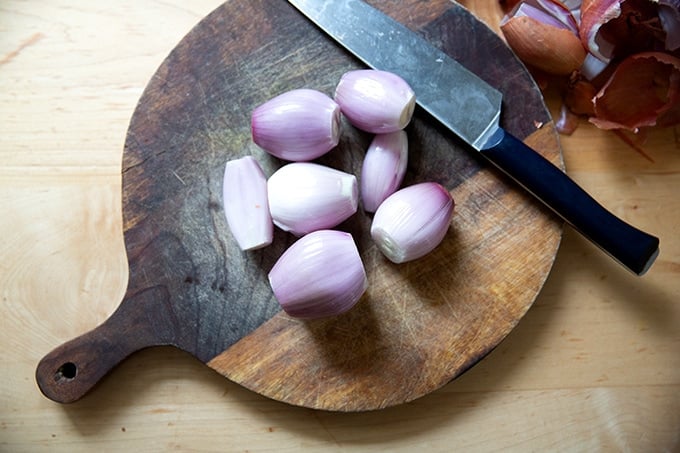
Then thinly slice them: You, of course, can use a knife, but if you are comfortable using a mandoline , now is the time to break it out.
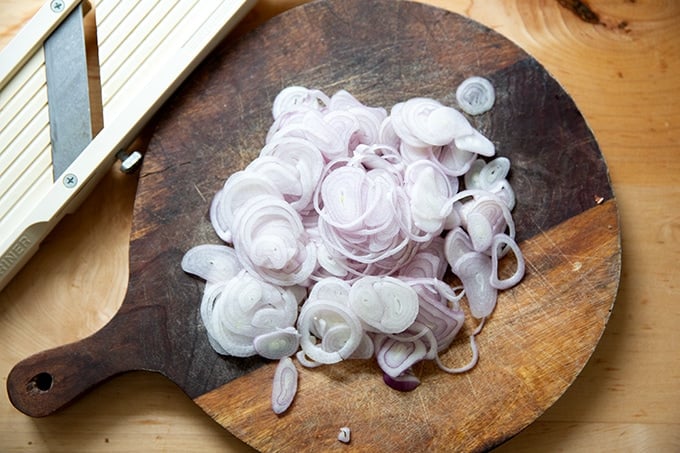
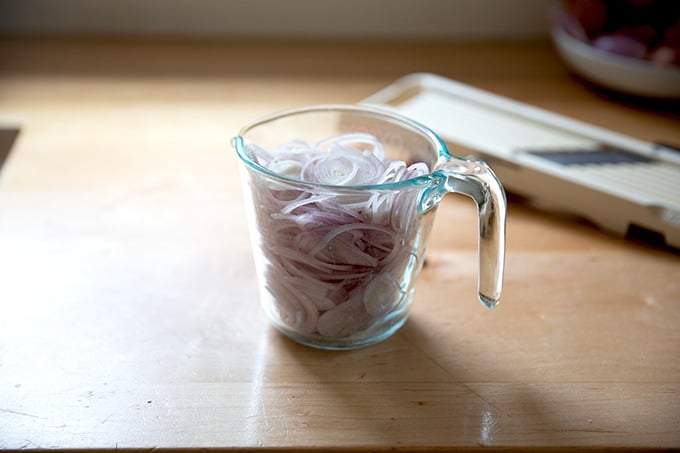
You need roughly two cups of sliced shallots:
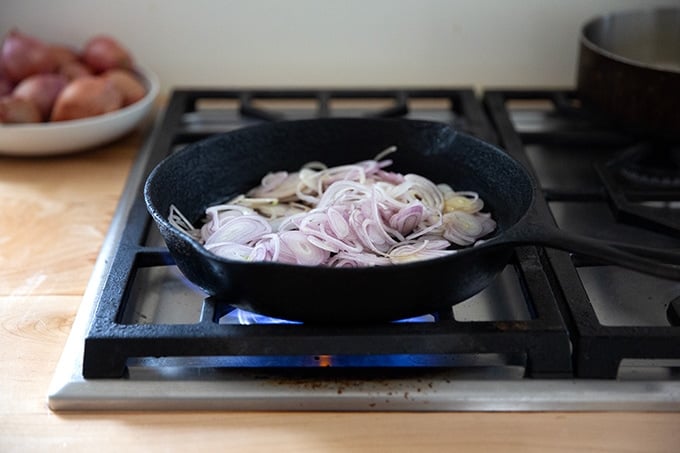
Add the shallots to a skillet with some olive oil:
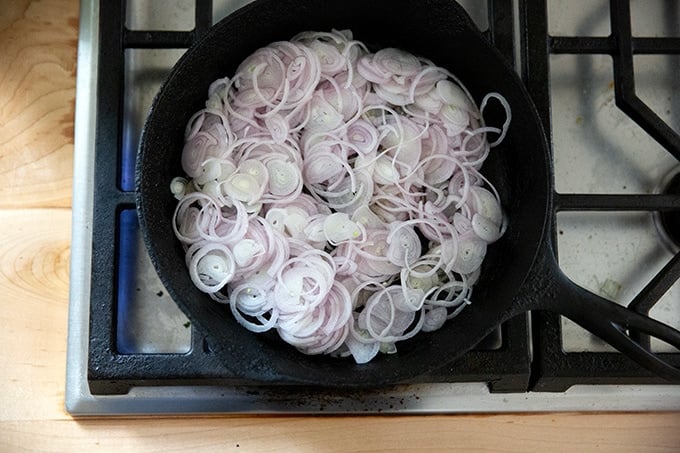
You can start the skillet over high heat, but as soon as the shallots begin sizzling, turn the heat to low.
This is an exercise of patience: as the shallots begin to slowly brown, stir occasionally:

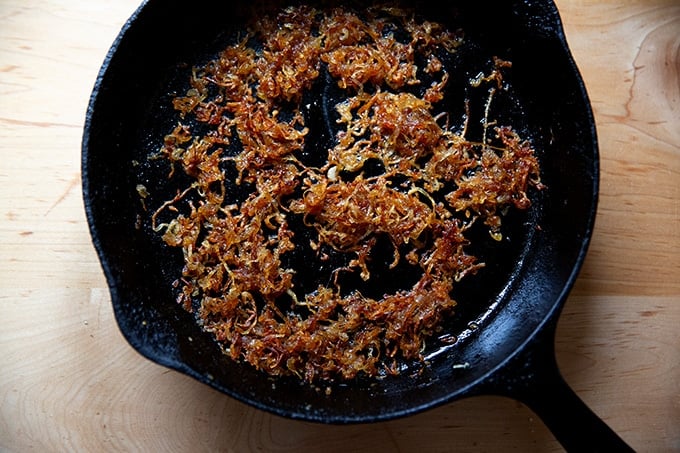
They’re getting there…

… there they are! When the shallots turn deep amber in hue, they’re done.
Transfer them to a paper towel or towel-lined plate. Season with flaky sea salt.
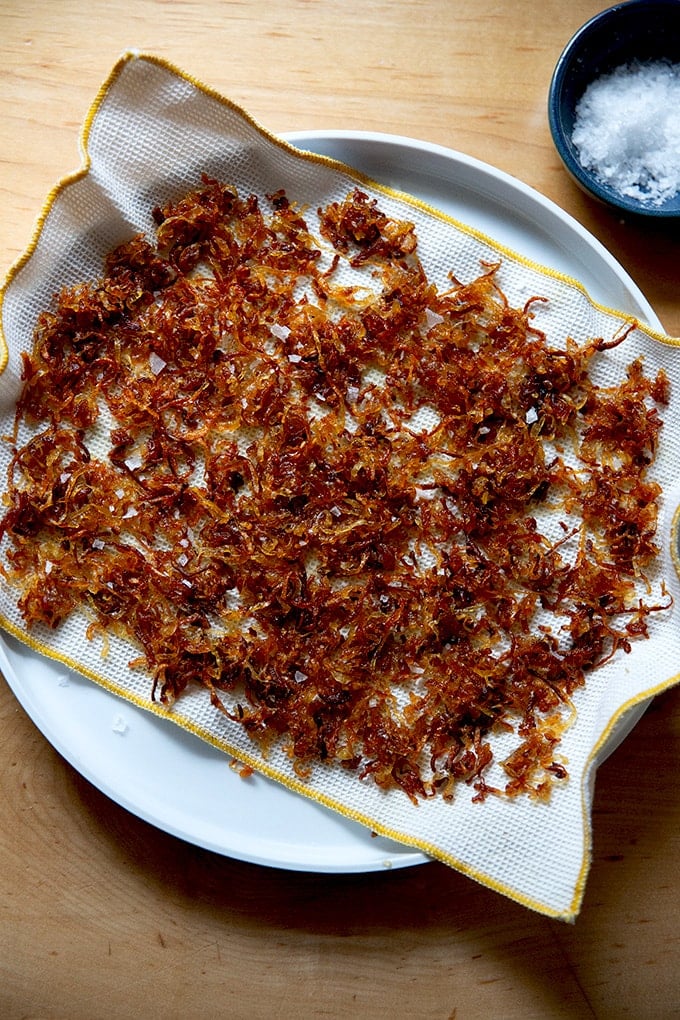
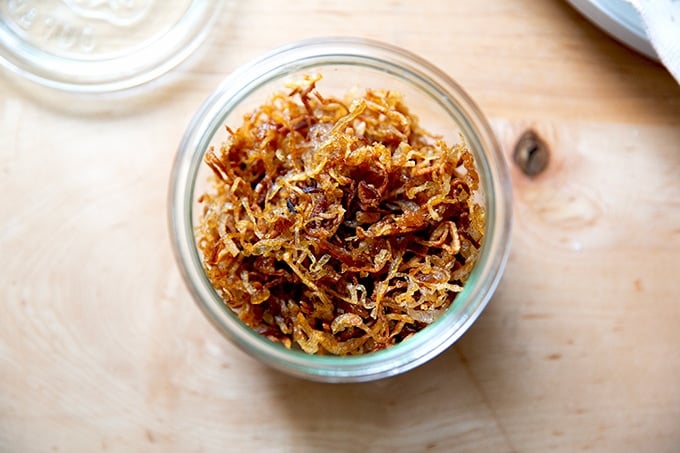
You can make the shallots days ahead of time. Store them at room temperature in an airtight vessel for 3 to 5 days.
While the shallots caramelize on the stovetop, get going on the green beans: I’ve been buying these French green beans from Whole Foods, which conveniently are already trimmed, and which are very tasty, too. Of course, regular green beans will work in their place.

This is two pounds of beans — scale down or up as needed. Toss with extra-virgin olive oil and salt.
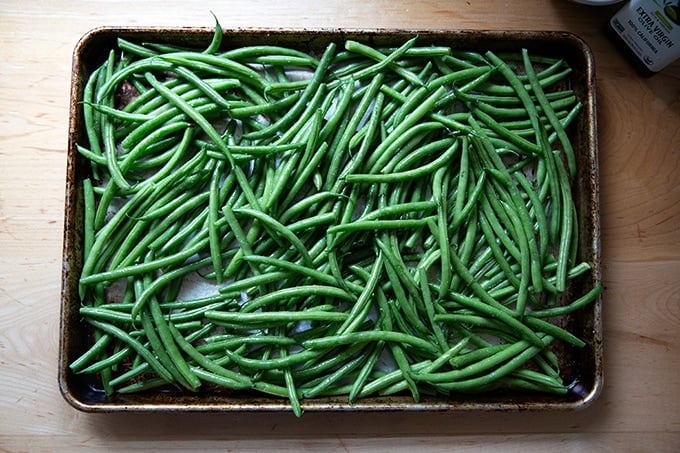
Transfer to a 450ºF oven for 15 to 25 minutes, depending on how many pounds of green beans you are cooking.
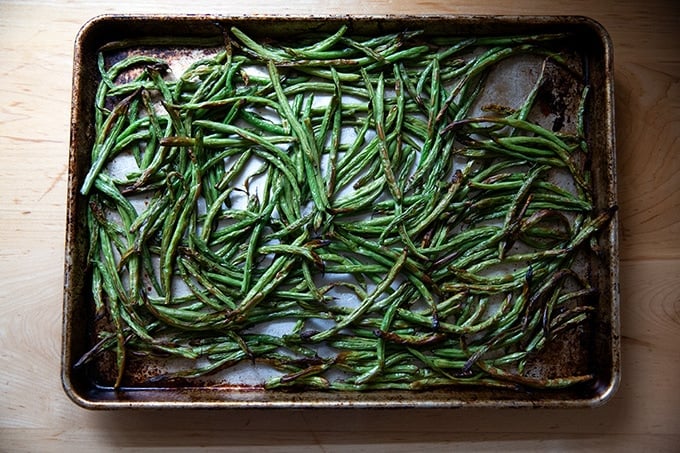
Out of the oven, toss the green beans with vinegar. Taste and adjust with salt to taste.

Transfer the beans to a serving platter.

Top with those irresistibly sweet shallots.
Description
Notes:
Green beans: I’ve been buying the French green beans (haricot verts) from Whole Foods, which are very tasty, and which conveniently are already trimmed. If you are using regular greens beans, trim away the rough stem (where the bean would attach to the vine) as opposed to the pointy tip.
Timing: If you are looking to serve these on the holiday table, here are a few thoughts: the shallots can be made 2-3 days ahead of time and stored in an airtight vessel at room temperature. The beans, however, should be roasted the day of serving. I tried reheating day-old, refrigerated beans, and they left much to be desired. I have, however, made these several times earlier in the day and served them at room temperature and they were delicious. If you have time or the oven space to roast the beans after the turkey emerges from the oven or in a second oven closer to serving time, that is ideal, otherwise, I think you could definitely roast them before your turkey enters the oven, transfer them onto a platter, top with the caramelized shallots, and hold them at room temperature before your turkey enters the oven.
5 to 7 shallots (enough to yield 2 cups sliced)
1/4 cup + 2 tablespoons extra-virgin olive oil
2 pounds green beans, trimmed, see notes above
kosher salt, I use Diamond Crystal brand (see Instructions below if using Morton or fine sea salt)
2 to 3 teaspoons white balsamic vinegar or whatever vinegar you like
flaky sea salt
- Heat the oven to 450ºF (convection roast if possible).
- Thinly slice the shallots. I love using my mandoline for this, but a knife works just fine, too. You need roughly 2 cups.
- Place 1/4 cup of the olive oil and the shallots in a skillet (I’ve been using a 9-inch cast iron skillet) and set over high heat. As soon as the oil and the shallots begin to sizzle, give the shallots a stir, then turn the heat to low. Line a plate with a paper towel or cloth dish towel. Cook the shallots for 25 to 30 minutes or more, stirring occasionally until they’ve turned a deep amber hue — be patient here. The shallots will soften first, then slowly begin to caramelize. If you turn up the heat, they’ll burn quickly. Low and slow is the name of the game here. That said, you can turn up the heat here and there if you wish, but if you do, stir continuously. As soon as you walk away from the skillet, turn the heat to low. Once the shallots are caramelized and beginning to crisp, use a slotted spoon or slotted spatula to transfer them to your prepared plate. Season with a generous pink of flaky sea salt. Once they are completely cool, you can transfer them to a storage container. Store at room temperature for 2 to 3 days.
- Meanwhile, place the green beans on a rimmed sheet pan (at least 13 x 18 inches). Toss with the remaining 2 tablespoons of olive oil and 1.5 to 2 teaspoons of the kosher salt. If you are sensitive to salt, use 1.5 teaspoons to start. I do not find 2 teaspoons of salt to be too salty here, and I, in fact, finish the green beans with more flaky sea salt to taste (but, as many of you know, I do love salt). If you are using Morton Kosher salt, you’ll want to use half as much: start with 3/4 teaspoon, then season with more to taste after the beans have roasted. And same goes for fine sea salt: use 3/4 teaspoon to start.
- Spread the beans in an even layer, then transfer the pan to the oven for 15 minutes (or 10 minutes if using only 1 pound of beans). Remove the pan, stir the beans, then return to the oven for 5 to 10 minutes more or until some of the greens are charred at the edges and all of the greens are crisp-tender.
- Remove the pan from the oven and toss with 2 to 3 teaspoons of the vinegar (I use 3 teaspoons). Taste. Add flaky sea salt or more kosher salt to taste. Toss, taste, and adjust with more salt and vinegar to taste.
- Transfer the beans to a platter, then top with the caramelized shallots. Serve immediately or at room temperature. I find these delicious at room temperature or even beyond room temperature (as in cold many hours later but not refrigerated cold).
- Prep Time: 20 minutes
- Cook Time: 30 minutes
- Category: Side Dish
- Method: Stovetop, Oven
- Cuisine: American
