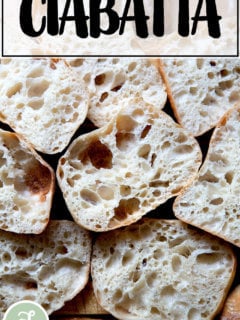
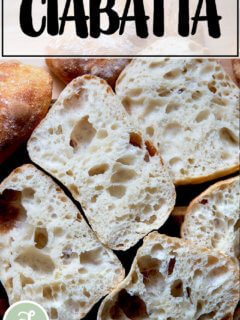
This post will teach you how to make a crusty, open-crumbed loaf of ciabatta bread. Below you will find a detailed guide full of tips and tricks to help you make a loaf of ciabatta bread with a crisp, golden exterior and a light, airy crumb. Find video guidance below, too!
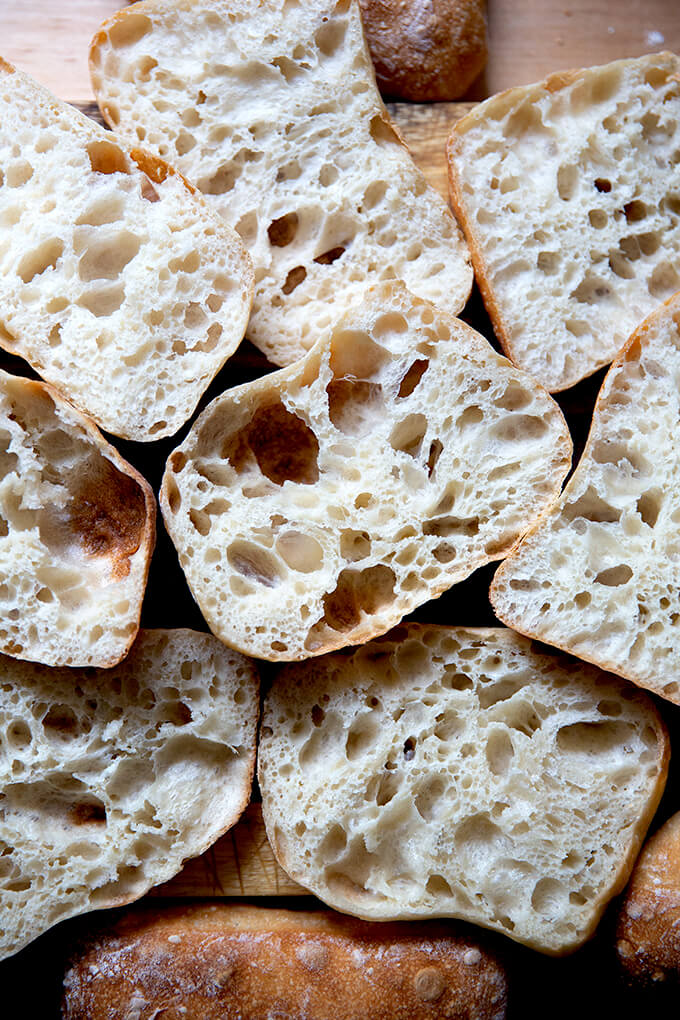
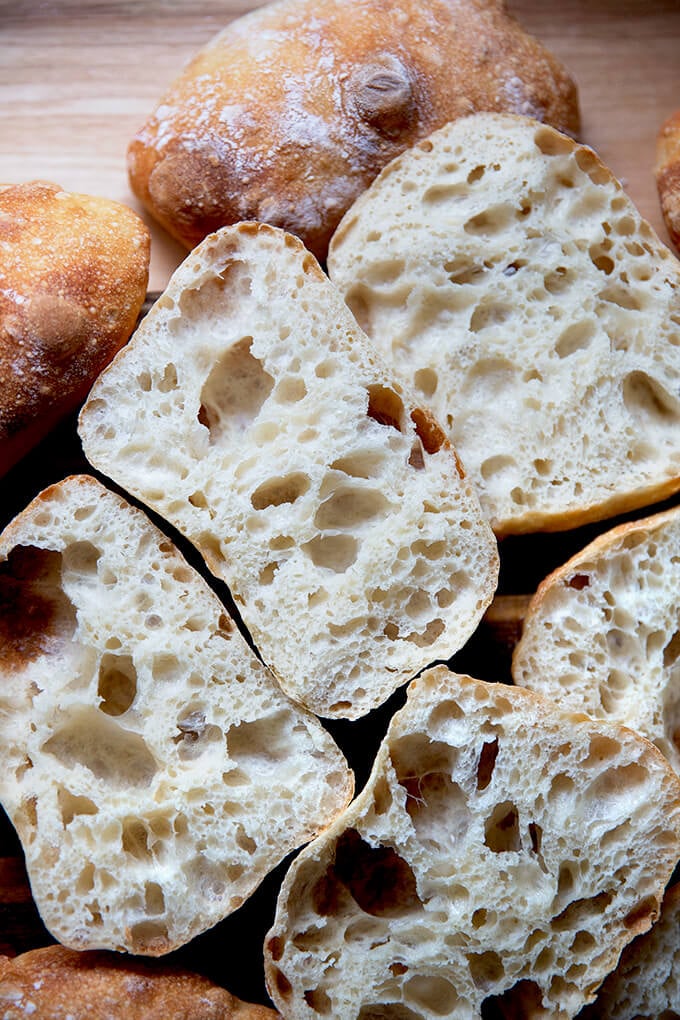
Originating from the Lake Como region of northern Italy, ciabatta means “slipper” in Italian and is characterized by a crusty exterior and a porous, chewy crumb. Traditionally, ciabatta is made with a poolish or biga , which is a small amount of flour and water mixed with a leavening agent, left to ferment for a short time. Ciabatta dough is wet and sticky, with hydration levels often 80% or higher.
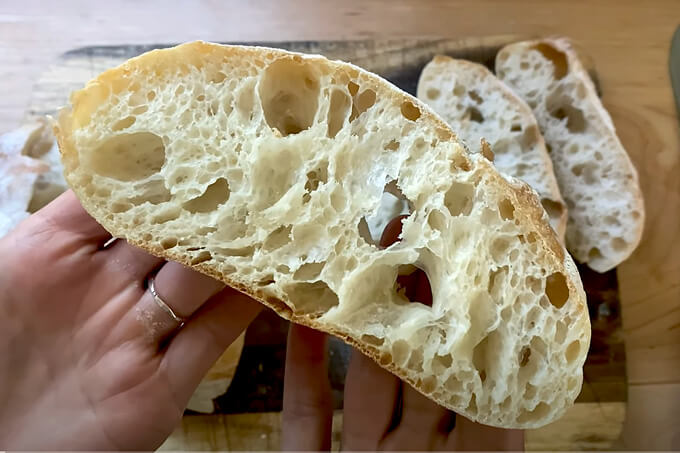
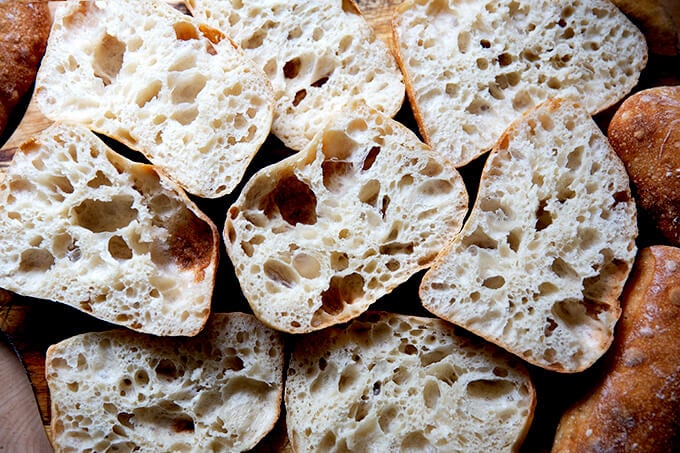
The recipe below is made in this traditional style, using a poolish that ferments for 3 to 4 hours and has an overall hydration of 82%. A few sets of stretches and folds make the dough completely manageable to work with, and the loaves emerge from the oven with a light and airy crumb full of amorphous holes.
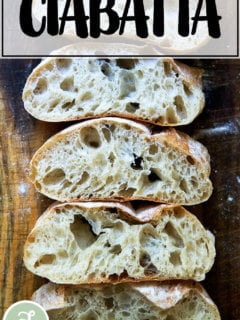
This bread is perfect for halving and sandwiching with fillings of all kinds; its crustiness ensures it won’t get soggy if you pack it for the beach or a hike. It’s also, of course, an excellent dinner bread, served alongside a pool of olive oil to dunk into at will.
PS: Simple Sourdough Ciabatta
How to Make Ciabatta Bread, Step by Step
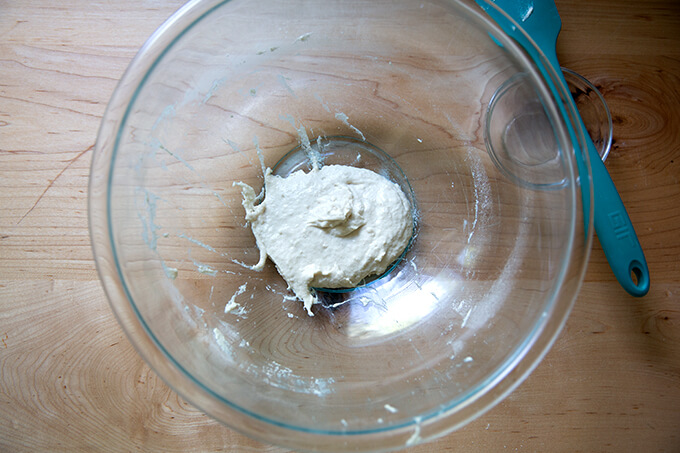
The first step of the recipe calls for making the poolish . To do so, gather your ingredients: flour, water, and instant yeast. SAF is my preference.
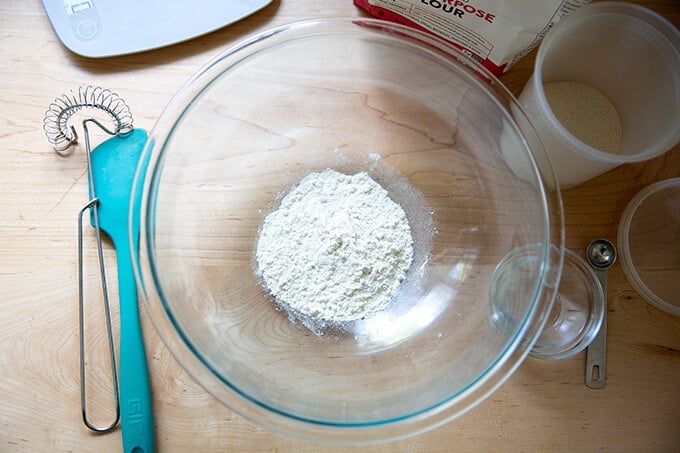
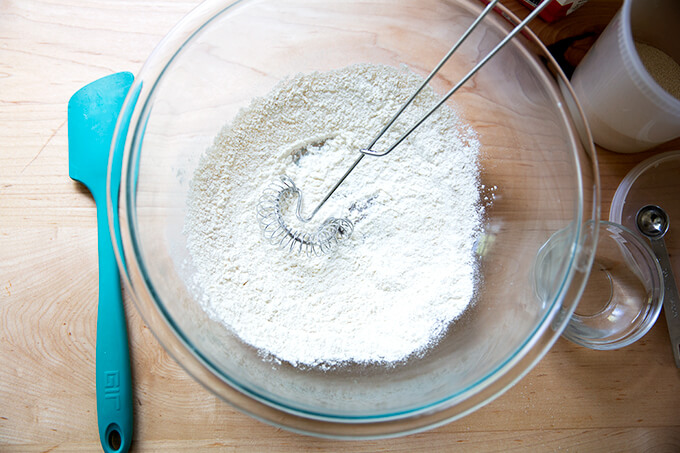
Whisk together 50 grams flour and 1/2 teaspoon instant yeast.
Add 50 grams water.
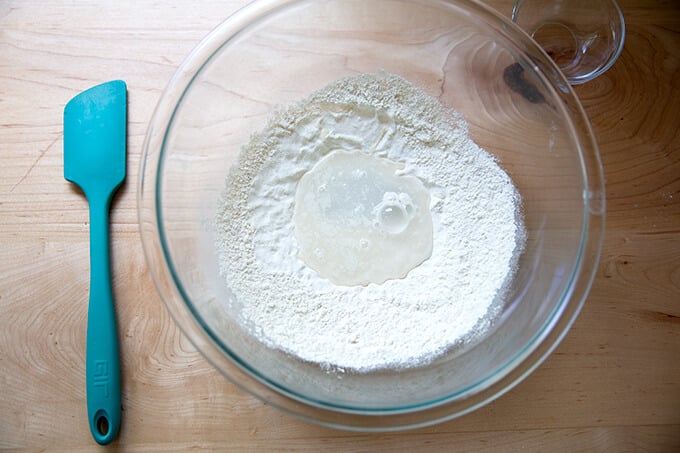
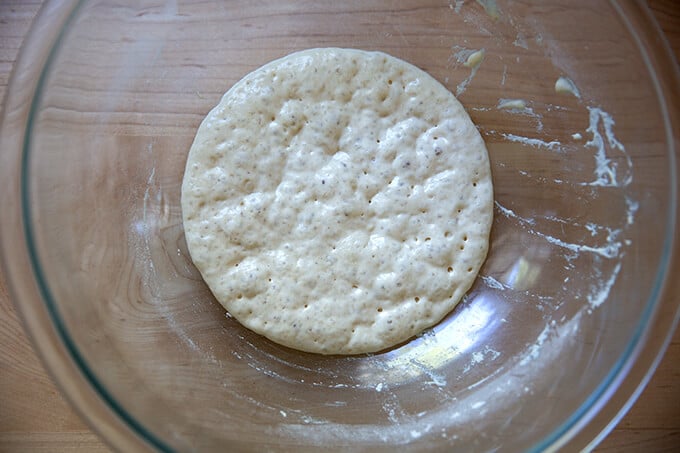
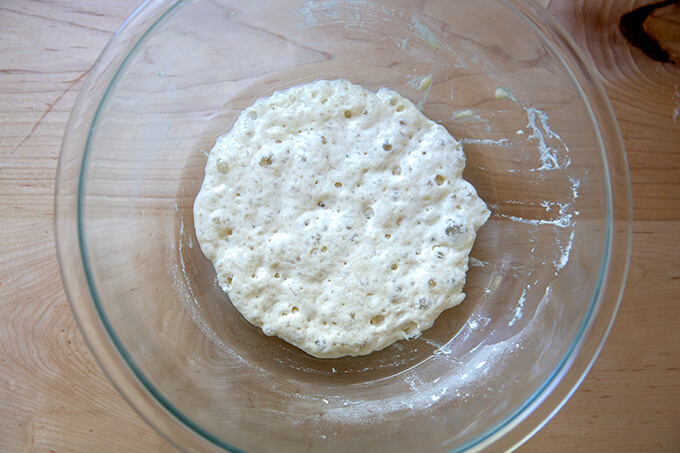
Stir to combine. Cover the bowl and let sit for 3 to 4 hours or until…
… the surface of the dough is dimpled with air pockets.
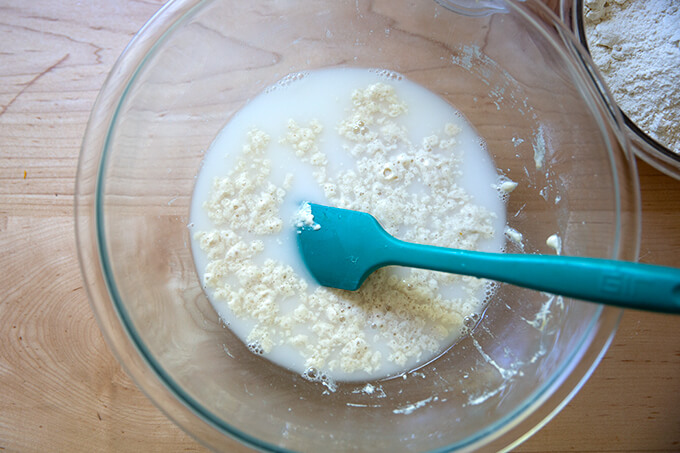
Add 360 grams water. (This part is really fun … the poolish bubbles up as a unit and floats on top of the water… it really feels alive!)
Stir to combine; then add 12 grams salt and stir again to combine.
Add 450 grams flour, preferably bread flour.
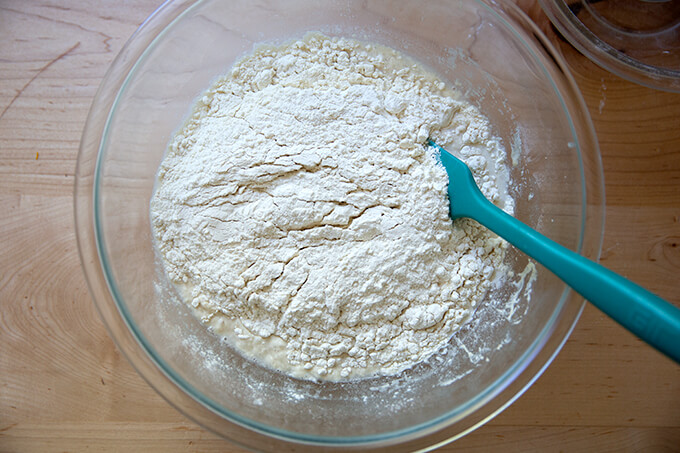
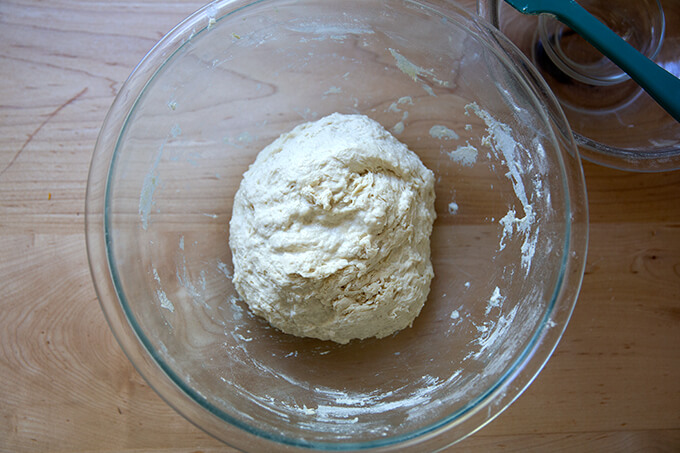
Using a spatula, stir until you have a sticky dough ball. Cover and set aside for 30 minutes.
With wet hands, perform a set of stretches and folds, by grabbing one side of the dough, and pulling it up and to the center. Rotate the bowl a quarter turn, and repeat the grabbing and pulling. Do this until you’ve made a full circle. ( Watch the video for more guidance. I employ a sort of “slap and fold” technique, which is helpful with this very wet dough.) Cover the bowl.
Thirty minutes later, repeat the stretching and folding.
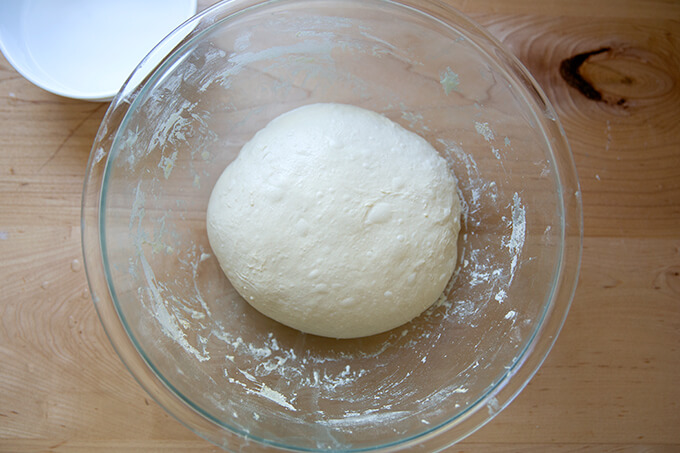
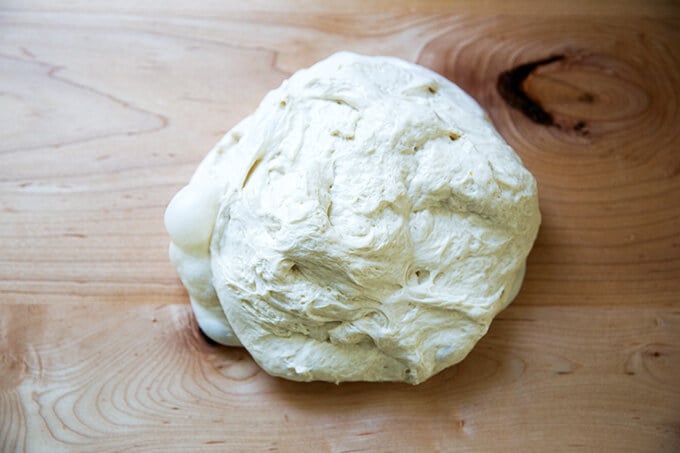
If time permits, repeat this stretching and folding twice more at 30-minute intervals. This is what the dough looks like after the third set of stretches and folds:
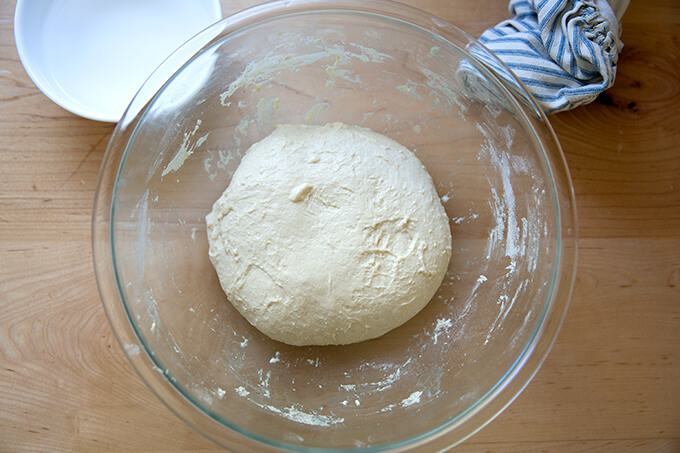
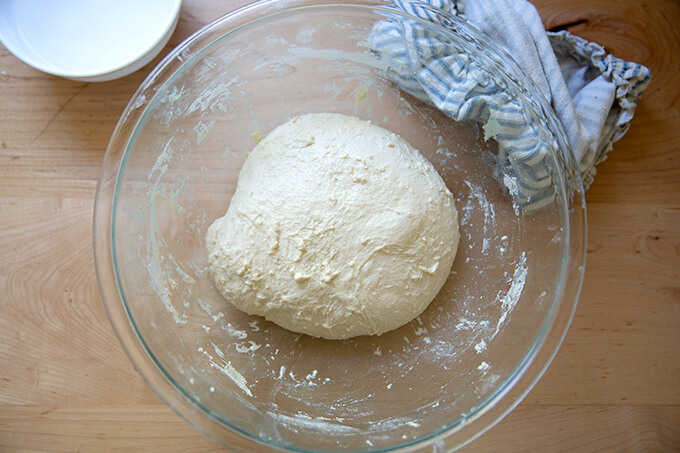
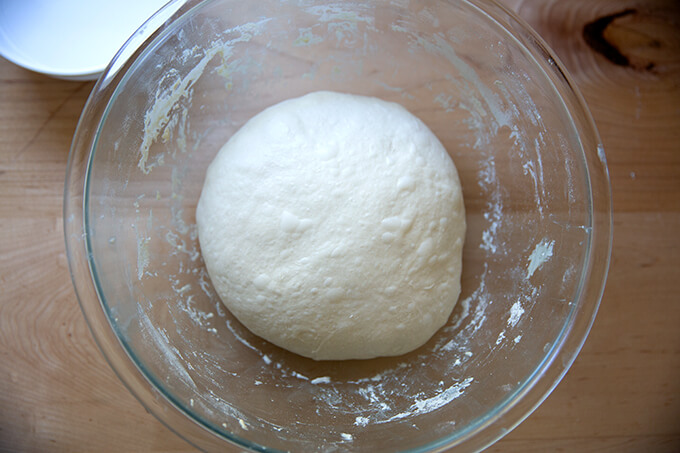
This is what the dough looks like after the 4th set. Feeling the dough transform from a sticky dough ball to a smooth and elastic one is really cool.
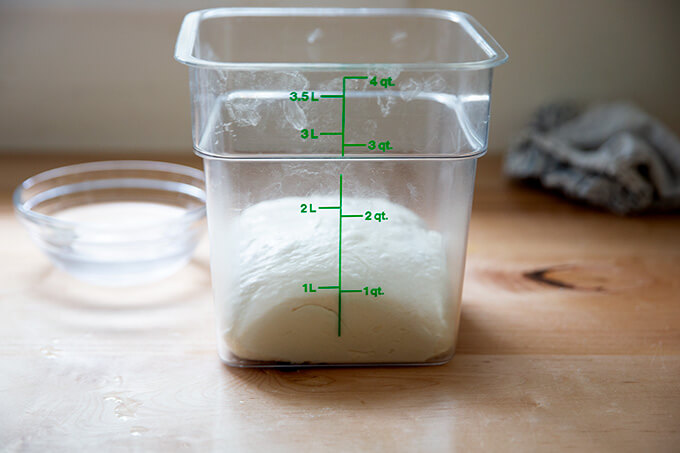
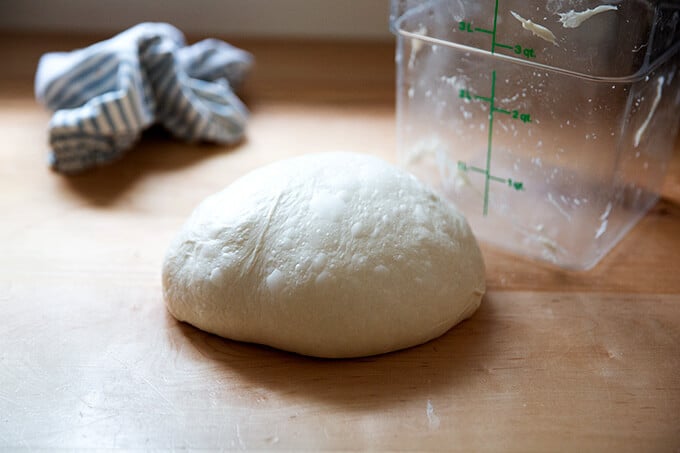
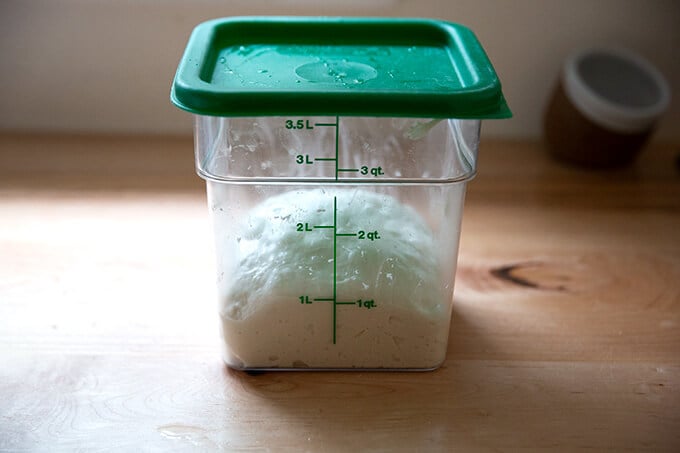
Transfer the dough to a straight-sided vessel and let it rise at room temperature until…
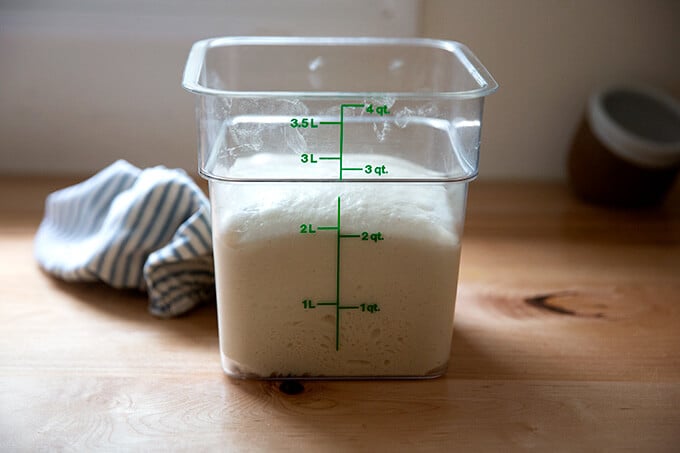
… it doubles in volume. (Note: If you don’t have a straight-sided vessel , you can simply let the dough rise in a bowl.)
Then, punch down (deflate) the dough — I like to remove the dough from the vessel …

… and ball it up using wet hands.
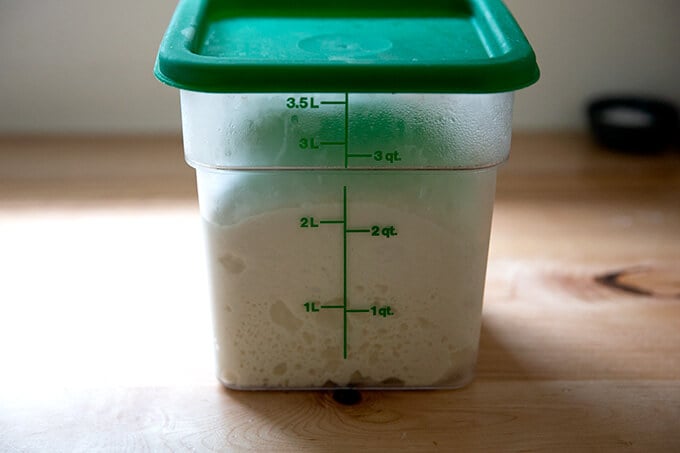
Return the dough to the vessel; then transfer to the fridge.
The dough will likely double in volume overnight in the fridge.
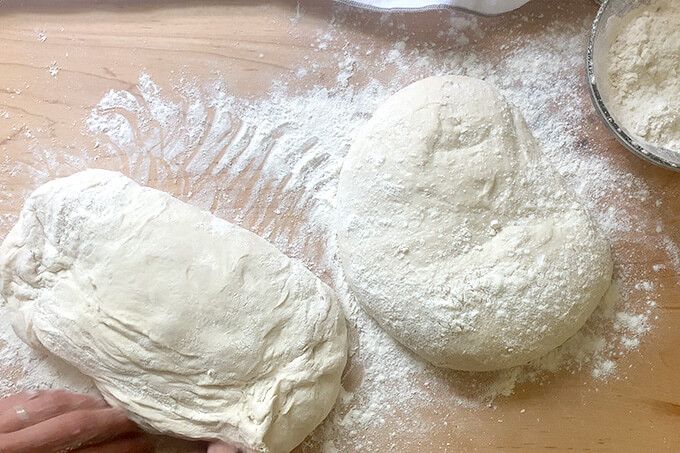
Remove the dough, turn it out onto a work surface…
… then ball it up.
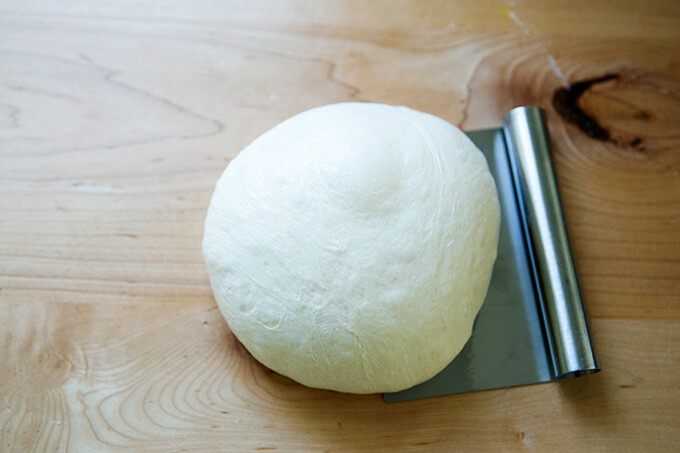
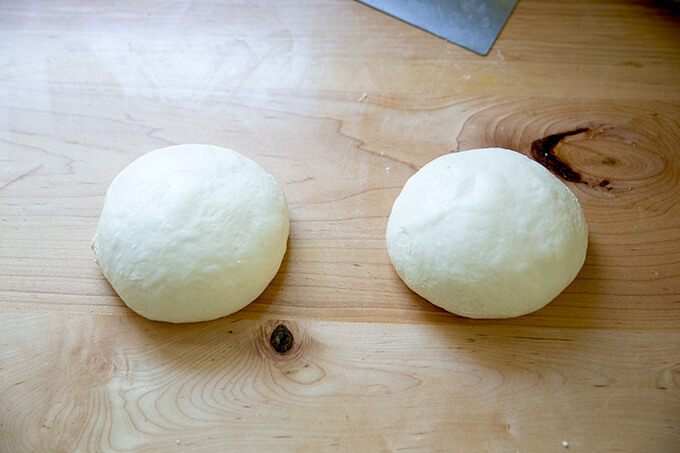
Divide the dough into two equal portions. Ball up each portion. I like to do this with very little or no flour — I find I get better tension with less flour.
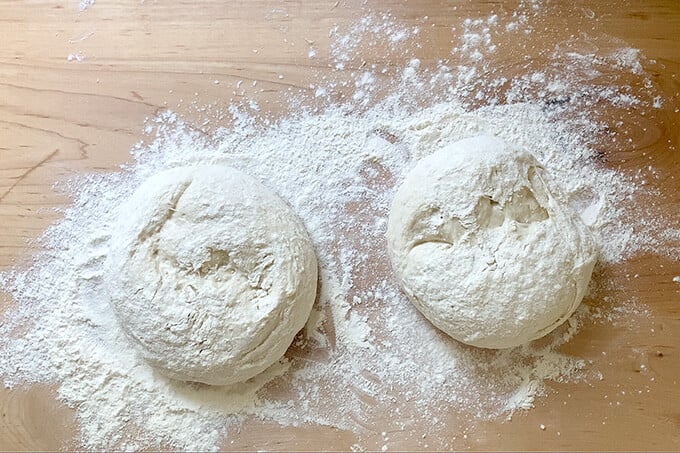
Sprinkle a work surface liberally with flour. Place the balls top-side down (the smooth side); then sprinkle the balls liberally with flour. Cover with a tea towel and let rest for 2.5 hours. Line a sheet pan with parchment paper.
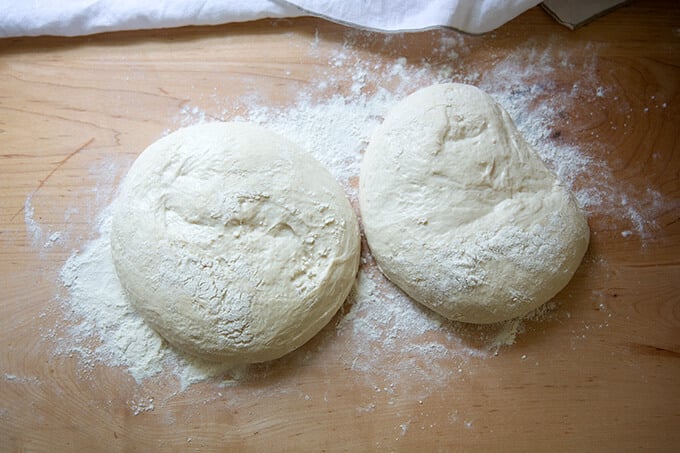
After the 2.5 hours… the dough balls will look like this:
Turn the balls back over…
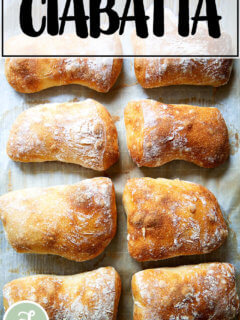
… then carefully transfer them to a parchment-lined sheet pan.
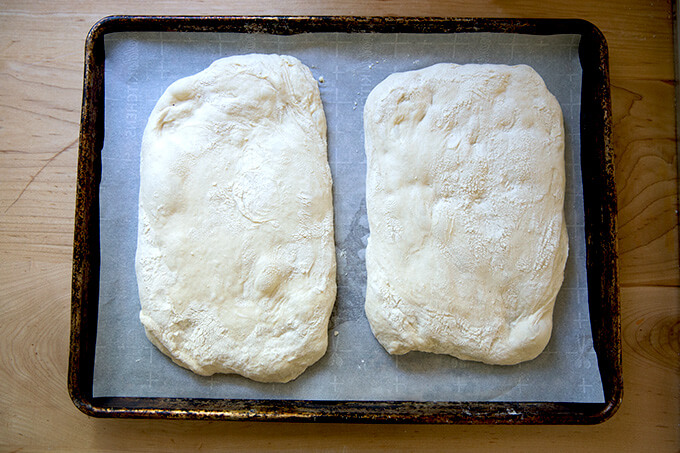
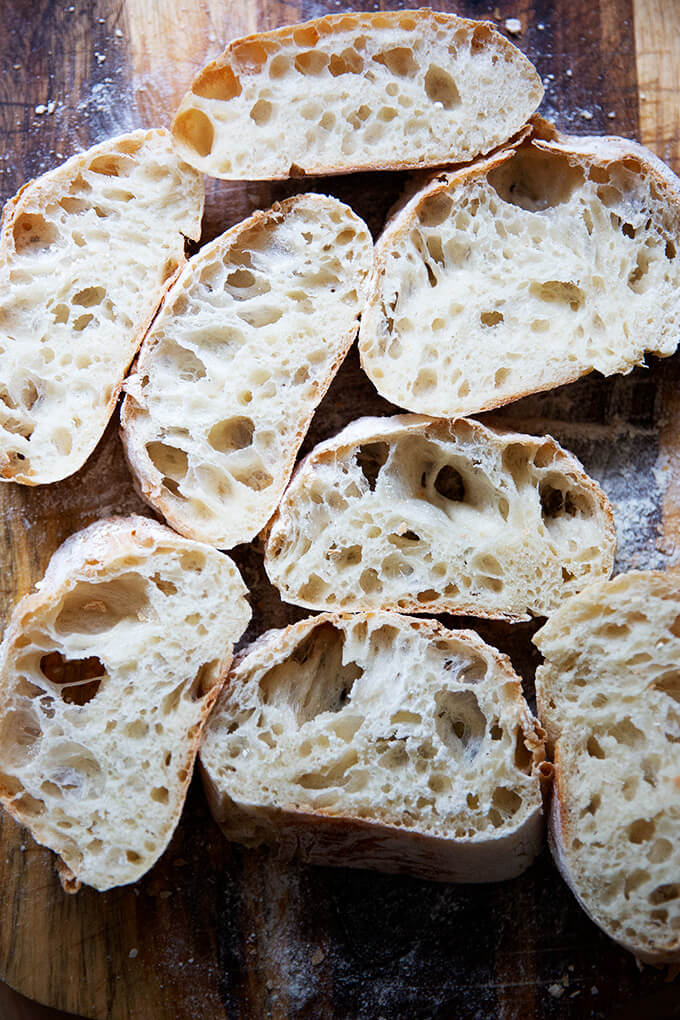
Bake at 425ºF for 20-25 minutes or until nicely golden:
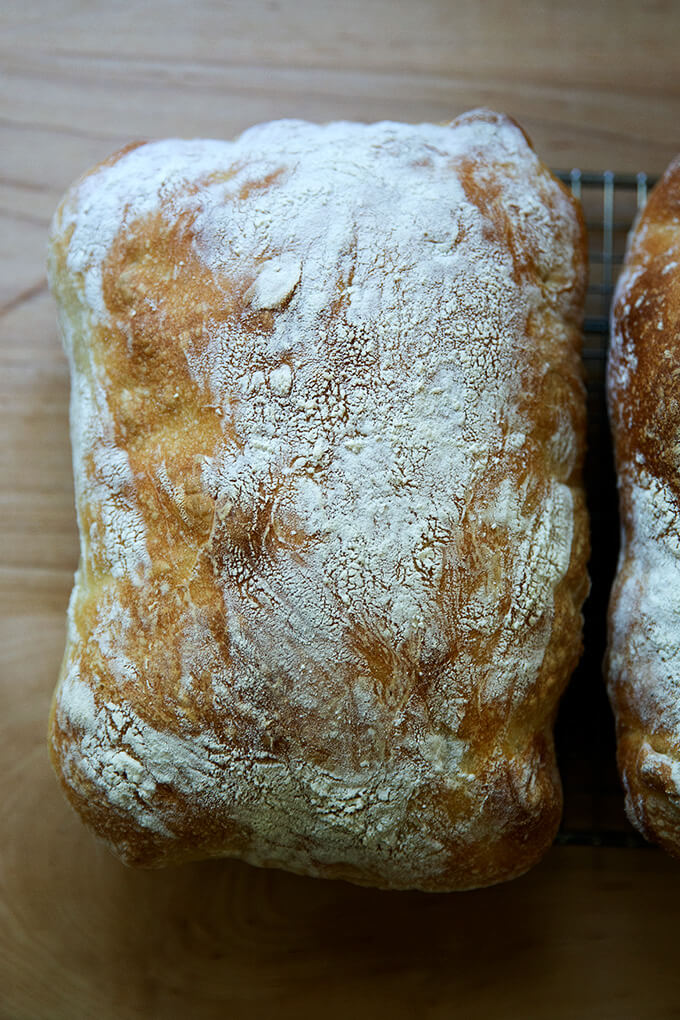
Let cool at least 20 minutes before slicing.
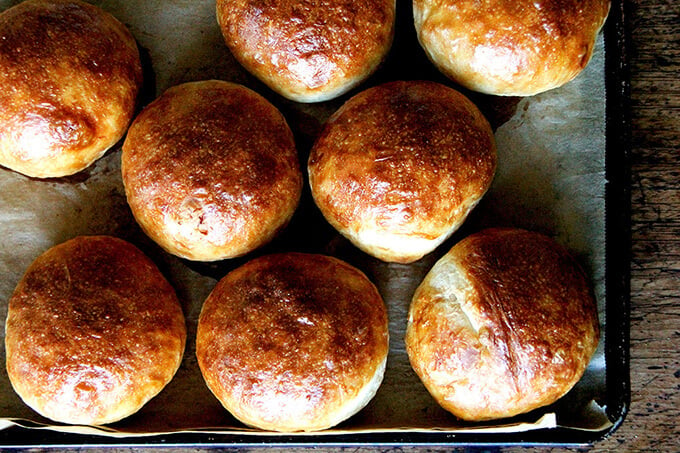
How to Make Ciabatta Rolls
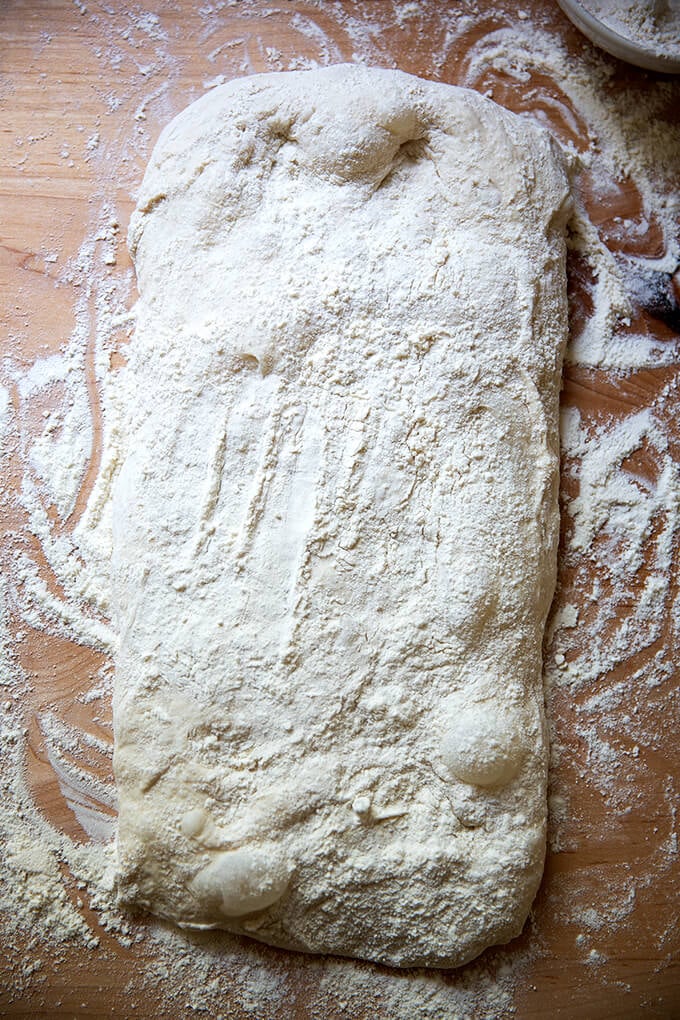
Follow the recipe in the recipe box below until the step where you remove the dough from the refrigerator; then sprinkle a work surface with flour. Turn the dough out, sprinkle the surface with more flour, and pat it into a rectangle.
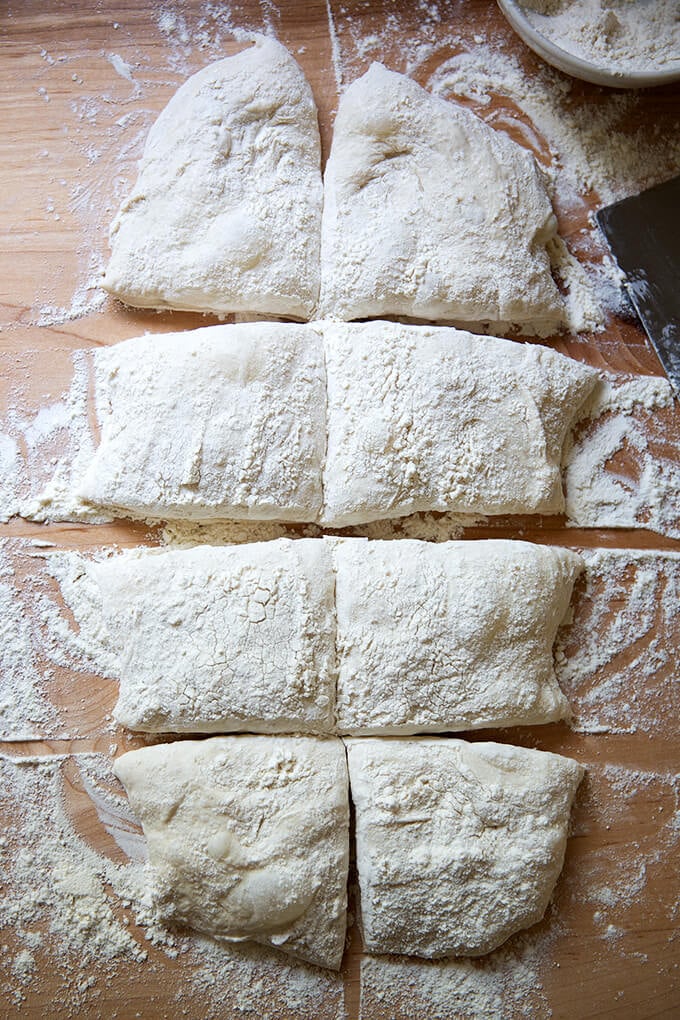
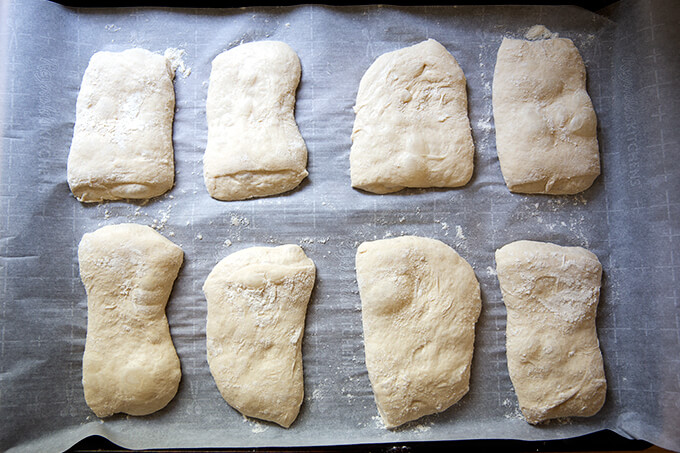
Divide into 8 portions.
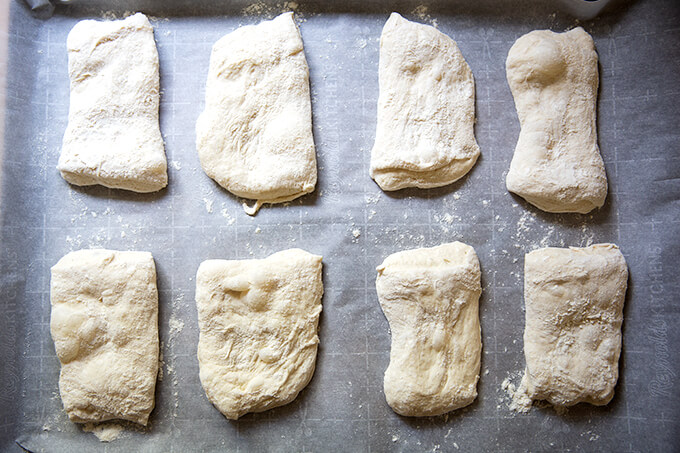
Transfer to a sheet pan, cover with a tea towel, and let stand for 2 to 2.5 hours.
Transfer the pan to the oven, and bake at 425ºF for 20 to 25 minutes.

Let cool for at least 20 minutes before halving or slicing.
Description
This post will teach you how to make a crusty, open-crumbed loaf of ciabatta bread. Below you will find a detailed guide full of tips and tricks to help you make a loaf of ciabatta bread with a crisp, golden exterior and a light, airy crumb. Find video guidance below, too.
Notes:
- As always, for best results, use a digital scale to measure the flour.
- I find a bench scraper particularly helpful for this recipe.
- I also really love using a straight-sided vessel (with lid ) both for letting the dough rise and storing it in the fridge.
- Water: This is a very high-hydration dough, and depending on the flour you are using and your environment (if you live in a humid environment, for instance), you may need to reduce the amount of water. If, for example, when doing your stretches and folds, the dough never came together in a cohesive ball, I would reduce the water by 50 to 60 grams next time around.
- Flour: I have had success using all-purpose flour, but if you can get your hands on bread flour (I use King Arthur Flour Bread Flour, which is 12.7% protein), that is ideal. All flours absorb water differently. Through troubleshooting with people all over the world, I have learned that the type of flour being used plays a critical role in how the dough turns out, and often the amount of water needs to be reduced, especially if you live in Canada or abroad. You can make the recipe once as written or add the water slowly, mixing as you do, until the dough resembles the dough in the video.
- Tunneling: A common problem with ciabatta is tunneling: large gaping holes running through a loaf of bread. If you end up baking a loaf of hollow ciabatta, try lengthening the final proof. Why? Because when under-proofed dough enters an oven, the remaining energy in the yeast leads to fast and furious gas production. This explosion of gas breaks the gluten structure of the bread, causing the tunnel to form.
For the sponge:
- 50 grams (about 1/3 cup ) all-purpose flour
- 2 grams ( 1/2 teaspoon ) instant yeast, SAF is my preference
- 50 grams (about 1/4 cup ) water, lukewarm or room temperature
For the ciabatta dough:
- 360 grams (about 1.5 cups ) water, lukewarm or room temperature
- 12 grams (about 2 teaspoons ) salt, kosher or sea salt
- 450 grams (about 3.5 cups ) bread flour, see notes above
- Make the poolish: In a large bowl, whisk together the 50 grams flour and the 2 grams (1/2 teaspoon) instant yeast. Add 50 grams water and stir with a spatula until combined. Cover the bowl with a tea towel or cloth bowl cover and set aside for 3 to 4 hours or until the dough’s surface is dimpled with holes.
- Make the dough: To the bowl of the poolish, add the water. The sponge should release from the bowl and parts of it, if not all of it, will float. Add the salt and stir briefly. Add the flour, and stir until you have a wet, sticky dough ball — dough will be very sticky. Cover with a tea towel or cloth bowl cover and let sit for 30 minutes.
- Stretches and folds : With wet hands, grab one side of the dough, and pull up and to the center. Rotate the bowl a quarter turn, and repeat the grabbing and pulling. Do this until you’ve made a full circle. (Watch the video for more guidance. I employ a “slap-and-fold” technique, which is helpful when handling these wet doughs.) Cover the bowl. If time permits, repeat this process three more times at 30-minute intervals for a total of 4 sets of stretches and folds over the course of two hours. If you are short on time, know that doing just one or two sets of stretches and folds is totally fine.
- Let it rise: Transfer the dough to a straight-sided vessel, if you have one, or leave it in the bowl if you don’t. Cover the vessel with a towel and let rise until doubled in volume. Punch down (deflate) the dough — if your dough is still in the bowl, you can deflate it using wet hands right in the bowl; if your dough is in a straight-sided vessel, it may be easier to turn the dough out onto a work surface and ball it up using wet hands to prevent sticking. Return the dough to the vessel, cover it with an airtight lid, and transfer it to the refrigerator immediately for at least 12 hours. The dough can remain in the fridge for as long as 48 hours.
- Portion, shape, and proof: For Ciabatta Loaves: Turn the dough out onto a work surface. I prefer to do this step without flour, but absolutely sprinkle your surface lightly with flour as needed to make the dough manageable to work with. Using a bench scraper or your hands, shape the dough into a tight ball; then use the bench scraper to divide the dough in half. If you want perfectly even balls, each portion will way roughly 455 grams. Again, use the bench scraper or your hands to ball up each portion into a tight ball — see video for guidance. Sprinkle your countertop liberally with flour. Place the balls top-side (smooth side) down onto the flour. The seam-side will be on top now, and it may split open — this is fine. Sprinkle the top surface of the balls liberally with flour. Cover with a tea towel and let rest for 2.5 hours. For Ciabatta Rolls: Sprinkle a work surface with flour. Turn the dough out onto the work surface, sprinkle the dough with more flour, and pat it into a rectangle. Using a bench scraper, divide into 8 portions. Transfer each portion to a parchment-lined sheet pan, cover with a tea towel, and let stand for 2.5 hours.
- Preheat the oven: After the dough has proofed for 2 hours, heat the oven to 425ºF .
- Bake: For Ciabatta Loaves: When the dough has finished proofing, gently flip each ball over — I find a bench scraper to be helpful here. Then use both hands to stretch each ball out gently into a rectangular shaped “slipper”. Transfer to a parchment-lined sheet pan. Transfer the pan to the oven and bake for 20 – 25 minutes or until the loaves are golden all around. For Ciabatta Rolls: Remove the towel, transfer the pan to the oven, and bake for 20 – 25 minutes, or until the loaves are golden all around.
- Cool: Remove pan from oven. Transfer ciabatta rolls to a cooling rack. Let cool for 20 to 30 minutes before slicing.
- Prep Time: 24 hours
- Cook Time: 20 minutes
- Category: Bread
- Method: Yeast
- Cuisine: Italian, American
This post will teach you how to make a crusty, open-crumbed loaf of ciabatta bread. Below you will find a detailed guide full of tips and tricks to help you make a loaf of ciabatta bread with a crisp, golden exterior and a light, airy crumb. Find video guidance below, too!
Originating from the Lake Como region of northern Italy, ciabatta means “slipper” in Italian and is characterized by a crusty exterior and a porous, chewy crumb. Traditionally, ciabatta is made with a poolish or biga , which is a small amount of flour and water mixed with a leavening agent, left to ferment for a short time. Ciabatta dough is wet and sticky, with hydration levels often 80% or higher.
The recipe below is made in this traditional style, using a poolish that ferments for 3 to 4 hours and has an overall hydration of 82%. A few sets of stretches and folds make the dough completely manageable to work with, and the loaves emerge from the oven with a light and airy crumb full of amorphous holes.
This bread is perfect for halving and sandwiching with fillings of all kinds; its crustiness ensures it won’t get soggy if you pack it for the beach or a hike. It’s also, of course, an excellent dinner bread, served alongside a pool of olive oil to dunk into at will.
PS: Simple Sourdough Ciabatta
How to Make Ciabatta Bread, Step by Step
The first step of the recipe calls for making the poolish . To do so, gather your ingredients: flour, water, and instant yeast. SAF is my preference.
Whisk together 50 grams flour and 1/2 teaspoon instant yeast.
Add 50 grams water.
Stir to combine. Cover the bowl and let sit for 3 to 4 hours or until…
… the surface of the dough is dimpled with air pockets.
Add 360 grams water. (This part is really fun … the poolish bubbles up as a unit and floats on top of the water… it really feels alive!)
Stir to combine; then add 12 grams salt and stir again to combine.
Add 450 grams flour, preferably bread flour.
Using a spatula, stir until you have a sticky dough ball. Cover and set aside for 30 minutes.
With wet hands, perform a set of stretches and folds, by grabbing one side of the dough, and pulling it up and to the center. Rotate the bowl a quarter turn, and repeat the grabbing and pulling. Do this until you’ve made a full circle. ( Watch the video for more guidance. I employ a sort of “slap and fold” technique, which is helpful with this very wet dough.) Cover the bowl.
Thirty minutes later, repeat the stretching and folding.
If time permits, repeat this stretching and folding twice more at 30-minute intervals. This is what the dough looks like after the third set of stretches and folds:
This is what the dough looks like after the 4th set. Feeling the dough transform from a sticky dough ball to a smooth and elastic one is really cool.
Transfer the dough to a straight-sided vessel and let it rise at room temperature until…
… it doubles in volume. (Note: If you don’t have a straight-sided vessel , you can simply let the dough rise in a bowl.)
Then, punch down (deflate) the dough — I like to remove the dough from the vessel …
… and ball it up using wet hands.
Return the dough to the vessel; then transfer to the fridge.
The dough will likely double in volume overnight in the fridge.
Remove the dough, turn it out onto a work surface…
… then ball it up.
Divide the dough into two equal portions. Ball up each portion. I like to do this with very little or no flour — I find I get better tension with less flour.
Sprinkle a work surface liberally with flour. Place the balls top-side down (the smooth side); then sprinkle the balls liberally with flour. Cover with a tea towel and let rest for 2.5 hours. Line a sheet pan with parchment paper.
After the 2.5 hours… the dough balls will look like this:
Turn the balls back over…
… then carefully transfer them to a parchment-lined sheet pan.
Bake at 425ºF for 20-25 minutes or until nicely golden:
Let cool at least 20 minutes before slicing.
How to Make Ciabatta Rolls
Follow the recipe in the recipe box below until the step where you remove the dough from the refrigerator; then sprinkle a work surface with flour. Turn the dough out, sprinkle the surface with more flour, and pat it into a rectangle.
Divide into 8 portions.
Transfer to a sheet pan, cover with a tea towel, and let stand for 2 to 2.5 hours.
Transfer the pan to the oven, and bake at 425ºF for 20 to 25 minutes.
Let cool for at least 20 minutes before halving or slicing.
Description
This post will teach you how to make a crusty, open-crumbed loaf of ciabatta bread. Below you will find a detailed guide full of tips and tricks to help you make a loaf of ciabatta bread with a crisp, golden exterior and a light, airy crumb. Find video guidance below, too.
Notes:
- As always, for best results, use a digital scale to measure the flour.
- I find a bench scraper particularly helpful for this recipe.
- I also really love using a straight-sided vessel (with lid ) both for letting the dough rise and storing it in the fridge.
- Water: This is a very high-hydration dough, and depending on the flour you are using and your environment (if you live in a humid environment, for instance), you may need to reduce the amount of water. If, for example, when doing your stretches and folds, the dough never came together in a cohesive ball, I would reduce the water by 50 to 60 grams next time around.
- Flour: I have had success using all-purpose flour, but if you can get your hands on bread flour (I use King Arthur Flour Bread Flour, which is 12.7% protein), that is ideal. All flours absorb water differently. Through troubleshooting with people all over the world, I have learned that the type of flour being used plays a critical role in how the dough turns out, and often the amount of water needs to be reduced, especially if you live in Canada or abroad. You can make the recipe once as written or add the water slowly, mixing as you do, until the dough resembles the dough in the video.
- Tunneling: A common problem with ciabatta is tunneling: large gaping holes running through a loaf of bread. If you end up baking a loaf of hollow ciabatta, try lengthening the final proof. Why? Because when under-proofed dough enters an oven, the remaining energy in the yeast leads to fast and furious gas production. This explosion of gas breaks the gluten structure of the bread, causing the tunnel to form.
For the sponge:
- 50 grams (about 1/3 cup ) all-purpose flour
- 2 grams ( 1/2 teaspoon ) instant yeast, SAF is my preference
- 50 grams (about 1/4 cup ) water, lukewarm or room temperature
For the ciabatta dough:
- 360 grams (about 1.5 cups ) water, lukewarm or room temperature
- 12 grams (about 2 teaspoons ) salt, kosher or sea salt
- 450 grams (about 3.5 cups ) bread flour, see notes above
- Make the poolish: In a large bowl, whisk together the 50 grams flour and the 2 grams (1/2 teaspoon) instant yeast. Add 50 grams water and stir with a spatula until combined. Cover the bowl with a tea towel or cloth bowl cover and set aside for 3 to 4 hours or until the dough’s surface is dimpled with holes.
- Make the dough: To the bowl of the poolish, add the water. The sponge should release from the bowl and parts of it, if not all of it, will float. Add the salt and stir briefly. Add the flour, and stir until you have a wet, sticky dough ball — dough will be very sticky. Cover with a tea towel or cloth bowl cover and let sit for 30 minutes.
- Stretches and folds : With wet hands, grab one side of the dough, and pull up and to the center. Rotate the bowl a quarter turn, and repeat the grabbing and pulling. Do this until you’ve made a full circle. (Watch the video for more guidance. I employ a “slap-and-fold” technique, which is helpful when handling these wet doughs.) Cover the bowl. If time permits, repeat this process three more times at 30-minute intervals for a total of 4 sets of stretches and folds over the course of two hours. If you are short on time, know that doing just one or two sets of stretches and folds is totally fine.
- Let it rise: Transfer the dough to a straight-sided vessel, if you have one, or leave it in the bowl if you don’t. Cover the vessel with a towel and let rise until doubled in volume. Punch down (deflate) the dough — if your dough is still in the bowl, you can deflate it using wet hands right in the bowl; if your dough is in a straight-sided vessel, it may be easier to turn the dough out onto a work surface and ball it up using wet hands to prevent sticking. Return the dough to the vessel, cover it with an airtight lid, and transfer it to the refrigerator immediately for at least 12 hours. The dough can remain in the fridge for as long as 48 hours.
- Portion, shape, and proof: For Ciabatta Loaves: Turn the dough out onto a work surface. I prefer to do this step without flour, but absolutely sprinkle your surface lightly with flour as needed to make the dough manageable to work with. Using a bench scraper or your hands, shape the dough into a tight ball; then use the bench scraper to divide the dough in half. If you want perfectly even balls, each portion will way roughly 455 grams. Again, use the bench scraper or your hands to ball up each portion into a tight ball — see video for guidance. Sprinkle your countertop liberally with flour. Place the balls top-side (smooth side) down onto the flour. The seam-side will be on top now, and it may split open — this is fine. Sprinkle the top surface of the balls liberally with flour. Cover with a tea towel and let rest for 2.5 hours. For Ciabatta Rolls: Sprinkle a work surface with flour. Turn the dough out onto the work surface, sprinkle the dough with more flour, and pat it into a rectangle. Using a bench scraper, divide into 8 portions. Transfer each portion to a parchment-lined sheet pan, cover with a tea towel, and let stand for 2.5 hours.
- Preheat the oven: After the dough has proofed for 2 hours, heat the oven to 425ºF .
- Bake: For Ciabatta Loaves: When the dough has finished proofing, gently flip each ball over — I find a bench scraper to be helpful here. Then use both hands to stretch each ball out gently into a rectangular shaped “slipper”. Transfer to a parchment-lined sheet pan. Transfer the pan to the oven and bake for 20 – 25 minutes or until the loaves are golden all around. For Ciabatta Rolls: Remove the towel, transfer the pan to the oven, and bake for 20 – 25 minutes, or until the loaves are golden all around.
- Cool: Remove pan from oven. Transfer ciabatta rolls to a cooling rack. Let cool for 20 to 30 minutes before slicing.
- Prep Time: 24 hours
- Cook Time: 20 minutes
- Category: Bread
- Method: Yeast
- Cuisine: American, Italian
Description
This post will teach you how to make a crusty, open-crumbed loaf of ciabatta bread. Below you will find a detailed guide full of tips and tricks to help you make a loaf of ciabatta bread with a crisp, golden exterior and a light, airy crumb. Find video guidance below, too.
Notes:
- As always, for best results, use a digital scale to measure the flour.
- I find a bench scraper particularly helpful for this recipe.
- I also really love using a straight-sided vessel (with lid ) both for letting the dough rise and storing it in the fridge.
- Water: This is a very high-hydration dough, and depending on the flour you are using and your environment (if you live in a humid environment, for instance), you may need to reduce the amount of water. If, for example, when doing your stretches and folds, the dough never came together in a cohesive ball, I would reduce the water by 50 to 60 grams next time around.
- Flour: I have had success using all-purpose flour, but if you can get your hands on bread flour (I use King Arthur Flour Bread Flour, which is 12.7% protein), that is ideal. All flours absorb water differently. Through troubleshooting with people all over the world, I have learned that the type of flour being used plays a critical role in how the dough turns out, and often the amount of water needs to be reduced, especially if you live in Canada or abroad. You can make the recipe once as written or add the water slowly, mixing as you do, until the dough resembles the dough in the video.
- Tunneling: A common problem with ciabatta is tunneling: large gaping holes running through a loaf of bread. If you end up baking a loaf of hollow ciabatta, try lengthening the final proof. Why? Because when under-proofed dough enters an oven, the remaining energy in the yeast leads to fast and furious gas production. This explosion of gas breaks the gluten structure of the bread, causing the tunnel to form.
For the sponge:
- 50 grams (about 1/3 cup ) all-purpose flour
- 2 grams ( 1/2 teaspoon ) instant yeast, SAF is my preference
- 50 grams (about 1/4 cup ) water, lukewarm or room temperature
For the ciabatta dough:
- 360 grams (about 1.5 cups ) water, lukewarm or room temperature
- 12 grams (about 2 teaspoons ) salt, kosher or sea salt
- 450 grams (about 3.5 cups ) bread flour, see notes above
- Make the poolish: In a large bowl, whisk together the 50 grams flour and the 2 grams (1/2 teaspoon) instant yeast. Add 50 grams water and stir with a spatula until combined. Cover the bowl with a tea towel or cloth bowl cover and set aside for 3 to 4 hours or until the dough’s surface is dimpled with holes.
- Make the dough: To the bowl of the poolish, add the water. The sponge should release from the bowl and parts of it, if not all of it, will float. Add the salt and stir briefly. Add the flour, and stir until you have a wet, sticky dough ball — dough will be very sticky. Cover with a tea towel or cloth bowl cover and let sit for 30 minutes.
- Stretches and folds : With wet hands, grab one side of the dough, and pull up and to the center. Rotate the bowl a quarter turn, and repeat the grabbing and pulling. Do this until you’ve made a full circle. (Watch the video for more guidance. I employ a “slap-and-fold” technique, which is helpful when handling these wet doughs.) Cover the bowl. If time permits, repeat this process three more times at 30-minute intervals for a total of 4 sets of stretches and folds over the course of two hours. If you are short on time, know that doing just one or two sets of stretches and folds is totally fine.
- Let it rise: Transfer the dough to a straight-sided vessel, if you have one, or leave it in the bowl if you don’t. Cover the vessel with a towel and let rise until doubled in volume. Punch down (deflate) the dough — if your dough is still in the bowl, you can deflate it using wet hands right in the bowl; if your dough is in a straight-sided vessel, it may be easier to turn the dough out onto a work surface and ball it up using wet hands to prevent sticking. Return the dough to the vessel, cover it with an airtight lid, and transfer it to the refrigerator immediately for at least 12 hours. The dough can remain in the fridge for as long as 48 hours.
- Portion, shape, and proof: For Ciabatta Loaves: Turn the dough out onto a work surface. I prefer to do this step without flour, but absolutely sprinkle your surface lightly with flour as needed to make the dough manageable to work with. Using a bench scraper or your hands, shape the dough into a tight ball; then use the bench scraper to divide the dough in half. If you want perfectly even balls, each portion will way roughly 455 grams. Again, use the bench scraper or your hands to ball up each portion into a tight ball — see video for guidance. Sprinkle your countertop liberally with flour. Place the balls top-side (smooth side) down onto the flour. The seam-side will be on top now, and it may split open — this is fine. Sprinkle the top surface of the balls liberally with flour. Cover with a tea towel and let rest for 2.5 hours. For Ciabatta Rolls: Sprinkle a work surface with flour. Turn the dough out onto the work surface, sprinkle the dough with more flour, and pat it into a rectangle. Using a bench scraper, divide into 8 portions. Transfer each portion to a parchment-lined sheet pan, cover with a tea towel, and let stand for 2.5 hours.
- Preheat the oven: After the dough has proofed for 2 hours, heat the oven to 425ºF .
- Bake: For Ciabatta Loaves: When the dough has finished proofing, gently flip each ball over — I find a bench scraper to be helpful here. Then use both hands to stretch each ball out gently into a rectangular shaped “slipper”. Transfer to a parchment-lined sheet pan. Transfer the pan to the oven and bake for 20 – 25 minutes or until the loaves are golden all around. For Ciabatta Rolls: Remove the towel, transfer the pan to the oven, and bake for 20 – 25 minutes, or until the loaves are golden all around.
- Cool: Remove pan from oven. Transfer ciabatta rolls to a cooling rack. Let cool for 20 to 30 minutes before slicing.
- Prep Time: 24 hours
- Cook Time: 20 minutes
- Category: Bread
- Method: Yeast
- Cuisine: Italian, American
Find it online : https://alexandracooks.com/2021/06/26/how-to-make-ciabatta-bread/


Last Friday, I attended my first real “event” since the lockdown. It was my daughter’s end-of-year soccer party, held in the backyard of her coach’s house. Guests were instructed to bring the sides, and so I made a summery quinoa salad — essentially the “stuffing” of these stuffed peppers.
It was well-received, but what stole the show was a tray of sliders, the recipe for which I immediately began tracking down. (You’d expect nothing less, right?) Turns out it’s a recipe from the King’s Hawaiian website , made with turkey instead of ham and without the mayo.
I left the party dreaming about those sliders and upon returning home immediately found the recipe online. It’s incredibly simple. In sum: assemble the sliders, make a simple sauce from pantry ingredients, pour the sauce over top; then pop in the oven.
I have yet to make the sliders, but this experience reminded me of a similar scenario several years ago in which I was introduced to Trader Joe’s 3-ingredient lentil salad , which blew my mind then and continues to every time I dump those three magical ingredients into a bowl. I have similar feelings every time I make these 4-ingredient balsamic-roasted mini peppers .
Why are these simple recipes often the most crowd-pleasing? The most show-stopping? Why do we ever make anything else? (If I’m being honest, as I continue dreaming about those sliders, I find myself thinking about how I could complicate them by maybe making the rolls from scratch or turning them into veggie sliders with roasted red peppers and eggplant and perhaps some pickled onions… will I ever learn? But doesn’t that sound delicious? I’ll keep you posted. )
Friends, I’m wishing you all a Happy Fourth 🇺🇸🇺🇸🇺🇸🇺🇸 Below you’ll find a few of my favorite dips, salads, and sides as well as a few seasonal desserts and a favorite, festive drink, too 🎉🎉
PS: This Memorial Day Weekend post may give you some more ideas for grilling and summer entertaining: there’s a recipe for a dead easy steak marinade , a favorite smoky grilled chicken , and the best, easiest ribs you’ll ever make (NOT on the grill).
PPS: The Best Brioche Buns
A Few Dips
Are we ready to dip again? When you dip we dip I dip 💃🏻. Anyone?
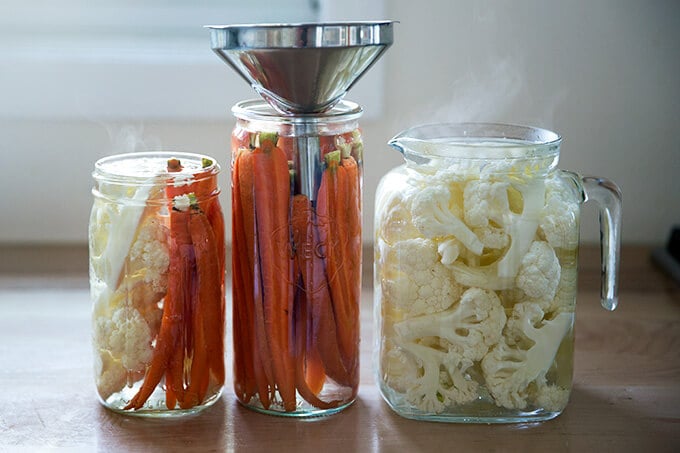
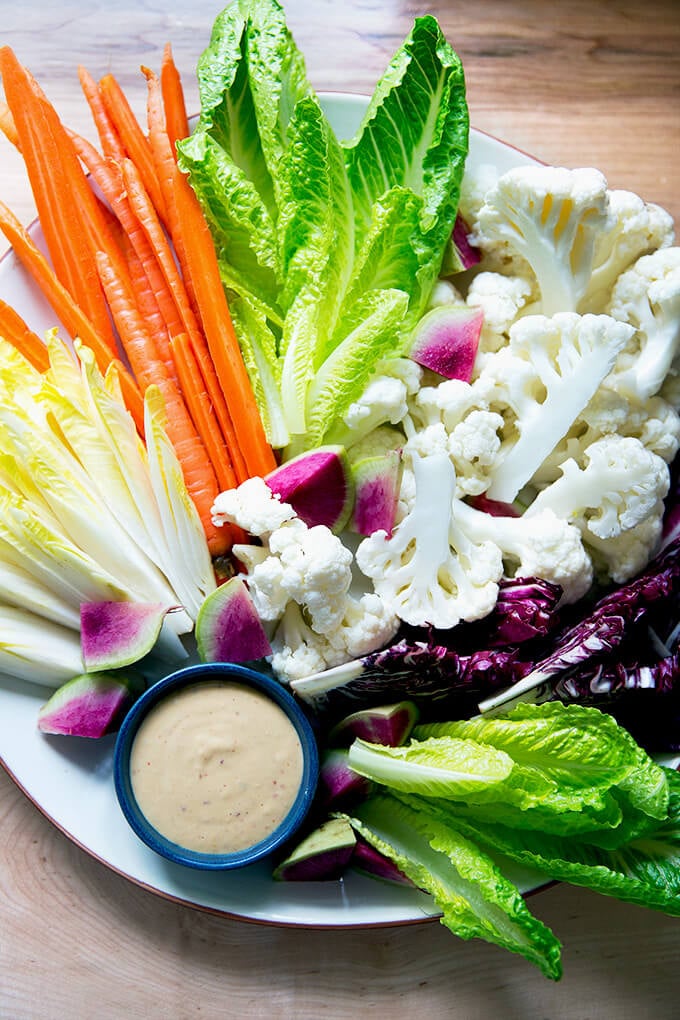
I typically stick to cauliflower and carrots with the pickling. Then I cut up whatever else looks good: Romaine, endive, watermelon radishes if you can find them (not easy this time of year) or other radishes and turnips (readily available!) if you can’t.
The veggies below are paired with this spicy cashew dressing/dip . It’s one of my faves.
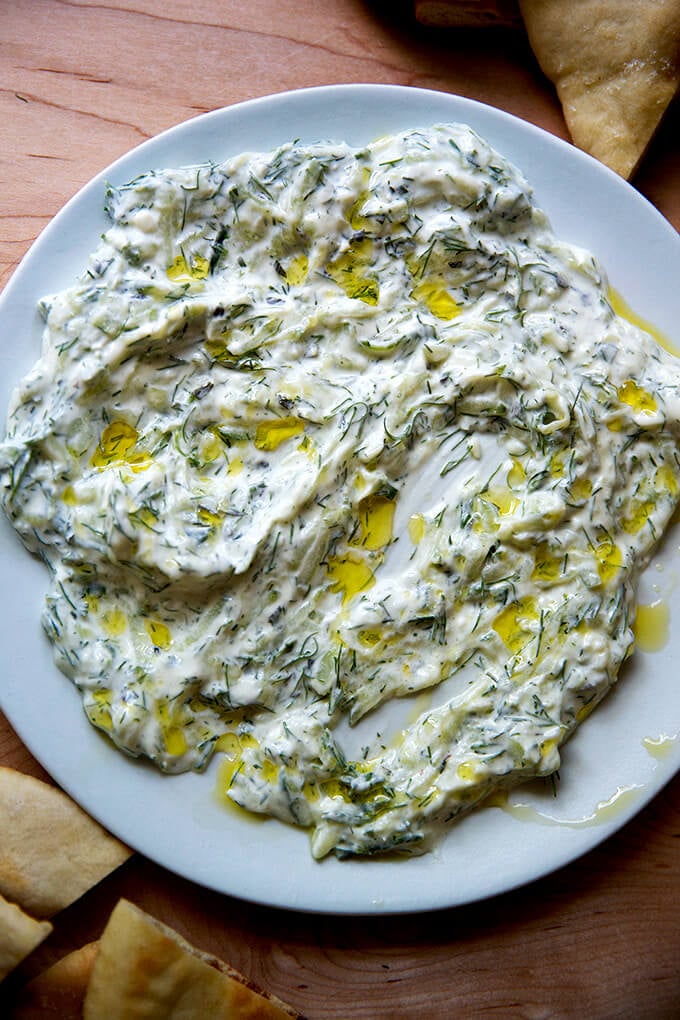
Tzatziki (Greek Cucumber-Yogurt Sauce)
Homemade Ranch Dip with Greek Yogurt
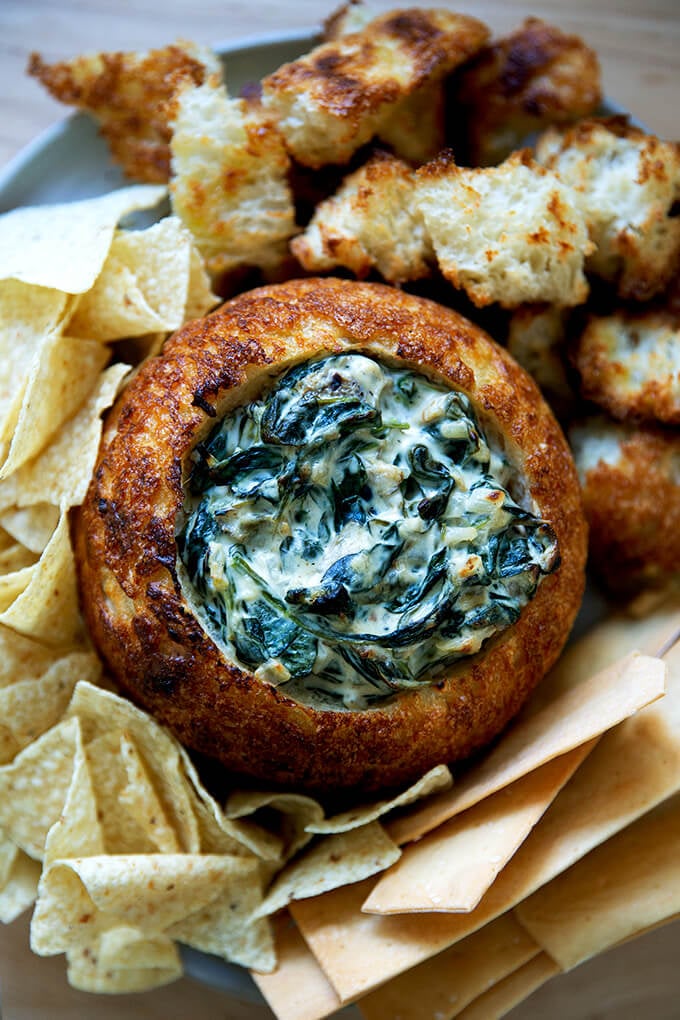
Spinach-Artichoke Dip
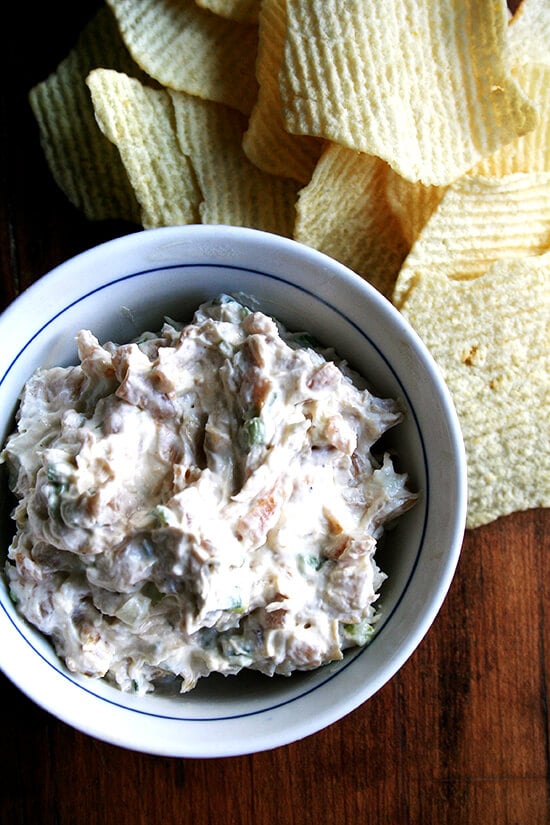
Real Sour Cream & Onion Dip
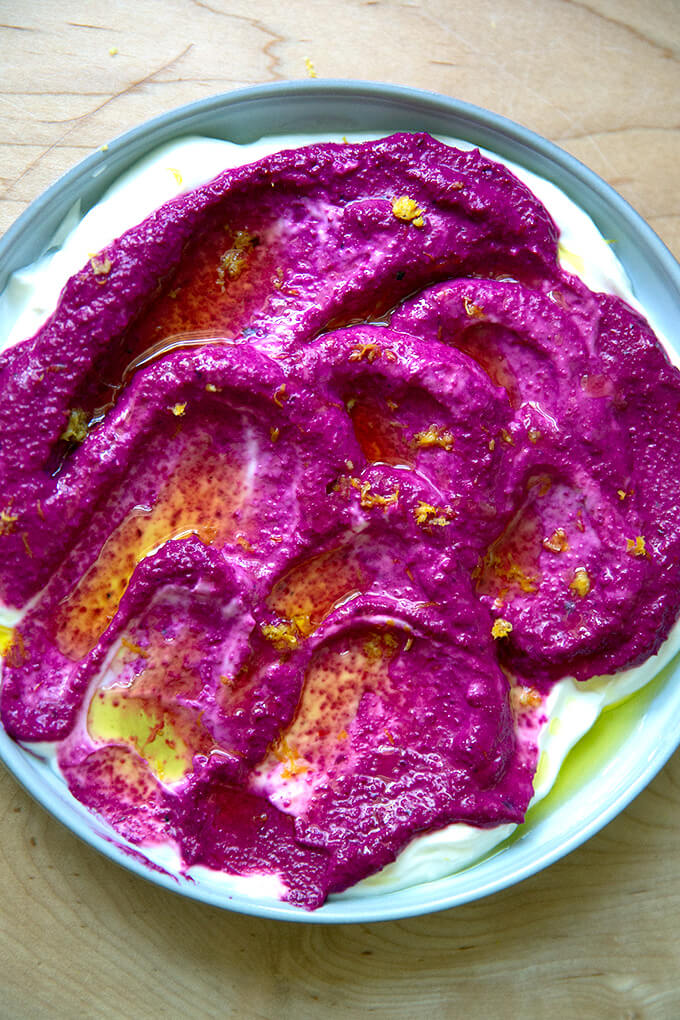
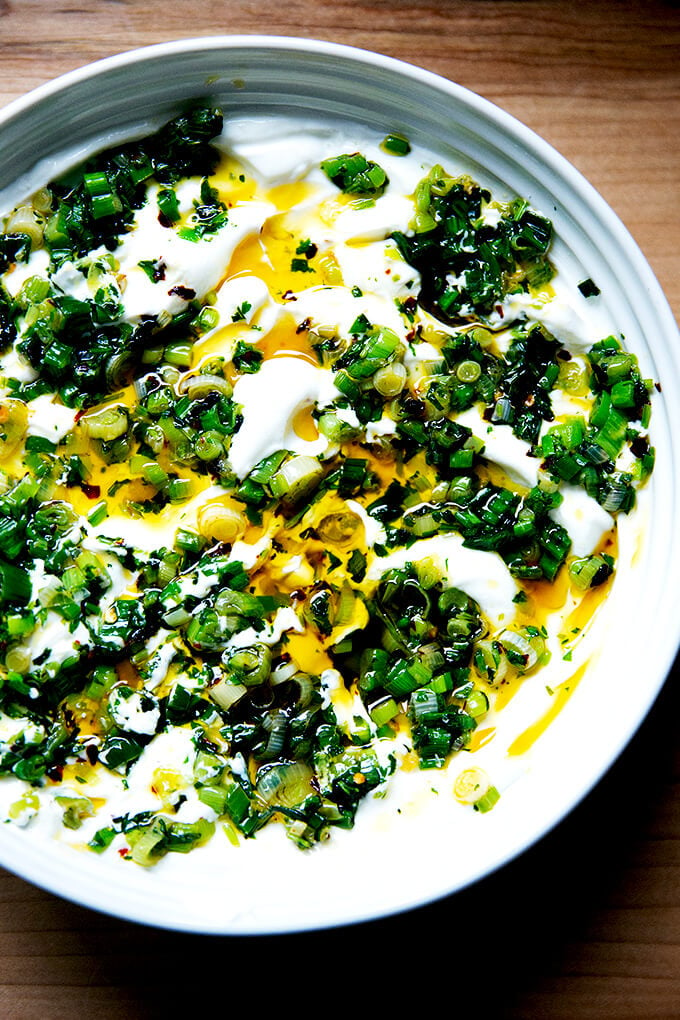
Raw Beet Dip with Greek Yogurt
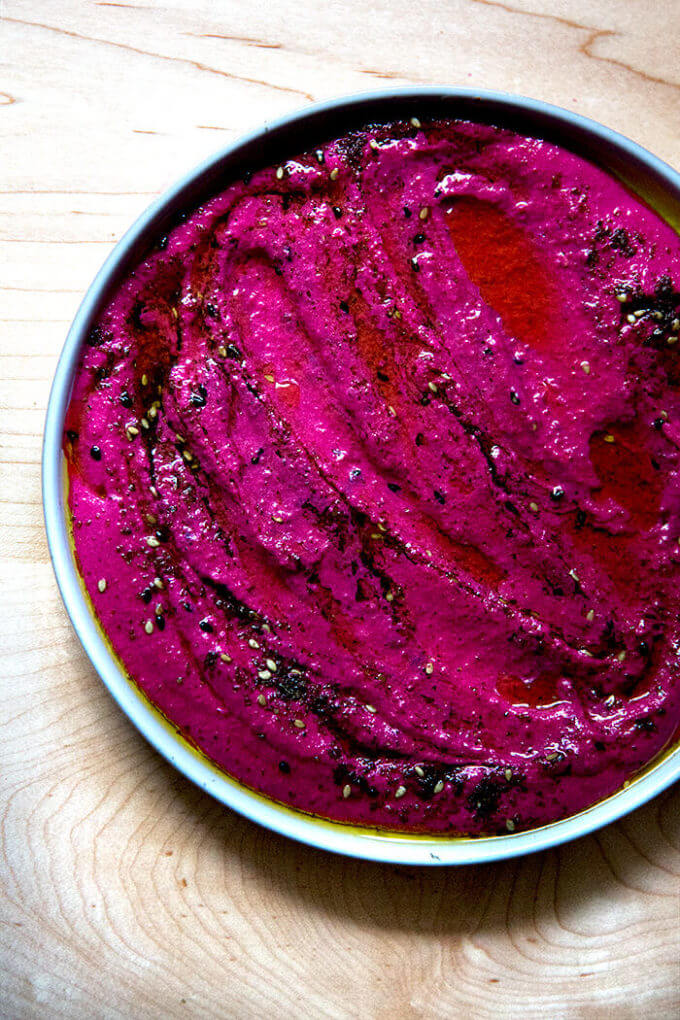
Maydan’s Beet-Labneh Dip
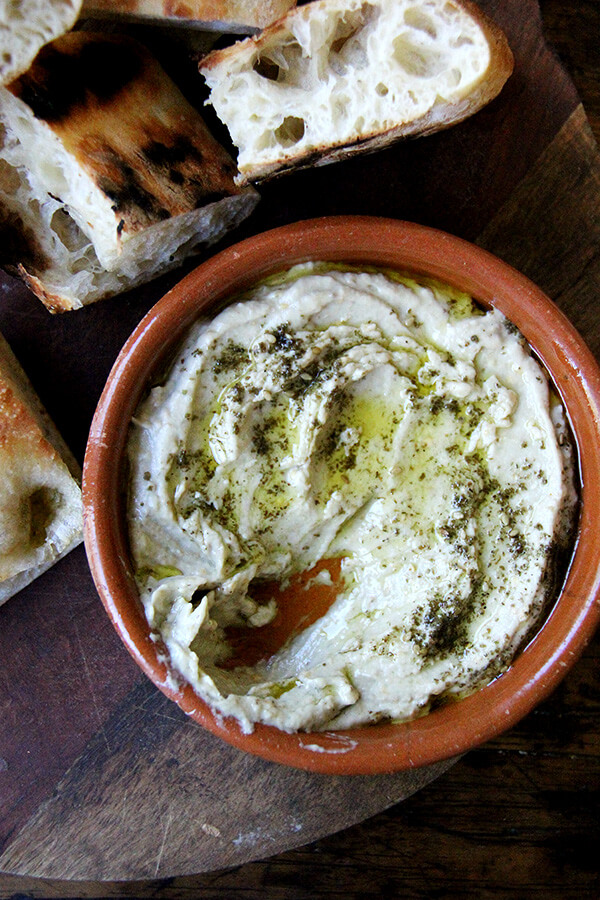
Smoky Eggplant Dip with Yogurt and Za’atar
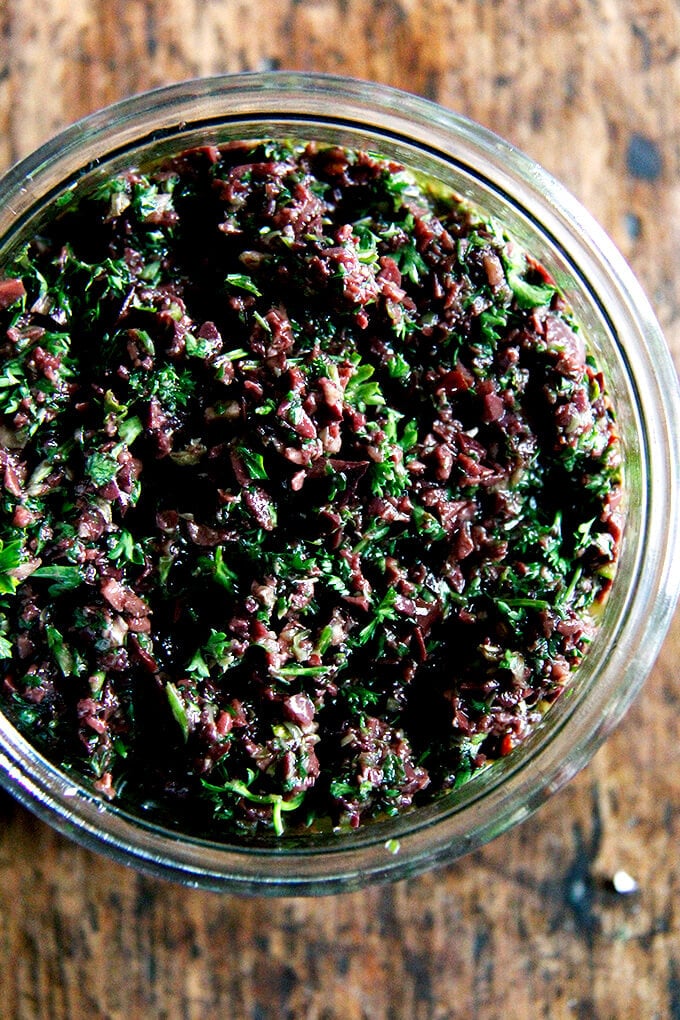
Olive Tapenade with Capers & Parsley
Salads & Sides
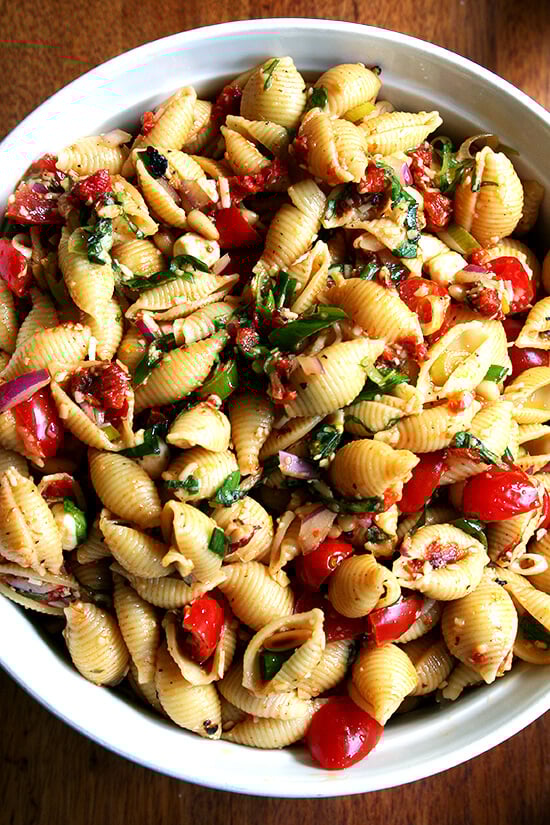
Kristina’s Simple Pasta Salad
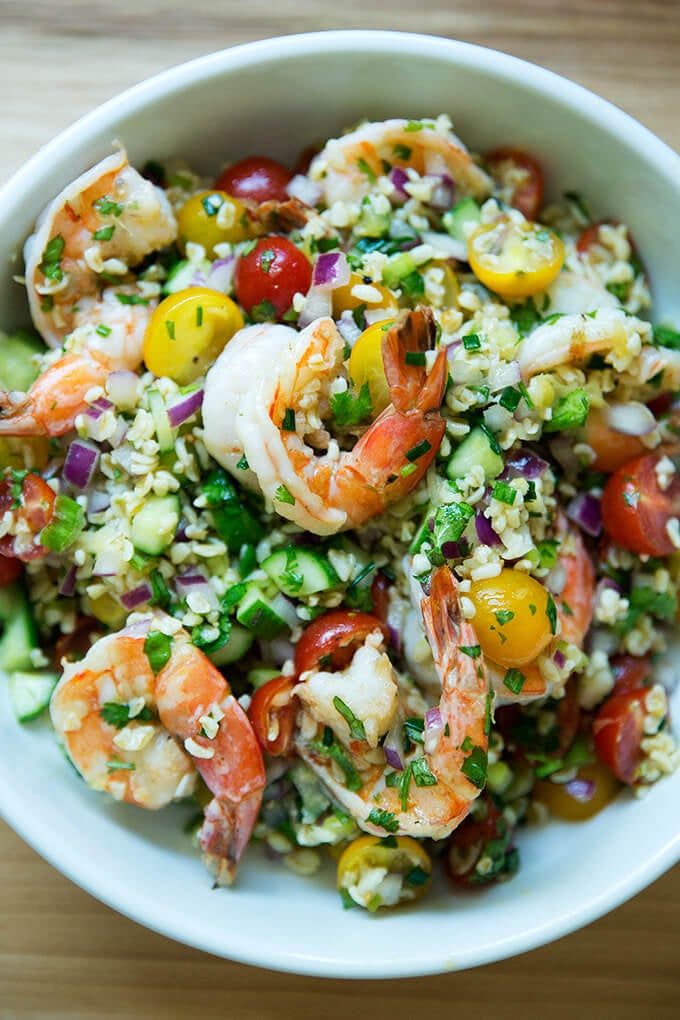
Tabbouleh with Cilantro, Lime & Grilled Shrimp
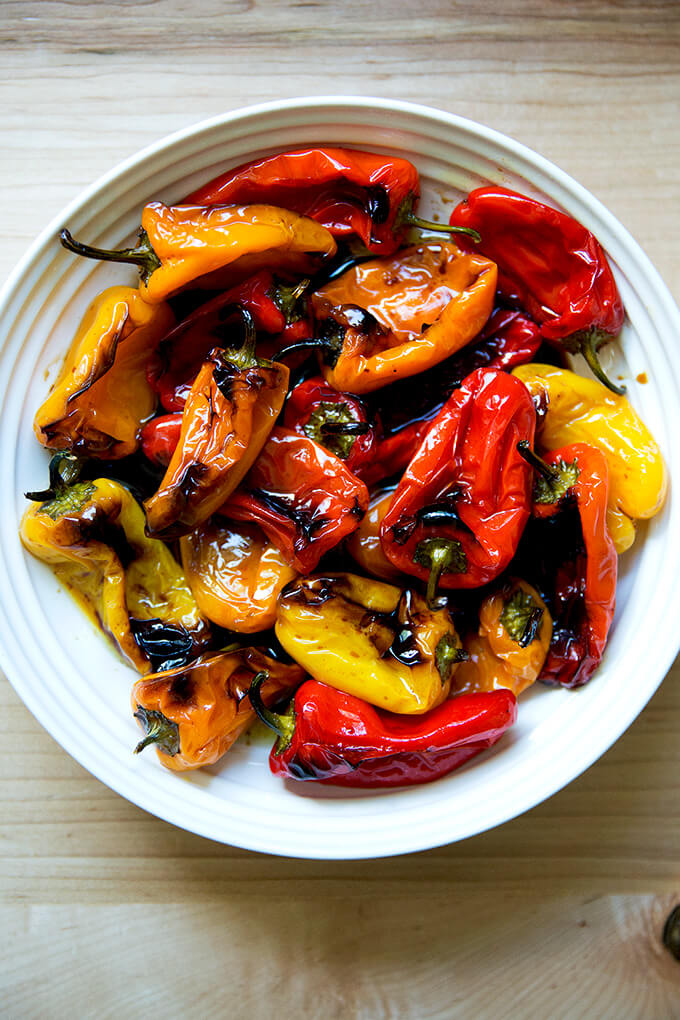
4-Ingredient Balsamic Roasted Mini Peppers
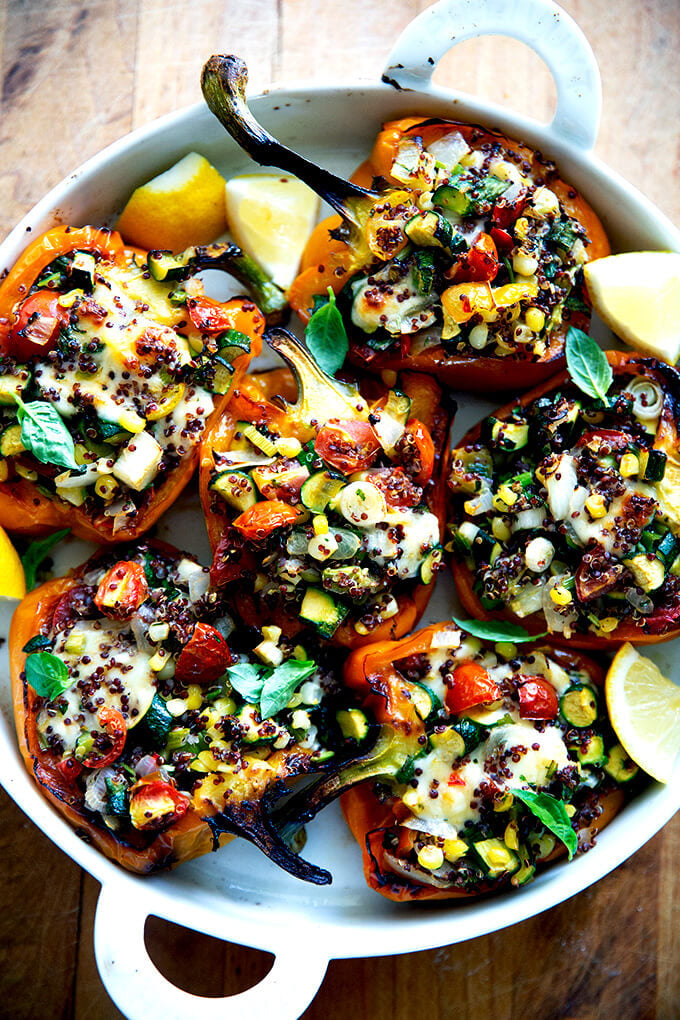
Veggie-Loaded Stuffed Bell Peppers
Find Many More Ideas Right Here → Salads & Sides
Desserts

Mixed Berry Galette (with Foolproof Pastry)
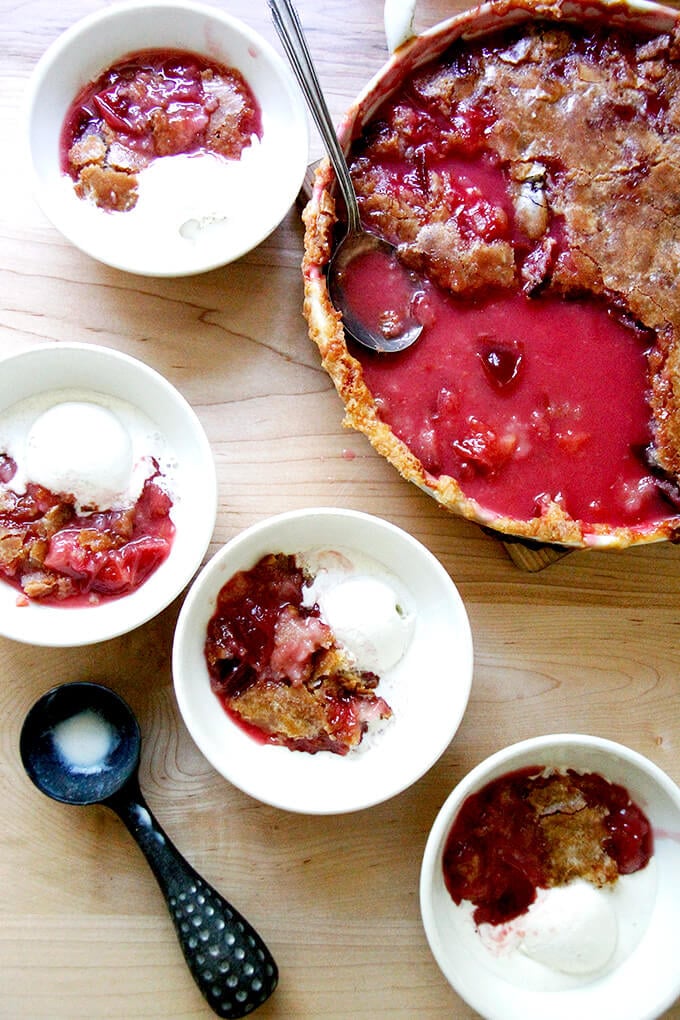
Peach (or Pluot) Cobbler with Hot Sugar Crust
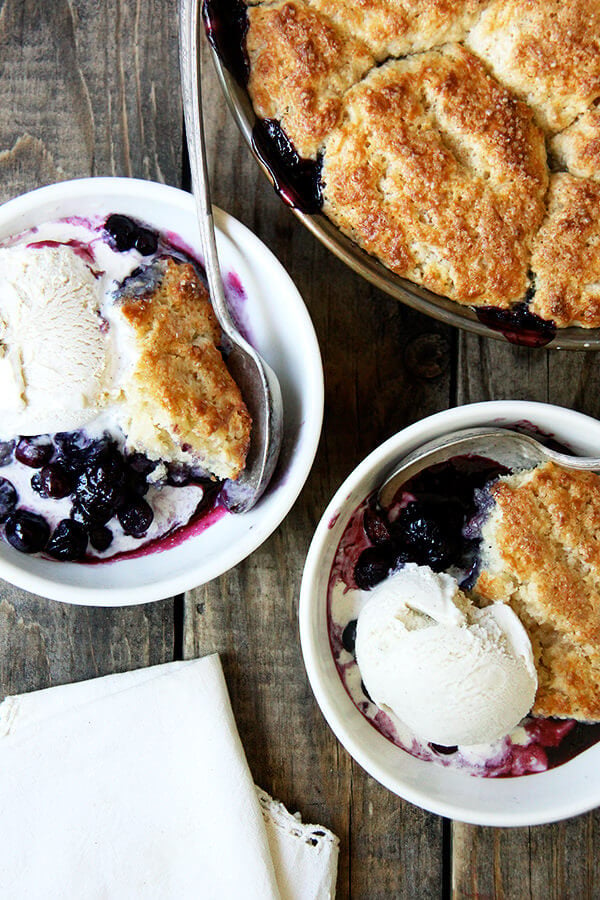
Lemon Blueberry Cobbler
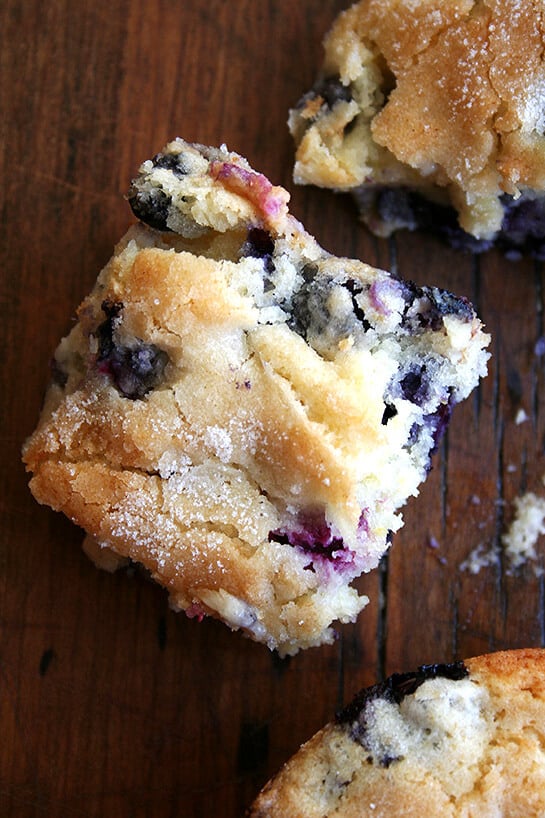
Buttermilk Blueberry Breakfast Cake
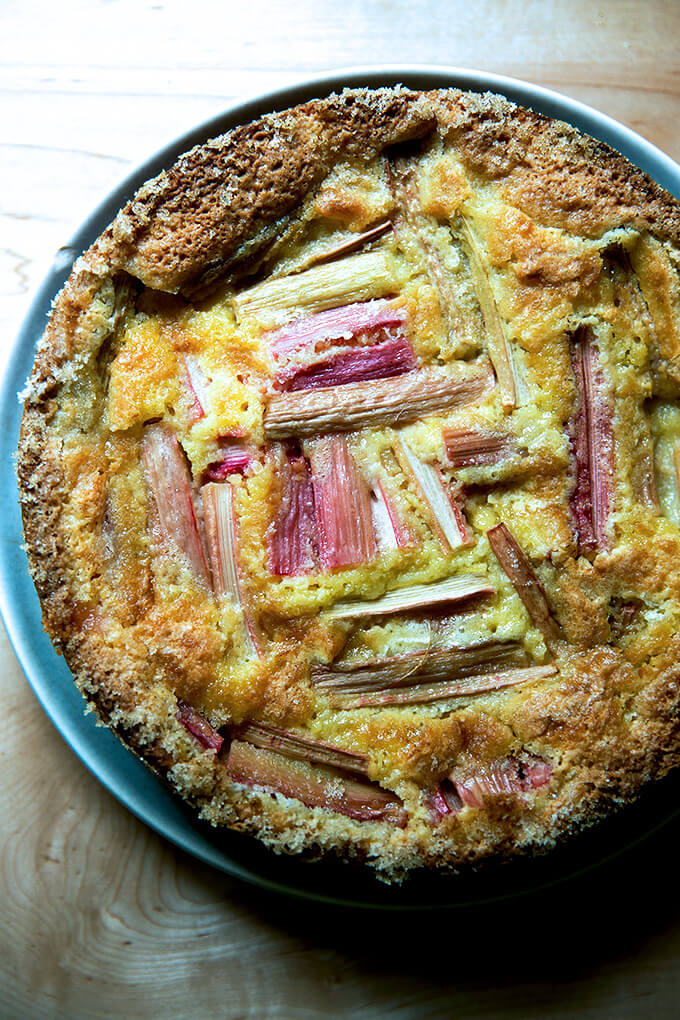
Rhubarb Custard Cake
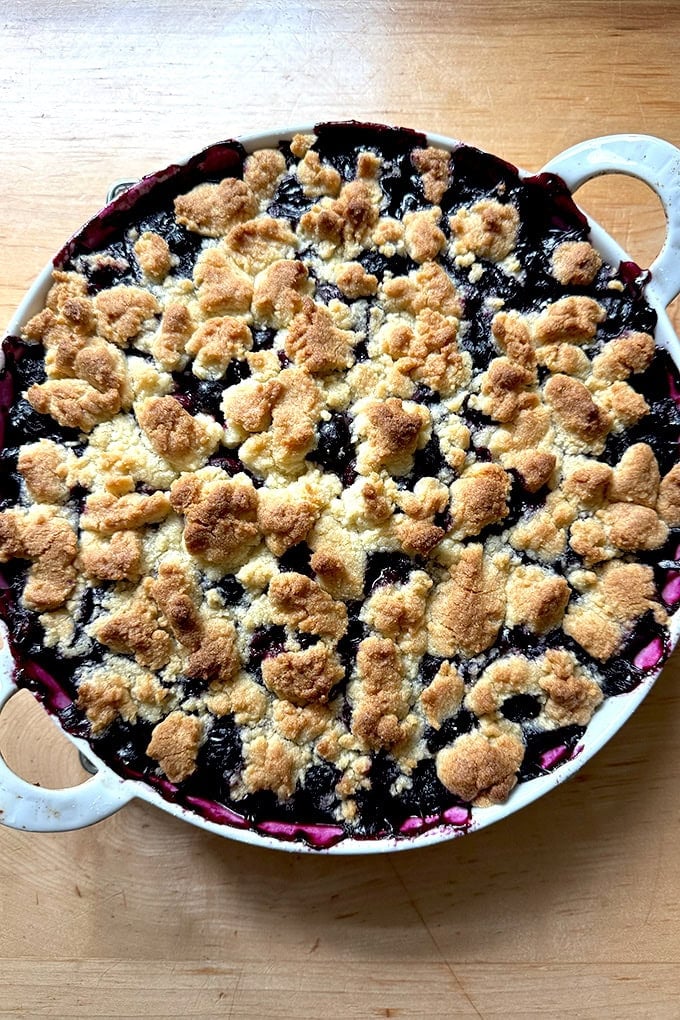
Easy Lemon Blueberry Crisp
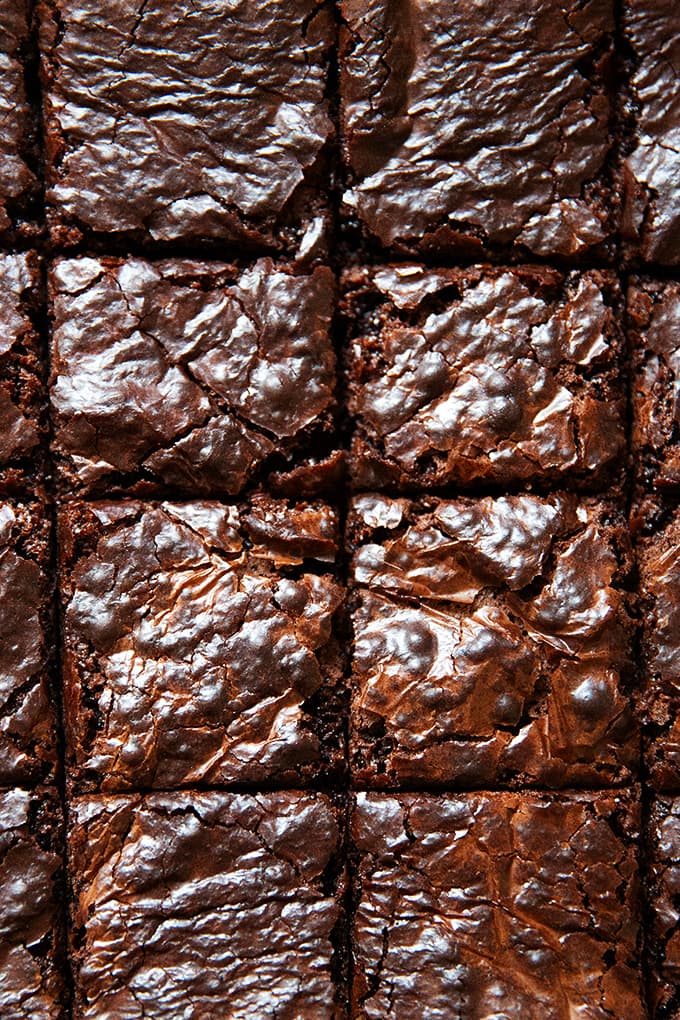
Best-Ever Fudgy (Shiny-Topped!) Homemade Brownies
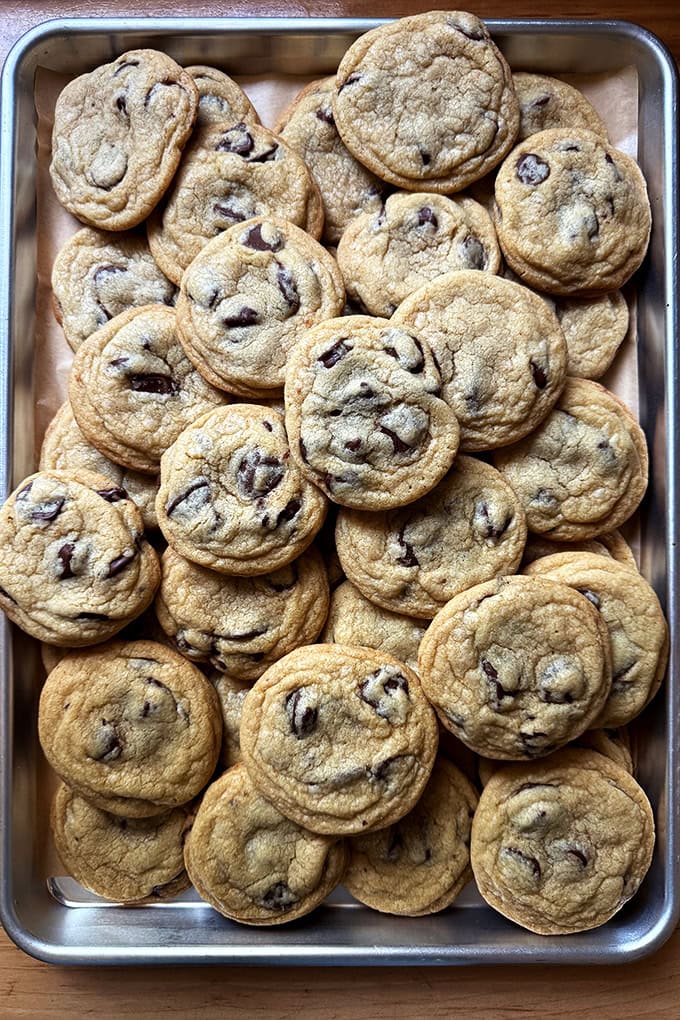
Soft and Chewy Chocolate Chip Cookies
Many More Ideas Right Here → Desserts

Paloma Slushie
A paloma is similar to a margarita but it’s made with grapefruit juice. This strawberry variation, adapted from a recipe in Julia’s Turshen’s Small Victories , is one of my favorites to make when entertaining because it lends itself to large-batch mixing. The trick? Instead of juicing limes, you peel them and blitz them whole in a blender. Brilliant , right? And instead of salting the rims of glasses, you add salt directly to the mix, which Julia notes serves two purposes: 1. Reduces work 2. Enhances the flavor of the juices.
Description
Adapted from the recipe for Paloma Slushies in Julia Turshen’s Small Victories , which calls for grapefruit juice as opposed to strawberries.
As with cooking, drink making requires adjusting to taste. Depending on how sweet your strawberries are, you may need more or less honey (or agave) or fresh lime. Also, depending on the size of your blender, you may need to add the strawberries in batches, and you may need to add the ice in batches as well. It all works out in the end, just be mindful of your blender’s capacity.
- 4 limes
- 1/4 cup (85 g) honey or agave syrup, see notes above
- 3 to 4 cups strawberries
- 1 cup (240 ml) tequila
- 1/2 teaspoon kosher salt
- 4 cups (720) ice cubes
- Peel three of the limes by lopping off the tops and the bottoms of each one, cutting just deep enough to expose the fruit beneath the pith. Stand each lime on your cutting board—it should be nice and steady. Cut the remaining peel and pith off the lime in wide strips, working your way around the fruit, so that you end up with a complete, peeled piece of fruit. Discard the peels or reserve them from another use. Cut the remaining lime into thin slices.
- Put the peeled limes in a blender; add the honey or agave, the strawberries, tequila, and salt; and blend until combined. Add the ice (see notes above—you likely will need to do this in batches) and let the machine run until the ice is totally blitzed and the mixture is very smooth.
- Pour into four glasses and garnish with the lime slices. Serve immediately.
- Prep Time: 15 minutes
- Category: Drinks
- Method: blender
- Cuisine: Mexican, American
