Light and airy with the loveliest chew, these sourdough English muffins are surprisingly easy to make. They do not require an autolyse, nor do they require English muffin rings for cooking.

When it comes to sourdough bread recipes , I like to keep it simple. None of the recipes on this site requires an autolyse, and very few require special equipment.
So when I came across an English muffin recipe in Maurizio Leo’s cookbook, The Perfect Loaf . that required neither an autolyse nor muffin rings, I was in! I made the recipe, following the instructions to a T, mixing with my stand mixer, and I was thrilled with the result: light and airy English muffins with the loveliest chew.
The second time around, I mixed by hand as that is my preferred method with sourdough, and no surprise, the muffins turned out equally beautifully: they are irresistible when toasted and slathered with butter, and they make an outstanding base for eggs Benedict.
Find step-by-step instructions below.
How to Make Sourdough English Muffins, Step by Step
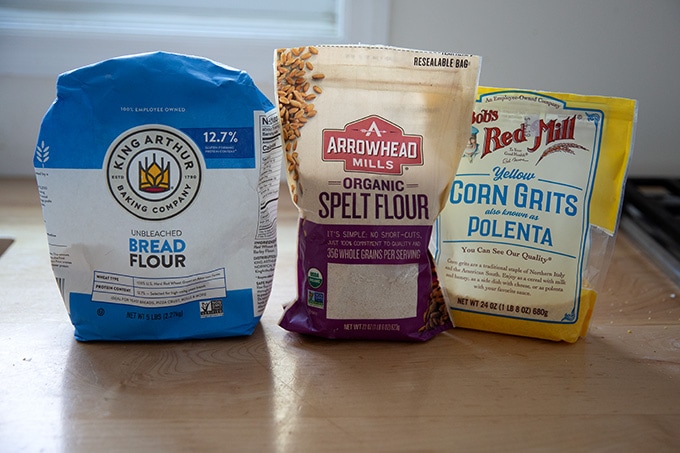
Before you begin, here are some flours you may want to pick up: high-protein flour (such as KAF’s bread flour) and spelt flour (for the dough itself) along with polenta or semolina flour (for the exterior).
This recipe starts by making a levain, a mix of ripe sourdough starter, water, and flour.
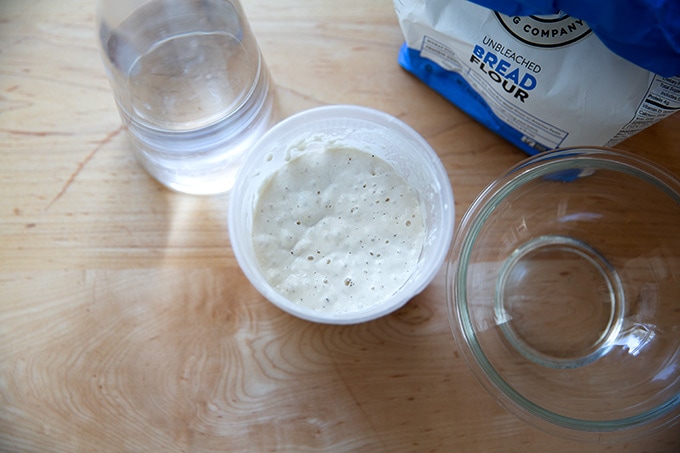
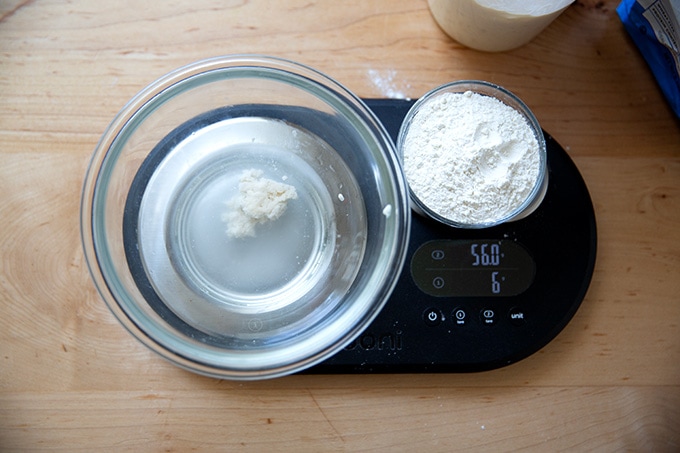
You’ll need 6 grams of ripe starter and 56 grams each flour and water.
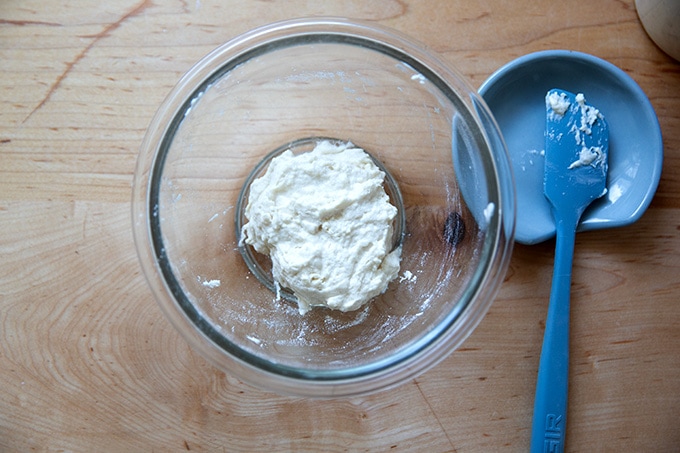
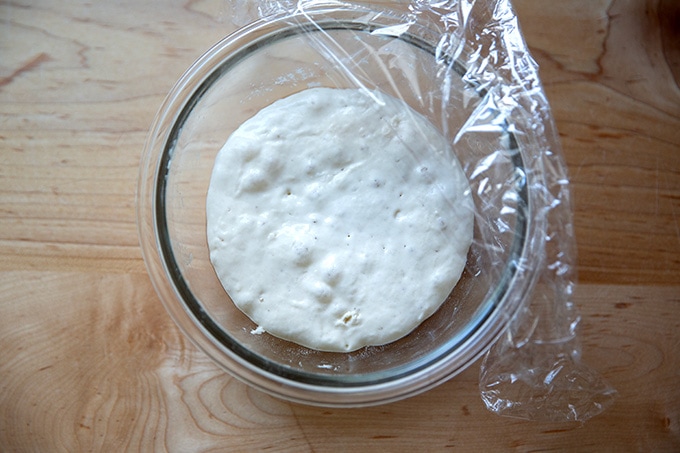
Mix together the flour, water, and starter in a bowl, cover it, and let it sit for 12 hours…
… or until is shows lots of signs of activity:
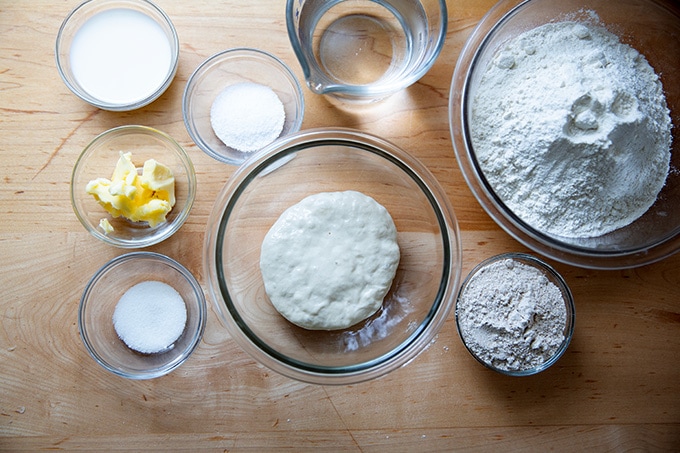
Gather the rest of your ingredients: water, milk, salt, sugar, butter, and flour.
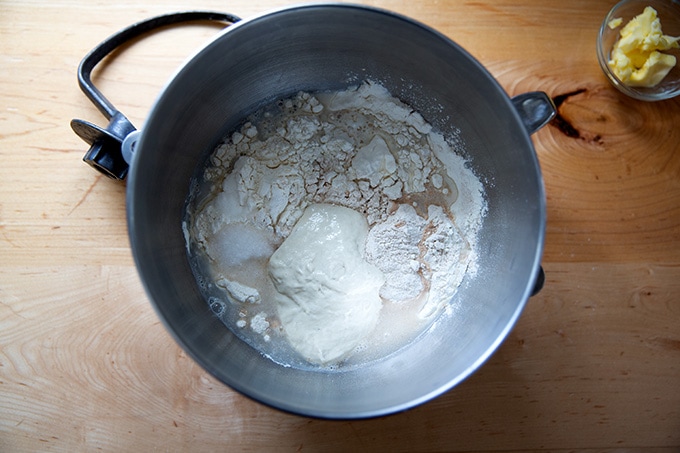
This dough is made in a stand mixer, though you could knead it by hand if you don’t have one (see recipe box for details). First, combine all of the ingredients except the butter in the bowl of a stand mixer.
Mix on low speed for 1 to 2 minutes until combined. Increase the speed to medium and mix for 3 minutes until the dough begins to cling to the dough hook. Let the dough rest in the bowl for 10 minutes.
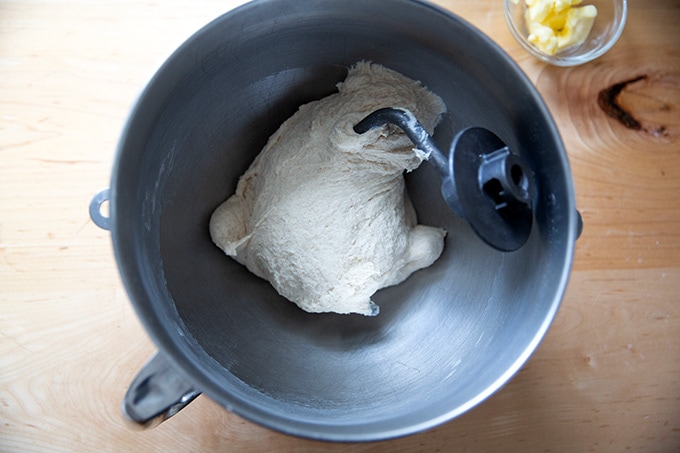
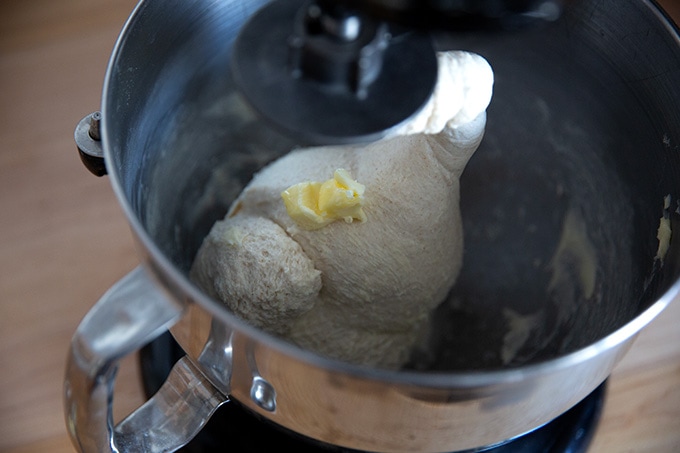
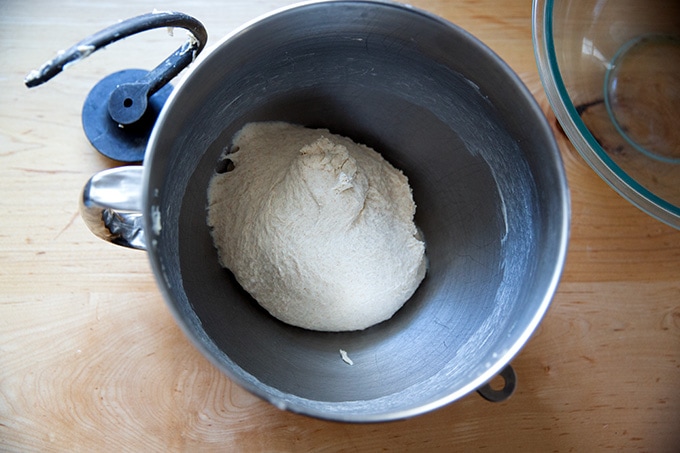
Add the butter, one pat at a time, until absorbed into the dough. Increase the speed to medium and mix for 1 to 2 minutes more until the dough smooths out and clings to the dough hook once again. The dough will be smooth and shiny.
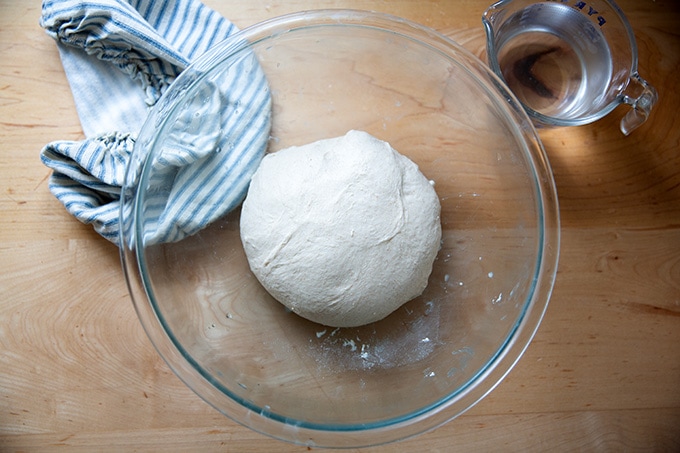
Stretch and fold : Let the dough rest for 30 minutes.
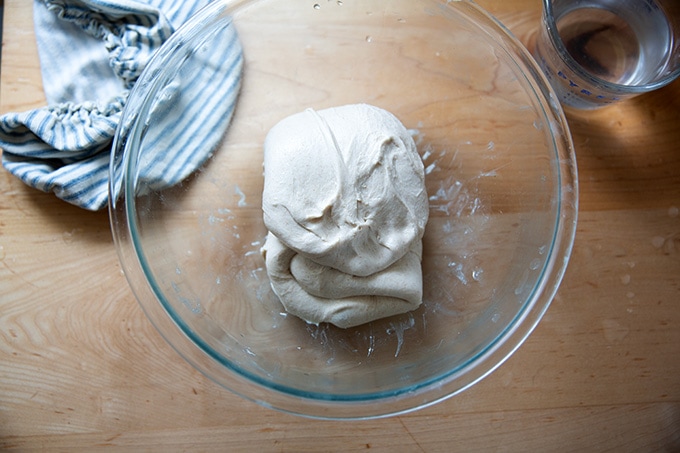
Using wet hands, grab one side of the dough and lift it up and over to the other side.
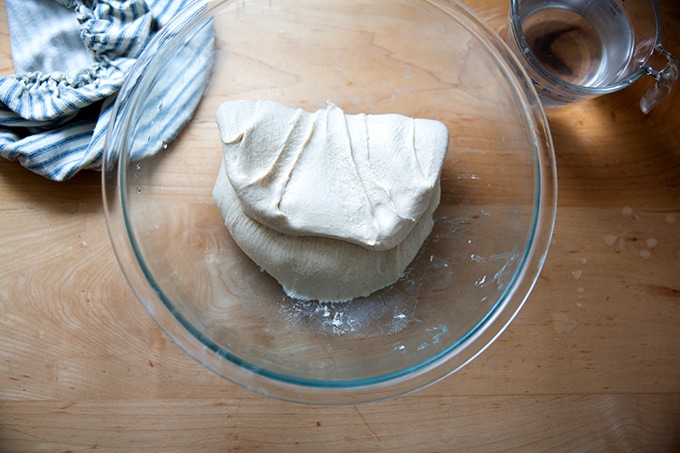
Rotate the bowl 180 degrees and repeat.
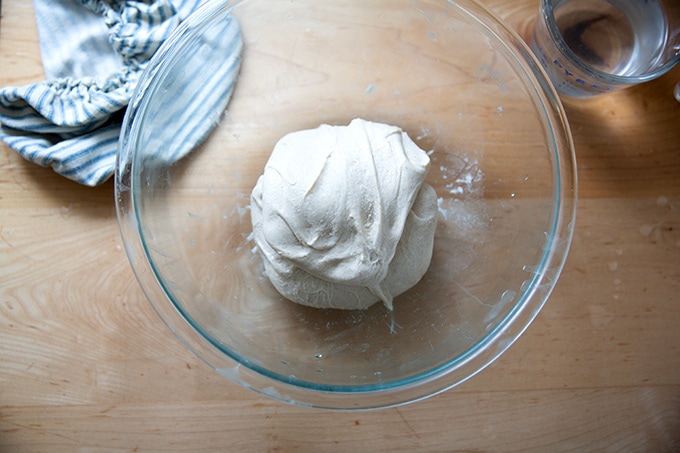
Then rotate the bowl a quarter turn and stretch and fold that side.
Rotate the bowl 180 degrees again and finish with a stretch and fold on the last side.
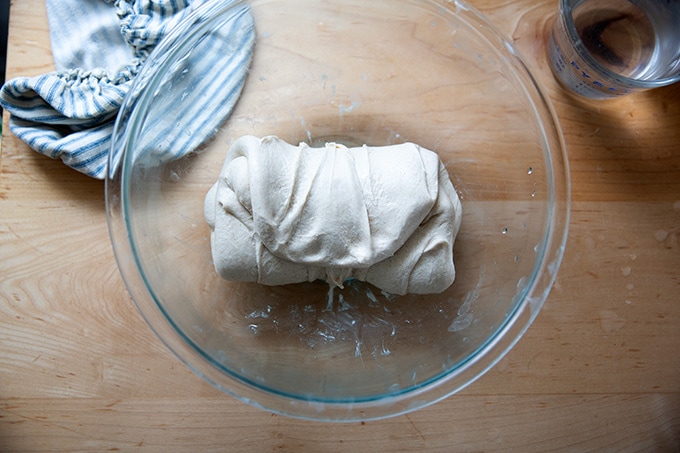
The dough should be folded up neatly. Cover the vessel, then repeat these folds every 30 minutes for a total of 3 sets of stretches and folds.
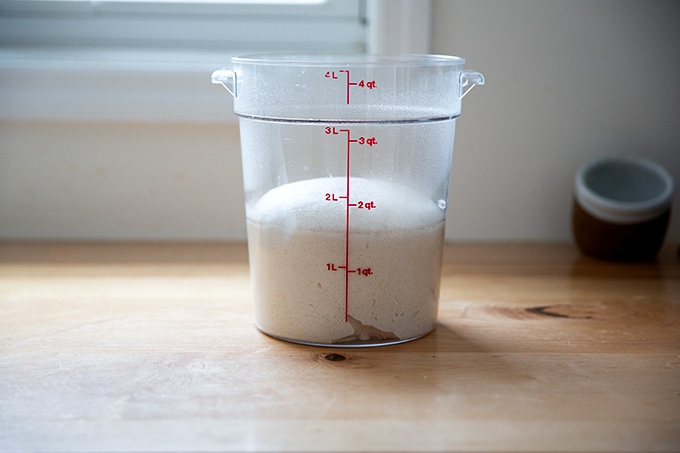
After the last set, cover the bowl and let the dough rest for the remainder of the bulk fermentation, about 2 hours (if your kitchen is 74ºF-76ºF) or longer if your kitchen is cooler. I transfer the dough to a straight-sided vessel for the bulk fermentation:
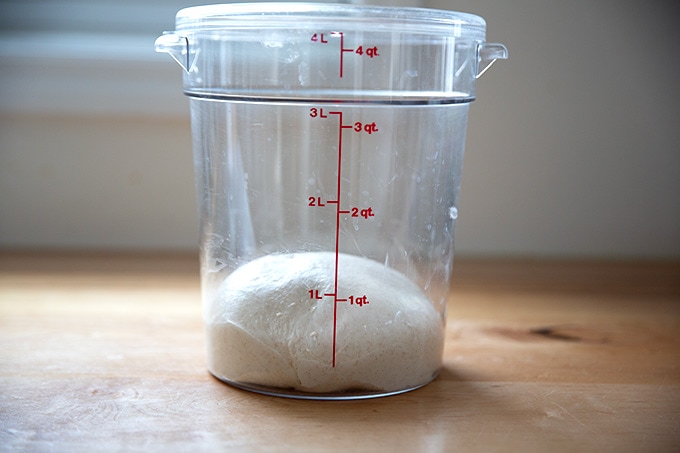
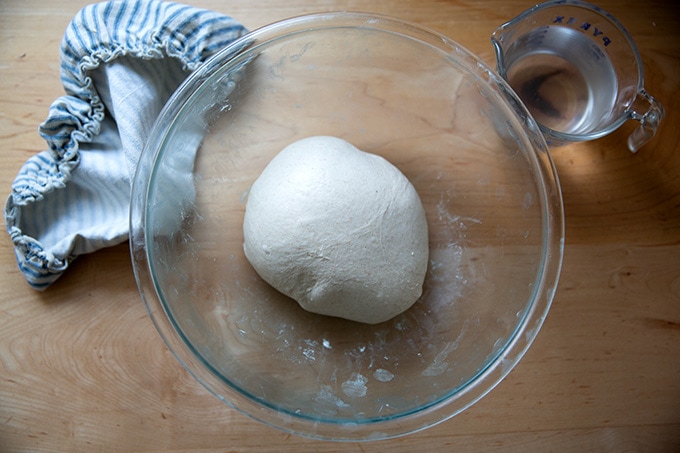
The bulk fermentation is complete when the dough has risen with domed edges. When determining when the bulk fermentation should end, Maurizio notes: “The amount of rise is less important than the fact that it has risen and looks alive and well aerated.”
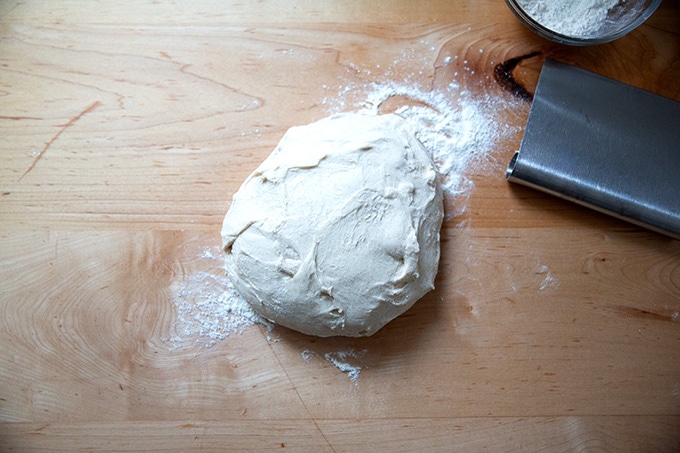
When the bulk fermentation is complete, turn the dough out onto a lightly floured work surface.
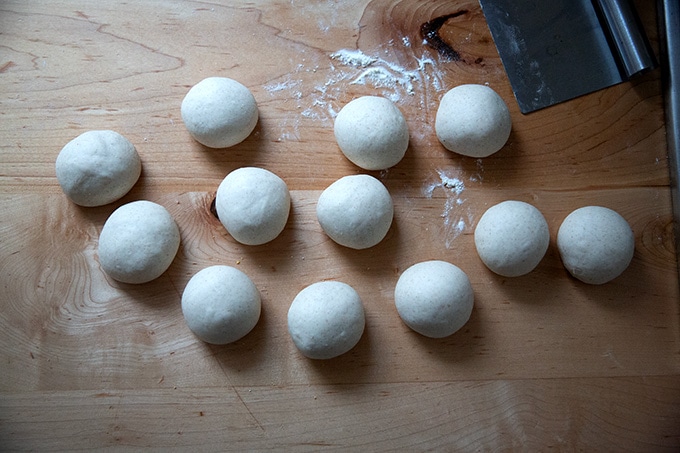
Divide the dough into 12 portions.

If you like to be precise, each portion should weigh 80 grams.
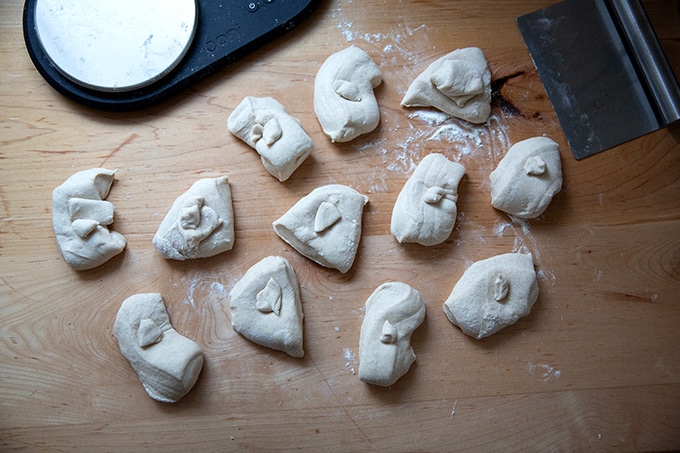
Ball up each portion.
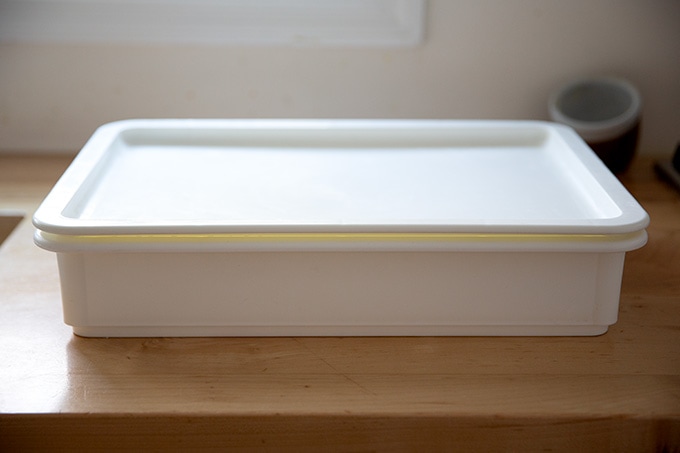
At this point, you’ll need a vessel for proofing. I love these lidded DoughMate proofing vessels , which I use for pizza dough as well. If you don’t have one, a 13×18-inch sheet pan will work just fine.
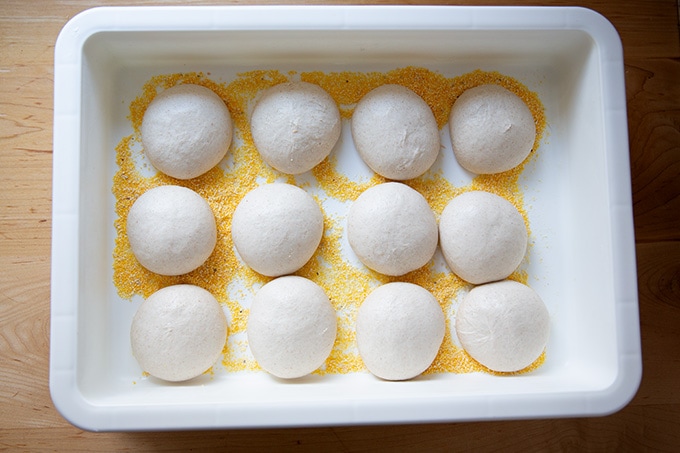
Dust the proofing vessel or a 13×18-inch sheet pan with semolina flour or cornmeal. Transfer the balls to the vessel, cover, then refrigerate overnight.

The following day, remove the vessel from the fridge and let the balls proof at room temperature for at least 3 hours or until they are very light to the touch.
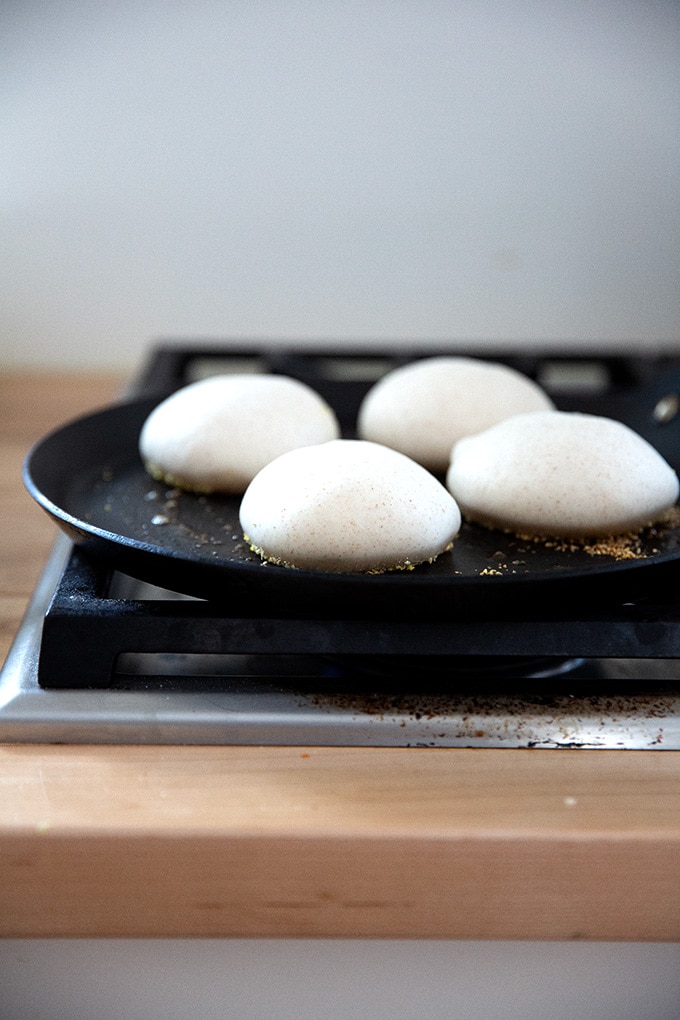
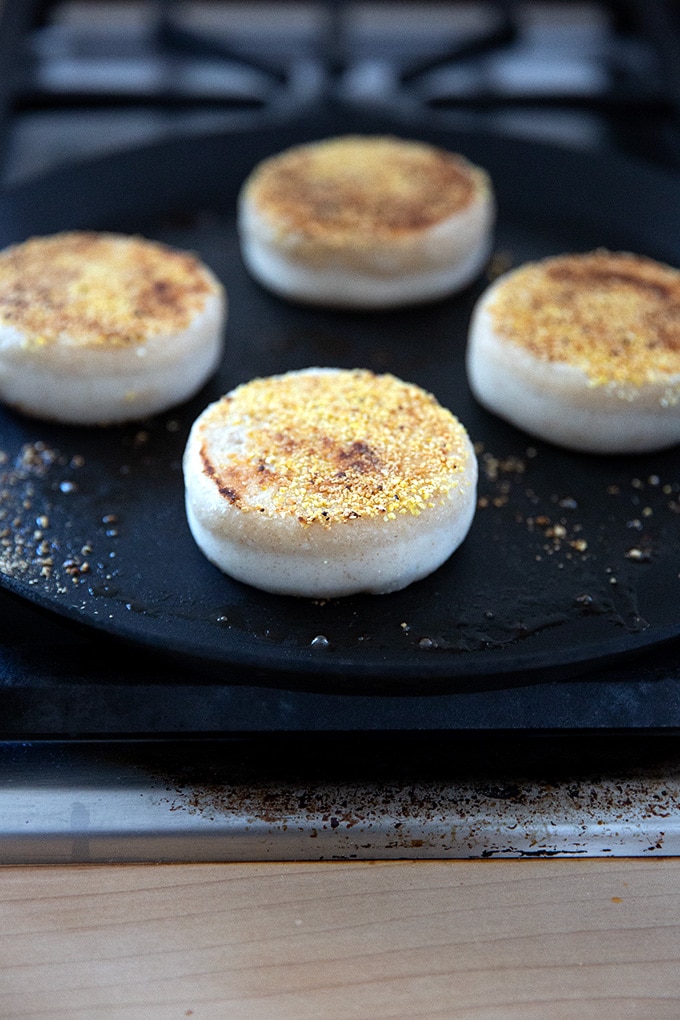
To cook, you’ll brown each side of the English muffin dough balls in a skillet on the stovetop.
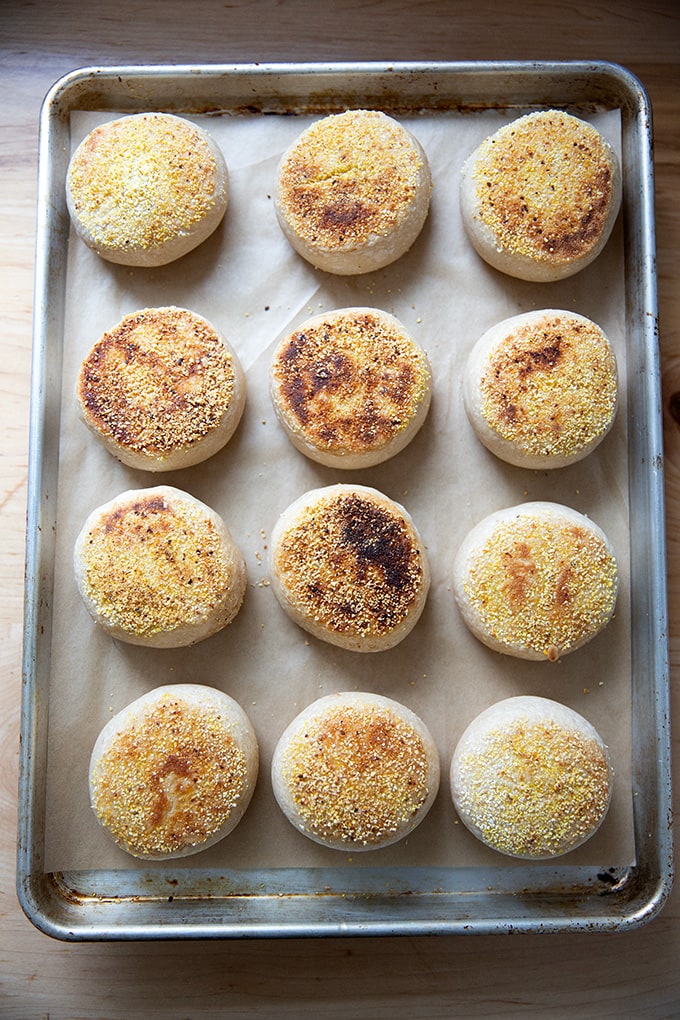
Then you’ll bake them for 15 minutes.


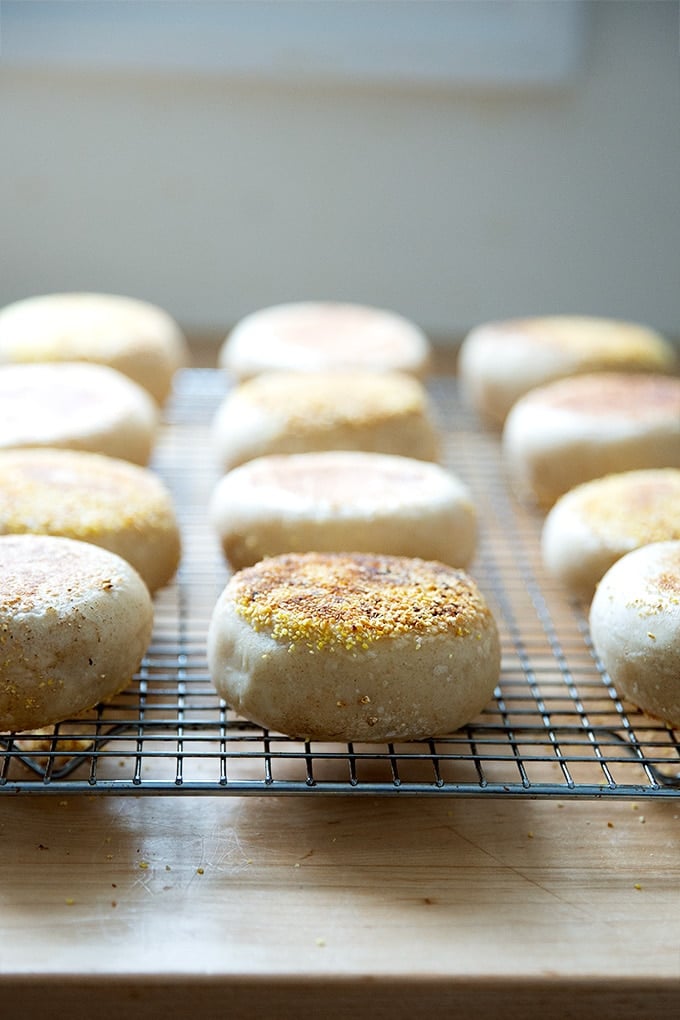
Let them cool for at least 30 minutes before halving and devouring…
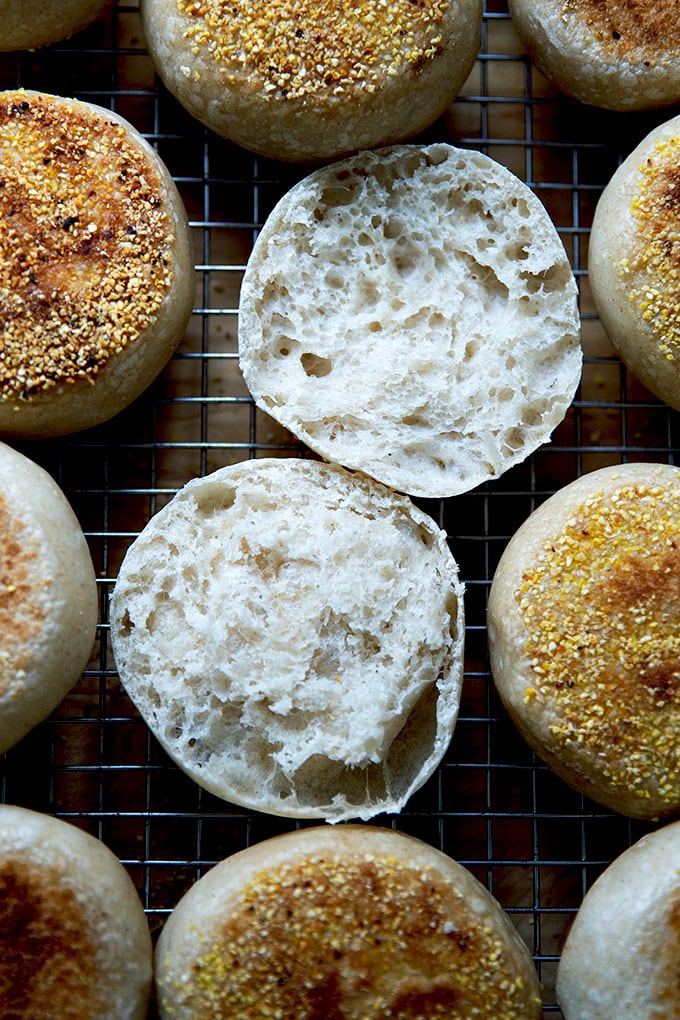
… or, if you have the patience, toasting and slathering with butter.

Description
Light and airy with the loveliest chew, these sourdough English muffins are surprisingly easy to make. They do not require an autolyse, nor do they require English muffin rings for cooking. They are irresistible toasted and slathered with butter or jam.
From Maurizio Leo’s The Perfect Loaf
There are no volume measurements for this recipe, so you’ll need a digital scale.
Notes:
Water Temperature: Maurizio gives very specific temperatures of the water. This is all in an effort to allow the dough to ferment properly. For the levain, the specific temperature of the water is 78ºF. For the dough itself, the temperature of the water you should use will vary depending on the temperature of your kitchen, and Maurizio provides a way to calculate this figure as well as a handy chart (if you hate math) in his book. When my kitchen is 68ºF, I should use water that is roughly 98ºF.
For the levain:
- 56 grams high-protein white flour ( 12.7 to 14% protein)
- 56 grams water, roughly 78ºF, see notes above
- 6 grams ripe sourdough starter
For the English muffins:
- 33 grams unsalted butter
- 437 grams high-protein white flour ( 12.7 to 14% protein), such as bread flour
- 55 grams whole spelt flour
- 55 grams whole or 2 % milk
- 9 grams sugar
- 283 grams water, roughly 98ºF, see notes above
- 10 grams fine sea salt or kosher salt
- 118 grams levain
- Make the levain : In a medium jar or small bowl, mix the levain ingredients until well incorporated (this liquid levain will feel quite loose) and loosely cover. Store on the counter for 12 hours.
- After the 12 hours, check the levain: it should show signs of readiness: well aerated, risen, bubbly on top and at the sides, and with a sour aroma. If the levain is not showing these signs, let it ferment 1 hour more and check again.
- Cut the butter into ½-inch thick pats. Place the pats on a plate on the counter to warm to room temperature.
- Mix the dough: In the bowl of a stand mixer fitted with the dough hook, add the flours, milk, sugar, water, salt, and ripe levain. Mix on low speed for 1 to 2 minutes until combined. Increase the speed to medium and mix for 3 minutes until the dough begins to cling to the dough hook. Let the dough rest in the bowl for 10 minutes. ( To mix by hand: In a large bowl, whisk together the flours, sugar, and salt. Add the water, milk, and levain and stir with a spatula until you have a sticky dough ball. Turn the dough out onto a lightly floured work surface, then knead by hand for 2 to 3 minutes until the dough comes together in a cohesive ball and feels tacky but not sticky. Return the dough to the bowl and let it rest for 10 minutes.)
- Gently press a butter pat with your finger: it should easily indent but not be wet or melted. If the butter is too warm, place it in the freezer for 5 minutes. If it is too firm, microwave it for 10 seconds, then check it again.
- With the mixer on low speed, add the butter, one pat at a time, until absorbed into the dough, scraping down the sides of the bowl and the paddle as needed. Continue until all the butter is added, 2 to 3 minutes. Increase the speed to medium and mix for 1 to 2 minutes more until the dough smooths out and clings to the dough hook once again. The dough will be smooth and shiny. Transfer to a container for the bulk fermentation. ( If you are hand-kneading: Turn the dough out onto a lightly floured work surface, sprinkle the butter over the dough, then knead the dough for 2 to 3 minutes, using flour only as kneaded, until the butter is incorporated and the dough is smooth and shiny. Transfer the dough to a container for the bulk fermentation.)
- Bulk fermentation : Let the dough rest for 30 minutes. Using wet hands, grab one side of the dough and lift it up and over to the other side. Rotate the bowl 180 degrees and repeat. Then rotate the bowl a quarter turn and stretch and fold that side. Rotate the bowl 180 degrees again and finish with a stretch and fold on the last side. The dough should be folded up neatly. Cover the vessel, then repeat these folds every 30 minutes for a total of 3 sets of stretches and folds. After the last set, cover the bowl and let the dough rest for the remainder of the bulk fermentation, roughly 2 hours if your kitchen is warm, longer if it is cool (3 to 4 hours or longer if necessary). End the bulk fermentation when the dough has risen, domed, and looks alive and well aerated. I tend to end the bulk fermentation when the dough has increased in volume by 50-75%.
- Prepare the proofing pan : Liberally dust a 13 x 18-inch half-sheet pan (or a lidded DoughMate ) with semolina flour or cornmeal (or white flour) and set aside.
- Uncover the container and lightly dust the top of the dough and a work surface with flour. Gently scrape the dough onto the floured work surface and use your bench knife to divide it into 12 pieces roughly 80 grams each.
- Using a lightly floured hand and your bench scraper, shape each piece into a taut ball and place it on the sheet pan; you should be able to comfortably fit all 12 pieces with space in between. Place the sheet pan inside a reusable plastic bag and seal. Alternatively, wrap the pan well with plastic wrap.
- Cold proof: Place the sheet pan in the refrigerator overnight.
- Warm proof: The next day, remove the pan from the fridge and let proof at room temperature (74ºF to 76ºF) for at least 3 hours. (Because my kitchen is cool (68ºF), this room temperature proof takes longer: more like 4 to 5 hours.) The dough is ready when it is very soft and puffed up — it should feel extremely delicate. (For the lightest and most tenderest muffins, it’s essential to give this dough plenty of time to finish proofing.) If it feels dense or tight, let it proof 30 minutes more and check again.
- Cook the English muffins: Place an oven rack in the middle position and preheat the oven to 350ºF. Line a 13 x 18-inch half-sheet pan with parchment paper and set it next to the stove.
- Place a heavy cast-iron skillet or other large skillet over medium-low heat (or preheat a griddle). Lightly grease the skillet with clarified (or not) butter. Using a flat spatula, gently transfer 2 to 4 dough rounds to the skillet to cook until the bottoms are deep brown, 2 to 3 minutes. Flip and cook for another 2 to 3 minutes, or until the other sides are deep brown. Transfer the muffins to the prepared sheet pan and repeat with the remaining dough rounds, wiping out and re-greasing the pan again with butter between each batch.
- Transfer the pan to the oven and bake for 15 minutes. When done, the muffins will have colored a little more at the edges, but they won’t be completely browned.
- Let the muffins cool on a wire rack for at least 30 minutes. These will keep for 3 to 4 days on the counter, covered. For longer storage, transfer to a zip-top plastic freezer bag once completely cooled and freeze for up to 3 months.
- Prep Time: 48 hours
- Cook Time: 45 minutes
- Category: Bread
- Method: Stovetop, Oven
- Cuisine: American
Light and airy with the loveliest chew, these sourdough English muffins are surprisingly easy to make. They do not require an autolyse, nor do they require English muffin rings for cooking.
When it comes to sourdough bread recipes , I like to keep it simple. None of the recipes on this site requires an autolyse, and very few require special equipment.
So when I came across an English muffin recipe in Maurizio Leo’s cookbook, The Perfect Loaf . that required neither an autolyse nor muffin rings, I was in! I made the recipe, following the instructions to a T, mixing with my stand mixer, and I was thrilled with the result: light and airy English muffins with the loveliest chew.
The second time around, I mixed by hand as that is my preferred method with sourdough, and no surprise, the muffins turned out equally beautifully: they are irresistible when toasted and slathered with butter, and they make an outstanding base for eggs Benedict.
Find step-by-step instructions below.
How to Make Sourdough English Muffins, Step by Step
Before you begin, here are some flours you may want to pick up: high-protein flour (such as KAF’s bread flour) and spelt flour (for the dough itself) along with polenta or semolina flour (for the exterior).
This recipe starts by making a levain, a mix of ripe sourdough starter, water, and flour.
You’ll need 6 grams of ripe starter and 56 grams each flour and water.
Mix together the flour, water, and starter in a bowl, cover it, and let it sit for 12 hours…
… or until is shows lots of signs of activity:
Gather the rest of your ingredients: water, milk, salt, sugar, butter, and flour.
This dough is made in a stand mixer, though you could knead it by hand if you don’t have one (see recipe box for details). First, combine all of the ingredients except the butter in the bowl of a stand mixer.
Mix on low speed for 1 to 2 minutes until combined. Increase the speed to medium and mix for 3 minutes until the dough begins to cling to the dough hook. Let the dough rest in the bowl for 10 minutes.
Add the butter, one pat at a time, until absorbed into the dough. Increase the speed to medium and mix for 1 to 2 minutes more until the dough smooths out and clings to the dough hook once again. The dough will be smooth and shiny.
Stretch and fold : Let the dough rest for 30 minutes.
Using wet hands, grab one side of the dough and lift it up and over to the other side.
Rotate the bowl 180 degrees and repeat.
Then rotate the bowl a quarter turn and stretch and fold that side.
Rotate the bowl 180 degrees again and finish with a stretch and fold on the last side.
The dough should be folded up neatly. Cover the vessel, then repeat these folds every 30 minutes for a total of 3 sets of stretches and folds.
After the last set, cover the bowl and let the dough rest for the remainder of the bulk fermentation, about 2 hours (if your kitchen is 74ºF-76ºF) or longer if your kitchen is cooler. I transfer the dough to a straight-sided vessel for the bulk fermentation:
The bulk fermentation is complete when the dough has risen with domed edges. When determining when the bulk fermentation should end, Maurizio notes: “The amount of rise is less important than the fact that it has risen and looks alive and well aerated.”
When the bulk fermentation is complete, turn the dough out onto a lightly floured work surface.
Divide the dough into 12 portions.
If you like to be precise, each portion should weigh 80 grams.
Ball up each portion.
At this point, you’ll need a vessel for proofing. I love these lidded DoughMate proofing vessels , which I use for pizza dough as well. If you don’t have one, a 13×18-inch sheet pan will work just fine.
Dust the proofing vessel or a 13×18-inch sheet pan with semolina flour or cornmeal. Transfer the balls to the vessel, cover, then refrigerate overnight.
The following day, remove the vessel from the fridge and let the balls proof at room temperature for at least 3 hours or until they are very light to the touch.
To cook, you’ll brown each side of the English muffin dough balls in a skillet on the stovetop.
Then you’ll bake them for 15 minutes.
Let them cool for at least 30 minutes before halving and devouring…
… or, if you have the patience, toasting and slathering with butter.
Description
Light and airy with the loveliest chew, these sourdough English muffins are surprisingly easy to make. They do not require an autolyse, nor do they require English muffin rings for cooking. They are irresistible toasted and slathered with butter or jam.
From Maurizio Leo’s The Perfect Loaf
There are no volume measurements for this recipe, so you’ll need a digital scale.
Notes:
Water Temperature: Maurizio gives very specific temperatures of the water. This is all in an effort to allow the dough to ferment properly. For the levain, the specific temperature of the water is 78ºF. For the dough itself, the temperature of the water you should use will vary depending on the temperature of your kitchen, and Maurizio provides a way to calculate this figure as well as a handy chart (if you hate math) in his book. When my kitchen is 68ºF, I should use water that is roughly 98ºF.
For the levain:
- 56 grams high-protein white flour ( 12.7 to 14% protein)
- 56 grams water, roughly 78ºF, see notes above
- 6 grams ripe sourdough starter
For the English muffins:
- 33 grams unsalted butter
- 437 grams high-protein white flour ( 12.7 to 14% protein), such as bread flour
- 55 grams whole spelt flour
- 55 grams whole or 2 % milk
- 9 grams sugar
- 283 grams water, roughly 98ºF, see notes above
- 10 grams fine sea salt or kosher salt
- 118 grams levain
- Make the levain : In a medium jar or small bowl, mix the levain ingredients until well incorporated (this liquid levain will feel quite loose) and loosely cover. Store on the counter for 12 hours.
- After the 12 hours, check the levain: it should show signs of readiness: well aerated, risen, bubbly on top and at the sides, and with a sour aroma. If the levain is not showing these signs, let it ferment 1 hour more and check again.
- Cut the butter into ½-inch thick pats. Place the pats on a plate on the counter to warm to room temperature.
- Mix the dough: In the bowl of a stand mixer fitted with the dough hook, add the flours, milk, sugar, water, salt, and ripe levain. Mix on low speed for 1 to 2 minutes until combined. Increase the speed to medium and mix for 3 minutes until the dough begins to cling to the dough hook. Let the dough rest in the bowl for 10 minutes. ( To mix by hand: In a large bowl, whisk together the flours, sugar, and salt. Add the water, milk, and levain and stir with a spatula until you have a sticky dough ball. Turn the dough out onto a lightly floured work surface, then knead by hand for 2 to 3 minutes until the dough comes together in a cohesive ball and feels tacky but not sticky. Return the dough to the bowl and let it rest for 10 minutes.)
- Gently press a butter pat with your finger: it should easily indent but not be wet or melted. If the butter is too warm, place it in the freezer for 5 minutes. If it is too firm, microwave it for 10 seconds, then check it again.
- With the mixer on low speed, add the butter, one pat at a time, until absorbed into the dough, scraping down the sides of the bowl and the paddle as needed. Continue until all the butter is added, 2 to 3 minutes. Increase the speed to medium and mix for 1 to 2 minutes more until the dough smooths out and clings to the dough hook once again. The dough will be smooth and shiny. Transfer to a container for the bulk fermentation. ( If you are hand-kneading: Turn the dough out onto a lightly floured work surface, sprinkle the butter over the dough, then knead the dough for 2 to 3 minutes, using flour only as kneaded, until the butter is incorporated and the dough is smooth and shiny. Transfer the dough to a container for the bulk fermentation.)
- Bulk fermentation : Let the dough rest for 30 minutes. Using wet hands, grab one side of the dough and lift it up and over to the other side. Rotate the bowl 180 degrees and repeat. Then rotate the bowl a quarter turn and stretch and fold that side. Rotate the bowl 180 degrees again and finish with a stretch and fold on the last side. The dough should be folded up neatly. Cover the vessel, then repeat these folds every 30 minutes for a total of 3 sets of stretches and folds. After the last set, cover the bowl and let the dough rest for the remainder of the bulk fermentation, roughly 2 hours if your kitchen is warm, longer if it is cool (3 to 4 hours or longer if necessary). End the bulk fermentation when the dough has risen, domed, and looks alive and well aerated. I tend to end the bulk fermentation when the dough has increased in volume by 50-75%.
- Prepare the proofing pan : Liberally dust a 13 x 18-inch half-sheet pan (or a lidded DoughMate ) with semolina flour or cornmeal (or white flour) and set aside.
- Uncover the container and lightly dust the top of the dough and a work surface with flour. Gently scrape the dough onto the floured work surface and use your bench knife to divide it into 12 pieces roughly 80 grams each.
- Using a lightly floured hand and your bench scraper, shape each piece into a taut ball and place it on the sheet pan; you should be able to comfortably fit all 12 pieces with space in between. Place the sheet pan inside a reusable plastic bag and seal. Alternatively, wrap the pan well with plastic wrap.
- Cold proof: Place the sheet pan in the refrigerator overnight.
- Warm proof: The next day, remove the pan from the fridge and let proof at room temperature (74ºF to 76ºF) for at least 3 hours. (Because my kitchen is cool (68ºF), this room temperature proof takes longer: more like 4 to 5 hours.) The dough is ready when it is very soft and puffed up — it should feel extremely delicate. (For the lightest and most tenderest muffins, it’s essential to give this dough plenty of time to finish proofing.) If it feels dense or tight, let it proof 30 minutes more and check again.
- Cook the English muffins: Place an oven rack in the middle position and preheat the oven to 350ºF. Line a 13 x 18-inch half-sheet pan with parchment paper and set it next to the stove.
- Place a heavy cast-iron skillet or other large skillet over medium-low heat (or preheat a griddle). Lightly grease the skillet with clarified (or not) butter. Using a flat spatula, gently transfer 2 to 4 dough rounds to the skillet to cook until the bottoms are deep brown, 2 to 3 minutes. Flip and cook for another 2 to 3 minutes, or until the other sides are deep brown. Transfer the muffins to the prepared sheet pan and repeat with the remaining dough rounds, wiping out and re-greasing the pan again with butter between each batch.
- Transfer the pan to the oven and bake for 15 minutes. When done, the muffins will have colored a little more at the edges, but they won’t be completely browned.
- Let the muffins cool on a wire rack for at least 30 minutes. These will keep for 3 to 4 days on the counter, covered. For longer storage, transfer to a zip-top plastic freezer bag once completely cooled and freeze for up to 3 months.
- Prep Time: 48 hours
- Cook Time: 45 minutes
- Category: Bread
- Method: Stovetop, Oven
- Cuisine: American
Find it online : https://alexandracooks.com/2023/01/13/homemade-sourdough-english-muffins/
Made from mostly pantry items, these one-pot curried chickpeas, spiced with Thai red curry paste and coconut milk, come together in a snap and are so flavorful and satisfying.

A few weeks ago, I set out to make this one-pot Thai chicken curry for dinner but discovered I had received boneless skinless chicken thighs (as opposed to bone-in, skin-on) in my grocery delivery.
Lacking the creativity to pivot, I made the curry anyway, reducing the cooking time in the oven from 1 hour to 30 minutes.
My plan mostly worked: the chicken thighs emerged moist and tender, and the sauce, while less concentrated than usual, did its job of flavoring the mounds of rice my children would be happy eating without any chicken at all.
Due to the abbreviated cooking time, however, I was left with a skillet full of sauce, and as I began cleaning up the kitchen, I pondered my options: saving it and cooking more chicken in it the following evening? Returning it to the oven filled with cauliflower florets or cubes of tofu or both? Saving the sauce to poach some fish in it later in the week?
All of those options likely would have worked but I decided to throw in a can of chickpeas instead and return the skillet to the oven.
Friends! The chickpeas were so tasty! I had planned on saving them for lunch the next day, but Ben and I polished them off. Suspecting the children would approve, too, I made them the following evening, and when my pickiest eater asked if there would be leftovers for her to pack in her thermos for lunch the next day, I knew I had a keeper.
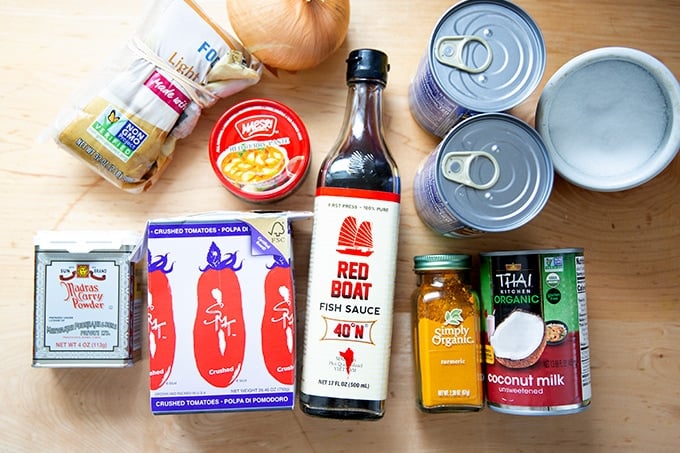
The beauty of this recipe is that it’s made from nearly all pantry items (see photo below). The one item you might not have is the Thai red curry paste. I buy it at my local Asian market, but you can find it online as well. All of the other items are easy to find and, as noted, might already be in your pantry.
How to Make One-Pot Curried Chickpeas, Step by Step
Gather your ingredients. You’ll also need cilantro (if you like it).
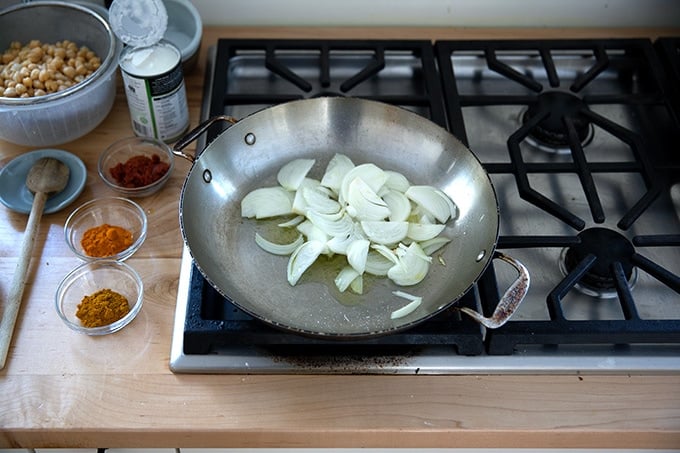
First, sauté an onion in olive oil for about 5 minutes.
Add spices: curry powder, turmeric, and Thai red curry paste .
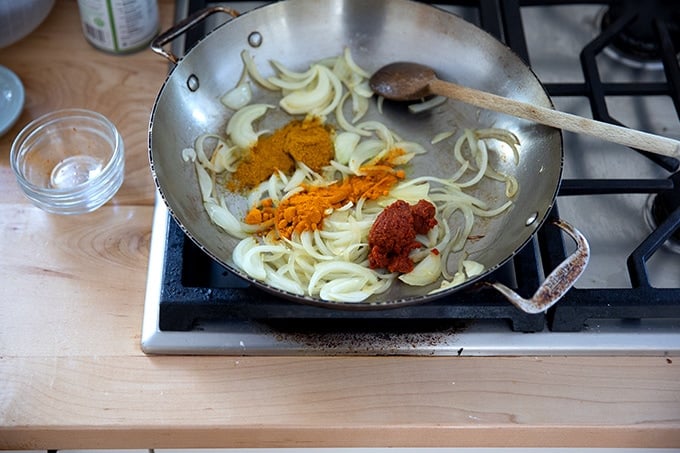
Stir until the onions are coated in the spices, then add crushed tomatoes — I’m using canned (boxed), but you can use fresh in the summertime.
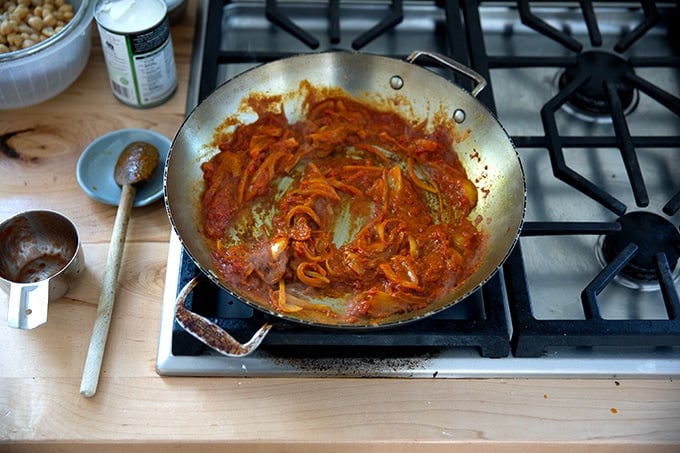
Add 1 can of unsweetened coconut milk, then fill the empty can with water and add it to the pot as well.
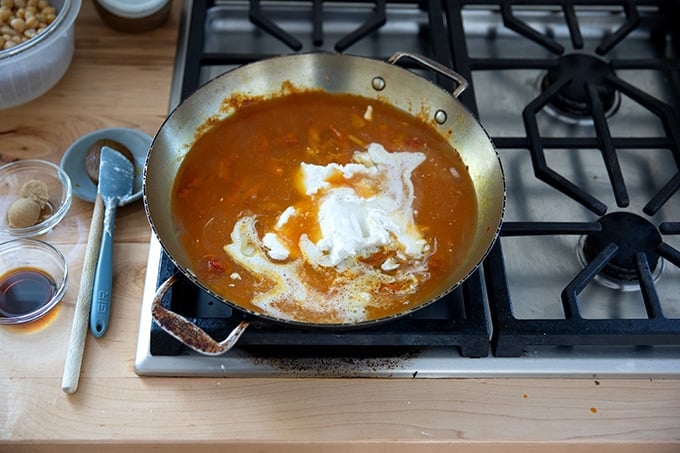
Stir to combine, then add brown sugar, fish sauce (or coconut aminos to keep it vegan), and salt.
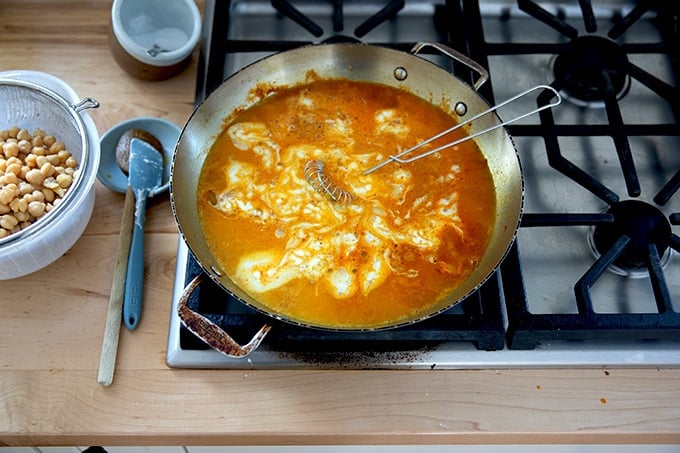
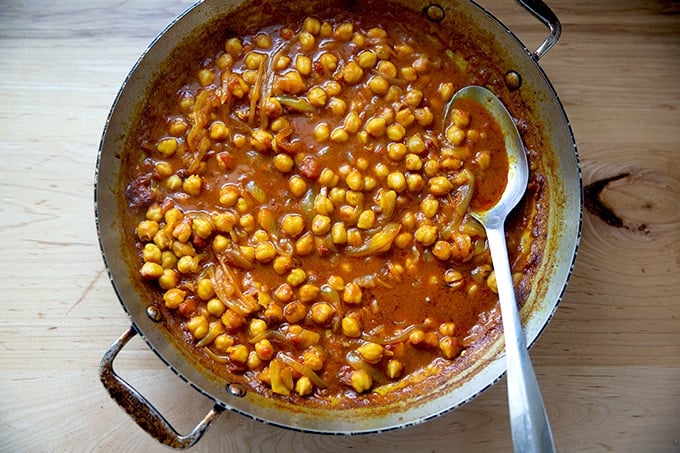
Add two cans of drained chickpeas, then bring to a simmer.
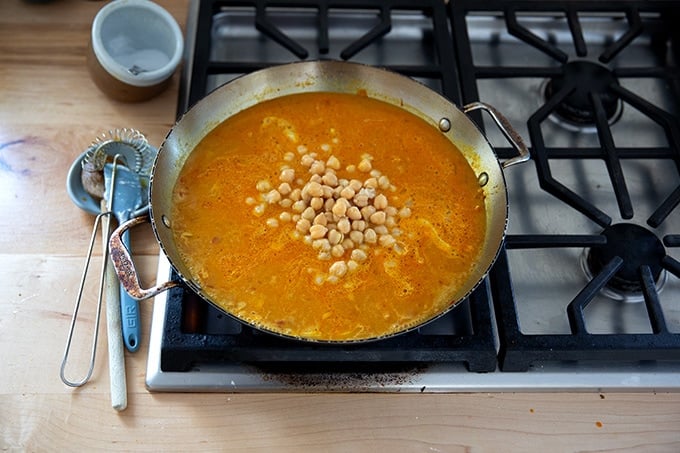
Transfer to the oven for 35 to 40 minutes. (You can also simply simmer this stovetop for roughly the same amount of time.)
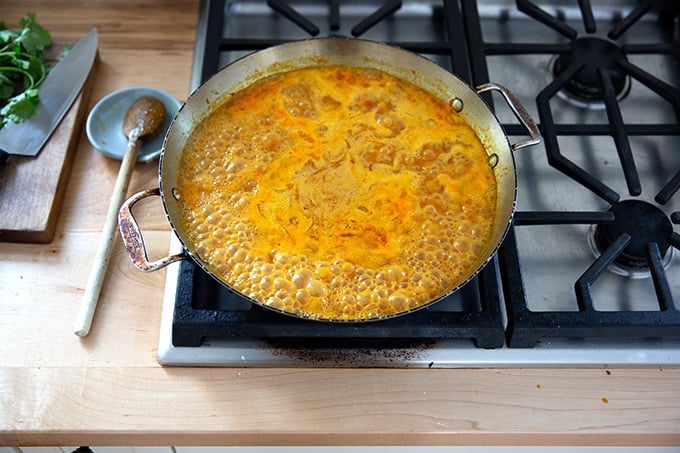
Depending on how saucy you like it, you can cook the chickpeas for more or less time. Chickpeas are thirsty, so they’ll continue to soak up the sauce as they sit, and if you have leftovers, you’ll likely need to add water when you reheat.
Add cilantro, if you wish. With the chicken variation of this recipe, I wilt in spinach at the end, which would be nice here, too.

Stir to combine, then serve with…

… rice or bread or whatever you wish. I’ve been serving it with basmati rice, made in my Instant Pot, and everyone has been loving it.

Description
This chickpea curry is an adaptation of this chicken curry recipe I learned to make while working at Fork in Philadelphia many years ago. In place of 8 bone-in chicken thighs, I’ve swapped in two cans of drained chickpeas.
A few notes:
If you wish to cook the chickpeas from scratch, here are two methods I love: Simple Slow Cooker Chickpeas (I make these often) and How to Cook Chickpeas From Scratch .
Thai red curry paste. Maesri is the brand I buy at the Asian market. You can find it online, too . I use roughly 1 tablespoons for this recipe, which makes the curry spicy but not outrageously so. If you are sensitive to heat, start with a tablespoon (or less) and adjust the sauce with more at the end.
Fish sauce: To keep this recipe vegetarian (vegan actually), simply omit it or use coconut aminos . If you omit it, you may need to use a touch more salt. Adjust to taste at the end.
Instant Pot rice: The rice I buy most often is called Jasmati … it’s what my little co-op carries, so I go with it. Basmati or Jasmine rice will work well here but you may have to tweak your timing a bit. Here’s what I do: Rinse two cups of rice very well. I use one of these . Drain the rice in a fine mesh sieve, and let it sit for a few minutes to really drain well. Place in an IP with 2 cups of water, 1 teaspoon kosher salt, and a good knob of butter (about a tablespoon). Cook on high for 6 minutes; let release naturally for at least 20 minutes before serving.
1 tablespoon olive oil
1 onion, sliced
kosher salt
2 teaspoons turmeric
2 teaspoons curry powder
1 to 3 tablespoons Thai red curry paste (see notes above)
1 cup crushed tomatoes (canned) or 3 to 4 plum tomatoes, chopped
1 can (13.5 oz) unsweetened coconut milk
1 tablespoon fish sauce, optional, see notes above
2 teaspoons brown sugar
2 cans (15 ounces each) chickpeas, drained and rinsed or 3 cups cooked chickpeas, see notes above
1/2 cup cilantro, roughly chopped, or more or less to taste
For serving:
- cooked Basmati or Jasmine rice (or any rice you like), see notes above for my Instant Pot method
- Heat oven to 400ºF.
- In a large sauté pan over hight heat, heat 1 tablespoon of olive oil. Add the onions and a pinch of salt, and immediately turn the heat to medium-low. Stir every so often, and cook until the onions soften and begin browning at the edges, about 5 minutes.
- Add the curry powder, turmeric, and Thai red curry paste to the onions, and stir until the onions are coated in the spices, about a minute. Add the crushed tomatoes and stir to combine. (If you are using fresh tomatoes, cook until they just begin to soften, about a minute.) Add the can of coconut milk. Fill up the empty can of coconut milk with water and add to the pan. Add the fish sauce (or coconut aminos) and brown sugar to the pan and whisk to combine. At this point, I’ve been adding 1/2 teaspoon kosher salt, but you may need more or less to taste depending on if you are using the fish sauce and the brand of curry paste you are using. I suggest bringing the mixture to a simmer, tasting it, then adding salt to taste. You can always add more at the end, too.
- Add the chickpeas and bring to a simmer. Transfer the pan to the oven uncovered and cook for 35 to 40 minutes — the liquid will reduce considerably but depending on how saucy you want it, you may want to cook it for more or less time. Note: If you make this ahead, you will need to add more water upon reheating.
- Add cilantro and stir. Taste. Adjust with salt to taste. Spoon rice into bowls. Top with the chickpeas and sauce, and serve immediately.
- Prep Time: 15 minutes
- Cook Time: 35 minutes
- Category: Dinner
- Method: Stovetop, Oven
- Cuisine: American, Thai
