If you can make focaccia — and you know you can! — you can make excellent Sicilian-style pizza at home. It’s shockingly easy. Read on to learn the game-changing secret that allows the focaccia-like crust to stabilize and ensures the toppings do not overcook. 🍕🍕🍕
While the definition of Sicilian-style pizza as we know it today is debatable, the indisputable original Sicilian pizza is something called sfincione , a focaccia-like dough topped with onions, bread crumbs, and caciocavallo cheese. In Sicily, it’s traditionally served on New Year’s Eve.
If you go to a Sicilian-style pizzeria today, you’ll find slices that resemble sfincione with their focaccia-like foundation, but the toppings will vary as much as they would in any slice shop.
Unlike other styles of pan pizzas — I’m looking at you, Detroit — Sicilian-style pizza is incredibly easy to make at home: if you can make focaccia, either yeasted or sourdough , you can make excellent Sicilian-style pizza at home.
Find step-by-step instructions below but before you proceed, read these game-changing tips for success:
4 Tips for Sicilian-Style Pizza Success
- Butter your baking pan before adding the olive oil. With some pans, using butter in addition to olive oil is imperative to prevent sticking. Moreover, butter adds flavor and promotes browning.
- Take care with your final dimpling. Dimple throughout the center of the dough not the perimeter to ensure an even parbake. I learned this from Peter Reinhart’s Perfect Pan Pizza .
- Parbake your crust: This is game-changing! Parbaking allows the focaccia-like crust to stabilize, which will ensure the crust does not taste doughy or gummy. Furthermore, it will prevent the toppings from overcooking.
- Invest in a Lloyd pan : Lloyd pans conduct heat better than standard half sheet pans and, as a result, produce a superior, crisper crust. I love the 16×12-inch Lloyd “Grandma” pan .
How to make Sicilian Pizza, Step by Step
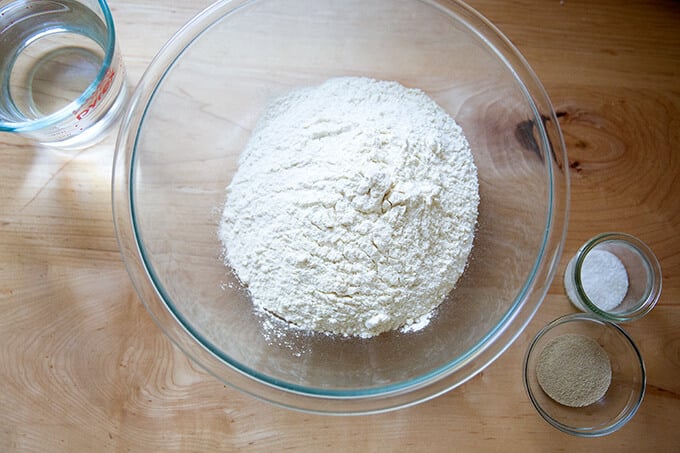
Gather your ingredients: bread flour, salt, instant yeast ( SAF is my preference), and lukewarm water:
Whisk together the flour, salt, and yeast first:
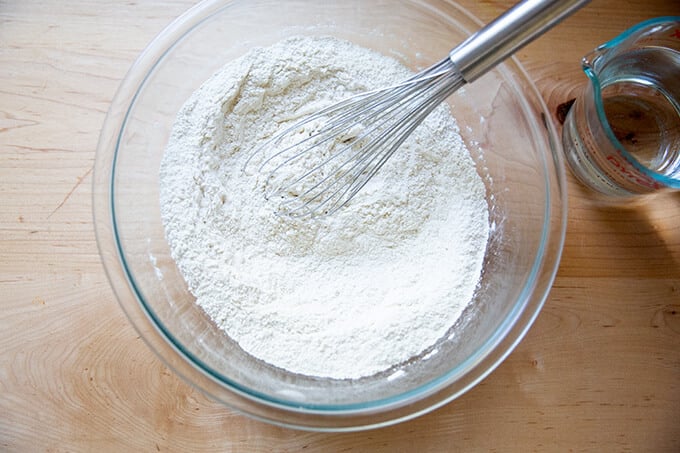
Add the water:
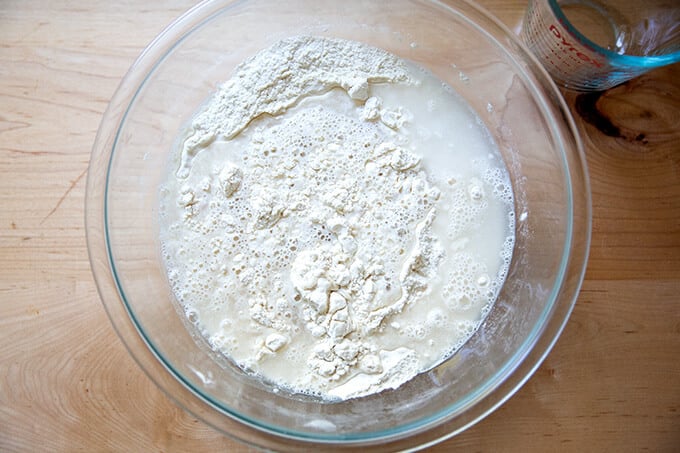
Use a spatula to stir the two together.
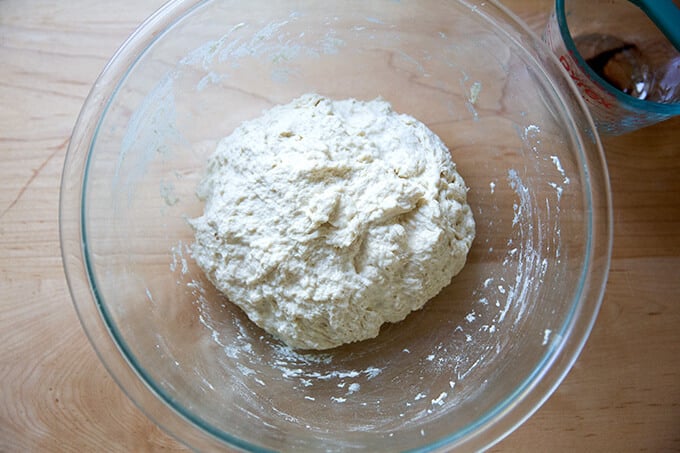
Slick the dough with olive oil:
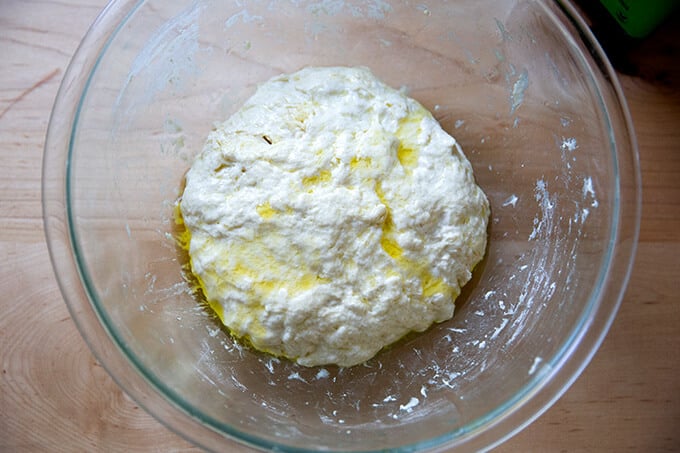
Then cover the bowl (with a lid or plastic wrap or something to make it airtight). Stick the bowl in the fridge immediately; leave it there to rise for 18 hours or longer—two to three days will give you an even lighter crust.
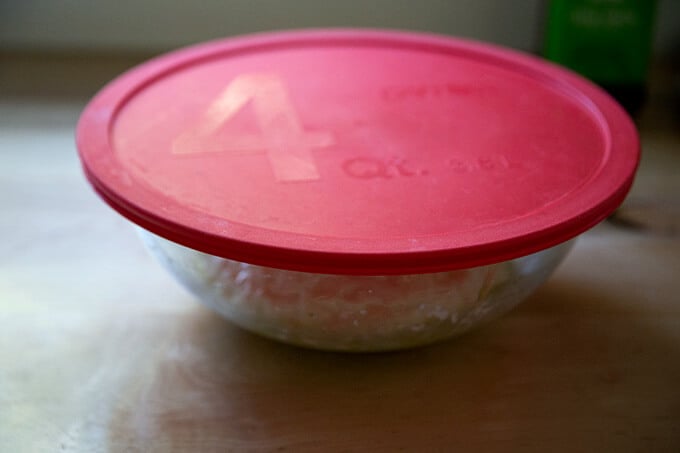
Uncover the bowl, then…
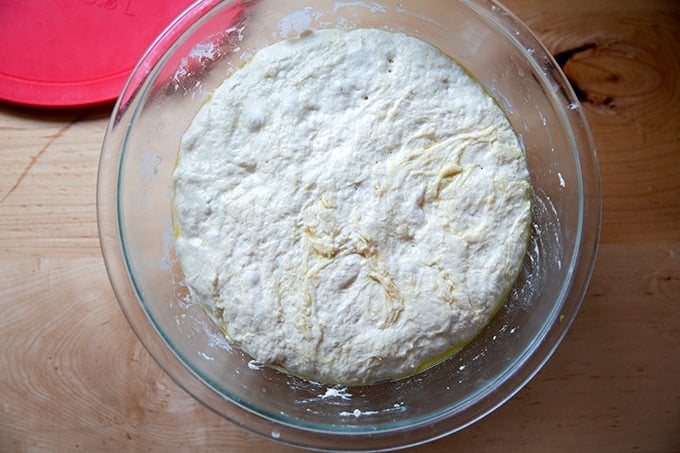
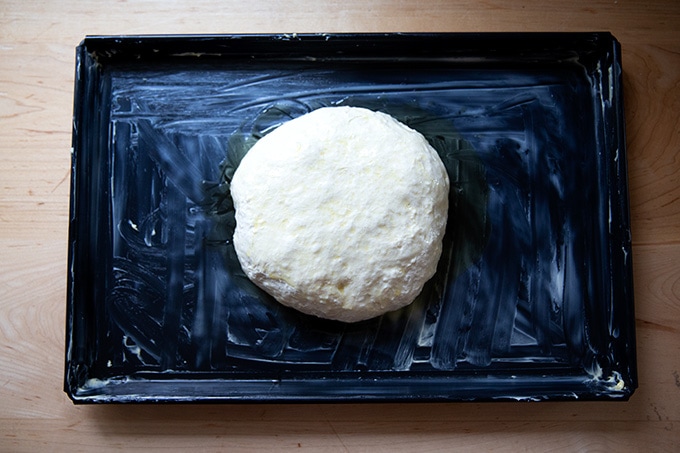
… deflate the dough. Using oiled hands grab a portion of the dough and stretch it up and toward the center. Turn the bowl slightly and repeat until you have created a rough ball.
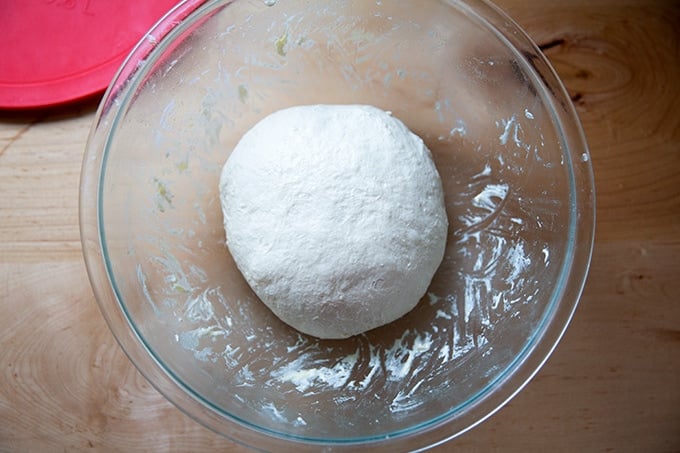
Prepare your pan for baking with both butter and olive oil. I love this Lloyd Sicilian-Style Pizza Pan .
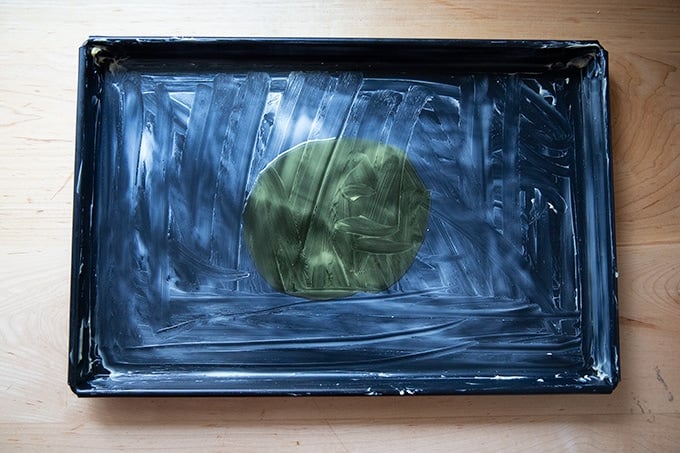
Transfer your dough ball to the pool of olive oil and turn it to coat.
Let sit for 2.5 to 3 hours or until it has poofed considerably.
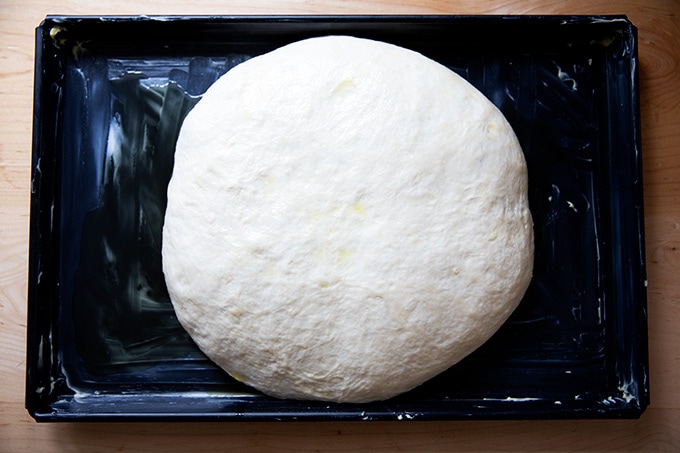
Dimple and stretch the dough to fit the pan. As soon as the dough resists, stop and let it rest for another 30 minutes.
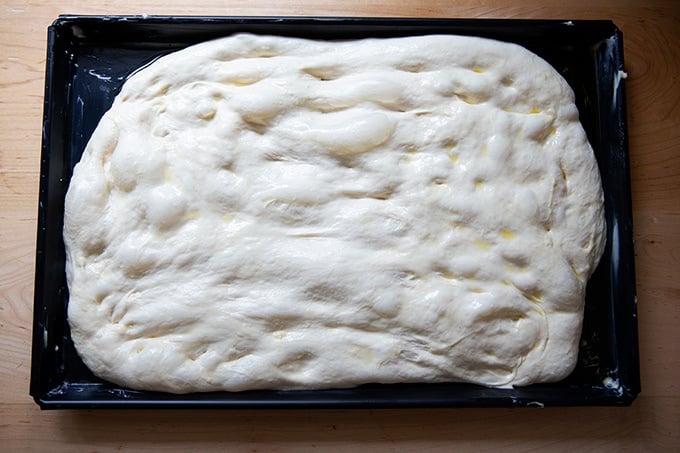
Then stretch it again to fit the pan. At this point, the dough can hang out in the pan for several hours. Cover it with plastic wrap to ensure the dough does not dry out if you plan on doing so. Dimple one last time throughout the center of the dough before transferring it to the oven to parbake it.
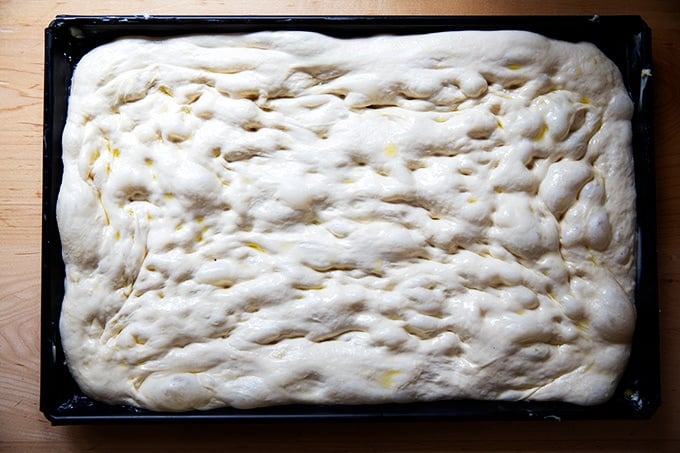
Parbake the dough for 11-12 minutes at 500ºF on a preheated Baking steel or pizza stone.
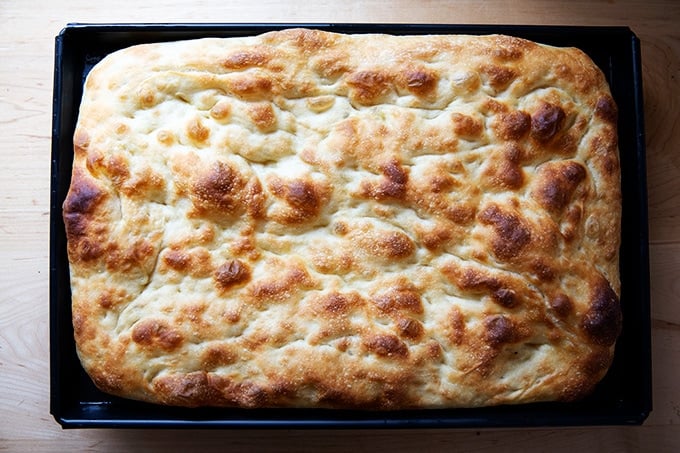
Then, top as you wish. I’m using my go-to homemade tomato sauce here.
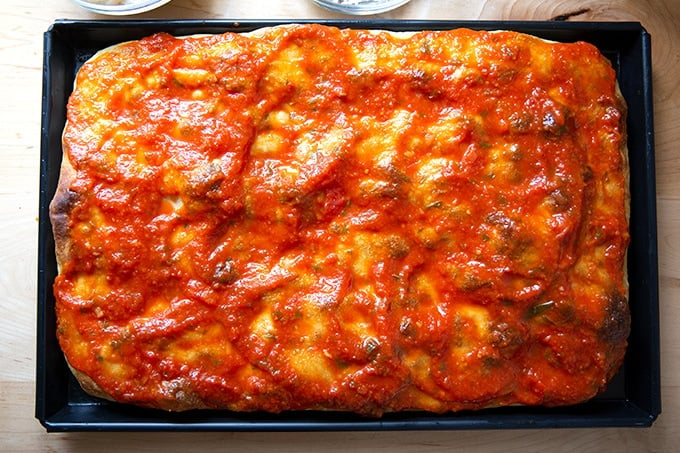
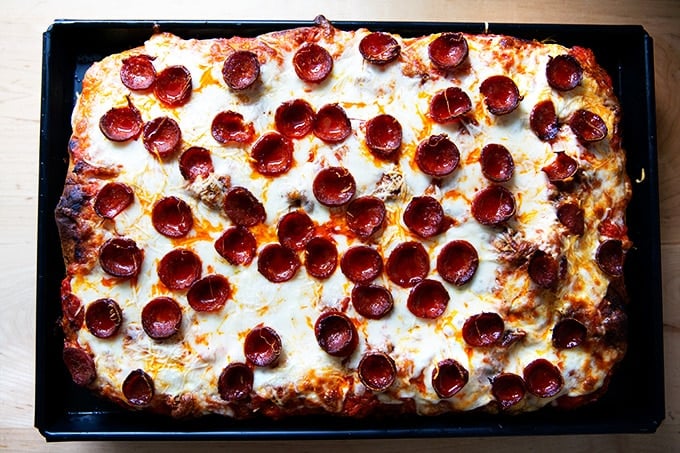
Top with cheese:
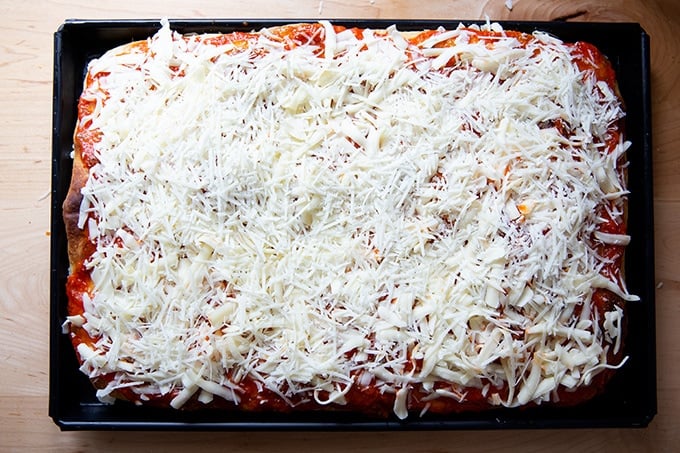
Then add pepperoni or sautéed vegetables or sausage or whatever you wish:
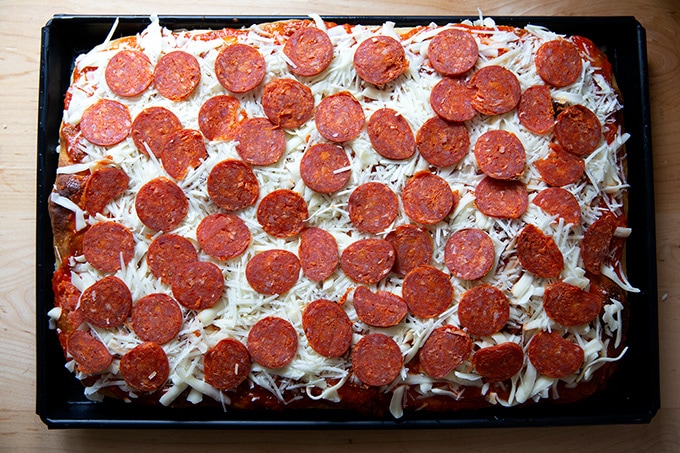
Transfer to the oven for another 10 minutes. Remove from oven and let rest in the pan for another 5 minutes before transferring the pizza to a board to rest.
Shower with pepper flakes, if you wish.
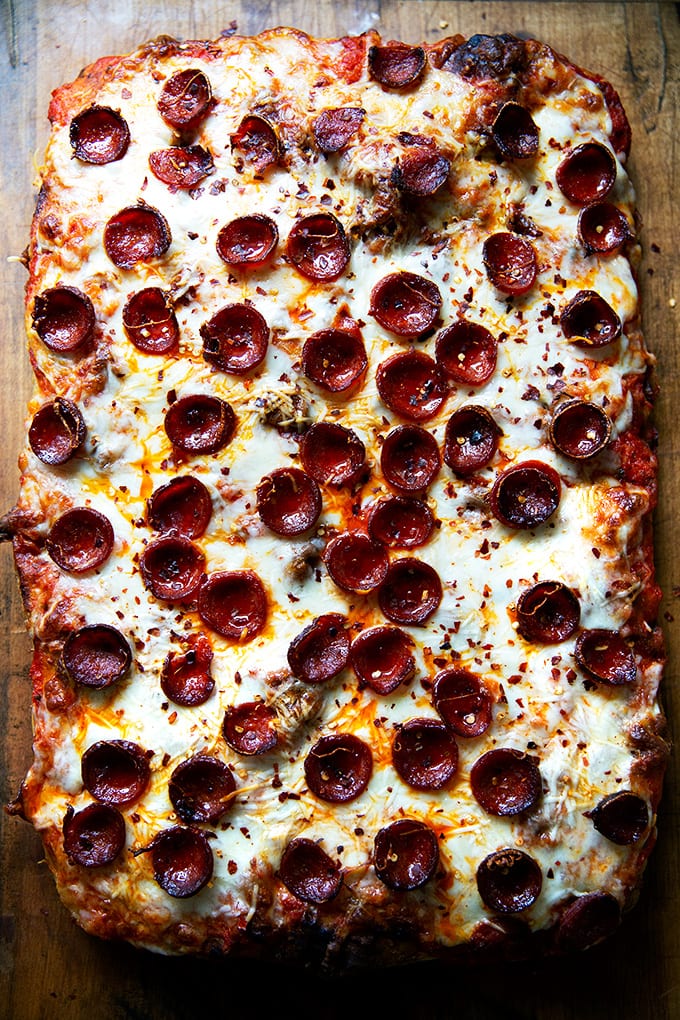
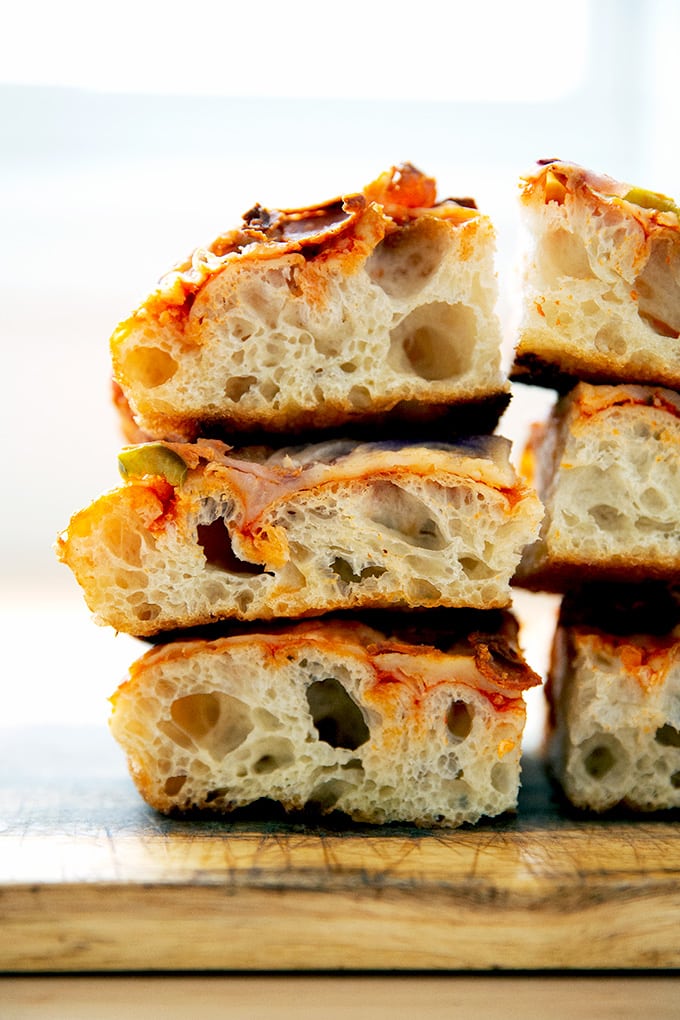
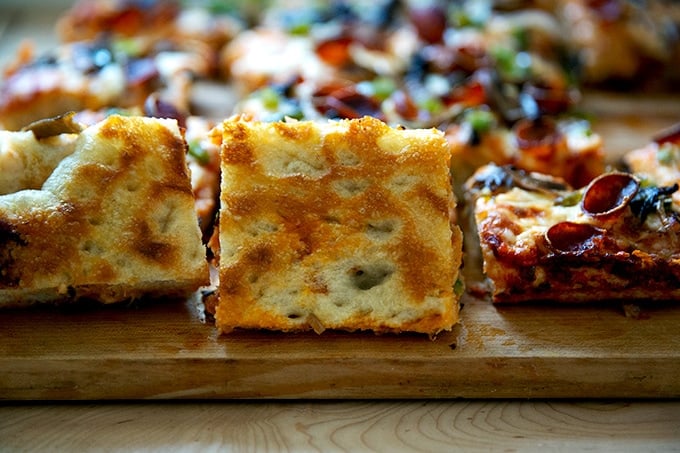
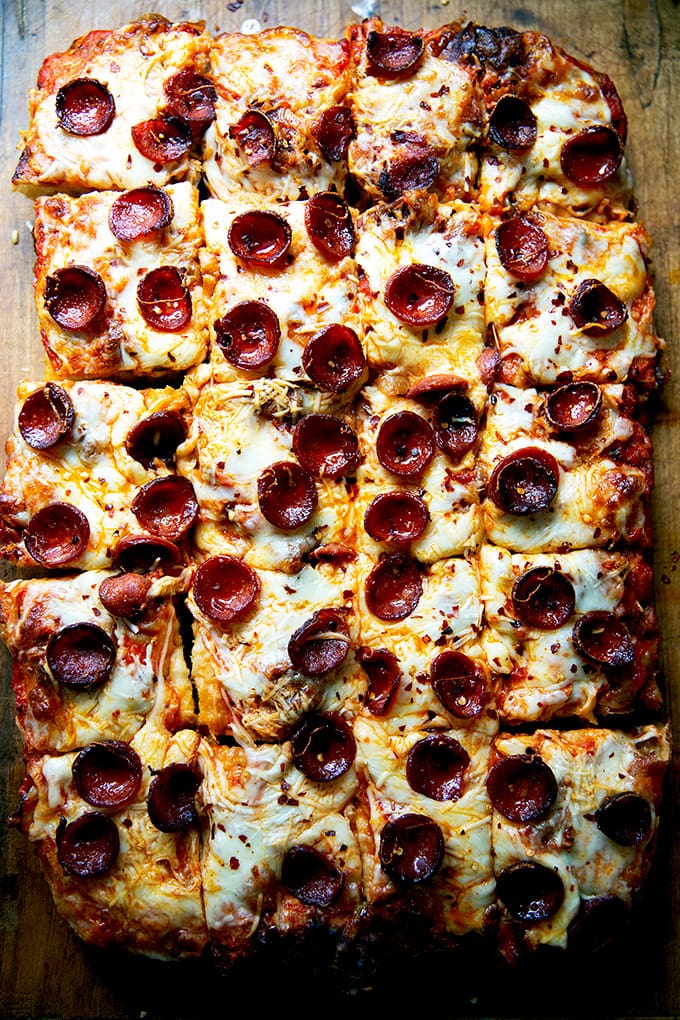
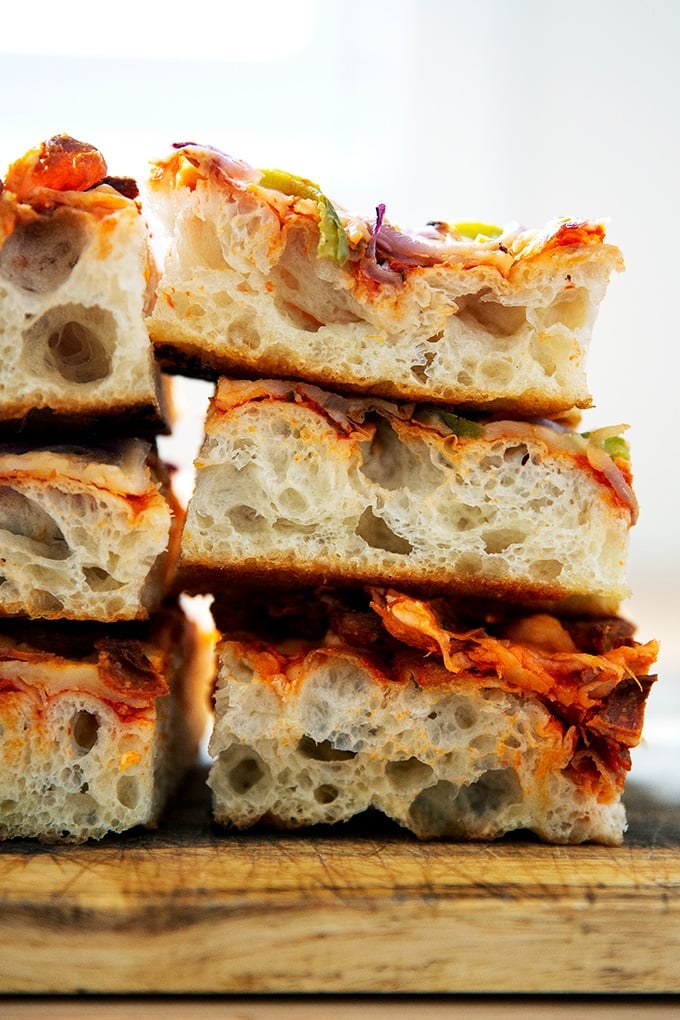
Cut into squares and serve.
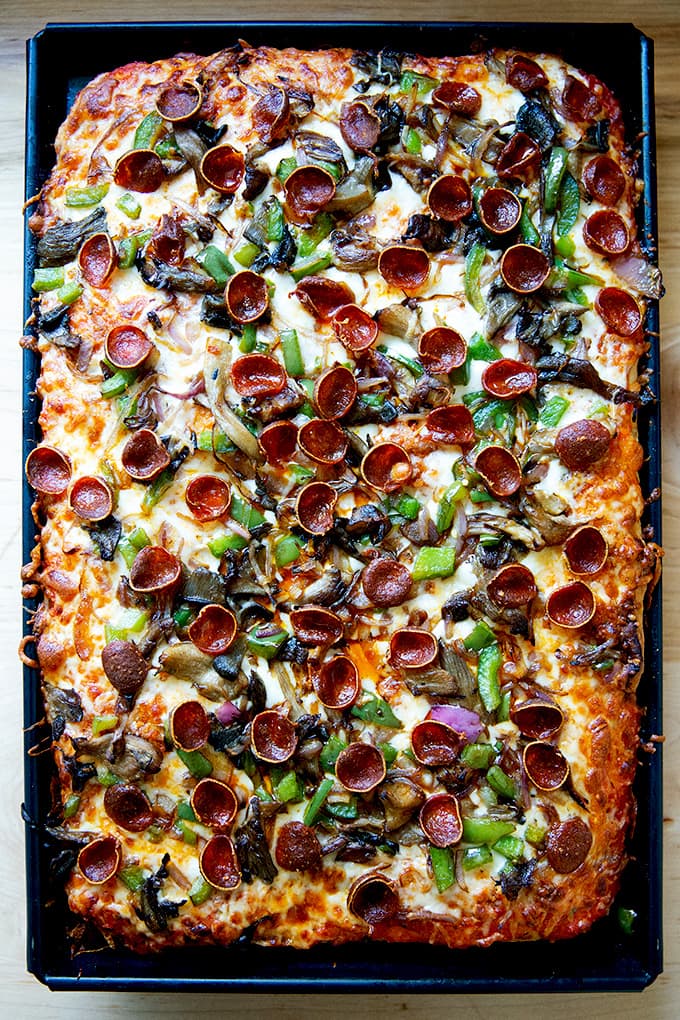
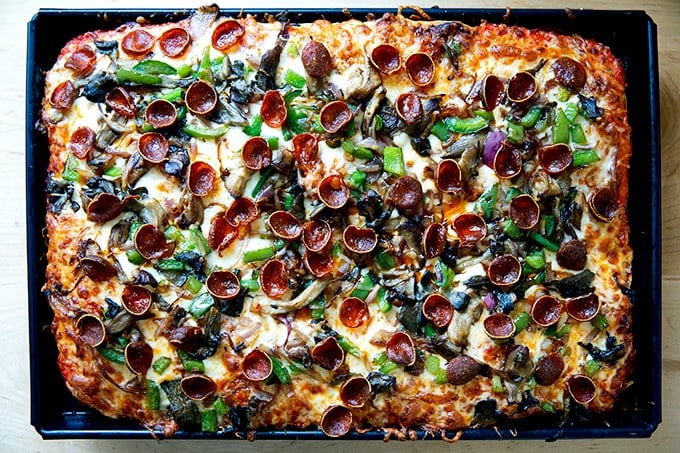
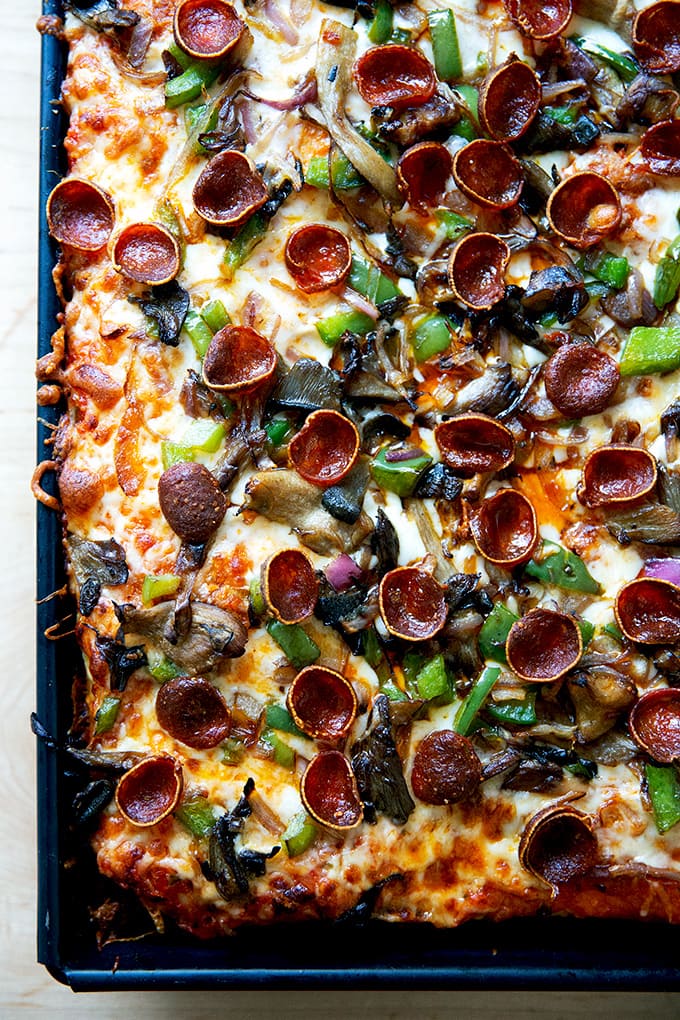
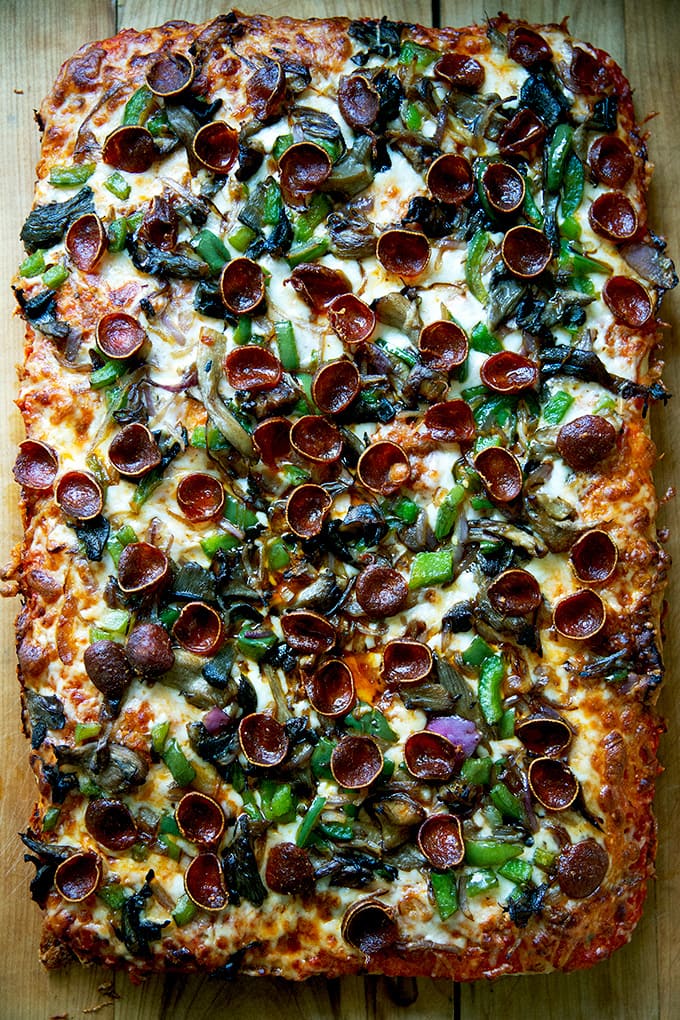
Here’s the sautéed vegetable + pepperoni one:

Description
If you can make focaccia — and you know you can! — you can make excellent Sicilian-style pizza at home. It’s shockingly easy. The key to success is to parbake the crust. Below you will find a yeasted dough recipe but if would like to make a sourdough version, follow the recipe for this simple sourdough focaccia bread recipe through step 5; then proceed with the recipe.
Attention Pizza Fans: My pizza cookbook,Pizza Night, is here!
Notes:
- As always, for best results, use a digital scale to measure the flour and water.
- As with the focaccia recipe , a long ferment is best. I often let the dough sit in the fridge for 2 days before proceeding.
- You’ll need a 12″ x 18″ sheet pan for this recipe. Lloyd makes a Sicilian-style pizza pan , which I love — it’s 12×16 inches, but it works great here. If you have a Lloyd Detroit-style pan and would prefer to use that here, see the notes below the recipe for scaling the dough recipe to fit that size pan.
- I love SAF instant yeast . I buy it in bulk, transfer it to a quart storage container , and store it in my fridge for months. You can store it in the freezer also.
- If you are using active-dry yeast , simply sprinkle the yeast over the lukewarm water and let it stand for 15 minutes or until it gets foamy; then proceed with the recipe.
- Flour: You can use all-purpose or bread flour here with great results. If you live in a humid environment, I would suggest using bread flour. If you are in Canada or the UK, also consider using bread flour or consider holding back some of the water. Reference the video for how the texture of the bread should look; then add water back as needed.
- Cheese: I know the idea of using grated cheese for some of you may be off-putting, but there are a few brands I like, and it saves some time using them: Trader Joe’s sells a Quattro Formaggi blend that’s great, and Tillamook sells a large-grate mozzarella that I also really love.
For the dough:
- 4 cups ( 512 g ) bread flour, see notes above
- 2 teaspoons ( 12 g ) kosher salt
- 2 teaspoons ( 8 g ) instant yeast, see notes above if using active dry
- 2 cups ( 455 g ) lukewarm water, made by combining 1/2 cup boiling water with 1 1/2 cups cold water
- olive oil
For the pizza:
- butter
- 2 tablespoons olive oil
- 12 ounces of grated cheese, such as whole milk mozzarella or a mix of Monterey Jack, Cheddar, and Mozzarella, see notes above
- 1 cup (+ a few spoonfuls) tomato sauce, such as this one or this one , or your favorite jarred sauce
For a veggie pizza:
- 3 tablespoons olive oil, divided
- 8 ounces mushrooms, sliced
- 1 green (or other) bell pepper, diced
- 1/2 red onion, thinly sliced
For a pepperoni pizza:
- 6 ounces pepperoni, I love Vermont Smoke & Cure, sliced as thinly as possible — if you want the pizza to be really loaded with pepperoni, you’ll need more like 12 ounces
- crushed red pepper flakes
For a pickled jalapeño & pepperoni pizza:
- 1 cup pickled jalapeños
- 6 ounces pepperoni, thinly sliced
- hot honey , optional
To make the dough:
- Make the dough: In a large bowl, whisk together the flour, salt, and instant yeast. Add the water. Using a rubber spatula, mix until the liquid is absorbed and the ingredients form a sticky dough ball. Rub the surface of the dough lightly with olive oil. If your bowl has a lid, cover the bowl. Alternatively, transfer the dough to a vessel with a lid or cover the bowl tightly with plastic wrap to ensure the dough doesn’t dry out in the fridge.
- Transfer dough to the fridge for at least 18 hours but ideally longer: 24 to 48 hours. Longer is fine, too: I’ve kept the dough in the fridge for 3 days before proceeding.
Prepare the pan for baking:
- Grease a 12″ x 18″ sheet pan with butter. Pour 2 tablespoons of olive oil into the center of the pan. (Note: This greasing step may seem excessive, but with some pans, it is imperative to do so to prevent sticking. Moreover, it adds flavor and helps brown the bottom crust perfectly.)
Prepare the pizza for baking:
- Remove the dough from the fridge and use lightly oiled hands to release it from the sides of the bowl. Then, again with oiled hands, grab an edge of dough and pull up and to the center. Turn the bowl slightly and repeat until you’ve shaped the dough into a rough ball.
- Place the dough ball in the pan and turn to coat. (Note: You do not need to cover the dough here. The coating of oil should be sufficient to prevent the dough from drying out.) Let rest for 3 hours. With lightly oiled hands, stretch the dough to fit the pan — tent your hands, and use your fingers to dimple and stretch. You will likely not be able to get the dough to stretch all the way to the edges. When the dough resists, let it rest again for 30 minutes; then stretch it again using the same technique.
- At this point, the dough can hang out in the pan for a couple of hours (if your kitchen is on the cool side). I’ve baked it 30 minutes after this point, and I’ve baked it two hours later. If the dough is going to hang out for a while, cover it with a sheet of plastic wrap.
Bake and Top the Pizza:
- If you have a Baking Steel or pizza stone, place it on a rack in the middle or lower third of your oven, and heat your oven to 500ºF.
- Using oiled hand, dimple the dough one last time with the exception of the perimeter — this is important. It will help the dough bake more evenly.
- Transfer pan to the oven and place on heated Baking Steel or pizza stone for about 10 to 11 minutes or until evenly golden.
- Remove pan from oven and lower the oven to 475ºF. (Note: my oven doesn’t change temperature so quickly, so I actually turn the oven off during this period. Just before I return the pan to the oven, I turn the oven back on to 475ºF. Also: You can do this parbake hours ahead of time or even a day ahead of time. )
- Spread the sauce evenly over the dough. Top with the grated cheese. Then top as you wish: For the veggie pizza: In a large skillet over high heat, heat 2 tablespoons of the olive oil. When it shimmers, add the mushrooms and let cook undisturbed for about a minute. Season with salt; then stir. Cook for 3 to 5 minutes or until the mushrooms are beginning to brown. Transfer to a bowl. Add the remaining tablespoon of oil to the skillet; then add the peppers and mushrooms. Cook for 1 to 3 minutes, or until slightly softened. Season with salt; then transfer to the bowl with the mushrooms. Toss to combine. Taste and adjust with salt as needed. Spread this mixture over the cheese. Add some sliced pepperoni if you wish. For the pepperoni pizza: Arrange the sliced pepperoni over the cheese. For the pepperoni + pickled jalapeño pizza: Arrange the sliced pepperoni and pickled jalapeños over the cheese.
- Transfer pan to the oven and bake for 10 to 12 minutes or until the cheese is melted and just beginning to brown in spots.
- Remove the pan from the oven and let the pizza rest for 5 minutes in the pan. If you are making a pepperoni pizza and are using the crushed red pepper flakes, sprinkle some of the pepper flakes over the top. If you are using the hot honey for the pickled jalapeño pizza, drizzle some over the top.
- Run a knife or spatula around the pan’s edges. Then, carefully remove the entire pizza from the pan, transferring it to a cutting board. I like to use a serrated knife to cut this pizza. You can cut the pizza into however many pieces you wish. I’ve been doing 20 squares.
Notes
To Scale the Dough for aLloyd Detroit-Style Pan, Use These Proportions (and please use ascale!):
- 277 g flour (2 cups + 2 tablespoons)
- 8 g salt (1.5 teaspoons)
- 6 g yeast (1.5 teaspoons)
- 245 g water (1 cup + 1 tablespoon)
- Note: My calculations lead me to think that a Detroit-style pan needs about 532 grams of dough. So another way to do it would be to make the recipe as written, use 532 grams of it for the Detroit-Style pan and use the remainder for something else — pizza, mini rolls, etc.
To Scale the Dough for a Lloyd Sicilian-Style Pan , Use These Proportions (and please use a scale !):
488 g (3 3/4 cups) flour
11 g (2 teaspoons) salt
8 g (2 teaspoons) yeast
432 g (1.75 cups + 2 tablespoons) water
Prep Time: 24 hours
Cook Time: 20 minutes
Category: Pizza
Method: oven
Cuisine: American, Sicilian
If you can make focaccia — and you know you can! — you can make excellent Sicilian-style pizza at home. It’s shockingly easy. Read on to learn the game-changing secret that allows the focaccia-like crust to stabilize and ensures the toppings do not overcook. 🍕🍕🍕
While the definition of Sicilian-style pizza as we know it today is debatable, the indisputable original Sicilian pizza is something called sfincione , a focaccia-like dough topped with onions, bread crumbs, and caciocavallo cheese. In Sicily, it’s traditionally served on New Year’s Eve.
If you go to a Sicilian-style pizzeria today, you’ll find slices that resemble sfincione with their focaccia-like foundation, but the toppings will vary as much as they would in any slice shop.
Unlike other styles of pan pizzas — I’m looking at you, Detroit — Sicilian-style pizza is incredibly easy to make at home: if you can make focaccia, either yeasted or sourdough , you can make excellent Sicilian-style pizza at home.
Find step-by-step instructions below but before you proceed, read these game-changing tips for success:
4 Tips for Sicilian-Style Pizza Success
- Butter your baking pan before adding the olive oil. With some pans, using butter in addition to olive oil is imperative to prevent sticking. Moreover, butter adds flavor and promotes browning.
- Take care with your final dimpling. Dimple throughout the center of the dough not the perimeter to ensure an even parbake. I learned this from Peter Reinhart’s Perfect Pan Pizza .
- Parbake your crust: This is game-changing! Parbaking allows the focaccia-like crust to stabilize, which will ensure the crust does not taste doughy or gummy. Furthermore, it will prevent the toppings from overcooking.
- Invest in a Lloyd pan : Lloyd pans conduct heat better than standard half sheet pans and, as a result, produce a superior, crisper crust. I love the 16×12-inch Lloyd “Grandma” pan .
How to make Sicilian Pizza, Step by Step
Gather your ingredients: bread flour, salt, instant yeast ( SAF is my preference), and lukewarm water:
Whisk together the flour, salt, and yeast first:
Add the water:
Use a spatula to stir the two together.
Slick the dough with olive oil:
Then cover the bowl (with a lid or plastic wrap or something to make it airtight). Stick the bowl in the fridge immediately; leave it there to rise for 18 hours or longer—two to three days will give you an even lighter crust.
Uncover the bowl, then…
… deflate the dough. Using oiled hands grab a portion of the dough and stretch it up and toward the center. Turn the bowl slightly and repeat until you have created a rough ball.
Prepare your pan for baking with both butter and olive oil. I love this Lloyd Sicilian-Style Pizza Pan .
Transfer your dough ball to the pool of olive oil and turn it to coat.
Let sit for 2.5 to 3 hours or until it has poofed considerably.
Dimple and stretch the dough to fit the pan. As soon as the dough resists, stop and let it rest for another 30 minutes.
Then stretch it again to fit the pan. At this point, the dough can hang out in the pan for several hours. Cover it with plastic wrap to ensure the dough does not dry out if you plan on doing so. Dimple one last time throughout the center of the dough before transferring it to the oven to parbake it.
Parbake the dough for 11-12 minutes at 500ºF on a preheated Baking steel or pizza stone.
Then, top as you wish. I’m using my go-to homemade tomato sauce here.
Top with cheese:
Then add pepperoni or sautéed vegetables or sausage or whatever you wish:
Transfer to the oven for another 10 minutes. Remove from oven and let rest in the pan for another 5 minutes before transferring the pizza to a board to rest.
Shower with pepper flakes, if you wish.
Cut into squares and serve.
Here’s the sautéed vegetable + pepperoni one:
Description
If you can make focaccia — and you know you can! — you can make excellent Sicilian-style pizza at home. It’s shockingly easy. The key to success is to parbake the crust. Below you will find a yeasted dough recipe but if would like to make a sourdough version, follow the recipe for this simple sourdough focaccia bread recipe through step 5; then proceed with the recipe.
Attention Pizza Fans: My pizza cookbook,Pizza Night, is here!
Notes:
- As always, for best results, use a digital scale to measure the flour and water.
- As with the focaccia recipe , a long ferment is best. I often let the dough sit in the fridge for 2 days before proceeding.
- You’ll need a 12″ x 18″ sheet pan for this recipe. Lloyd makes a Sicilian-style pizza pan , which I love — it’s 12×16 inches, but it works great here. If you have a Lloyd Detroit-style pan and would prefer to use that here, see the notes below the recipe for scaling the dough recipe to fit that size pan.
- I love SAF instant yeast . I buy it in bulk, transfer it to a quart storage container , and store it in my fridge for months. You can store it in the freezer also.
- If you are using active-dry yeast , simply sprinkle the yeast over the lukewarm water and let it stand for 15 minutes or until it gets foamy; then proceed with the recipe.
- Flour: You can use all-purpose or bread flour here with great results. If you live in a humid environment, I would suggest using bread flour. If you are in Canada or the UK, also consider using bread flour or consider holding back some of the water. Reference the video for how the texture of the bread should look; then add water back as needed.
- Cheese: I know the idea of using grated cheese for some of you may be off-putting, but there are a few brands I like, and it saves some time using them: Trader Joe’s sells a Quattro Formaggi blend that’s great, and Tillamook sells a large-grate mozzarella that I also really love.
For the dough:
- 4 cups ( 512 g ) bread flour, see notes above
- 2 teaspoons ( 12 g ) kosher salt
- 2 teaspoons ( 8 g ) instant yeast, see notes above if using active dry
- 2 cups ( 455 g ) lukewarm water, made by combining 1/2 cup boiling water with 1 1/2 cups cold water
- olive oil
For the pizza:
- butter
- 2 tablespoons olive oil
- 12 ounces of grated cheese, such as whole milk mozzarella or a mix of Monterey Jack, Cheddar, and Mozzarella, see notes above
- 1 cup (+ a few spoonfuls) tomato sauce, such as this one or this one , or your favorite jarred sauce
For a veggie pizza:
- 3 tablespoons olive oil, divided
- 8 ounces mushrooms, sliced
- 1 green (or other) bell pepper, diced
- 1/2 red onion, thinly sliced
For a pepperoni pizza:
- 6 ounces pepperoni, I love Vermont Smoke & Cure, sliced as thinly as possible — if you want the pizza to be really loaded with pepperoni, you’ll need more like 12 ounces
- crushed red pepper flakes
For a pickled jalapeño & pepperoni pizza:
- 1 cup pickled jalapeños
- 6 ounces pepperoni, thinly sliced
- hot honey , optional
To make the dough:
- Make the dough: In a large bowl, whisk together the flour, salt, and instant yeast. Add the water. Using a rubber spatula, mix until the liquid is absorbed and the ingredients form a sticky dough ball. Rub the surface of the dough lightly with olive oil. If your bowl has a lid, cover the bowl. Alternatively, transfer the dough to a vessel with a lid or cover the bowl tightly with plastic wrap to ensure the dough doesn’t dry out in the fridge.
- Transfer dough to the fridge for at least 18 hours but ideally longer: 24 to 48 hours. Longer is fine, too: I’ve kept the dough in the fridge for 3 days before proceeding.
Prepare the pan for baking:
- Grease a 12″ x 18″ sheet pan with butter. Pour 2 tablespoons of olive oil into the center of the pan. (Note: This greasing step may seem excessive, but with some pans, it is imperative to do so to prevent sticking. Moreover, it adds flavor and helps brown the bottom crust perfectly.)
Prepare the pizza for baking:
- Remove the dough from the fridge and use lightly oiled hands to release it from the sides of the bowl. Then, again with oiled hands, grab an edge of dough and pull up and to the center. Turn the bowl slightly and repeat until you’ve shaped the dough into a rough ball.
- Place the dough ball in the pan and turn to coat. (Note: You do not need to cover the dough here. The coating of oil should be sufficient to prevent the dough from drying out.) Let rest for 3 hours. With lightly oiled hands, stretch the dough to fit the pan — tent your hands, and use your fingers to dimple and stretch. You will likely not be able to get the dough to stretch all the way to the edges. When the dough resists, let it rest again for 30 minutes; then stretch it again using the same technique.
- At this point, the dough can hang out in the pan for a couple of hours (if your kitchen is on the cool side). I’ve baked it 30 minutes after this point, and I’ve baked it two hours later. If the dough is going to hang out for a while, cover it with a sheet of plastic wrap.
Bake and Top the Pizza:
- If you have a Baking Steel or pizza stone, place it on a rack in the middle or lower third of your oven, and heat your oven to 500ºF.
- Using oiled hand, dimple the dough one last time with the exception of the perimeter — this is important. It will help the dough bake more evenly.
- Transfer pan to the oven and place on heated Baking Steel or pizza stone for about 10 to 11 minutes or until evenly golden.
- Remove pan from oven and lower the oven to 475ºF. (Note: my oven doesn’t change temperature so quickly, so I actually turn the oven off during this period. Just before I return the pan to the oven, I turn the oven back on to 475ºF. Also: You can do this parbake hours ahead of time or even a day ahead of time. )
- Spread the sauce evenly over the dough. Top with the grated cheese. Then top as you wish: For the veggie pizza: In a large skillet over high heat, heat 2 tablespoons of the olive oil. When it shimmers, add the mushrooms and let cook undisturbed for about a minute. Season with salt; then stir. Cook for 3 to 5 minutes or until the mushrooms are beginning to brown. Transfer to a bowl. Add the remaining tablespoon of oil to the skillet; then add the peppers and mushrooms. Cook for 1 to 3 minutes, or until slightly softened. Season with salt; then transfer to the bowl with the mushrooms. Toss to combine. Taste and adjust with salt as needed. Spread this mixture over the cheese. Add some sliced pepperoni if you wish. For the pepperoni pizza: Arrange the sliced pepperoni over the cheese. For the pepperoni + pickled jalapeño pizza: Arrange the sliced pepperoni and pickled jalapeños over the cheese.
- Transfer pan to the oven and bake for 10 to 12 minutes or until the cheese is melted and just beginning to brown in spots.
- Remove the pan from the oven and let the pizza rest for 5 minutes in the pan. If you are making a pepperoni pizza and are using the crushed red pepper flakes, sprinkle some of the pepper flakes over the top. If you are using the hot honey for the pickled jalapeño pizza, drizzle some over the top.
- Run a knife or spatula around the pan’s edges. Then, carefully remove the entire pizza from the pan, transferring it to a cutting board. I like to use a serrated knife to cut this pizza. You can cut the pizza into however many pieces you wish. I’ve been doing 20 squares.
Notes
To Scale the Dough for aLloyd Detroit-Style Pan, Use These Proportions (and please use ascale!):
- 277 g flour (2 cups + 2 tablespoons)
- 8 g salt (1.5 teaspoons)
- 6 g yeast (1.5 teaspoons)
- 245 g water (1 cup + 1 tablespoon)
- Note: My calculations lead me to think that a Detroit-style pan needs about 532 grams of dough. So another way to do it would be to make the recipe as written, use 532 grams of it for the Detroit-Style pan and use the remainder for something else — pizza, mini rolls, etc.
To Scale the Dough for a Lloyd Sicilian-Style Pan , Use These Proportions (and please use a scale !):
488 g (3 3/4 cups) flour
11 g (2 teaspoons) salt
8 g (2 teaspoons) yeast
432 g (1.75 cups + 2 tablespoons) water
Prep Time: 24 hours
Cook Time: 20 minutes
Category: Pizza
Method: Oven
Cuisine: Sicilian, American
If you can make focaccia — and you know you can! — you can make excellent Sicilian-style pizza at home. It’s shockingly easy. Read on to learn the game-changing secret that allows the focaccia-like crust to stabilize and ensures the toppings do not overcook. 🍕🍕🍕
While the definition of Sicilian-style pizza as we know it today is debatable, the indisputable original Sicilian pizza is something called sfincione , a focaccia-like dough topped with onions, bread crumbs, and caciocavallo cheese. In Sicily, it’s traditionally served on New Year’s Eve.
If you go to a Sicilian-style pizzeria today, you’ll find slices that resemble sfincione with their focaccia-like foundation, but the toppings will vary as much as they would in any slice shop.
Unlike other styles of pan pizzas — I’m looking at you, Detroit — Sicilian-style pizza is incredibly easy to make at home: if you can make focaccia, either yeasted or sourdough , you can make excellent Sicilian-style pizza at home.
Find step-by-step instructions below but before you proceed, read these game-changing tips for success:
4 Tips for Sicilian-Style Pizza Success
- Butter your baking pan before adding the olive oil. With some pans, using butter in addition to olive oil is imperative to prevent sticking. Moreover, butter adds flavor and promotes browning.
- Take care with your final dimpling. Dimple throughout the center of the dough not the perimeter to ensure an even parbake. I learned this from Peter Reinhart’s Perfect Pan Pizza .
- Parbake your crust: This is game-changing! Parbaking allows the focaccia-like crust to stabilize, which will ensure the crust does not taste doughy or gummy. Furthermore, it will prevent the toppings from overcooking.
- Invest in a Lloyd pan : Lloyd pans conduct heat better than standard half sheet pans and, as a result, produce a superior, crisper crust. I love the 16×12-inch Lloyd “Grandma” pan .
How to make Sicilian Pizza, Step by Step
Gather your ingredients: bread flour, salt, instant yeast ( SAF is my preference), and lukewarm water:
Whisk together the flour, salt, and yeast first:
Add the water:
Use a spatula to stir the two together.
Slick the dough with olive oil:
Then cover the bowl (with a lid or plastic wrap or something to make it airtight). Stick the bowl in the fridge immediately; leave it there to rise for 18 hours or longer—two to three days will give you an even lighter crust.
Uncover the bowl, then…
… deflate the dough. Using oiled hands grab a portion of the dough and stretch it up and toward the center. Turn the bowl slightly and repeat until you have created a rough ball.
Prepare your pan for baking with both butter and olive oil. I love this Lloyd Sicilian-Style Pizza Pan .
Transfer your dough ball to the pool of olive oil and turn it to coat.
Let sit for 2.5 to 3 hours or until it has poofed considerably.
Dimple and stretch the dough to fit the pan. As soon as the dough resists, stop and let it rest for another 30 minutes.
Then stretch it again to fit the pan. At this point, the dough can hang out in the pan for several hours. Cover it with plastic wrap to ensure the dough does not dry out if you plan on doing so. Dimple one last time throughout the center of the dough before transferring it to the oven to parbake it.
Parbake the dough for 11-12 minutes at 500ºF on a preheated Baking steel or pizza stone.
Then, top as you wish. I’m using my go-to homemade tomato sauce here.
Top with cheese:
Then add pepperoni or sautéed vegetables or sausage or whatever you wish:
Transfer to the oven for another 10 minutes. Remove from oven and let rest in the pan for another 5 minutes before transferring the pizza to a board to rest.
Shower with pepper flakes, if you wish.
Cut into squares and serve.
Here’s the sautéed vegetable + pepperoni one:
Description
If you can make focaccia — and you know you can! — you can make excellent Sicilian-style pizza at home. It’s shockingly easy. The key to success is to parbake the crust. Below you will find a yeasted dough recipe but if would like to make a sourdough version, follow the recipe for this simple sourdough focaccia bread recipe through step 5; then proceed with the recipe.
Attention Pizza Fans: My pizza cookbook,Pizza Night, is here!
Notes:
- As always, for best results, use a digital scale to measure the flour and water.
- As with the focaccia recipe , a long ferment is best. I often let the dough sit in the fridge for 2 days before proceeding.
- You’ll need a 12″ x 18″ sheet pan for this recipe. Lloyd makes a Sicilian-style pizza pan , which I love — it’s 12×16 inches, but it works great here. If you have a Lloyd Detroit-style pan and would prefer to use that here, see the notes below the recipe for scaling the dough recipe to fit that size pan.
- I love SAF instant yeast . I buy it in bulk, transfer it to a quart storage container , and store it in my fridge for months. You can store it in the freezer also.
- If you are using active-dry yeast , simply sprinkle the yeast over the lukewarm water and let it stand for 15 minutes or until it gets foamy; then proceed with the recipe.
- Flour: You can use all-purpose or bread flour here with great results. If you live in a humid environment, I would suggest using bread flour. If you are in Canada or the UK, also consider using bread flour or consider holding back some of the water. Reference the video for how the texture of the bread should look; then add water back as needed.
- Cheese: I know the idea of using grated cheese for some of you may be off-putting, but there are a few brands I like, and it saves some time using them: Trader Joe’s sells a Quattro Formaggi blend that’s great, and Tillamook sells a large-grate mozzarella that I also really love.
For the dough:
- 4 cups ( 512 g ) bread flour, see notes above
- 2 teaspoons ( 12 g ) kosher salt
- 2 teaspoons ( 8 g ) instant yeast, see notes above if using active dry
- 2 cups ( 455 g ) lukewarm water, made by combining 1/2 cup boiling water with 1 1/2 cups cold water
- olive oil
For the pizza:
- butter
- 2 tablespoons olive oil
- 12 ounces of grated cheese, such as whole milk mozzarella or a mix of Monterey Jack, Cheddar, and Mozzarella, see notes above
- 1 cup (+ a few spoonfuls) tomato sauce, such as this one or this one , or your favorite jarred sauce
For a veggie pizza:
- 3 tablespoons olive oil, divided
- 8 ounces mushrooms, sliced
- 1 green (or other) bell pepper, diced
- 1/2 red onion, thinly sliced
For a pepperoni pizza:
- 6 ounces pepperoni, I love Vermont Smoke & Cure, sliced as thinly as possible — if you want the pizza to be really loaded with pepperoni, you’ll need more like 12 ounces
- crushed red pepper flakes
For a pickled jalapeño & pepperoni pizza:
- 1 cup pickled jalapeños
- 6 ounces pepperoni, thinly sliced
- hot honey , optional
To make the dough:
- Make the dough: In a large bowl, whisk together the flour, salt, and instant yeast. Add the water. Using a rubber spatula, mix until the liquid is absorbed and the ingredients form a sticky dough ball. Rub the surface of the dough lightly with olive oil. If your bowl has a lid, cover the bowl. Alternatively, transfer the dough to a vessel with a lid or cover the bowl tightly with plastic wrap to ensure the dough doesn’t dry out in the fridge.
- Transfer dough to the fridge for at least 18 hours but ideally longer: 24 to 48 hours. Longer is fine, too: I’ve kept the dough in the fridge for 3 days before proceeding.
Prepare the pan for baking:
- Grease a 12″ x 18″ sheet pan with butter. Pour 2 tablespoons of olive oil into the center of the pan. (Note: This greasing step may seem excessive, but with some pans, it is imperative to do so to prevent sticking. Moreover, it adds flavor and helps brown the bottom crust perfectly.)
Prepare the pizza for baking:
- Remove the dough from the fridge and use lightly oiled hands to release it from the sides of the bowl. Then, again with oiled hands, grab an edge of dough and pull up and to the center. Turn the bowl slightly and repeat until you’ve shaped the dough into a rough ball.
- Place the dough ball in the pan and turn to coat. (Note: You do not need to cover the dough here. The coating of oil should be sufficient to prevent the dough from drying out.) Let rest for 3 hours. With lightly oiled hands, stretch the dough to fit the pan — tent your hands, and use your fingers to dimple and stretch. You will likely not be able to get the dough to stretch all the way to the edges. When the dough resists, let it rest again for 30 minutes; then stretch it again using the same technique.
- At this point, the dough can hang out in the pan for a couple of hours (if your kitchen is on the cool side). I’ve baked it 30 minutes after this point, and I’ve baked it two hours later. If the dough is going to hang out for a while, cover it with a sheet of plastic wrap.
Bake and Top the Pizza:
- If you have a Baking Steel or pizza stone, place it on a rack in the middle or lower third of your oven, and heat your oven to 500ºF.
- Using oiled hand, dimple the dough one last time with the exception of the perimeter — this is important. It will help the dough bake more evenly.
- Transfer pan to the oven and place on heated Baking Steel or pizza stone for about 10 to 11 minutes or until evenly golden.
- Remove pan from oven and lower the oven to 475ºF. (Note: my oven doesn’t change temperature so quickly, so I actually turn the oven off during this period. Just before I return the pan to the oven, I turn the oven back on to 475ºF. Also: You can do this parbake hours ahead of time or even a day ahead of time. )
- Spread the sauce evenly over the dough. Top with the grated cheese. Then top as you wish: For the veggie pizza: In a large skillet over high heat, heat 2 tablespoons of the olive oil. When it shimmers, add the mushrooms and let cook undisturbed for about a minute. Season with salt; then stir. Cook for 3 to 5 minutes or until the mushrooms are beginning to brown. Transfer to a bowl. Add the remaining tablespoon of oil to the skillet; then add the peppers and mushrooms. Cook for 1 to 3 minutes, or until slightly softened. Season with salt; then transfer to the bowl with the mushrooms. Toss to combine. Taste and adjust with salt as needed. Spread this mixture over the cheese. Add some sliced pepperoni if you wish. For the pepperoni pizza: Arrange the sliced pepperoni over the cheese. For the pepperoni + pickled jalapeño pizza: Arrange the sliced pepperoni and pickled jalapeños over the cheese.
- Transfer pan to the oven and bake for 10 to 12 minutes or until the cheese is melted and just beginning to brown in spots.
- Remove the pan from the oven and let the pizza rest for 5 minutes in the pan. If you are making a pepperoni pizza and are using the crushed red pepper flakes, sprinkle some of the pepper flakes over the top. If you are using the hot honey for the pickled jalapeño pizza, drizzle some over the top.
- Run a knife or spatula around the pan’s edges. Then, carefully remove the entire pizza from the pan, transferring it to a cutting board. I like to use a serrated knife to cut this pizza. You can cut the pizza into however many pieces you wish. I’ve been doing 20 squares.
Notes
To Scale the Dough for aLloyd Detroit-Style Pan, Use These Proportions (and please use ascale!):
- 277 g flour (2 cups + 2 tablespoons)
- 8 g salt (1.5 teaspoons)
- 6 g yeast (1.5 teaspoons)
- 245 g water (1 cup + 1 tablespoon)
- Note: My calculations lead me to think that a Detroit-style pan needs about 532 grams of dough. So another way to do it would be to make the recipe as written, use 532 grams of it for the Detroit-Style pan and use the remainder for something else — pizza, mini rolls, etc.
To Scale the Dough for a Lloyd Sicilian-Style Pan , Use These Proportions (and please use a scale !):
488 g (3 3/4 cups) flour
11 g (2 teaspoons) salt
8 g (2 teaspoons) yeast
432 g (1.75 cups + 2 tablespoons) water
Prep Time: 24 hours
Cook Time: 20 minutes
Category: Pizza
Method: Oven
Cuisine: American, Sicilian
If you can make focaccia — and you know you can! — you can make excellent Sicilian-style pizza at home. It’s shockingly easy. Read on to learn the game-changing secret that allows the focaccia-like crust to stabilize and ensures the toppings do not overcook. 🍕🍕🍕
While the definition of Sicilian-style pizza as we know it today is debatable, the indisputable original Sicilian pizza is something called sfincione , a focaccia-like dough topped with onions, bread crumbs, and caciocavallo cheese. In Sicily, it’s traditionally served on New Year’s Eve.
If you go to a Sicilian-style pizzeria today, you’ll find slices that resemble sfincione with their focaccia-like foundation, but the toppings will vary as much as they would in any slice shop.
Unlike other styles of pan pizzas — I’m looking at you, Detroit — Sicilian-style pizza is incredibly easy to make at home: if you can make focaccia, either yeasted or sourdough , you can make excellent Sicilian-style pizza at home.
Find step-by-step instructions below but before you proceed, read these game-changing tips for success:
4 Tips for Sicilian-Style Pizza Success
- Butter your baking pan before adding the olive oil. With some pans, using butter in addition to olive oil is imperative to prevent sticking. Moreover, butter adds flavor and promotes browning.
- Take care with your final dimpling. Dimple throughout the center of the dough not the perimeter to ensure an even parbake. I learned this from Peter Reinhart’s Perfect Pan Pizza .
- Parbake your crust: This is game-changing! Parbaking allows the focaccia-like crust to stabilize, which will ensure the crust does not taste doughy or gummy. Furthermore, it will prevent the toppings from overcooking.
- Invest in a Lloyd pan : Lloyd pans conduct heat better than standard half sheet pans and, as a result, produce a superior, crisper crust. I love the 16×12-inch Lloyd “Grandma” pan .
How to make Sicilian Pizza, Step by Step
Gather your ingredients: bread flour, salt, instant yeast ( SAF is my preference), and lukewarm water:
Whisk together the flour, salt, and yeast first:
Add the water:
Use a spatula to stir the two together.
Slick the dough with olive oil:
Then cover the bowl (with a lid or plastic wrap or something to make it airtight). Stick the bowl in the fridge immediately; leave it there to rise for 18 hours or longer—two to three days will give you an even lighter crust.
Uncover the bowl, then…
… deflate the dough. Using oiled hands grab a portion of the dough and stretch it up and toward the center. Turn the bowl slightly and repeat until you have created a rough ball.
Prepare your pan for baking with both butter and olive oil. I love this Lloyd Sicilian-Style Pizza Pan .
Transfer your dough ball to the pool of olive oil and turn it to coat.
Let sit for 2.5 to 3 hours or until it has poofed considerably.
Dimple and stretch the dough to fit the pan. As soon as the dough resists, stop and let it rest for another 30 minutes.
Then stretch it again to fit the pan. At this point, the dough can hang out in the pan for several hours. Cover it with plastic wrap to ensure the dough does not dry out if you plan on doing so. Dimple one last time throughout the center of the dough before transferring it to the oven to parbake it.
Parbake the dough for 11-12 minutes at 500ºF on a preheated Baking steel or pizza stone.
Then, top as you wish. I’m using my go-to homemade tomato sauce here.
Top with cheese:
Then add pepperoni or sautéed vegetables or sausage or whatever you wish:
Transfer to the oven for another 10 minutes. Remove from oven and let rest in the pan for another 5 minutes before transferring the pizza to a board to rest.
Shower with pepper flakes, if you wish.
Cut into squares and serve.
Here’s the sautéed vegetable + pepperoni one:
Description
If you can make focaccia — and you know you can! — you can make excellent Sicilian-style pizza at home. It’s shockingly easy. The key to success is to parbake the crust. Below you will find a yeasted dough recipe but if would like to make a sourdough version, follow the recipe for this simple sourdough focaccia bread recipe through step 5; then proceed with the recipe.
Attention Pizza Fans: My pizza cookbook,Pizza Night, is here!
Notes:
- As always, for best results, use a digital scale to measure the flour and water.
- As with the focaccia recipe , a long ferment is best. I often let the dough sit in the fridge for 2 days before proceeding.
- You’ll need a 12″ x 18″ sheet pan for this recipe. Lloyd makes a Sicilian-style pizza pan , which I love — it’s 12×16 inches, but it works great here. If you have a Lloyd Detroit-style pan and would prefer to use that here, see the notes below the recipe for scaling the dough recipe to fit that size pan.
- I love SAF instant yeast . I buy it in bulk, transfer it to a quart storage container , and store it in my fridge for months. You can store it in the freezer also.
- If you are using active-dry yeast , simply sprinkle the yeast over the lukewarm water and let it stand for 15 minutes or until it gets foamy; then proceed with the recipe.
- Flour: You can use all-purpose or bread flour here with great results. If you live in a humid environment, I would suggest using bread flour. If you are in Canada or the UK, also consider using bread flour or consider holding back some of the water. Reference the video for how the texture of the bread should look; then add water back as needed.
- Cheese: I know the idea of using grated cheese for some of you may be off-putting, but there are a few brands I like, and it saves some time using them: Trader Joe’s sells a Quattro Formaggi blend that’s great, and Tillamook sells a large-grate mozzarella that I also really love.
For the dough:
- 4 cups ( 512 g ) bread flour, see notes above
- 2 teaspoons ( 12 g ) kosher salt
- 2 teaspoons ( 8 g ) instant yeast, see notes above if using active dry
- 2 cups ( 455 g ) lukewarm water, made by combining 1/2 cup boiling water with 1 1/2 cups cold water
- olive oil
For the pizza:
- butter
- 2 tablespoons olive oil
- 12 ounces of grated cheese, such as whole milk mozzarella or a mix of Monterey Jack, Cheddar, and Mozzarella, see notes above
- 1 cup (+ a few spoonfuls) tomato sauce, such as this one or this one , or your favorite jarred sauce
For a veggie pizza:
- 3 tablespoons olive oil, divided
- 8 ounces mushrooms, sliced
- 1 green (or other) bell pepper, diced
- 1/2 red onion, thinly sliced
For a pepperoni pizza:
- 6 ounces pepperoni, I love Vermont Smoke & Cure, sliced as thinly as possible — if you want the pizza to be really loaded with pepperoni, you’ll need more like 12 ounces
- crushed red pepper flakes
For a pickled jalapeño & pepperoni pizza:
- 1 cup pickled jalapeños
- 6 ounces pepperoni, thinly sliced
- hot honey , optional
To make the dough:
- Make the dough: In a large bowl, whisk together the flour, salt, and instant yeast. Add the water. Using a rubber spatula, mix until the liquid is absorbed and the ingredients form a sticky dough ball. Rub the surface of the dough lightly with olive oil. If your bowl has a lid, cover the bowl. Alternatively, transfer the dough to a vessel with a lid or cover the bowl tightly with plastic wrap to ensure the dough doesn’t dry out in the fridge.
- Transfer dough to the fridge for at least 18 hours but ideally longer: 24 to 48 hours. Longer is fine, too: I’ve kept the dough in the fridge for 3 days before proceeding.
Prepare the pan for baking:
- Grease a 12″ x 18″ sheet pan with butter. Pour 2 tablespoons of olive oil into the center of the pan. (Note: This greasing step may seem excessive, but with some pans, it is imperative to do so to prevent sticking. Moreover, it adds flavor and helps brown the bottom crust perfectly.)
Prepare the pizza for baking:
- Remove the dough from the fridge and use lightly oiled hands to release it from the sides of the bowl. Then, again with oiled hands, grab an edge of dough and pull up and to the center. Turn the bowl slightly and repeat until you’ve shaped the dough into a rough ball.
- Place the dough ball in the pan and turn to coat. (Note: You do not need to cover the dough here. The coating of oil should be sufficient to prevent the dough from drying out.) Let rest for 3 hours. With lightly oiled hands, stretch the dough to fit the pan — tent your hands, and use your fingers to dimple and stretch. You will likely not be able to get the dough to stretch all the way to the edges. When the dough resists, let it rest again for 30 minutes; then stretch it again using the same technique.
- At this point, the dough can hang out in the pan for a couple of hours (if your kitchen is on the cool side). I’ve baked it 30 minutes after this point, and I’ve baked it two hours later. If the dough is going to hang out for a while, cover it with a sheet of plastic wrap.
Bake and Top the Pizza:
- If you have a Baking Steel or pizza stone, place it on a rack in the middle or lower third of your oven, and heat your oven to 500ºF.
- Using oiled hand, dimple the dough one last time with the exception of the perimeter — this is important. It will help the dough bake more evenly.
- Transfer pan to the oven and place on heated Baking Steel or pizza stone for about 10 to 11 minutes or until evenly golden.
- Remove pan from oven and lower the oven to 475ºF. (Note: my oven doesn’t change temperature so quickly, so I actually turn the oven off during this period. Just before I return the pan to the oven, I turn the oven back on to 475ºF. Also: You can do this parbake hours ahead of time or even a day ahead of time. )
- Spread the sauce evenly over the dough. Top with the grated cheese. Then top as you wish: For the veggie pizza: In a large skillet over high heat, heat 2 tablespoons of the olive oil. When it shimmers, add the mushrooms and let cook undisturbed for about a minute. Season with salt; then stir. Cook for 3 to 5 minutes or until the mushrooms are beginning to brown. Transfer to a bowl. Add the remaining tablespoon of oil to the skillet; then add the peppers and mushrooms. Cook for 1 to 3 minutes, or until slightly softened. Season with salt; then transfer to the bowl with the mushrooms. Toss to combine. Taste and adjust with salt as needed. Spread this mixture over the cheese. Add some sliced pepperoni if you wish. For the pepperoni pizza: Arrange the sliced pepperoni over the cheese. For the pepperoni + pickled jalapeño pizza: Arrange the sliced pepperoni and pickled jalapeños over the cheese.
- Transfer pan to the oven and bake for 10 to 12 minutes or until the cheese is melted and just beginning to brown in spots.
- Remove the pan from the oven and let the pizza rest for 5 minutes in the pan. If you are making a pepperoni pizza and are using the crushed red pepper flakes, sprinkle some of the pepper flakes over the top. If you are using the hot honey for the pickled jalapeño pizza, drizzle some over the top.
- Run a knife or spatula around the pan’s edges. Then, carefully remove the entire pizza from the pan, transferring it to a cutting board. I like to use a serrated knife to cut this pizza. You can cut the pizza into however many pieces you wish. I’ve been doing 20 squares.
Notes
To Scale the Dough for aLloyd Detroit-Style Pan, Use These Proportions (and please use ascale!):
- 277 g flour (2 cups + 2 tablespoons)
- 8 g salt (1.5 teaspoons)
- 6 g yeast (1.5 teaspoons)
- 245 g water (1 cup + 1 tablespoon)
- Note: My calculations lead me to think that a Detroit-style pan needs about 532 grams of dough. So another way to do it would be to make the recipe as written, use 532 grams of it for the Detroit-Style pan and use the remainder for something else — pizza, mini rolls, etc.
To Scale the Dough for a Lloyd Sicilian-Style Pan , Use These Proportions (and please use a scale !):
488 g (3 3/4 cups) flour
11 g (2 teaspoons) salt
8 g (2 teaspoons) yeast
432 g (1.75 cups + 2 tablespoons) water
Prep Time: 24 hours
Cook Time: 20 minutes
Category: Pizza
Method: Oven
Cuisine: American, Sicilian
Find it online : https://alexandracooks.com/2022/03/20/homemade-sicilian-style-pizza/
My 6th-grade daughter recently asked me if the meat I cooked for our family was “lean”. Propelled by lessons learned in health class, she also had questions about brown rice and whole wheat flour and if I used them. Sometimes. But first: lean meat.
Wellllllll , I replied, not really . I explained I favor dark meat chicken over light and that I only buy 80/20 ground beef. I confessed to never having cooked ground turkey and that bacon was definitely not lean. And the reason she likes those ribs so much is because of the fat.
But I defended my choices, too, noting foremost that we don’t eat a lot of meat, and also that not all fat is bad. I explained that “leanness” is not the only factor to consider when evaluating what’s “healthy.” And I talked to her about factory versus sustainable farming. Despite my efforts, the conversation ended with a request: Can you make me a chicken breast?
Sure Sweetie Pie. I’d love to.
Sigh. As many of you know, chicken breasts do not excite me. There is one and only one chicken breast recipe on this site, and while I love it, my children do not. Would there be any point to this endeavor? Would I make the effort only to watch them push their chicken pieces around their plate? To guess how many seconds might pass before they asked for the ketchup?
I wasn’t sure, but as you can gather from the title of this post, the exercise was a success, and it didn’t take too many tries to get there. When I presented the grilled breasts aside boiled (and well-buttered) broccoli, I waited with bated breath. And when I heard mmmmms all around and requests for seconds, I danced a very happy jig.
This is what I did:
3 Tips for Juicy Grilled Chicken Breasts
- Pound.
- Brine.
- Marinate.
Pound. Pounding not only ensures the thickness of the breast is uniform, it also tenderizes the meat.
Brine. Inspired by a recipe in Cook’s Science , I decided to make the effort to brine the chicken breasts briefly before grilling them. I understand if this step might be a page-turner for you — not too long ago it would have been for me as well — but it truly helps both season the meat and keep it moist during the cooking. And I promise you it’s not hard: simply dissolve 1/4 cup each of salt and sugar in cold water, submerge the breasts, leave for 30 to 60 minutes or up to 4 hours.
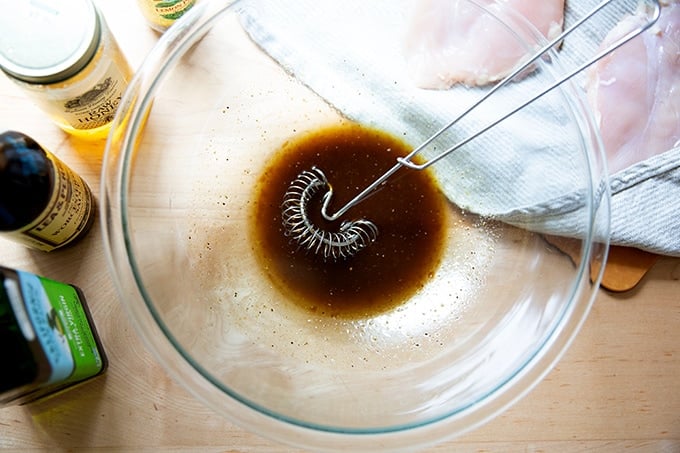
Marinate . The marinade I went with here is inspired by a reliable and simple favorite — olive oil, Worcestershire sauce, and lemon pepper — with the addition of a teaspoon of honey for flavor and to encourage browning. You can marinate for as few as 15 minutes or up to 24 hours.
An Interesting Note
In a sidebar in Cook’s Science , the authors name Bell & Evans Air-Chilled Boneless Skinless Chicken Breasts as their favorite specifically for its tender texture. And the reason the texture of this particular brand of chicken is more tender than others is that it’s given time to “age.” Once the chicken is broken down into parts, the breasts are aged on the bone for 12 hours before the bones and skin are removed. Why does aging make the meat more tender? Two reasons:
- Enzymes are at work during the aging process. “The natural protease enzymes break down the contracted muscle fibers making them more tender.”
- Boning meat too soon causes “the muscle to contract, and a shorter, contracted muscle is related to tougher meat.”
Interesting, right? Many companies skip this aging step because building time into the process costs money. If you live locally, the Niskayuna Co-op carries Bell & Evans chicken breasts.
Simple Grilled Chicken Breast, Step by Step
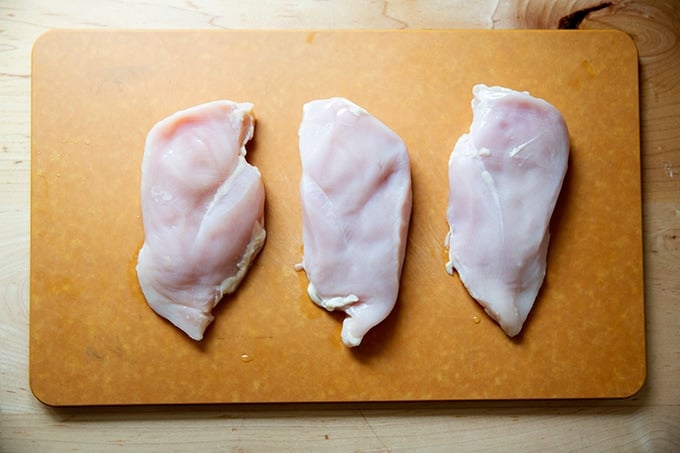
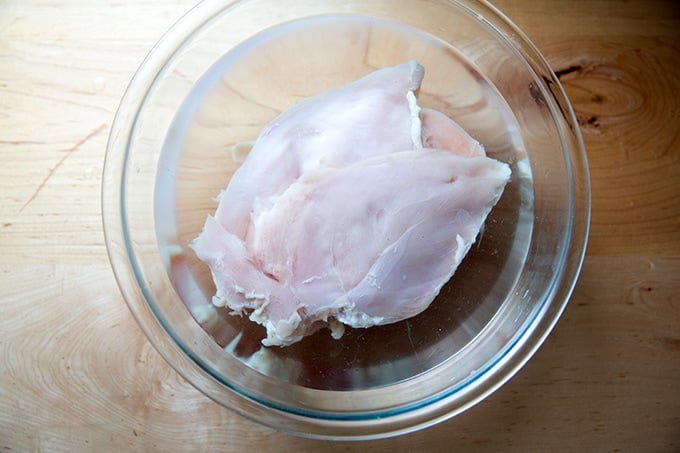
Place your chicken breasts on a clean work surface.
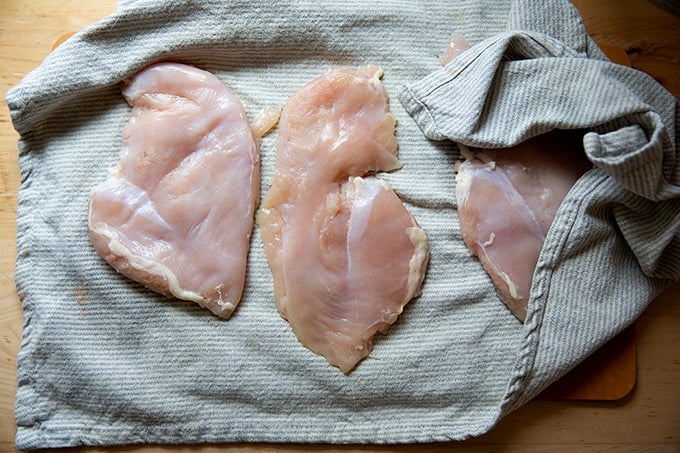
Cover with wax paper, parchment, or plastic wrap; then flatten them with a meat mallet.
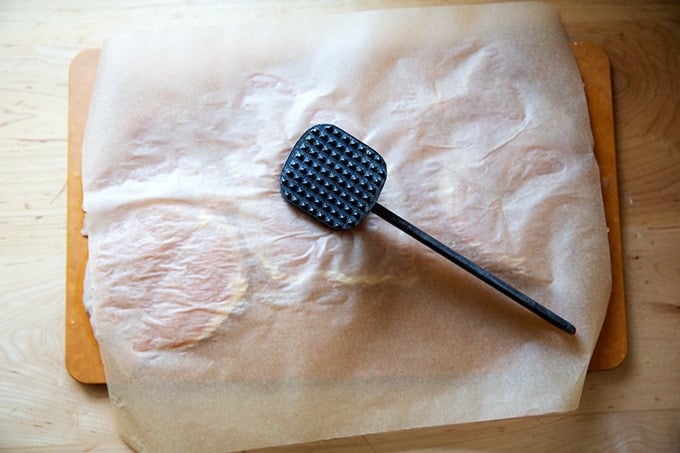
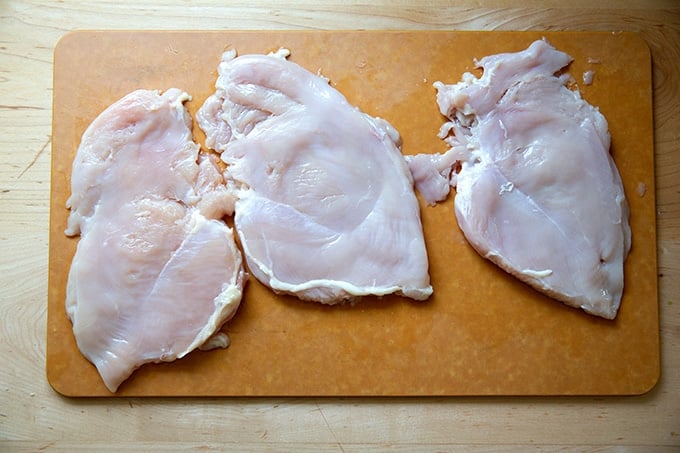
You want the breasts to be roughly 1/2-inch thick.
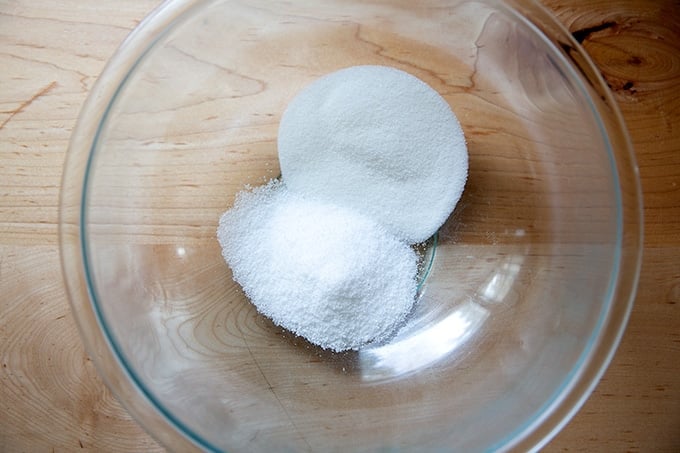
Make the brine by dissolving 1/4 cup each salt and sugar in 1.5 quarts of cold water.
Add the breasts and leave for 30 to 60 minutes. I’ve brined them for longer, too, with no adverse effects.
Pat dry.
Whisk together a simple marinade: olive oil, Worcestershire, honey, and lemon pepper.

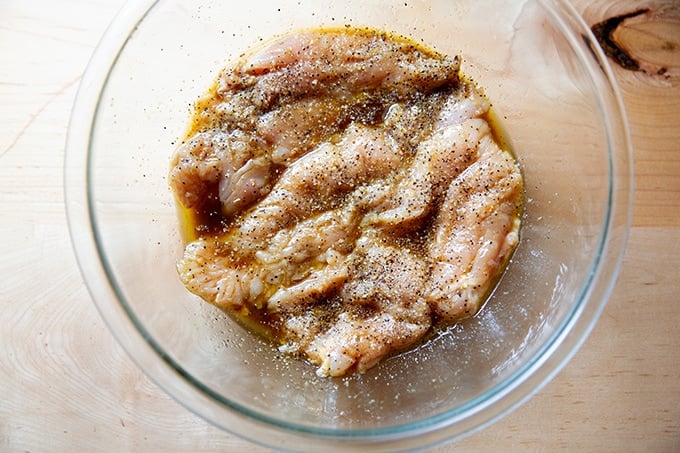
Add the breasts and let marinate for as few as 15 minutes or as long as 24 hours.
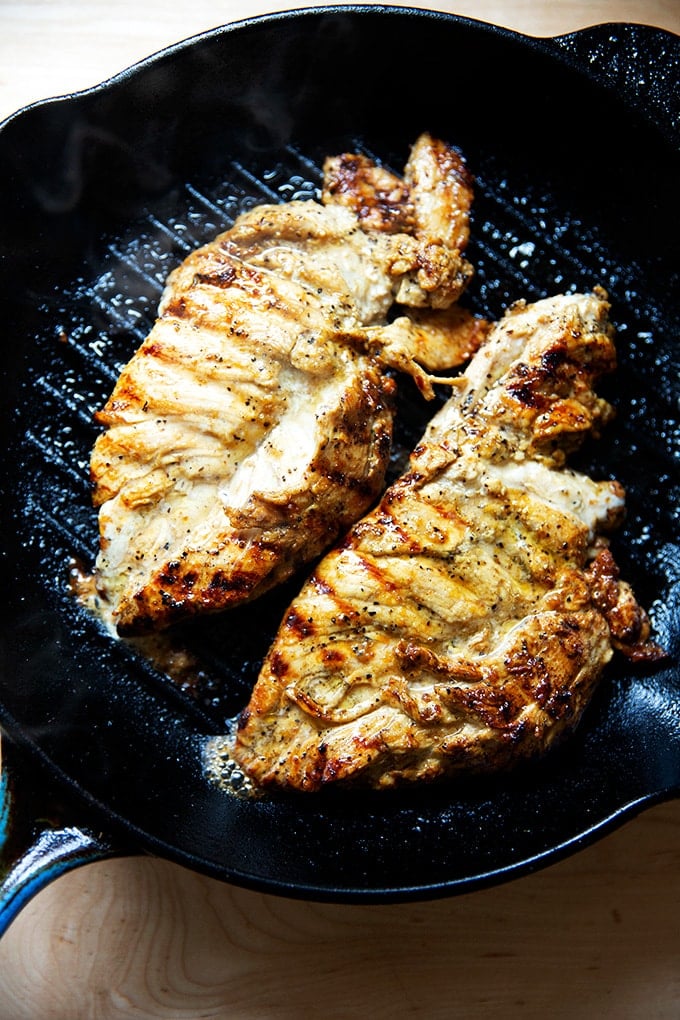
Place a grill pan (or heat an outdoor grill) over medium-high heat, brush with 2 teaspoons of oil, and grill the breasts for roughly 3 minutes a side.

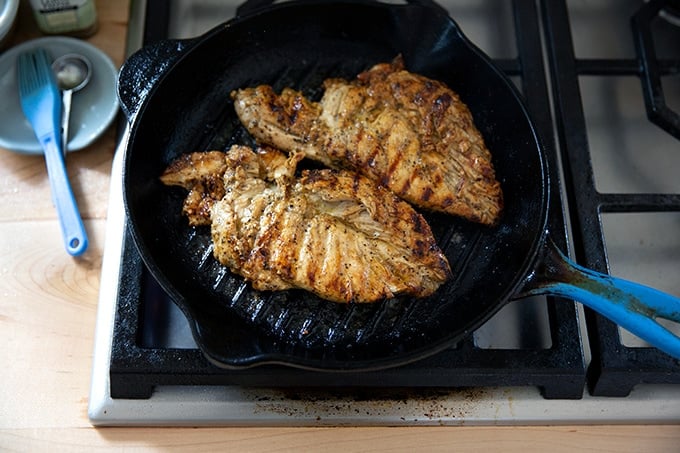
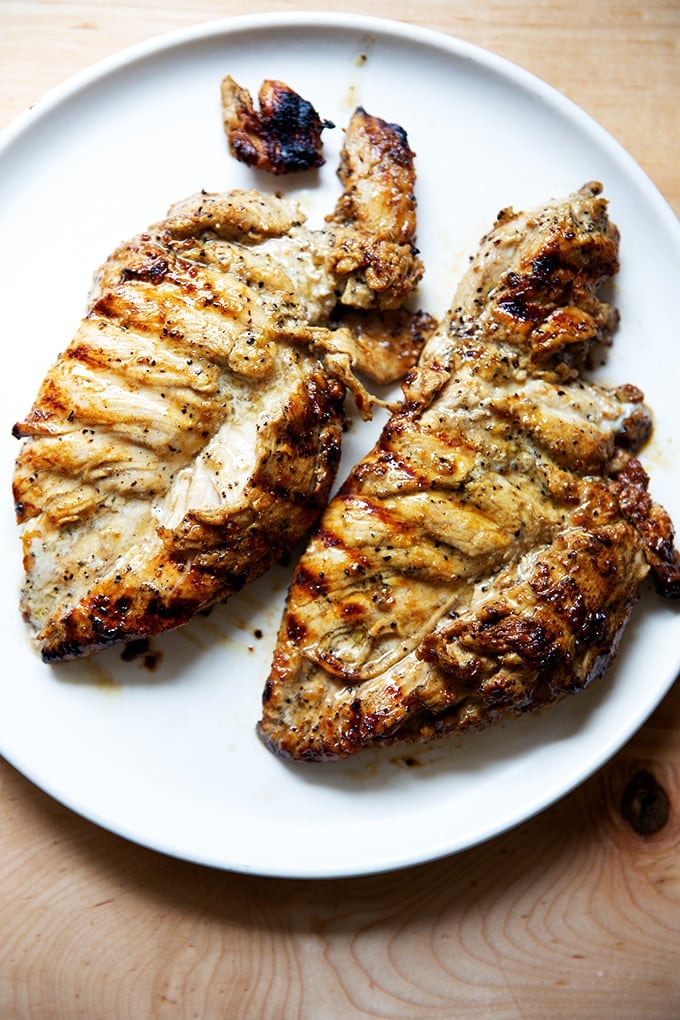
Transfer to a plate to rest for 5 minutes before serving.
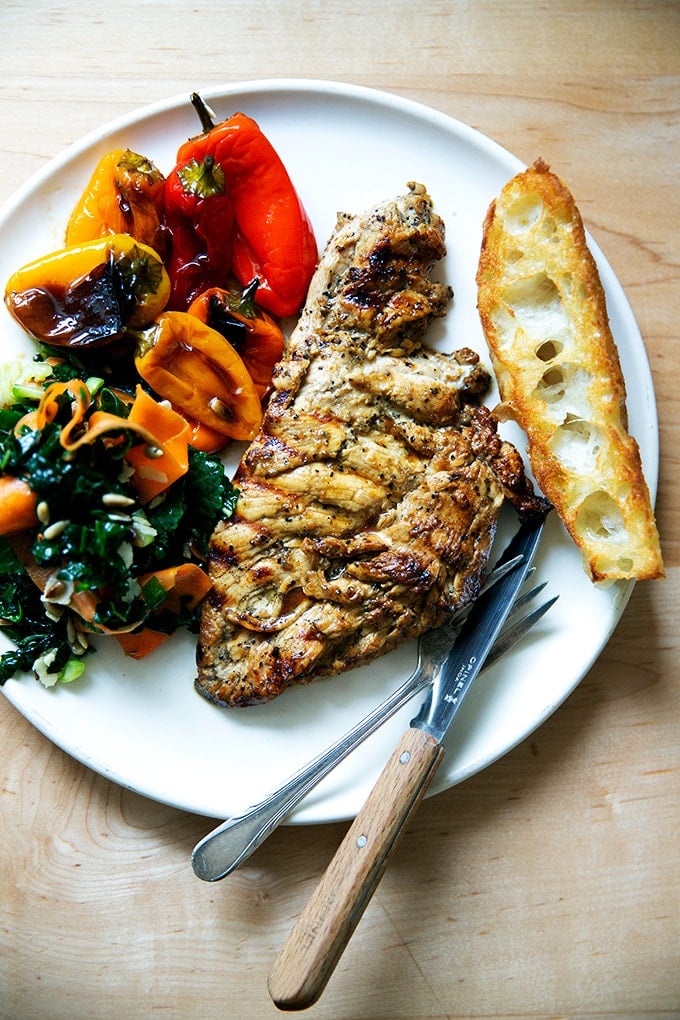
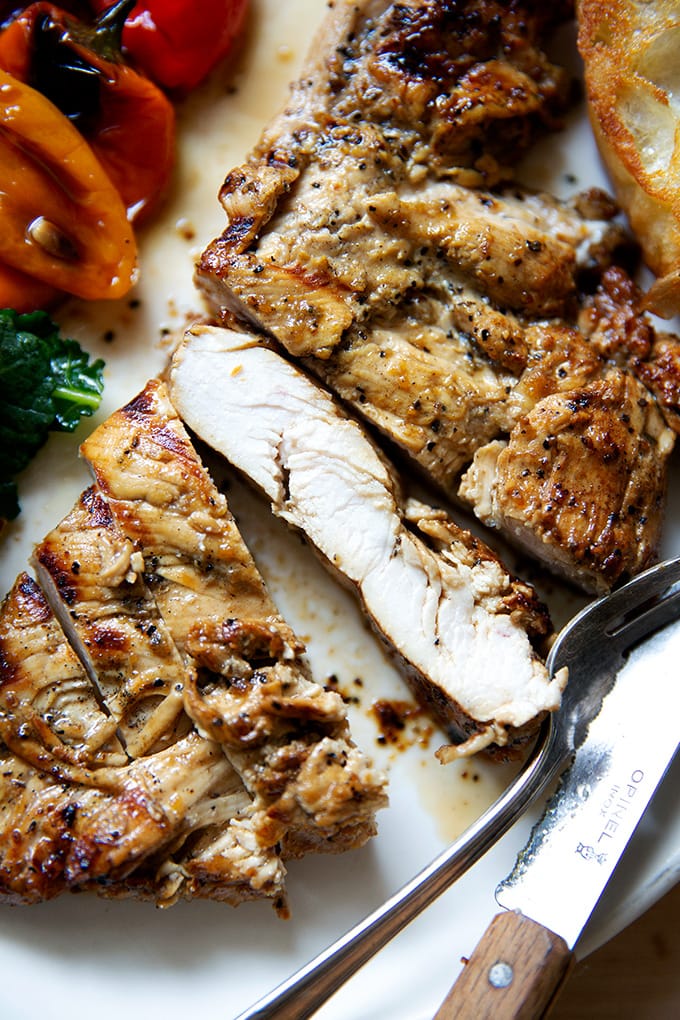
Serve aside whatever you like. Pictured below: balsamic-roasted mini peppers , kale salad with the addition of ribbony carrots, cucumbers, and toasted sunflower seeds, and focaccia .
So juicy!
Description
The brine recipe is from Cook’s Science . The marinade comes from this Dead Easy Steak Marinade .
Update: Recently, for time purposes, I skipped the brining step, and they breasts came out as juicy as ever — I pounded them, cut them in half (so I had 6 small-ish breasts) and let them marinate for several hours in the fridge. I do think brining is a wonderful technique for breasts, but perhaps pounding is more of the key to tenderness here.
For the brine (optional, see notes above):
- 1/4 cup salt
- 1/4 cup sugar
For the chicken:
- 3 to 4 boneless, skinless chicken breasts
- 1/4 cup olive oil
- 2 tablespoons Worcestershire sauce
- 1 teaspoon honey
- lemon pepper, salt-free if possible, to taste
- 2 teaspoons neutral oil or olive oil
- kosher salt to taste
- To make the brine (note I do not do this in anymore… see notes above): In a large bowl, dissolve the salt and sugar in 1.5 quarts of cold water.
- Place the chicken breasts on a clean cutting board. Cover with a sheet of plastic wrap, parchment paper, or wax paper. Use a meat mallet to pound the breasts to a thickness of 1/2 inch. Submerge the breasts in the water and leave for 30 to 60 minutes. I’ve also left the breasts in the brine for 3 to 4 hours without any adverse effects. I brine the breasts at room temperature if the brining period is going to be brief (under 1 hour), and I refrigerate the breasts if it’s going to be longer.
- Remove the breasts from the brine, and pat dry.
- In a large bowl, whisk together the olive oil, Worcestershire sauce, honey, and lemon pepper to taste — I use at least a teaspoon in the marinade. Let the breasts marinate for 15 minutes or up to 24 hours.
- Heat a grill or a grill pan over medium-high heat. When it’s hot, brush with 2 teaspoons of the neutral oil or olive oil. Remove the breasts from the marinade, letting the excess marinade drip off. Place the breasts on the grill or grill pan — if you are using a grill pan, you’ll likely need to do this in batches. Season the top side of the breasts with salt. I like to sprinkle on a little more lemon pepper at this step. Cook 3 minutes. Flip. Season the cooked side with salt, and cook for 3 minutes more or until the chicken is cooked through.
- Transfer the chicken to a plate to cool. Let rest for 5 minutes before serving.
- Prep Time: 60 minutes
- Cook Time: 6 minutes
- Category: Dinner
- Method: Grill
- Cuisine: American
