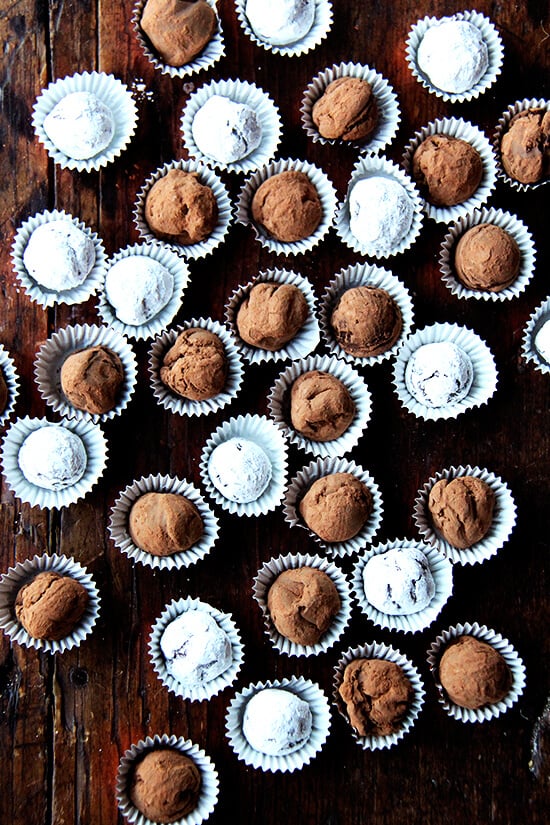
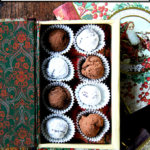
After serving a delectable Thanksgiving Eve dinner of cedar-plank grilled arctic char and roasted Brussels sprouts, my mother and aunt poured coffee and passed around plates of these Grand Marnier chocolate truffles, a party trick they learned from their mother, something they always have on hand this time of year.
A cup of coffee, a boozy bite of chocolate — is there a better way to end (start?) the day? This time of year especially, when there never seems to be enough time, having a stash of truffles in the cupboard has been known, in our family at least, to save the day.
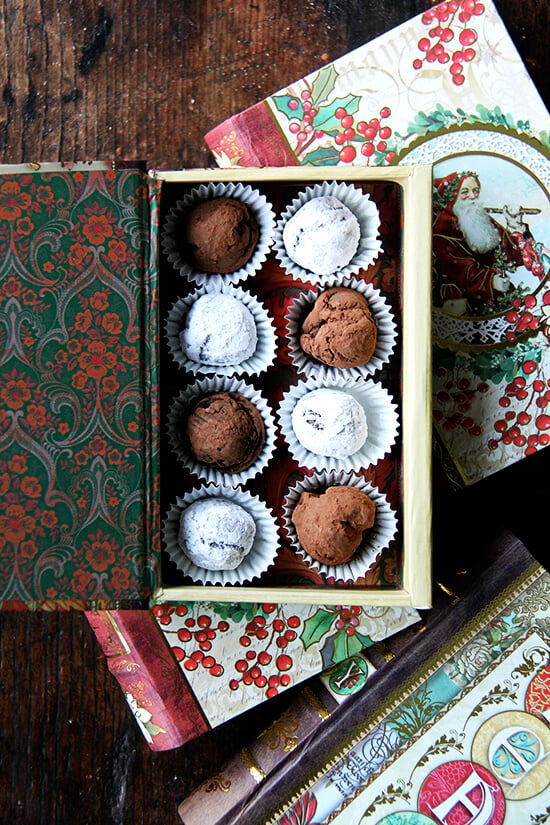
Truffles make a simple dessert, an elegant homemade gift, a festive treat to break out at impromptu gatherings. One batch, which yields at least 3 dozen, can be made days in advance and stored in the fridge. Just be sure to bring them to room temperature before serving.
Easy to make and pretty to boot, what’s not to love? My gramma taught her daughters well.
#100 scoop:
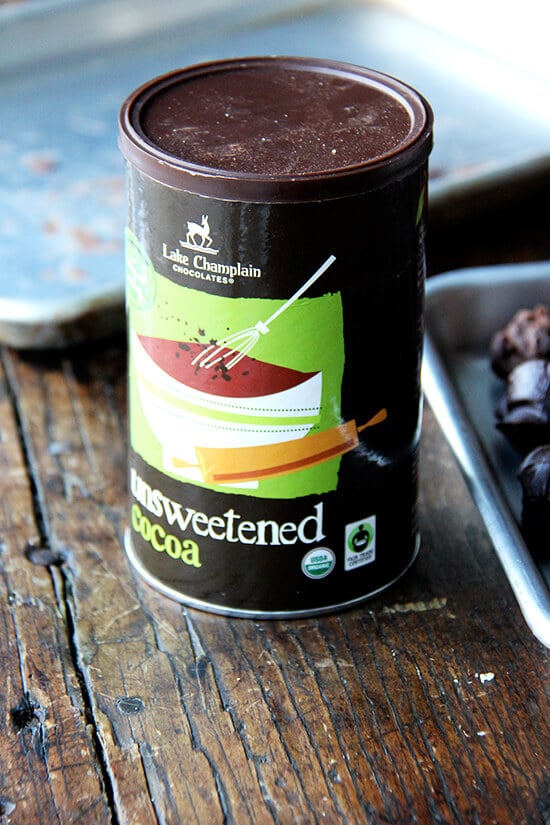
I love this Lake Champlain Chocolates Fair Trade unsweetened cocoa powder, which is delicious in the best chocolate cake , my favorite brownies , and Mollie Katzen’s Chocolate Eclipse .
Gift boxes:
Description
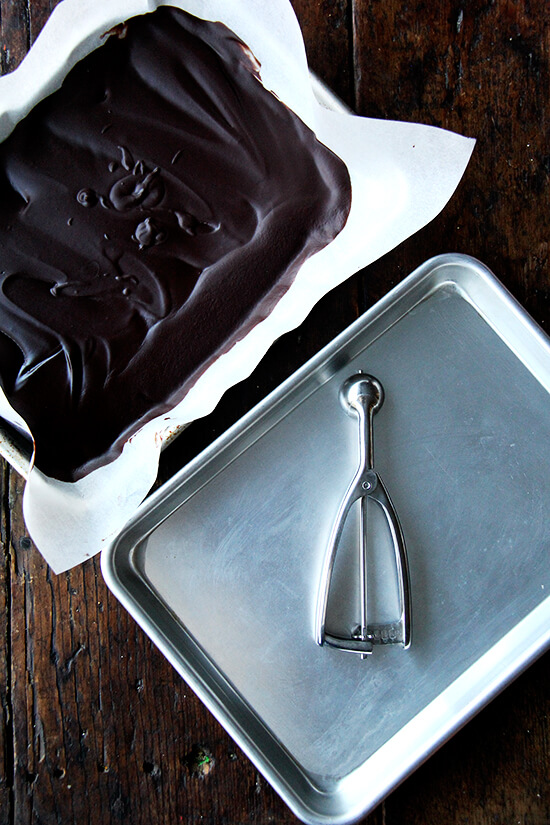
A few pieces of gear that are nice to have when making truffles: #100 scoop , quarter sheet pans , parchment paper
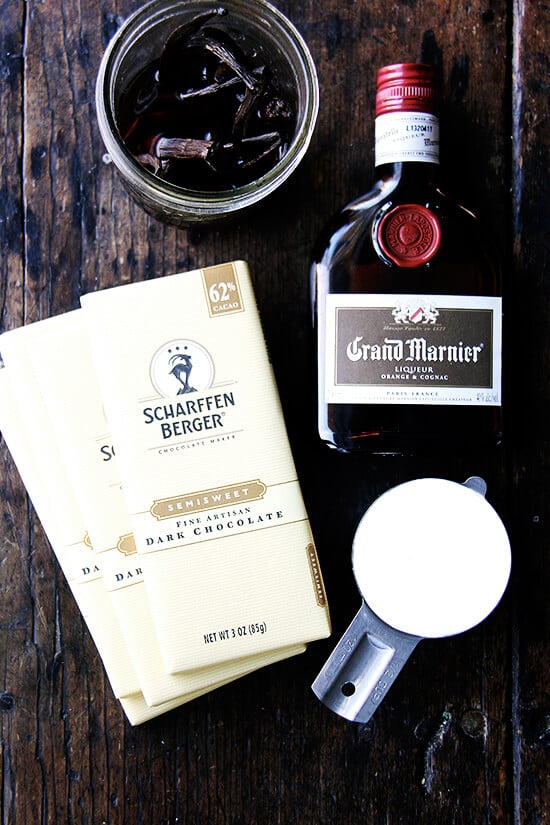
- 12 oz . bittersweet chocolate (I love Scharffen Berger 62% cacao; anything between 60%-70% cacao is great)
- 3/4 cup heavy cream
- 1 to 2 tablespoons Grand Marnier
- 1/4 to 1/2 teaspoon flaky sea salt such as Maldon
- unsweetened cocoa powder, preferably Dutch-processed, sifted, for rolling
- confectioners’ sugar for rolling (optional)
- Line a jelly roll pan with parchment or a Silpat. I love my quarter sheet pans for this, but a 9×9-inch square baking pan or something like it, will work just fine. Also, you don’t have to line it with anything, but it makes for an easier clean up.
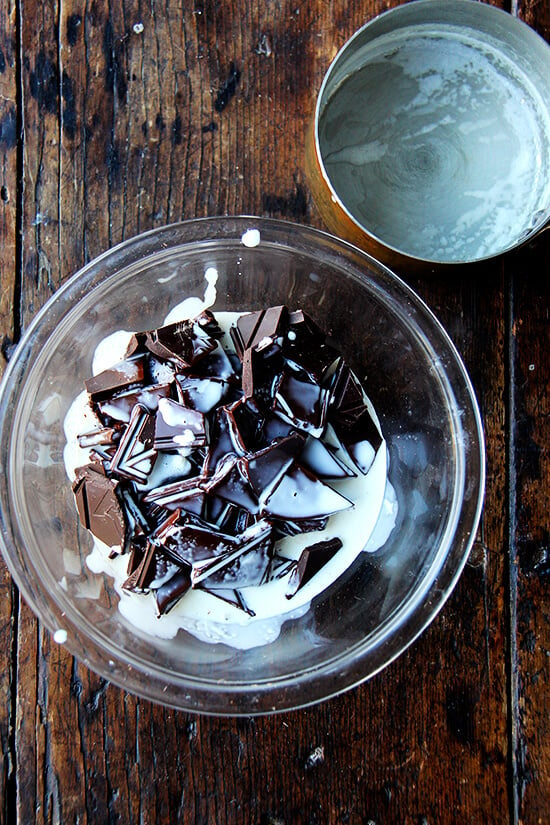
- Bring cream to a boil, keeping an eye on it constantly. Break chocolate into small chunks and place in a heat-safe bowl. Pour cream over chocolate, push chocolate chunks down with a spatula so they are submerged, and let sit for 3 minutes — cover bowl with a plate to trap the heat.
- Remove the plate and stir the cream and chocolate together until smooth. (If the mixture isn’t smooth, you may need to place the bowl over simmering water (or use a double boiler) to melt the cream and chocolate together further.)
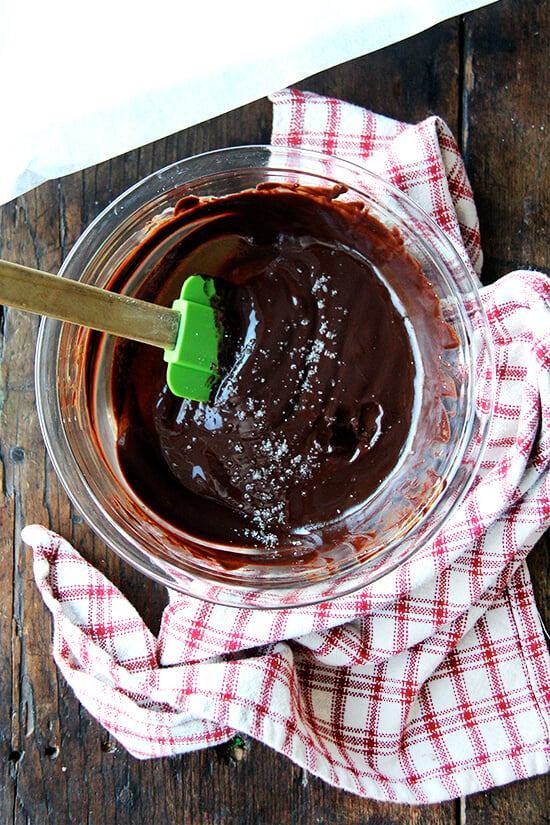
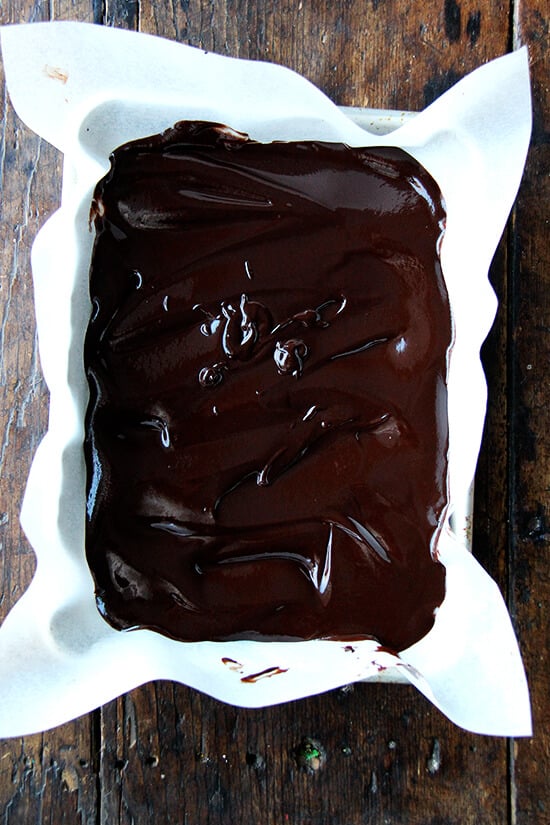
- Add liqueur (1 to 2 tablespoons to taste) and 1/4 teaspoon salt off the heat, and stir until smooth. Taste. Add another 1/4 teaspoon salt if you wish. Spread mixture into prepared pan, then refrigerate it for about 30 minutes or until almost hard.
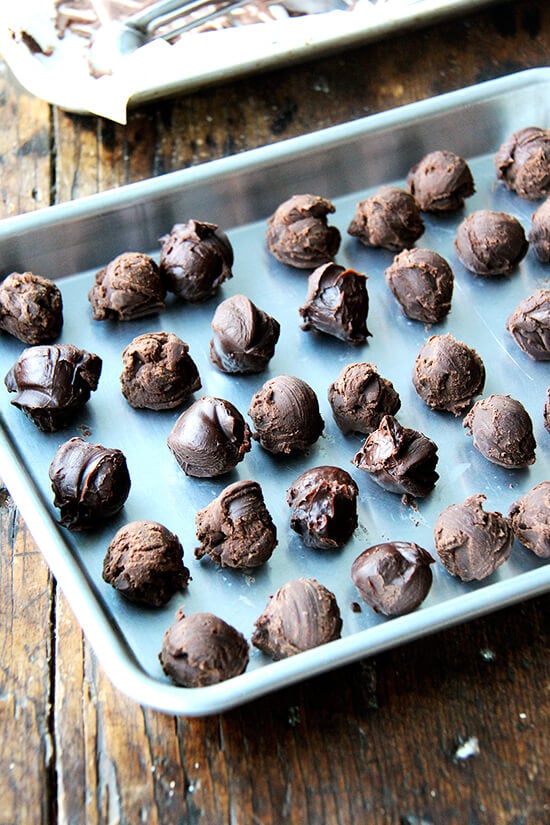
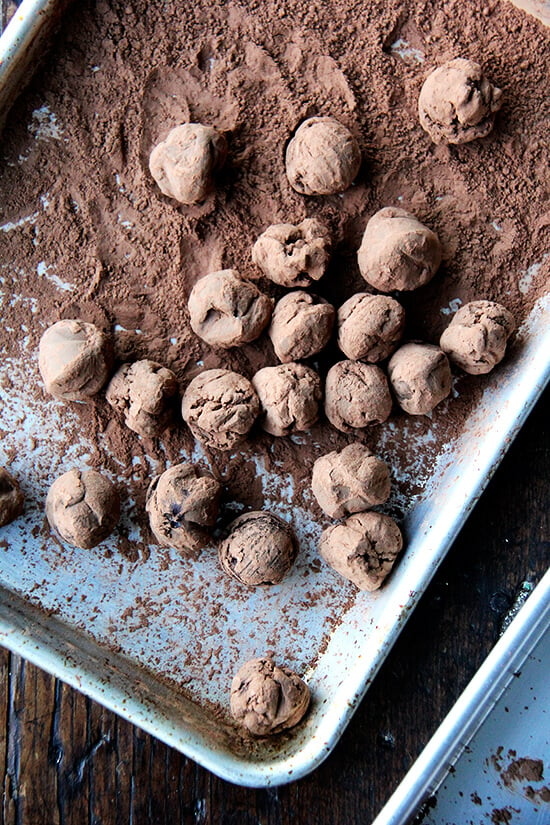
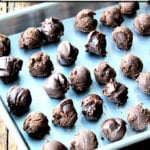
- Drag a melon baller or #100 scoop across firm chocolate mixture to shape the truffles. Drop truffles onto a clean baking sheet. Note: As you shape, if the chocolate gets too soft, stick the pan back in the fridge for a bit. If it seems too hard, let it sit at room temperature until it is manageable. Also, do not worry about misshapen truffles — they should look a bit irregular. Refrigerate truffles for 15 minutes once formed.
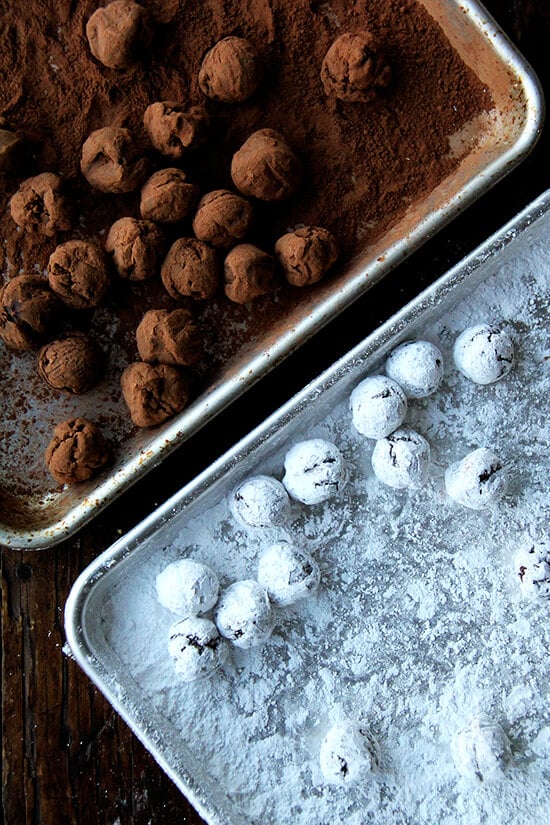
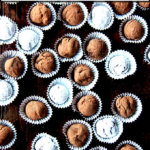
- Spread some cocoa into a shallow dish (don’t forget to sift it!), preferably one with sides. If using confectioners’ sugar, spread it in a separate dish. Spread truffles (maybe 10 at a time) into each vessel and shake the vessel to coat the truffles. (Note: If you plan to dust with powdered sugar but want to stash your truffles in the fridge, don’t dust with powdered sugar till just before serving — the powdered sugar gets absorbed and also kind of melts in the fridge — best to dust them just before serving.)
- Store truffles in fridge or a cool part of your house. Let come to room temperature (at least an hour) before serving. If necessary, re-dust the truffles with cocoa before serving.
- Prep Time: 20 minutes
- Cook Time: 10 minutes
- Category: Cookie
- Method: No-bake
- Cuisine: American, French
Description
A few pieces of gear that are nice to have when making truffles: #100 scoop , quarter sheet pans , parchment paper
- 12 oz . bittersweet chocolate (I love Scharffen Berger 62% cacao; anything between 60%-70% cacao is great)
- 3/4 cup heavy cream
- 1 to 2 tablespoons Grand Marnier
- 1/4 to 1/2 teaspoon flaky sea salt such as Maldon
- unsweetened cocoa powder, preferably Dutch-processed, sifted, for rolling
- confectioners’ sugar for rolling (optional)
- Line a jelly roll pan with parchment or a Silpat. I love my quarter sheet pans for this, but a 9×9-inch square baking pan or something like it, will work just fine. Also, you don’t have to line it with anything, but it makes for an easier clean up.
- Bring cream to a boil, keeping an eye on it constantly. Break chocolate into small chunks and place in a heat-safe bowl. Pour cream over chocolate, push chocolate chunks down with a spatula so they are submerged, and let sit for 3 minutes — cover bowl with a plate to trap the heat.
- Remove the plate and stir the cream and chocolate together until smooth. (If the mixture isn’t smooth, you may need to place the bowl over simmering water (or use a double boiler) to melt the cream and chocolate together further.)
- Add liqueur (1 to 2 tablespoons to taste) and 1/4 teaspoon salt off the heat, and stir until smooth. Taste. Add another 1/4 teaspoon salt if you wish. Spread mixture into prepared pan, then refrigerate it for about 30 minutes or until almost hard.
- Drag a melon baller or #100 scoop across firm chocolate mixture to shape the truffles. Drop truffles onto a clean baking sheet. Note: As you shape, if the chocolate gets too soft, stick the pan back in the fridge for a bit. If it seems too hard, let it sit at room temperature until it is manageable. Also, do not worry about misshapen truffles — they should look a bit irregular. Refrigerate truffles for 15 minutes once formed.
- Spread some cocoa into a shallow dish (don’t forget to sift it!), preferably one with sides. If using confectioners’ sugar, spread it in a separate dish. Spread truffles (maybe 10 at a time) into each vessel and shake the vessel to coat the truffles. (Note: If you plan to dust with powdered sugar but want to stash your truffles in the fridge, don’t dust with powdered sugar till just before serving — the powdered sugar gets absorbed and also kind of melts in the fridge — best to dust them just before serving.)
- Store truffles in fridge or a cool part of your house. Let come to room temperature (at least an hour) before serving. If necessary, re-dust the truffles with cocoa before serving.
- Prep Time: 20 minutes
- Cook Time: 10 minutes
- Category: Cookie
- Method: No-bake
- Cuisine: American, French
Find it online : https://alexandracooks.com/2014/12/09/grand-marnier-chocolate-truffles/
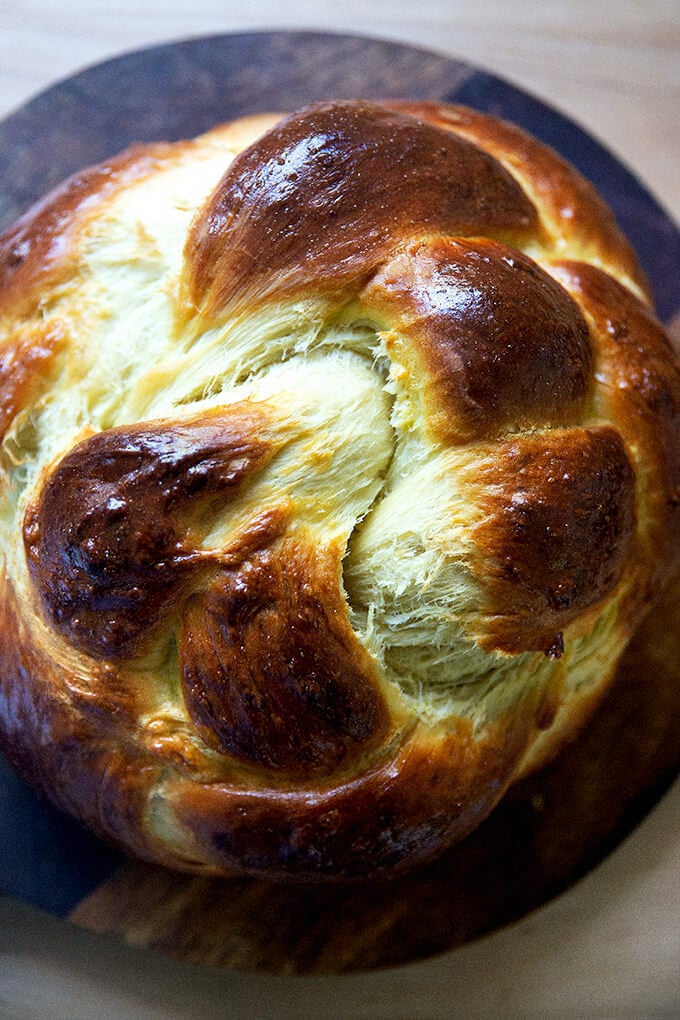
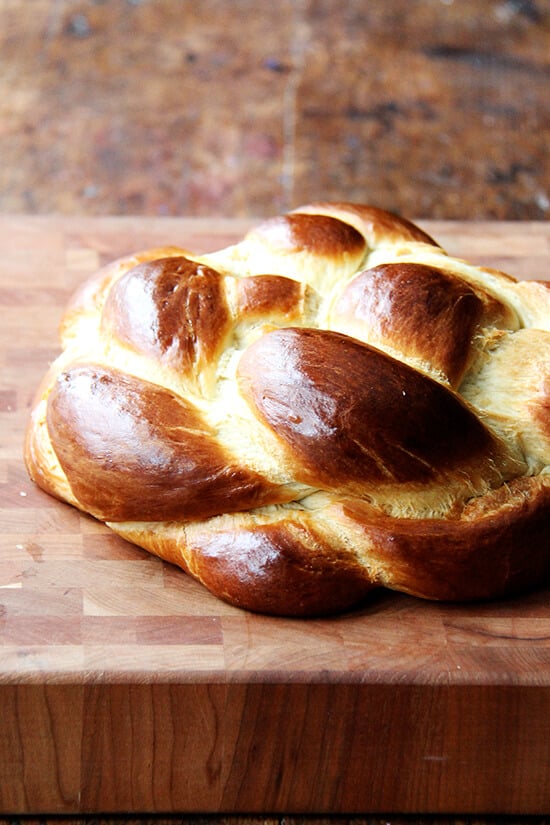
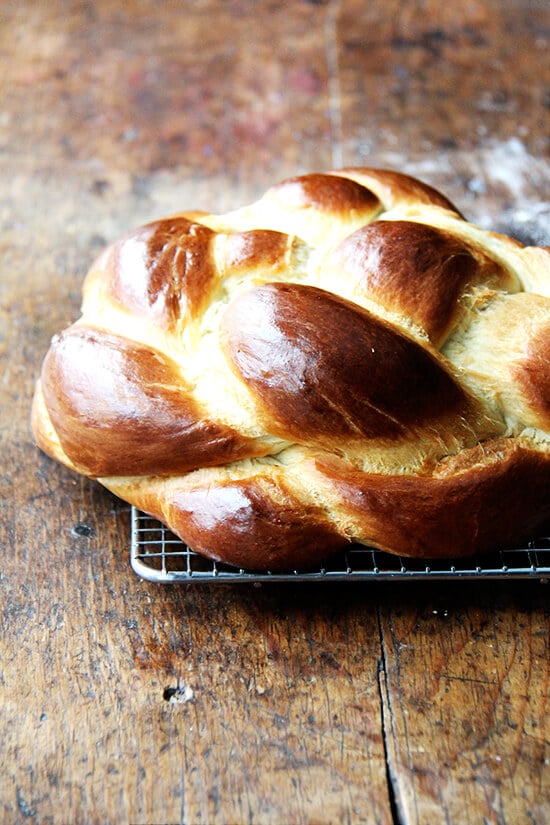
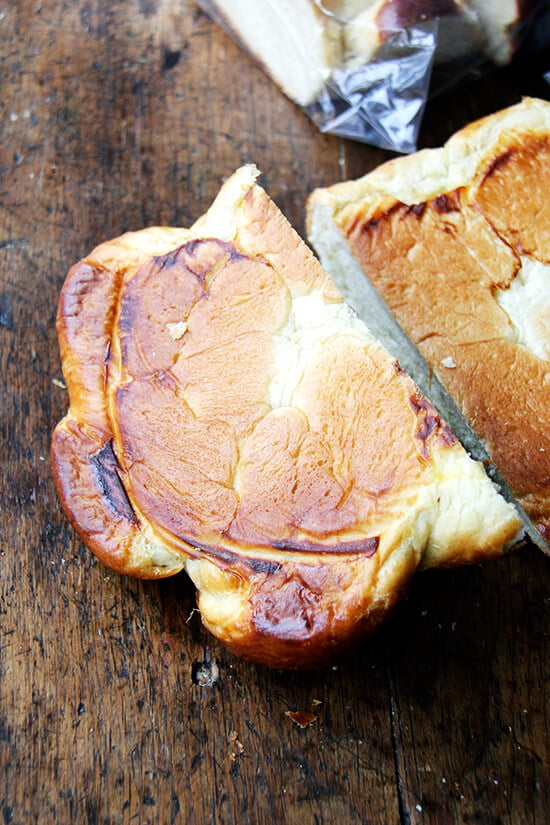
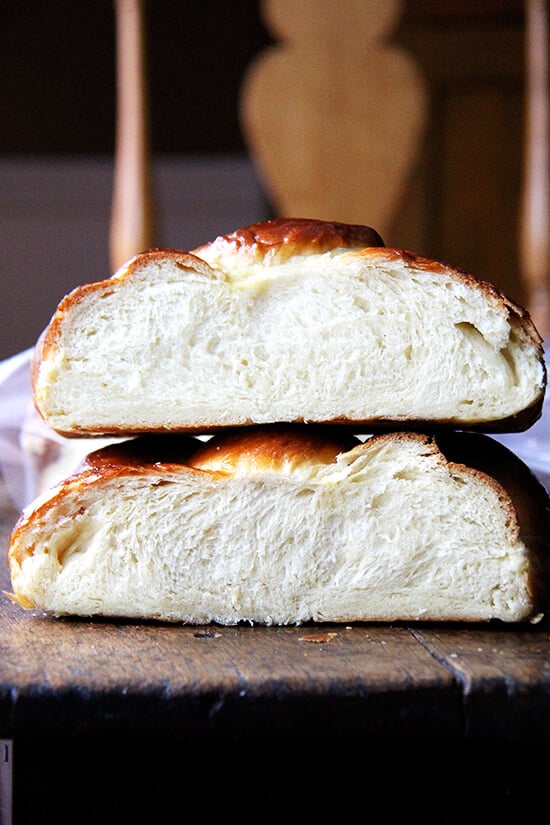
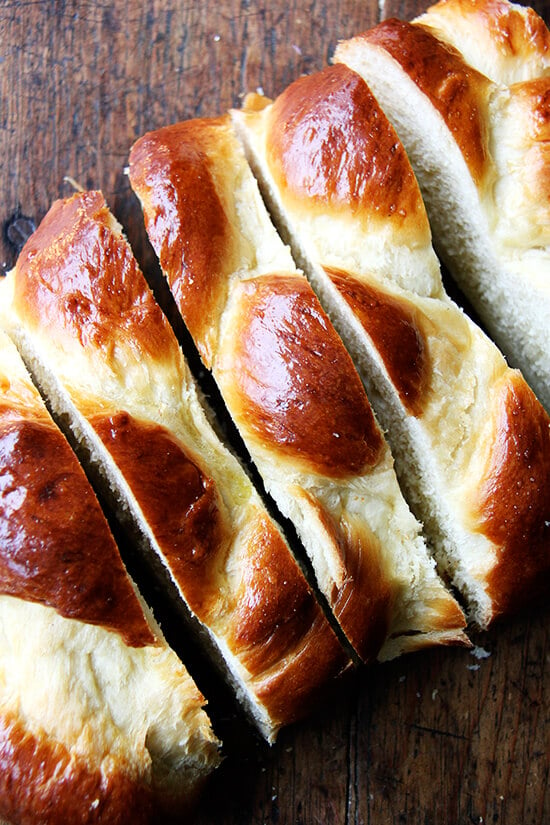
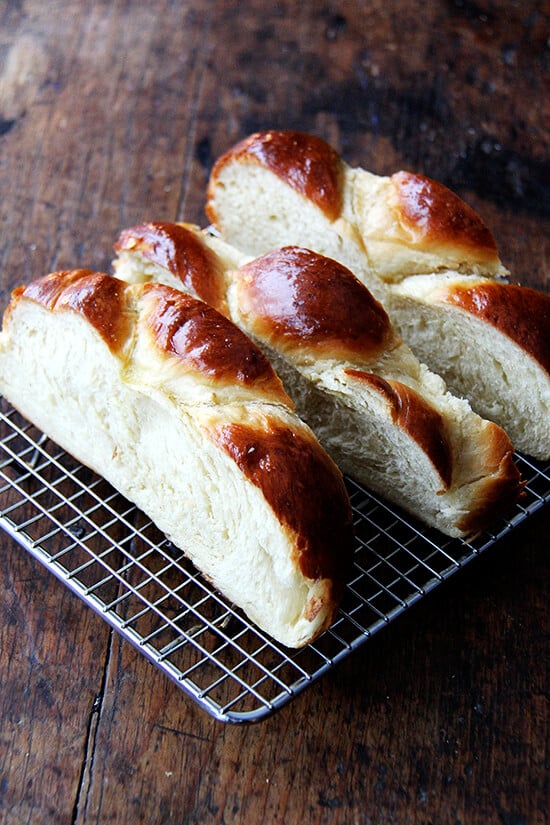
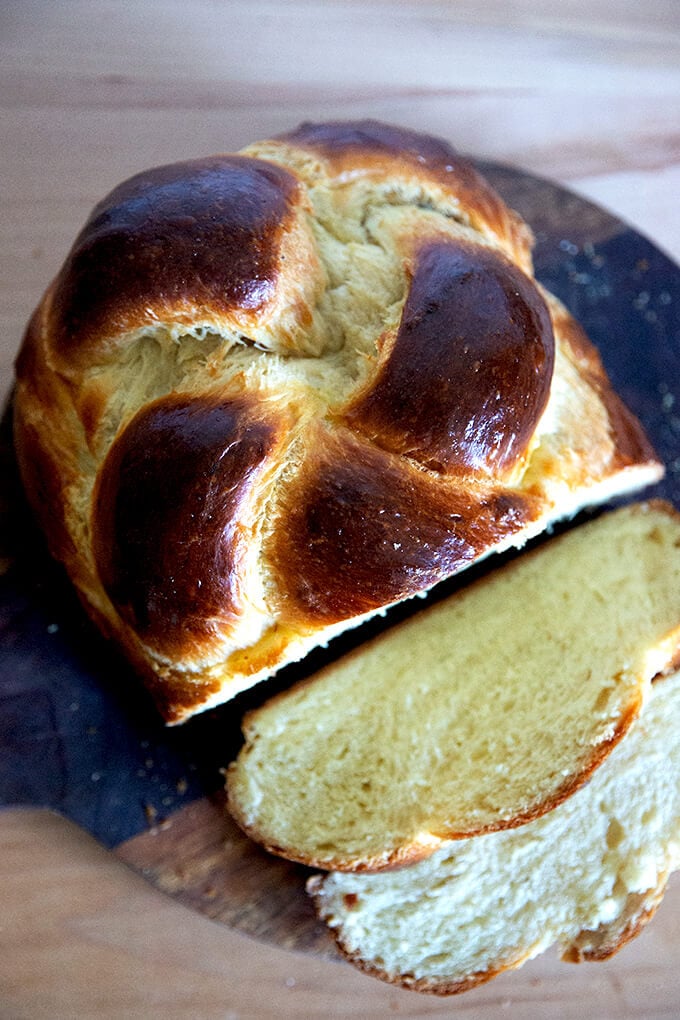
This challah is perfection: golden-crusted with a light, airy crumb. My friend, Holly, learned this recipe from the wife of a rabbi, and one day she taught me how to make it. I am forever grateful because it’s so delicious, so easy, and every time I make it, my children think I’m a hero. Also: It makes the BEST French toast.
When my friend Holly, one of the most reliable cooks I know, told me she had a great challah recipe, one she learned from a wife of a rabbi, and offered to show me how to make it, I nearly leapt into her arms.
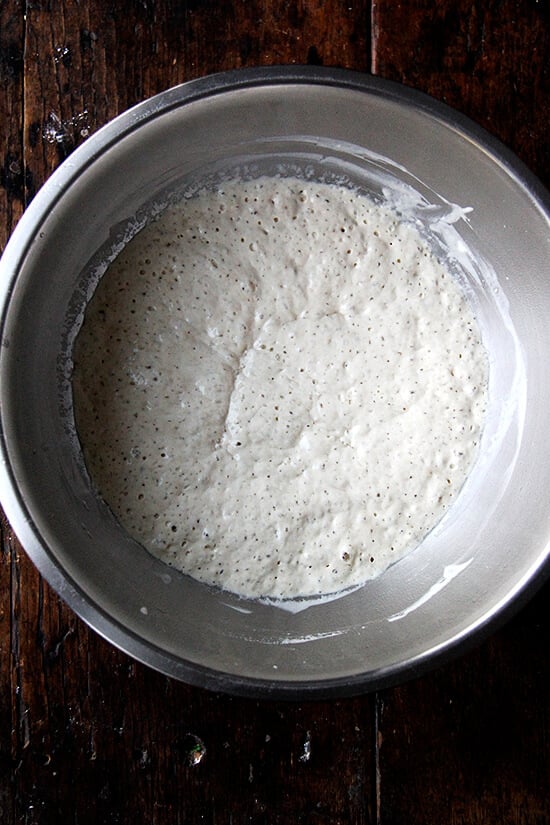
Shortly thereafter on a Friday morning, after dropping the kids off at school, I joined Holly at her house for coffee and a challah lesson. When I arrived, Holly had already made the sponges — 1 cup water, 1 cup flour, 1 packet yeast — which looked alive and ready for action. This is her Friday ritual: make the sponge before dropping her kids off at school; finish the process when she returns.
What I loved about Holly’s challah recipe and process is that it is so simple, so unfussy, so unlike the challah I had been making.
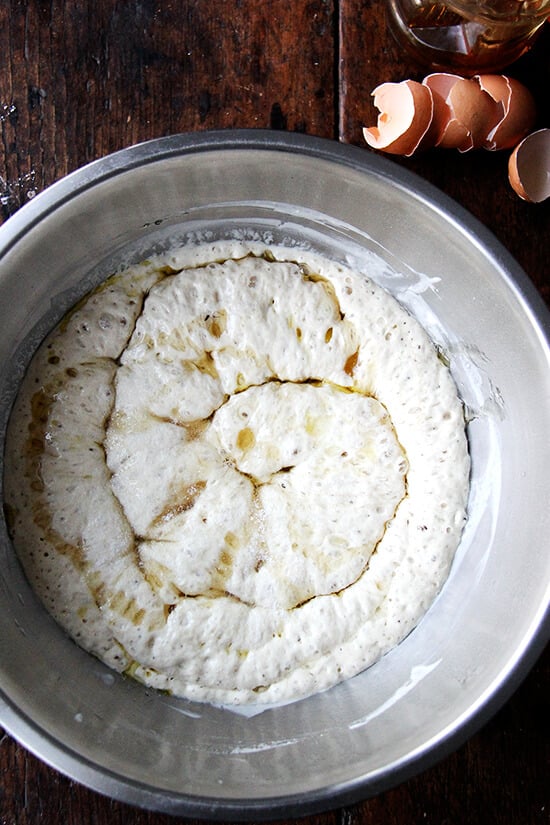
Into each bowl we cracked two eggs, then added the honey, salt, oil and finally the remaining flour. After a brief kneading by hand, the dough was ready to rise. At this point I left, bowl of dough in hand, and completed the process on my own, guidance provided by Holly via text.
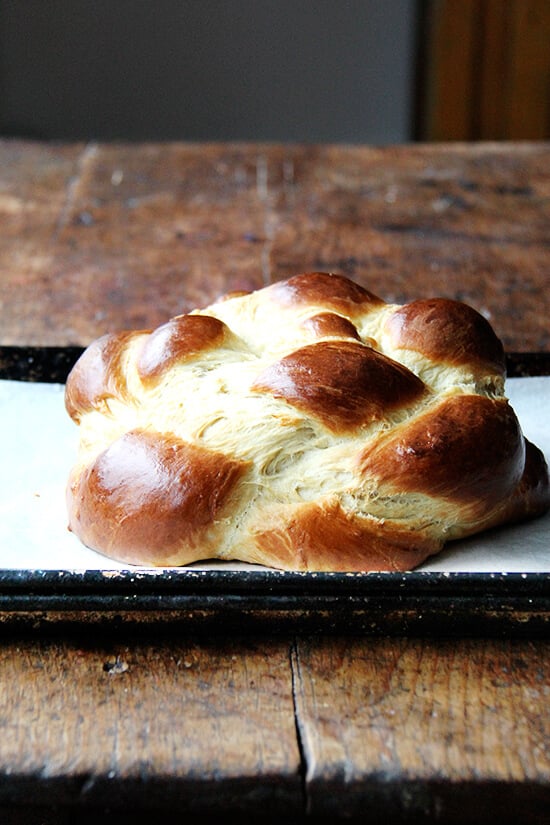
The dough rose beautifully and baked into a perfectly golden, light and airy, tangle of braids. Nearly every week since, I have made Holly’s challah, a treat aside any soup (lots of this one and this one these days), a treasure for weekend brunch.
Incidentally, while I was in VT for Thanksgiving , my aunt mentioned she had made a breakthrough with her koulourakia (a twisted Greek cookie): after burning the bottom of several batches, she layered one cookie sheet on top of another, which provided enough insulation to prevent the bottoms from burning. Genius! The conversation immediately made me think of my challah-making trials, a burnt underside almost always a constant.
And so, the day after Thanksgiving, I made a loaf of Holly’s challah for my family, baked the bread on two layers of sheetpans, and for the first time, the bottom of my challah cooked evenly without the slightest sign of overbrowning — a miracle! The Greeks raved! The abstemious indulged! What can I say, Holly’s challah makes me wanna holla holla!
PS: Overnight Refrigerator Focaccia = The Best Focaccia
This is what the sponge — 1 cup water, 1 cup flour, 1 packet yeast — looks like after about an hour:
Then, you add the eggs, honey, salt and oil right into the bowl:
Work in the flour:
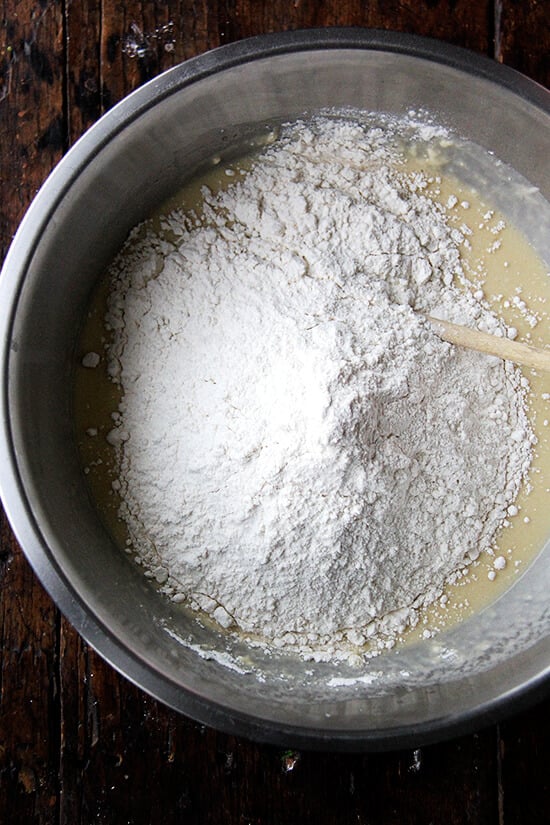
Mix until sticky:
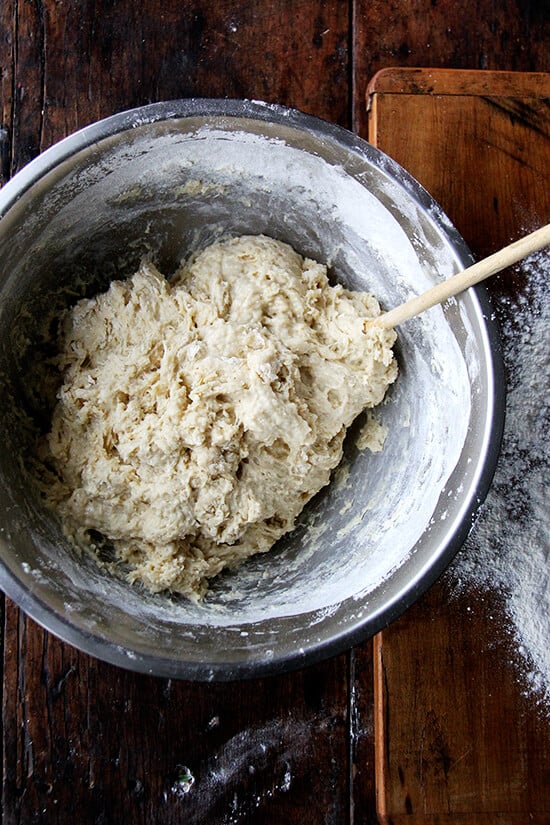
Knead briefly until smooth:
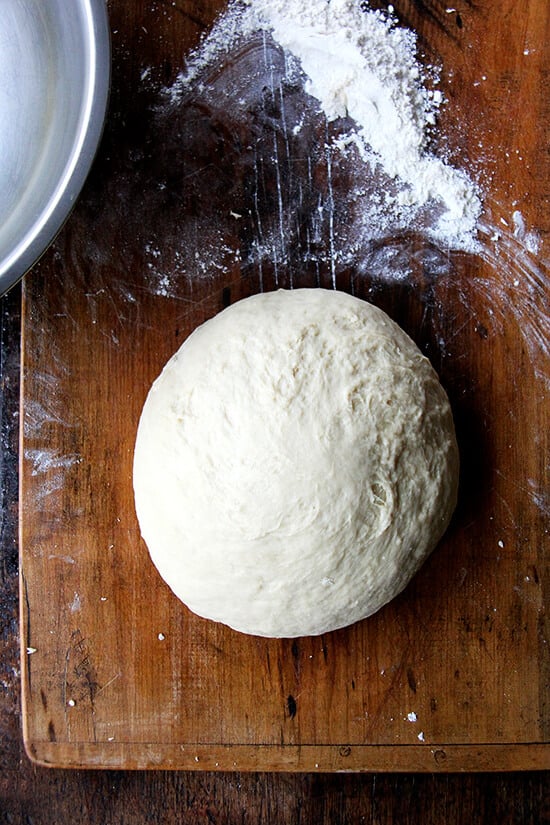
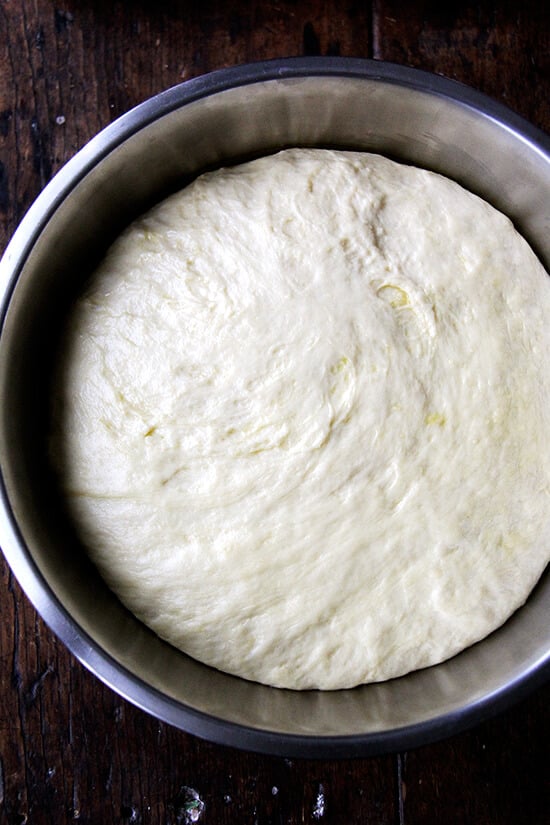
Transfer to an oiled bowl to rise:
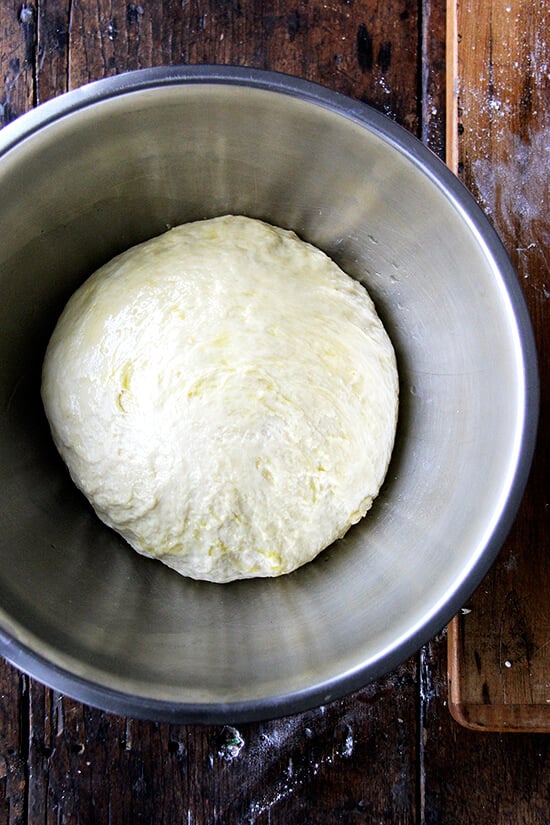
Then wait an hour or two:
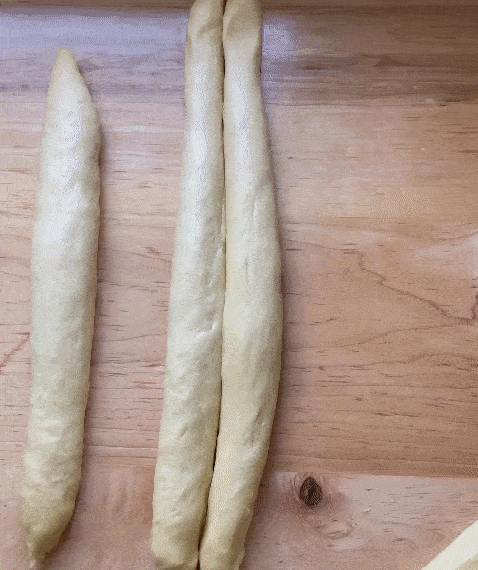
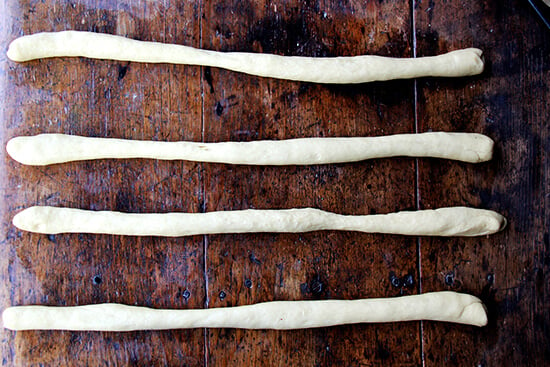
I made a double batch this time, so I divided the dough into 8 portions:
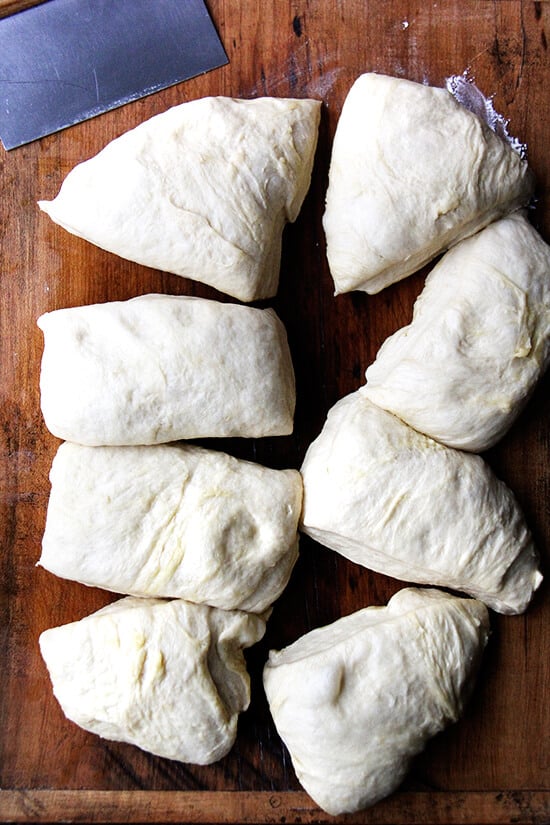
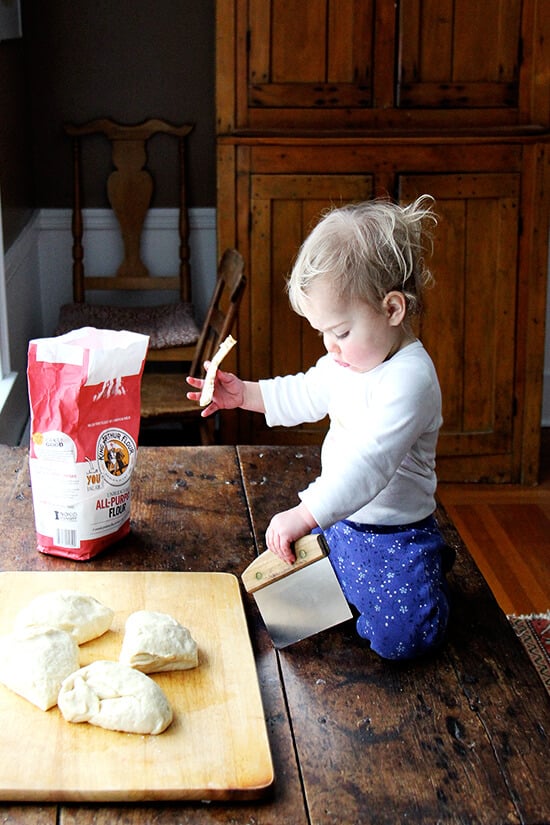
But with a single batch, divide the dough into three or four portions. Be sure to have a helper by your side:
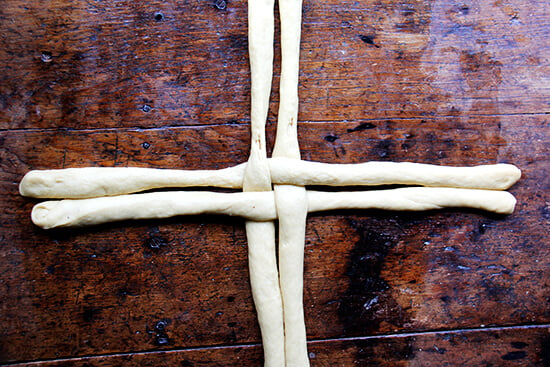
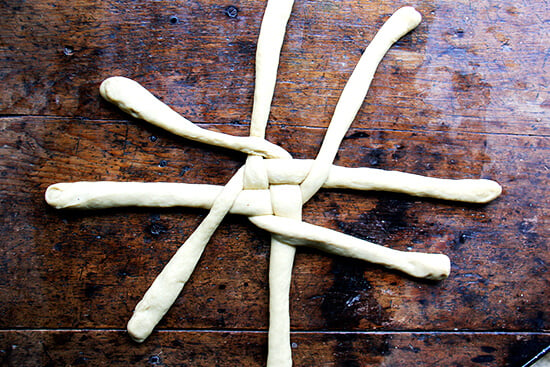
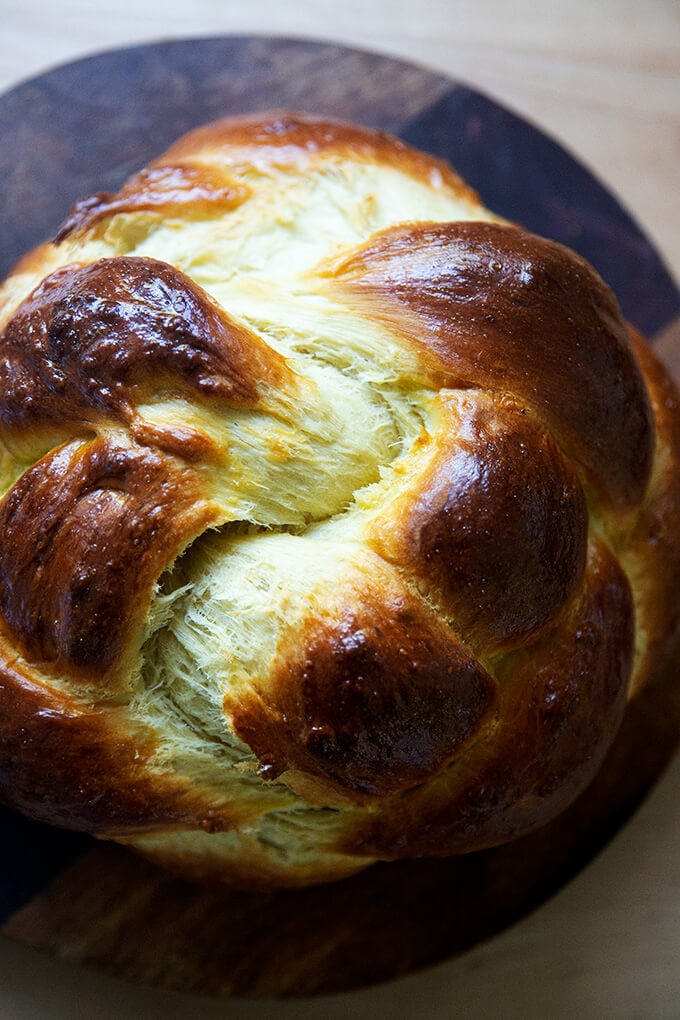
Time to shape! Here’s a quick video on how to shape a round loaf of challah.
And the basic steps:
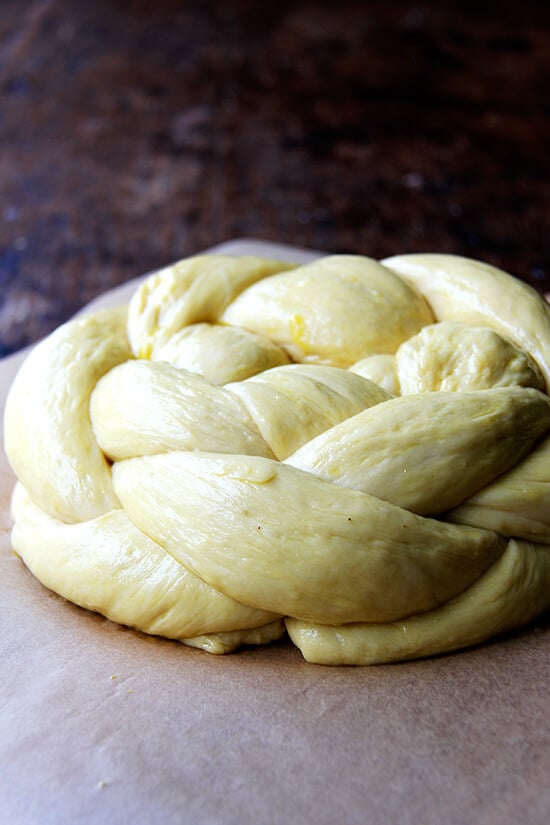
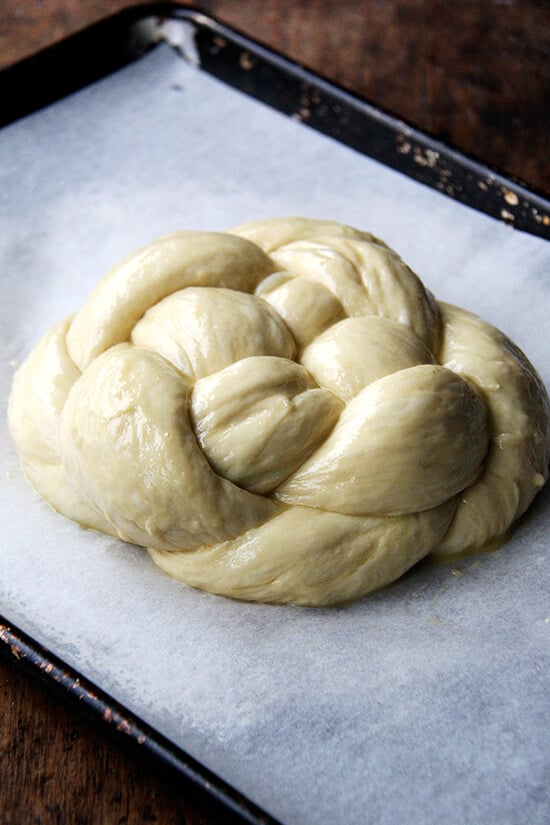
Holly’s is much prettier:

I actually prefer the shape of the more traditional 3 or 4 braid challah for purposes of toast and French toast, but the circular shape is so pretty.
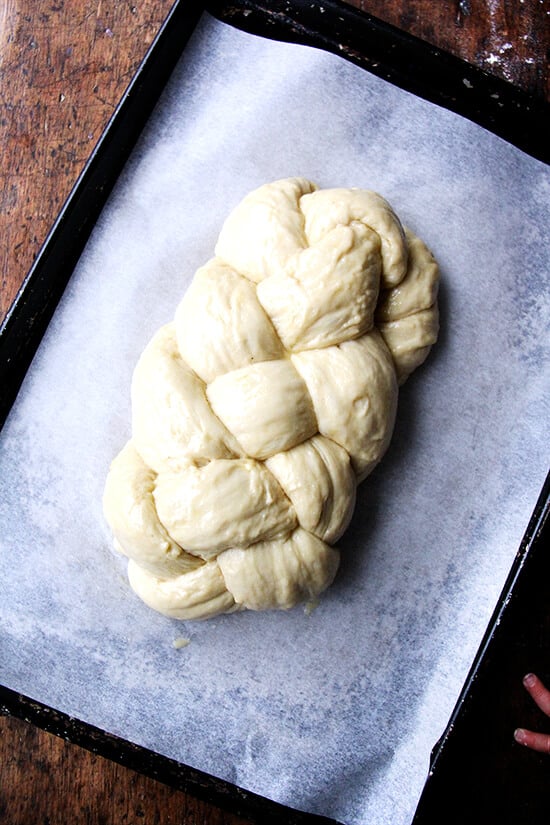
Baking the challah on two sheet pans prevents a burnt bottom:
This is day-old challah:
The benefit of making a double batch?
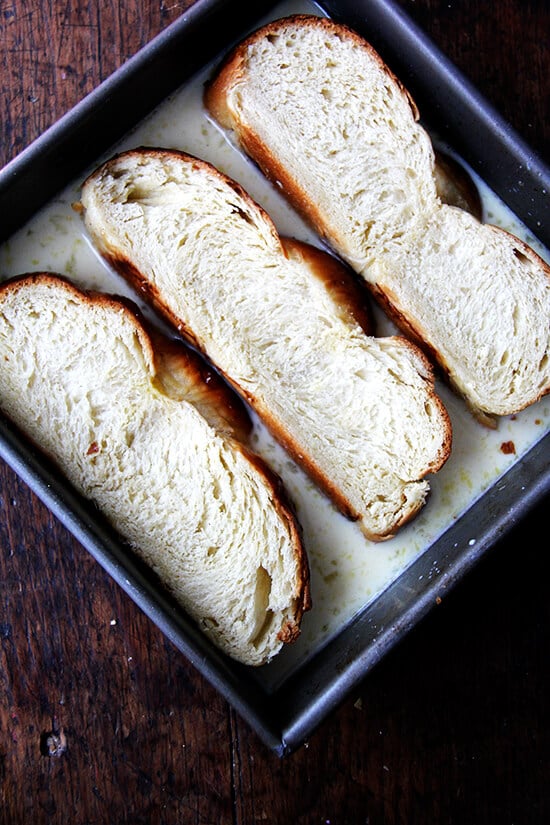
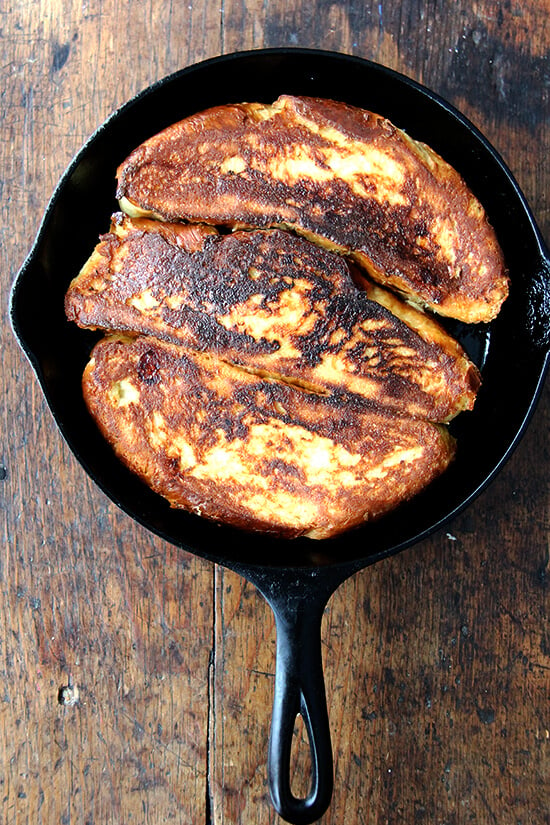
French toast of course.
I like to dry out slices overnight:
And I love the Tartine recipe , which calls for lots of lemon zest and no cinnamon, but traditional pan-fried recipes work just fine, too. I bet the overnight method would be delicious with challah, too.
Description
I learned this recipe from my friend, Holly, who calls it Jennifer’s Challah.
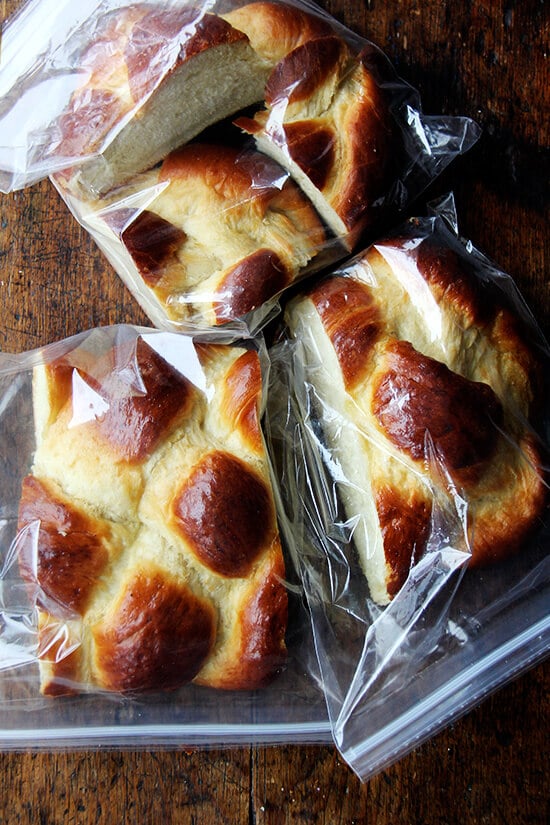
The recipe doubles well. Bread keeps well in a ziplock bag on the counter for several days, and it freezes well, too.
A few notes:
You can use at least one cup of whole wheat flour or white whole wheat flour. (Holly always does.)
To create lukewarm water: use ¼ cup boiling water and ¾ cup cold water, which will give you perfect lukewarm water.
To create a warm place for your bread to rise: Heat your oven for 1 minute, then shut it off. It doesn’t matter what temperature you set it to when you heat it; the key is to only allow it to heat for 1 minute. This brief blast of heat will create a cozy, draft-free spot for your bread to rise.
A double egg wash creates a beautifully golden and shiny finish to the challah.
Baking on two sheet pans prevents the bottom of the challah from burning.
As for shaping, there are lots of resources on youtube. I included one video below for making the entire challah, and a quick gif at the very start of the post, which shows how to shape the round challah.
4 to 5 cups ( 510 g to 620 g ) all-purpose or bread flour
1 package or 2¼ teaspoons ( 8 g ) instant yeast
1 cup ( 236 g ) lukewarm water (made by mixing 1/4 cup boiling water and ¾ cup cold water)
1 tablespoon ( 10 g ) kosher salt
¼ cup ( 84 g ) honey
½ cup ( 112 g ) safflower oil or other neutral oil (canola, grapeseed, etc.)
2 eggs
Egg wash:
- 1 egg beaten with 1 teaspoon water
- poppy seeds, optional
- Make the sponge: Whisk one cup (128 g) of the flour with the yeast and stir in the lukewarm water until the sponge is smooth. Cover with plastic wrap or a dish towel and let rise about 45 minutes or until puffy and bubbly.
- Directly into the bowl, add the salt, honey, oil and eggs. Stir with a spatula or spoon until well mixed, then add the remaining three cups (384 g) of flour. Stir with a spoon until dough forms a sticky mass. Add a bit more flour, and use your hands to knead briefly in the bowl; then turn dough onto lightly floured work surface and knead for a minute or two, until the dough becomes smooth. Transfer to a lightly oiled bowl, cover it with dish towel or plastic wrap and let it rise in a warm spot until doubled in bulk, one to two hours or longer depending on the temperature of your kitchen. (Note: you can make the dough to this point, punch it down, and stash it in the refrigerator overnight).
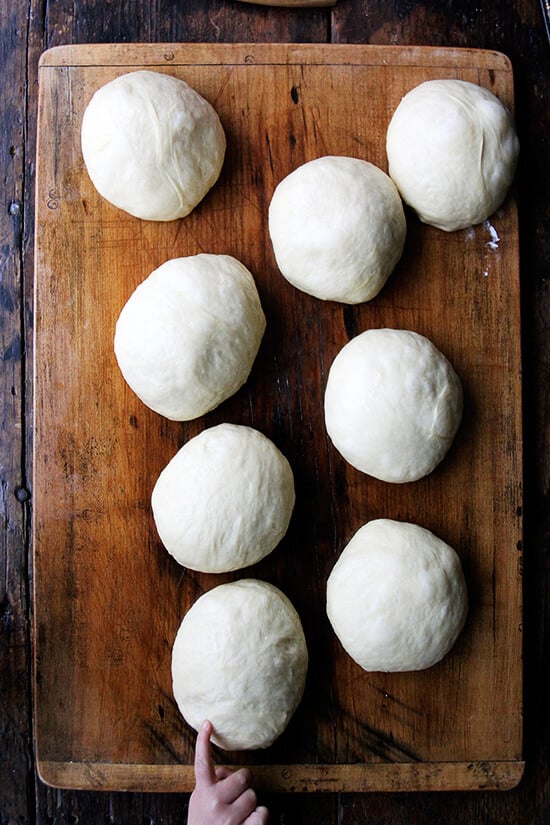
- Punch down and divide into three or four parts, depending on what shape you want to make. Roll each portion into a ball. Let rest 10-15 minutes. Roll each ball into long ropes (at least 12 inches in length for the 4-braided challah) and braid into desired shape (see notes above or check youtube). Brush with egg wash.
- Preheat the oven to 350ºF. Let the loaf rise on a greased or parchment-lined baking sheet, about 30 minutes. Place another baking sheet underneath it — this will help insulate the bottom and keep it from burning.
- Brush one more time with egg wash and sprinkle with poppy seeds if you like. Bake for 45 to 50 minutes, checking after 40 minutes. Cool completely before slicing.
- Prep Time: 20 minutes
- Cook Time: 45 minutes
- Category: Bread
- Method: Yeast-Risen
- Cuisine: Jewish
