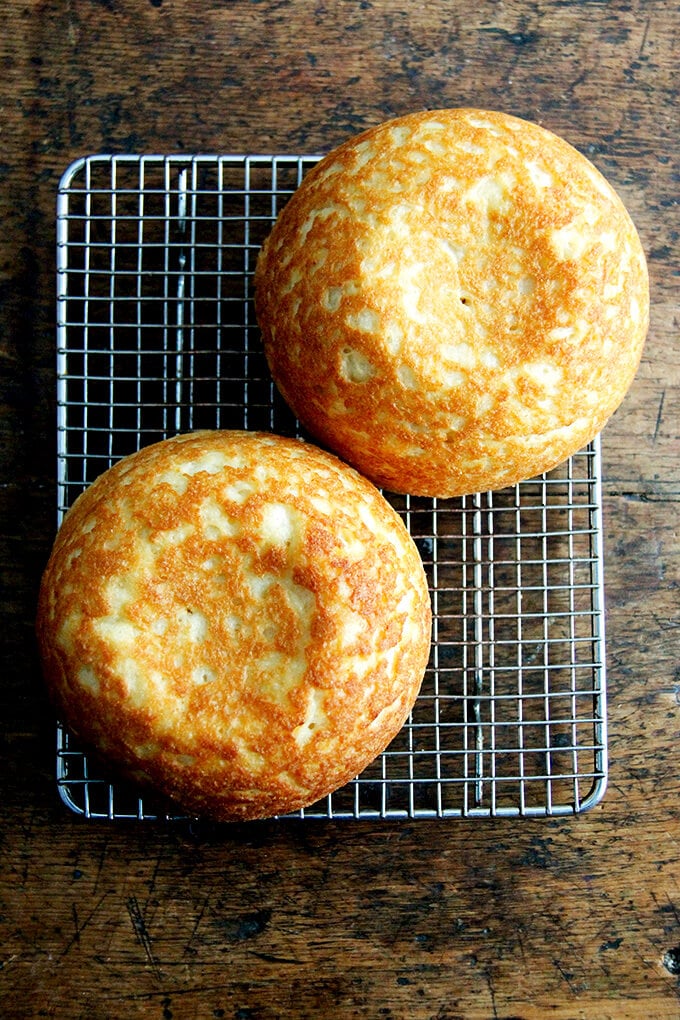
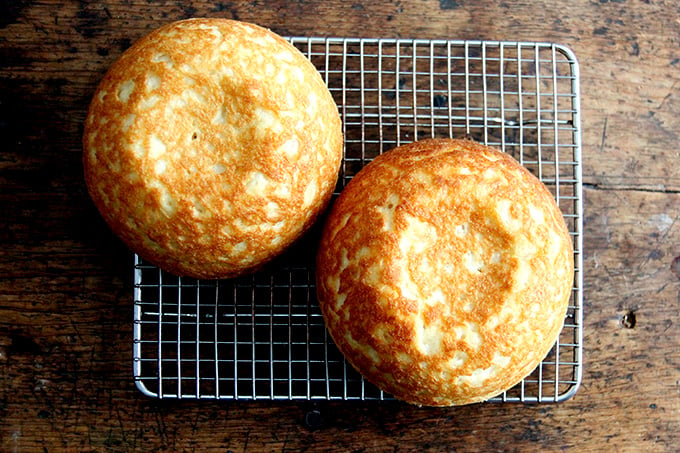
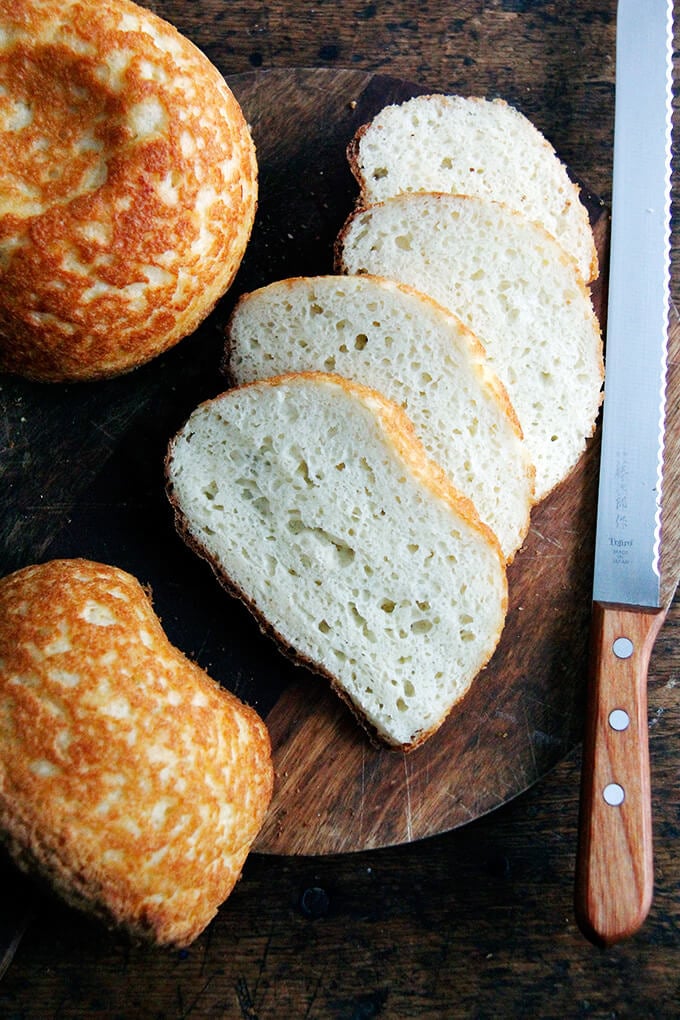
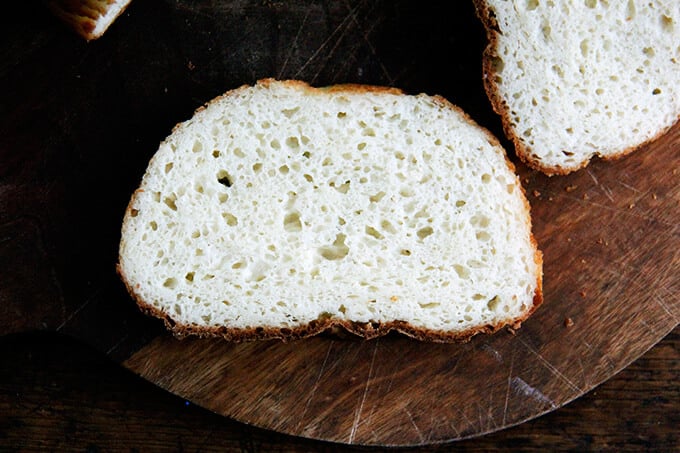
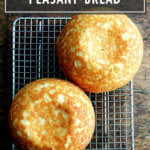
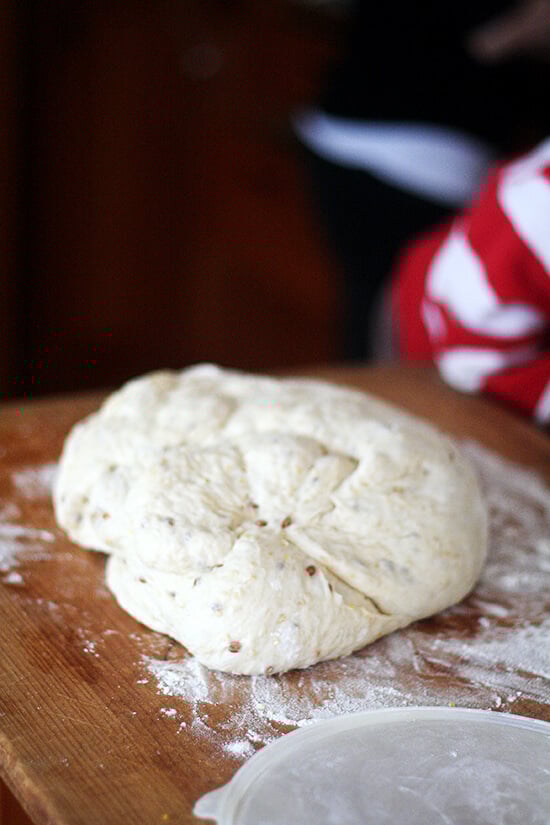
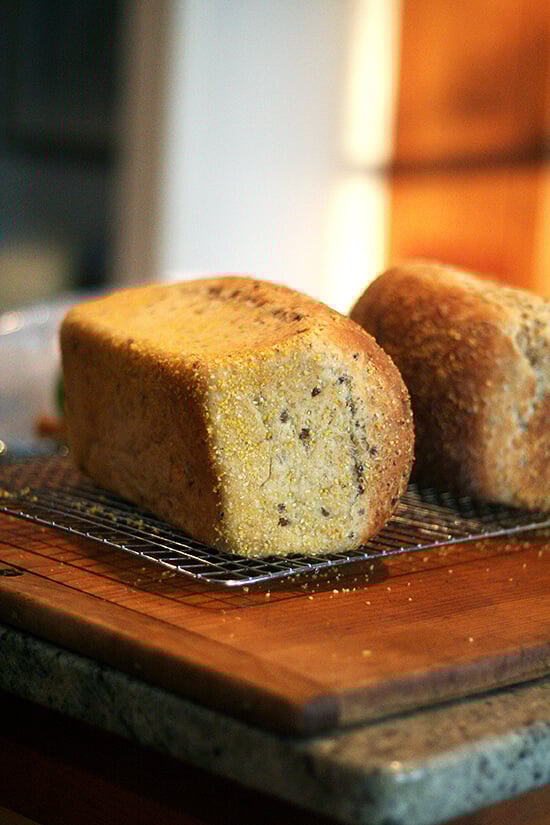
This gluten-free peasant bread has such a nice texture — soft and spongy, light and moist — and moreover, when sliced, the pieces hold their shape. Bread lovers, even those not adhering to a gluten-free diet, rave about the texture and flavor of this bread . This recipe comes from my cookbook, Bread Toast Crumbs !
For the past year, the most frequent question asked on this blog is this: Can the peasant bread be made gluten-free?
Everyone knows someone — a friend, an uncle, a cousin — recently diagnosed with Celiac disease who has had to forget bread as he/she once knew it.
You might have this friend, this uncle, this cousin. I do. And you might want to treat him/her to a loaf of freshly baked bread but you don’t know where to begin.
This is the position my mother found herself in a month ago while preparing for the arrival of her brother-in-law, who had recently adopted a gluten-free diet. Panicked by the thought of serving dinner without warm, fresh bread on the table, she called asking if I had ever successfully made the peasant bread gluten free. I answered as I have to everyone who has asked thus far: no, not yet.
It seemed like a good time to take an earnest stab at making a gluten-free peasant bread. Unfortunately, a respectable loaf did not materialize before my uncle’s arrival, but one has since.
Gluten-Free Bread Baking Tips
- For every cup of flour (128g), use about a teaspoon of xanthum gum.
- For every 2 cups of flour (128g), use 1 egg.
- Use a little more yeast proportionally to help lighten the bread’s texture.
- Use a high-quality gluten-free mix, such as C4C or King Arthur Flour. If your gluten-free flour mix contains xanthum gum, no need to add additional.
Description
From my cookbook, Bread Toast Crumbs .
For best results, use a digital scale . It makes all the difference with bread baking.
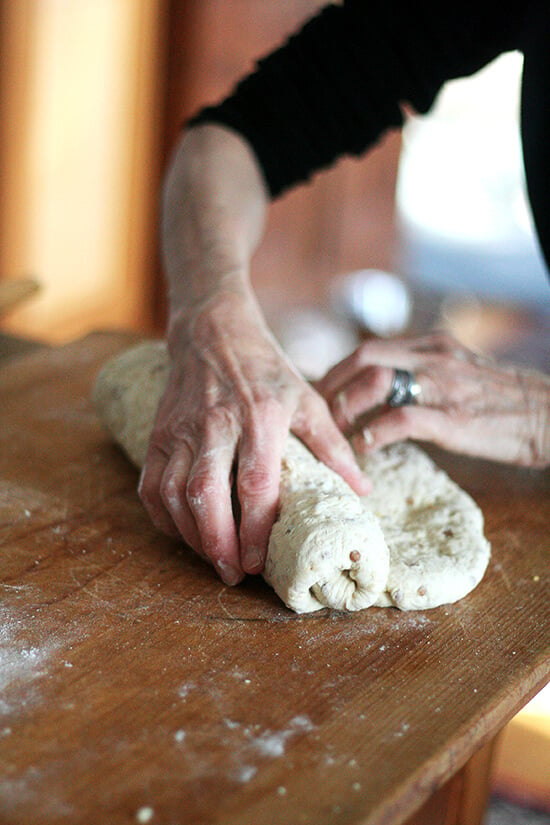
Note: If you are using a different brand of gluten-free flour, you may not need all of the liquid. Because all gluten-free flours and mixes absorb water at a different rate, you may find your dough to be much more liquidy than mine — this is due to the flour. This is what I suggest: add the liquid a little bit at the time, mixing with a spatula to combine. Reference the video to see what the dough should look like as far as texture goes.
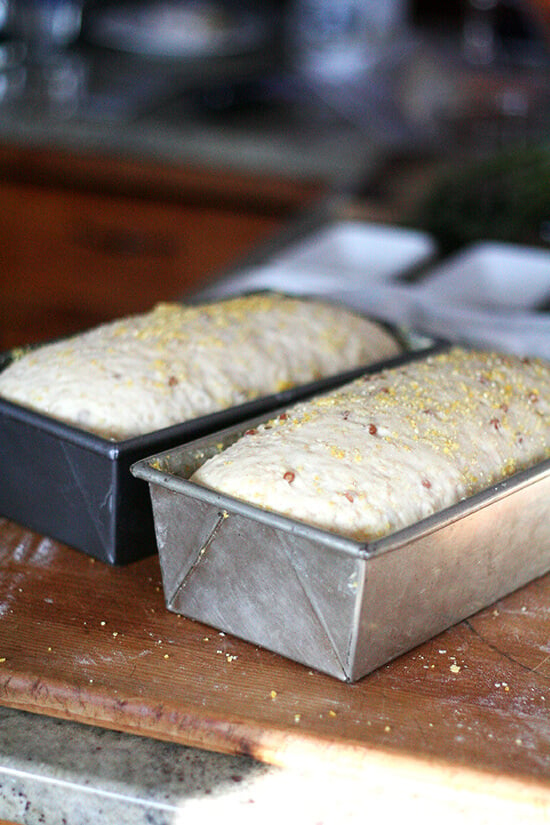
Loaf Pan: I have not tried this yet, but someone emailed me recently letting me know she bakes the entire batter in a 9×5-inch loaf pan, so if you don’t have the 1-quart Pyrex bowls, know that a 9×5-inch loaf pan is an option.
- 4 cups ( 500 g ) gluten-free flour—my favorite is Cup4Cup, see notes above if using a different type of gluten-free flour
- 2 teaspoons ( 10 g ) kosher salt
- 2 1/4 teaspoons ( 8 g ) instant yeast
- 2 cups ( 455 g ) lukewarm water
- 2 tablespoons ( 42 g ) honey
- 2 eggs lightly beaten
- 2 tablespoons ( 28 g ) olive oil or grapeseed or other neutral oil
- 1 teaspoon ( 4 g ) white wine or cider vinegar
- softened unsalted butter for greasing
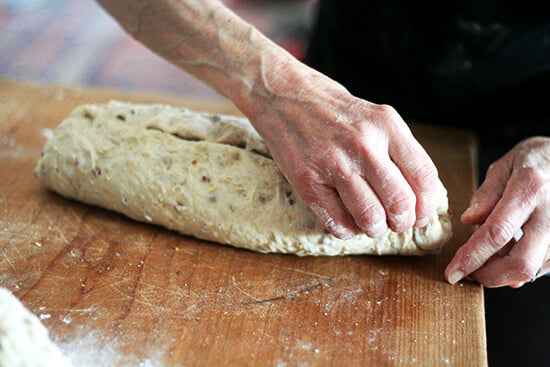
- In a large bowl, whisk together the flour, salt, and instant yeast. In a medium bowl, pour the water over the honey and stir to dissolve. Add the eggs, oil, and vinegar. Add the wet ingredients to the dry and mix with a spatula to form a batter. (See notes above if you are using a different brand of gf flour.)
- Grease two 1-quart oven-safe bowls (or a 9×5-inch loaf pan, see notes above) with the softened butter—be generous. Divide the dough evenly between the prepared bowls. With wet hands, smooth the surface of the dough. Let the dough rise in a warm or draft-free spot for 30 to 45 minutes, until the top of the dough just crowns the rims of the bowls — this may take longer… just be patient and wait till the dough crowns the rim: it might take as long as 2 hours if your kitchen is cool. Halfway through the rising, set a rack in the middle of the oven and preheat it to 425 degrees F.
- Transfer the bowls to the oven, and bake for 15 minutes. Reduce the heat to 375 degrees F and bake for 17 to 20 minutes more, until golden all around. Remove the bowls from the oven and turn the loaves out onto the cooling racks. Let the loaves cool for at least 20 minutes before cutting.
- Prep Time: 15 minutes
- Cook Time: 40 minutes
- Category: Bread
- Method: Bake
- Cuisine: Gluten-Free
This gluten-free peasant bread has such a nice texture — soft and spongy, light and moist — and moreover, when sliced, the pieces hold their shape. Bread lovers, even those not adhering to a gluten-free diet, rave about the texture and flavor of this bread . This recipe comes from my cookbook, Bread Toast Crumbs !
For the past year, the most frequent question asked on this blog is this: Can the peasant bread be made gluten-free?
Everyone knows someone — a friend, an uncle, a cousin — recently diagnosed with Celiac disease who has had to forget bread as he/she once knew it.
You might have this friend, this uncle, this cousin. I do. And you might want to treat him/her to a loaf of freshly baked bread but you don’t know where to begin.
This is the position my mother found herself in a month ago while preparing for the arrival of her brother-in-law, who had recently adopted a gluten-free diet. Panicked by the thought of serving dinner without warm, fresh bread on the table, she called asking if I had ever successfully made the peasant bread gluten free. I answered as I have to everyone who has asked thus far: no, not yet.
It seemed like a good time to take an earnest stab at making a gluten-free peasant bread. Unfortunately, a respectable loaf did not materialize before my uncle’s arrival, but one has since.
Gluten-Free Bread Baking Tips
- For every cup of flour (128g), use about a teaspoon of xanthum gum.
- For every 2 cups of flour (128g), use 1 egg.
- Use a little more yeast proportionally to help lighten the bread’s texture.
- Use a high-quality gluten-free mix, such as C4C or King Arthur Flour. If your gluten-free flour mix contains xanthum gum, no need to add additional.
Description
From my cookbook, Bread Toast Crumbs .
For best results, use a digital scale . It makes all the difference with bread baking.
Note: If you are using a different brand of gluten-free flour, you may not need all of the liquid. Because all gluten-free flours and mixes absorb water at a different rate, you may find your dough to be much more liquidy than mine — this is due to the flour. This is what I suggest: add the liquid a little bit at the time, mixing with a spatula to combine. Reference the video to see what the dough should look like as far as texture goes.
Loaf Pan: I have not tried this yet, but someone emailed me recently letting me know she bakes the entire batter in a 9×5-inch loaf pan, so if you don’t have the 1-quart Pyrex bowls, know that a 9×5-inch loaf pan is an option.
- 4 cups ( 500 g ) gluten-free flour—my favorite is Cup4Cup, see notes above if using a different type of gluten-free flour
- 2 teaspoons ( 10 g ) kosher salt
- 2 1/4 teaspoons ( 8 g ) instant yeast
- 2 cups ( 455 g ) lukewarm water
- 2 tablespoons ( 42 g ) honey
- 2 eggs lightly beaten
- 2 tablespoons ( 28 g ) olive oil or grapeseed or other neutral oil
- 1 teaspoon ( 4 g ) white wine or cider vinegar
- softened unsalted butter for greasing
- In a large bowl, whisk together the flour, salt, and instant yeast. In a medium bowl, pour the water over the honey and stir to dissolve. Add the eggs, oil, and vinegar. Add the wet ingredients to the dry and mix with a spatula to form a batter. (See notes above if you are using a different brand of gf flour.)
- Grease two 1-quart oven-safe bowls (or a 9×5-inch loaf pan, see notes above) with the softened butter—be generous. Divide the dough evenly between the prepared bowls. With wet hands, smooth the surface of the dough. Let the dough rise in a warm or draft-free spot for 30 to 45 minutes, until the top of the dough just crowns the rims of the bowls — this may take longer… just be patient and wait till the dough crowns the rim: it might take as long as 2 hours if your kitchen is cool. Halfway through the rising, set a rack in the middle of the oven and preheat it to 425 degrees F.
- Transfer the bowls to the oven, and bake for 15 minutes. Reduce the heat to 375 degrees F and bake for 17 to 20 minutes more, until golden all around. Remove the bowls from the oven and turn the loaves out onto the cooling racks. Let the loaves cool for at least 20 minutes before cutting.
- Prep Time: 15 minutes
- Cook Time: 40 minutes
- Category: Bread
- Method: Bake
- Cuisine: Gluten-Free
Find it online : https://alexandracooks.com/2014/03/21/gluten-free-peasant-bread/

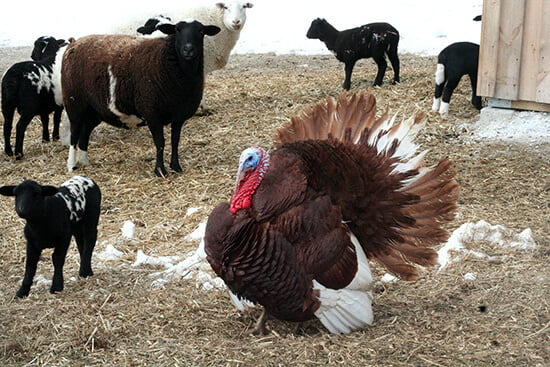
I just spent a week eating cheese, making butter, growing sprouts, baking bread, snuggling with Golden Retrievers, visiting farms, driving through covered bridges, admiring snow-capped mountains and frozen lakes, and sampling microbrews while eating wood-fired pizzas. Could I have been anywhere in the world but Vermont?
Perhaps, but short of meeting a few friends for a morning snowshoe, my week couldn’t have been filled with more quintessential Green Mountain State activities. My siblings and I grew up traveling to Charlotte many times a year to visit my mother’s sister Marcy, master of pies , soup , and delectably melty appetizers . The five-hour drive always felt interminable, knowing what we had awaiting us: our cousins, a zipline, Uncle Wade’s waffles, Lake Champlain, dogs and endless outdoor fun.
For my parents, the drive was a breeze, the nature scenes providing endless distraction. I never quite understood the enthusiasm for the birds perched on the highway light poles or the first glimpse of Mount Mansfield, but on my drive north this past Sunday, I realized I had officially become my parents. “Children!” I would shout at every turn. “Look at the cows! The silos! The mountains! The sugar houses!”
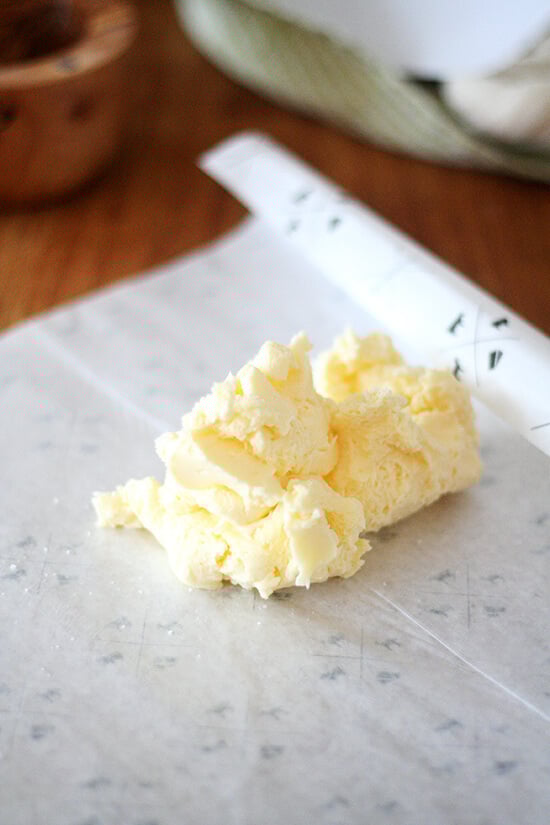
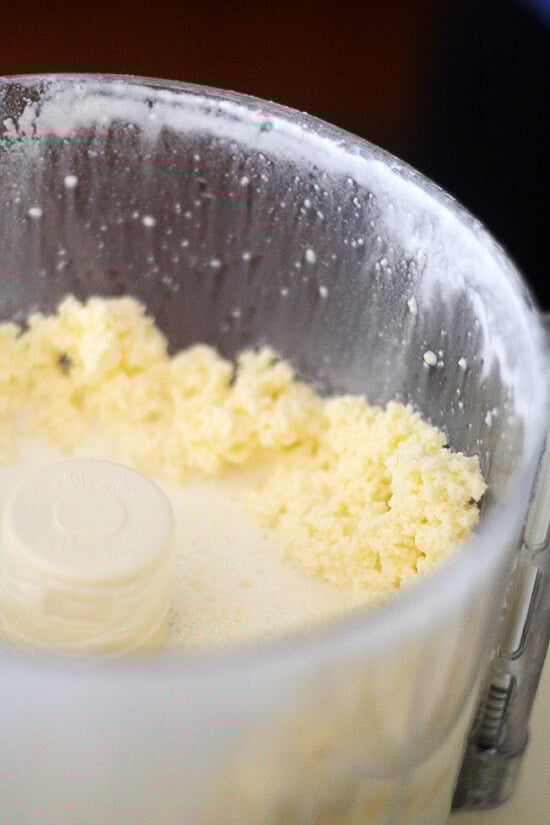
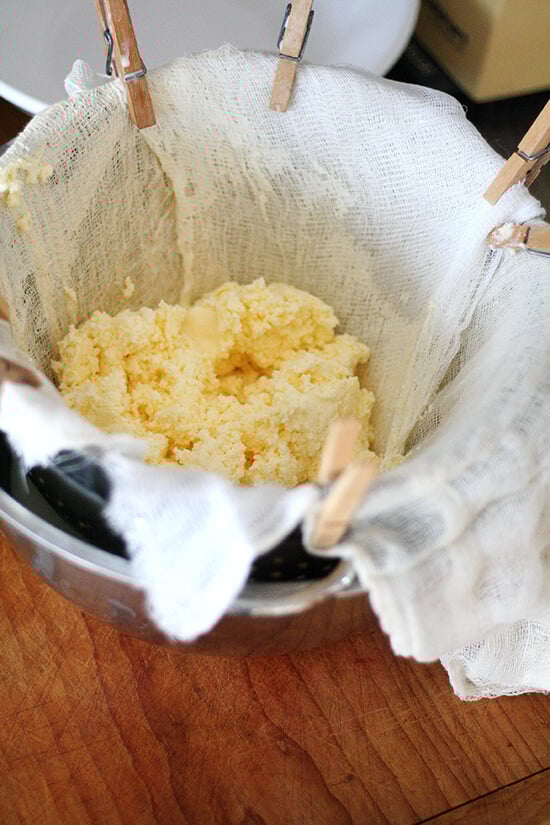
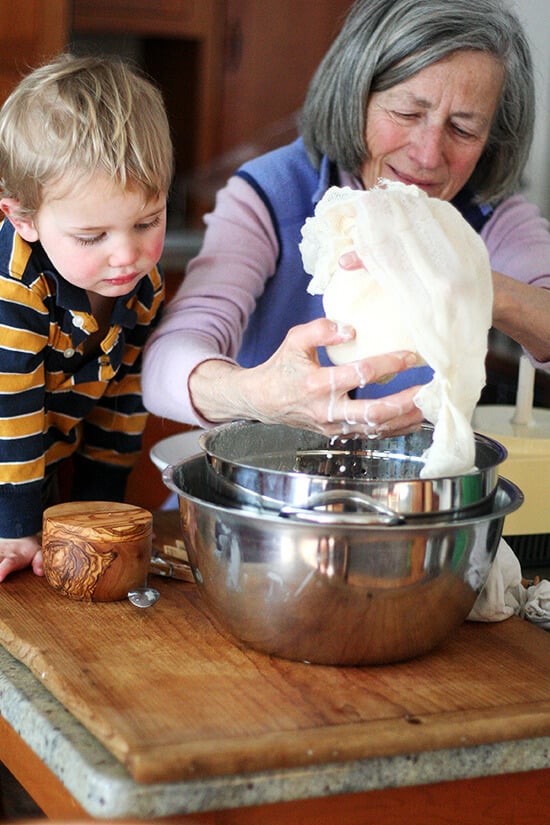
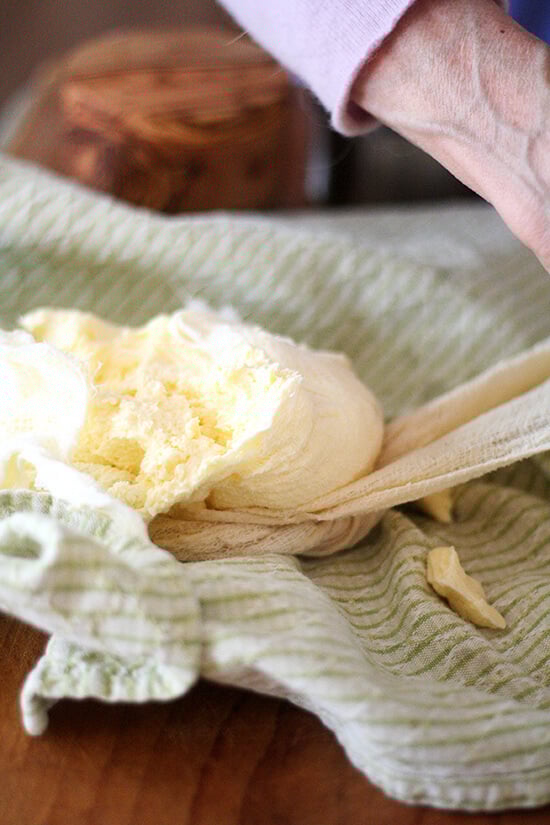
I didn’t want to leave Vermont, and I took a few things home with me to make the parting more bearable, namely a log of the homemade cultured butter Marcy had made during my stay. As with other homemade dairy experiments , the process is half the fun: watching the cream thicken on the countertop, seeing it separate into butter curds and real buttermilk in the food processor, unwrapping the cheesecloth to reveal a rich, tangy mass.
If you are into these sorts of homemade projects, cultured butter is a fun one to add to your repertoire. Having it on hand will, of course, require making homemade bread , of which you might eat more than you care to admit. Don’t say I didn’t warn you.
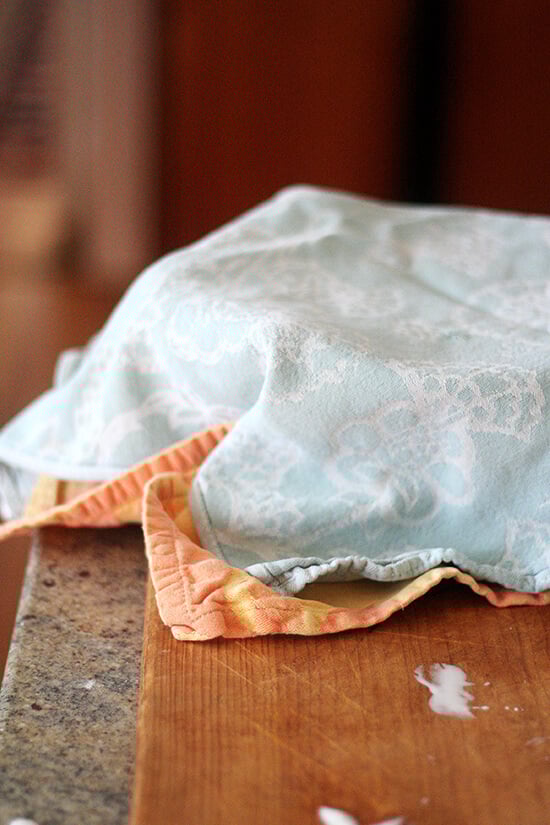
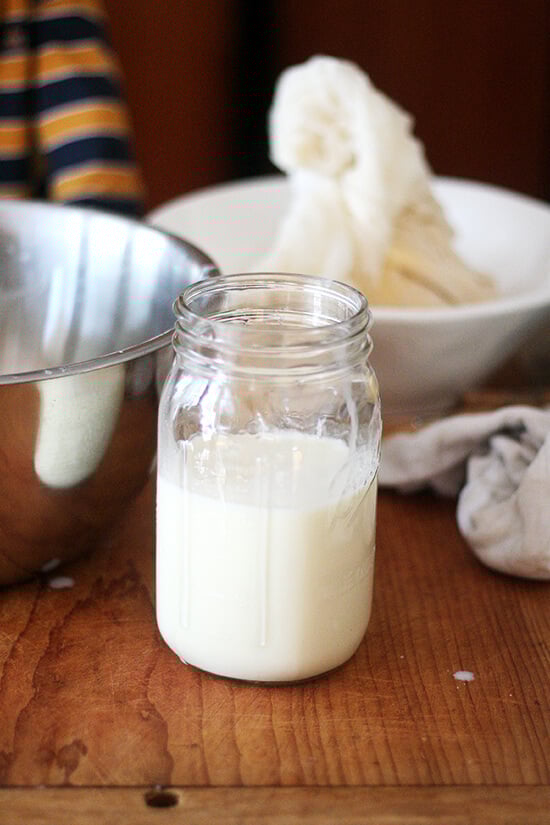
Real buttermilk:
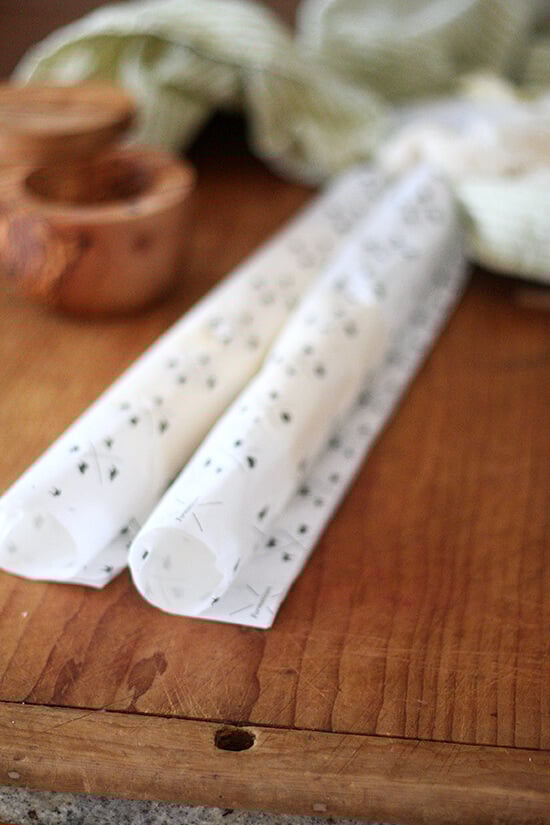
Homemade butter wrapped in cheese paper :

A few snapshots from the trip:
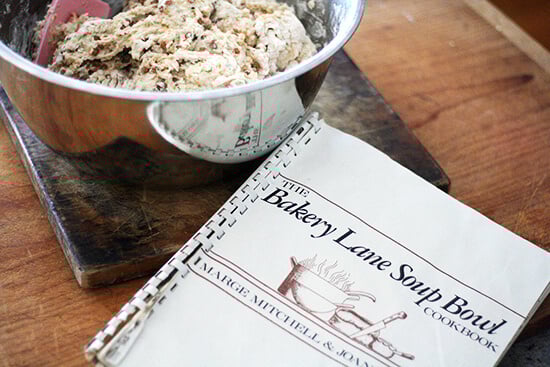
Marcy made the most delectable wheat berry toasting bread, a recipe adapted from this Bakery Lane Soup Bowl’s honey-whole wheat toasting bread :


Wade’s famous waffles:

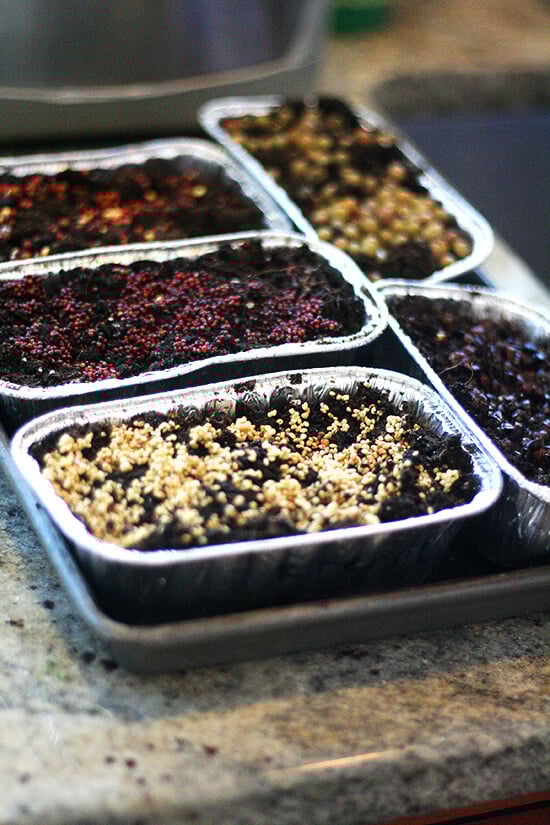
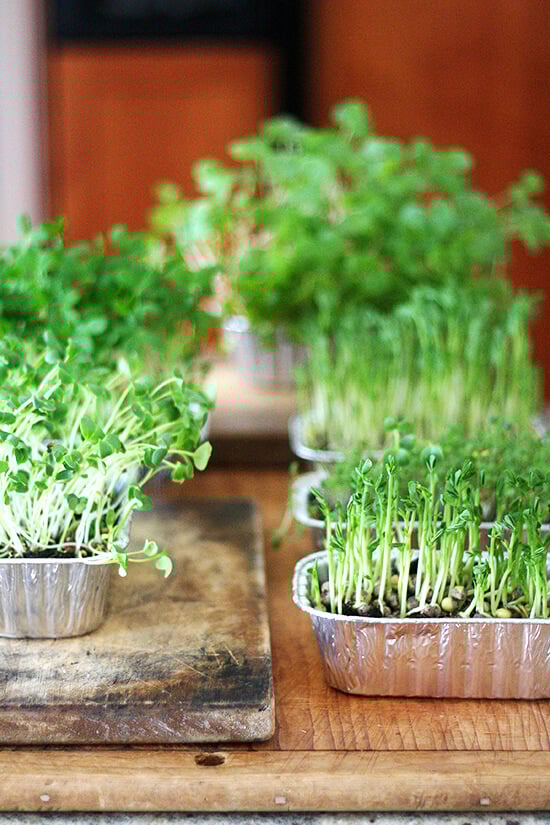
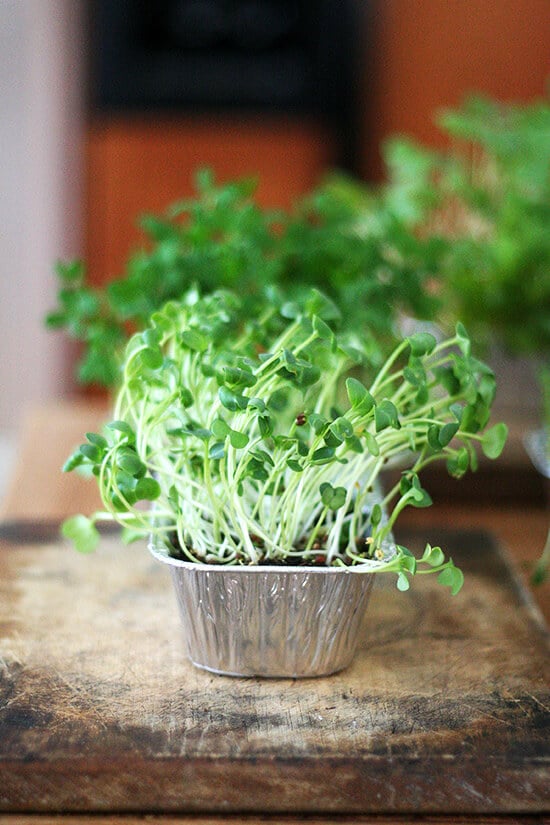
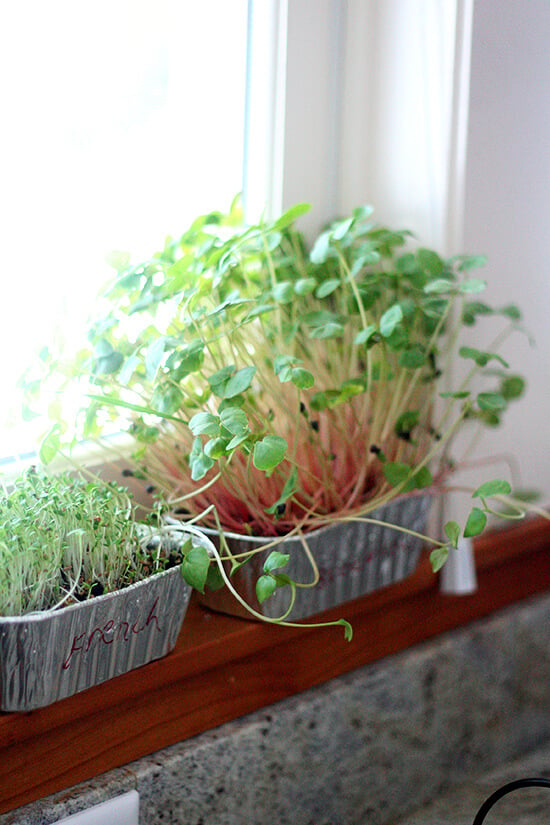
Marcy has sprouts growing all over her house. The process is amazingly easy, and they look so pretty, too. I will report back on this when I get mine going:


If you like homemade dairy projects, here are a few other ideas: crème fraîche , yogurt , ricotta .
Description
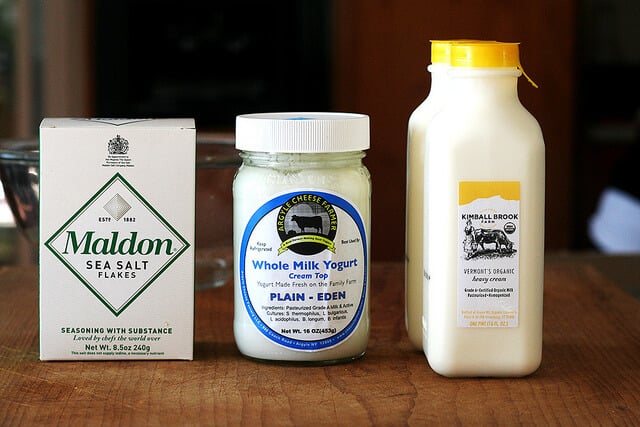
- 4 cups good quality heavy cream
- 1/2 cup plain whole milk yogurt
- 1/4 teaspoon fine sea salt, or to taste
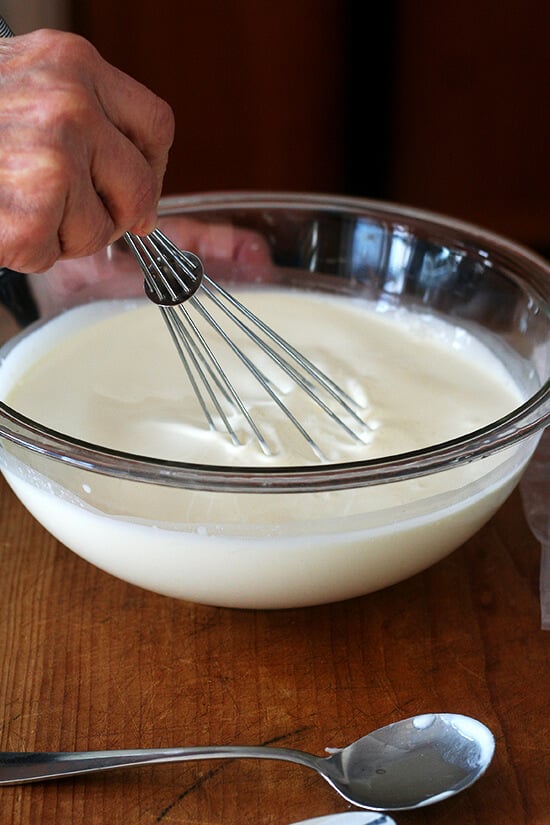
- Combine cream and yogurt in a large jar or bowl. Seal jar well and shake aggressively until combined, or whisk well if using a bowl. Cover jar or bowl with a clean kitchen towel and let mixture sit in a warm area of your kitchen for 18 to 36 hours; it should thicken and taste rich and tangy.
- Seal the jar or cover bowl tightly with plastic wrap and refrigerate until it reaches 60 degrees, 1 to 2 hours. If you refrigerate it longer, allow mixture to warm slightly at room temperature before proceeding.
- Line a fine-mesh sieve with a double layer of cheesecloth and place it over a large bowl. Make sure there is plenty of extra overhang of cheesecloth.
- In the bowl of a food processor, add the thickened butter mixture and process on high — warning this might make a mess even in a 14-cup food processor…you might want to do it in two batches — until the yellow curds begin to separate from the buttermilk, 2 to 3 minutes. It will have the appearance of liquidy cottage cheese.
- Slowly pour the buttermilk through the mesh sieve and then dump the butter curds in. Let sit for 1 to 2 minutes, allowing buttermilk to drip through. Gather the ends of the cheesecloth up and around the butter, pushing the curds down and into a ball. Twist the cheesecloth and squeeze the ball to extract as much buttermilk as possible. You will be left with a butterball.
- Pour the buttermilk into a separate container and reserve for another use. Place the butterball in the empty bowl. Be sure to squeeze out all excess butter from the cheesecloth. Pour 1/3 cup of ice water over the butter and, using a spatula, “wash” the butter, folding it over itself and pressing down to extract the extra buttermilk. Drain off the milky liquid and discard it; repeat this process until the liquid is clear, 4 to 6 times. The butter will start to harden; at that point your hands may work better than the spatula.
- Place the butter on a clean kitchen towel and pat lightly to remove excess moisture. Knead a few times with your hands and pat dry again; this will help extend its storage life. Sprinkle the finished butter with salt and knead a few more times to combine.
- Lay out a sheet of parchment paper, or two if you would like to divide the batch in half, and place the butter on the paper. Form the butter into a log and then roll it up in the paper and twist the ends to seal. Make sure the log has a uniform thickness throughout. Refrigerate until ready to use. The butter will last about a month in the refrigerator.
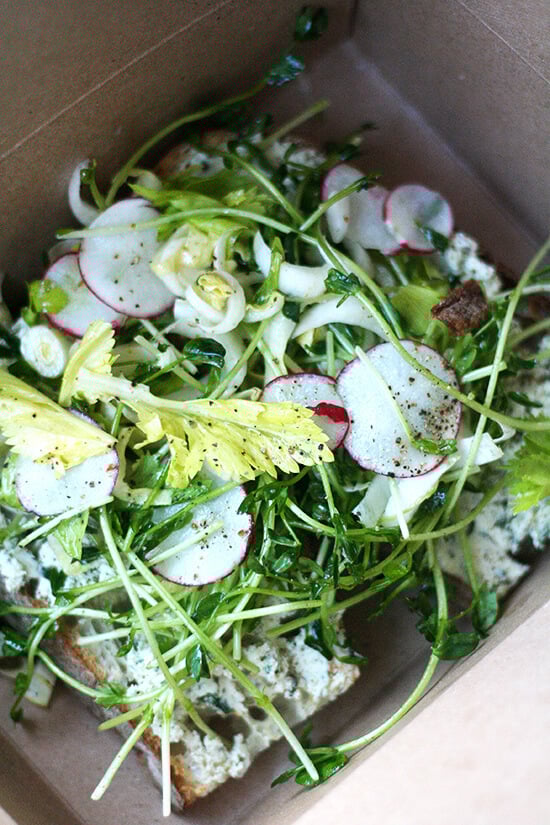
Lunch at South End Kitchen: a tartine of homemade herbed ricotta with pea shoots, endive, and herbs…delicious:

Lunch at Folino’s : wood-fired pizzas and the best IPA I have ever tasted from Fiddlehead Brewing Company . So fun to see you, Linds! (Pie bird from Chef Contos):
