Earlier this year, we found ourselves with visitors weekend after weekend, and so, to keep things simple, I found myself making the same things over an over again: often my favorite lentil soup , often chicken with parmesan and white wine , and always this kale salad.
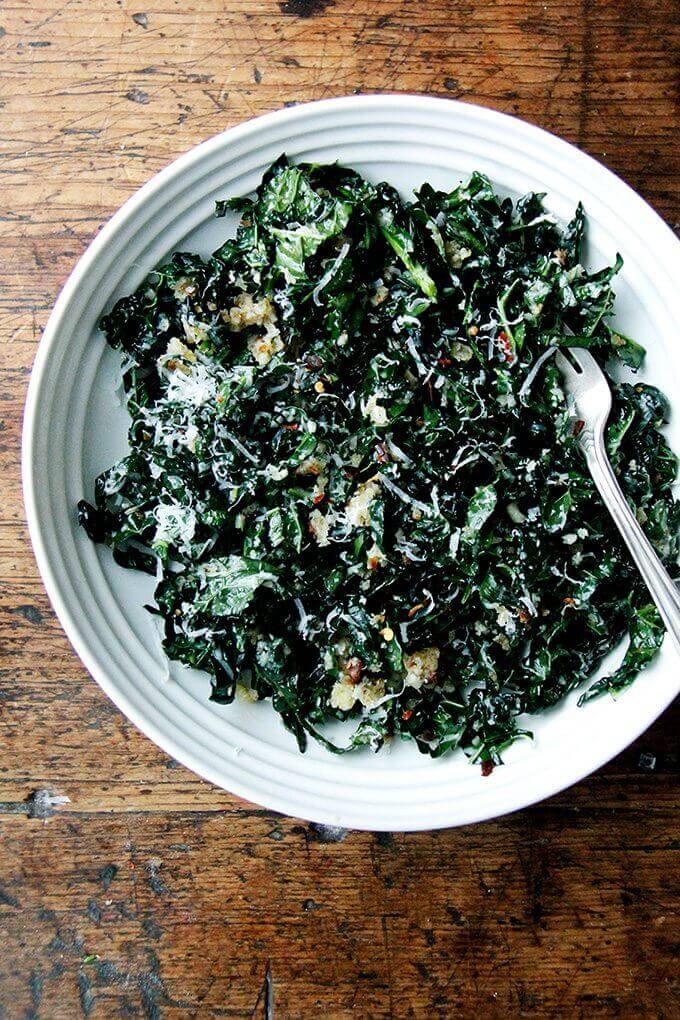
It’s simple: thinly sliced Tuscan kale + grated Parmigiano Reggiano + shallot vinaigrette. Until recently, I had never thought to dress kale with a shallot vinaigrette, always favoring something bolder or creamier, reasoning that kale’s tough leaves needed something more assertive. It turns out they don’t. When the ribs are removed from the leaves, and when the leaves are slivered, the pieces feel like confetti, light and tender. No massaging required.
If I have a hunk of days-old bread on hand, I’ll whizz it in the food processor, toast up the crumbs in olive oil, and add them to the mix, but often I leave them out.
Over the weekend, for a dear friend’s 40th birthday party, I made an enormous kale salad (no bread crumbs), a double batch of lentil soup, and many loaves of bread. Because I was making such a large quantity of everything, I pulled out the food processor to grate the cheese, then to mince the shallots for the dressing. It worked like a charm.
Yesterday, for a potluck at my kids’ preschool, I did the same thing, using the processor one more time for the crumbs. You absolutely do not need to use a food processor to make this salad, but should you find yourself making it for a crowd, it’s really handy. I’ve included the quantities for both a large and small batch of shallot vinaigrette in the recipe.
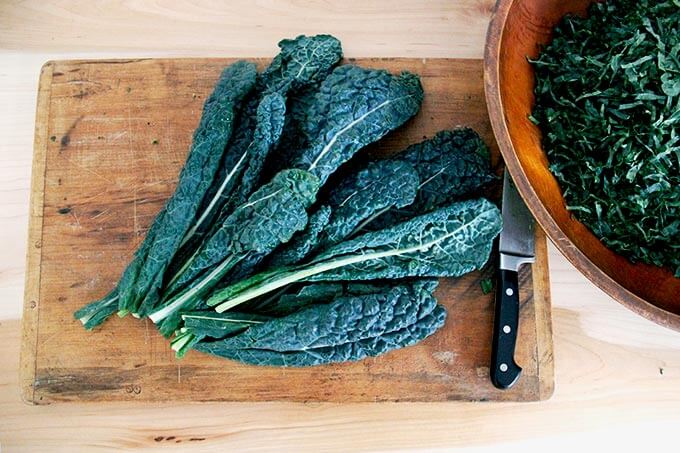
Here’s a visual play-by-play. Gather your Tuscan kale.
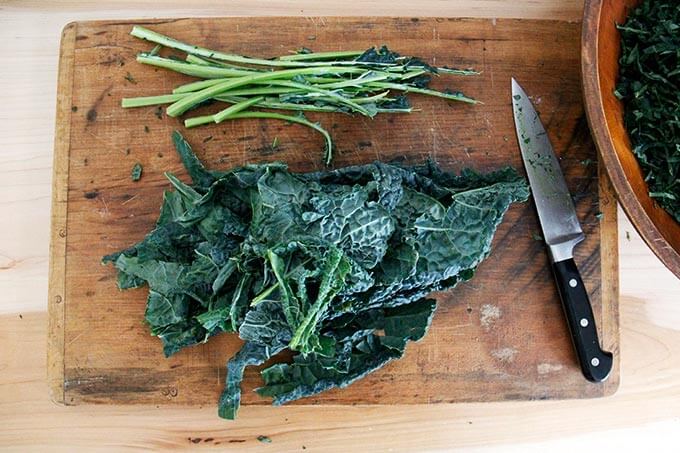
Remove the stems:
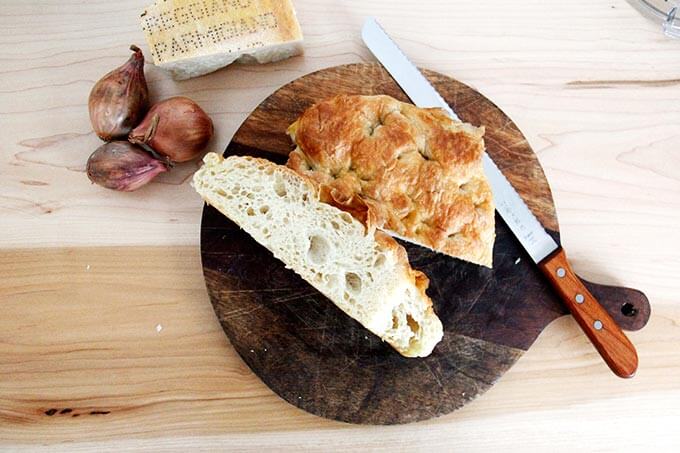
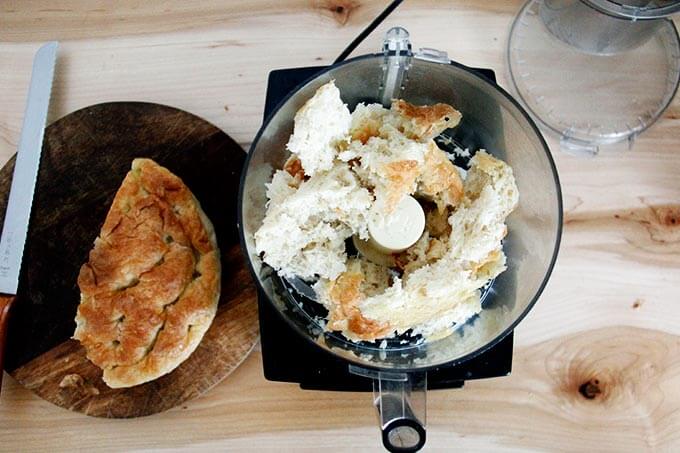
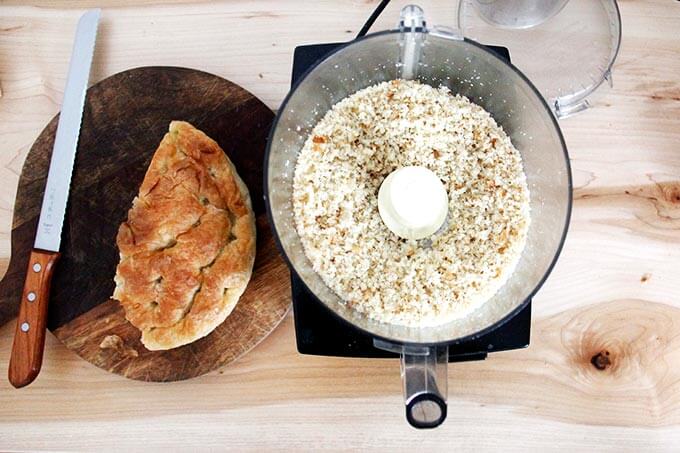
Gather your days-old bread, if making crumbs. This is the overnight focaccia . I used about half of one round for a very large salad.
Tear the bread into pieces and throw them in the food processor:
Whizz into crumbs:
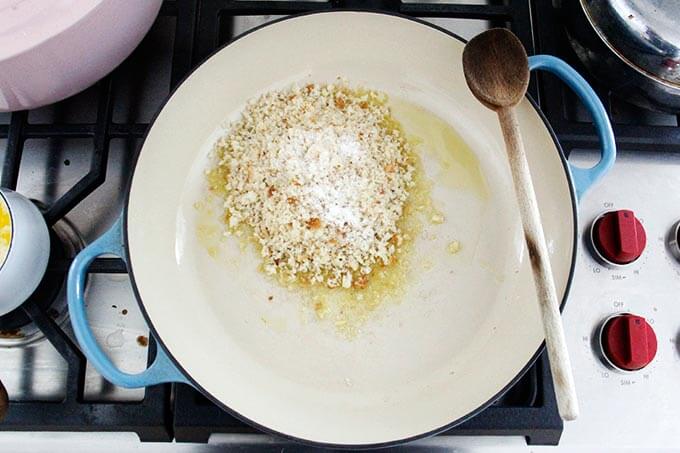
Toast the crumbs in olive oil and season with salt:
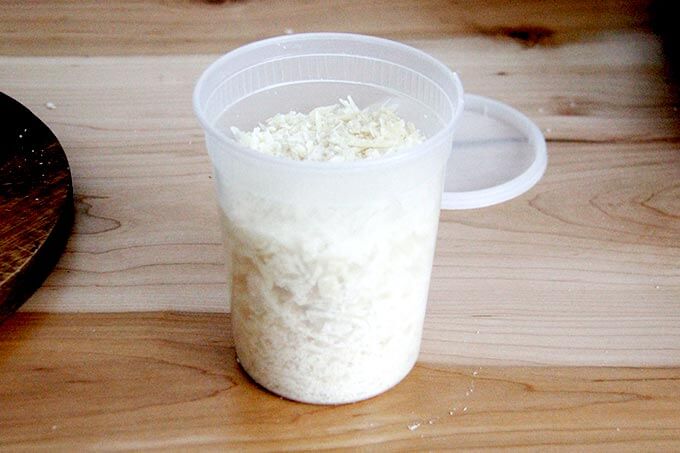
Don’t wash the processor! Give it a wipe, switch in the grating attachment, and send hunks of parmesan down the food chute:
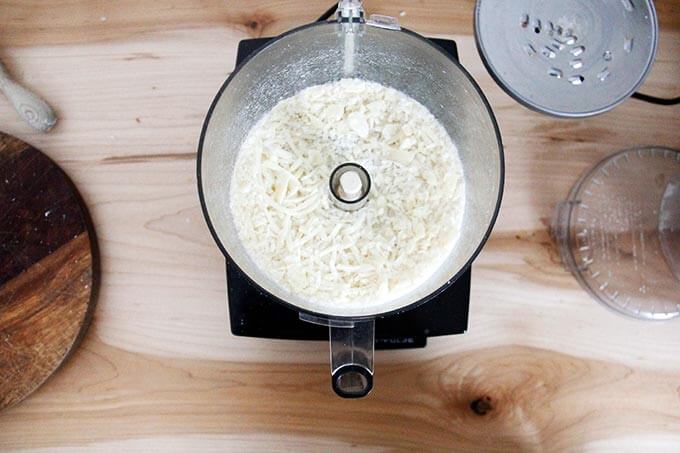
Ta da! And again, don’t wash the food processor! Give it a wipe …
and get going on the dressing:
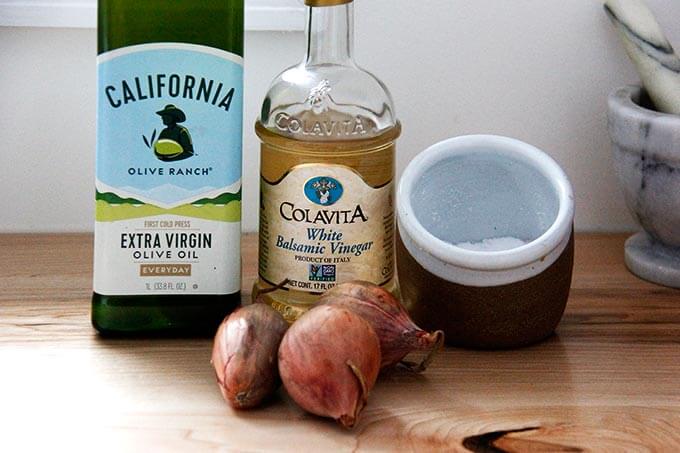
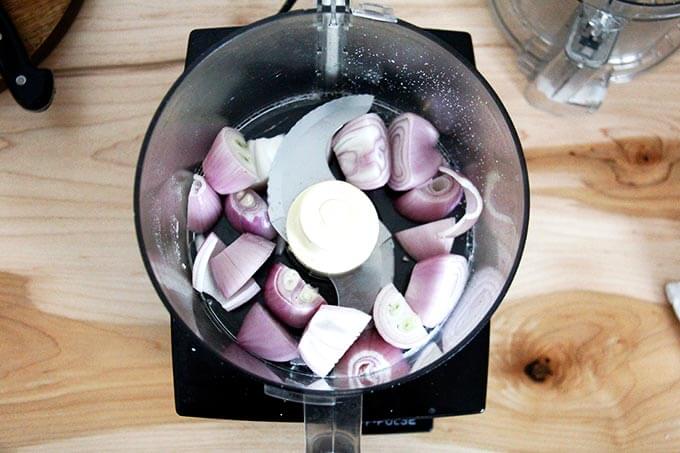
Peel the shallots:

Throw them in the food processor:
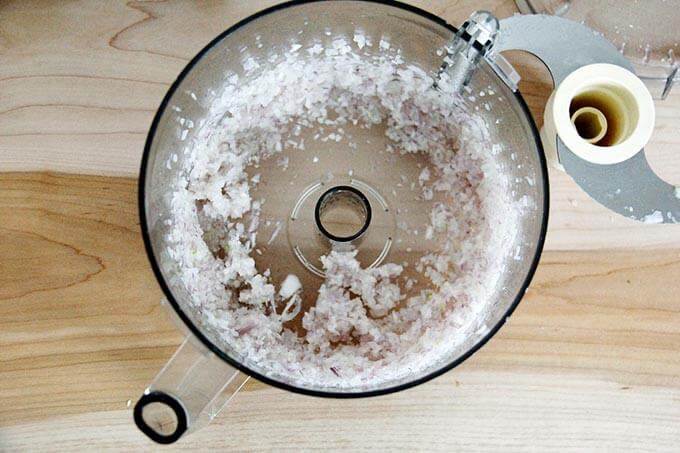
And whizz until fine. It’s now safe to wash your food processor. (You can also do this, of course, without a food processor.)
Soak the shallots in white balsamic vinegar for at least 15 minutes.
Whisk in the olive oil.
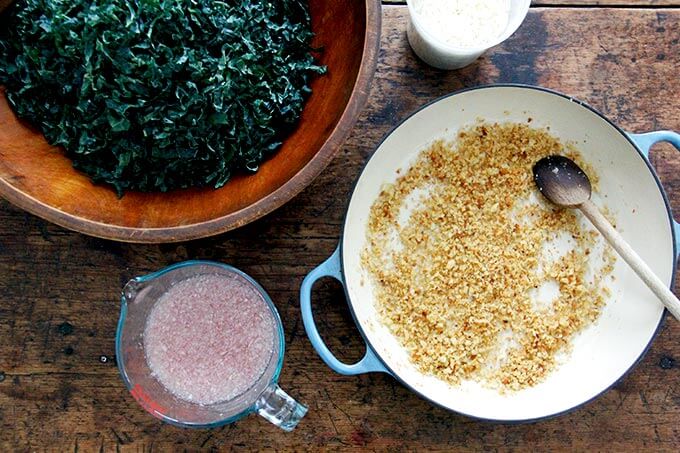
Gather your components: kale, parmesan, toasty crumbs, and shallot vinaigrette:
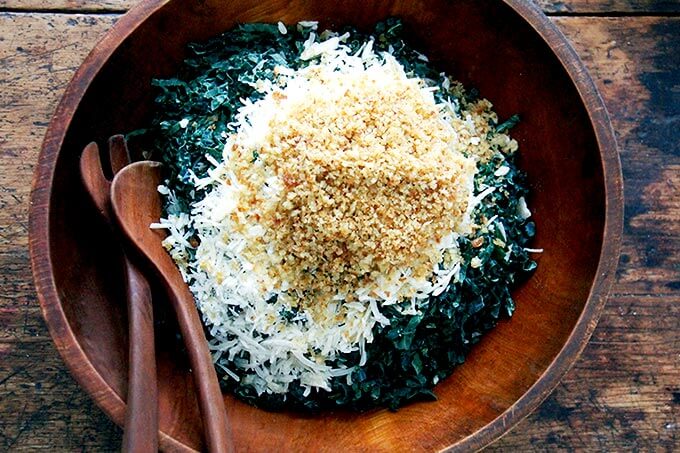
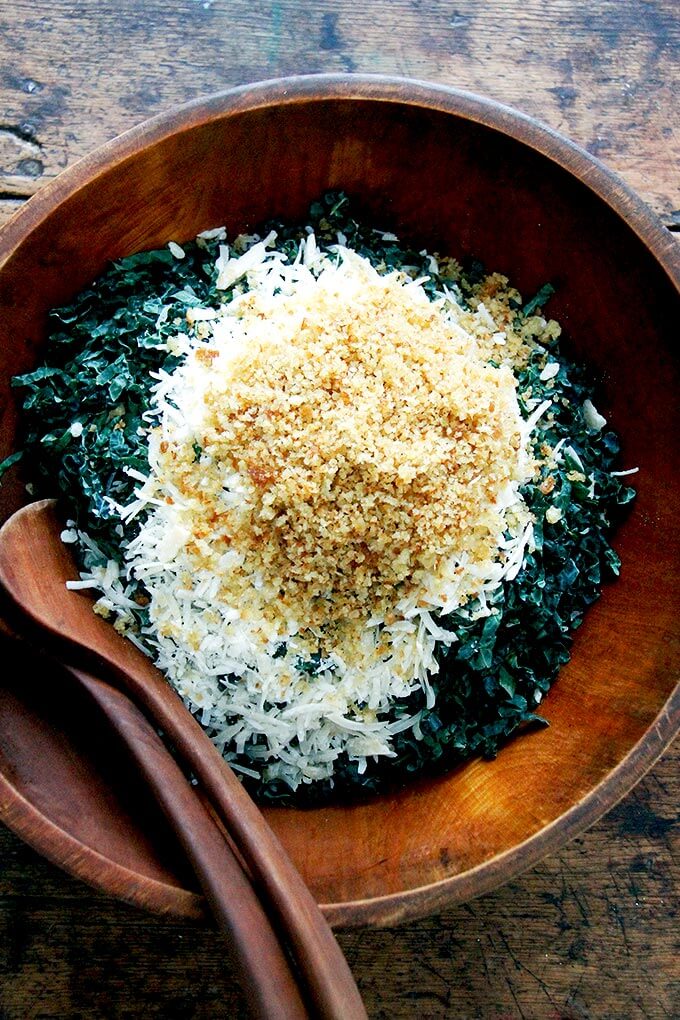
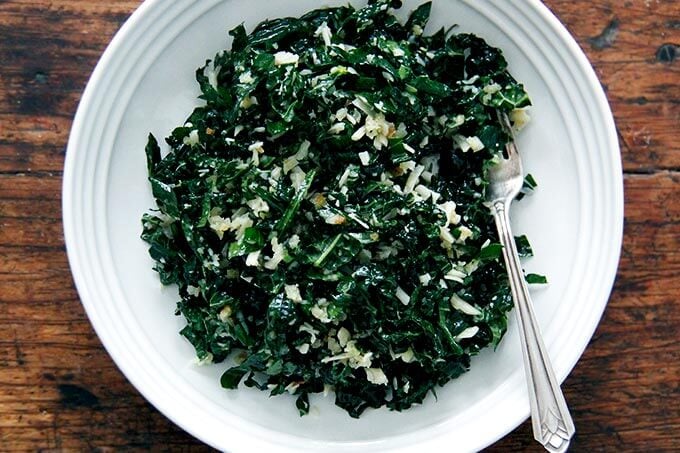
Toss and serve!
Description
- Tuscan kale, stems removed, leaves finely chopped. No need to massage.
- Grated Parmigiano Reggiano
- Shallot Vinaigrette. See notes below if you’d like to make a small batch.
- Optional: olive oil toasted bread crumbs
If you plan on using the food processor, as outlined above in the photos, this should be your order: bread crumbs, cheese, shallots, wiping with a tea towel between each use. Once the shallots are puréed and macerating in the vinegar, it’s safe to give the processor a rinse and tuck it away.
You absolutely do not need to use a food processor to make this salad. I’ve had two occasions this week that called for making an enormous salad, and so I found the food processor to be so handy. Entertaining or not, however, it’s so nice having a large batch of vinaigrette on hand. It will keep for weeks in your fridge.
for the toasted bread crumbs (totally optional):
- a large hunk of bread, to yield 1.5 to 2 cups lightly packed fresh crumbs, see notes
- 2 tablespoons extra-virgin olive oil
- 1/4 teaspoon kosher salt
for the large-batch shallot vinaigrette:
- 3 to 4 shallots, peeled and coarsely chopped
- 1 cup white balsamic vinegar, my preference is Colavita
- 1 to 2 teaspoons kosher salt
- 1 1/3 cups extra-virgin olive oil, my preference is California Olive Ranch
for assembly:
- Tuscan kale, however many heads you need, stems removed, leaves finely chopped
- grated Parmigiano Reggiano
- toasted bread crumbs, optional
- shallot vinaigrette to taste
- freshly ground black pepper
If you are using a food processor, this should be your order: crumbs, cheese, shallots:
- To make the crumbs: Place day-old bread in the food processor and purée until fine. Measure out 1.5 to 2 cups of crumbs. Heat the 2 tablespoons of oil over medium heat. Add the crumbs and the salt. Cook, stirring occasionally, until crumbs are golden brown. This could take 5 to 15 minutes (or longer) depending on your heat level. If you have the time, go slowly to prevent burning. When the crumbs are nice and golden, turn off the heat. Let cool briefly. Taste. Add more salt if necessary.
- To grate the cheese: Wipe out the processor, switch to the grating attachment, and pass hunks of cheese through the food chute.
- To make the shallot vinaigrette: Wipe out the processor. Place the shallots in the food processor and pulse until very finely chopped. Transfer shallots to medium bowl or 1-qt liquid measure. Cover with the balsamic vinegar and 1 teaspoon of the salt. Let stand for at least 15 minutes. Whisk in the olive oil slowly. Taste, adding more salt by the 1/2 teaspoon to taste. I always use 2 teaspoons. Vinaigrette will keep for weeks in the fridge.
- To assemble the salad: Place the finely chopped leaves in a large bowl. Top with however many toasted bread crumbs you would like. Top with however much cheese you would like. Give your vinaigrette a stir, then pour some of it over your greens. Give the salad a toss. Taste. Add more dressing if you wish. Add pepper to taste, if you wish, too.
Notes
Small Batch Dressing Quantities
1/4 cup finely minced shallots
1/4 cup white balsamic vinegar, I like Colavita brand
1/2 teaspoon kosher salt
1/3 cup extra virgin olive oil
Prep Time: 30 minutes
Category: Salad
Method: Toss
Cuisine: American
Earlier this year, we found ourselves with visitors weekend after weekend, and so, to keep things simple, I found myself making the same things over an over again: often my favorite lentil soup , often chicken with parmesan and white wine , and always this kale salad.
It’s simple: thinly sliced Tuscan kale + grated Parmigiano Reggiano + shallot vinaigrette. Until recently, I had never thought to dress kale with a shallot vinaigrette, always favoring something bolder or creamier, reasoning that kale’s tough leaves needed something more assertive. It turns out they don’t. When the ribs are removed from the leaves, and when the leaves are slivered, the pieces feel like confetti, light and tender. No massaging required.
If I have a hunk of days-old bread on hand, I’ll whizz it in the food processor, toast up the crumbs in olive oil, and add them to the mix, but often I leave them out.
Over the weekend, for a dear friend’s 40th birthday party, I made an enormous kale salad (no bread crumbs), a double batch of lentil soup, and many loaves of bread. Because I was making such a large quantity of everything, I pulled out the food processor to grate the cheese, then to mince the shallots for the dressing. It worked like a charm.
Yesterday, for a potluck at my kids’ preschool, I did the same thing, using the processor one more time for the crumbs. You absolutely do not need to use a food processor to make this salad, but should you find yourself making it for a crowd, it’s really handy. I’ve included the quantities for both a large and small batch of shallot vinaigrette in the recipe.
Here’s a visual play-by-play. Gather your Tuscan kale.
Remove the stems:
Gather your days-old bread, if making crumbs. This is the overnight focaccia . I used about half of one round for a very large salad.
Tear the bread into pieces and throw them in the food processor:
Whizz into crumbs:
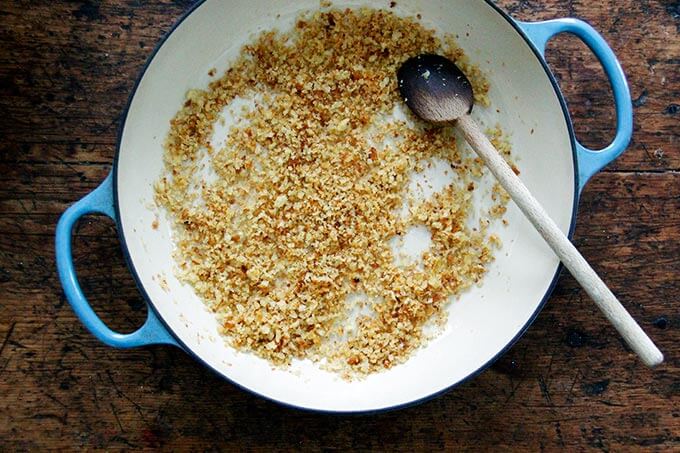
Toast the crumbs in olive oil and season with salt:
Don’t wash the processor! Give it a wipe, switch in the grating attachment, and send hunks of parmesan down the food chute:
Ta da! And again, don’t wash the food processor! Give it a wipe …
and get going on the dressing:
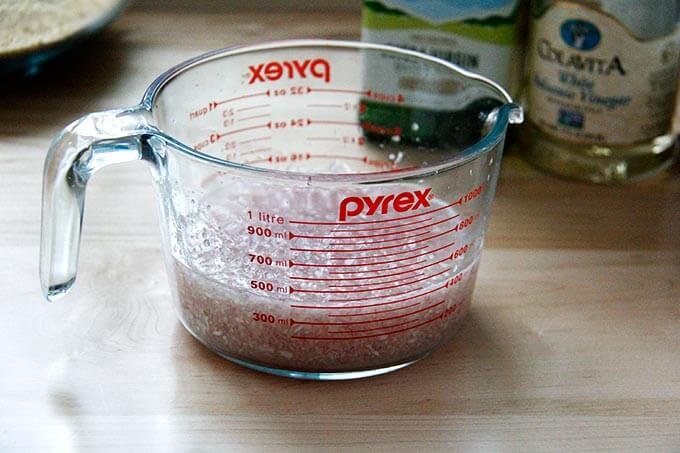
Peel the shallots:
Throw them in the food processor:
And whizz until fine. It’s now safe to wash your food processor. (You can also do this, of course, without a food processor.)
Soak the shallots in white balsamic vinegar for at least 15 minutes.
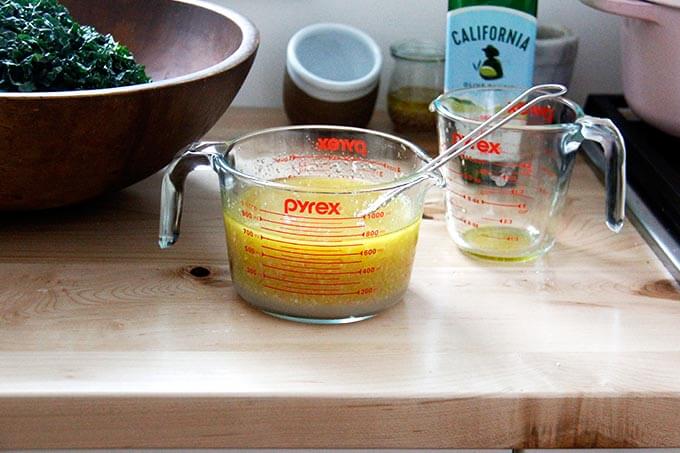
Whisk in the olive oil.
Gather your components: kale, parmesan, toasty crumbs, and shallot vinaigrette:
Toss and serve!
Description
- Tuscan kale, stems removed, leaves finely chopped. No need to massage.
- Grated Parmigiano Reggiano
- Shallot Vinaigrette. See notes below if you’d like to make a small batch.
- Optional: olive oil toasted bread crumbs
If you plan on using the food processor, as outlined above in the photos, this should be your order: bread crumbs, cheese, shallots, wiping with a tea towel between each use. Once the shallots are puréed and macerating in the vinegar, it’s safe to give the processor a rinse and tuck it away.
You absolutely do not need to use a food processor to make this salad. I’ve had two occasions this week that called for making an enormous salad, and so I found the food processor to be so handy. Entertaining or not, however, it’s so nice having a large batch of vinaigrette on hand. It will keep for weeks in your fridge.
for the toasted bread crumbs (totally optional):
- a large hunk of bread, to yield 1.5 to 2 cups lightly packed fresh crumbs, see notes
- 2 tablespoons extra-virgin olive oil
- 1/4 teaspoon kosher salt
for the large-batch shallot vinaigrette:
- 3 to 4 shallots, peeled and coarsely chopped
- 1 cup white balsamic vinegar, my preference is Colavita
- 1 to 2 teaspoons kosher salt
- 1 1/3 cups extra-virgin olive oil, my preference is California Olive Ranch
for assembly:
- Tuscan kale, however many heads you need, stems removed, leaves finely chopped
- grated Parmigiano Reggiano
- toasted bread crumbs, optional
- shallot vinaigrette to taste
- freshly ground black pepper
If you are using a food processor, this should be your order: crumbs, cheese, shallots:
- To make the crumbs: Place day-old bread in the food processor and purée until fine. Measure out 1.5 to 2 cups of crumbs. Heat the 2 tablespoons of oil over medium heat. Add the crumbs and the salt. Cook, stirring occasionally, until crumbs are golden brown. This could take 5 to 15 minutes (or longer) depending on your heat level. If you have the time, go slowly to prevent burning. When the crumbs are nice and golden, turn off the heat. Let cool briefly. Taste. Add more salt if necessary.
- To grate the cheese: Wipe out the processor, switch to the grating attachment, and pass hunks of cheese through the food chute.
- To make the shallot vinaigrette: Wipe out the processor. Place the shallots in the food processor and pulse until very finely chopped. Transfer shallots to medium bowl or 1-qt liquid measure. Cover with the balsamic vinegar and 1 teaspoon of the salt. Let stand for at least 15 minutes. Whisk in the olive oil slowly. Taste, adding more salt by the 1/2 teaspoon to taste. I always use 2 teaspoons. Vinaigrette will keep for weeks in the fridge.
- To assemble the salad: Place the finely chopped leaves in a large bowl. Top with however many toasted bread crumbs you would like. Top with however much cheese you would like. Give your vinaigrette a stir, then pour some of it over your greens. Give the salad a toss. Taste. Add more dressing if you wish. Add pepper to taste, if you wish, too.
Notes
Small Batch Dressing Quantities
1/4 cup finely minced shallots
1/4 cup white balsamic vinegar, I like Colavita brand
1/2 teaspoon kosher salt
1/3 cup extra virgin olive oil
Prep Time: 30 minutes
Category: Salad
Method: Toss
Cuisine: American
Find it online : https://alexandracooks.com/2018/03/15/favorite-kale-salad-large-batch-shallot-vinaigrette/
This versatile homemade harissa paste recipe uses fresh peppers and chilies rather than dried peppers and is every bit as authentic and delicious a traditional harissa sauce recipes. Though spice and heat are the paste’s predominant flavors, this harissa paste has sweet notes, too, thanks to the roasted peppers and near-caramelized onions, and a freshness lent by a healthy squeeze of lemon juice.
For years, I’ve wanted to make harissa paste at home, but every time I’ve set out to make it, I’ve been deterred by the process: many recipes that surface with a google search call for using dried chilies, which I can never find, and which, perhaps unfairly, I find to be a pain to work with.
A few weeks ago on a whim, I searched YouTube for homemade harissa recipes and was surprised to find a slew of videos demonstrating the process using fresh red bell peppers and fresh hot chilies as opposed to dried.
How promising?! I thought. But is using fresh peppers authentic? I worried . And more to the point, will harissa made with fresh peppers taste good?
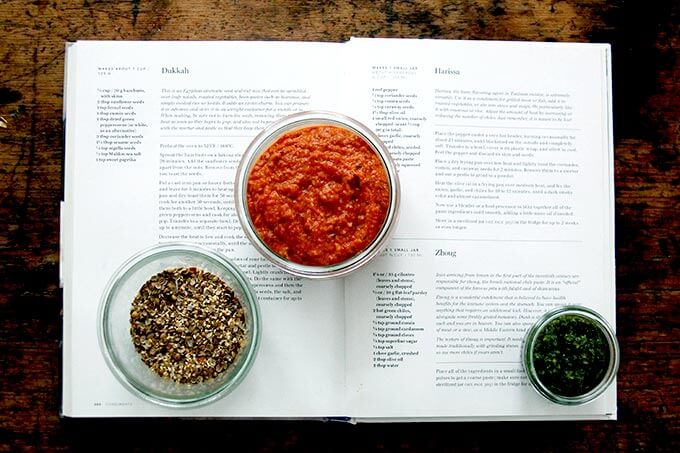
A few weeks later, I made skhug, and shortly thereafter, I found myself flipping through Jerusalem: A Cookbook in search of something else to drizzle it over, when I came to the condiments chapter and to a two-page spread that included dukkah , zhoug ( skhug !), and harissa all nestled together.
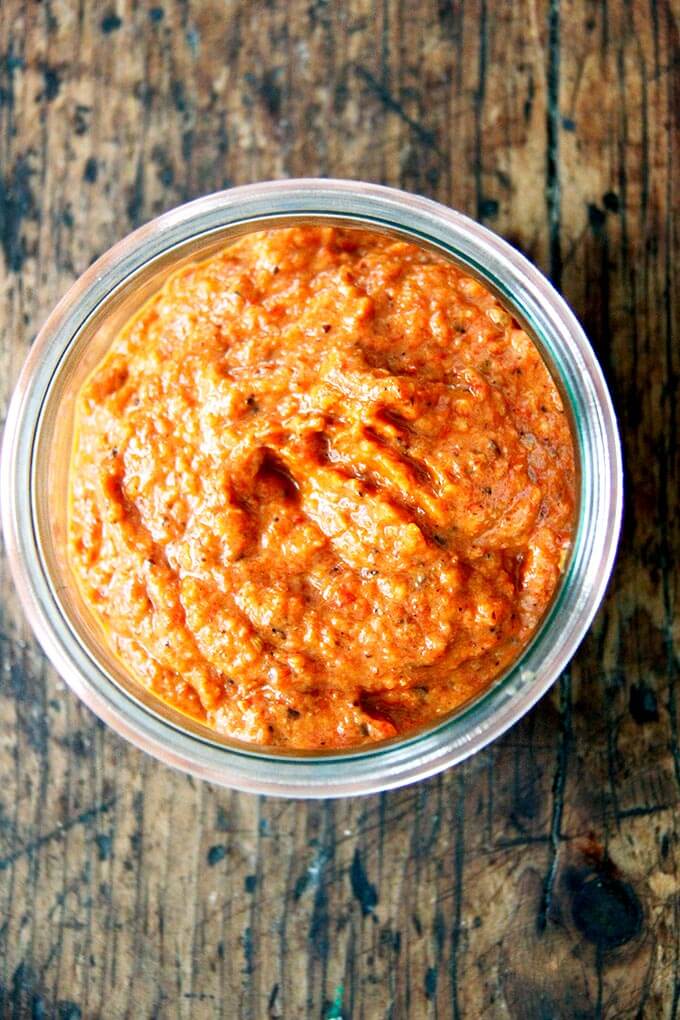
Homemade Harissa Paste with Fresh Peppers
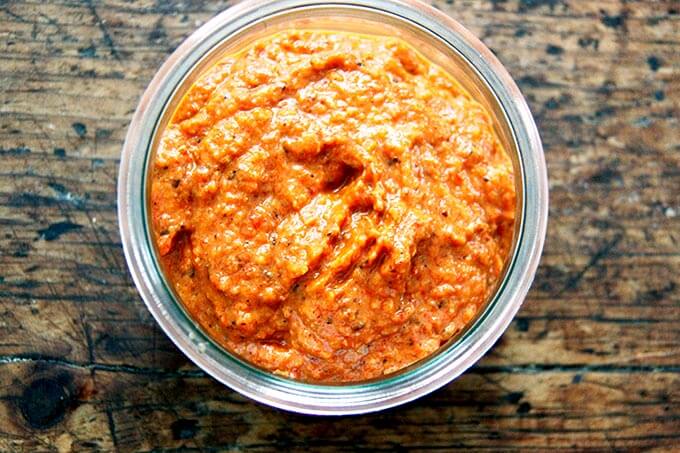
What struck me about the Jerusalem harissa recipe is that it, too, called for using fresh red bell peppers and fresh hot chilies. I gave it a go and was so pleased with the results: a brilliantly hued, fiery paste, carrying the flavors of smoky, toasted cumin and coriander.
Though spice and heat are the paste’s predominant flavors, it has sweet notes, too, thanks to the roasted peppers and near-caramelized onions, and a freshness lent by a healthy squeeze of lemon juice.
In sum, the three main components to this harissa paste include:
- roasted red peppers
- sautéed onions, garlic, and hot chilies
- toasted spices and lemon
But the more I look at other harissa recipes, the more I realize how similar in spirit they all are: in essence, harissa is a spicy, concentrated vegetable paste , typically seasoned with cumin, coriander, and caraway.
The concentrated paste could be created from any number of vegetables: dried, reconstituted chilies and roasted or steamed red bell peppers are common as are tomatoes, both fresh and sun-dried. That said, I’ve come across a number of a recipes that don’t include peppers at all.
All of this makes me wonder, what other vegetables could you cook down—could you concentrate into a paste—then season with toasted spices, and purée with the caramelized onions and garlic?
Making the harissa made me better understand skhug , which is made with fresh green chilies, fresh garlic, fresh herbs, toasted spices, and lemon—in essence, it’s a green, uncooked harissa.
It’s easy, I think, to overthink the process of making less-familiar condiments like harissa, to be worried about making something inauthentic, to let perfect be the enemy of good.
But if you make a paste that hits the notes of spicy, smoky, sweet, and sharp, you’ve likely got something on hand that’s going to work for you in that Moroccan tagine recipe you’ve been eyeing.
It is nearly impossible to page through a monthly cooking magazine or a new cookbook without finding one or two (or ten!) recipes calling for harissa-glazed this or harissa-braised that. And though it’s not a huge task anymore to locate ready-made harissa at the store, it’s nice to know how to make it at home.
Homemade harissa? Yes. You. Can.
Use Harissa Paste With:
- Leblebi: North African Chickpea Stew
- Moroccan Chicken and Rice
- Grated Carrot Salad with Harissa and Avocado
- Moroccan Rice with Dates and Oranges
- Smoky Grilled Chicken with Skhug and Yogurt Sauce
More Homemade Sauce Recipes
- Skhug, also known as: Green Harissa
- Sun-Dried Tomato and Spinach Pesto
- Basil Pesto
- The Only Green Sauce You Need
- Aioli Two Ways
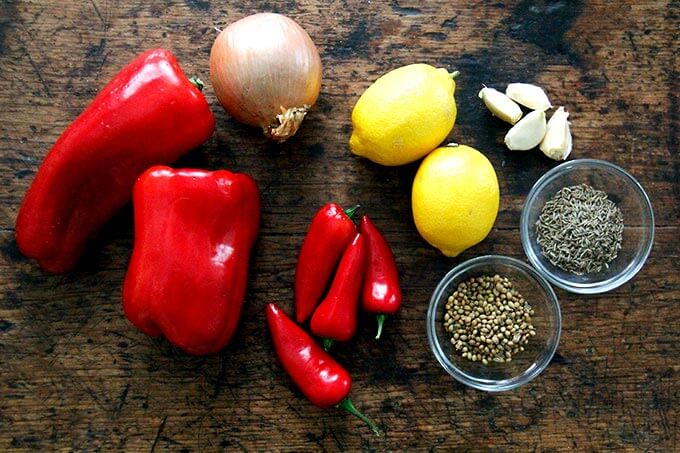
Here’s a play-by-play: Gather your ingredients.
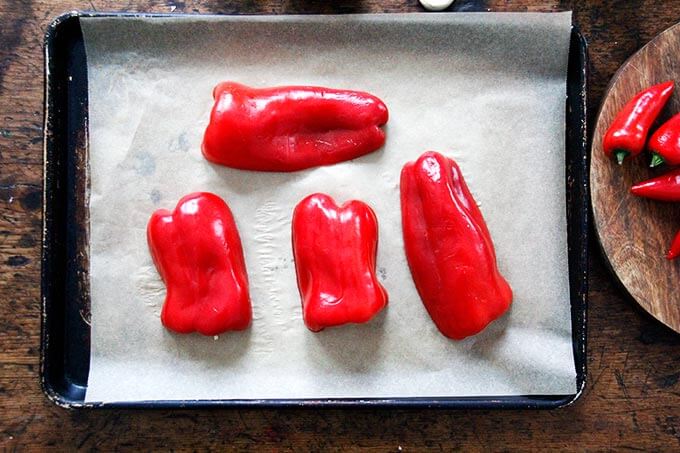
Roast peppers until charred.
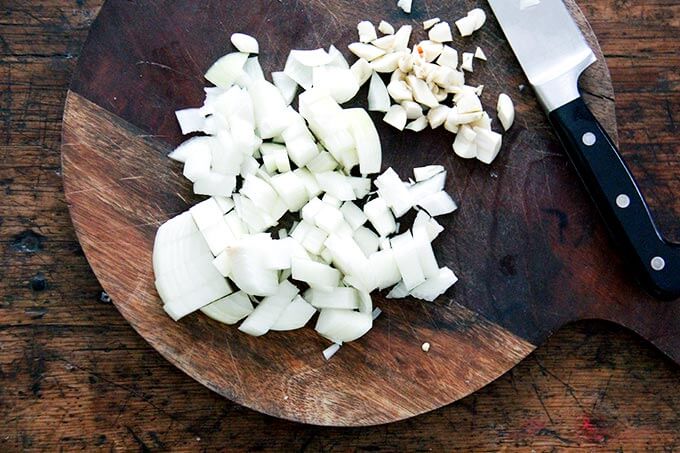
Meanwhile, chop onions and garlic. A coarse chop is fine.
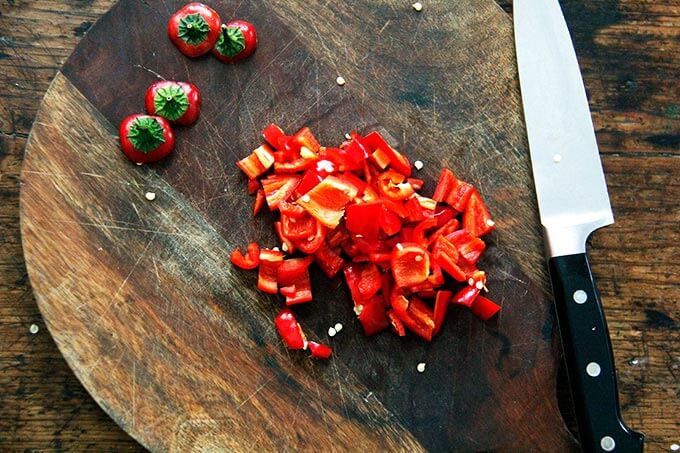
Chop some hot chilies, too. These are Fresnos, but I’ve used habaneros, too.
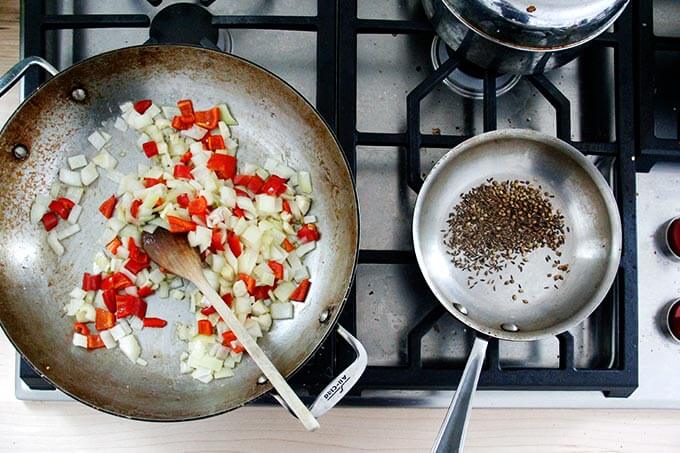
Sauté the onions, garlic, and chilies; toast some cumin and coriander seeds.
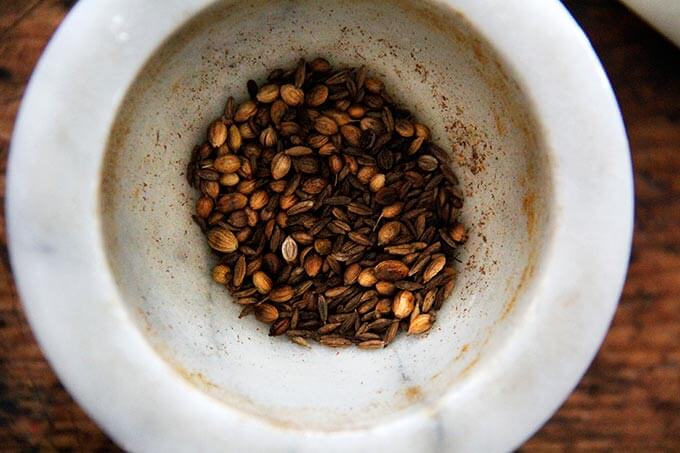
Grind the toasted seeds.
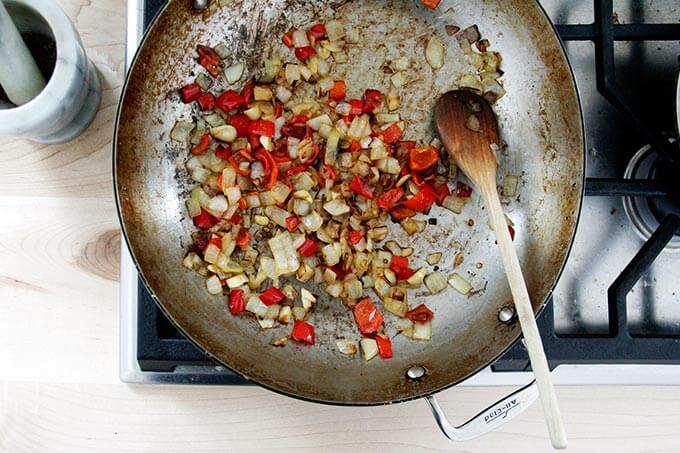
When the onion-pepper mixture begins to caramelize, it’s about done.
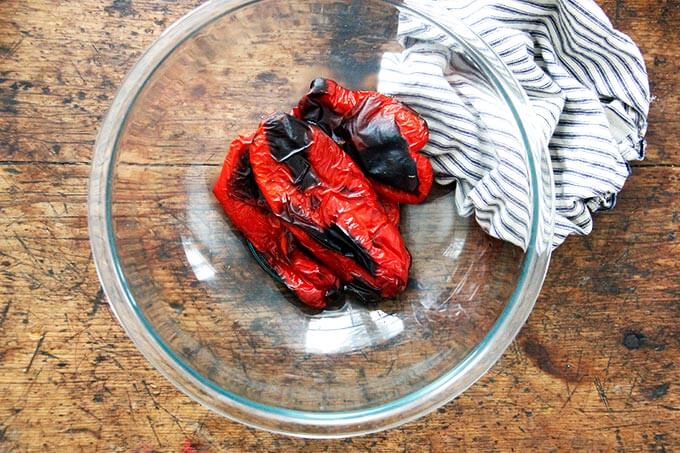
Transfer roasted peppers to a bowl.
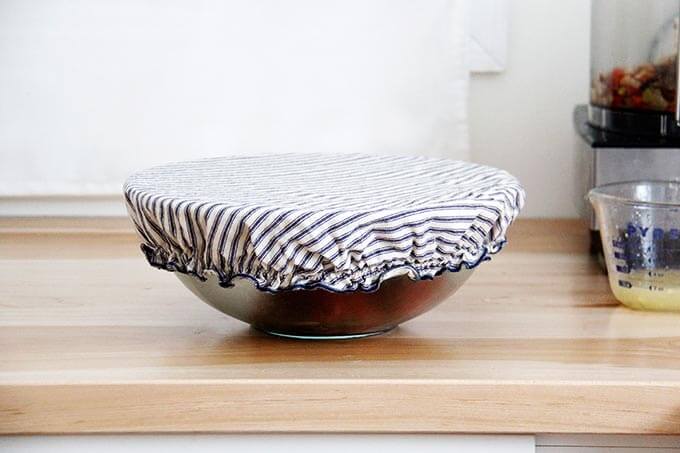
And cover it with a bowl cover or plastic wrap.
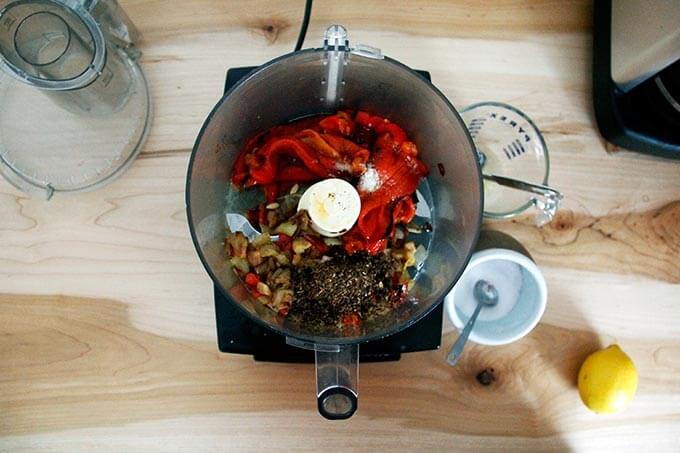
Throw everything—peeled roasted peppers, sautéd onions and chilies, toasted spices—in the food processor along with some salt and fresh lemon juice.
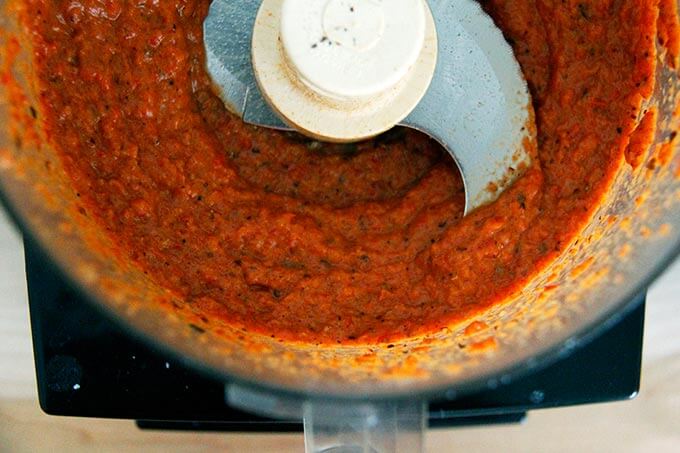
Purée until smooth, adding a splash of olive oil, and more salt and lemon to taste.
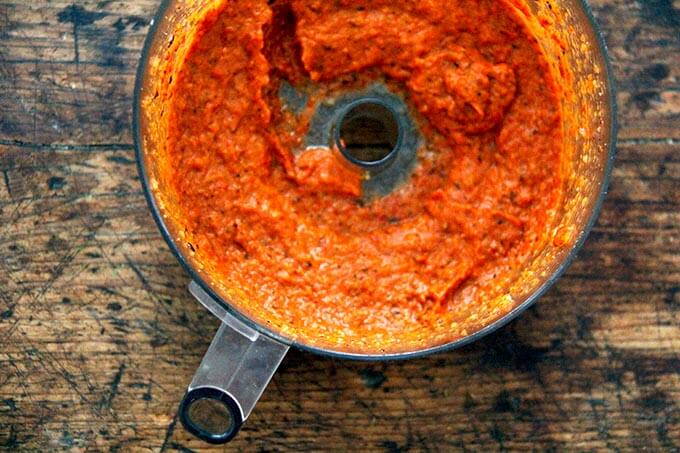
Harissa!
Description
From Yotam Ottolenghi and Sami Tamimi’s Jerusalem: A Cookbook .
I’ve made a number of small changes to the recipe, so if you’d like to view the original, find it here . Changes include: omit the caraway seed and tomato paste, use a white onion in place of a red (though a red onions will work fine), roast the peppers at 450ºF as opposed to broil.
Regarding chilies, I’ve used both Fresnos, as pictured here, and habaneros. Once when I made this, I seeded the peppers, and the resulting harissa tasted good but there was no heat to it. So now, I leave the hot chilies mostly with their seeds and membranes intact. It’s really hard to know how hot the harissa is going to be till the very end because chilies, even of the same variety, vary in their heat level. Tasting one raw beforehand will give you a sense, but it’s still hard to know exactly until the harissa is completely puréed. If you find your harissa to be incredibly spicy, you can either just use less of it in your recipes; or you could roast some more bell peppers, peel them, and purée them with your batch of harissa.
- 2 red bell peppers, halved, cored, and seeded
- 1 tsp coriander seeds
- 1 tsp cumin seeds
- 3 tbsp olive oil, plus more to taste
- 1 onion, coarsely chopped, to yield 1 to 2 cups
- 3 to 5 cloves garlic, coarsely chopped
- 3 hot red chiles, coarsely chopped, see notes
- 2 to 4 tbsp freshly squeezed lemon juice
- 1/2 teaspoon kosher salt plus more to taste
- Preheat the oven to 450ºF. Place the peppers on sheetpan lined with parchment paper. Roast until nicely charred nearly all around, 20-25 minutes. Transfer peppers to a bowl, cover with plastic wrap or a cloth bowl cover, and allow to cool. Peel the pepper and discard its skin.
- Place a small, dry frying pan over medium heat and toast the coriander and cumin seeds until they begin to darken and smell fragrant. Transfer them to a mortar and use a pestle to grind to a powder.
- Heat the olive oil in a large frying pan over medium heat, and fry the onion, garlic, and chiles for 10 to 12 minutes, until they begin to caramelize.
- Use a blender or a food processor to blitz together all of the ingredients until smooth, adding a little more oil if needed. I usually add another tablespoon. Taste. Adjust with more salt, lemon, or oil to taste.
- Store in a sterilized jar in the fridge for up to 2 weeks or even longer.
- Prep Time: 20 minutes
- Cook Time: 35 minutes
- Category: Condiment
- Method: Oven/Stovetop
- Cuisine: Middle Eastern/North African
