You don’t need any fancy equipment to make sourdough bread.
If you have a sourdough starter and some sort of baking vessel on hand, you can start baking. This sourdough focaccia recipe, for instance, requires nothing more than a sourdough starter and a 9×13-inch baking vessel or something similar.
If you find yourself, however, really getting into sourdough baking, and if, in particular, you’re after a crusty boule, you may want to pick up a few more pieces of gear.
Here are the tools and ingredients I find essential for sourdough bread baking.
10 Essential Tools for Sourdough Bread Baking
1. Sourdough Starter
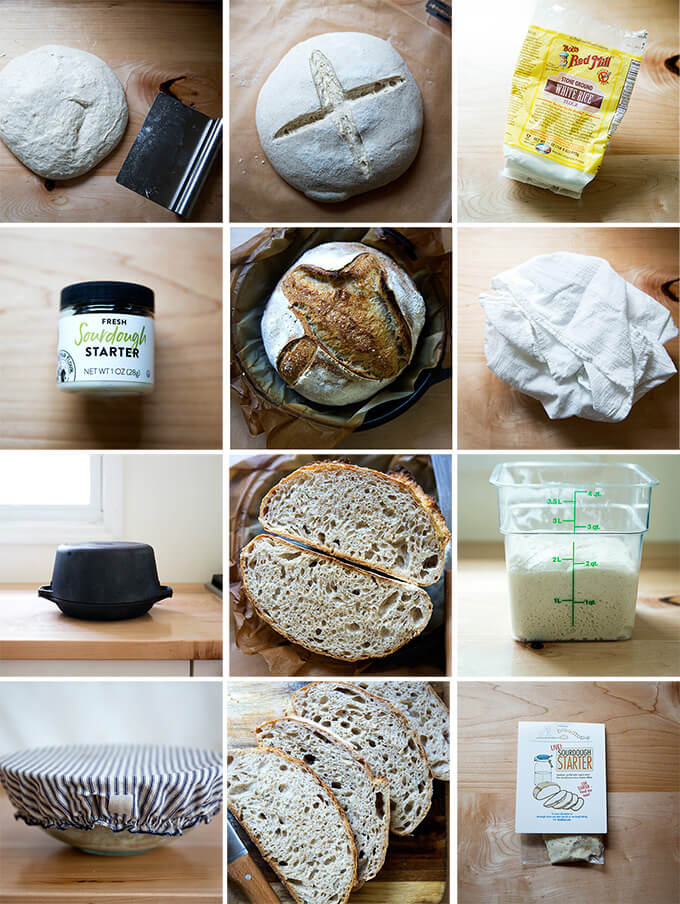
As you know, a sourdough starter is what distinguishes a loaf of sourdough bread from a loaf of yeast-leavened bread. For ease, you can buy (or procure) a starter as opposed to making one from scratch . If you know a sourdough baker, he or she most likely will share. If you don’t, here are two online sources:
- Breadtopia
- King Arthur Flour
2.Digital Scale
I say this all the time, but if you are serious about bread baking or baking in general, you must measure your ingredients with a digital scale. It’s the only way to truly accurately measure ingredients and to, in turn, make smart/informed changes based on your results. In fact, I will go so far as to say: do not attempt making sourdough bread without a digital scale on hand .
This scale costs under $15, is very accurate, and holds up to 11 pounds.
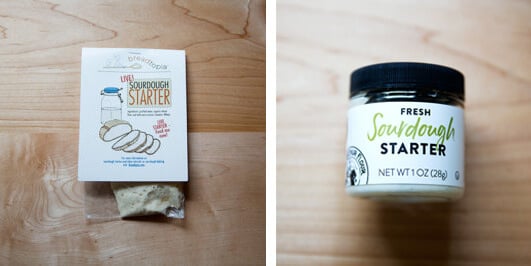
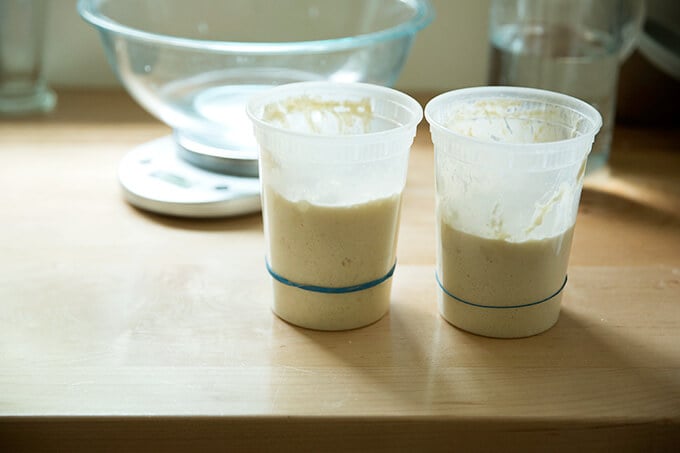
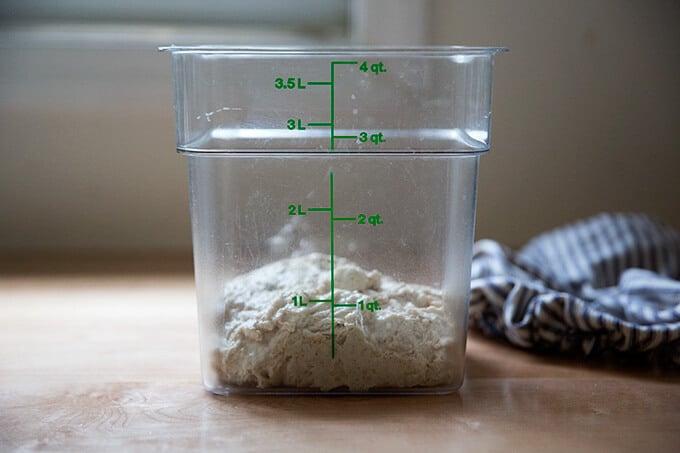
3.Clear, Straight-Sided Vessel
This 4-qt Cambro has become, after my scale, my most valued tool for sourdough baking. Why? It lets me see exactly when the dough has risen sufficiently (roughly 50% increase in volume) and is therefore ready to be shaped. When dough rises in a bowl, judging how much it has grown is tricky. There’s no question with a straight-sided vessel.
4.Non-Stick Flour-Sack Towels
I love these flour sack towels from Dot and Army. When you use flour sack towels, dough, even very high-hydration dough, releases without any sticking. These are also great.

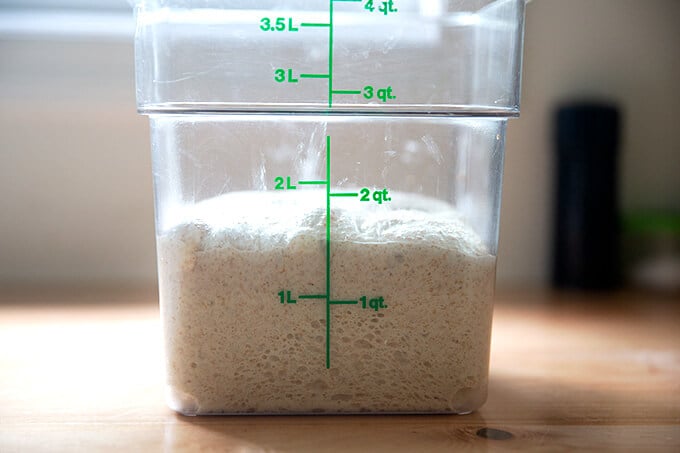
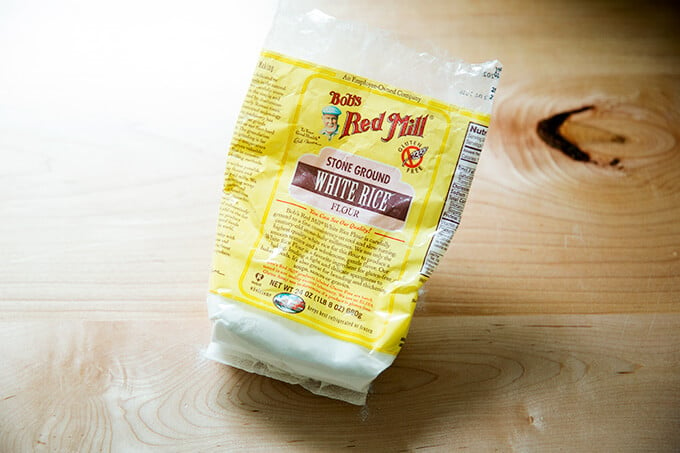
5.Rice flour
I sprinkle a little bit of rice flour on the flour sack towel before placing the shaped dough on it. It’s purely for looks — I like the contrast of the dusting of white flour against the auburn hue of the bread, and rice flour doesn’t burn the way wheat flour does. Before I discovered the flour sack towels, I used the rice flour to help prevent sticking with my tea towels, so you may find it helpful for that purpose as well.
6.Bench scraper for shaping.
I no longer flour a work surface for shaping. I rely on my bench scraper and minimal handling of the dough. See video here or below .
7.Parchment Paper
For ease in transferring dough from counter to Dutch oven, I rely on parchment paper .
8.Razor Blade
For slashing dough before it bakes, you’ll need a razor blade . I don’t do any fancy scoring, but it doesn’t matter. A simple X looks dramatic in the end.
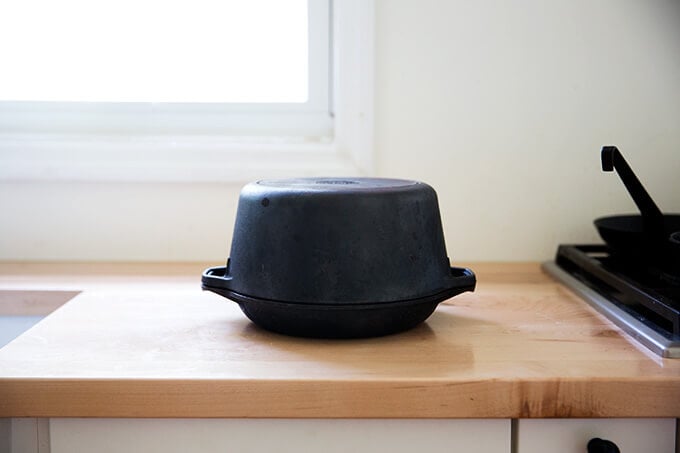
9.Double Dutch Oven
If you are after that crusty boule, you’ll need a Dutch oven. This one is durable and reasonably priced. This one is more of a splurge but beautifully designed with handles on top and great for making batards and other oblong-shaped loaves. If you have a Dutch oven, you can definitely use it, but keep in mind: you might not like what the hot temperature of the oven for an extended period of time does to it. My Le Creuset Dutch oven, for instance, turned very dark on both the exterior and interior and required a deep cleaning afterwards.
10.Oven Mitts
And if you’re going to be handling a screaming hot cast iron vessel, you’re going to need a good pair of oven mitts. These have been great.

A Few More Things
- Sharp Bread Knife
Crusty loaves require a good, sharp knife. This one is attractive and reasonably priced. This one is a little more expensive, but also nicely designed and sharp.
A large bowl for mixing the dough. Something like this is nice because it’s clear, which makes it easy to read the scale.
A spatula: Love my GIR Spatula .
You don’t need any fancy equipment to make sourdough bread.
If you have a sourdough starter and some sort of baking vessel on hand, you can start baking. This sourdough focaccia recipe, for instance, requires nothing more than a sourdough starter and a 9×13-inch baking vessel or something similar.
If you find yourself, however, really getting into sourdough baking, and if, in particular, you’re after a crusty boule, you may want to pick up a few more pieces of gear.
Here are the tools and ingredients I find essential for sourdough bread baking.
10 Essential Tools for Sourdough Bread Baking
1. Sourdough Starter
As you know, a sourdough starter is what distinguishes a loaf of sourdough bread from a loaf of yeast-leavened bread. For ease, you can buy (or procure) a starter as opposed to making one from scratch . If you know a sourdough baker, he or she most likely will share. If you don’t, here are two online sources:
- Breadtopia
- King Arthur Flour
2.Digital Scale
I say this all the time, but if you are serious about bread baking or baking in general, you must measure your ingredients with a digital scale. It’s the only way to truly accurately measure ingredients and to, in turn, make smart/informed changes based on your results. In fact, I will go so far as to say: do not attempt making sourdough bread without a digital scale on hand .
This scale costs under $15, is very accurate, and holds up to 11 pounds.
3.Clear, Straight-Sided Vessel
This 4-qt Cambro has become, after my scale, my most valued tool for sourdough baking. Why? It lets me see exactly when the dough has risen sufficiently (roughly 50% increase in volume) and is therefore ready to be shaped. When dough rises in a bowl, judging how much it has grown is tricky. There’s no question with a straight-sided vessel.
4.Non-Stick Flour-Sack Towels
I love these flour sack towels from Dot and Army. When you use flour sack towels, dough, even very high-hydration dough, releases without any sticking. These are also great.
5.Rice flour
I sprinkle a little bit of rice flour on the flour sack towel before placing the shaped dough on it. It’s purely for looks — I like the contrast of the dusting of white flour against the auburn hue of the bread, and rice flour doesn’t burn the way wheat flour does. Before I discovered the flour sack towels, I used the rice flour to help prevent sticking with my tea towels, so you may find it helpful for that purpose as well.
6.Bench scraper for shaping.
I no longer flour a work surface for shaping. I rely on my bench scraper and minimal handling of the dough. See video here or below .
7.Parchment Paper
For ease in transferring dough from counter to Dutch oven, I rely on parchment paper .
8.Razor Blade
For slashing dough before it bakes, you’ll need a razor blade . I don’t do any fancy scoring, but it doesn’t matter. A simple X looks dramatic in the end.
9.Double Dutch Oven
If you are after that crusty boule, you’ll need a Dutch oven. This one is durable and reasonably priced. This one is more of a splurge but beautifully designed with handles on top and great for making batards and other oblong-shaped loaves. If you have a Dutch oven, you can definitely use it, but keep in mind: you might not like what the hot temperature of the oven for an extended period of time does to it. My Le Creuset Dutch oven, for instance, turned very dark on both the exterior and interior and required a deep cleaning afterwards.
10.Oven Mitts
And if you’re going to be handling a screaming hot cast iron vessel, you’re going to need a good pair of oven mitts. These have been great.
A Few More Things
- Sharp Bread Knife
Crusty loaves require a good, sharp knife. This one is attractive and reasonably priced. This one is a little more expensive, but also nicely designed and sharp.
A large bowl for mixing the dough. Something like this is nice because it’s clear, which makes it easy to read the scale.
A spatula: Love my GIR Spatula .
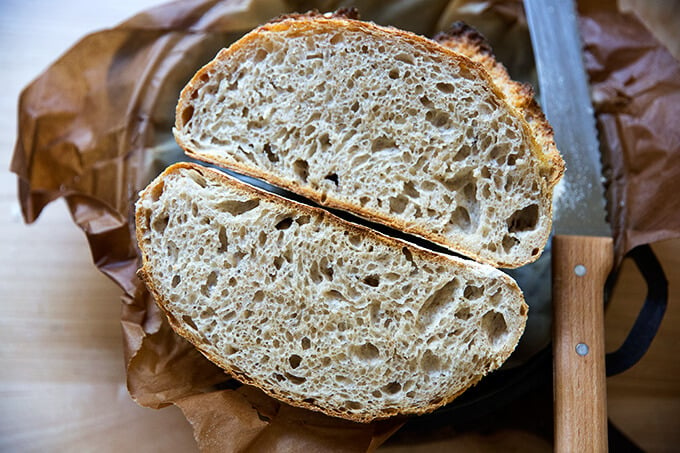
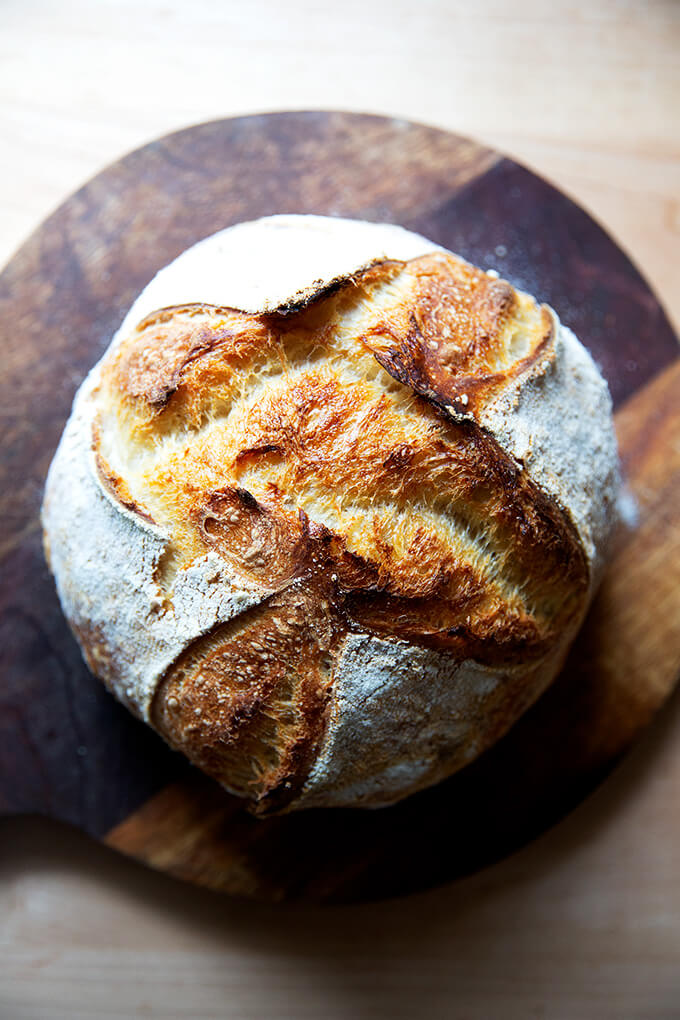
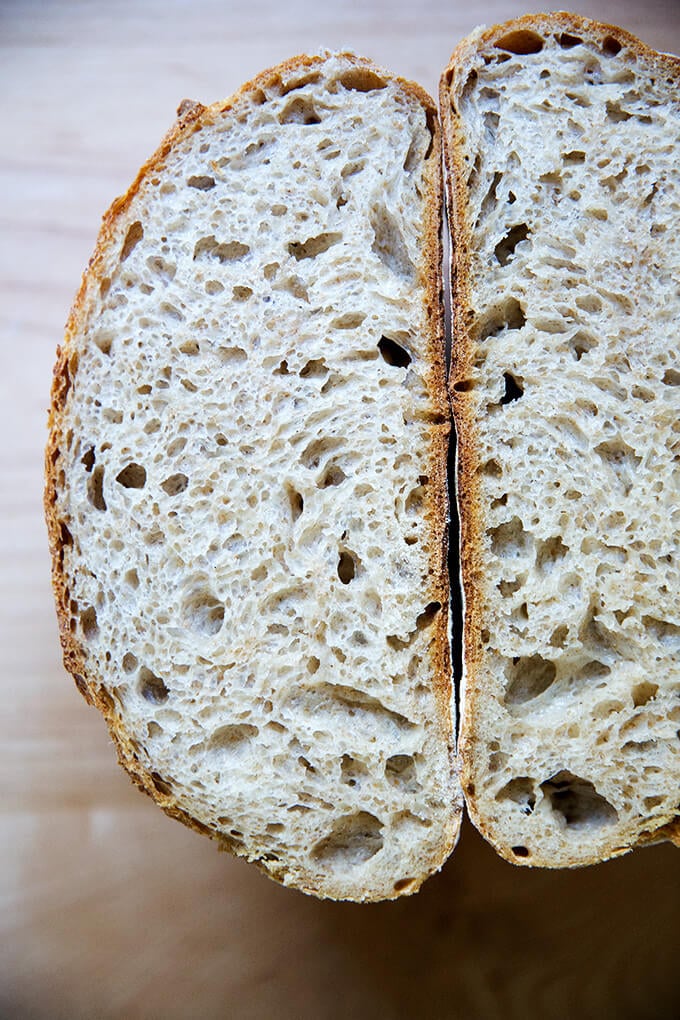
Made with a small portion of stone-milled whole wheat flour, this sourdough bread is so flavorful, aromatic, and tasty. Using a mix of both bread flour and whole wheat flour keeps the texture light while providing a nutritional boost and lovely flavor. 🍞🍞🍞🍞
If you are looking to add more nutrition to your bread, a logical first step is to replace some of the white flour with whole wheat flour. The trouble with this idea is that not all whole-wheat flours are created equal.
Let’s get straight to it. Most commercial flour (both white and whole wheat) is made from roller-milled wheat, meaning a roller mill has separated the wheat kernel into three parts: the endosperm, germ, and bran. White flour is made from the endosperm. Whole wheat flour is made from a combination of the endosperm, germ, and bran. Much research shows that as soon as the wheat kernel is separated into the various parts, much of the nutritional value is lost — even when the bran and germ are added in after the fact.
So what’s the solution? Seek out stone-milled flour, which is flour made from wheat that passes through a stone mill, the process of which keeps the endosperm, bran, and germ together. Much research shows that keeping the components together preserves the nutritional value.
What’s more, the bran and germ present in stone-milled flours lend so much by way of flavor, texture, aroma and hue:
The recipe below calls for a mix of both bread flour and stone-milled flour. Using a small amount of stone-milled flour gives your bread a boost of nutrition while preserving its light texture. Once you’ve made the recipe once, if you like what the whole wheat flour is contributing to your loaf, you can increase the proportion of stone-milled flour next time around.
How to Make Whole Wheat-ish Sourdough Bread, Step by Step
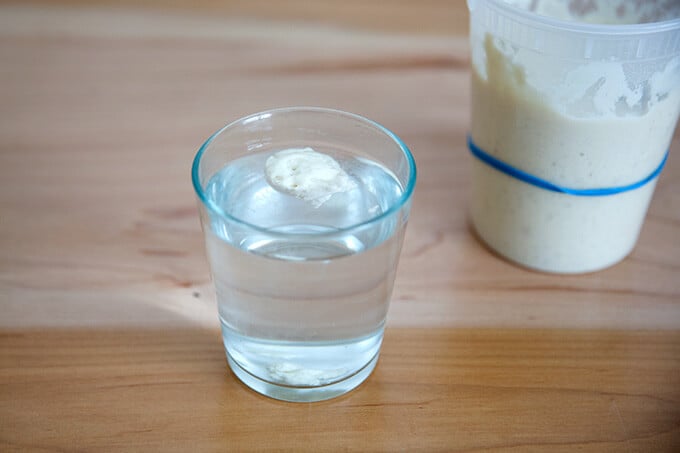
First, gather your ingredients: you need an active/fed sourdough starter:
To ensure it is ready, drop a spoonful into a glass of water. If it floats, it’s ready:
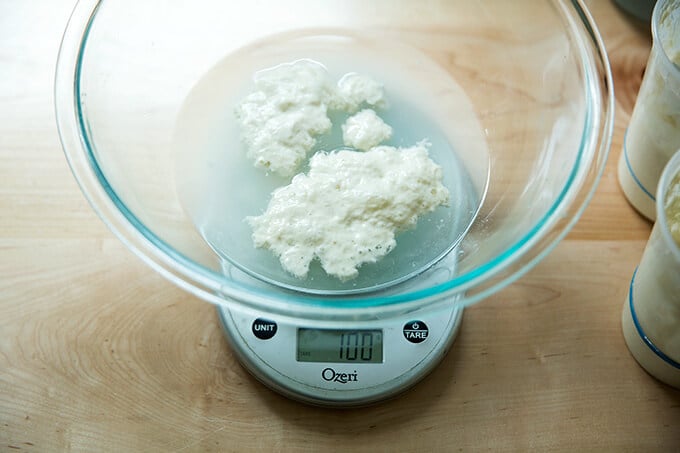
Place 300 g of water, 100 g of starter, and 10 g of salt into a bowl.
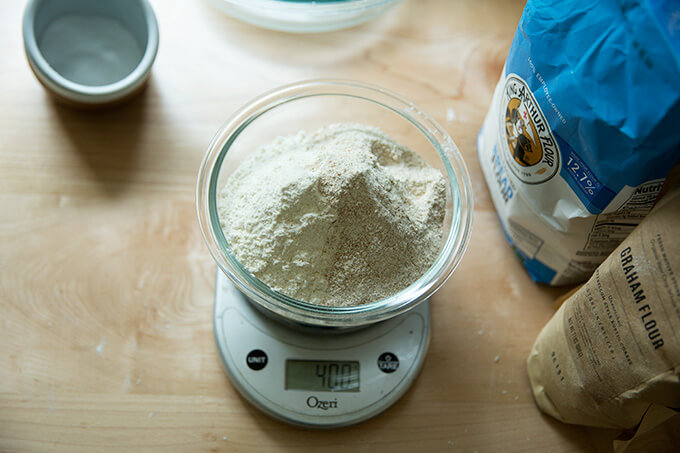
Next, weigh your flour: you need 400 grams of flour. For this whole-wheat-ish loaf, my preference is 350 grams of bread flour (King Arthur Flour) and 50 grams of stone-milled, freshly milled flour (I use a mix of Anson Mills rye and graham).

Mix until a sticky dough forms.
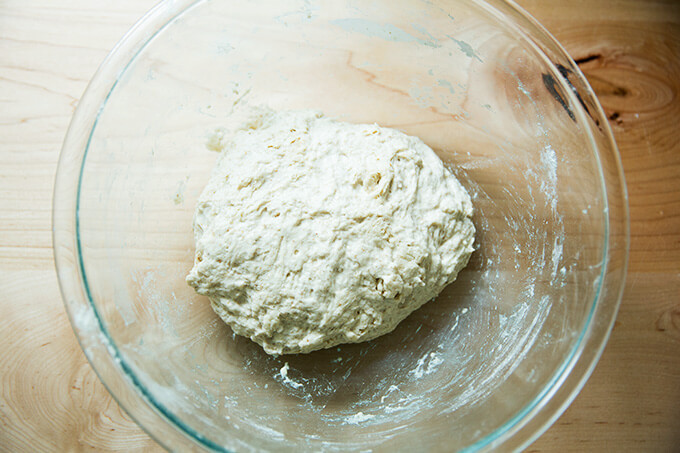
Then transfer to a straight-sided vessel for the bulk fermentation (the first rise).
After 30 minutes, stretch and fold the dough:
You’ll repeat this stretching and folding 3x at 30-minute intervals…
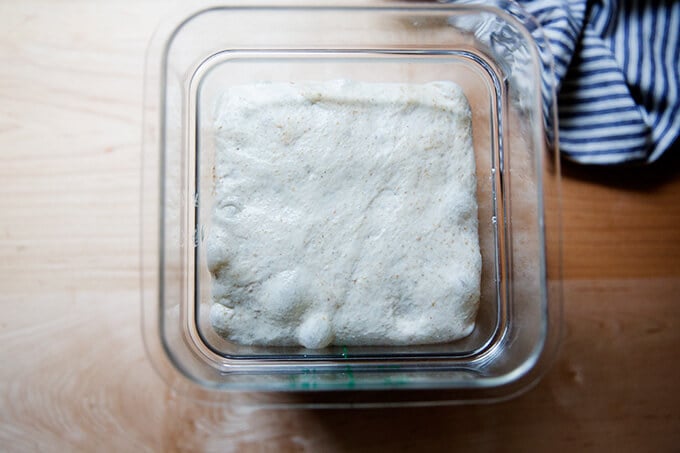
… then you’ll leave the dough to rise until it increases in volume by 50-75%:
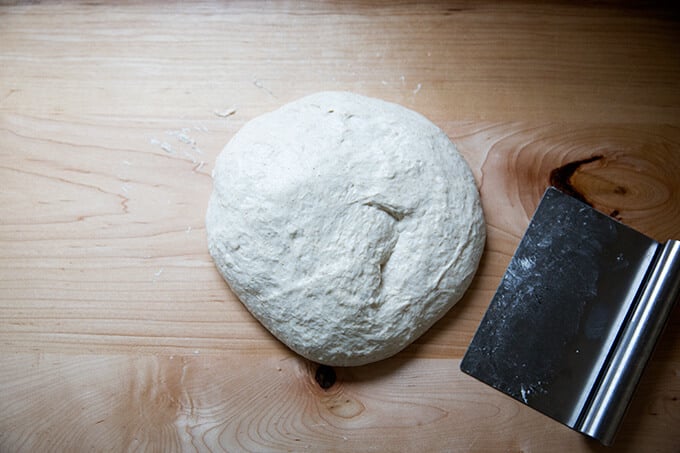
Transfer dough to a clean work surface. I prefer to use no flour and minimal handling to shape it into a ball.
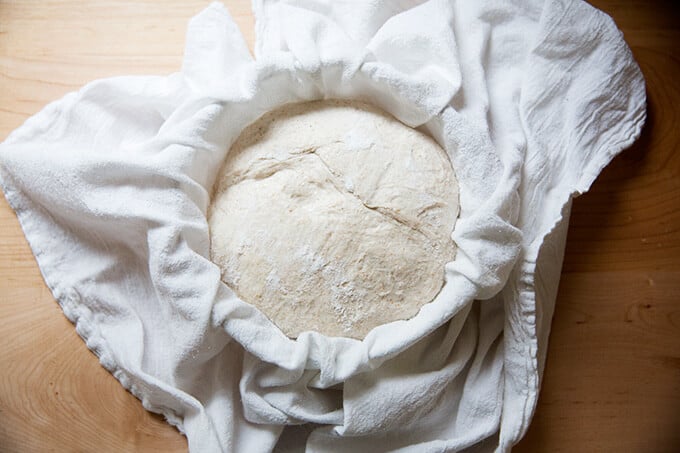
After the initial shape, let the dough rest for 20-40 minutes; then shape again and transfer to a flour sack-lined bowl.
Transfer bowl to fridge to proof (second rise) for 18 to 24 hours
After 18 to 24 hours, transfer dough to a sheet of parchment paper. This video shows how:
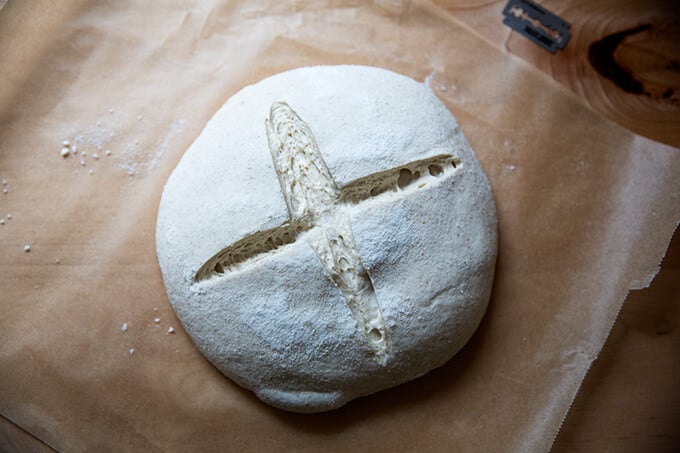
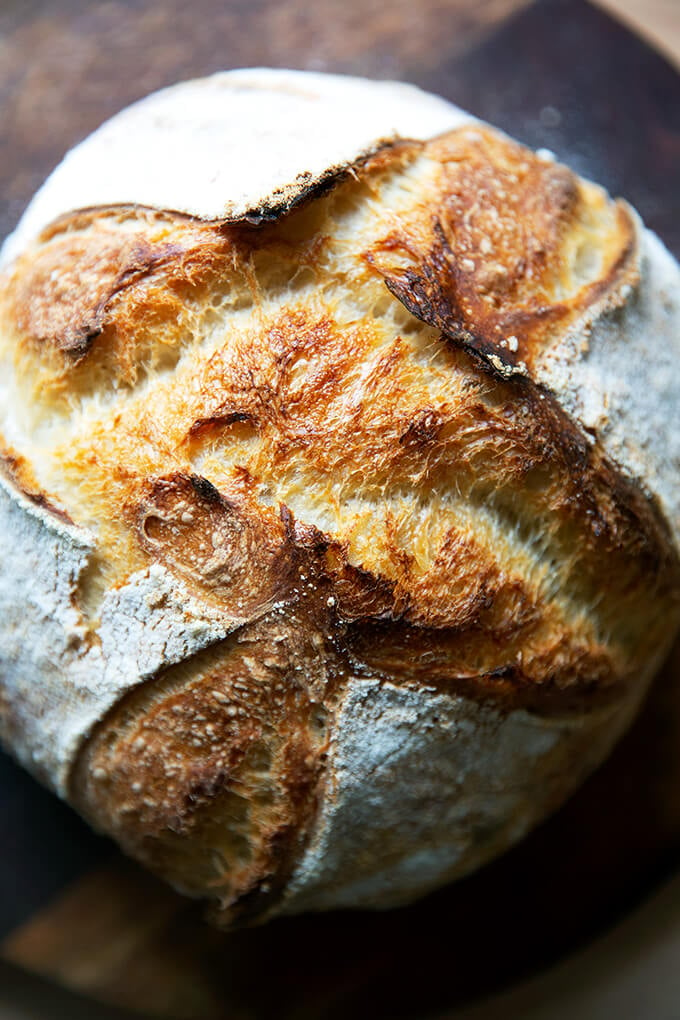
Score as you wish; simple is fine.
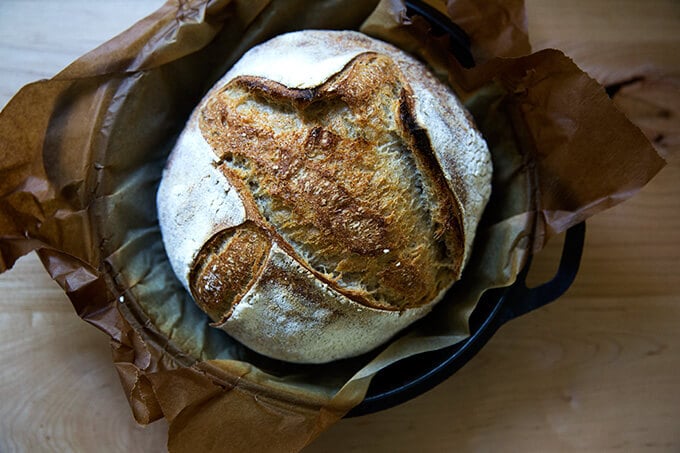
Transfer to a Dutch oven and bake, covered, at 450ºF for 30 minutes, then uncover and bake at 400ºF for 10 minutes.
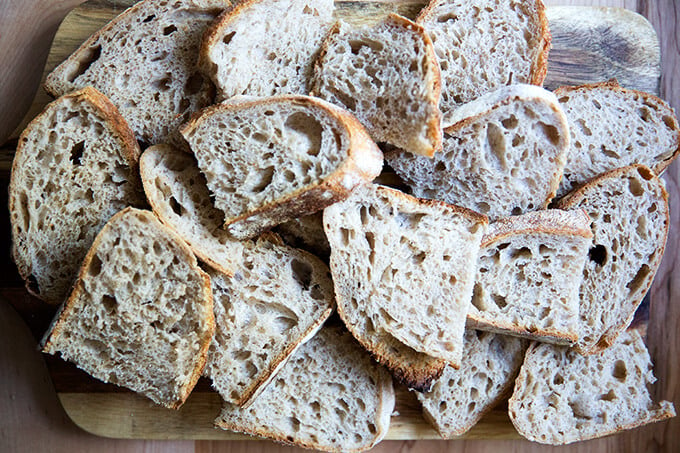
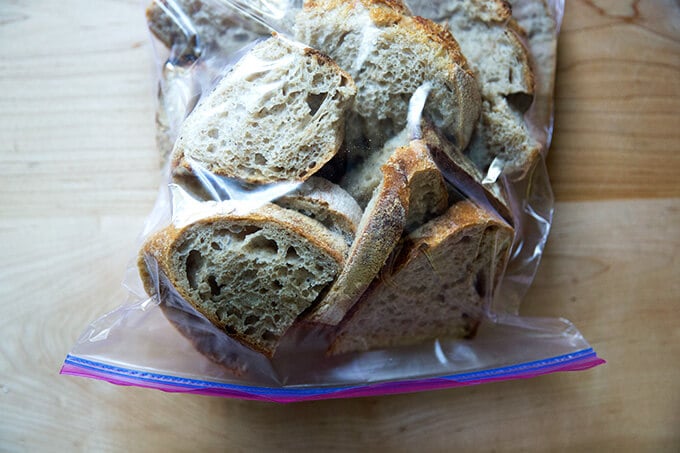
Store the bread at room temperature in a ziptop bag for 3 to 4 days or in the freezer for up to 3 months:
Description
Made with a small portion of stone-milled whole wheat flour, this sourdough bread is so flavorful, aromatic, and tasty. Using a mix of both bread flour and whole wheat flour keeps the texture light while providing a nutritional boost and more flavor.
Notes:
Special equipment: Straight-sided vessel for the bulk fermentation, Dutch oven , flour-sack towel
Digital Scale: Do not attempt this recipe without a scale. This one costs $10 . Troubleshooting what goes wrong with sourdough bread is impossible if you’ve measured with cups. They’re simply not accurate.
Troubleshooting: If you have issues with your dough being too sticky, please read this post: Why is my sourdough so sticky? The 4 common mistakes.
Flour:
- I prefer making this bread with 350g bread flour and 50g of freshly milled, stone-milled flour, which provides both flavor and color. I love using a mix of Anson Mills graham flour and rye flour, but there are many great stone-milled flours out there, and you may have a local source, which is even better. Where to buy stone-milled flour? In the past few years, it has become easier to find stone-milled flour, and if you are up for it, you should seek out locally, stone-milled flour. Why? Because if you’re buying locally milled flour, you likely can find out how recently it was milled. Because stone-milled flour perishes more quickly than roller-milled flour, it’s best if you can find a local source, which will ensure it will be fresh. Note: Store stone-milled flour in the freezer if you don’t bake regularly. I find locally milled stone-milled flours at a local co-op, Honest Weight Food Co-op, and I also order online from various sources. Here are a few I love: Cairnspring Mills, Anson Mills, and Community Grains 50g may seem like a tiny amount of stone-milled flour for this recipe, but I am constantly amazed by how much flavor this small amount of freshly milled flour adds.
Please read notes above before proceeding. Watching the video is helpful, too.
- 300 g water
- 100 g active sourdough starter
- 10 g kosher salt or sea salt
- 350 g bread flour, see notes above
- 50 g whole wheat flour, preferably stone-milled, see notes above
- rice flour, for dusting
- Mix the dough. In a large bowl, combine the water, starter, and salt. Stir with a rubber spatula to loosely combine. Add the flours, and stir with a spatula to combine — it will be a wet, sticky dough ball. Transfer to a straight-sided vessel and cover with a tea towel or bowl cover for 30 minutes.
- Stretch and fold . After 30 minutes, grab a corner of the dough and pull it up and into the center. Repeat until you’ve performed this series of folds 4 to 5 times with the dough. Let the dough rest for another 30 minutes and repeat the stretching and folding action. If you have the time, do this twice more for a total of 4 times in 2 hours. [ Video guidance here. ] Note: Even if you can only perform one series of stretches and folds, your dough will benefit. So don’t worry if you have to run off shortly after you mix the dough.
- Bulk fermentation: Cover the vessel with a tea towel or bowl cover and let rise at room temperature (70ºF/21ºC) for 4 to 18 hours (times will vary based on the time of year, the humidity, and the temperature of your kitchen). The bulk fermentation will end when the dough has nearly doubled in volume, and you can see bubbles throughout the dough and on the surface. (Note: Do not use your oven with the light on for the bulk fermentation — it is too warm for the dough. To determine when the bulk fermentation is done, it is best to rely on visual cues (doubling in volume) as opposed to time. A straight-sided vessel makes monitoring the bulk fermentation especially easy because it allows you to see when your dough has truly doubled.)
- Shape: Gently transfer the dough to a clean work surface. I prefer to use no flour and a bench scraper at this step, but if you find an unfloured work surface to be difficult, feel free to lightly flour it. [ Video guidance is especially helpful for this step .] Fold the dough, envelope style: top third over to the center; bottom third up and over to the center. Then repeat from right to left. Turn the dough over and use your bench scraper to push the dough up, then back towards you to create a tight ball. Repeat this pushing and pulling till you feel you have some tension in your ball. Place the dough ball top side down and let rest 30 to 40 minutes. ( FYI: This is called the bench rest. )
- Proof. Line a shallow 2-qt bowl (or something similar) with a tea towel or flour sack towel . Flour sack towels are amazing because the dough doesn’t stick to them, and therefore, you need very little rice flour, but if you only have a tea towel, you will be fine. If you are using a tea towel, sprinkle it generously with rice flour. If you are using a flour sack towel, you can use a lighter hand with the rice flour. After the 30-to 40-minute bench rest, repeat the envelope-style folding and the bench scraper pushing and pulling till you have a tight ball. [ Video guidance here .] Place the ball top side down in your prepared towel-lined bowl. Cover bowl with overhanging towel. Transfer bowl to the fridge for 12 to 24 hours. (Note: When you remove your dough from the fridge, visually it will likely look unchanged. This is OK. You do not need to let it then proof at room temperature before baking.)
- Bake. Heat oven to 500ºF. Remove your sourdough from the fridge. Open the towel. Place a sheet of parchment over the bowl. Place a plate over the parchment. With a hand firmly on the plate and one on the bowl, turn the dough out onto the parchment-paper-lined plate. [ Video guidance here. ] Carefully remove the bowl and towel. Carefully remove the plate. Brush off any excess rice flour. Use a razor blade to score the dough as you wish. I always do a simple X. Grab the ends of the parchment paper and transfer to the Dutch oven. [ Video guidance here .] Cover it. Lower oven temperature to 450ºF, bake covered for 30 minutes. Uncover. Lower the temperature to 400ºF. Bake for 10 minutes more or until the loaf has darkened to your liking. Transfer the loaf to a cooling rack.
- Cool. Let the loaf cool for at least 30 minutes before cutting.
- Prep Time: 48 hours
- Cook Time: 45 minutes
- Category: Bread
- Method: Sourdough
- Cuisine: Global
