This duck leg confit recipe bucks tradition, calling for three ingredients and three hours of time. You don’t need a supply of duck fat; you don’t need to devote three days of your life. This recipe and method will yield restaurant-worthy duck leg confit as well as a supply of duck fat to keep on hand for future duck leg confit experiments.
What is Duck Confit?
Confit is an ancient method of preserving, born out of necessity: by salting meat, cooking it, and storing it in fat, it could keep without refrigeration for months on end.
Today, the method is no longer used (typically) to preserve meat, though it still yields incredibly tasty meat.
For duck leg confit, duck legs first cook slowly in salt and fat till the meat is nearly falling off the bone. Before serving, the legs are crisped in a pan till golden all over.
3-Ingredient, 3-Hour Duck Leg Confit: The Story
On January 23rd, 2006, two cases of duck legs arrived at Fork , the restaurant where I was working, and per the day’s to-do list, I threw them into hotel pans, covered them with a layer of kosher salt, then headed to the walk-in to find the duck fat.
This was how we made duck confit at Fork: 1 case of duck legs per hotel pan, liberal coating of kosher salt, duck fat submergence, tight covering of aluminum foil, two and a half hours in the oven.
But when I got to the walk-in, I couldn’t find the duck fat. I looked and looked. I had made the mistake more than once of declaring we were out of something when we weren’t, and so I looked some more. Shit, I thought.
But before running to the chef, Thien Ngo, I looked and looked again. It had to be there. I was positive this was the greatest conspiracy of the inanimate I had ever faced. There was no way two 8-quart tubs of duck fat had walked out of that walk-in.
But after awhile, I had to tell Thien. He looked too. He couldn’t find it. We suspected it had been tossed. There had been a lot of turnover in the kitchen staff in recent weeks, and it was likely someone had innocently trashed the duck fat, a supply Thien had been building for eight years, a supply that grew more flavorful with every use, the key ingredient to one of the restaurant’s staple dishes.
After Thien berated me for allowing this to happen, noting that this — me! — was why he could never take a vacation — oh, the drama! — let alone a day off, he set to work rectifying the situation.
Into each hotel pan he tossed pounds and pounds and pounds of butter along with a few sprigs of thyme and lots of salt. Then he cooked the legs just the same: tightly covered with foil for two-and-a-half hours. And when those legs emerged from the oven, we stored them just the same: legs in one tub; fat, clearly labeled, in another.
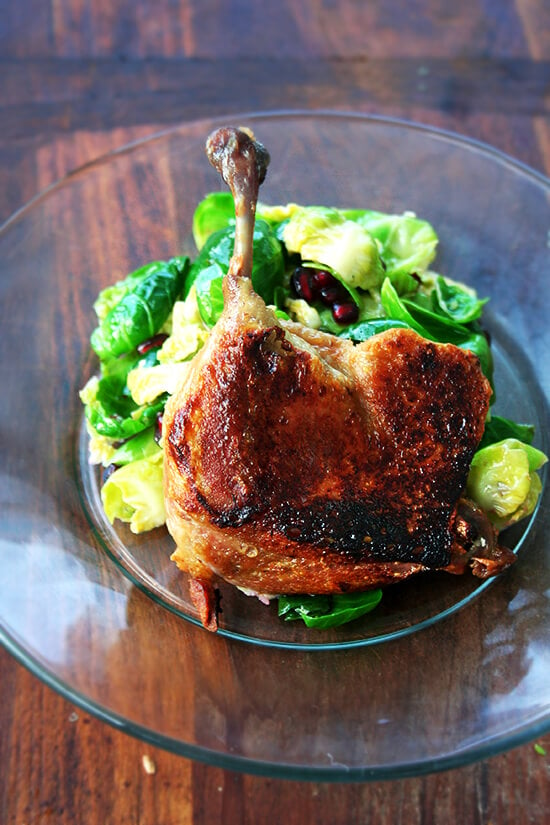
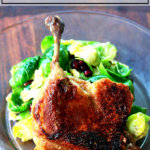
That evening, the line cooks crisped up those duck legs as always, standing them up dramatically against mounds of frisée tossed with crispy lardons and pan-seared Brussels sprouts. Nobody suspected a thing. Losing 16 quarts of duck fat turned out to be not such a big deal, but if the specificity of the date is any indication, I’ve never quite recovered from the experience.
Have you ever wanted to make duck confit at home? Have you been deterred by the two-day process as well as by this ingredient: 3-quarts of duck fat? Have you searched to no avail for duck fat at your grocery store? Have you looked online only to discover that such a purchase might set you back 50 bucks or so before shipping?
Well, if so, I have some good news: you can make pretty damn good duck confit in about three hours with only three ingredients: duck legs, salt, and butter. It may not be traditional, but it might be the fastest, most-delicious bistro-style meal you ever prepare. What’s more, after you make it once, you’ll start building your own supply of duck fat, which, so long as you run a tight ship, you might just have on hand forever.
PS: Perfect Pan-Seared Duck Breasts with Port Wine Sauce
PPS: Looking to complete your French-bistro dinner at home? Try this: Chocolate Pots de Crème
How to Make Duck Confit: A Step-by-Step Guide
Making duck confit is a two-part process: first the legs braise slowly in fat; then the legs are seared stovetop to crisp up the skin.
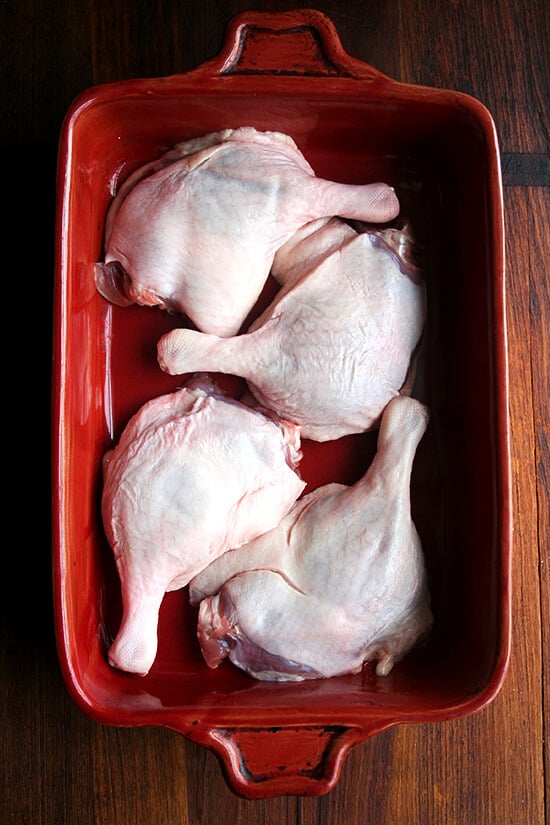
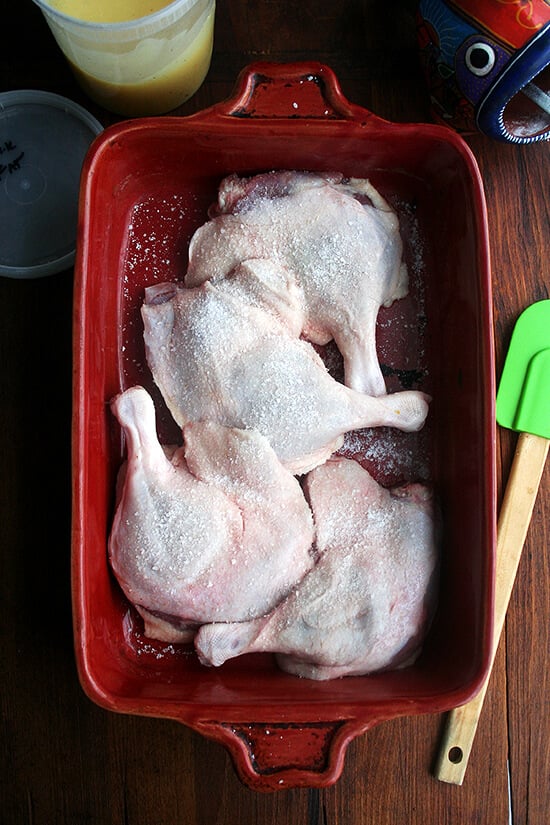
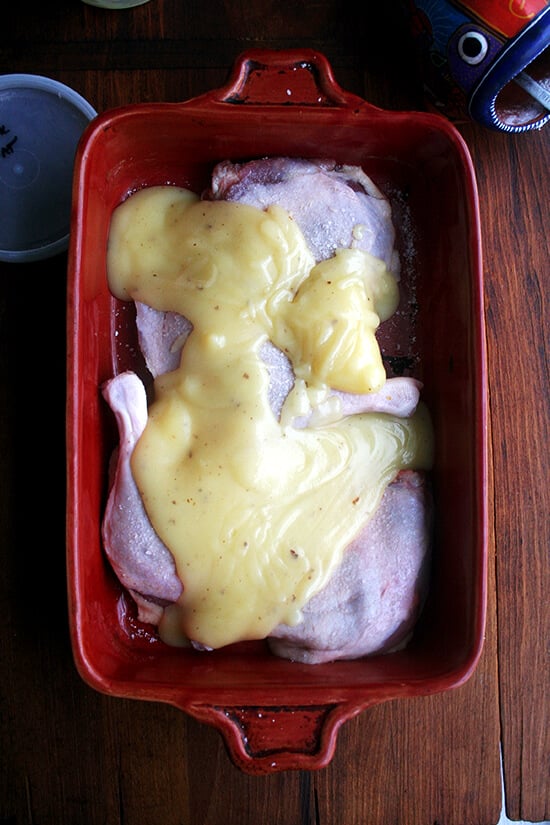
Step 1: Nestle 4 legs snugly into a baking dish:
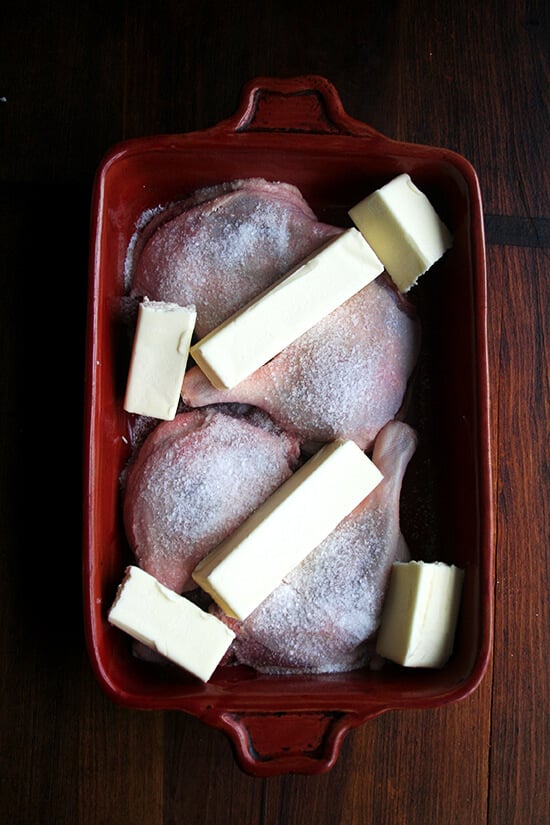
Step 2: Sprinkle with 1 tablespoon kosher salt:

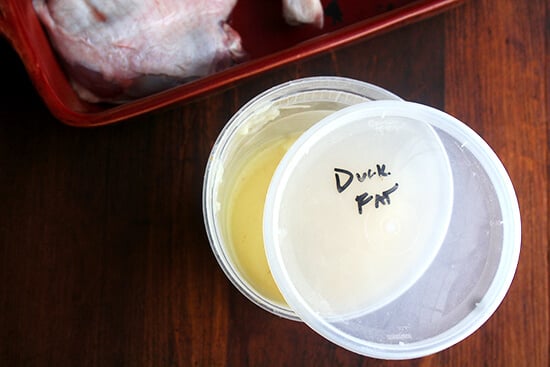
Step 3: Cover with a pound (2 cups) of butter. Before you are deterred by the quantity of butter, take a look at the third photo below with the retrieved fat.
Step 4: Transfer to the oven in a tightly covered pan for 2.5 hours:
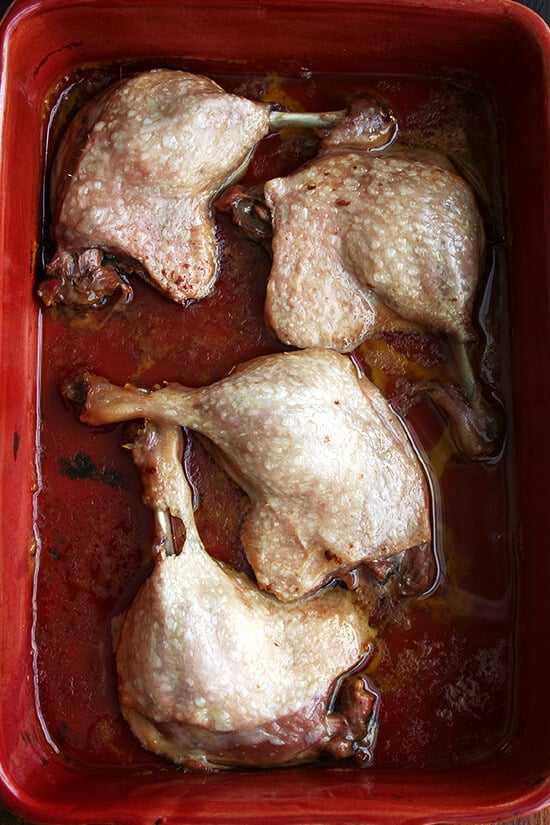
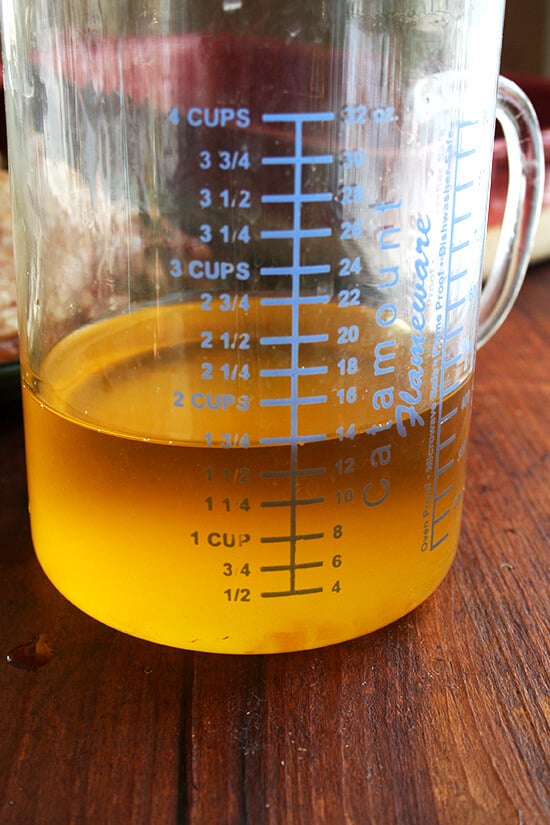
Step 5: Remove duck legs from pan and set on a plate. Transfer fat to a storage vessel.
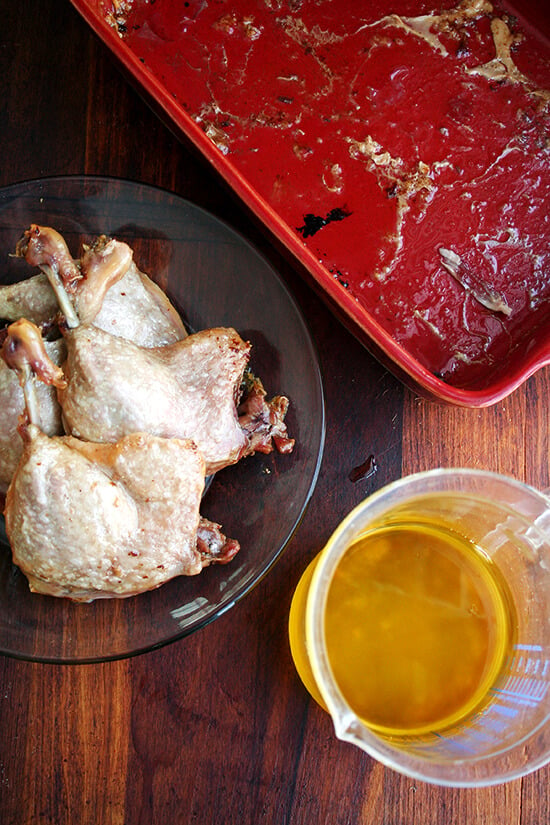
This is the amount of fat retrieved from the baking pan: 1.75 cups. So essentially, only about 1/4 cup of fat — that’s 1 tablespoon per leg — goes into the cooking of these legs.
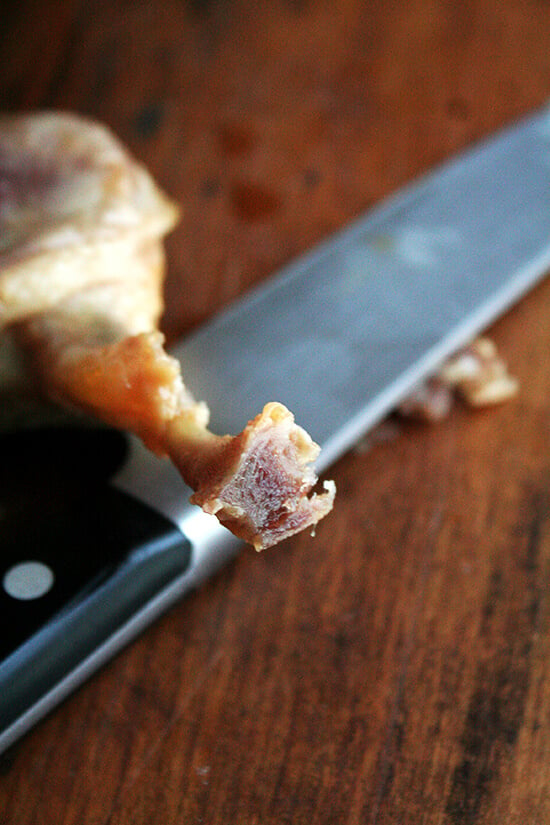
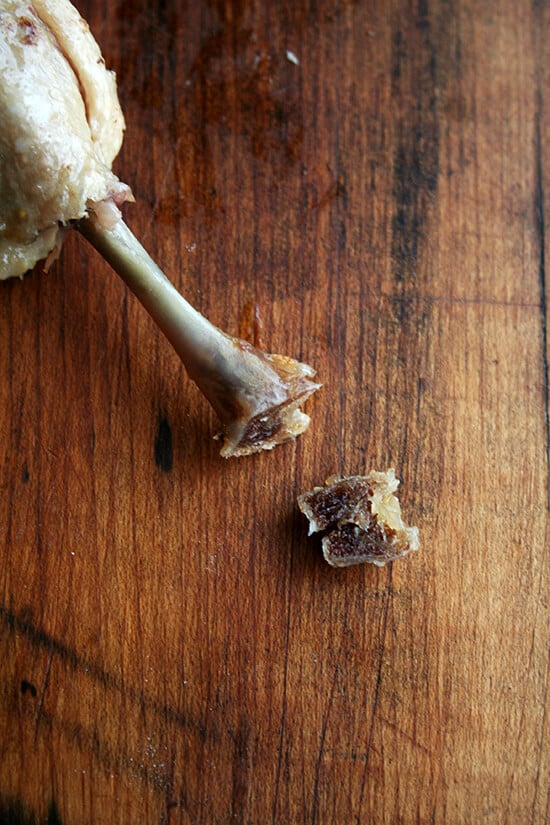
And when you are ready to crisp up the legs, if you feel like being fancy, use the heel of your knife to whack off the end of the bone…
and trim away any fat extending up the bone:
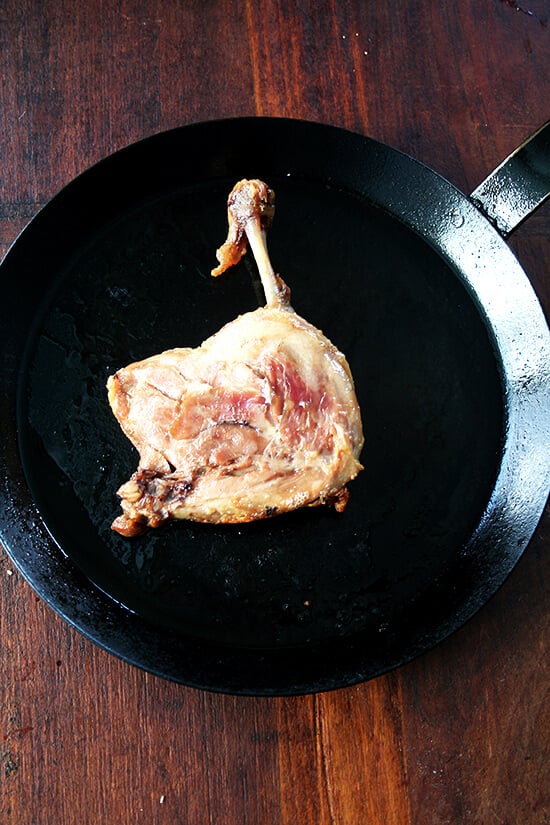
To prepare the duck legs for serving, place skin side down in a hot pan:
Store the duck fat:
The next time you make confit, use your newly created supply of duck fat:
Description
This is not a recipe for making traditional duck confit, which tends to be a lengthy three-phase process of salting, rinsing and then simmering in fat. Rather, it’s a recipe inspired by the duck confit made by Chef Thien Ngo at Fork, when he discovered his many-years old supply had been mistakenly trashed.
Traditionally, too, confit is stored in fat, which will preserve it for months. You certainly could do that, but if you plan on crisping up the legs within a few days, it’s easier to store the legs and fat separately.
Serve the confit with a simple green salad tossed in a shallot vinaigrette . Do not be deterred by the amount of fat here (or in any confit recipe). Very little fat ends up in the meat, and the duck confit itself does not taste fatty.
- 4 duck legs
- 1 tablespoon kosher salt
- 1 lb. butter
- Preheat the oven to 325ºF.
- Place duck legs in a 9×13-inch or other similarly sized baking pan — you want them to fit somewhat snuggly (more snug than what you see in the pictures is just fine). Sprinkle with the tablespoon of kosher salt. Cover legs with sticks of butter, breaking the sticks in half if necessary. Cover pan tightly with aluminum foil — use a couple of sheets of foil if necessary. Be sure to wrap tightly.
- Bake for 2.5 hours. Remove pan from oven. Let cool briefly, then remove foil to cool completely. Once cool enough to handle, transfer legs to a plate (if serving immediately or within the next few hours) or a storage container (if serving on subsequent days). Transfer fat to a storage container. Label it duck fat. Store in fridge indefinitely. When you make confit again, use this fat in place of butter. (Note: You may need to pop your vat of duck fat in the microwave so that you can pour it out of its container. Alternatively, plop the container into hot water, or let it sit at room temperature for a few hours.)
- If possible, bring the cooked duck legs to room temperature an hour before cooking. If you feel like being fancy, use the heel of your knife to whack off the top half of the bone nub at the end of each duck leg (see photo for guidance). Also, trim off any fat extending up the bone. Note: this is purely for presentation purposes and truly is not necessary.
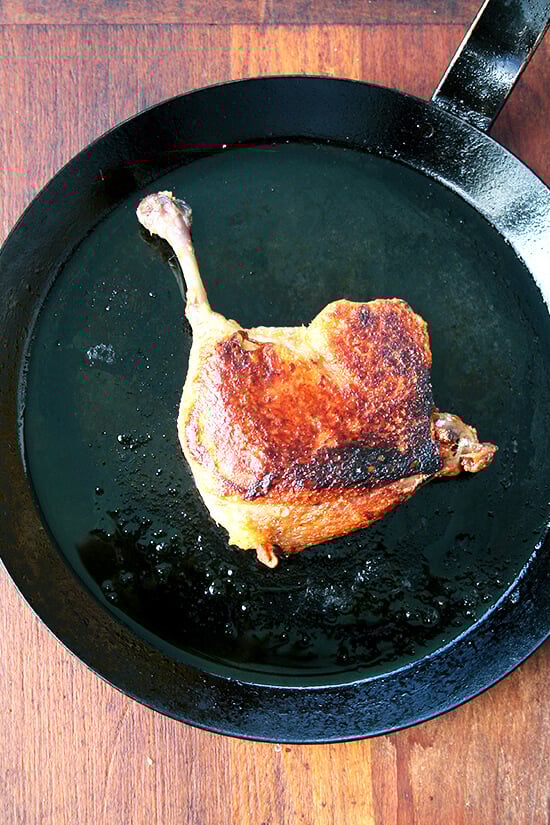
- Preheat the oven to 350ºF. (Note: preheating the oven is only necessary if you’ve stored your legs in the fridge.) Heat a cast iron skillet over medium heat. You should not need to add any fat to the pan — the duck legs should have enough fat clinging to their skin sides. Once hot, add duck legs skin side down. Let them crisp undisturbed for a minute or two. Shake the pan to make sure the skin isn’t sticking. If it is, use a spatula to gently separate the legs from the pan, being careful not to tear the skin. Continue crisping, repositioning the legs if necessary to ensure the skin is browning evenly, about 5 to 8 minutes total. If the legs have been refrigerated, once the skin is nicely crisped, transfer pan to the oven (no need to flip the legs over) for 5 to 10 minutes or until the meat is nicely heated through. If the legs have not been refrigerated, you probably can get away with just flipping the legs over and cooking for one minute skin side up. You don’t want to cook the legs too much on the flesh side or the meat will get too tough.
- Prep Time: 5 minutes
- Cook Time: 2 hours 45 minutes
- Category: Dinner
- Method: Oven
- Cuisine: French
Description
This is not a recipe for making traditional duck confit, which tends to be a lengthy three-phase process of salting, rinsing and then simmering in fat. Rather, it’s a recipe inspired by the duck confit made by Chef Thien Ngo at Fork, when he discovered his many-years old supply had been mistakenly trashed.
Traditionally, too, confit is stored in fat, which will preserve it for months. You certainly could do that, but if you plan on crisping up the legs within a few days, it’s easier to store the legs and fat separately.
Serve the confit with a simple green salad tossed in a shallot vinaigrette . Do not be deterred by the amount of fat here (or in any confit recipe). Very little fat ends up in the meat, and the duck confit itself does not taste fatty.
- 4 duck legs
- 1 tablespoon kosher salt
- 1 lb. butter
- Preheat the oven to 325ºF.
- Place duck legs in a 9×13-inch or other similarly sized baking pan — you want them to fit somewhat snuggly (more snug than what you see in the pictures is just fine). Sprinkle with the tablespoon of kosher salt. Cover legs with sticks of butter, breaking the sticks in half if necessary. Cover pan tightly with aluminum foil — use a couple of sheets of foil if necessary. Be sure to wrap tightly.
- Bake for 2.5 hours. Remove pan from oven. Let cool briefly, then remove foil to cool completely. Once cool enough to handle, transfer legs to a plate (if serving immediately or within the next few hours) or a storage container (if serving on subsequent days). Transfer fat to a storage container. Label it duck fat. Store in fridge indefinitely. When you make confit again, use this fat in place of butter. (Note: You may need to pop your vat of duck fat in the microwave so that you can pour it out of its container. Alternatively, plop the container into hot water, or let it sit at room temperature for a few hours.)
- If possible, bring the cooked duck legs to room temperature an hour before cooking. If you feel like being fancy, use the heel of your knife to whack off the top half of the bone nub at the end of each duck leg (see photo for guidance). Also, trim off any fat extending up the bone. Note: this is purely for presentation purposes and truly is not necessary.
- Preheat the oven to 350ºF. (Note: preheating the oven is only necessary if you’ve stored your legs in the fridge.) Heat a cast iron skillet over medium heat. You should not need to add any fat to the pan — the duck legs should have enough fat clinging to their skin sides. Once hot, add duck legs skin side down. Let them crisp undisturbed for a minute or two. Shake the pan to make sure the skin isn’t sticking. If it is, use a spatula to gently separate the legs from the pan, being careful not to tear the skin. Continue crisping, repositioning the legs if necessary to ensure the skin is browning evenly, about 5 to 8 minutes total. If the legs have been refrigerated, once the skin is nicely crisped, transfer pan to the oven (no need to flip the legs over) for 5 to 10 minutes or until the meat is nicely heated through. If the legs have not been refrigerated, you probably can get away with just flipping the legs over and cooking for one minute skin side up. You don’t want to cook the legs too much on the flesh side or the meat will get too tough.
- Prep Time: 5 minutes
- Cook Time: 2 hours 45 minutes
- Category: Dinner
- Method: Oven
- Cuisine: French
Find it online : https://alexandracooks.com/2013/12/19/cheaters-duck-confit/
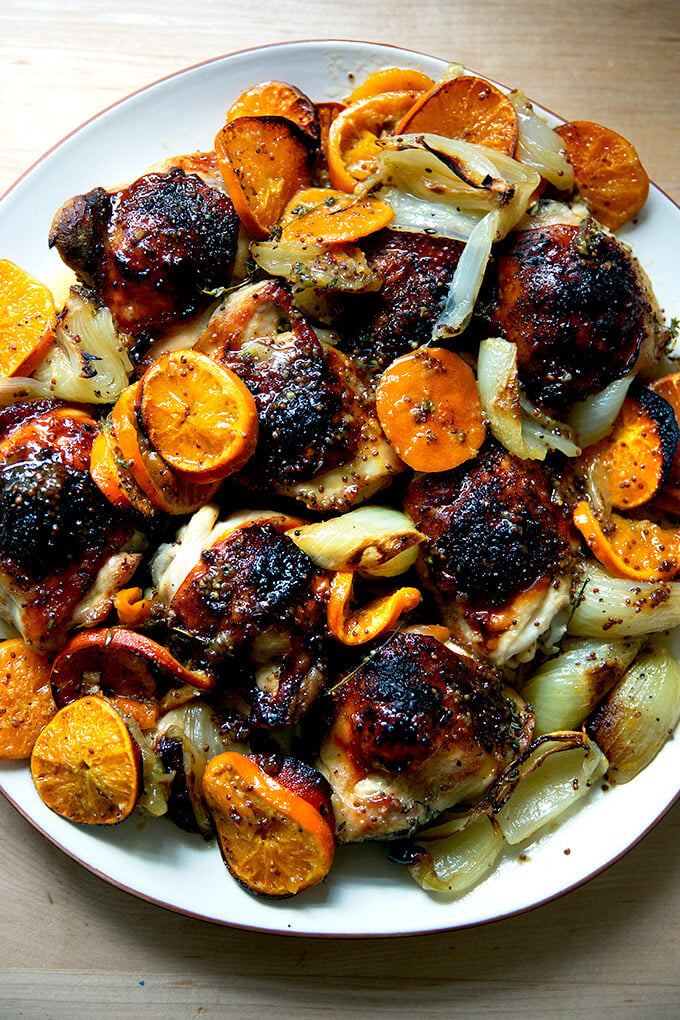
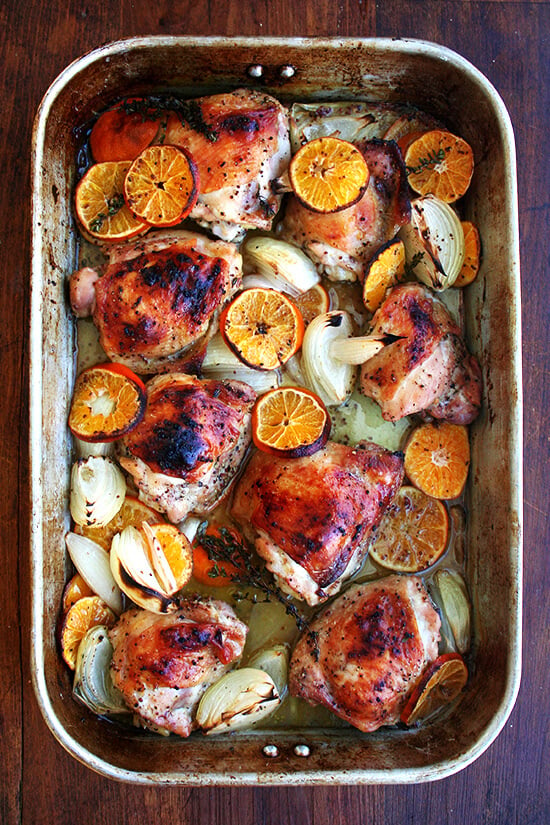
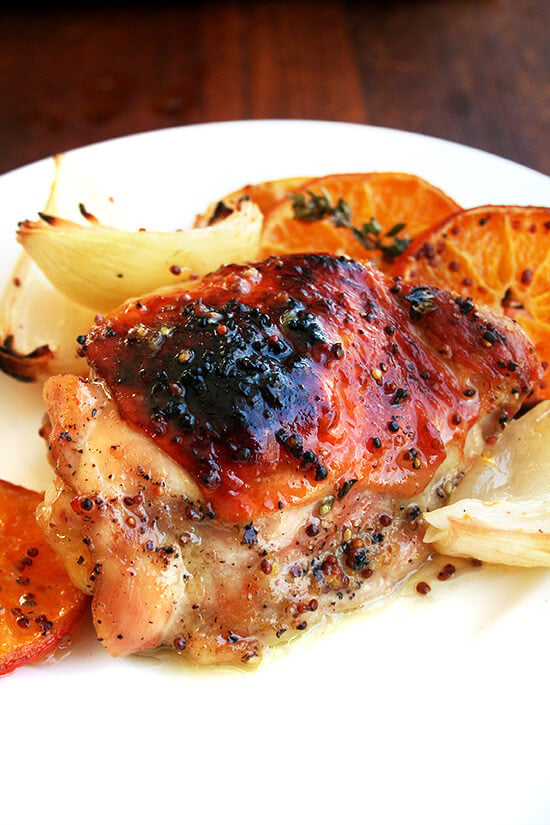
Here’s a low-effort, big-reward chicken recipe: roasted chicken thighs with clementines. It requires about 15 minutes (or less) to throw together, and it bakes for about an hour. The result? A stunning, festive, incredibly delicious assembly of caramelized onions, burnished oranges, and crispy-skinned fall-off-the-bone tender chicken.
Upon receiving Jerusalem early last summer, I poured through it cover to cover, reading about hummus wars and baba ghanoush, feeling inspired to start burning eggplants and preserving lemons with every turn of the page.
Six months later I’m only just enjoying my first taste of the cookbook: roast chicken with clementines, a recipe my mother has been urging me to make since the start of citrus season.
This recipe calls for high heat — 475ºF — for a long time — just under an hour — which allows the chicken skin to brown and the vegetables to caramelize beautifully. The liquid, a mixture of freshly squeezed citrus juice and some sort of anise-flavored liqueur (Arak, Ouzo or Pernod), keeps the chicken meat incredibly juicy below its crispy skin. (Update: I always use white wine for simplicity.)
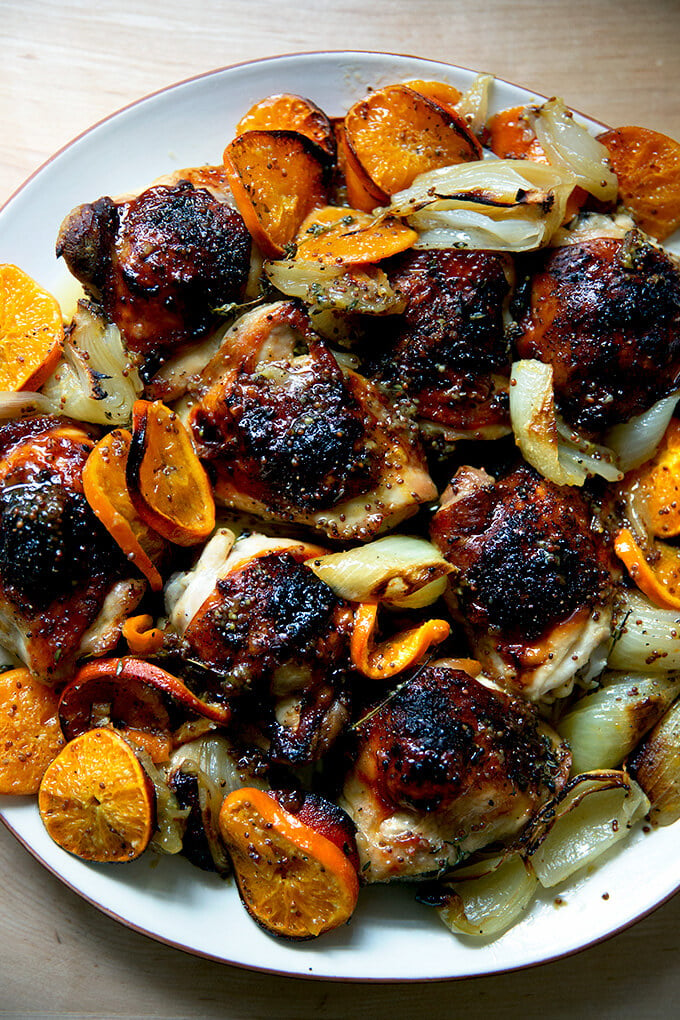
Ottolenghi and Tamimi, the authors, note in the preface to the recipe, this is a “sweetly comforting dish you will always want to come back to” and suggest serving it with plain rice or bulgur. For me, the volume of slightly sweet, mustard-seed laced juices pooling below the chicken demands lots of crusty bread .
This dish is festive and colorful, and with clementine season in full swing, there couldn’t be a better time to get it on your table. Hope you love it as much as I do.
How to Make Roast Chicken and Clementines
Gather your ingredients:

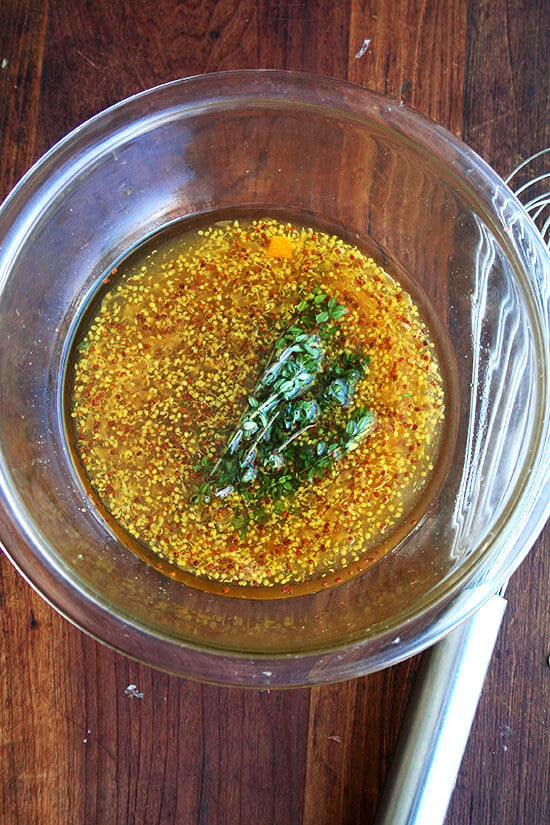
Stir together a simple sauce:
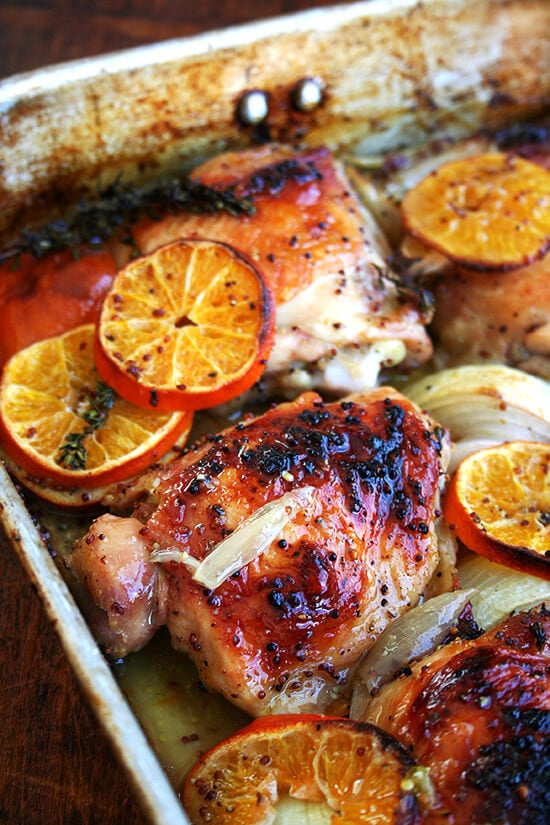
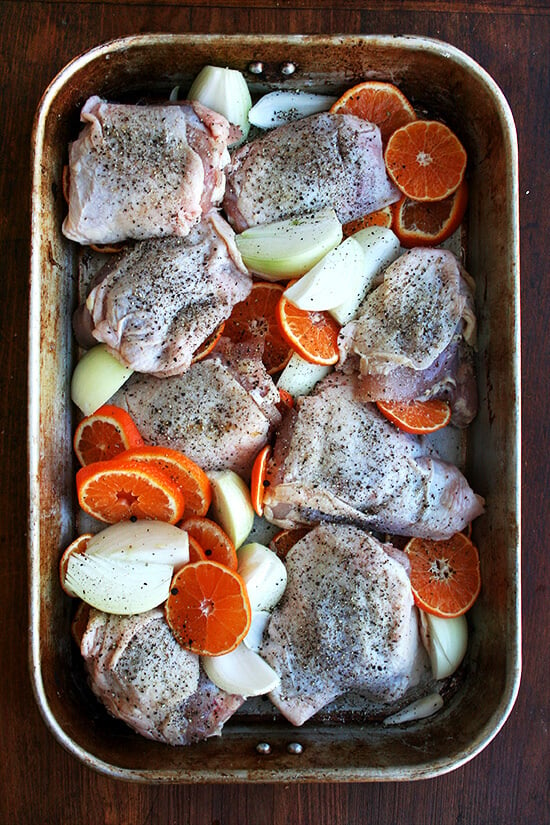
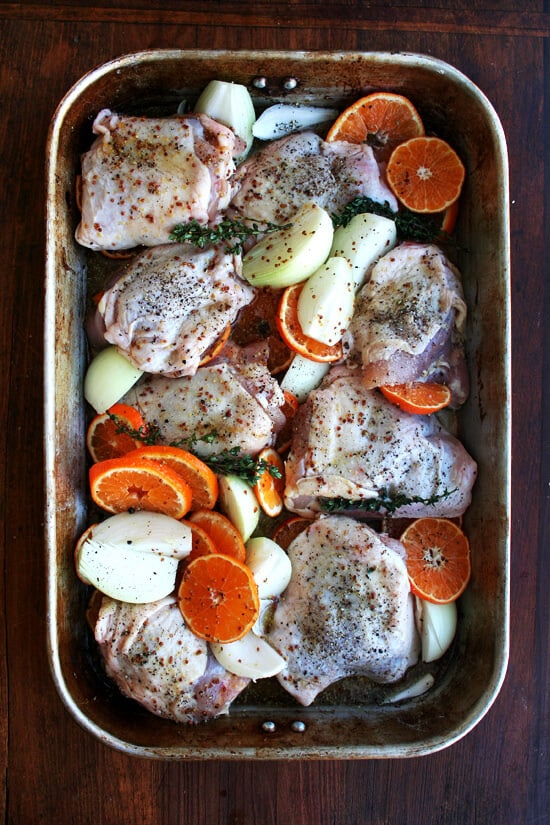
Combine everything in a large roasting pan:
Transfer to the oven for about an hour.
It’s done when the skin is crisp and caramelized, and the meat is nearly falling off the bone:


Description
Adapted from Jerusalem by Yotam Ottolenghi and Sami Tamimi
Feel free to take liberties with the ingredients here. I now make this with 1/3 cup clementine juice (versus 3 tablespoons orange juice and 3 tablespoons lemon juice), which works just fine. The original recipe called for fennel bulbs but I prefer onions, and I have also used leeks in place of the onions. The original recipe also called for fennel seed, which I omit, and anise-flavored liqueur, but I now use white wine. So, essentially (and unintentionally!) I’ve removed all three of the anise-flavored components to this dish.
The key is to use a large enough roasting pan that allows space between each piece of chicken. If the chicken is crowded together it won’t brown properly. Marinating overnight is not necessary though it’s nice to know that you can assemble this dish ahead of time.
Also, the clementine pieces are edible! Some of them are tastier than others — the ones that are exposed (above the juices during the roasting) crisp up and can taste a little bitter; the ones that remain under the juices during the entire cooking process, however, are soft and delicious. You can be strategic and place more of the orange slices beneath the chicken so that they are protected, but I would leave some of them exposed, because they look so pretty when they get a bit caramelized. (I also don’t mind when the oranges are a bit bitter/crisp.)
- 1/3 cup white wine (or Arak, Ouzo, or Pernod, see notes above)
- 1/4 cup olive oil
- 1/3 cup freshly squeezed orange (or clementine) juice
- 2 tablespoons grainy mustard
- 3 tablespoons light brown sugar or honey
- 2 teaspoons kosher salt
- freshly ground pepper
- 8 bone-in, skin-on chicken pieces (a mix of thighs and drumsticks is nice)
- 4 clementines, unpeeled, sliced thin
- a few sprigs of thyme
- 2 to 3 medium onions (or fennel bulbs) cut lengthwise and then into quarters
- In a large mixing bowl, whisk together alcohol of choice, oil, orange juice, mustard, brown sugar, and salt. Season with pepper, to taste. If you are roasting immediately: Place chicken skin side up in a large roasting pan with clementine slices, thyme sprigs, and onion pieces. Pour sauce over top and gently toss everything together with your hands. If you are marinating: Place chicken with clementine slices, thyme sprigs, and onion pieces in a large mixing bowl or ziplock bag. Turn several times to coat. Marinate chicken for several hours or overnight.
- Preheat oven to 475ºF degrees. Transfer pan to the oven. After 30 minutes, check on the chicken. If the skin is browning too quickly, turn the oven down to 400ºF and continue roasting until the skin is brown and crisp, 20 to 25 minutes longer. I roast the chicken at 475ºF for 45 minutes and at 400ºF for 10 minutes, but every oven is different, so just keep an eye on it. Remove pan from the oven.
- Transfer chicken and clementines and onion pieces with juices to a serving platter. Let rest 5 to 10 minutes before serving.
- Prep Time: 10 minutes
- Cook Time: 55 minutes
- Category: Chicken
- Method: Roasting
