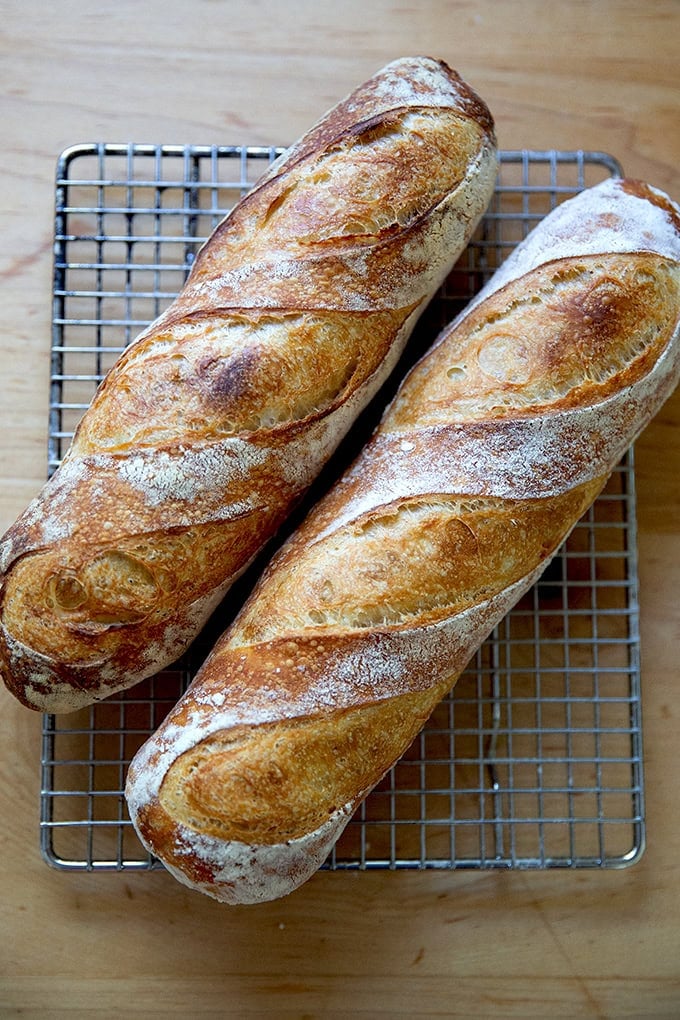
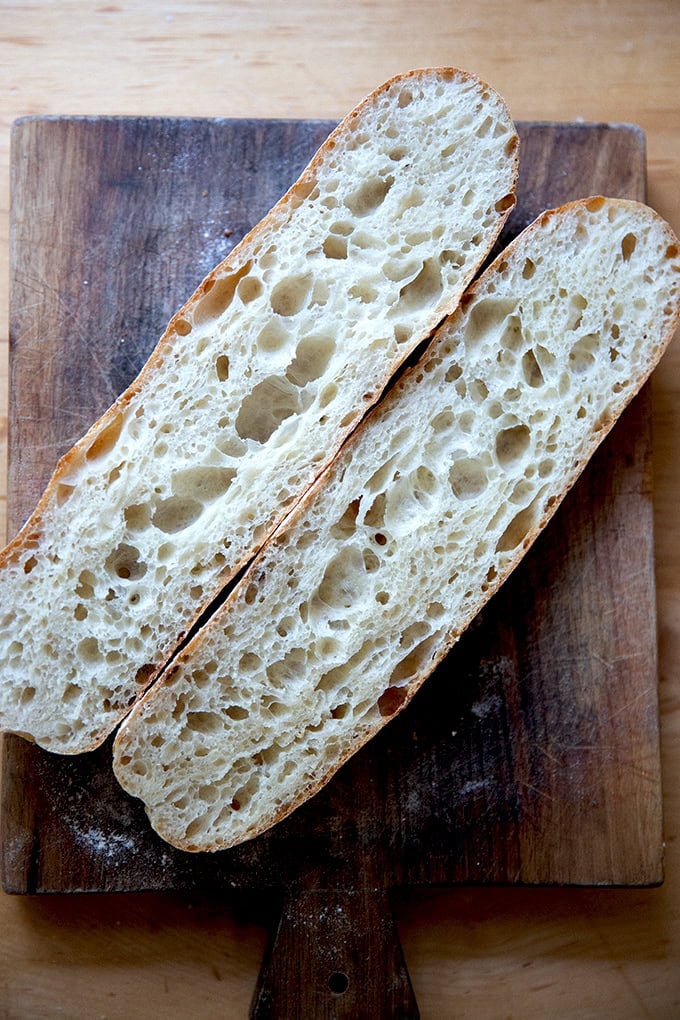
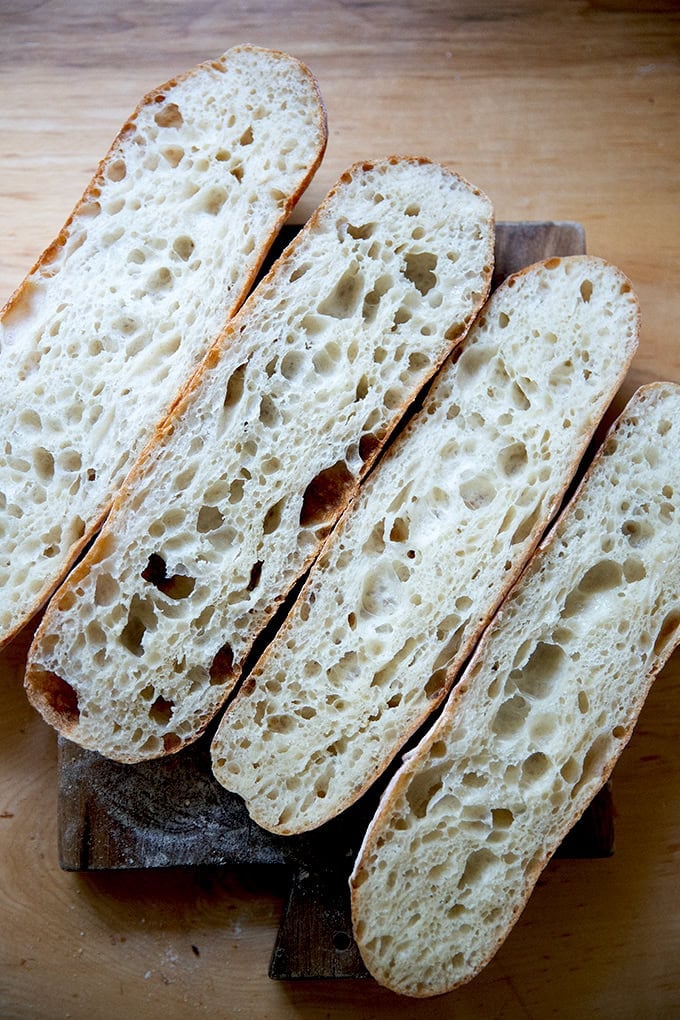
Made with a no-knead, four-ingredient dough, these baguettes have an open crumb and a shatteringly crisp crust. The key to success is twofold: allowing the dough sufficient time to ferment and baking in a steamy environment. Find step-by-step instructions below.
If you’ve attempted making baguettes at home but have found the process discouraging from the shaping (requiring very practiced hands) to the equipment (couches, lames, lava rocks) to the baking (demanding steam), I hear you.
Baguettes are not the easiest of bread recipes to make at home. Having tried many methods over the years, I have learned that the key to success is twofold: allowing the dough sufficient time to ferment and baking with steam.
As with many breads, a long fermentation produces a better bread. Why? Because when dough rises slowly, good things happen: enzymes in both the flour and the yeast break down the starches in the flour into simple sugars, which contribute both to flavor and to browning. If you make your dough at least a day before you plan on baking it, you will see improved flavor and browning.
As with many crusty bread recipes (like this simple sourdough bread recipe and Jim Lahey’s no-knead bread ), baguettes require steam during the baking process to produce that deeply burnished, shatteringly crisp crust. Let’s explore this further:
The Importance of Steam: Oven Spring + Crust Formation
Steam is good for baguettes for two reasons: oven spring (dough springing in the oven upon entry) and crust development.
Oven Spring
Dough springs in the oven for a few reasons: 1. Increased fermentation activity, meaning as the yeasts rapidly multiply in the hot oven, the dough produces carbon dioxide gas. 2. Steam : As water in the dough evaporates, it transforms into steam. Both the carbon dioxide gas and the steam push against the gluten structure, causing the dough to spring.
A moist, steamy environment allows for maximum oven spring (which creates a light and airy crumb) because it allows the dough to expand to its fullest potential before a crust forms. In other words: when dough stays soft during the early phases of baking, its oven spring will be greater because it isn’t being restricted by a dry, hard crust.
Crust Formation: Color & Texture
In the early stages of baking, the rapid increase in enzymatic activity on the surface of the loaf breaks down the starches in the dough into simple sugars. These sugars ultimately contribute to crust color. In a steamy environment, the enzymes remain active for longer, leading to an even richer color.
A steamy environment will also help produce a crust with a subtle sheen. This is because, during the early stages of baking, the starches on the surface of the loaf gelatinize — meaning they swell with water, and as they break down, they form a gel. During the last 10 minutes of baking, when the lid is removed and the baguettes are baking in dry heat, that gel layer dries out, transforming into a shiny, crackly crust as opposed to one that is dull and hard.
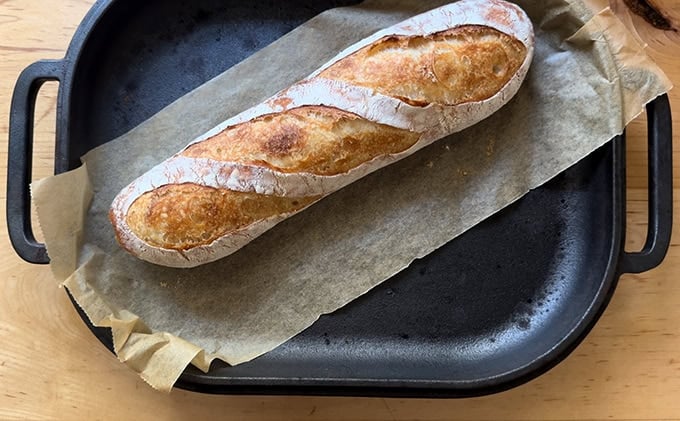
Compare the two photos below. This first one shows a baguette baked with steam:
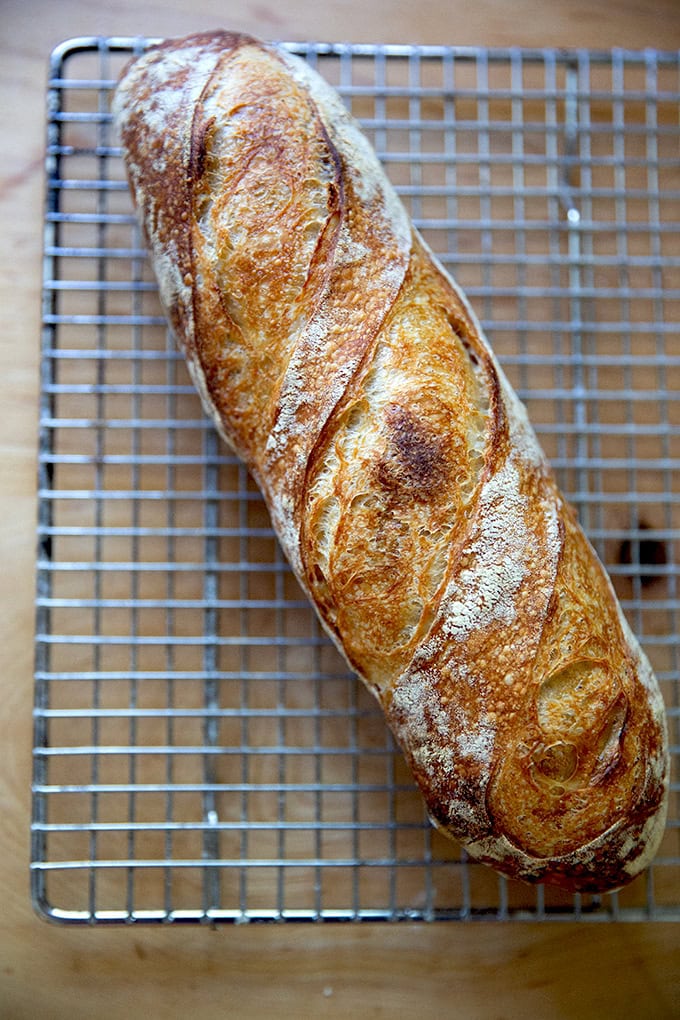
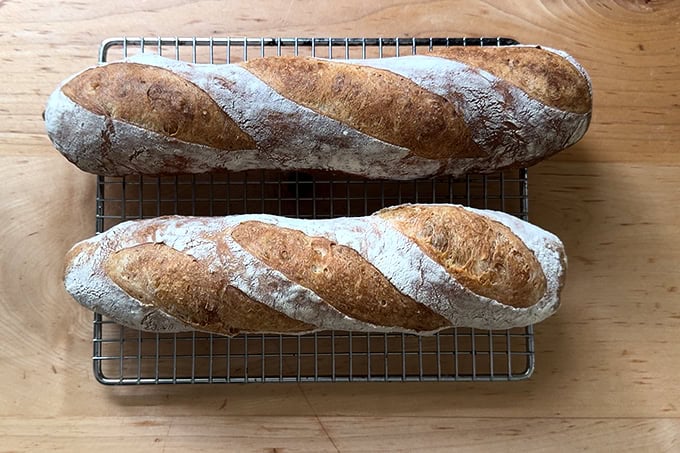
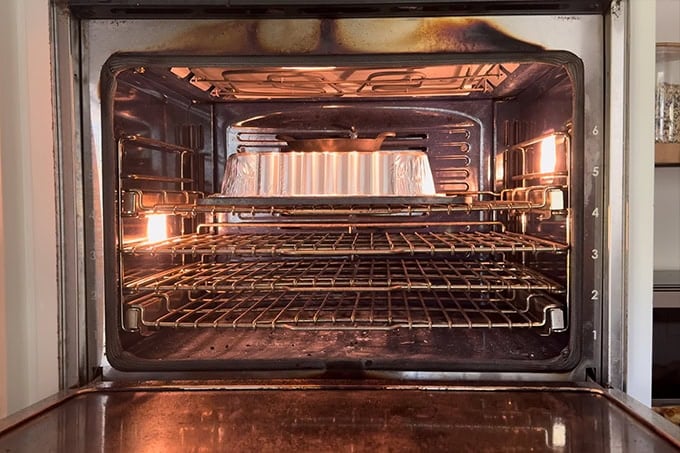
In the below photo, the baguettes were baked on the Baking Steel without steam. In the above photo, observe the caramelization of the crust, the score differentiation, and the slight sheen. Compare it to the dry, lusterless crusts below:
How to Make Baguettes, Step by Step 🥖🥖
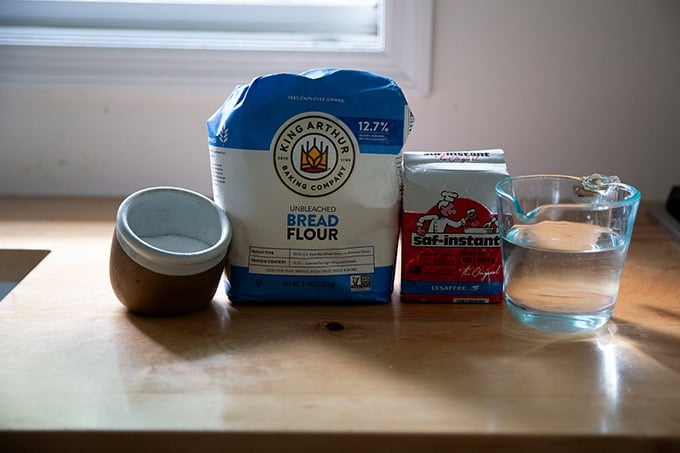
Gather your ingredients: flour, salt, yeast, and water. I conducted most of my experiments with King Arthur Bread flour, since it is widely available and such a reliable flour. SAF instant yeast is my favorite. See notes in the recipe box regarding salt.
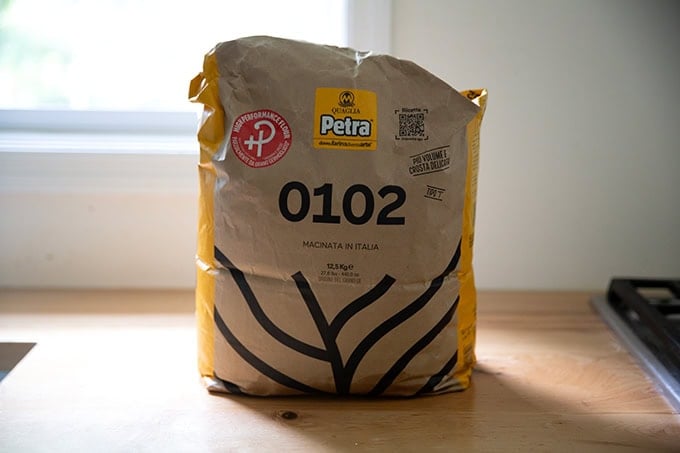
I also had excellent results using this Petra 0102 flour , which is made from partially sprouted wheat flour and which I love for the flavor and texture it lends to a bread or pizza.
Measure everything out, ideally with a scale :

Combine the dry ingredients together first:
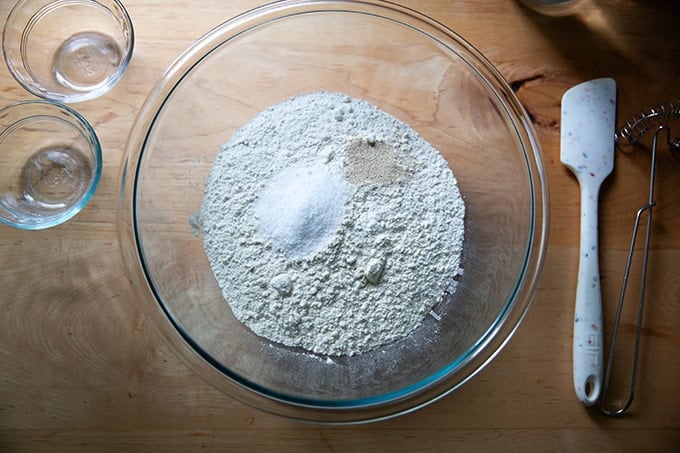
Whisk them together:
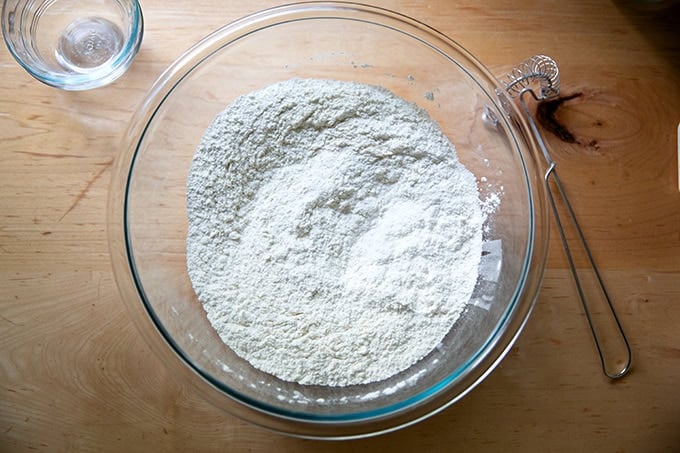
Then add the water:
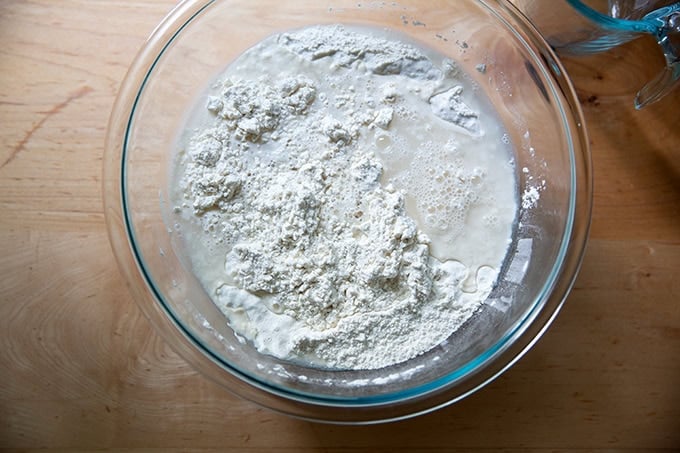
Mix until you have a shaggy dough ball:
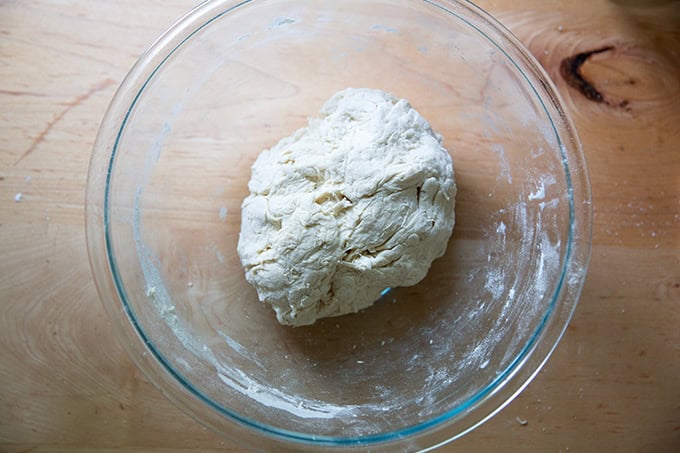
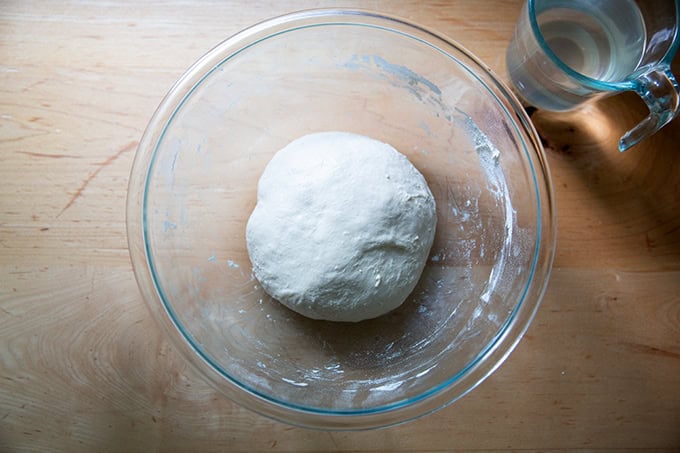
Let it rest for 30 minutes or so, then stretch and fold it (see video for guidance):
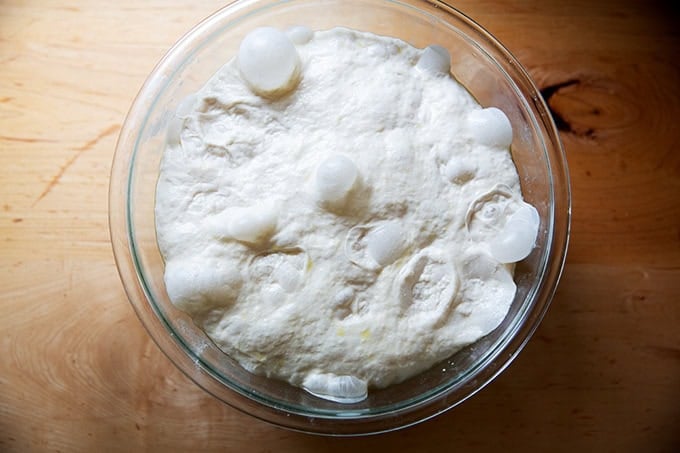
Cover the bowl with an airtight lid, then let it rise at room temperature until it doubles in volume and its surface is covered in bubbles.
Using lightly floured hand, deflate the dough:
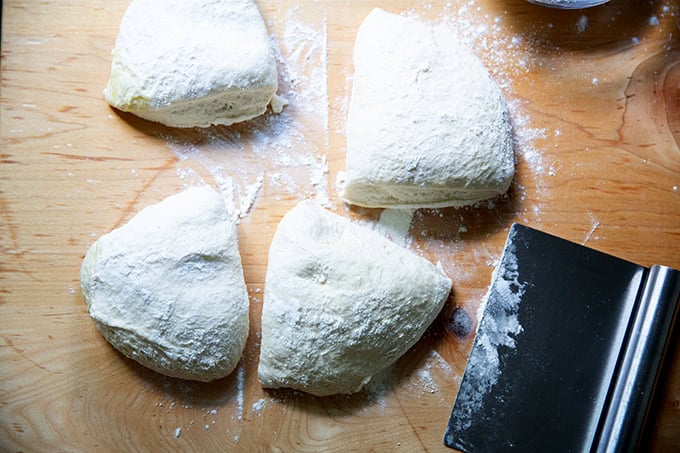
Then turn it out onto a work surface and divide it into four equal portions. I do like to use a scale to ensure each portion is identical, roughly 237 grams each.
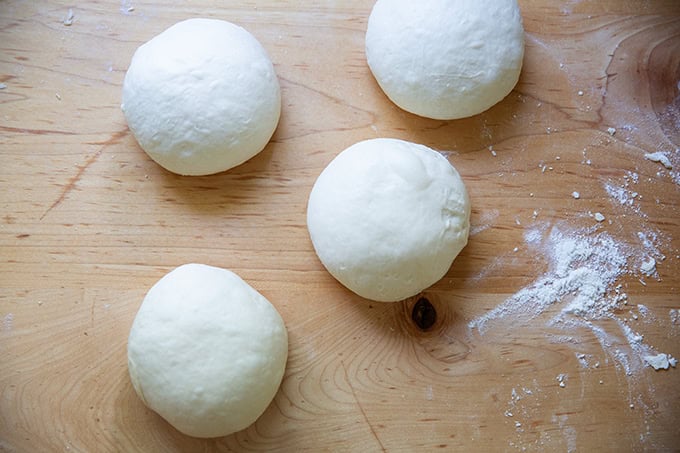
Ball up each portion:
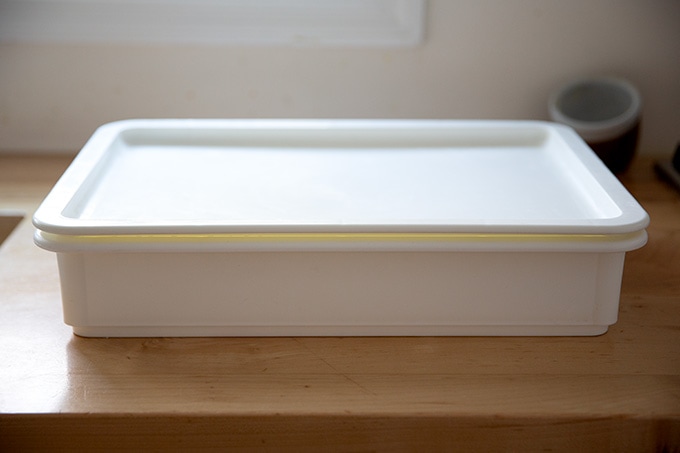
Transfer to storage vessels , then transfer to the fridge ideally for at least a day. The dough balls can stay in the fridge for as long as a week.

On baking day, turn the dough out onto a work surface. I do not use any flour here, but if you find the dough to be sticky, use flour lightly as needed.
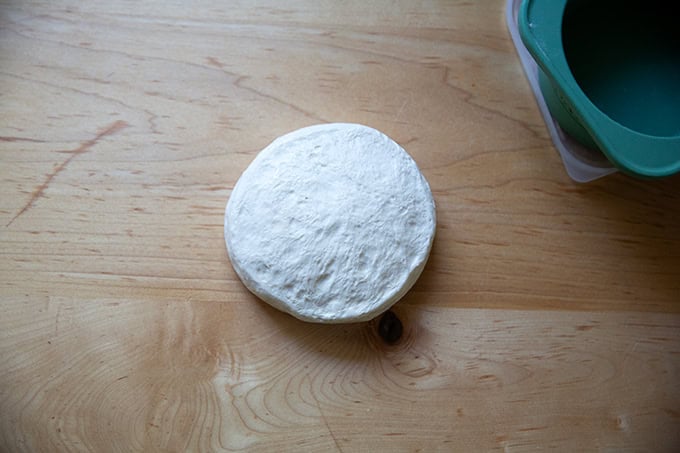
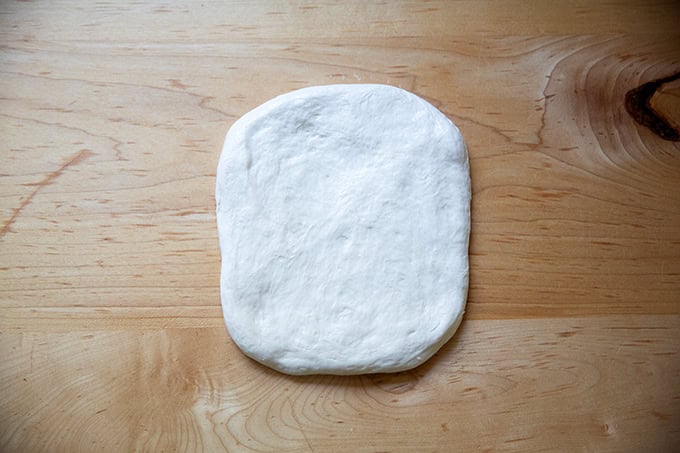
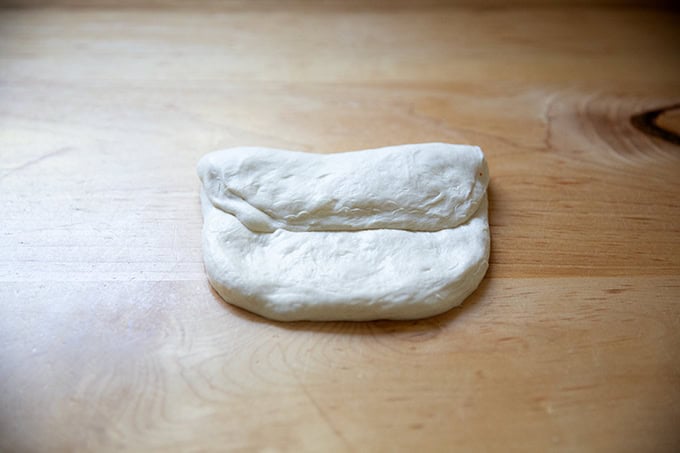
Pat the dough into roughly a 6×7-inch rectangle:
Fold the dough from the top down:
Rotate the dough 180 degrees, and fold from the top down (also known as an “envelope” fold).
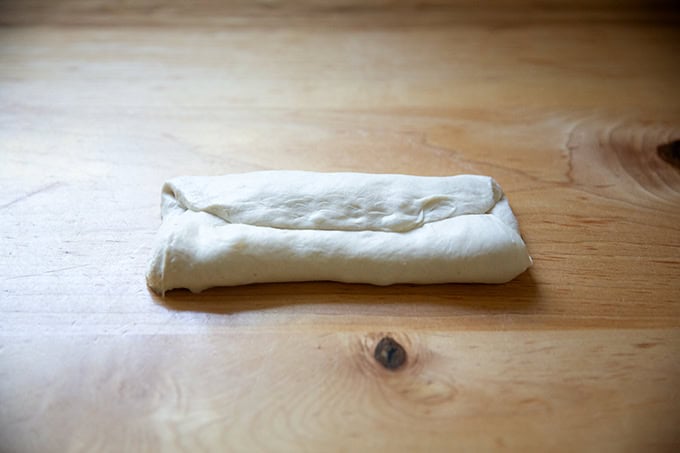
Then fold again from the top down, essentially folding the envelope in half.
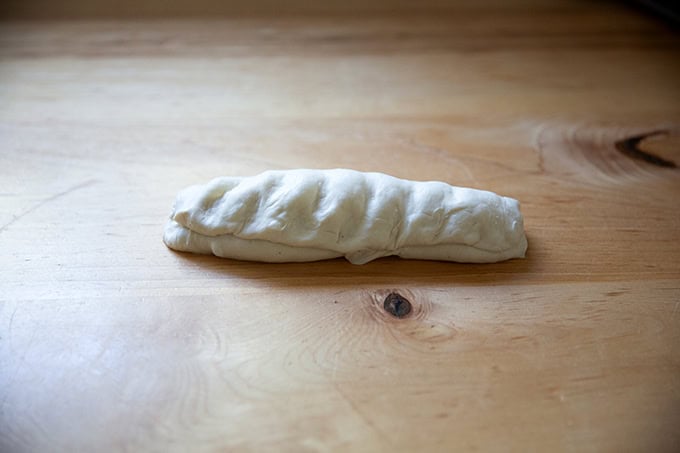
Then, repeat (see video for guidance):
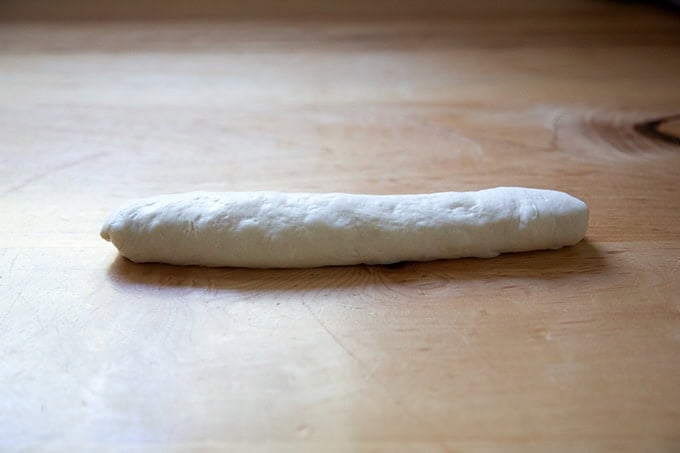
Pinch the seam closed.
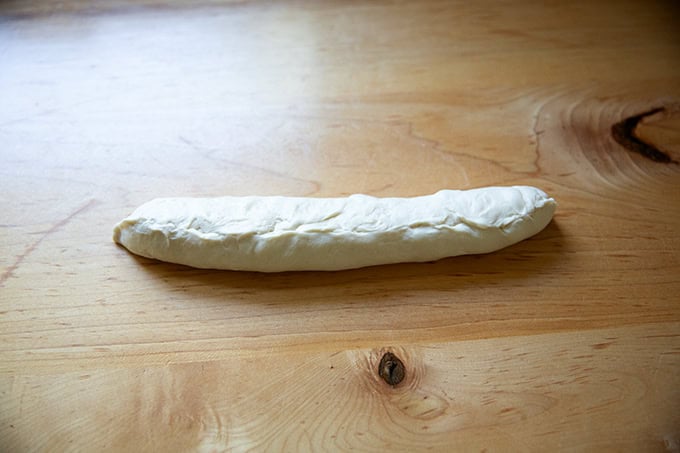
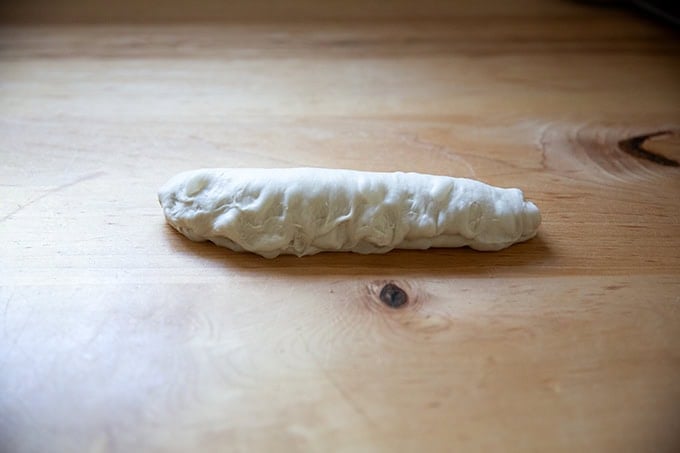
Turn over so that the seam is down and gently roll.
Here’s video guidance of the above-outlined steps:
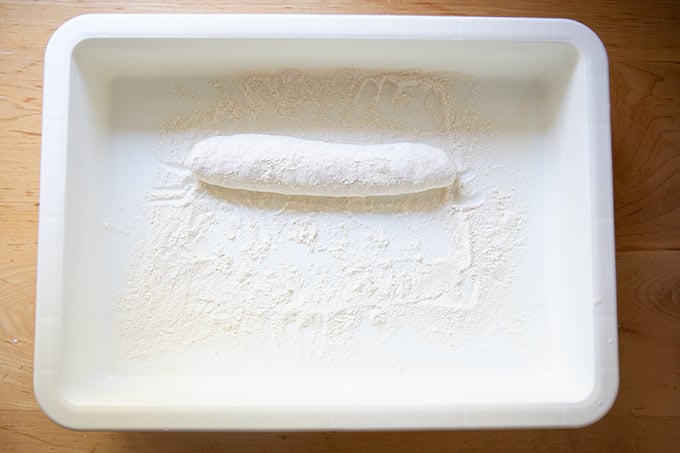
Transfer to a floured, lidded storage vessel. I love these DoughMates , but you could use a large Tupperware or a 9×13-inch dish tucked inside a 2-gallon ziptop bag.
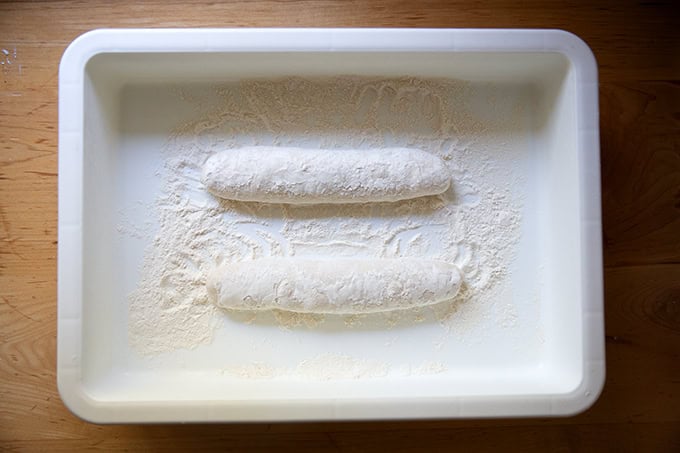
Often I’ll proof two at one time, though I try to stagger the entry of each by 30 minutes so as to avoid overproofing the dough.
Cover the container and let the dough proof for 2.5 to 3 hours or…
… until it feels very light and airy to the touch. One assessment tool you can use is the “poke” test: using a lightly floured finger, poke the dough making an indentation roughly 1/2-inch deep; if it springs back immediately, the dough needs more time; if it springs back slowly initially, but then holds a partial indentation — in other words, if it doesn’t completely refill — the dough is ready to be baked. (And if it doesn’t spring back at all, the dough is overproofed, but push on anyway, because it may bake up just fine.) I don’t love this method because I find it to be misleading: my dough behaves nearly the same way at the 2-hour mark as it does at the 3-hour mark, and yet my baguettes consistently have a lighter, airier crumb if I wait 3 hours before baking them. Nonetheless, it is a tool you can use.
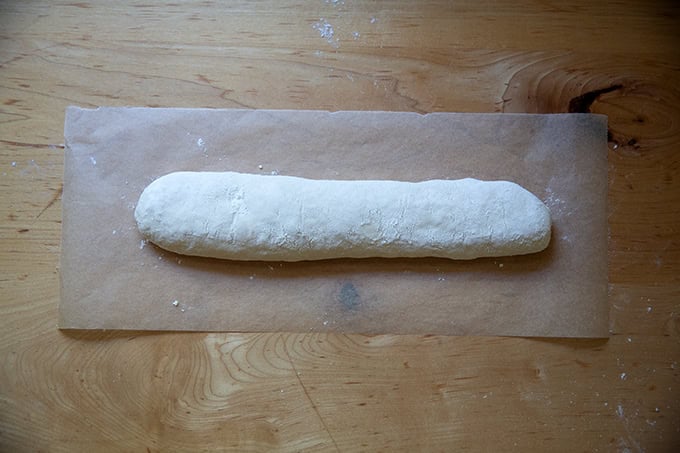
When the dough is ready for baking, remove it from the DoughMate and place it on a sheet of parchment paper — I take full sheets, fold them in half lengthwise, then cut them in half.
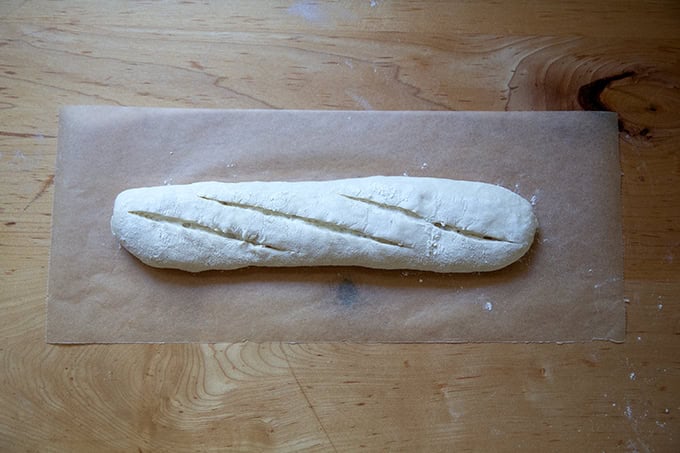
Use a razor blade to score it.
Then bake it…
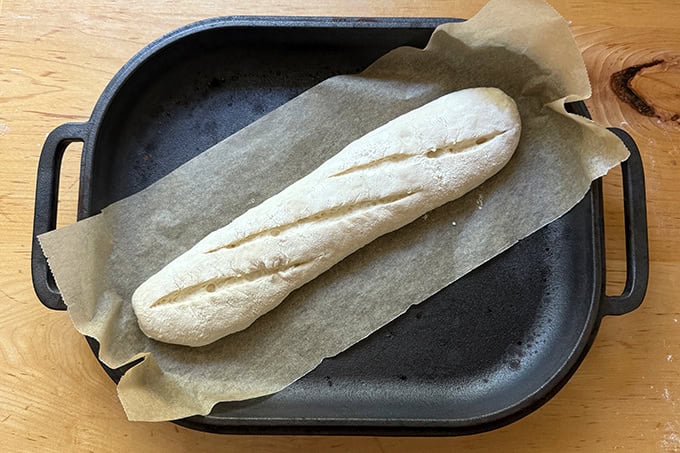
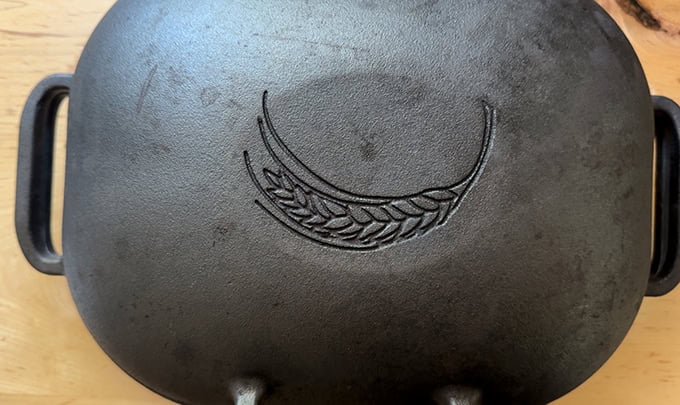
Method 1: Preheated Challenger Bread Pan . Place the Challenger or other oblong-shaped Dutch oven into an oven and preheat to 450ºF. This takes roughly 30 minutes in my oven. Lower the scored log, parchment paper and all into the preheated pan.
Cover it and return it to the oven for 10 minutes.
Uncover it, and return it to the oven for another 10 minutes…

… or until the baguette is beautifully golden brown:
Transfer to a cooling rack. Let cool for 15 minutes or so before…
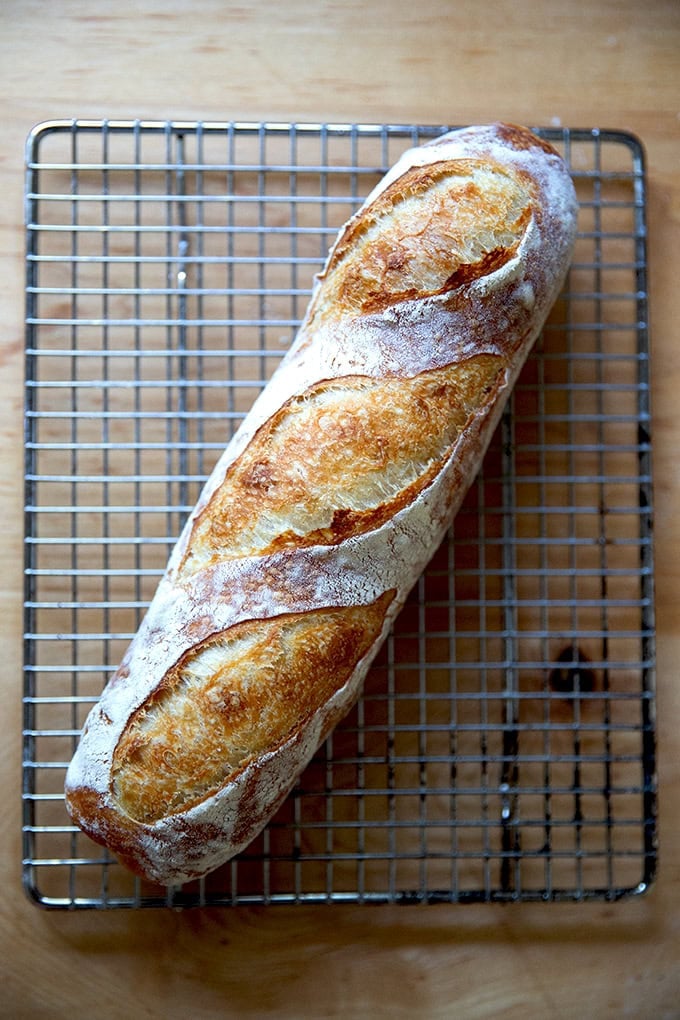
… serving.
As noted above, I’ve been experimenting with Petra 0102 flour . The baguette on the left is made with Petra flour; the one on the right is King Arthur bread flour.
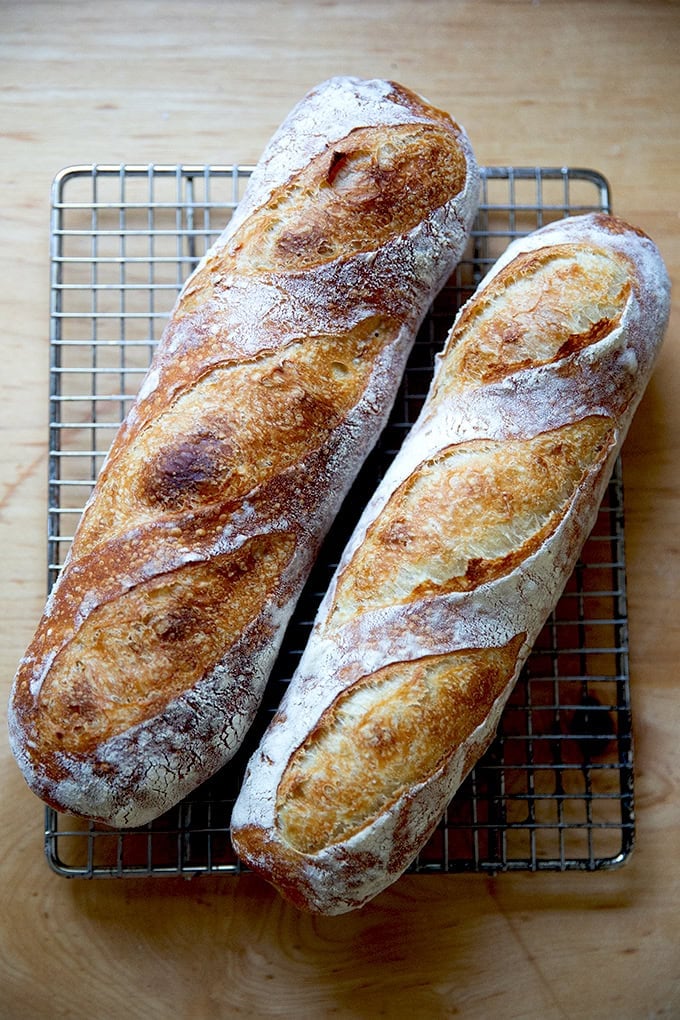
Left: Petra flour ; right: King Arthur bread flour.
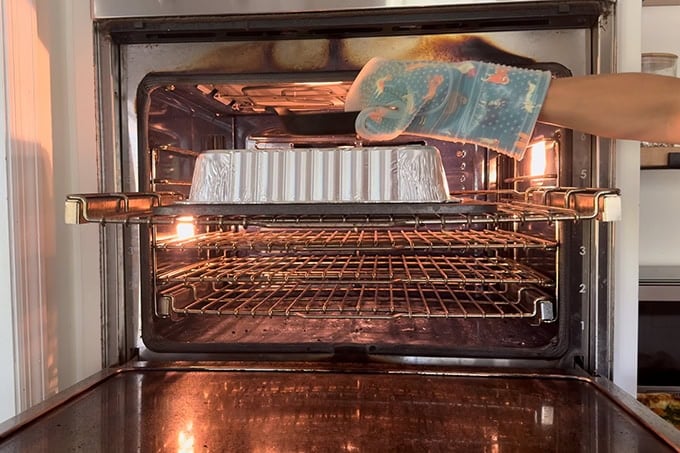
Method 2: Baking Steel or stone. Place a Baking Steel or a baking stone in the middle of your oven and preheat it to 450ºF. This may take 30 minutes or so. Shimmy your baguette, parchment paper and all, onto the hot surface using a peel .
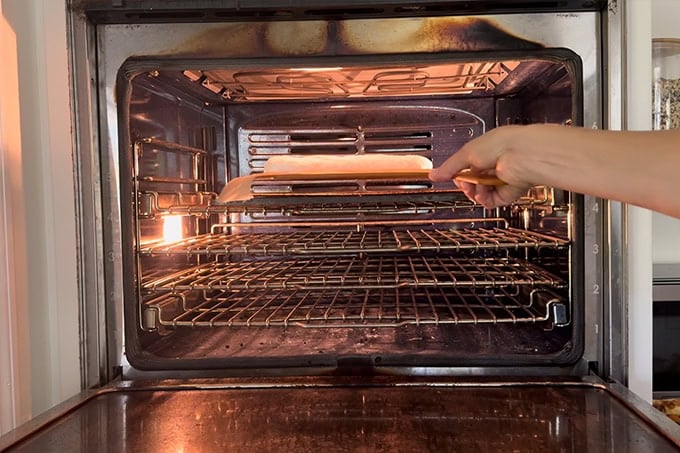
Cover the baguette with a disposable aluminum pan (lasagna-sized) and weigh it down with something heavy enough to seal it down without collapsing it:
Bake for 10 minutes. Then remove the weight and pan.
Continue baking the baguette for another 10 minutes…
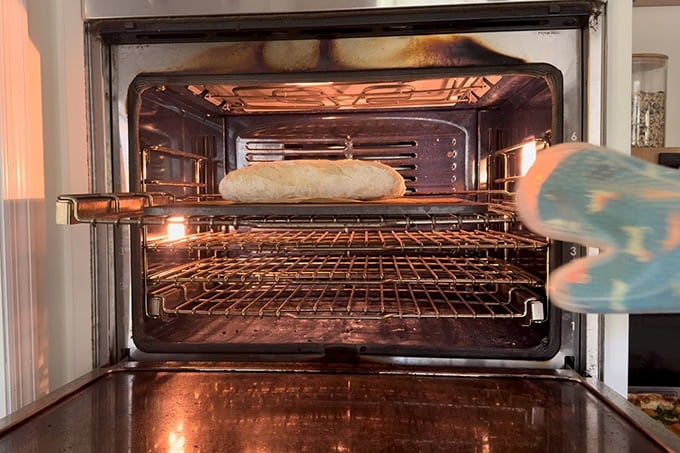
… or until it’s golden and bronzy to your liking:
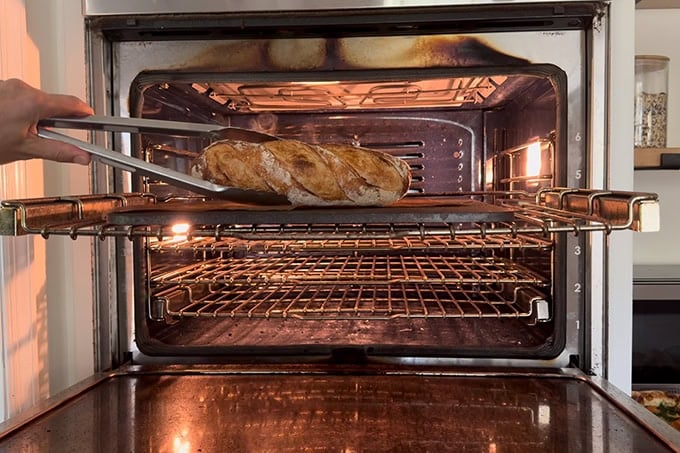
Let cool for 20-ish minutes or so before halving:
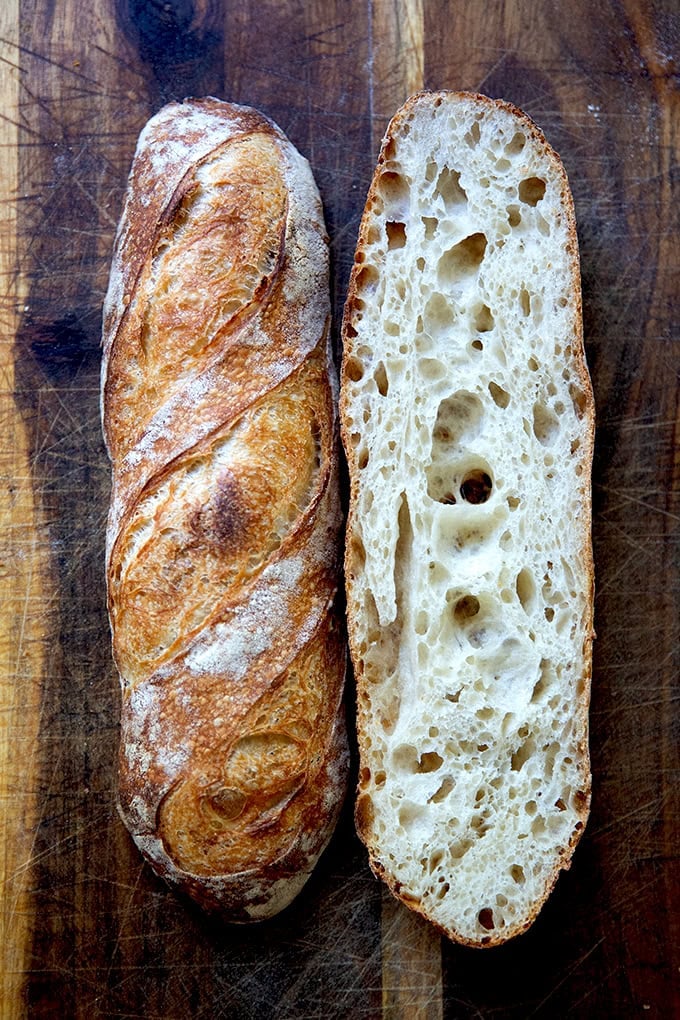
The below pictured loaf is made with KAF bread flour, and this dough experienced no refrigeration: I mixed the dough on Friday night, portioned it, and balled it up Saturday morning, let the balls rest in a DoughMate for 2 hours or so, shaped into baguettes, and let rest again for another 2 hours; then baked:

Description
Made with a no-knead, four-ingredient dough, these baguettes have an open crumb and a shatteringly crisp crust. The key to success is twofold: allowing the dough sufficient time to ferment and baking in a steamy environment. Find step-by-step instructions below.
Dough recipe adapted from the outdoor variation of the Neapolitanish pizza dough recipe from my cookbook, Pizza Night .
Notes
- For best results, use a scale to measure everything.
- Flour: In most of my experiments I used King Arthur Bread flour but I also got excellent results and often an even more open crumb when I used Petra 0102 Flour , which is made from partially sprouted wheat.
- Salt : I use Diamond Crystal kosher salt, but you could use fine sea salt in its place. Again, for best results use a scale to measure. 16 grams of salt may seem like a lot, but the rule for bread and pizza dough is that the amount of salt should be 2 to 3% the weight of the flour. 16.5 grams is 3%; 11 grams is 2%. If you are using Diamond Crystal kosher salt, you’ll use roughly 5 teaspoons. If you are using Morton kosher salt or fine sea salt, you’ll use 2.5 teaspoons.
- Yeast: SAF instant yeast is my favorite.
Timing
Example Timeline #1: Fridge Time
Wednesday Evening: Mix Dough
Thursday Morning : Ball Up Dough, Transfer to Fridge
Friday Afternoon (or any subsequent afternoon for as long as a week): Remove Dough Ball From Fridge 3 Hours Prior to Baking
Friday Evening: Bake Baguette
Example Timeline #2: No Fridge Time
Thursday Evening: Mix Dough
Friday Morning : Ball Up Dough, Transfer to a Lidded Vessel (such as a DoughMate), Leave at Room Temperature for Two Hours.
Friday Midday: Shape the Dough Balls into Baguette Shape and Return to Lidded Vessel, Leave at Room Temperature for Roughly Two Hours More.
Friday Afternoon : Bake the Baguettes
Three baking tools for baguettes:
- Challenger Bread Baker
- Baking Steel ( the original or the pro ) + a disposable aluminum lasagna pan
- Emile Henry Lidded Baguette Baker or other
Other Equipment:
Dough Storage Containers: This set of four has become a favorite.
DoughMate storage vessel
parchment paper
razor blades
550 grams (about 4¼ cups ) bread flour or all-purpose flour, plus more for dusting, see notes above
15 to 16 grams salt, see notes above
2 grams (about ½ teaspoon ) instant yeast, see notes above
385 grams (about 1 2/3 cups ) cold (about 60°F) water
Extra-virgin olive oil
- Mix the dough : In a large bowl, whisk together the flour, salt, and yeast. Add the water and use a spatula to mix until the dough comes together into a shaggy dough ball. If the dough is dry, use your hands to gently knead it in the bowl until it comes together. Cover the bowl with a towel and let rest for at least 15 minutes and up to 30 minutes.
- Stretch and fold : Fill a small bowl with water. Dip one hand into the bowl of water, then use the dry hand to stabilize the bowl while you grab an edge of the dough with your wet hand, pull up, and fold it toward the center. Repeat this stretching and folding motion 8 to 10 times, turning the bowl 90 degrees after each set. By the end, the dough should transform from shaggy in texture to smooth and cohesive.
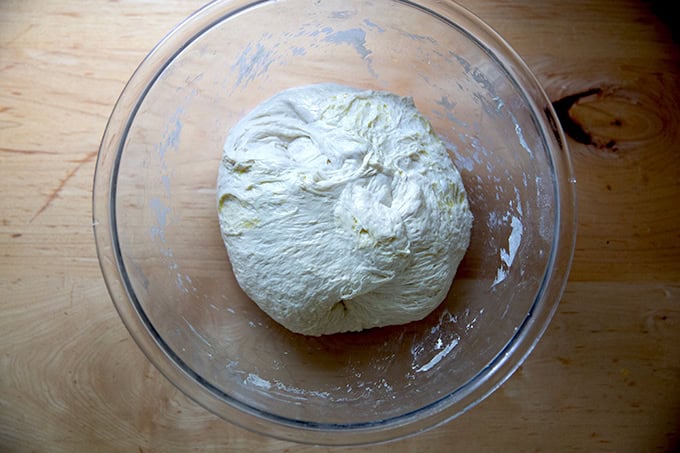
- Pour about 1 teaspoon of olive oil over the dough and use your hands to rub it all over. Cover the bowl tightly and let the dough rise at room temperature until it has nearly doubled in volume, 6 to 10 hours. The time will vary depending on the time of year and the temperature of your kitchen.
- Portion the dough : Turn the dough out onto a lightly floured work surface and use a bench scraper to divide the dough into 4 equal portions, roughly 237 grams each. Using flour as needed, form each portion into a ball by grabbing the edges of the dough and pulling them toward the center to create a rough ball. Then flip the ball over, cup both your hands around the dough, and drag it toward you, creating tension as you pull. Repeat this cupping and dragging until you have a tight ball.
- Store the dough: Place the dough balls in individual airtight containers (see notes above) and transfer to the fridge for 1 to 3 days.
- Shape and proof the dough: On baking day, remove however many rounds of dough you wish to make into baguettes. Place on a clean work surface. I prefer to use no flour here, but if you are finding the dough to be too sticky, lightly flour your work surface. ( Note: I suggest watching the video before you attempt shaping. ) Pat the dough into roughly a 6 inch square or 6×7-inch rectangle. Fold the top down toward the center and pinch it gently. Turn the dough 180º and fold the top down again toward the center and pinch it gently (creating an “envelope”). Fold the top down again toward the center, pinching gently. Repeat one last time folding the top down all the way to end, pinching to seal the two halves together. (Again: Best to watch the video here!) Use both hand to gently roll the dough, then flip the log over and pinch the seam together. Flip the log over one last time, roll gently, then transfer to a lightly floured DoughMate container. (Alternatively you could use a 9×13-inch baking pan, which you will tuck inside a 2-gallon ziptop bag to create an airtight environment.) Roll the log in the flour, letting it rest seam-side down. Cover the vessel and let rest for 2.5 – 3 hours or until the dough passes the poke test: when it’s pressed gently, it springs back slowly.
- Prepare Your Baking Vessel of Choice : Challenger Bread Baker: After the dough has proofed for roughly 2 hours, place your Challenger bread pan in the oven on a middle rack and preheat it to 450ºF. This will take roughly 30 minutes. Fold a standard sheet of parchment paper in half vertically, and tear or cut along the seam. Baking Steel: After the dough has proofed for roughly 2 hours, place your Baking Steel in the oven on a middle rack, and preheat it to 450ºF. This will take roughly 30 minutes. Fold a standard sheet of parchment paper in half vertically, and tear or cut along the seam. Have the disposable aluminum pan at the ready as well as a small oven-safe skillet or vessel, strong enough to weigh down the pan without collapsing it. Emile Henry Baguette Baker: Butter your baguette baker and set aside. Preheat your oven to 450ºF (you do not preheat this vessel).
- Score your Dough: Open the lid of the DoughMate and gently roll the log back and forth a few times to release it from the bottom of the vessel. Use your hand to brush away the excess flour. If you are using the Challenger Bread Baker or Baking Steel, lift up the dough and transfer it to one of the parchment paper strips. Using a sharp blade, make three diagonal slashes evenly spaced along the top of the log. If you using something similar to the Emile Henry lidded baguette baker, simply transfer it to the buttered baker, then using a sharp blade, make three diagonal slashes evenly spaced along the top of the log.
- Bake Your Dough: Challenger Bread Baker: Using reliable oven mitts, remove the lid from the baker and lower the parchment sheet into the bottom of the pan, orienting it on the diagonal to allow for the most space. Cover the vessel. Close the oven. Bake for 10 minutes. Uncover and bake for 10 minutes more or until the baguette is evenly golden brown or to your liking. Baking Steel: Place the parchment sheet on a peel, and shimmy it parchment paper and all onto the steel. Cover with the aluminum pan. Place a small oven-safe skillet or something heavy enough to weigh the pan down without collapsing it. Bake for 10 minutes. Uncover and bake for 10 minutes more or until the baguette is evenly golden brown or to your liking. Emile Henry Baguette Baker: Your scored dough is in the baker (per step 8). Cover the vessel and transfer to your preheated oven (450ºF). Bake for 10 minutes. Uncover and bake for 10 minutes more or until the baguette is evenly golden brown or to your liking.
- Let Cool: Remove the baguette from the oven and let cool for 20-ish minutes before serving.
- Storing: Baguettes are best eaten the day they are made, but if you must store them, transfer them to a ziplock bag and store at room temperature for up to 3 days or in the freezer for up to 3 months. Always reheat before serving: 350ºF for 15 minutes or so.
- Prep Time: 2 days
- Cook Time: 20 minutes
- Category: Bread
- Method: Oven
- Cuisine: American, French
Made with a no-knead, four-ingredient dough, these baguettes have an open crumb and a shatteringly crisp crust. The key to success is twofold: allowing the dough sufficient time to ferment and baking in a steamy environment. Find step-by-step instructions below.
If you’ve attempted making baguettes at home but have found the process discouraging from the shaping (requiring very practiced hands) to the equipment (couches, lames, lava rocks) to the baking (demanding steam), I hear you.
Baguettes are not the easiest of bread recipes to make at home. Having tried many methods over the years, I have learned that the key to success is twofold: allowing the dough sufficient time to ferment and baking with steam.
As with many breads, a long fermentation produces a better bread. Why? Because when dough rises slowly, good things happen: enzymes in both the flour and the yeast break down the starches in the flour into simple sugars, which contribute both to flavor and to browning. If you make your dough at least a day before you plan on baking it, you will see improved flavor and browning.
As with many crusty bread recipes (like this simple sourdough bread recipe and Jim Lahey’s no-knead bread ), baguettes require steam during the baking process to produce that deeply burnished, shatteringly crisp crust. Let’s explore this further:
The Importance of Steam: Oven Spring + Crust Formation
Steam is good for baguettes for two reasons: oven spring (dough springing in the oven upon entry) and crust development.
Oven Spring
Dough springs in the oven for a few reasons: 1. Increased fermentation activity, meaning as the yeasts rapidly multiply in the hot oven, the dough produces carbon dioxide gas. 2. Steam : As water in the dough evaporates, it transforms into steam. Both the carbon dioxide gas and the steam push against the gluten structure, causing the dough to spring.
A moist, steamy environment allows for maximum oven spring (which creates a light and airy crumb) because it allows the dough to expand to its fullest potential before a crust forms. In other words: when dough stays soft during the early phases of baking, its oven spring will be greater because it isn’t being restricted by a dry, hard crust.
Crust Formation: Color & Texture
In the early stages of baking, the rapid increase in enzymatic activity on the surface of the loaf breaks down the starches in the dough into simple sugars. These sugars ultimately contribute to crust color. In a steamy environment, the enzymes remain active for longer, leading to an even richer color.
A steamy environment will also help produce a crust with a subtle sheen. This is because, during the early stages of baking, the starches on the surface of the loaf gelatinize — meaning they swell with water, and as they break down, they form a gel. During the last 10 minutes of baking, when the lid is removed and the baguettes are baking in dry heat, that gel layer dries out, transforming into a shiny, crackly crust as opposed to one that is dull and hard.
Compare the two photos below. This first one shows a baguette baked with steam:
In the below photo, the baguettes were baked on the Baking Steel without steam. In the above photo, observe the caramelization of the crust, the score differentiation, and the slight sheen. Compare it to the dry, lusterless crusts below:
How to Make Baguettes, Step by Step 🥖🥖
Gather your ingredients: flour, salt, yeast, and water. I conducted most of my experiments with King Arthur Bread flour, since it is widely available and such a reliable flour. SAF instant yeast is my favorite. See notes in the recipe box regarding salt.
I also had excellent results using this Petra 0102 flour , which is made from partially sprouted wheat flour and which I love for the flavor and texture it lends to a bread or pizza.
Measure everything out, ideally with a scale :
Combine the dry ingredients together first:
Whisk them together:
Then add the water:
Mix until you have a shaggy dough ball:
Let it rest for 30 minutes or so, then stretch and fold it (see video for guidance):
Cover the bowl with an airtight lid, then let it rise at room temperature until it doubles in volume and its surface is covered in bubbles.
Using lightly floured hand, deflate the dough:
Then turn it out onto a work surface and divide it into four equal portions. I do like to use a scale to ensure each portion is identical, roughly 237 grams each.
Ball up each portion:
Transfer to storage vessels , then transfer to the fridge ideally for at least a day. The dough balls can stay in the fridge for as long as a week.
On baking day, turn the dough out onto a work surface. I do not use any flour here, but if you find the dough to be sticky, use flour lightly as needed.
Pat the dough into roughly a 6×7-inch rectangle:
Fold the dough from the top down:
Rotate the dough 180 degrees, and fold from the top down (also known as an “envelope” fold).
Then fold again from the top down, essentially folding the envelope in half.
Then, repeat (see video for guidance):
Pinch the seam closed.
Turn over so that the seam is down and gently roll.
Here’s video guidance of the above-outlined steps:
Transfer to a floured, lidded storage vessel. I love these DoughMates , but you could use a large Tupperware or a 9×13-inch dish tucked inside a 2-gallon ziptop bag.
Often I’ll proof two at one time, though I try to stagger the entry of each by 30 minutes so as to avoid overproofing the dough.
Cover the container and let the dough proof for 2.5 to 3 hours or…
… until it feels very light and airy to the touch. One assessment tool you can use is the “poke” test: using a lightly floured finger, poke the dough making an indentation roughly 1/2-inch deep; if it springs back immediately, the dough needs more time; if it springs back slowly initially, but then holds a partial indentation — in other words, if it doesn’t completely refill — the dough is ready to be baked. (And if it doesn’t spring back at all, the dough is overproofed, but push on anyway, because it may bake up just fine.) I don’t love this method because I find it to be misleading: my dough behaves nearly the same way at the 2-hour mark as it does at the 3-hour mark, and yet my baguettes consistently have a lighter, airier crumb if I wait 3 hours before baking them. Nonetheless, it is a tool you can use.
When the dough is ready for baking, remove it from the DoughMate and place it on a sheet of parchment paper — I take full sheets, fold them in half lengthwise, then cut them in half.
Use a razor blade to score it.
Then bake it…
Method 1: Preheated Challenger Bread Pan . Place the Challenger or other oblong-shaped Dutch oven into an oven and preheat to 450ºF. This takes roughly 30 minutes in my oven. Lower the scored log, parchment paper and all into the preheated pan.
Cover it and return it to the oven for 10 minutes.
Uncover it, and return it to the oven for another 10 minutes…
… or until the baguette is beautifully golden brown:
Transfer to a cooling rack. Let cool for 15 minutes or so before…
… serving.
As noted above, I’ve been experimenting with Petra 0102 flour . The baguette on the left is made with Petra flour; the one on the right is King Arthur bread flour.
Left: Petra flour ; right: King Arthur bread flour.
Method 2: Baking Steel or stone. Place a Baking Steel or a baking stone in the middle of your oven and preheat it to 450ºF. This may take 30 minutes or so. Shimmy your baguette, parchment paper and all, onto the hot surface using a peel .
Cover the baguette with a disposable aluminum pan (lasagna-sized) and weigh it down with something heavy enough to seal it down without collapsing it:
Bake for 10 minutes. Then remove the weight and pan.
Continue baking the baguette for another 10 minutes…
… or until it’s golden and bronzy to your liking:
Let cool for 20-ish minutes or so before halving:
The below pictured loaf is made with KAF bread flour, and this dough experienced no refrigeration: I mixed the dough on Friday night, portioned it, and balled it up Saturday morning, let the balls rest in a DoughMate for 2 hours or so, shaped into baguettes, and let rest again for another 2 hours; then baked:
Description
Made with a no-knead, four-ingredient dough, these baguettes have an open crumb and a shatteringly crisp crust. The key to success is twofold: allowing the dough sufficient time to ferment and baking in a steamy environment. Find step-by-step instructions below.
Dough recipe adapted from the outdoor variation of the Neapolitanish pizza dough recipe from my cookbook, Pizza Night .
Notes
- For best results, use a scale to measure everything.
- Flour: In most of my experiments I used King Arthur Bread flour but I also got excellent results and often an even more open crumb when I used Petra 0102 Flour , which is made from partially sprouted wheat.
- Salt : I use Diamond Crystal kosher salt, but you could use fine sea salt in its place. Again, for best results use a scale to measure. 16 grams of salt may seem like a lot, but the rule for bread and pizza dough is that the amount of salt should be 2 to 3% the weight of the flour. 16.5 grams is 3%; 11 grams is 2%. If you are using Diamond Crystal kosher salt, you’ll use roughly 5 teaspoons. If you are using Morton kosher salt or fine sea salt, you’ll use 2.5 teaspoons.
- Yeast: SAF instant yeast is my favorite.
Timing
Example Timeline #1: Fridge Time
Wednesday Evening: Mix Dough
Thursday Morning : Ball Up Dough, Transfer to Fridge
Friday Afternoon (or any subsequent afternoon for as long as a week): Remove Dough Ball From Fridge 3 Hours Prior to Baking
Friday Evening: Bake Baguette
Example Timeline #2: No Fridge Time
Thursday Evening: Mix Dough
Friday Morning : Ball Up Dough, Transfer to a Lidded Vessel (such as a DoughMate), Leave at Room Temperature for Two Hours.
Friday Midday: Shape the Dough Balls into Baguette Shape and Return to Lidded Vessel, Leave at Room Temperature for Roughly Two Hours More.
Friday Afternoon : Bake the Baguettes
Three baking tools for baguettes:
- Challenger Bread Baker
- Baking Steel ( the original or the pro ) + a disposable aluminum lasagna pan
- Emile Henry Lidded Baguette Baker or other
Other Equipment:
Dough Storage Containers: This set of four has become a favorite.
DoughMate storage vessel
parchment paper
razor blades
550 grams (about 4¼ cups ) bread flour or all-purpose flour, plus more for dusting, see notes above
15 to 16 grams salt, see notes above
2 grams (about ½ teaspoon ) instant yeast, see notes above
385 grams (about 1 2/3 cups ) cold (about 60°F) water
Extra-virgin olive oil
- Mix the dough : In a large bowl, whisk together the flour, salt, and yeast. Add the water and use a spatula to mix until the dough comes together into a shaggy dough ball. If the dough is dry, use your hands to gently knead it in the bowl until it comes together. Cover the bowl with a towel and let rest for at least 15 minutes and up to 30 minutes.
- Stretch and fold : Fill a small bowl with water. Dip one hand into the bowl of water, then use the dry hand to stabilize the bowl while you grab an edge of the dough with your wet hand, pull up, and fold it toward the center. Repeat this stretching and folding motion 8 to 10 times, turning the bowl 90 degrees after each set. By the end, the dough should transform from shaggy in texture to smooth and cohesive.
- Pour about 1 teaspoon of olive oil over the dough and use your hands to rub it all over. Cover the bowl tightly and let the dough rise at room temperature until it has nearly doubled in volume, 6 to 10 hours. The time will vary depending on the time of year and the temperature of your kitchen.
- Portion the dough : Turn the dough out onto a lightly floured work surface and use a bench scraper to divide the dough into 4 equal portions, roughly 237 grams each. Using flour as needed, form each portion into a ball by grabbing the edges of the dough and pulling them toward the center to create a rough ball. Then flip the ball over, cup both your hands around the dough, and drag it toward you, creating tension as you pull. Repeat this cupping and dragging until you have a tight ball.
- Store the dough: Place the dough balls in individual airtight containers (see notes above) and transfer to the fridge for 1 to 3 days.
- Shape and proof the dough: On baking day, remove however many rounds of dough you wish to make into baguettes. Place on a clean work surface. I prefer to use no flour here, but if you are finding the dough to be too sticky, lightly flour your work surface. ( Note: I suggest watching the video before you attempt shaping. ) Pat the dough into roughly a 6 inch square or 6×7-inch rectangle. Fold the top down toward the center and pinch it gently. Turn the dough 180º and fold the top down again toward the center and pinch it gently (creating an “envelope”). Fold the top down again toward the center, pinching gently. Repeat one last time folding the top down all the way to end, pinching to seal the two halves together. (Again: Best to watch the video here!) Use both hand to gently roll the dough, then flip the log over and pinch the seam together. Flip the log over one last time, roll gently, then transfer to a lightly floured DoughMate container. (Alternatively you could use a 9×13-inch baking pan, which you will tuck inside a 2-gallon ziptop bag to create an airtight environment.) Roll the log in the flour, letting it rest seam-side down. Cover the vessel and let rest for 2.5 – 3 hours or until the dough passes the poke test: when it’s pressed gently, it springs back slowly.
- Prepare Your Baking Vessel of Choice : Challenger Bread Baker: After the dough has proofed for roughly 2 hours, place your Challenger bread pan in the oven on a middle rack and preheat it to 450ºF. This will take roughly 30 minutes. Fold a standard sheet of parchment paper in half vertically, and tear or cut along the seam. Baking Steel: After the dough has proofed for roughly 2 hours, place your Baking Steel in the oven on a middle rack, and preheat it to 450ºF. This will take roughly 30 minutes. Fold a standard sheet of parchment paper in half vertically, and tear or cut along the seam. Have the disposable aluminum pan at the ready as well as a small oven-safe skillet or vessel, strong enough to weigh down the pan without collapsing it. Emile Henry Baguette Baker: Butter your baguette baker and set aside. Preheat your oven to 450ºF (you do not preheat this vessel).
- Score your Dough: Open the lid of the DoughMate and gently roll the log back and forth a few times to release it from the bottom of the vessel. Use your hand to brush away the excess flour. If you are using the Challenger Bread Baker or Baking Steel, lift up the dough and transfer it to one of the parchment paper strips. Using a sharp blade, make three diagonal slashes evenly spaced along the top of the log. If you using something similar to the Emile Henry lidded baguette baker, simply transfer it to the buttered baker, then using a sharp blade, make three diagonal slashes evenly spaced along the top of the log.
- Bake Your Dough: Challenger Bread Baker: Using reliable oven mitts, remove the lid from the baker and lower the parchment sheet into the bottom of the pan, orienting it on the diagonal to allow for the most space. Cover the vessel. Close the oven. Bake for 10 minutes. Uncover and bake for 10 minutes more or until the baguette is evenly golden brown or to your liking. Baking Steel: Place the parchment sheet on a peel, and shimmy it parchment paper and all onto the steel. Cover with the aluminum pan. Place a small oven-safe skillet or something heavy enough to weigh the pan down without collapsing it. Bake for 10 minutes. Uncover and bake for 10 minutes more or until the baguette is evenly golden brown or to your liking. Emile Henry Baguette Baker: Your scored dough is in the baker (per step 8). Cover the vessel and transfer to your preheated oven (450ºF). Bake for 10 minutes. Uncover and bake for 10 minutes more or until the baguette is evenly golden brown or to your liking.
- Let Cool: Remove the baguette from the oven and let cool for 20-ish minutes before serving.
- Storing: Baguettes are best eaten the day they are made, but if you must store them, transfer them to a ziplock bag and store at room temperature for up to 3 days or in the freezer for up to 3 months. Always reheat before serving: 350ºF for 15 minutes or so.
- Prep Time: 2 days
- Cook Time: 20 minutes
- Category: Bread
- Method: Oven
- Cuisine: American, French
Find it online : https://alexandracooks.com/2024/09/19/crusty-open-crumb-baguettes/
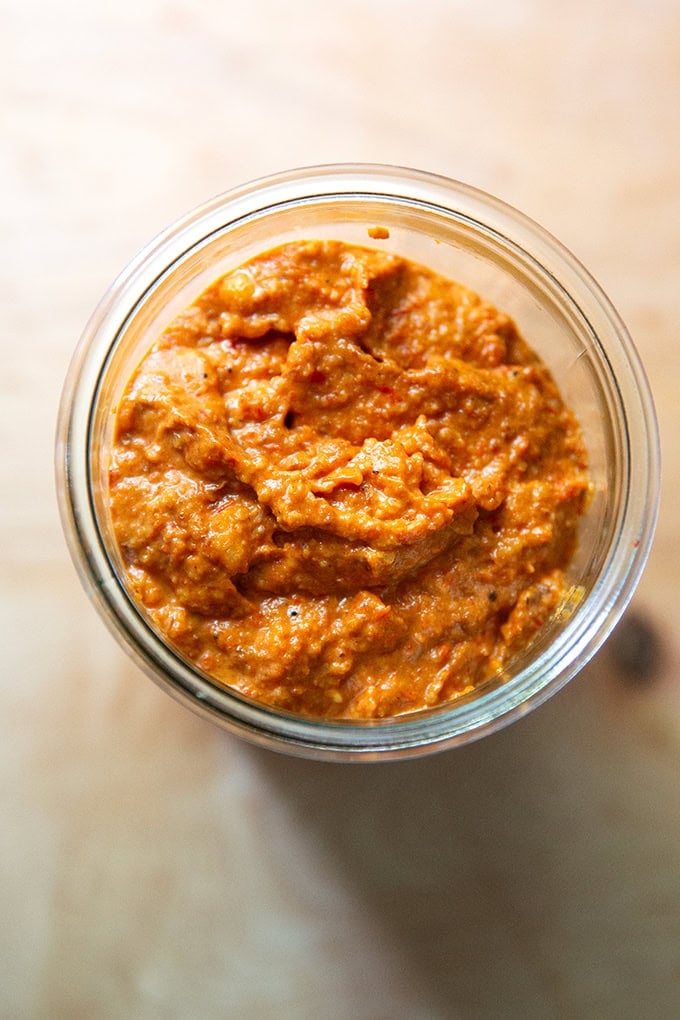
This homemade romesco sauce comes together in no time and is so incredibly flavorful. The beauty of this recipe is that you don’t peel the peppers — you roast them with the tomatoes and garlic; then you purée them with olive oil, vinegar, almonds, and spices. You will want to spread this smoky romesco sauce on everything!
A few months ago I opened Joe Yonan’s latest book, Mastering the Art of Plant-Based Cooking , and was immediately struck by a recipe for romesco sauce. It called for placing all of the essential components — peppers, tomatoes, unpeeled garlic, stale bread, and almonds — on a sheet pan, roasting them all together; then puréeing them with smoked paprika, vinegar, and olive oil.
If you’ve made romesco sauce before, you know it often calls for roasting and peeling peppers first, a step that usually deters me from getting started. Joe’s method sounded so promising, so I gave it a go and was astounded by the ease in which the sauce came together as well as the flavor: smoky, bright, slightly sweet and with the loveliest texture thanks to the generous amount of almonds.
I loved not having to peel the peppers, and I loved how easily the roasted unpeeled cloves of garlic released from their skins after 15 minutes in the oven.
Second: I now omit the bread cubes. Out of stale bread on one occasion, I carried on without it, and I could not taste a difference in the finished sauce. I think this is because the toasted almonds provide so much by way of body, texture, and flavor. If you wish to add stale bread to this sauce, which is traditional, see the notes in the recipe card below.
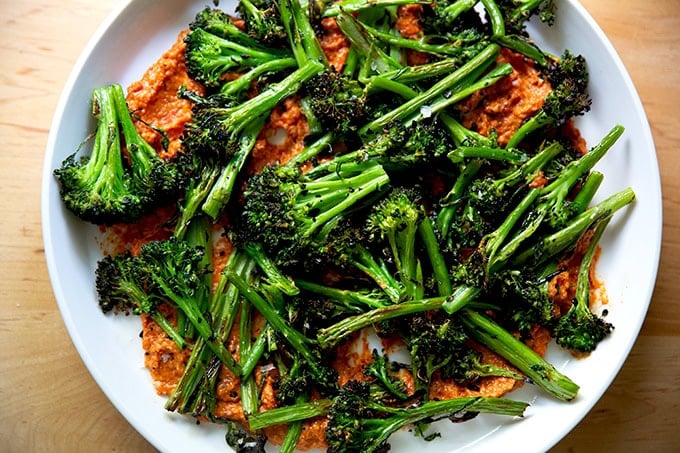
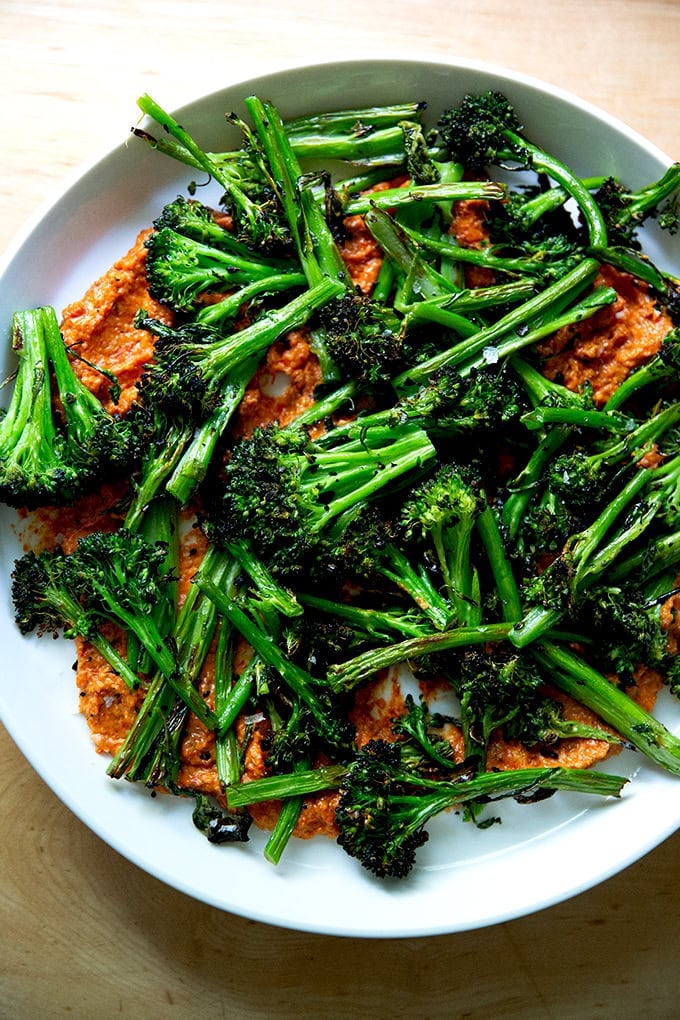
Friends, I can’t stop making this sauce! It is heavenly served as a dip with raw or blanched vegetables of all kinds — carrots, snap peas, bell peppers, radishes — but my favorite way to use it is as such: spread it over a platter and tumble charred vegetables over the top. Broiled broccolini is my favorite:
You’ll find instructions for both the broccolini and romesco below. I can’t wait for you to make it!
Joe Yonan’s latest book: Mastering the Art of Plant-Based Cooking
Homemade Romesco Sauce, Step by Step
Gather your ingredients: almonds, peppers, garlic, tomatoes, smoked paprika, olive oil, vinegar, and stale bread (optional… I now omit).
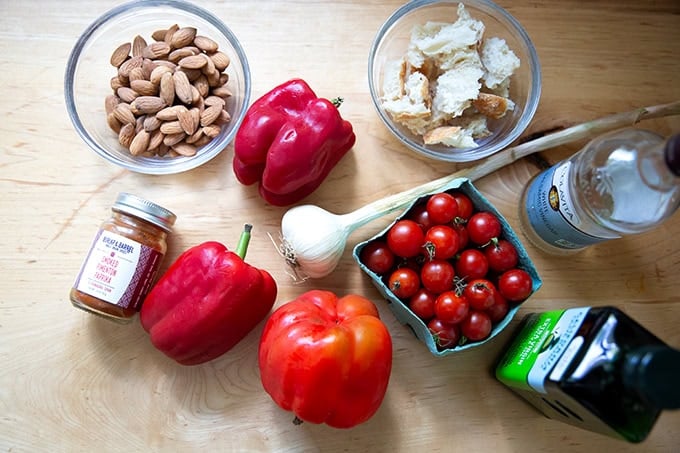
Chop the peppers and place them on a sheet pan with tomatoes, unpeeled but lightly smashed garlic, and the bread cubes (if using).
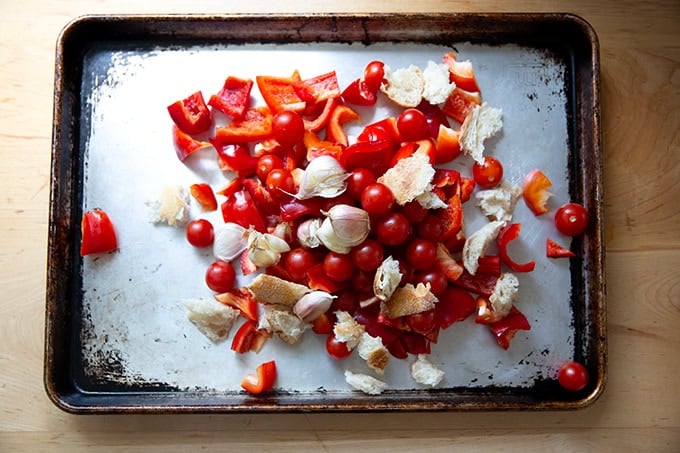
Toss with olive oil and salt…
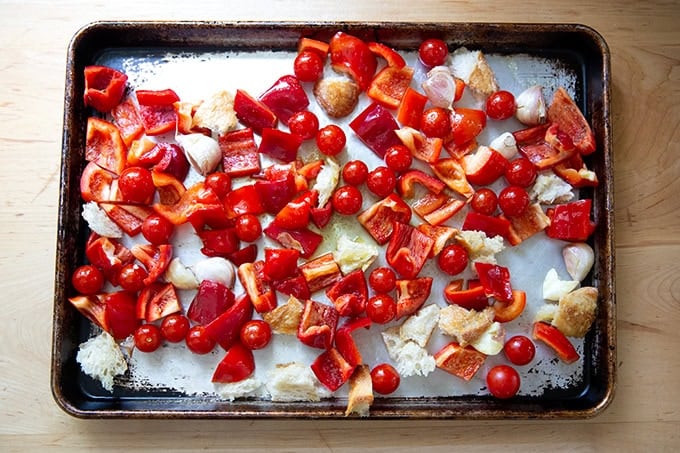
… then roast for 15 minutes at 500ºF.
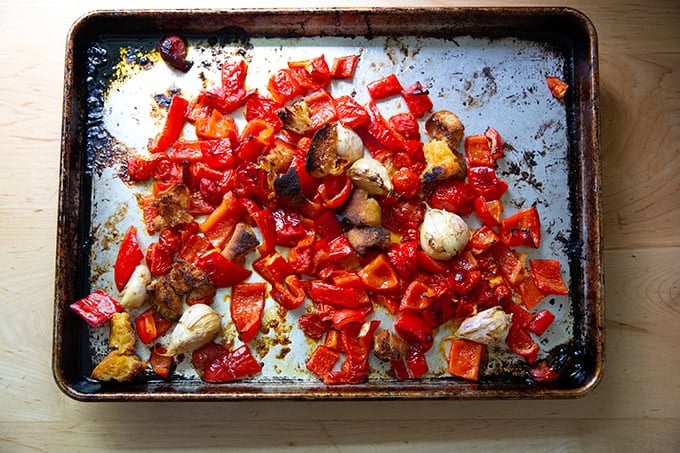
Peel the cloves of garlic — the skins will slip right off.

Then place everything into a blender with toasted almonds, smoked paprika, olive oil, vinegar, and salt.
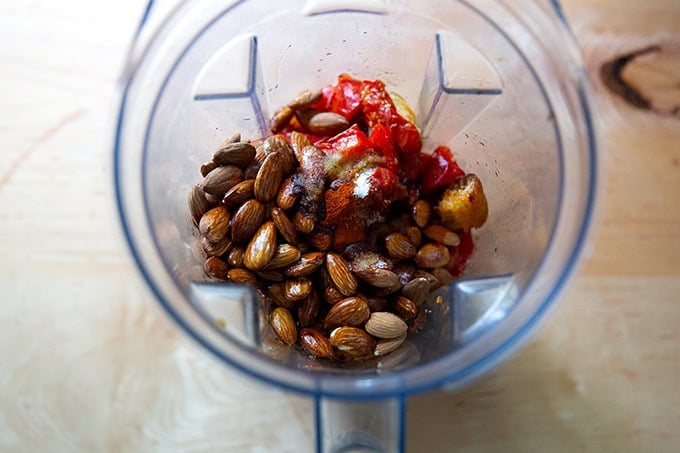
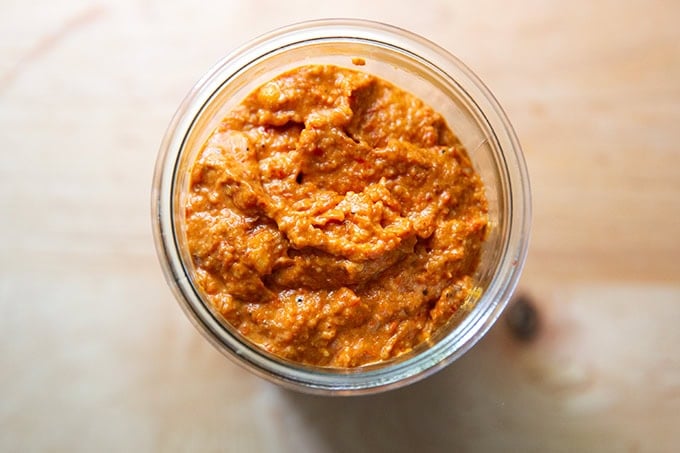
Purée until blended with a lightly coarse texture.

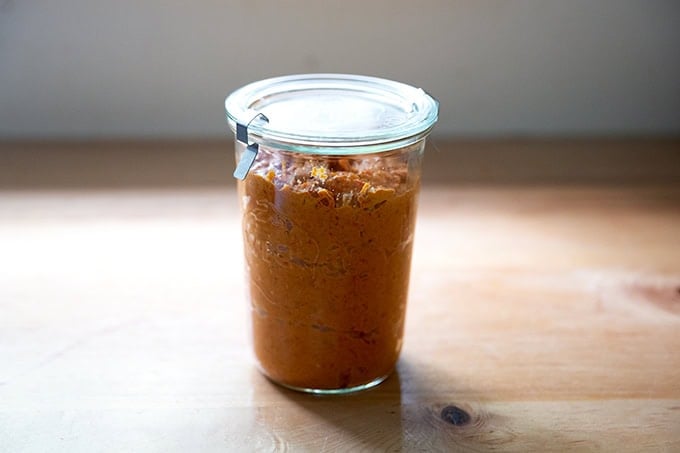
Transfer to a jar and store in the fridge for up to two weeks.
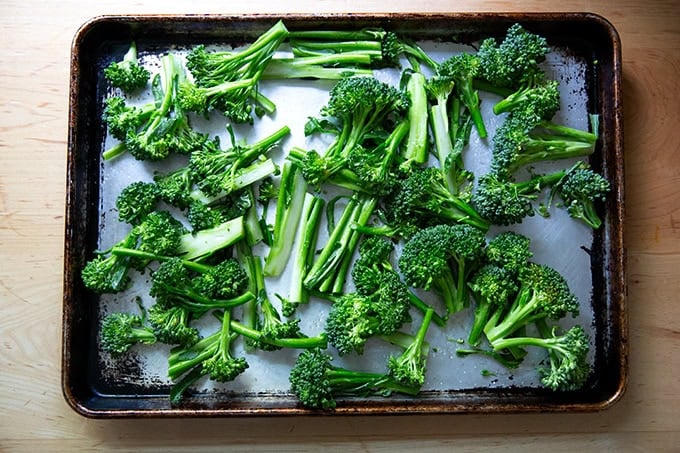
A favorite way to eat it: Place 1 pound of chopped broccolini on a sheet pan. Dress with 2 tablespoons of extra-virgin olive oil and 1 teaspoon of kosher salt (Diamond Crystal). Toss to combine then spread into an even layer.
Broil for 5 to 6 minutes, checking every two minutes, until charred to your liking.
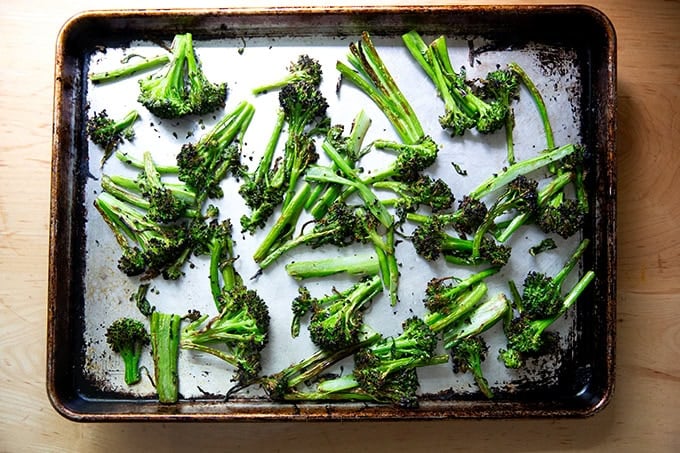
Tumble the broccolini onto a platter spread with romesco. Drizzle with a little more olive oil and season with a pinch of flaky sea salt if you wish.
This has been my choice side dish for my pizza nights of late.

Description
Notes:
The original recipe calls for roasting everything — the peppers, tomatoes, bread cubes, garlic, and almonds — at 500ºF for 15 minutes. This method works — I’ve made it like this multiple times successfully — but on one or two occasions, I have found it to be a little less forgiving: sometimes my almonds got too toasted as did my bread cubes.
I’ve found that toasting the almonds in a skillet stovetop over low heat while the other ingredients roast is just as simple and allows me to get a little more char on the peppers and tomatoes in the oven. I often roast them for 20 minutes total.
Also, I now omit the bread cubes. This is for a few reasons, first, because, as noted, I found the bread often chars a bit too much during the 15 minutes, but mostly because I don’t feel the bread crumbs add anything. I cannot taste a difference between a romesco made with toasted bread and one made without. I think this is because the almonds provide so much by way of body, texture, and flavor. If you wish to add bread cubes to this, which is traditional for romesco, do so. To the sheet pan of vegetables add:
- 1 cup lightly packed (56 g) bread cubes
A Few More Notes:
Vinegar: Sherry vinegar is traditional here, but it can be overpowering. If you want to use it, I’d suggest starting with 1 tablespoon and then using a milder vinegar for the other few tablespoons.
Salt : I use Diamond Crystal kosher salt. If you use Morton or fine sea salt, you’ll need half as much by volume.
Heat: If you like a little heat, add ½ teaspoon cayenne, or to taste.
To make the charred broccolini: Place 1 pound of chopped broccolini on a sheet pan. Dress with 2 tablespoons of extra-virgin olive oil and 1 teaspoon of kosher salt (Diamond Crystal). Toss to combine then spread into an even layer. Broil for 5 to 6 minutes, checking every two minutes, until charred to your liking. Drizzle with a little more olive oil and season with a pinch of flaky sea salt if you wish.
- 1 cup (142 g) raw almonds
- 3 large bell peppers (1.25 lbs), cut into 2 -inch chunks
- 8 ounces cherry tomatoes or 2 large tomatoes
- 6 garlic cloves, unpeeled and lightly smashed
- ¼ cup extra-virgin olive oil, plus 1/3 cup for blending
- kosher salt or fine sea salt, see notes above
- 2 teaspoons smoked paprika
- 3 to 4 tablespoons white balsamic vinegar, plus more to taste, see notes above
- Preheat the oven to 500ºF.
- Place the almonds in a small skillet and set on the stovetop over low heat.
- On a sheet pan, toss together the peppers, tomatoes, garlic cloves, 1/4 cup olive oil, and 1 1/2 teaspoon kosher salt (Diamond Crystal, see notes above). Roast for 15 minutes, stirring halfway, or until the mixture browns in spots. Often I roast for 20 minutes total. Let cool slightly.
- Extract the garlic cloves and peel them. Then add the contents of the sheet pan plus the garlic to a food processor or blender. Add the smoked paprika, almonds, another 1 1/2 teaspoons kosher salt (Diamond Crystal, see notes above), 1/3 cup extra-virgin olive oil, and 3 tablespoons of vinegar. Purée until mostly smooth with a little chunky texture. Taste and season with more salt and/or vinegar if needed: I often add another 1/2 teaspoon of kosher salt as well as another tablespoon of vinegar.
- Drizzle with olive oil before serving.
- Prep Time: 10 minutes
- Cook Time: 20 minutes
- Category: Condiment
- Method: Oven, Blender
- Cuisine: Spanish, American
