When my friend Anne announced she was getting married in my neck of the woods and asked if I might be interested in making some apple pies in place of a wedding cake, I immediately called my aunt Marcy to consult. I hadn’t made a pie in a long time — years! — and I not only needed a refresher on the basics — how many apples? what spices? tapioca or flour? how much sugar? — I also needed help with the logistics: would I realistically be able to make, bake and store enough pies to feed an entire (albeit small) wedding? Could I face this challenge with grace and dignity?
The conclusion we came to pretty quickly was no. Absolutely not. In my wise old age I have learned that sometimes it just makes sense to accept my limitations. Deep thoughts by Ali.
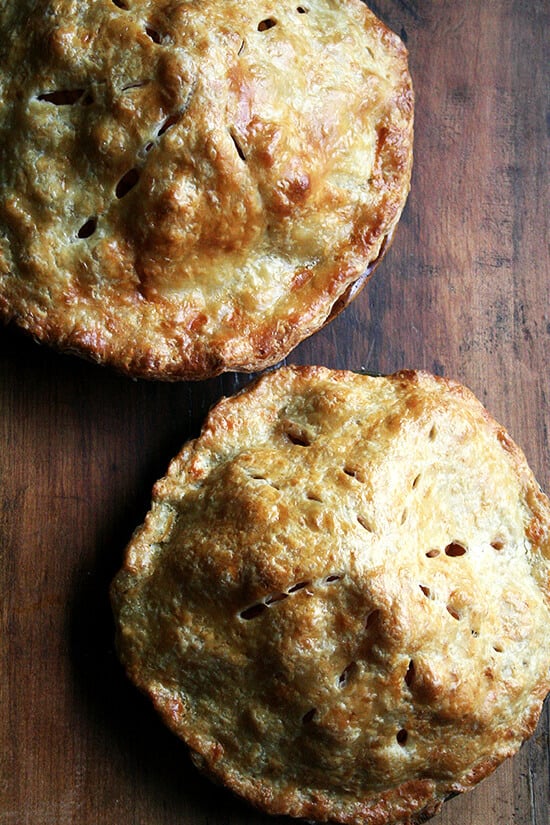
After explaining to Anne that for the wellbeing of everyone in my house I would have to decline, we came up with a saner solution: I would make two ceremonial pies for the pie-cutting ritual. Two pies I could handle. Nobody in my house would be harmed.
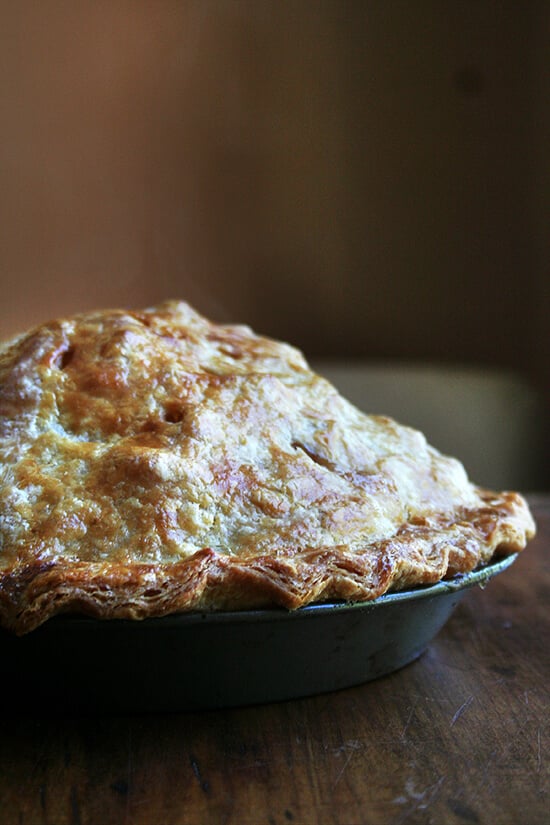
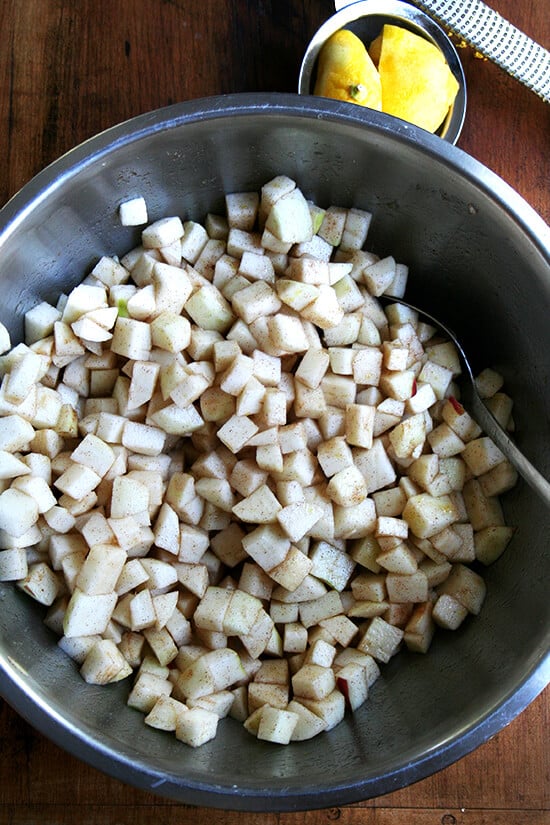
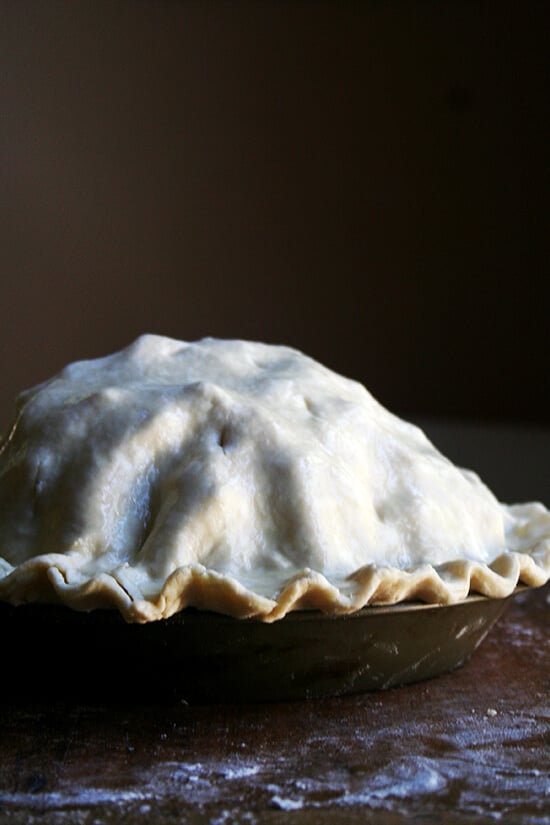
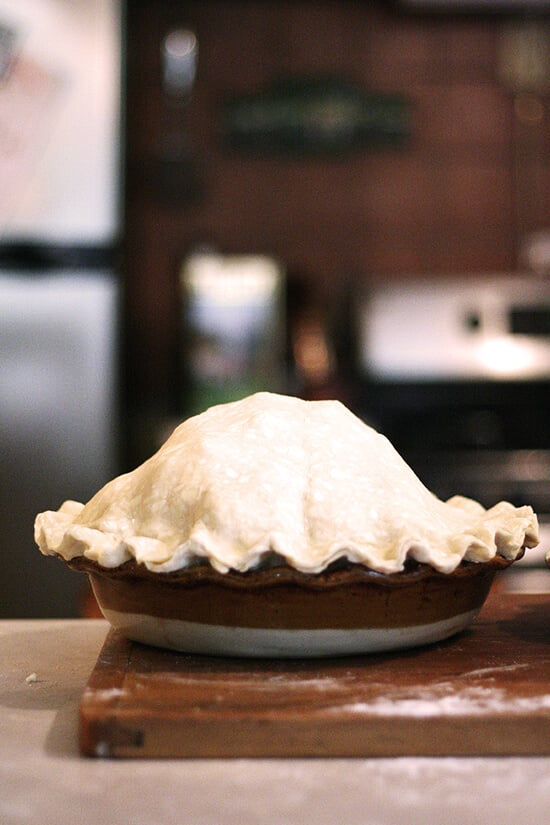
In the past few weeks, I’ve done a few test runs, seeking guidance from my aunt, the pie master in our family, the entire way. When it comes to making pies, Marcy cuts no corners, uses refrigerated bowls, a chilled marble rolling pin, and cold cold flour and butter. She follows the fraisage technique, using the heel — not the palm! — of her hand to cut the butter into the flour. She seasons the apples with both cinnamon and cloves, lemon juice and zest, and prefers tapioca to flour as a thickener. She never uses fewer than 10 apples per pie.
Over the years Marcy’s pies have developed such a reputation that other members of my family are afraid to weigh in on the subject of pie. During these past few weeks, I’ve called both my mother and sister to seek their advice on various pie-making matters, but from both of them each time I faced the same response: Ask Marcy.
I have done my best to relay my aunt’s pie-making wisdom here, with the exception, however, of the fraisage method, a technique I have not yet attempted, one that, once conquered, elevates the pie maker to the pie master: Marcy’s pie crusts boast an unparalleled level of flakiness. And so, I’m afraid, I leave you today with a quandary: To fraisage or not to fraisage? Perhaps something to ponder while apple picking this weekend? Happy Friday, Everyone.


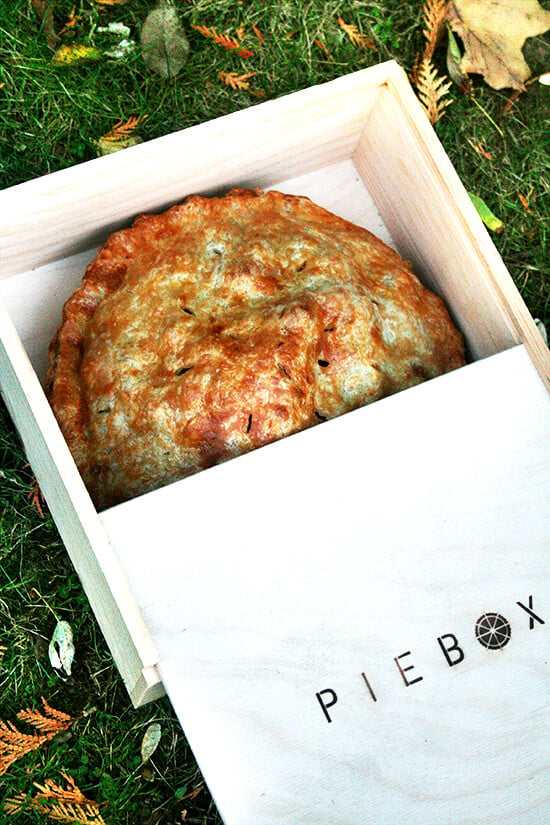
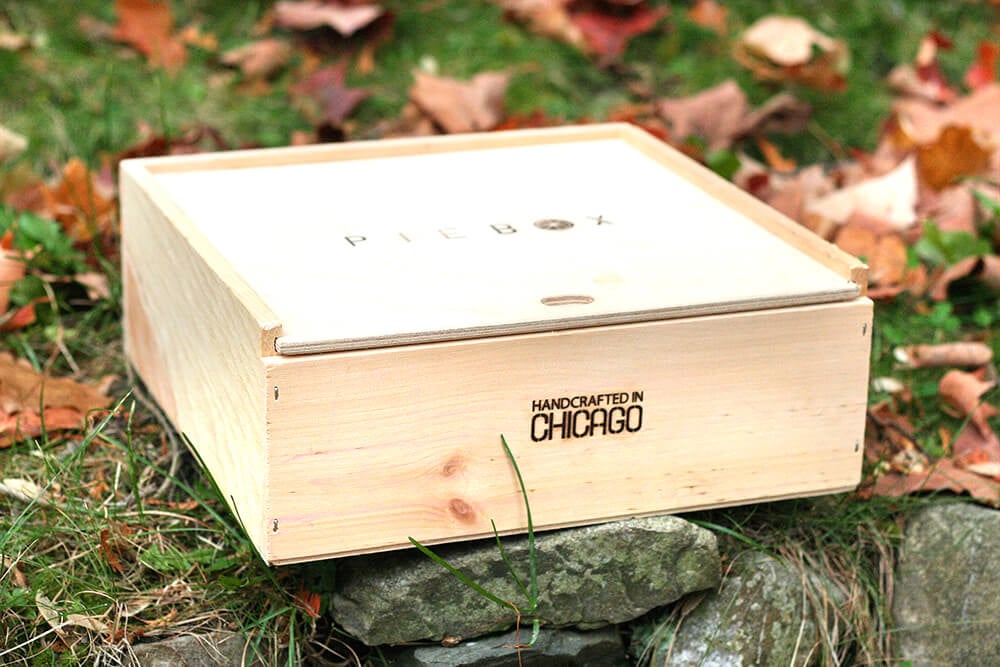
A dear friend living in Chicago gave me this piebox this past summer. Isn’t it fun?

Wouldn’t this be more fun?
Update: October 12th, 2013, Anne & Matt’s Wedding:


The beautiful couple, Anne and Matt:
- 2 rounds pie dough
- 10 apples, whatever you like, I like Cortland and Honey Crisp
- 3/4 cup to 1 cup sugar
- 1 teaspoon cinnamon
- a grating of fresh cloves (optional)
- zest of one lemon (optional)
- juice of one lemon
- 2 tablespoons tapioca (the minute kind) or flour
- 2 tablespoons butter (cold or room temperature)
- 1 egg mixed with 1 tablespoon cream for the egg wash
- Preheat the oven to 425ºF with racks in the lowest part of the oven. If you have a pizza stone or Steel, place it in the oven. Peel the apples and cut into large chunks. Place in a large bowl and toss with the 3/4 cup of sugar, the cinnamon, the cloves (if using), the zest (if using), the juice of one lemon and the tapioca. Set aside.
- On a lightly floured work surface, place one pie dough round in the center. Roll it out into a circle two inches larger in diameter than your pie plate. Fold the circle in half and in half again. Place in your pie plate and unfold. Press down gently so that the dough fits into the corners. Place pie plate in the fridge while you roll out the second round. Roll the second round out in the same fashion, making it a touch larger in diameter than the first round if possible.
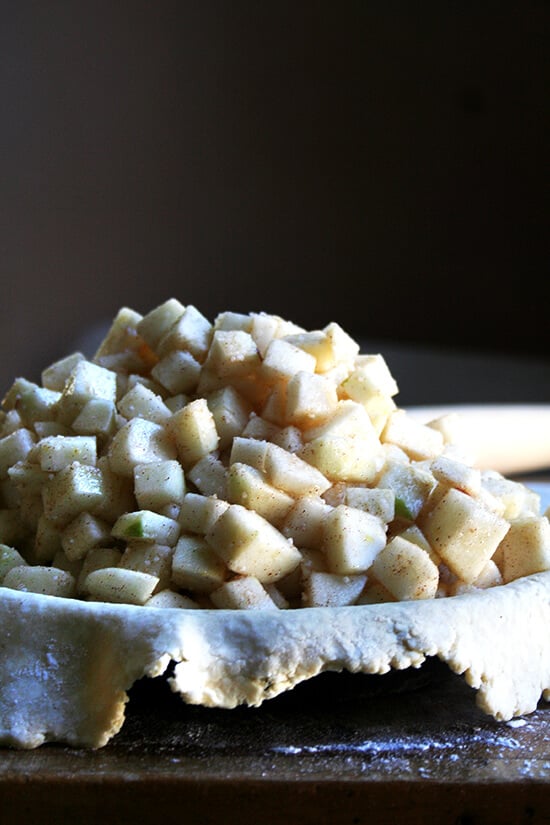
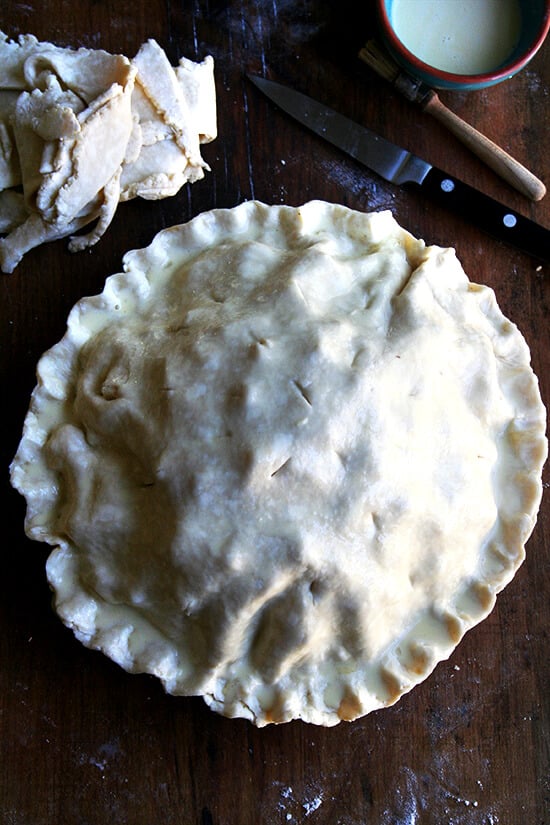
- Taste an apple. If it doesn’t taste sweet enough, add the remaining 1/4 cup sugar and toss. Pour the apples into the center of your pie plate, using your hands to keep as many apples from tumbling out as possible. Cut the butter into small cubes and scatter them over the apples. Lay the second round of pie dough over top. Using scissors, trim the overhanging dough and set aside. (Wrap these scraps into a ball to make cinnamon snails or an apple galette.)
- To crimp the edges together, lay two fingers a finger’s-width apart from your right hand below the edge of the dough. Gently press down with your left finger in between the two fingers. Move two fingers’ width to the right and repeat — your left-most finger on your right hand will reinforce the impression made by the right-most finger from the first crimp. Or just crimp the edges together however you wish. It all tastes the same in the end.
- Brush the entire surface of the dough with the egg wash. Make slits using a sharp paring knife all over the surface. Place the pie on a parchment-lined baking sheet.
- Bake for 20 minutes at 425ºF. Reduce the temperature to 350ºF and continue baking until golden all over, anywhere from 30 minutes to an hour longer depending on your oven. I have been baking them closer to 30 minutes at 350ºF, but aunt Marcy, the expert, bakes them longer, so use your judgment.
- Prep Time: 25 minutes
- Cook Time: 50 minutes
- Category: Dessert
- Method: bake
- Cuisine: American
When my friend Anne announced she was getting married in my neck of the woods and asked if I might be interested in making some apple pies in place of a wedding cake, I immediately called my aunt Marcy to consult. I hadn’t made a pie in a long time — years! — and I not only needed a refresher on the basics — how many apples? what spices? tapioca or flour? how much sugar? — I also needed help with the logistics: would I realistically be able to make, bake and store enough pies to feed an entire (albeit small) wedding? Could I face this challenge with grace and dignity?
The conclusion we came to pretty quickly was no. Absolutely not. In my wise old age I have learned that sometimes it just makes sense to accept my limitations. Deep thoughts by Ali.
After explaining to Anne that for the wellbeing of everyone in my house I would have to decline, we came up with a saner solution: I would make two ceremonial pies for the pie-cutting ritual. Two pies I could handle. Nobody in my house would be harmed.
In the past few weeks, I’ve done a few test runs, seeking guidance from my aunt, the pie master in our family, the entire way. When it comes to making pies, Marcy cuts no corners, uses refrigerated bowls, a chilled marble rolling pin, and cold cold flour and butter. She follows the fraisage technique, using the heel — not the palm! — of her hand to cut the butter into the flour. She seasons the apples with both cinnamon and cloves, lemon juice and zest, and prefers tapioca to flour as a thickener. She never uses fewer than 10 apples per pie.
Over the years Marcy’s pies have developed such a reputation that other members of my family are afraid to weigh in on the subject of pie. During these past few weeks, I’ve called both my mother and sister to seek their advice on various pie-making matters, but from both of them each time I faced the same response: Ask Marcy.
I have done my best to relay my aunt’s pie-making wisdom here, with the exception, however, of the fraisage method, a technique I have not yet attempted, one that, once conquered, elevates the pie maker to the pie master: Marcy’s pie crusts boast an unparalleled level of flakiness. And so, I’m afraid, I leave you today with a quandary: To fraisage or not to fraisage? Perhaps something to ponder while apple picking this weekend? Happy Friday, Everyone.
A dear friend living in Chicago gave me this piebox this past summer. Isn’t it fun?
Wouldn’t this be more fun?
Update: October 12th, 2013, Anne & Matt’s Wedding:
The beautiful couple, Anne and Matt:
- 2 rounds pie dough
- 10 apples, whatever you like, I like Cortland and Honey Crisp
- 3/4 cup to 1 cup sugar
- 1 teaspoon cinnamon
- a grating of fresh cloves (optional)
- zest of one lemon (optional)
- juice of one lemon
- 2 tablespoons tapioca (the minute kind) or flour
- 2 tablespoons butter (cold or room temperature)
- 1 egg mixed with 1 tablespoon cream for the egg wash
- Preheat the oven to 425ºF with racks in the lowest part of the oven. If you have a pizza stone or Steel, place it in the oven. Peel the apples and cut into large chunks. Place in a large bowl and toss with the 3/4 cup of sugar, the cinnamon, the cloves (if using), the zest (if using), the juice of one lemon and the tapioca. Set aside.
- On a lightly floured work surface, place one pie dough round in the center. Roll it out into a circle two inches larger in diameter than your pie plate. Fold the circle in half and in half again. Place in your pie plate and unfold. Press down gently so that the dough fits into the corners. Place pie plate in the fridge while you roll out the second round. Roll the second round out in the same fashion, making it a touch larger in diameter than the first round if possible.
- Taste an apple. If it doesn’t taste sweet enough, add the remaining 1/4 cup sugar and toss. Pour the apples into the center of your pie plate, using your hands to keep as many apples from tumbling out as possible. Cut the butter into small cubes and scatter them over the apples. Lay the second round of pie dough over top. Using scissors, trim the overhanging dough and set aside. (Wrap these scraps into a ball to make cinnamon snails or an apple galette.)
- To crimp the edges together, lay two fingers a finger’s-width apart from your right hand below the edge of the dough. Gently press down with your left finger in between the two fingers. Move two fingers’ width to the right and repeat — your left-most finger on your right hand will reinforce the impression made by the right-most finger from the first crimp. Or just crimp the edges together however you wish. It all tastes the same in the end.
- Brush the entire surface of the dough with the egg wash. Make slits using a sharp paring knife all over the surface. Place the pie on a parchment-lined baking sheet.
- Bake for 20 minutes at 425ºF. Reduce the temperature to 350ºF and continue baking until golden all over, anywhere from 30 minutes to an hour longer depending on your oven. I have been baking them closer to 30 minutes at 350ºF, but aunt Marcy, the expert, bakes them longer, so use your judgment.
Prep Time: 25 minutes
Cook Time: 50 minutes
Category: Dessert
Method: bake
Cuisine: American
2 rounds pie dough
10 apples, whatever you like, I like Cortland and Honey Crisp
3/4 cup to 1 cup sugar
1 teaspoon cinnamon
a grating of fresh cloves (optional)
zest of one lemon (optional)
juice of one lemon
2 tablespoons tapioca (the minute kind) or flour
2 tablespoons butter (cold or room temperature)
1 egg mixed with 1 tablespoon cream for the egg wash
- Preheat the oven to 425ºF with racks in the lowest part of the oven. If you have a pizza stone or Steel, place it in the oven. Peel the apples and cut into large chunks. Place in a large bowl and toss with the 3/4 cup of sugar, the cinnamon, the cloves (if using), the zest (if using), the juice of one lemon and the tapioca. Set aside.
- On a lightly floured work surface, place one pie dough round in the center. Roll it out into a circle two inches larger in diameter than your pie plate. Fold the circle in half and in half again. Place in your pie plate and unfold. Press down gently so that the dough fits into the corners. Place pie plate in the fridge while you roll out the second round. Roll the second round out in the same fashion, making it a touch larger in diameter than the first round if possible.
- Taste an apple. If it doesn’t taste sweet enough, add the remaining 1/4 cup sugar and toss. Pour the apples into the center of your pie plate, using your hands to keep as many apples from tumbling out as possible. Cut the butter into small cubes and scatter them over the apples. Lay the second round of pie dough over top. Using scissors, trim the overhanging dough and set aside. (Wrap these scraps into a ball to make cinnamon snails or an apple galette.)
- To crimp the edges together, lay two fingers a finger’s-width apart from your right hand below the edge of the dough. Gently press down with your left finger in between the two fingers. Move two fingers’ width to the right and repeat — your left-most finger on your right hand will reinforce the impression made by the right-most finger from the first crimp. Or just crimp the edges together however you wish. It all tastes the same in the end.
- Brush the entire surface of the dough with the egg wash. Make slits using a sharp paring knife all over the surface. Place the pie on a parchment-lined baking sheet.
- Bake for 20 minutes at 425ºF. Reduce the temperature to 350ºF and continue baking until golden all over, anywhere from 30 minutes to an hour longer depending on your oven. I have been baking them closer to 30 minutes at 350ºF, but aunt Marcy, the expert, bakes them longer, so use your judgment.
- Prep Time: 25 minutes
- Cook Time: 50 minutes
- Category: Dessert
- Method: bake
- Cuisine: American
Find it online : https://alexandracooks.com/2013/10/11/basic-apple-pie/
If you’re a vodka sauce fan, this recipe is for you. Ina’s vodka sauce = the best vodka sauce ever.
After reading the preface to this pasta alla vecchia bettola recipe in The Barefoot Contessa’s Foolproof , I had to make it immediately. More than being a mainstay on the menu of one of Ina’s favorite restaurants for 20 years, what struck me about the recipe was the method, which calls for roasting the sauce in a covered pan for one-and-a-half hours.
The recipe originates from a restaurant in Florence, and Ina likens the dish to the classic penne alla vodka “but with so much more flavor.”
Few sauces that call for using canned tomatoes leave me satisfied the way this one has. But this sauce has the potential to make this winter like no other.
During the hour and a half in the oven, liquids reduce and flavors concentrate, and the resulting sweet-spicy mixture needs little more than a few splashes of cream and a handful of cheese to balance it out. Adding the full cup of cream makes for an incredibly delicious sauce, but it can hold its own with much less.
This recipe is a little fussier than most of its kind, but the hands-on time is minimal, and the lengthy cooking time really transforms the canned tomatoes. If you’re a penne alla vodka fan, this one’s for you. And don’t be afraid to use the full cup of cream. You won’t be disappointed you did!
PS: If you’re pressed for time, this quick homemade tomato sauce , which includes a vodka sauce variation, can be ready in about 30 minutes.
PPS: And if you’re looking for a fresh tomato sauce, this quick, fresh tomato-basil sauce is a favorite.
Ina’s Vodka Sauce, Step by Step
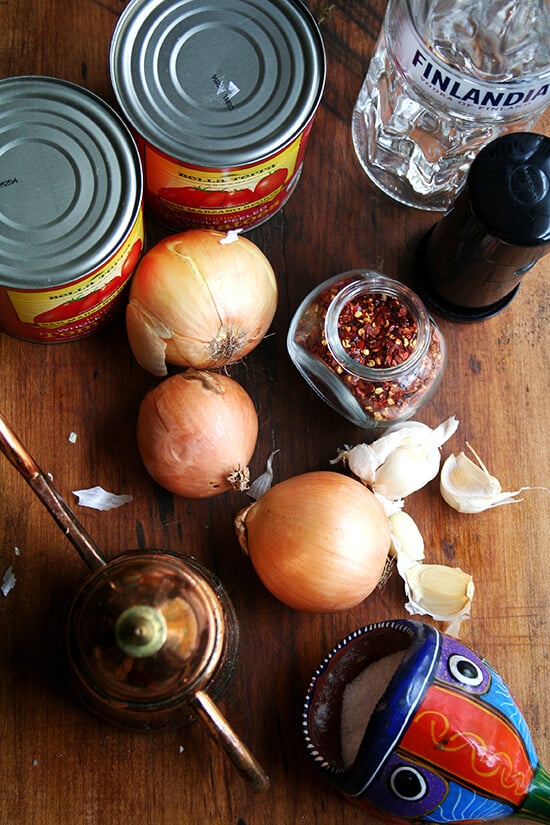
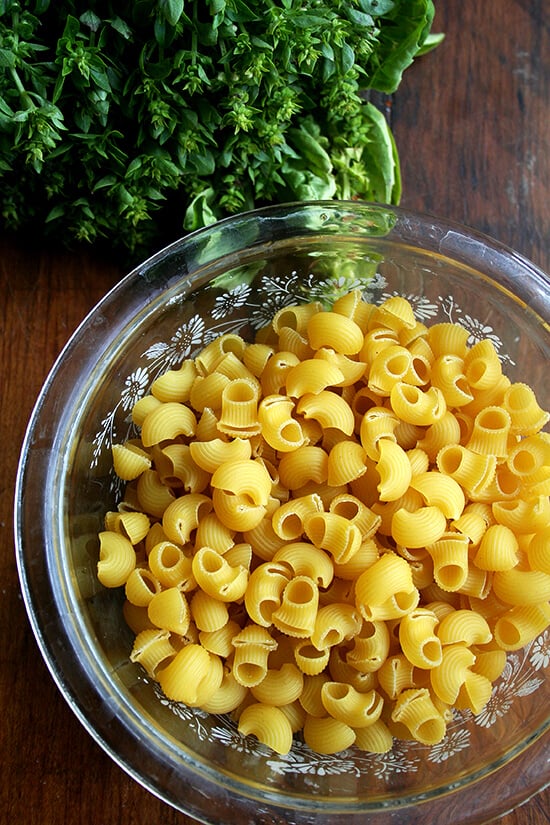
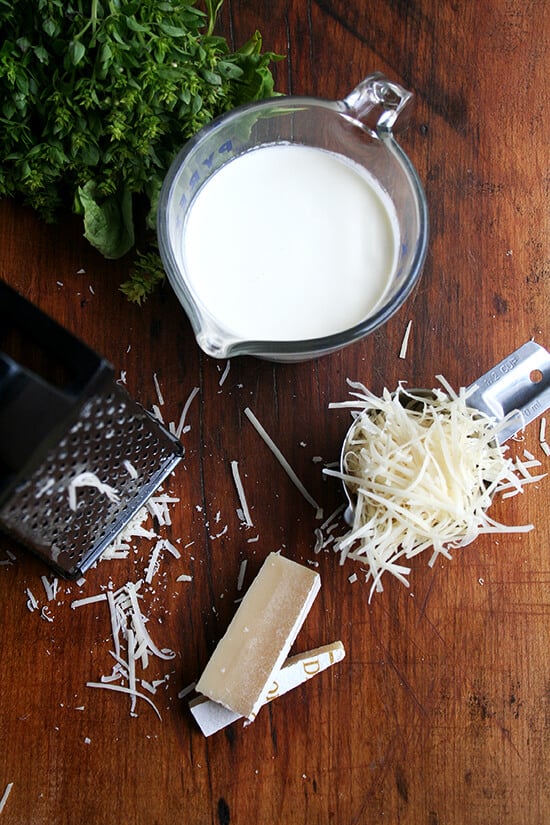
Gather your ingredients:
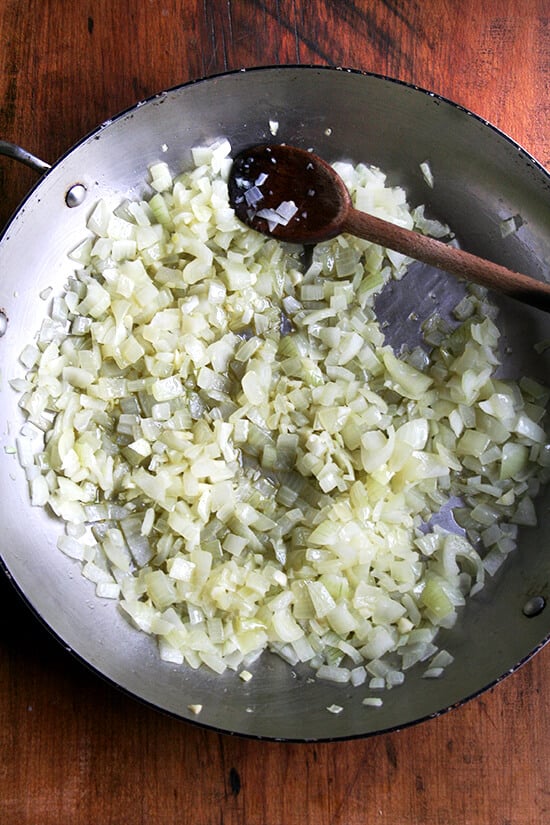
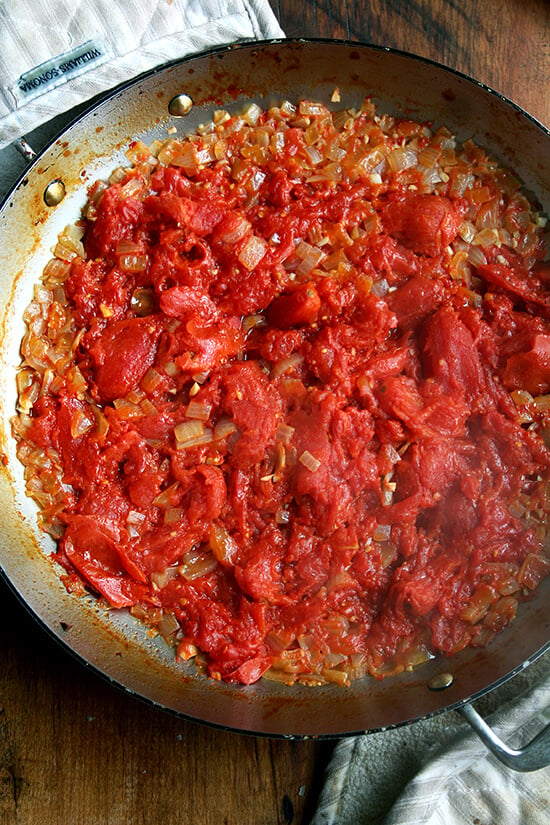
First, sweat the onions and garlic for five minutes:
After draining (or not… I don’t do this anymore) the San Marzano tomatoes…
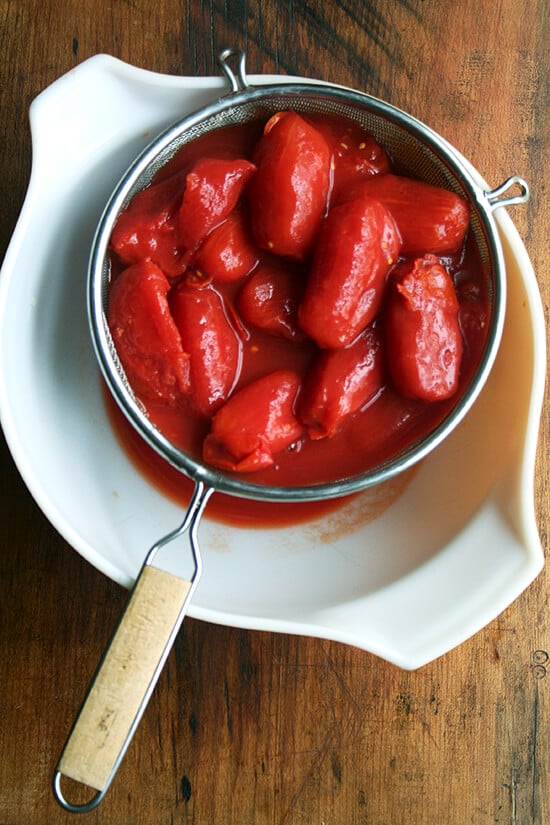
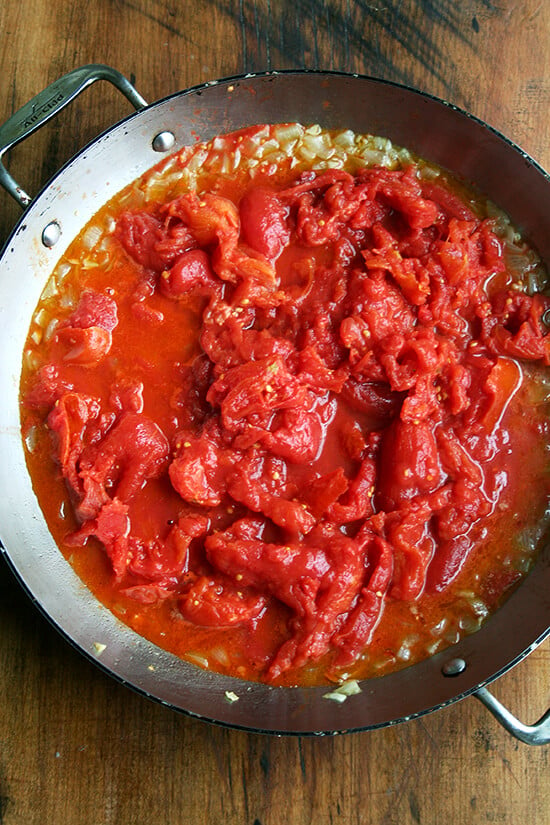
… squeeze them right into the pan:
Transfer to the oven and after 1.5 hours …
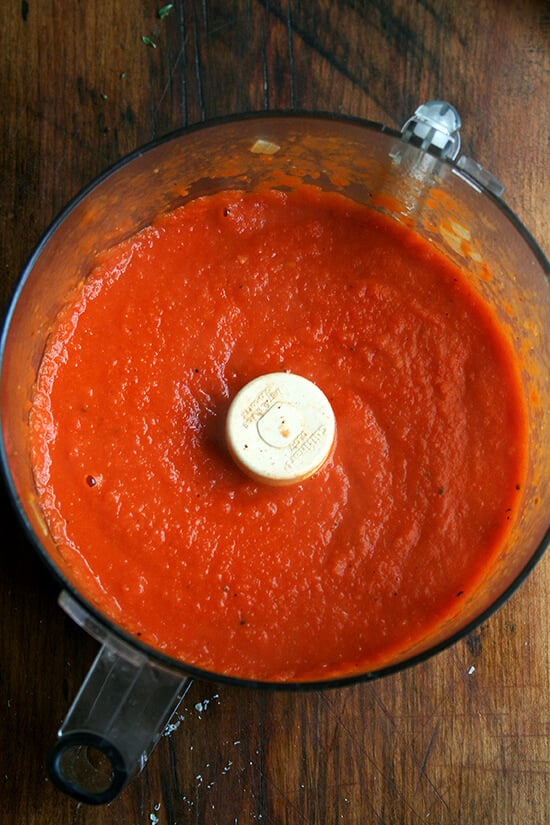
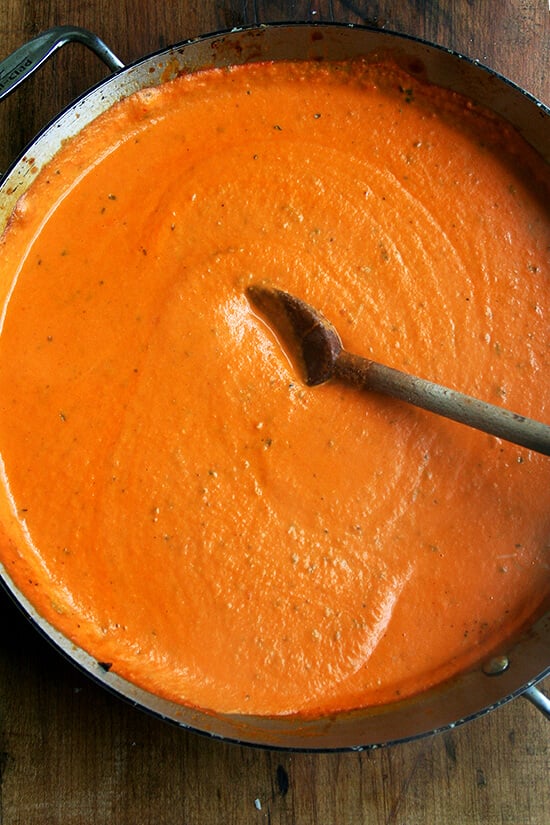
…purée the mixture in a blender or food processor:
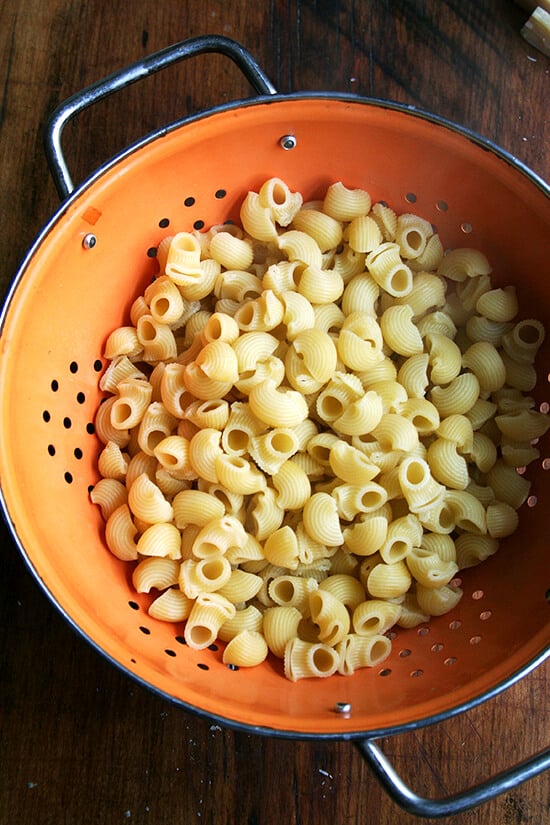
Meanwhile, boil some pasta.
Drain it.
Gather some heavy cream and grate some parmesan cheese.
Add the cream to the sauce.
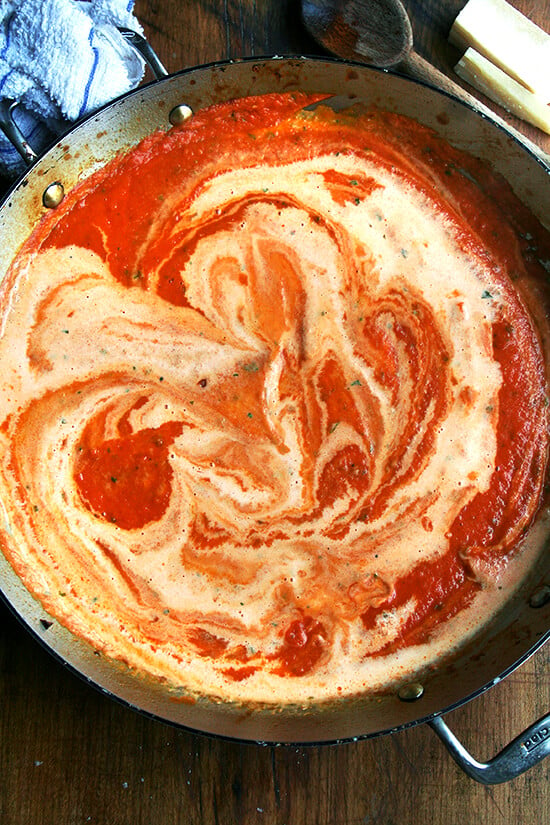
Stir to incorporate.
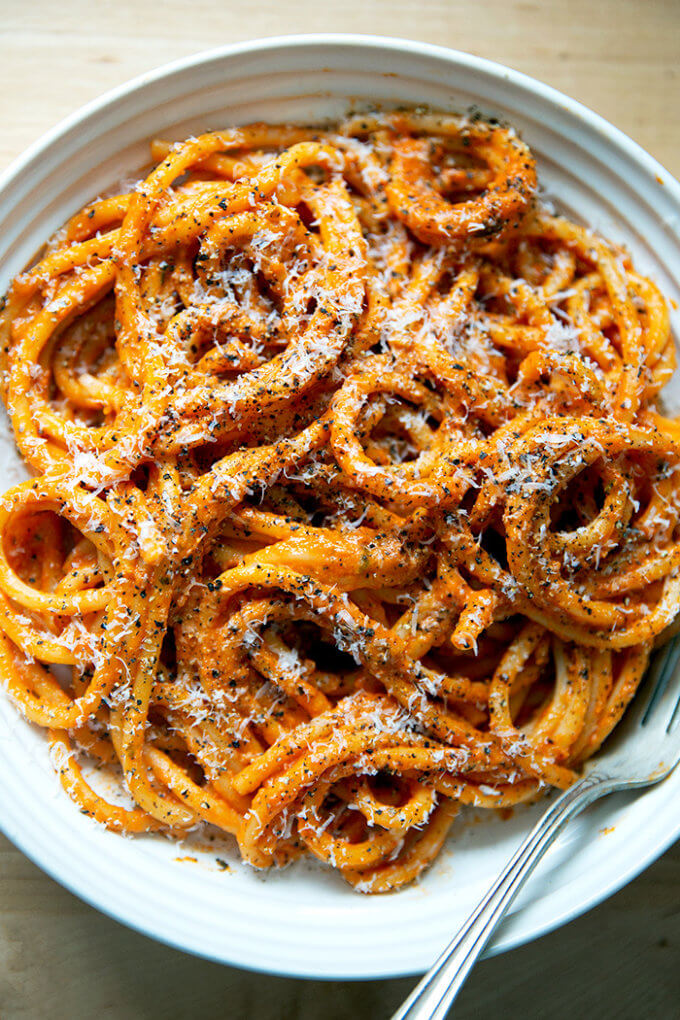
Toss the sauce with pasta and shower with the grated parmesan.
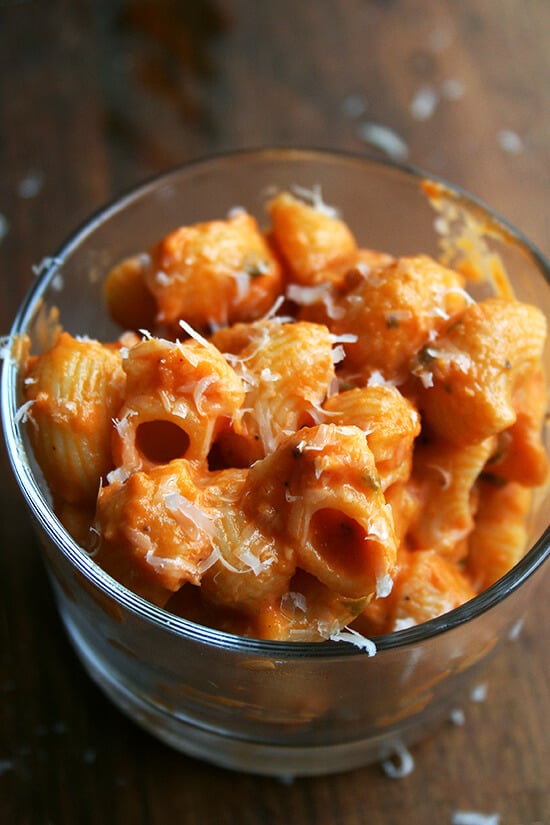
I love this sauce with bucatini, too.
Description
If you are a vodka sauce fan, you have to try Ina Garten’s recipe: Ina’s Vodka Sauce = the BEST vodka sauce recipe. Made with canned San Marzano tomatoes, vodka, cream, onion, garlic, and a few seasonings, it’s perfectly balanced and so darn flavorful. I love tossing it with bucatini. Restaurant-quality pasta at home — Yes. You. Can!
Inspired by: The Barefoot Contessa’s Foolproof.
- ¼ cup olive oil
- 1 medium (or a few small) Spanish onion(s), chopped or sliced to yield 2½ cups
- 3 cloves of garlic, minced or sliced
- ¼ – ½ teaspoon crushed red pepper flakes (If you are sensitive to heat, just use a pinch and adjust at the end. The ½ teaspoon makes for a seriously spicy sauce.)
- 1½ teaspoons dried oregano (optional — I don’t use. I love dried oregano, but I don’t always love it in tomato sauce.)
- 1 cup vodka
- two 28 -ounce cans peeled plum tomatoes ( 56 ounces total)
- Kosher salt
- Freshly ground black pepper
- ¾ pound penne pasta or whatever shape you like
- 4 tablespoons fresh oregano or basil (I use basil)
- ¼ to 1 cup heavy cream
- grated Parmigiano or Pecorino
- Preheat oven to 375ºF.
- Heat the olive oil in a large oven proof sauté pan over medium heat, add the onions and garlic and cook for about 5 minutes until translucent. Add the red pepper flakes and dried oregano (if using) and cook for 1 minute more. Add the vodka and continue cooking until the mixture is reduced by half, about 5 minutes more.
- Meanwhile, drain the tomatoes through a sieve. UPDATE: I no longer drain the tomatoes. I find the sauce comes out just as well, and by eliminating this draining step, I don’t have to worry about using up that juice at a later date. If you have made this many times and wish to continue draining the tomatoes, go for it. Save the strained juice. It freezes well and can be used for future sauce-making days or bloody Mary mix, etc.
- Add the tomatoes to the pan and use scissors to snip them into smaller pieces. Add 2 teaspoons salt and a pinch of black pepper. Cover the pan with a tight-fitting lid or foil and place it in the oven for 1½ hours.
- Meanwhile, bring a large pot of salted water to a boil and cook the pasta al dente. (Note: Ina adds 2 tablespoons of kosher salt to her pasta water. I do this, too, and find it really seasons the pasta nicely. There is no need to save pasta cooking liquid in this recipe, but if there were, the reserved liquid would be too salty. Just something to keep in mind.) Drain and return pasta to its cooking pot.
- Place the tomato mixture in a blender or food processor and purée in batches until the sauce is a smooth consistency. Place potholders or dishtowels around the handles of your pot to prevent burning your hands in the next step. (Note: I purée a handful of basil with the sauce at this step and don’t add any more fresh herbs.) Return sauce to the pan.
- Reheat the sauce, add 2 tablespoons fresh oregano (if using) and enough heavy cream to make the sauce a creamy consistency — start with a quarter cup; taste; add more as necessary. Add salt (if necessary) and pepper, to taste, and simmer for 10 minutes.
- Add sauce to the pasta until it’s coated to your liking, and cook for 2 minutes more. Stir in a generous handful of grated cheese. Serve with an additional sprinkle of cheese and a sprinkle of fresh oregano (if using) on each plate. Store the remaining sauce in the fridge for up to a week.
- Prep Time: 15 minutes
- Cook Time: 2 hours
- Category: Dinner
- Method: Oven
- Cuisine: Italian
