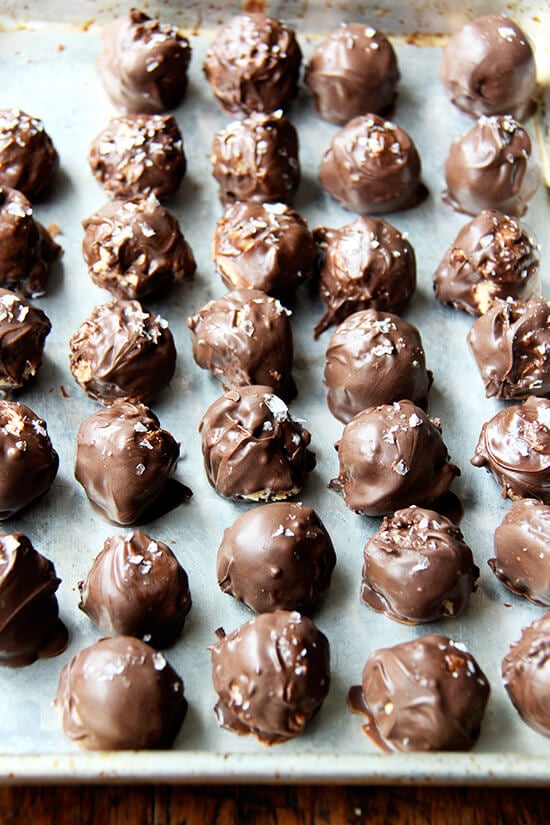
These chocolate-covered peanut butter balls taste like Reese’s Peanut Butter Cups, but better — think: dark chocolate + peanut butter + sea salt. This is a wonderful recipe to make for holiday gifting. Not only does the recipe yield 165 balls (!!), the balls can be made ahead of time.
This recipe comes from the mother of one of my mother’s students, who made them as a thank you gift for teaching her son. She included the recipe with the balls — how nice?! — and we’ve been making them ever since.
If you have never made something like this, don’t let fear of difficulty or time deter you from making them. Scooping the peanut butter balls and coating them with chocolate does take time, but with a good podcast streaming in the background, it will pass quickly.
And with a little bit of practice and patience, you’ll find your rhythm and I think — hope! — you’ll find it fairly easy and ultimately very rewarding.
Description
The mother of one of my mother’s students made these for Christmas as a gift one year and included the recipe in the gift … how nice?! We’ve been making them ever since.
- 2 cups ( 5.5 oz ) vanilla wafers
- 1 lb confectioner’s sugar
- 1/2 lb unsalted butter, softened
- 12 oz smooth peanut butter
- 1 lb bag candy-making dark chocolate disks, Merckens brand is good
- Maldon or Fleur de Sel or other flaky sea salt
- paper petit four s wrappers
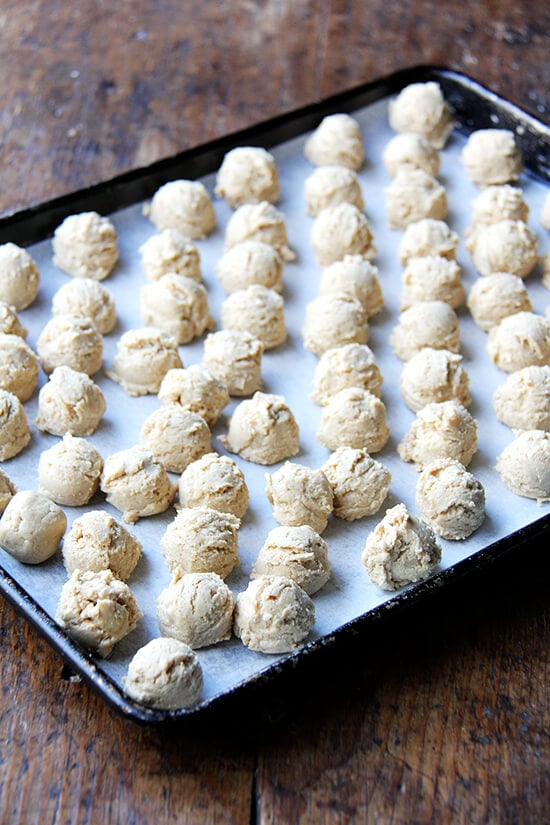
- Using food processor with metal blade, combine vanilla wafers and confectioner’s sugar. Pulse until well blended. Add softened butter, and pulse again until well blended. Add peanut butter, a little at a time, pulsing after each addition until well blended. Once smooth, transfer mixture to a separate bowl. At this point, you can either wrap the mixture in plastic wrap and chill for an hour, or you can start forming the balls. I find it easy to form the balls immediately, and then chill them afterwards. (You will ultimately develop a method that works for you.)
- I used a scale to weigh each ball. Each ball should weigh 1/4 oz or be approximately a rounded 1/2 teaspoon in size. When you have portioned the desired number of balls you wish to make (I portion all at once, which takes a bit of time, but which passes quickly with a good podcast streaming in the background), chill the balls in the refrigerator until firm (at least one hour). Wrap the remaining dough and store in the refrigerator until ready to use again.
- Meanwhile, slowly melt the chocolate (estimate how much you will need) in the bowl of a double boiler. When the balls are firm, remove only a few at a time (I work with 12 at one time). When the chocolate is melted, whisk until smooth and turn off the heat. Drop a ball into the chocolate, move gently around with a fork, and when completely coated remove ball with a toothpick. Gently lower ball into paper petit fours wrapper and gently twist the toothpick–it should ease out slowly. This process will take a little bit of trial and error, but you will eventually develop a method that works for you. Don’t worry if there is a little blemish revealing some peanut butter on the top of the ball. You can fix that at the end by spooning tiny tiny amount of chocolate over the holes to touch up the open spots.
- When the 12 balls are coated and in the paper cups, sprinkle a tiny amount of Fleur de Sel on top of each peanut butter ball. Chill balls in freezer for 5 minutes to firm. Transfer to a stationary box (I ordered mine on-line), wrap, give and enjoy!
- Prep Time: 60 minutes
- Cook Time: 5 minutes
- Category: Cookie/Candy
- Method: No-bake
- Cuisine: American
Description
The mother of one of my mother’s students made these for Christmas as a gift one year and included the recipe in the gift … how nice?! We’ve been making them ever since.
- 2 cups ( 5.5 oz ) vanilla wafers
- 1 lb confectioner’s sugar
- 1/2 lb unsalted butter, softened
- 12 oz smooth peanut butter
- 1 lb bag candy-making dark chocolate disks, Merckens brand is good
- Maldon or Fleur de Sel or other flaky sea salt
- paper petit four s wrappers
- Using food processor with metal blade, combine vanilla wafers and confectioner’s sugar. Pulse until well blended. Add softened butter, and pulse again until well blended. Add peanut butter, a little at a time, pulsing after each addition until well blended. Once smooth, transfer mixture to a separate bowl. At this point, you can either wrap the mixture in plastic wrap and chill for an hour, or you can start forming the balls. I find it easy to form the balls immediately, and then chill them afterwards. (You will ultimately develop a method that works for you.)
- I used a scale to weigh each ball. Each ball should weigh 1/4 oz or be approximately a rounded 1/2 teaspoon in size. When you have portioned the desired number of balls you wish to make (I portion all at once, which takes a bit of time, but which passes quickly with a good podcast streaming in the background), chill the balls in the refrigerator until firm (at least one hour). Wrap the remaining dough and store in the refrigerator until ready to use again.
- Meanwhile, slowly melt the chocolate (estimate how much you will need) in the bowl of a double boiler. When the balls are firm, remove only a few at a time (I work with 12 at one time). When the chocolate is melted, whisk until smooth and turn off the heat. Drop a ball into the chocolate, move gently around with a fork, and when completely coated remove ball with a toothpick. Gently lower ball into paper petit fours wrapper and gently twist the toothpick–it should ease out slowly. This process will take a little bit of trial and error, but you will eventually develop a method that works for you. Don’t worry if there is a little blemish revealing some peanut butter on the top of the ball. You can fix that at the end by spooning tiny tiny amount of chocolate over the holes to touch up the open spots.
- When the 12 balls are coated and in the paper cups, sprinkle a tiny amount of Fleur de Sel on top of each peanut butter ball. Chill balls in freezer for 5 minutes to firm. Transfer to a stationary box (I ordered mine on-line), wrap, give and enjoy!
- Prep Time: 60 minutes
- Cook Time: 5 minutes
- Category: Cookie/Candy
- Method: No-bake
- Cuisine: American
Find it online : https://alexandracooks.com/2006/11/21/chocolate-dipped-peanut-butter-balls/
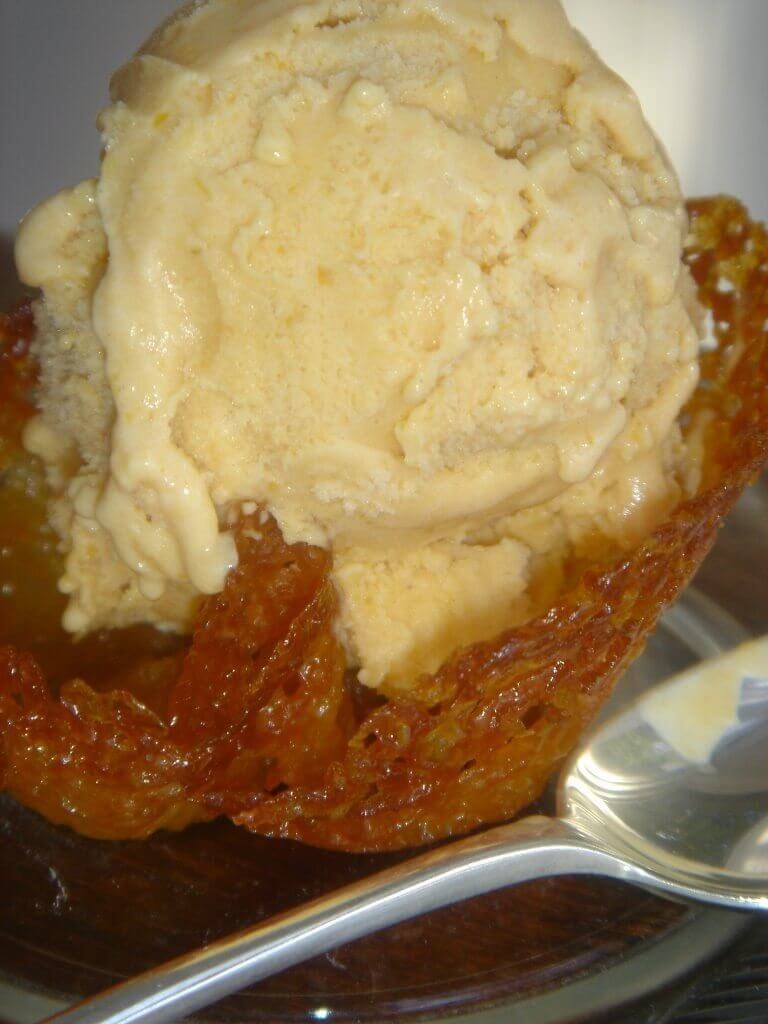
One of my mother’s former students brought homemade pumpkin ice cream to our Thanksgiving dinner. Homemade. Pumpkin. Ice. Cream. Could there be a better contribution to a Thanksgiving dessert spread? I think not. This student is brilliant.
If you have an ice cream maker and are maybe in need of a change from pumpkin pie, I think you and your guests will not be disappointed. If you dare not break tradition, but have the time and energy to make some ice cream as well, I think a scoop of pumpkin ice cream next to pumpkin pie would not be bad either.
- 1 8-oz can pumpkin puree
- 1 tsp . vanilla extract
- 2 cups heavy cream
- 3/4 cup light brown sugar
- 1/4 tsp . kosher salt
- 5 egg yolks
- 1/2 tsp . cinnamon
- 1/4 tsp . ground ginger
- a few gratings fresh nutmeg
- 1 T. bourbon
- In a small bowl, whisk together the pumpkin puree and vanilla. Set aside.
- In a heavy-bottomed saucepan combine the cream, brown sugar and salt. Heat until sugar is dissolved and liquid is hot to the touch. In a separate bowl, whisk together the yolks, cinnamon, ginger and nutmeg. Slowly ladle small amounts of the hot cream into the yolk mixture, whisking constantly. (I place the bowl on a kitchen towel to steady it while I whisk.) When the yolk mixture is tempered, or at about the same temperature as the cream mixture (after 3-4 ladles of cream have been added), pour it into the saucepan. Over medium heat, stir with a wooden spoon until custard thickens slightly and coats the back of the spoon, about 3-5 minutes longer. When custard is at the right consistency, immediately strain through a fine-mesh sieve. Stir in reserved pumpkin mixture. Transfer mixture to a storage container, cover with plastic wrap–press the wrap directly on the surface of the custard–and chill for at least 3 hours, preferably overnight.
- When custard is chilled, transfer to an ice cream maker and freeze according to manufacturer’s instructions. Add the bourbon during the last minute of churning. Serve or store in freezer immediately.
Notes
Adding the bourbon is important: it allows the ice cream to maintain a soft texture even after several hours spent in the freezer. The taste is virtually undetectable, so if you desire a stronger bourbon flavor, add more than one tablespoon.
Prep Time: 40 minutes
Cook Time: 25 minutes
Category: Ice Cream
Method: Ice Cream Maker
Cuisine: American
1 2/3 cups sugar
1 cup flour
1 tsp . finely grated orange zest
7/8 cup orange juice
14 T. melted butter, cooled slightly
- Whisk together sugar, flour and orange zest. Drizzle in orange juice and whisk until thoroughly combined. Drizzle in butter and whisk until smooth. (I use a stand mixer or a hand-held mixer to make this, but you could definitely whisk it by hand.)
- Refrigerate mixture for at least two hours.
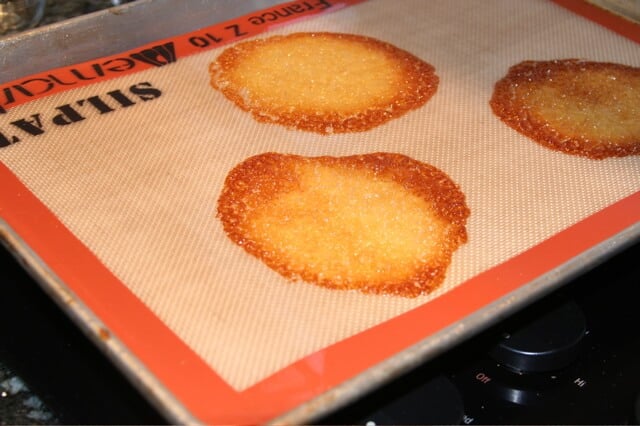
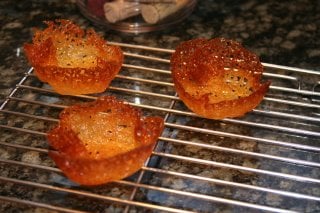
- Preheat oven to 350°F. Line a sheet pan with a Silpat. Spoon tablespoon-sized dollops of batter onto prepared pan. (I only make about 4-5 at a time. This takes a little bit of practice, but the recipe yields more than enough batter to allow for mess-ups. You will ultimately develop your own system) With the back of a wet spoon, gently smooth out the dollops of batter. Bake until golden brown, about 10-15 minutes. Remove from oven and let sit on silpat until slightly hardened but still pliable, about 1-2 minutes. With a narrow spatula, remove tuile from silpat and place in custard cup or ramekin. Let sit in mold until completely hardened, 3-4 minutes longer, then transfer to a cooling rack. Store in an air-tight container until ready to serve. When ready to serve, place tuile on plate, place one scoop of ice cream in tuile and serve. Enjoy!
- Prep Time: 15 minutes
- Cook Time: 15 minutes
- Category: Cookie
- Method: Oven
- Cuisine: American
