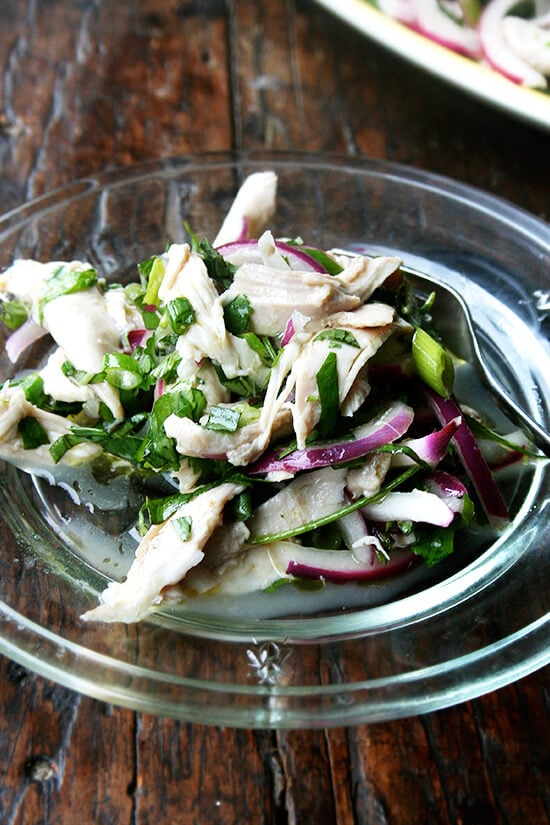
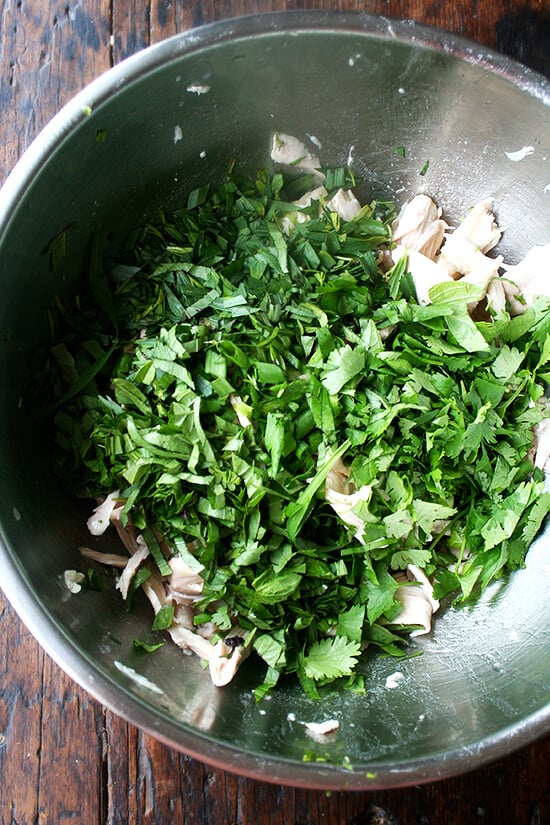
The quantity of herbs heaped onto nearly every dish at every Vietnamese restaurant never ceases to amaze me. And this time of year, I crave nothing more than eating this kind of food: fresh, light, fragrant. Summer rolls lined with mint, green papaya salad speckled with Thai basil, chicken salad loaded with scallions and cilantro — oh Nam Phuong ! You feel so far away.
This is another nice no-mayo salad to serve at a summer gathering or to bring to a potluck. I love a classic chicken salad, but I love the lightness of this one, too. And there’s only one thing to keep in mind while making it: less is not more. Don’t be afraid to heap on those herbs.
Description
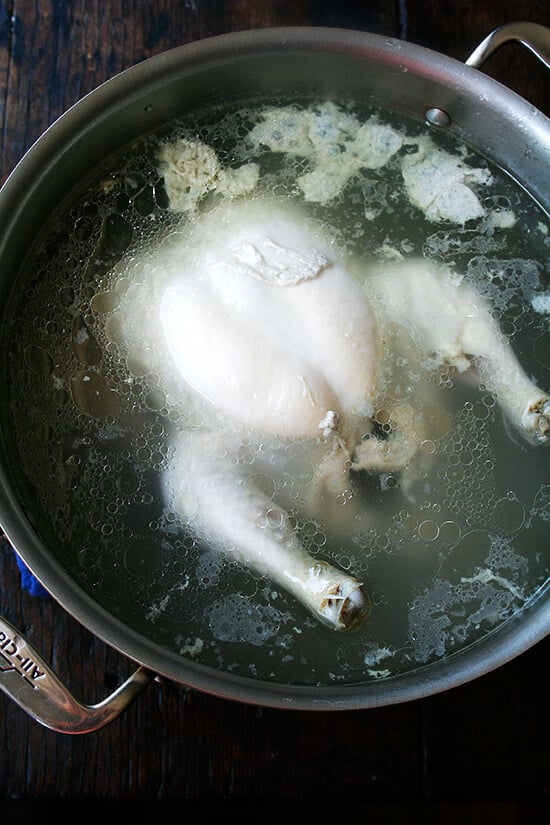
I’ve given instructions below for how I learned to poach a chicken at the restaurant, which is how I now always poach a chicken: place chicken in a pot; cover with cold water; partially cover pot and bring to a boil; turn off the heat; let chicken finish cooking while it cools completely in the liquid. This takes a few hours. If you do this method, it is imperative that you let the chicken cool completely in the liquid before removing it otherwise it won’t be cooked. I like to do this at night — I stick the whole, cooled pot in the fridge (it’s always a challenge finding space), and then pull the chicken from the bone in the morning. You can, of course, do this first thing in the morning, too. Also, if you are pressed for time, just simmer your chicken until it’s done. What I love about the bring-the-water-to-a-boil-and-shut-it-off method is that the chicken never over cooks — it is plump and moist and juicy. I should note that when you begin pulling the chicken from the bone, the meat might look pink, which will make you think it is not cooked, but it is — the red spots/blood vessels (this is a guess?) sometimes spread into the meat giving it a pinkish hue. If you are nervous, just plunge the pulled meat into a pot of boiling water for a second and drain it, but I can almost assure you your chicken will be cooked if you allow it to cool completely in its cooking liquid.
- 1 small chicken (about 3 lbs. if you can find one)
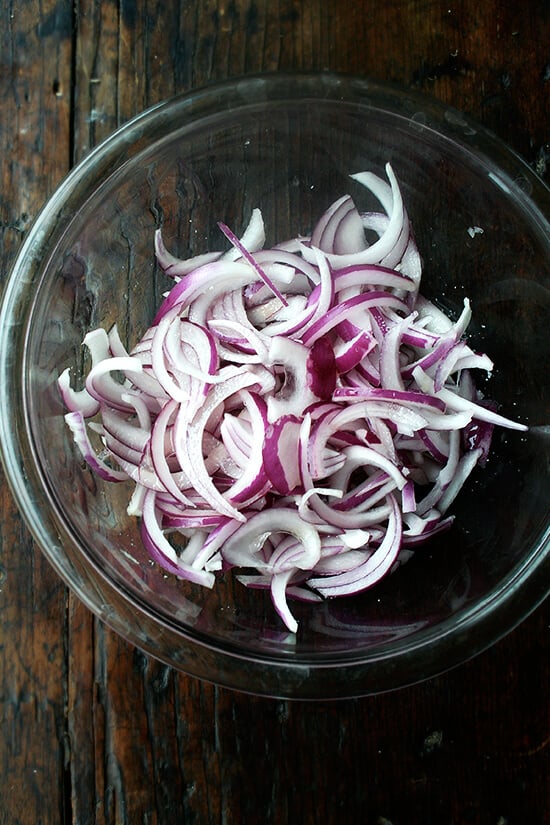
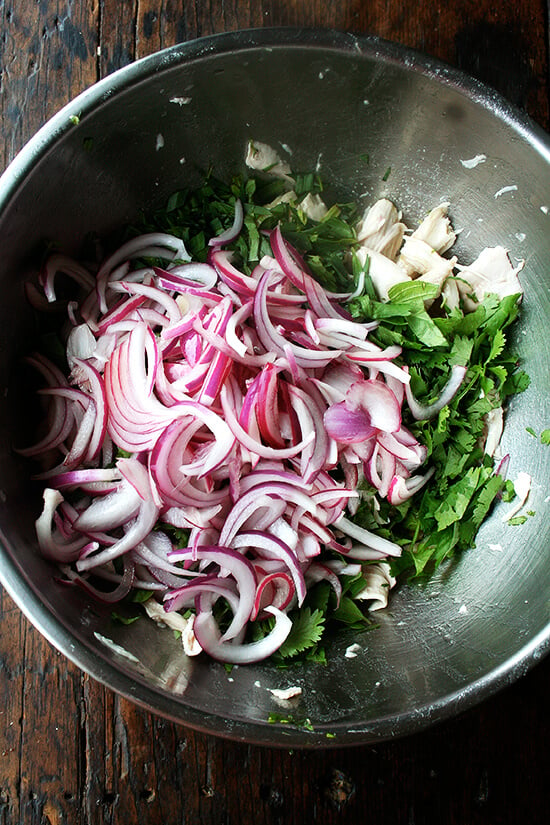
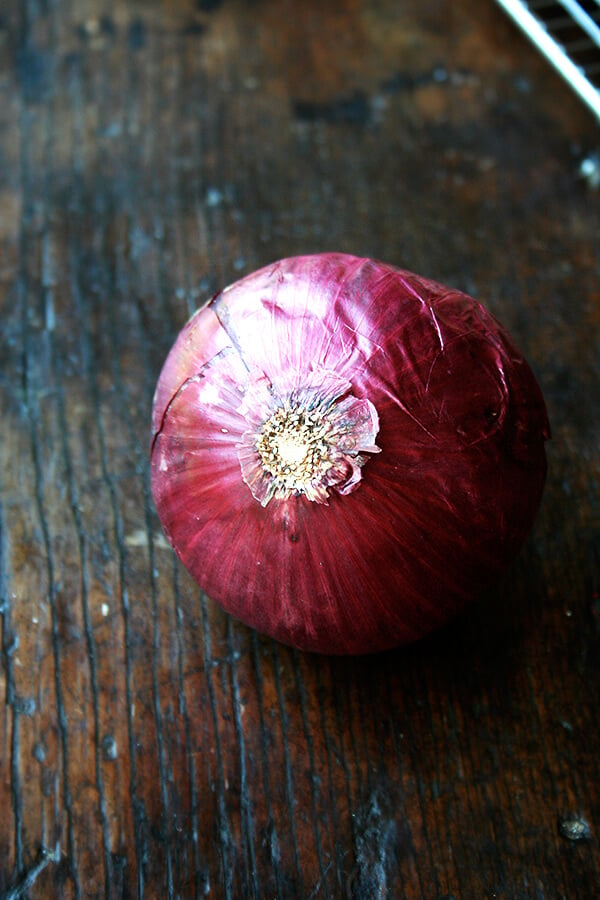
- 1 large red onion
- 2 to 4 tablespoons white balsamic (or other) vinegar
- kosher salt
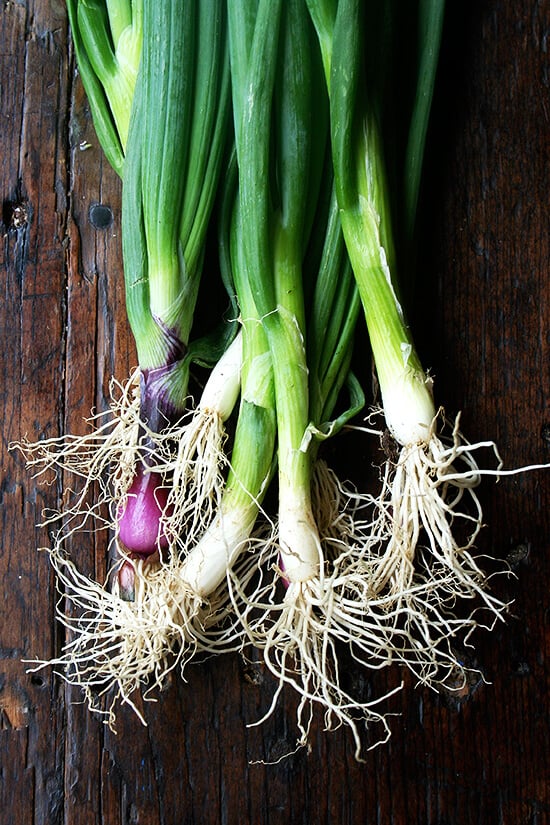
- 3 to 4 scallions
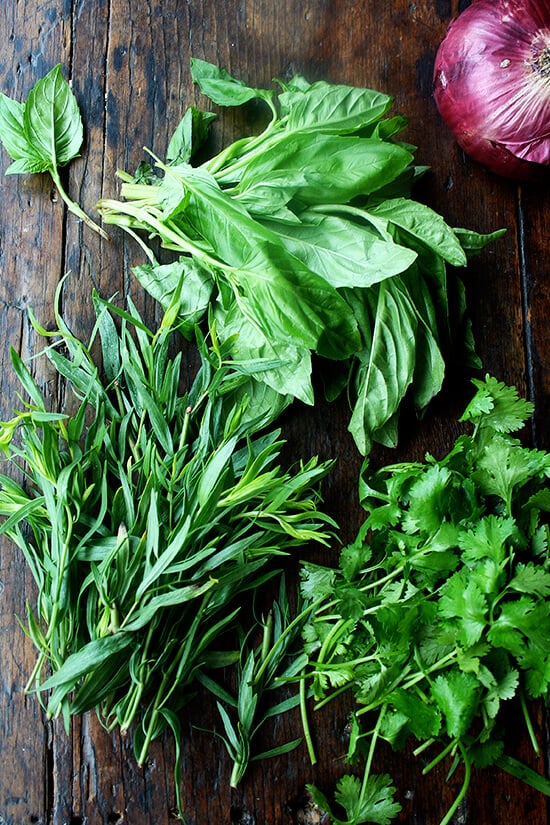
- a ton of herbs: basil, tarragon, cilantro, Thai basil, mint
- ¼ cup extra-virgin olive oil plus 1 or 2 more tablespoons
- freshly cracked black pepper
- crushed red pepper flakes or a mince hot chili (optional)
- Place chicken in a large pot. Cover with cold water. Partially cover, bring to a simmer, then turn off the heat. Let chicken cool completely in liquid. This takes a few hours. (Alternatively, simmer chicken until it’s done.)
- When ready to make the salad, thinly slice the onion and place in a bowl. Cover with two tablespoons of vinegar and a pinch of salt. Set aside.
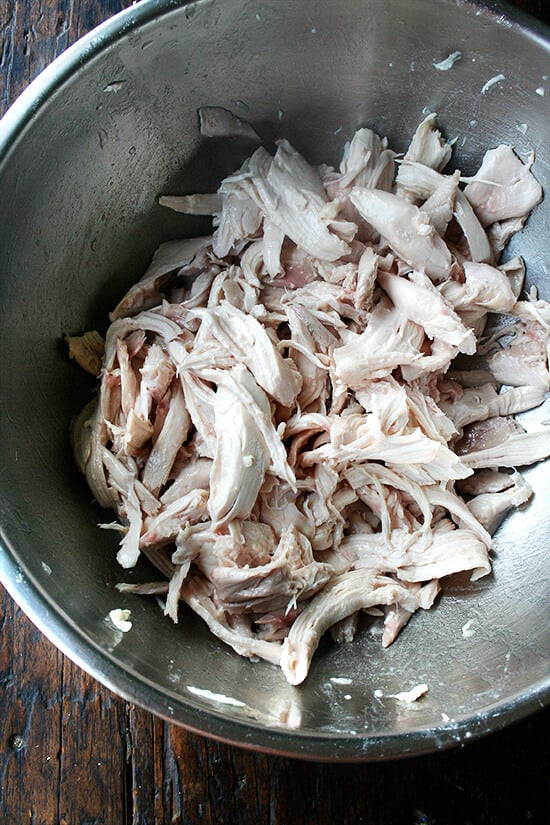
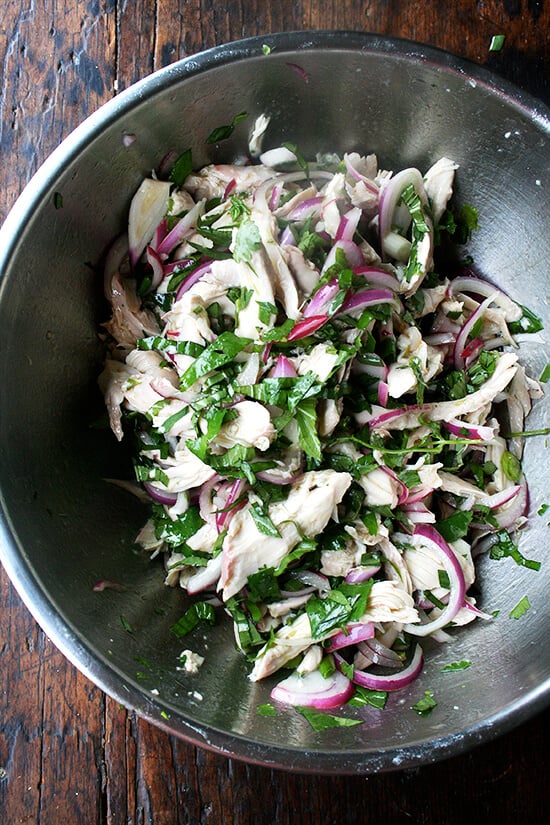
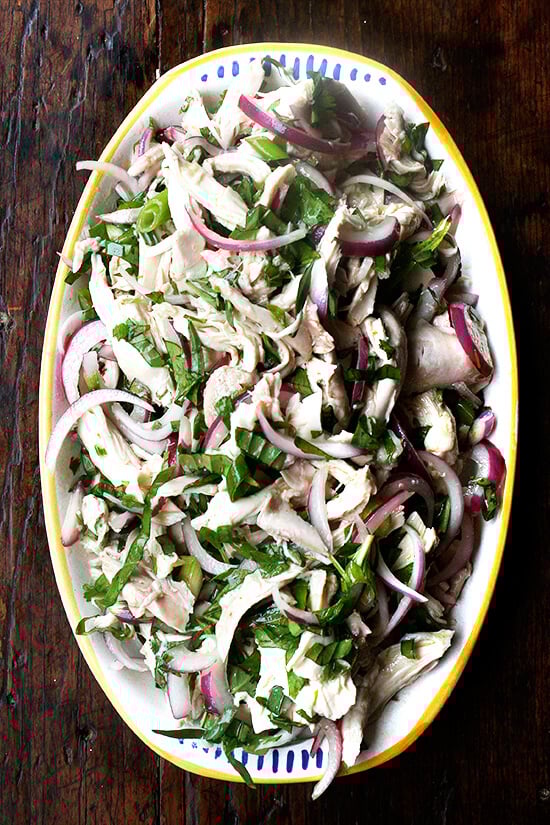
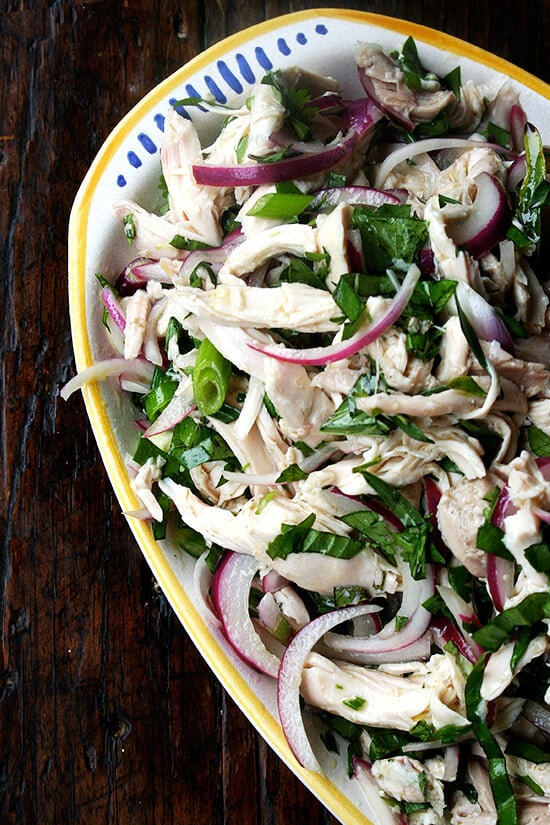
- Meanwhile pull chicken from bones and place in a large mixing bowl. Slice the scallions somewhat thinly (or not) and add to the bowl. Give the herbs a rough chop and add to the bowl. Add the macerated red onions and the ¼ cup of olive oil. Season with ½ teaspoon kosher salt and freshly cracked pepper to taste. Add pepper flakes or chili to taste.
- Use your hands to toss everything together. Take a taste. If necessary add another tablespoon of vinegar and olive oil. Add more salt if necessary. Toss again and taste until seasoning is right. Serve.
- Prep Time: 15 minutes
- Cook Time: 10 minutes
Description
I’ve given instructions below for how I learned to poach a chicken at the restaurant, which is how I now always poach a chicken: place chicken in a pot; cover with cold water; partially cover pot and bring to a boil; turn off the heat; let chicken finish cooking while it cools completely in the liquid. This takes a few hours. If you do this method, it is imperative that you let the chicken cool completely in the liquid before removing it otherwise it won’t be cooked. I like to do this at night — I stick the whole, cooled pot in the fridge (it’s always a challenge finding space), and then pull the chicken from the bone in the morning. You can, of course, do this first thing in the morning, too. Also, if you are pressed for time, just simmer your chicken until it’s done. What I love about the bring-the-water-to-a-boil-and-shut-it-off method is that the chicken never over cooks — it is plump and moist and juicy. I should note that when you begin pulling the chicken from the bone, the meat might look pink, which will make you think it is not cooked, but it is — the red spots/blood vessels (this is a guess?) sometimes spread into the meat giving it a pinkish hue. If you are nervous, just plunge the pulled meat into a pot of boiling water for a second and drain it, but I can almost assure you your chicken will be cooked if you allow it to cool completely in its cooking liquid.
- 1 small chicken (about 3 lbs. if you can find one)
- 1 large red onion
- 2 to 4 tablespoons white balsamic (or other) vinegar
- kosher salt
- 3 to 4 scallions
- a ton of herbs: basil, tarragon, cilantro, Thai basil, mint
- ¼ cup extra-virgin olive oil plus 1 or 2 more tablespoons
- freshly cracked black pepper
- crushed red pepper flakes or a mince hot chili (optional)
- Place chicken in a large pot. Cover with cold water. Partially cover, bring to a simmer, then turn off the heat. Let chicken cool completely in liquid. This takes a few hours. (Alternatively, simmer chicken until it’s done.)
- When ready to make the salad, thinly slice the onion and place in a bowl. Cover with two tablespoons of vinegar and a pinch of salt. Set aside.
- Meanwhile pull chicken from bones and place in a large mixing bowl. Slice the scallions somewhat thinly (or not) and add to the bowl. Give the herbs a rough chop and add to the bowl. Add the macerated red onions and the ¼ cup of olive oil. Season with ½ teaspoon kosher salt and freshly cracked pepper to taste. Add pepper flakes or chili to taste.
- Use your hands to toss everything together. Take a taste. If necessary add another tablespoon of vinegar and olive oil. Add more salt if necessary. Toss again and taste until seasoning is right. Serve.
- Prep Time: 15 minutes
- Cook Time: 10 minutes
Find it online : https://alexandracooks.com/2014/06/26/chicken-salad-with-olive-oil-herbs/
Last week, while scrolling through emails on my phone, I came across a subject heading from Tasting Table that gave me pause: Never Grill a Burger Again.
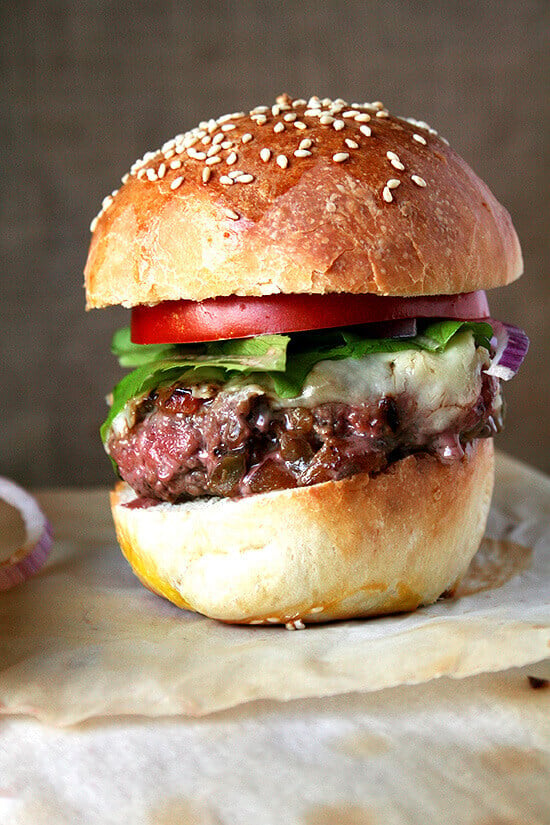
Did I dare make this vision a reality? How could I not? I’ve always considered burgers one of the hardest things to get right, and this post offered a path to burger domination. I followed the tutorial nearly to a T, and Ben, completely unaware of the experiments I had been conducting, declared it the best burger he’s ever eaten.
How to Make A Great Burger
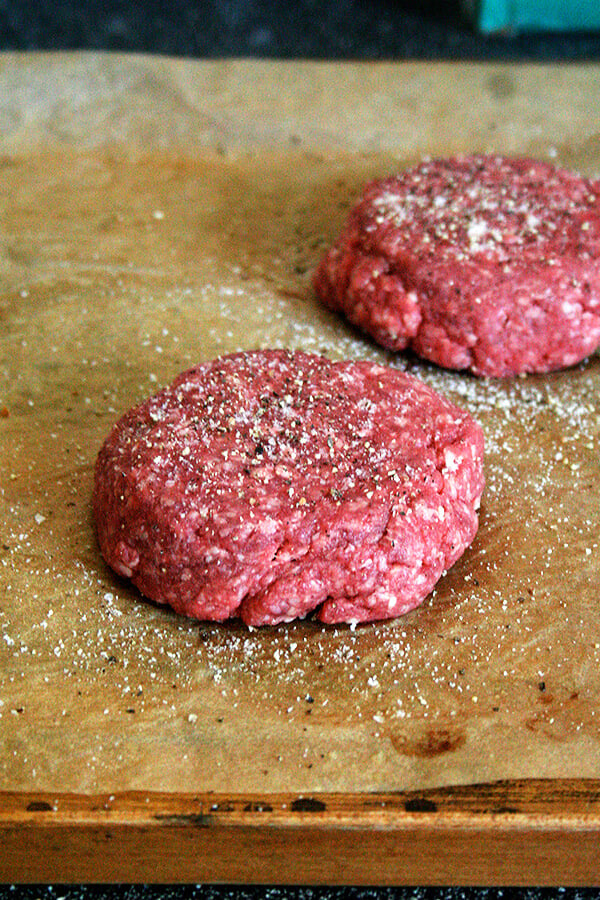
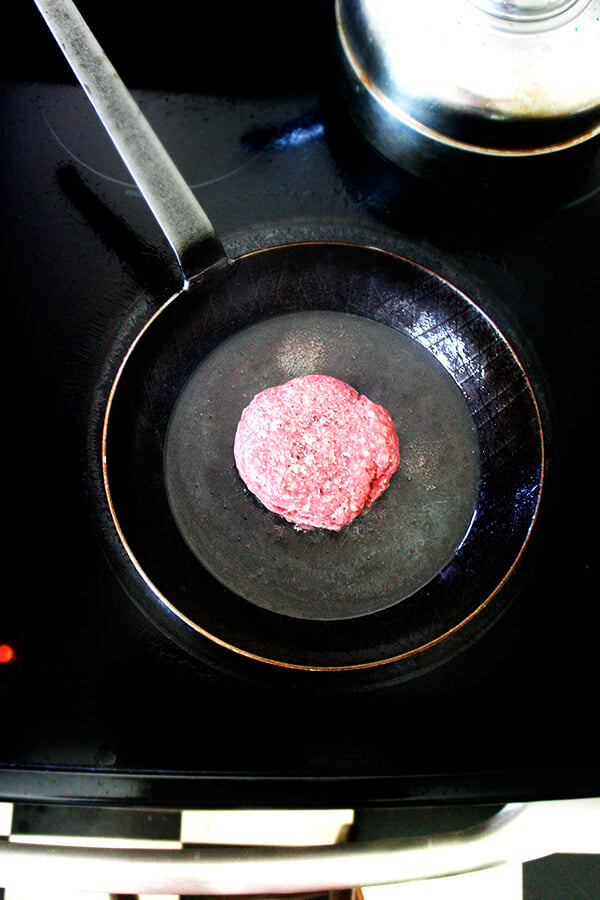
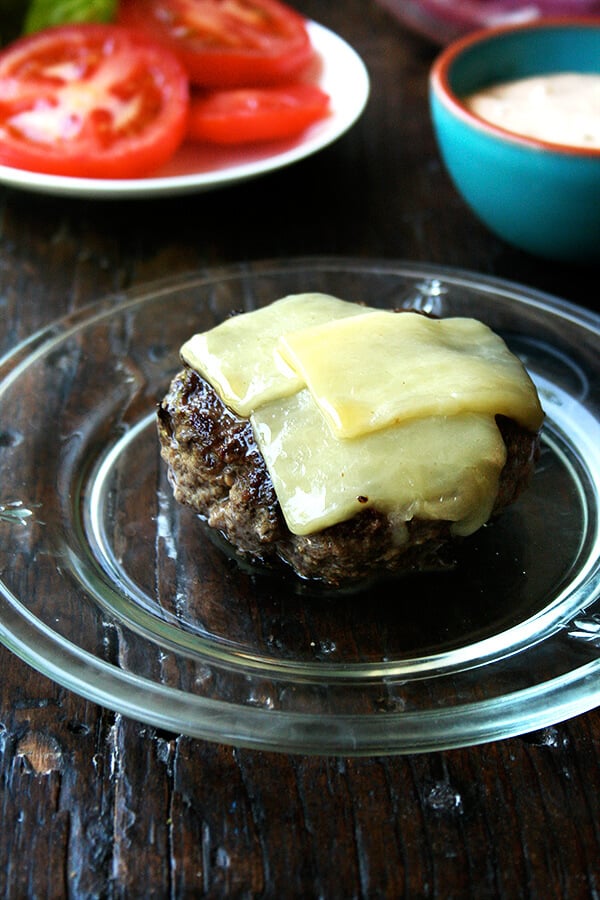
- Sear burgers (as opposed to grill) in a heavy-bottomed pan to prevent fat from being lost, which leads to “a dried-out patty with a charred exterior.” Cooking the patty in fat helps keep the patties juicy.
- Use cold meat as opposed to room temperature to create a good sear.
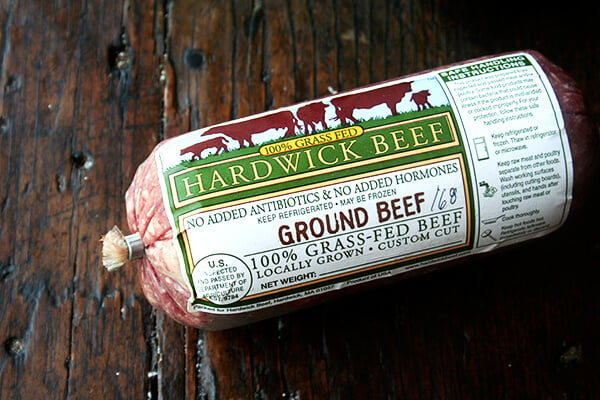
- Tasting Table (and others) suggest using a mix of sirloin, chuck, and short rib. I can’t ever find the energy to go through this effort. I buy grass-fed beef and look for 20% fat.
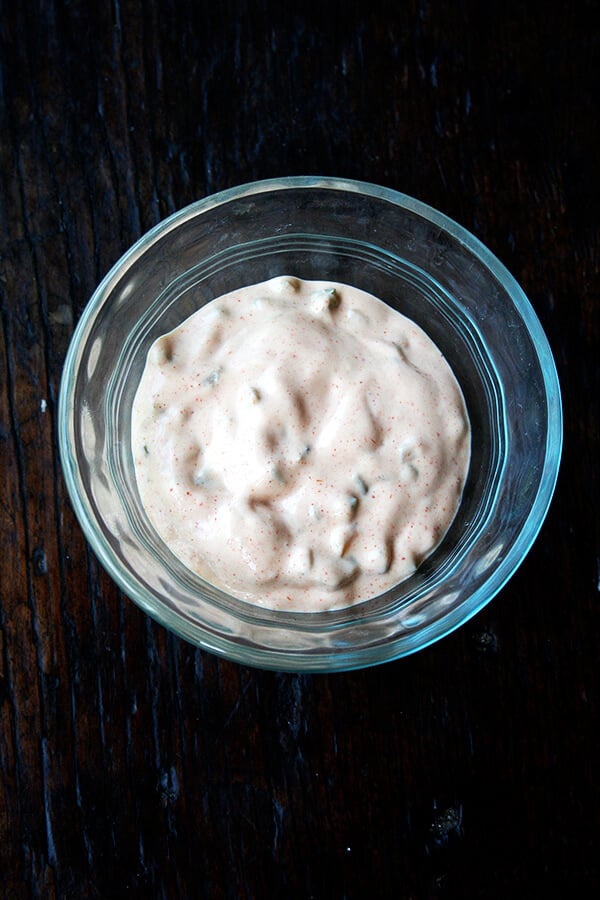
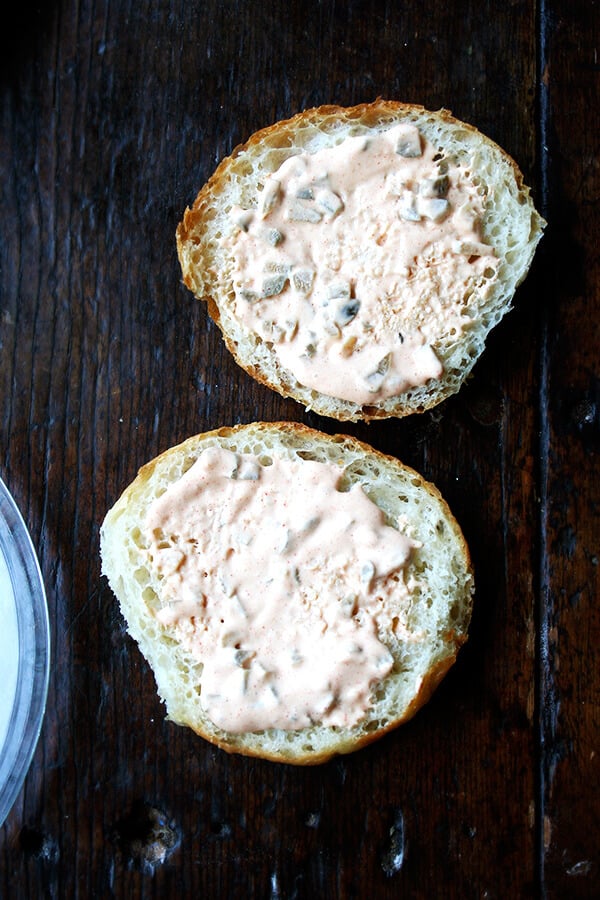
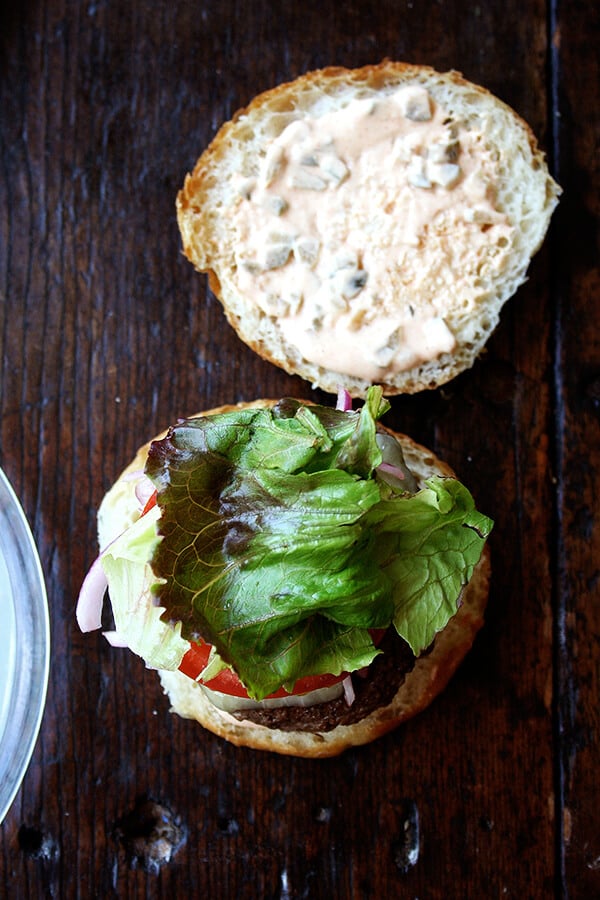
- Make a sauce: the recipe included below is a mixture of pantry staples (mayonnaise, mustard, ketchup, minced pickles, cayenne and cornichons), a combination that is so much greater than the sum of its parts.
- Quick pickle some onions : thinly slice onions and macerated them in vinegar. These, I find, to be essential. Recipe below.
- Season aggressively with salt and pepper, use a neutral flavored oil, don’t overcook — depending on the size and thickness of your patties, the timing will vary and may take some trial and error to get right. For patties about an inch thick weighing five to six ounces each, four minutes a side over medium-high heat has become my magic formula for producing medium-rare burgers.
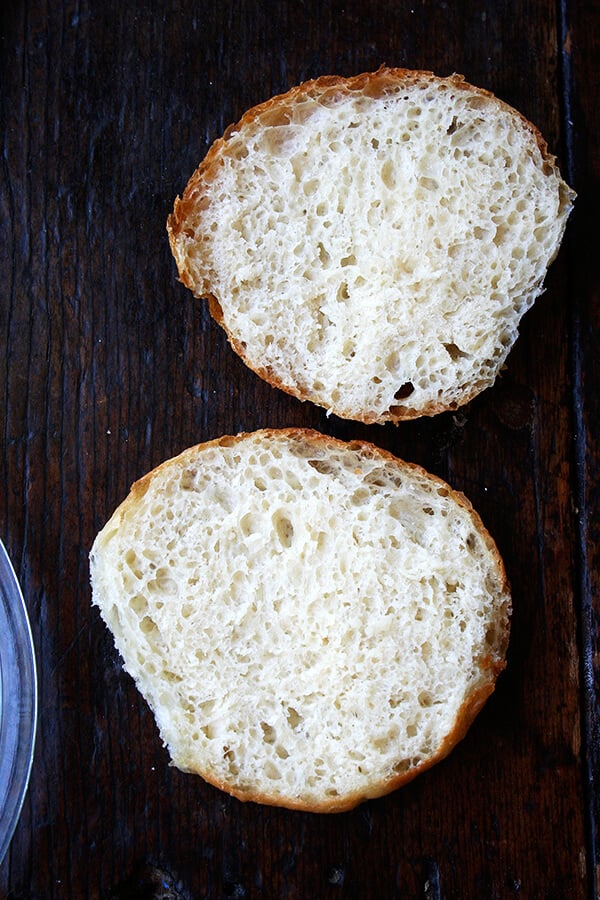
- Make brioche buns : This recipe is no-knead, foolproof, and delicious: The Best No-Knead Brioche Buns
Description
For the Secret Sauce:
- ⅓ cup mayonnaise
- 1 tablespoon Dijon mustard
- 1 tablespoon ketchup
- 1 tablespoon finely chopped bread-and-butter pickles or cornichons
- ⅛ teaspoon cayenne pepper
- ⅛ teaspoon sweet paprika or smoked
For the Quick-Pickled Onions
- ½ red onion, thinly sliced lengthwise
- 1 tablespoon red wine vinegar
- Salt
- To make the secret sauce: In a small mixing bowl, combine all ingredients and stir until blended. Put the sauce in the refrigerator until ready to use.
- To make the quick-pickled onions: In a small mixing bowl, combine the onions and vinegar. Season with salt and allow the onions to macerate until they have softened, about 15 minutes. Set aside until ready to use.
- Prep Time: 5 minutes
- Category: Condiment
- Cuisine: American
