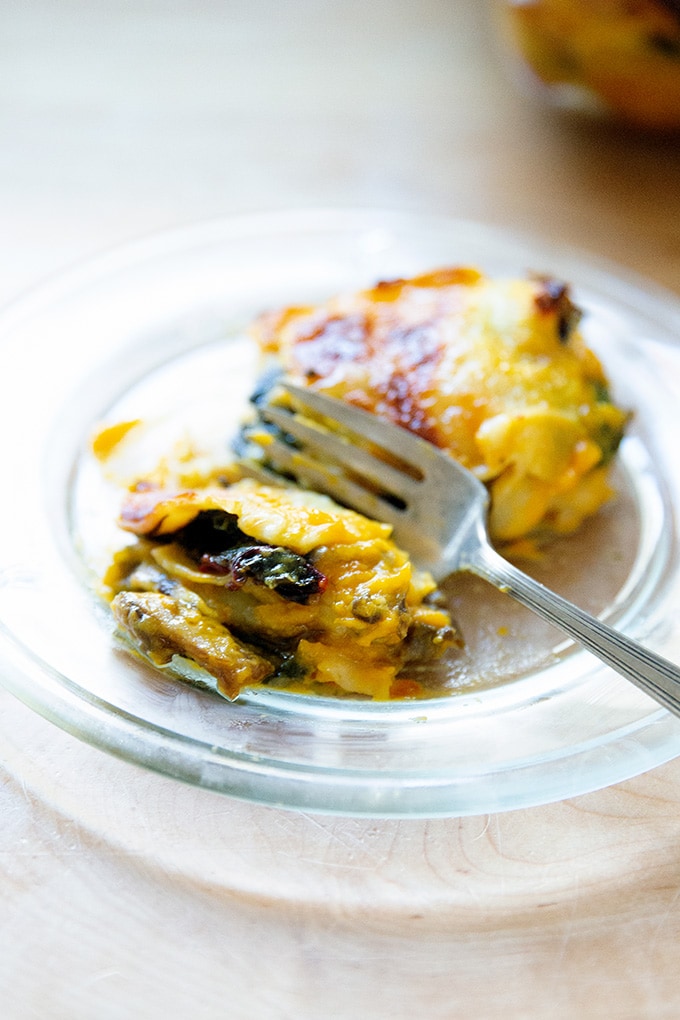
Many years ago, I discovered a magical butternut squash sauce for pasta. It’s a simple recipe that comes together quickly and is loved by all, its exceptional creamy texture evoking bechamel, but with more flavor thanks to a hint of fresh sage.
Over the years, I’ve used the sauce in other ways, namely in this baked penne recipe , and most recently in lasagna in place of tomato sauce. It works beautifully and pairs well with many other flavors and ingredients from caramelized leeks and hot Italian sausage to wilted greens and sautéed mushrooms. Here, I’m using sautéed Swiss chard and oyster mushrooms, but this recipe is easily customizable to what you have on hand and prefer.
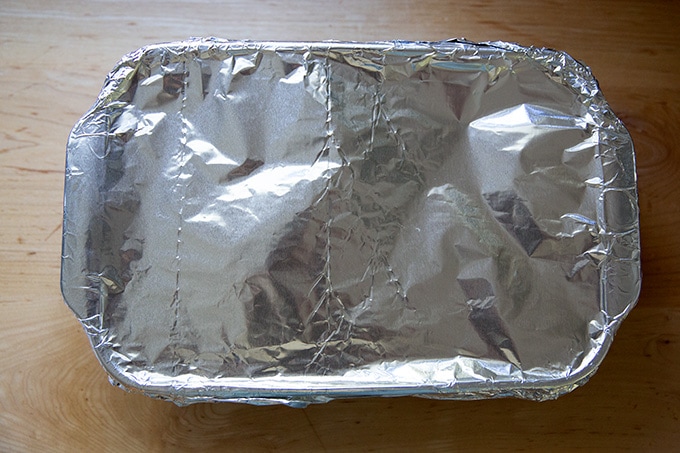
What I love about this recipe (and lasagna in general) is that you can assemble it ahead of time and bake it when you are ready. This past week, in anticipation of friends coming over for dinner on Friday, I made the lasagna on Thursday afternoon, covered the pan in foil, and stuck it in the fridge until the following evening, about an hour before dinner.
On Friday, our friends arrived as the lasagna was cooling, leaving me with lots of time to hold the 4-month-old baby (!!) in attendance. Never have I been more grateful for the existence of lasagna. Incidentally, this was a really simple, doable, stress-free, make-ahead-able menu:
- lasagna (assembled on Thursday, baked on Friday)
- salad with this apple cider vinaigrette (dressing made on Thursday)
- focaccia (prepped on Thursday, baked on Friday)
- French apple tart (made on Friday)
PS: If you’ve been reading for awhile, you know about this other butternut squash lasagna recipe , which is near and dear to my heart, something I make often around the holidays and throughout the winter. It calls for roasted cubes of butternut squash, a rosemary-and-sage infused bechamel, and a final layer of salted whipped cream, which imparts the baked lasagna with brown buttery notes. It is heaven. How does this compare? Well, it’s just different, a little lighter, more vegetal, but just as delicious in its own way.
Lasagna: Some Notes
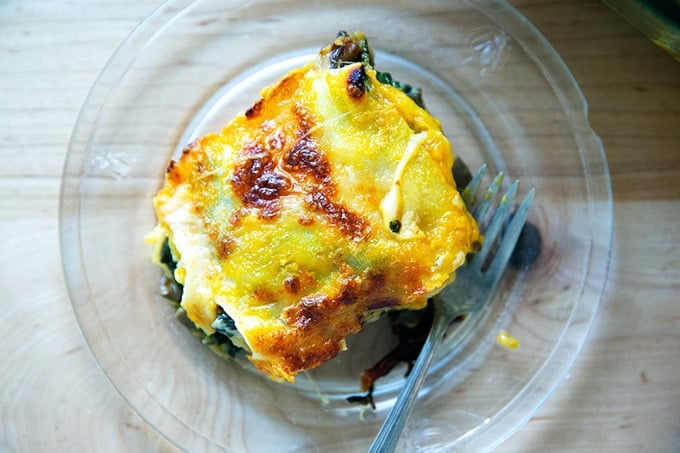
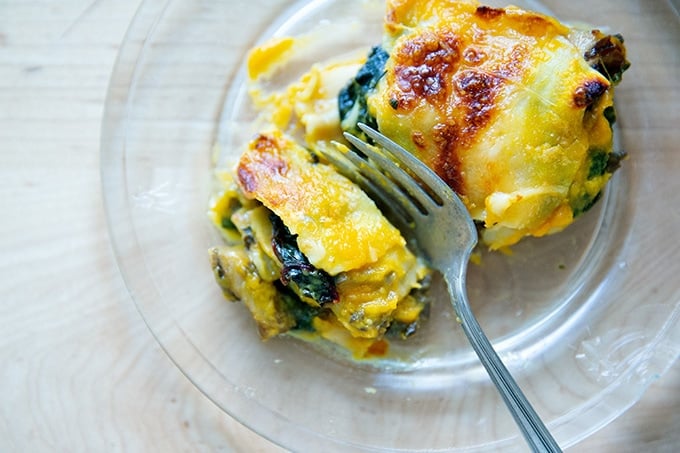
- Assembly: My formula for lasagna is such: sauce + no-boil noodles + sauce + cooked vegetables + mozzarella and parmesan, then repeat. The idea is to always have sauce on either side of the noodles. The vegetables can be anything you like, but cooked vegetables are important because you want to remove the water content, which prevents the lasagna from being soggy. I never include a ricotta-egg layer, which simplifies the process.
- No-Boil Noodles: I love no-boil noodles, but sometimes they don’t perform optimally, especially on the top layer. With this recipe, which is less saucy than other lasagna I make, I soak the last 3 sheets of noodles in hot water for 2 minutes before transferring them to the lasagna. This ensures they’ll expand beautifully in the oven.
- How to Freeze/Make Ahead: The assembled lasagna can be stored in the fridge covered for 24 hours. To freeze, bake the lasagna for 40 minutes covered, remove from the oven, let cool completely, then freeze.
How to Make Butternut Squash Lasagna, Step by Step
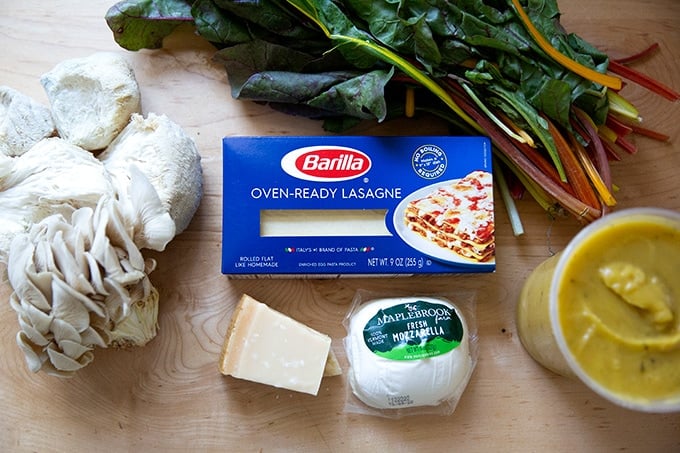
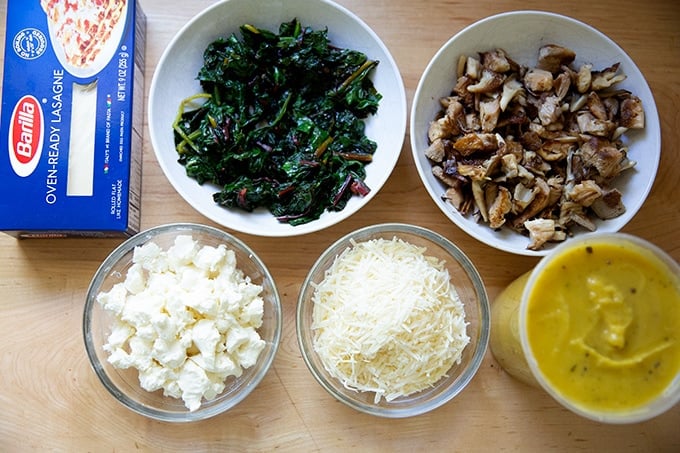
Gather your ingredients: Mushrooms, Swiss chard, no-boil noodles, mozzarella, parmesan and butternut squash sauce (recipe is included below)
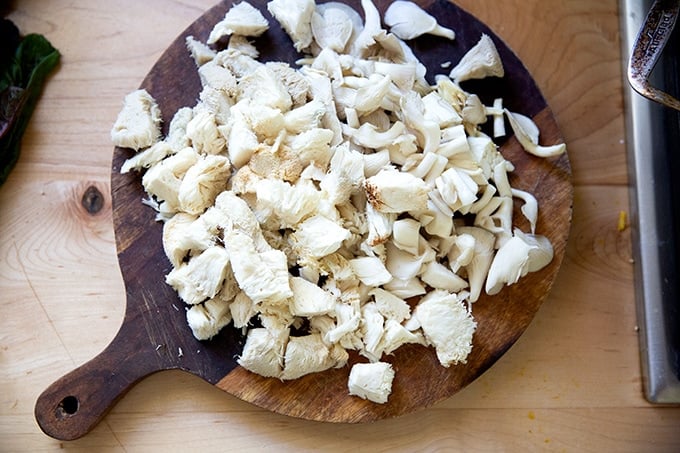
Chop the mushrooms:
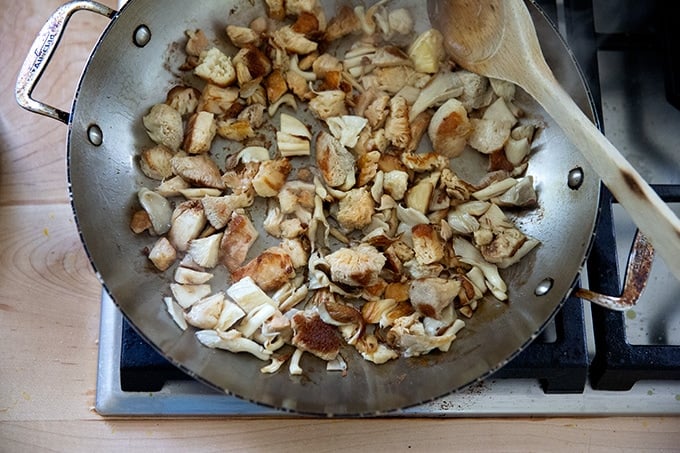
Sauté them.
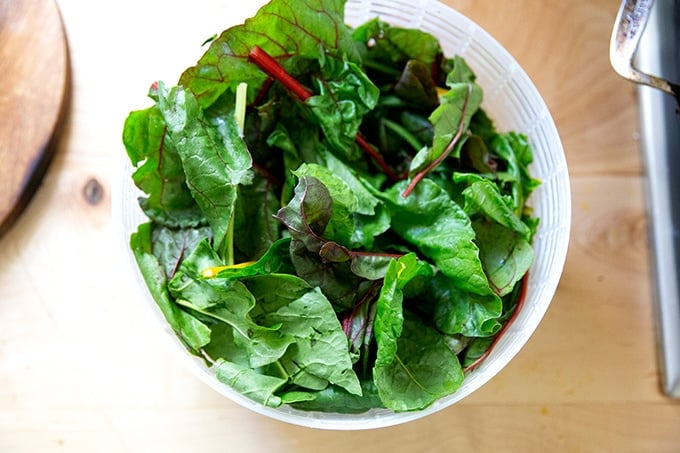
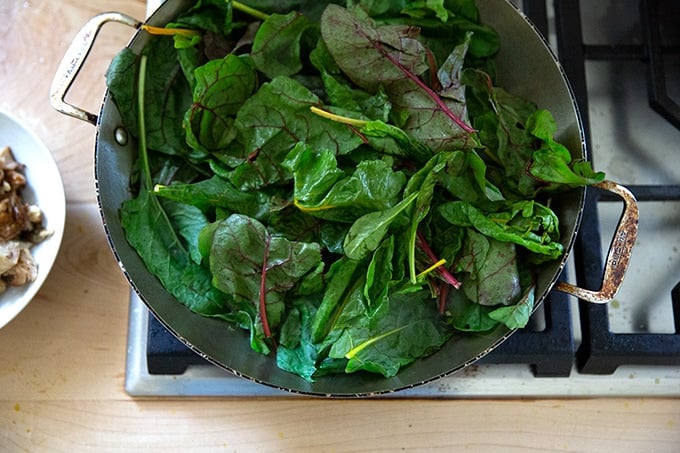
Wash your greens if they are dirty.
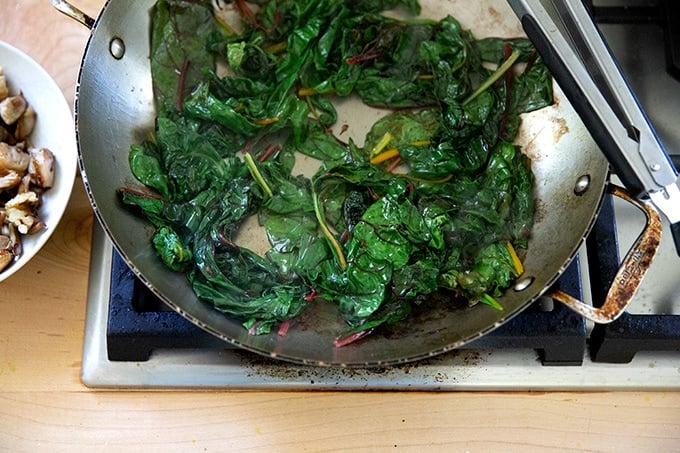
Sauté them.
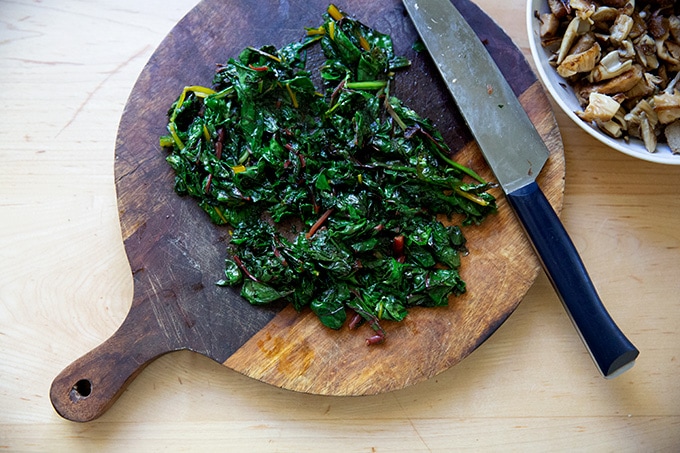
Chop them up.
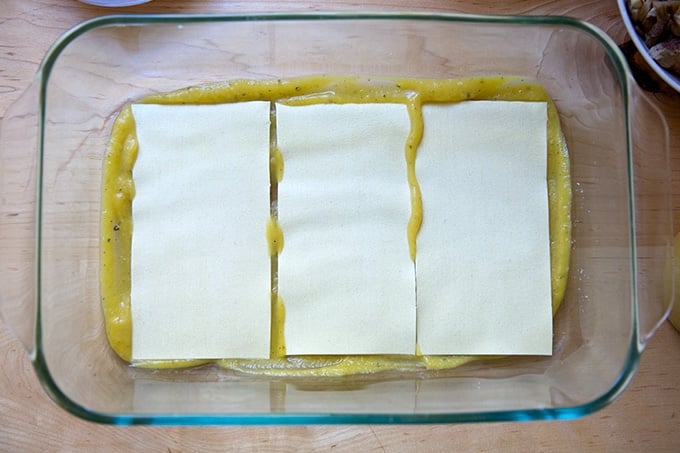
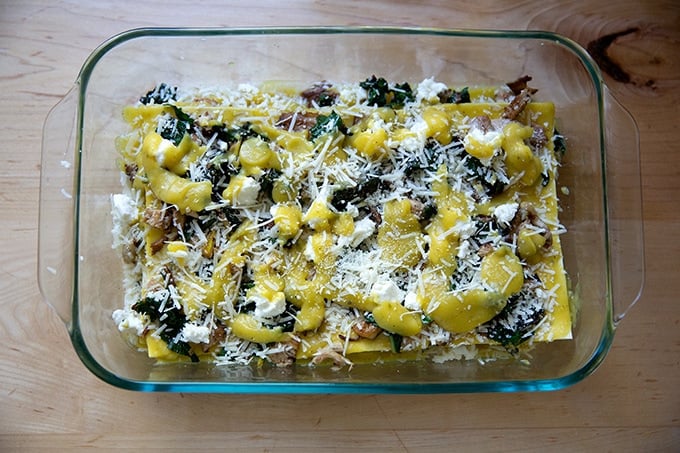
Begin assembling by spreading a thin layer of sauce in the bottom of the baking dish. Top with 3 layers of no-boil noodles.
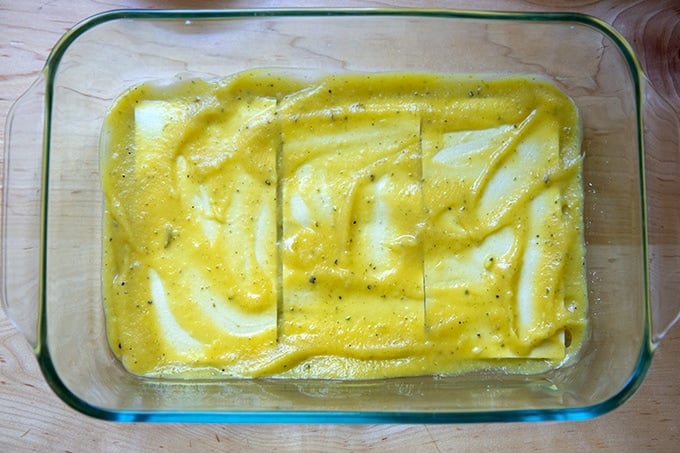
Spread another thin layer of sauce over the top.
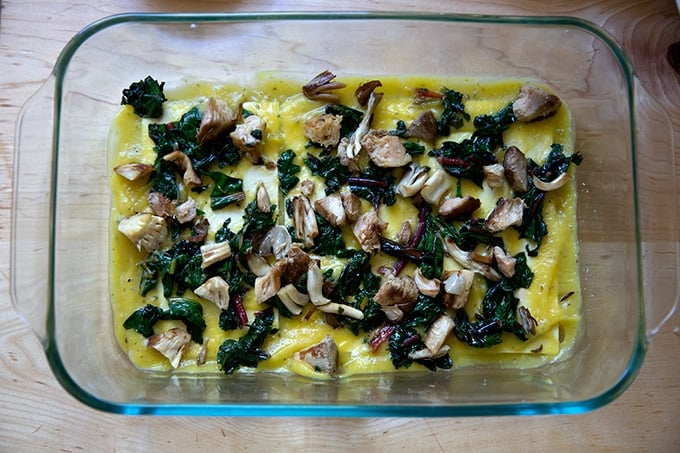
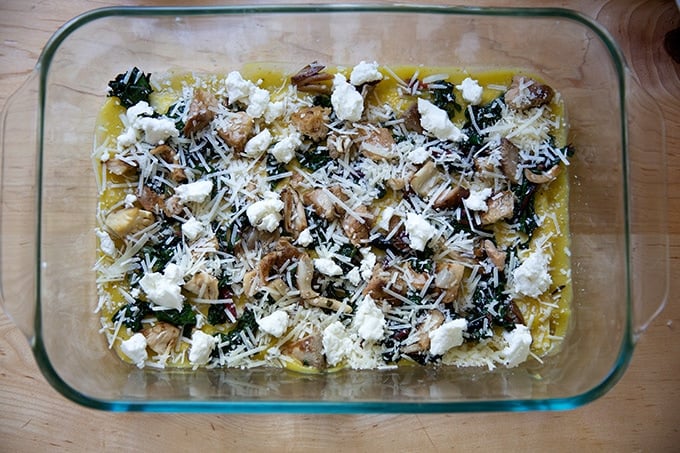
Top with a layer of vegetables.
Sprinkle parmesan and mozzarella over the top.
Repeat this layering until you’ve topped the final layer of cheese with a layer of sauce.
Soak the final layer of noodles in hot water for 2 minutes.
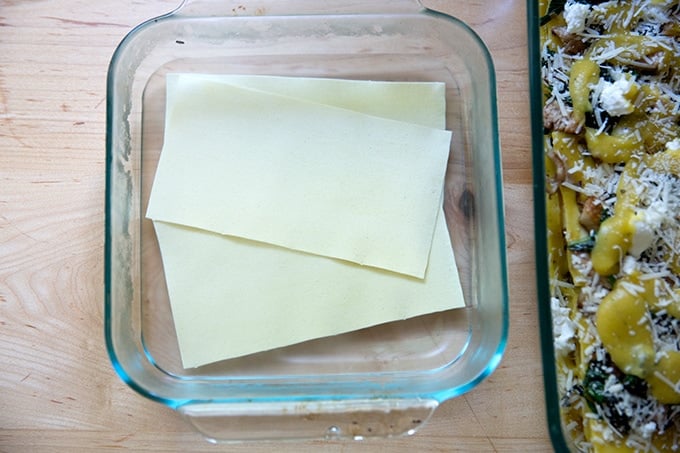
Transfer to the baking dish.

Top with another layer of sauce and cheese.
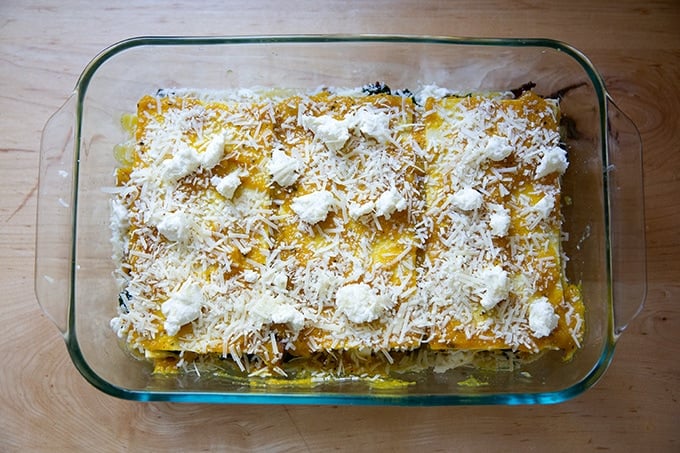
Cover with foil and bake immediately or transfer to the fridge for 24 hours.
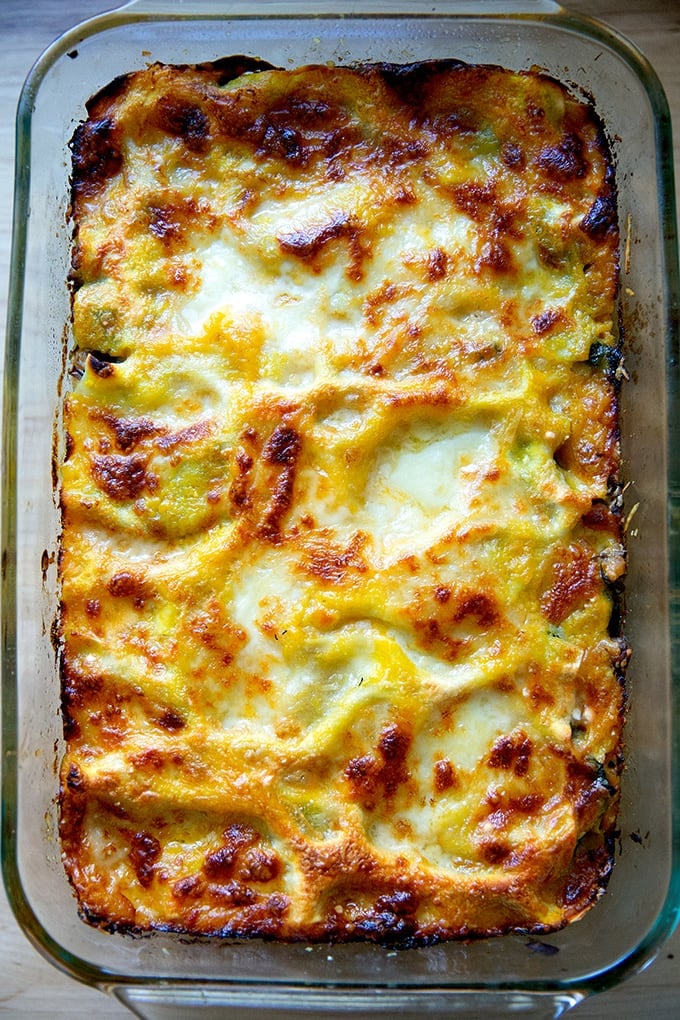
Ta-da 🎉
Description
Notes:
- To make this vegan, use vegan parmesan and mozzarella in place of the traditional parmesan and mozzarella.
- To make this gluten-free, use gluten-free lasagna noodles. The Tinkyada brand is wonderful.
- Any mushroom and greens can be used in place of the oyster mushrooms and Swiss chard.
- How to Freeze/Make Ahead: The assembled lasagna can be stored in the fridge covered for 24 hours. To freeze, bake the lasagna for 40 minutes covered, remove from the oven, let cool completely, then freeze.
For the butternut squash sauce:
- ¼ cup olive oil
- 1 tablespoon finely chopped fresh sage
- 1 onion, diced
- kosher salt
- 1.25 lb peeled butternut squash pieces, about 4 cups
For the lasagna:
- ¼ cup olive oil, divided
- 1 lb. oyster mushrooms, roughly chopped
- Kosher salt
- 1 lb. Swiss Chard, leaves removed from stems to yield 8 to 9 ounces, roughly chopped
- 1 quart of the butternut squash sauce
- 12 sheets no-boil lasagna noodles
- 4 ounces Parmigiano Reggiano, grated (about 1 cup )
- 8 ounces low-moisture, whole milk mozzarella, pulled into small pieces
- To make the sauce: Heat the olive oil in a 5- to 6-quart heavy pot over moderately high heat, then add chopped sage and cook until fragrant, about 15 seconds. Add the cubed squash, diced onion, 2 cups water, 1 teaspoon salt, and pepper to taste. If your squash pieces are not submerged in water, add more water just until they are barely covered. Simmer, uncovered, stirring occasionally, until squash is very tender and water has reduced considerably, about 15 to 20 minutes depending on the size of the squash pieces.
- Transfer mixture to a food processor or blender and purée until smooth. (Alternatively use an immersion blender.) Taste sauce. Add more salt if necessary. Transfer to a bowl or storage vessel — you should have 1 quart of sauce.
- To make the lasagna: Heat the oven to 375ºF. Heat 2 tablespoons of the olive oil in a large skillet over high heat. When it shimmers, add the mushrooms and let cook undisturbed for 2 minutes. Season with salt, then sir. Cook for another 2 minutes or until the mushrooms are cooked and browned at the edges. Transfer to a bowl to cool. Return the skillet — no need to wash it — to the stovetop over high heat and add the remaining 2 tablespoons of olive oil. Add the Swiss chard leaves and let cook undisturbed for 1 minute. Season with salt. Use tongs to rearrange the leaves and encourage them to wilt. Cook for 1 to 2 minutes more or until the leaves have collapsed. Transfer leaves to a bowl to cool.
- To assemble the lasagna: Spoon ½ cup of the butternut squash sauce into the bottom of a 9×13-inch baking dish. Top with three sheets of the lasagna noodles. Spread a scant ½ cup butternut squash sauce over the noodles. Spread ⅓ of the mushrooms and ⅓ of the Swiss chard leaves over top. Spread about ¼ cup of parmesan over top, then ¼ cup mozzarella. Repeat this layering until you have topped the third layer of noodles with the last of the mushrooms and Swiss chard, ¼ cup of each of the cheeses, and a scant ½ cup of butternut squash sauce.
- For the final layer of noodles, bring a small pot or kettle of water to a boil. Pour it into a small vessel such as an 8-inch baking dish. Submerge the remaining 3 noodle sheets into the water and let sit for 2 to 3 minutes, using tongs to occasionally rearrange the noodles to ensure they are not sticking together. (Note: This step ensures this final layer of noodles, which might not be surrounded by as much moisture as the bottom three layers, will soften and expand properly once in the oven.) Use tongs to remove each sheet of noodles and transfer to the pan. Spread the remaining sauce — it should be about ½ cup — over top, then top with the remaining cheese.
- Cover the pan with foil and refrigerate for up to 24 hours or transfer to the oven and bake for 40 minutes. Remove foil, and bake for 10 to 20 minutes more or until the cheese has melted and the top is bubbly and evenly golden. Let cool for 10 minutes before serving.
- Prep Time: 1 hour
- Cook Time: 1 hour
- Category: Pasta
- Method: Oven
- Cuisine: American, Italian
Find it online : https://alexandracooks.com/2022/10/02/butternut-squash-lasagna-with-greens-mushrooms-no-boil-noodles/
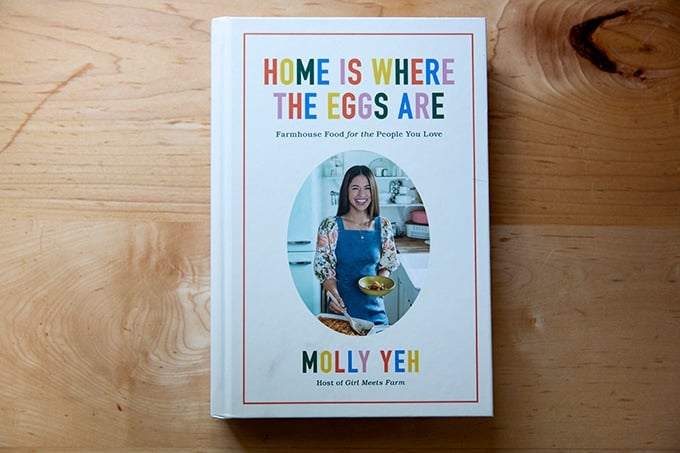
Upon flipping through Molly Yeh’s new book, Home is Where the Eggs Are , I found myself immediately drawn to the cookie dough oat bars, which Molly describes as “the new staple bar of your dessert-as-breakfast dreams.”
My children love granola bars — Z-Bars, Clif Bars, Chewy Quaker Oat Bars — and if I’m being honest, I do, too. When we have a box of peanut butter Clif Bars on hand, I have a hard time resisting them. And while there are worse things to snack on, I never feel great buying or eating them.
It was time to give making granola bars from scratch another go. Molly’s bars looked simple enough, a no-bake recipe she noted she could make with Bernie, her daughter, strapped to her in her carrier and “toss in whatever mix-ins were within arm’s reach.”
Encouraged by this note, along with another about the many variations — approximately 435,785,406 — Molly has made over the years, I made them with a few substitutions: chia seeds, melted butter, and chopped dark chocolate for the hemp seeds, coconut oil, and mini chocolate chips, respectively.
They turned out beautifully, tasting, as Molly promised, like cookie dough — seed-flecked, toasted-oat cookie dough. The first batch disappeared quickly, and I have since made many variations, including the original recipe as well as one with almond flour in place of the seeds, when I found myself without any. They all work, so play around! I do think the mini chocolate chips (as opposed to larger ones or a chopped chocolate bar) work best.
Friends, Molly Yeh’s new book, Home is Where the Eggs Are , is so much fun. If you follow Molly on Instagram or watch her Food Network Show , you know she exudes joy. But what this book has reminded me of is that she is such an excellent writer, too, her recipe head notes and chapter openers reflecting the witty and self-effacing, honest and curious, whimsical but approachable Molly Yeh that captivated us from the very beginning .
If you are someone who likes to read cookbooks cover to cover as you would a novel, this will be a great addition to your library. Bonus: All of the baking recipes include gram measurements 🎉🎉🎉
How To Make No-Bake Granola Bars, Step by Step
Gather your ingredients:
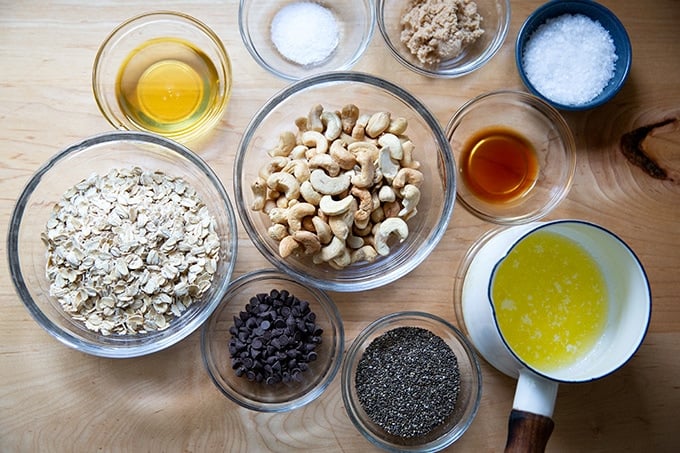
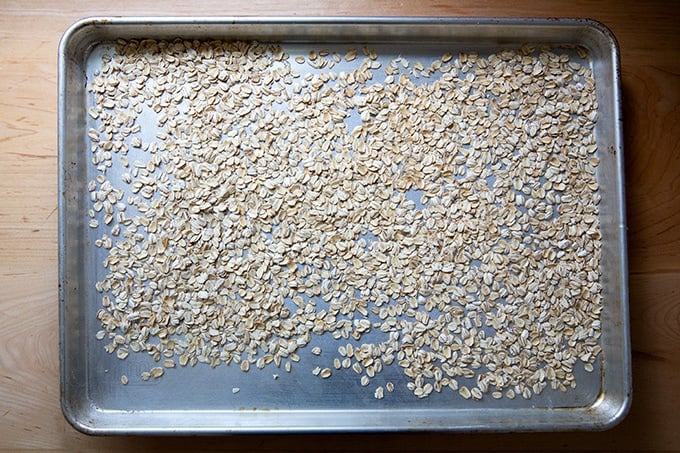
Toast the oats for 10 minutes.
Then transfer them to a food processor with cashews, chia or hemp seeds, salt, and brown sugar.
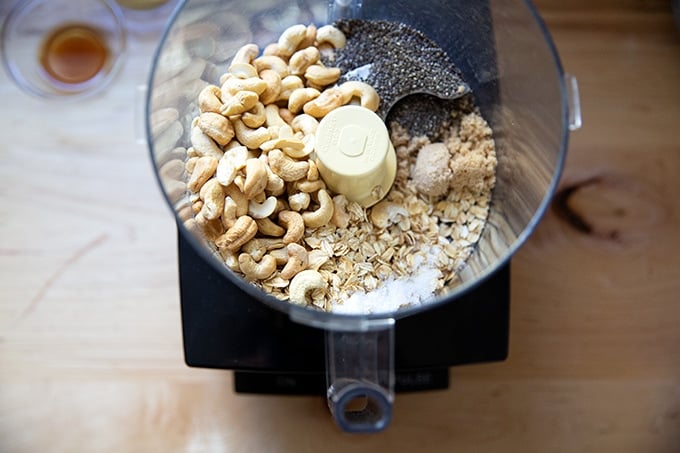
Purée until very fine.
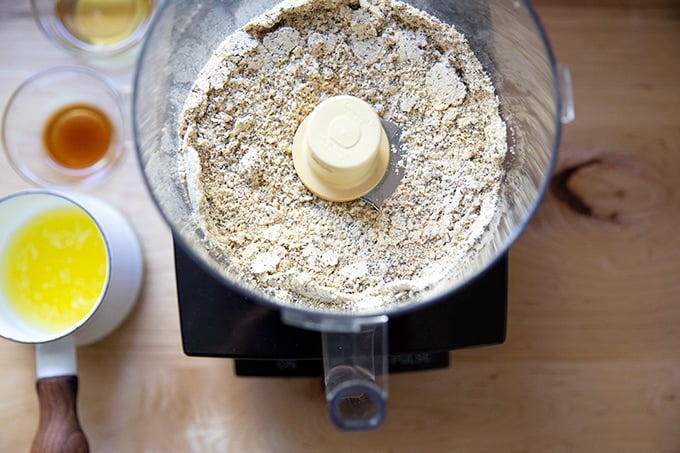
Add melted butter or coconut oil, honey or maple syrup, and vanilla.
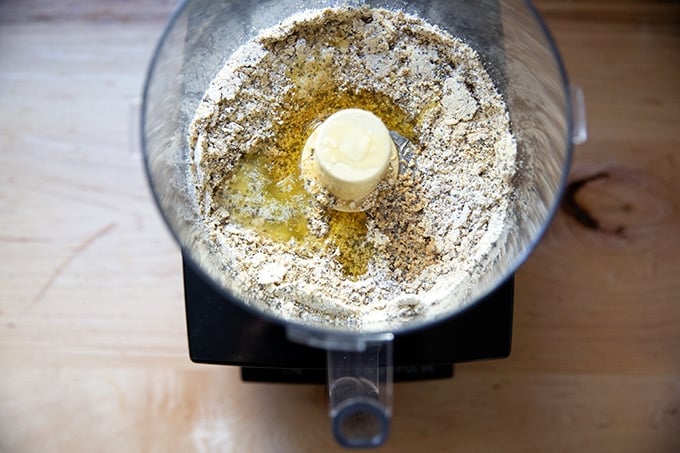
Process until the mixture begins to come together.
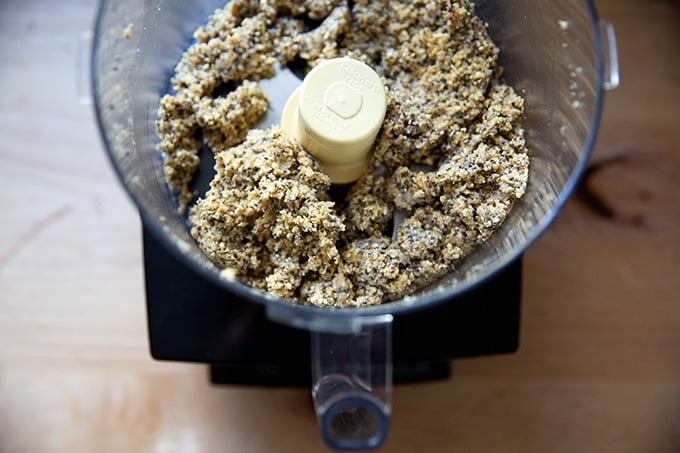
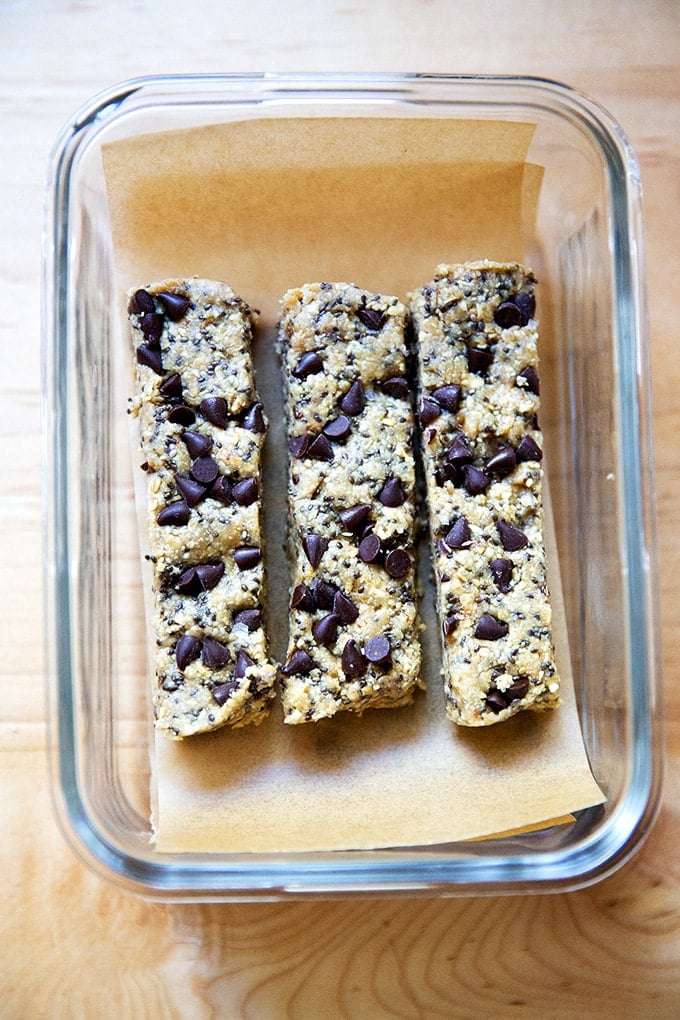
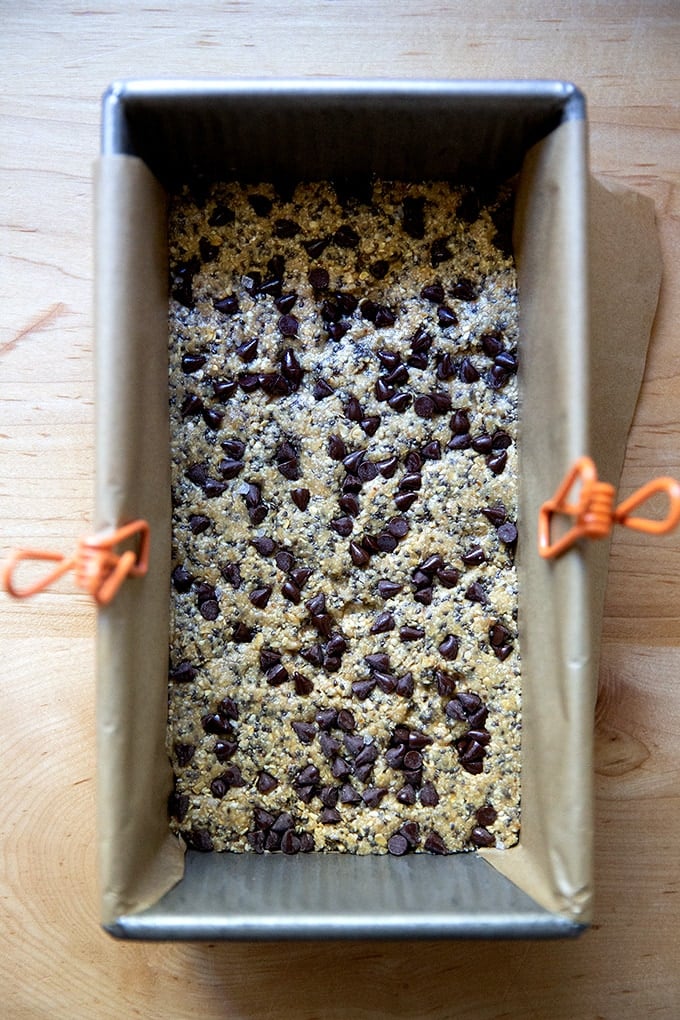
Press into a pan. Top with chocolate chips and sea salt. Press again. Then chill for 1 hour.
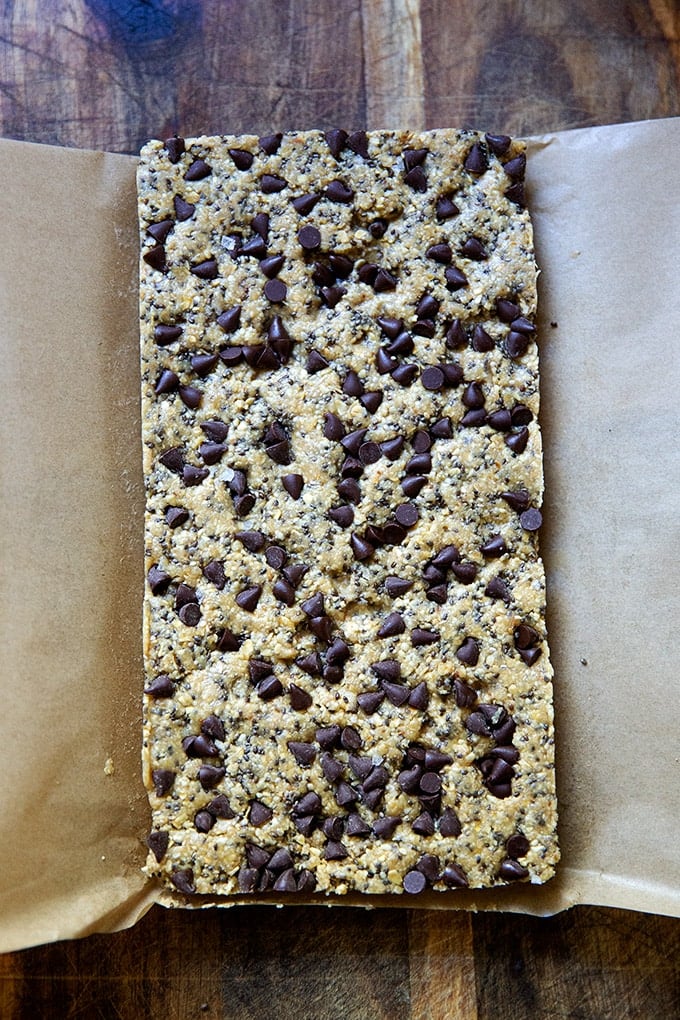
Remove from the pan.
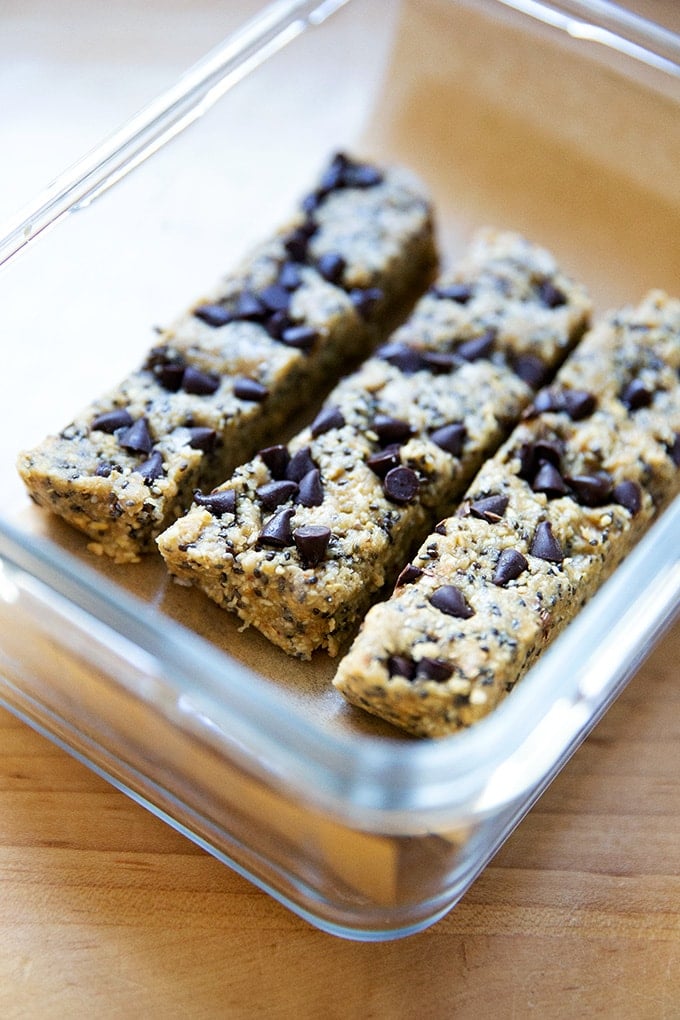
Then cut into bars and store in the fridge for up to two weeks.
Description
From Molly Yeh’s new book Home is Where the Eggs Are
In the book, Molly notes she has made approximately 435,785,406 variations of these bars, so I think it’s safe to say you can adapt this recipe to what you have on hand. I have tried many variations but the one I love best includes chia seeds, honey, and melted butter, which of course pushes them out of the vegan category. That said, I have made the vegan version with coconut oil and maple syrup, and they are delicious.
- 1 cup ( 90 grams ) rolled or quick-cooking oats
- 1 cup ( 144 grams ) whole raw cashews
- 1/4 cup ( 32 grams ) chia or hemp seeds
- 1 tablespoon ( 13 grams ) packed light brown sugar, plus more to taste
- 1/2 teaspoon kosher salt
- 3 tablespoons ( 38 grams ) coconut oil or melted butter
- 2 tablespoons ( 42 grams ) honey or maple syrup, plus more if needed
- 1 1/2 teaspoons vanilla extract
- 2 tablespoons ( 30 grams ) semisweet mini chocolate chips
- Flaky sea salt
- Heat the oven to 350ºF. Line a loaf pan with enough parchment to come all the way up on the long sides and allow 1-inch wings. Set aside.
- Spread the oats on a rimmed sheet pan and toast until fragrant and slightly darker, about 10 minutes. Add to a food processor along with the cashews, seeds, brown sugar, and salt and blend until very fine, like the consistency of fine breadcrumbs. Add the coconut oil or butter, honey or maple syrup, and vanilla and blend until the mixture is combined and starts to form a dough. It’ll still look crumbly in the food processor, but if you squeeze some in your hand, it should stick together. (If it feels a little too dry, you can add a touch more coconut oil/butter or honey/maple syrup.) Taste it and if you’d like it to be sweeter, blend in up to 1 tablespoon (13 grams) more brown sugar.
- Press the mixture into the prepared loaf pan, spreading it out firmly and evenly. I find if I lay one of my plastic bench scrapers atop the dough and press down on it, I can get a nice even layer. Press the chocolate chips firmly into the top and sprinkle with a pinch of flaky sea salt. Transfer to the fridge for at least 30 minutes, then remove and slice into 8 small bars. Return to the fridge. They are hard to resist upon cutting, but I like them even better when they’ve firmed up longer in the fridge. Store in an airtight container in the fridge for up to a couple of weeks.
- Prep Time: 20 minutes
- Category: Snack
- Method: No-Bake
- Cuisine: American
