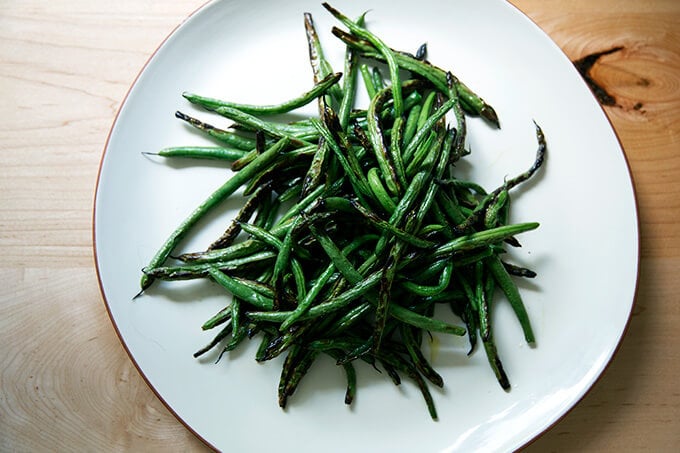
This easy recipe calls for fresh green beans and just 5 minutes under your oven’s broiler. Tossed with a garlic, chili, and caper oil, the blistered beans are irresistible! This is one of the simplest and most delicious ways to prepare fresh green beans.
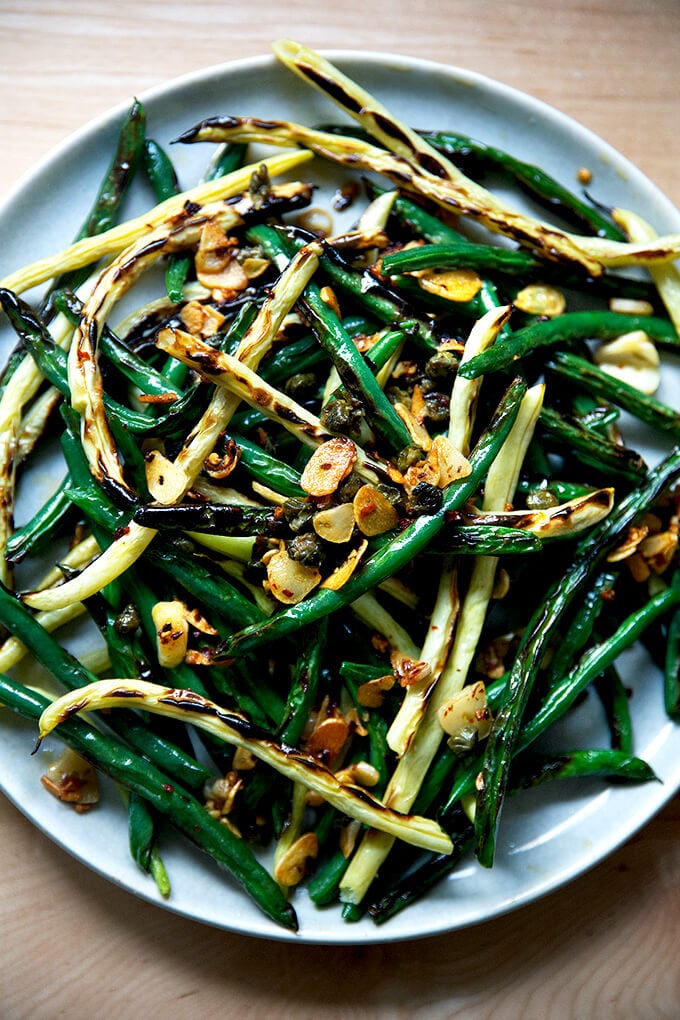
When the first fresh green beans arrived in our CSA, I immediately pulled up an old Bon Appetit recipe, but took a different path: instead of deep-frying the beans in oil stovetop, I broiled them; and while the beans cooked, I infused a few tablespoons of oil in a small skillet with garlic, capers, and crushed red pepper flakes.
In just about 5 minutes, when the green beans looked blistered to my liking, I piled them onto a platter and poured the spicy, garlicky oil overtop. No joke: I ate the entire pound of green beans standing at the counter hovered over the platter.
Friends! These beans are so good. And they couldn’t be faster to prepare: don’t take an eye off your broiler — 2 minutes aside and the beans are done! For both its ease in preparation as well as its deliciousness, this is one of my to-go vegetable side dishes this time of year.
I hope you give it a go. The method has me wondering if it might work with broiled asparagus? broccoli? cauliflower? peppers? I can’t imagine a charred vegetable that wouldn’t welcome a sizzle of salty, fragrant, fiery oil.
Five More Favorite Vegetable Side Dishes
- Charred Broccoli Salad with Dates & Almonds
- Crispy, Oven-Roasted Cabbage Wedges
- Burnt Carrots with Honey & Almonds
- 4-Ingredient Balsamic-Roasted Peppers
- Blistered Poblanos Stuffed with Corn & Quinoa

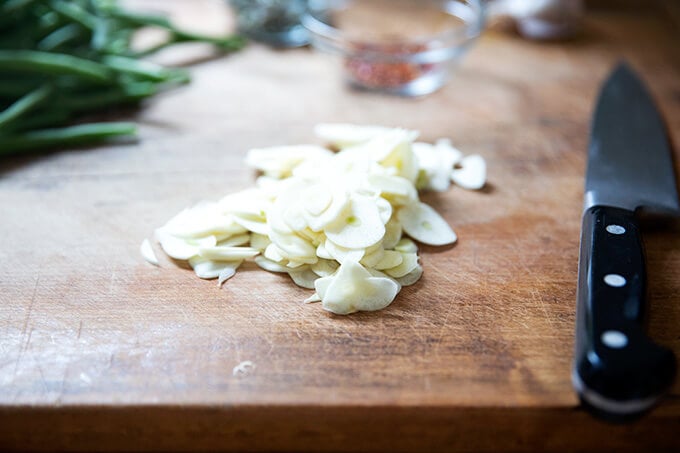
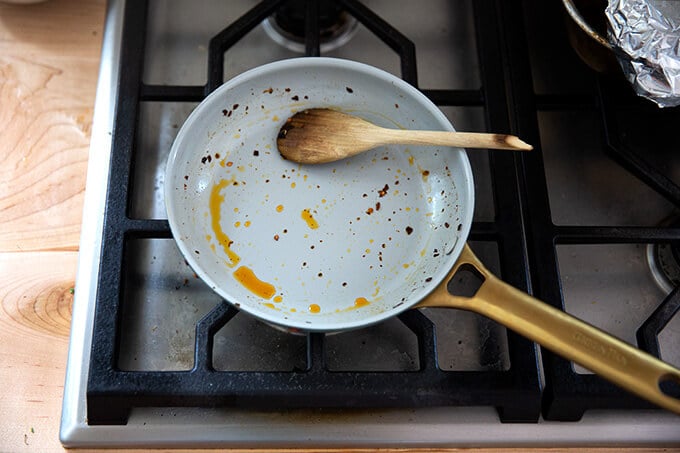
Starting the oil, garlic, pepper flakes, and capers in a cold pan ensures you won’t burn the garlic. Just be patient: there’s a fine line between garlic that’s crispy and caramelized and burnt and bitter.

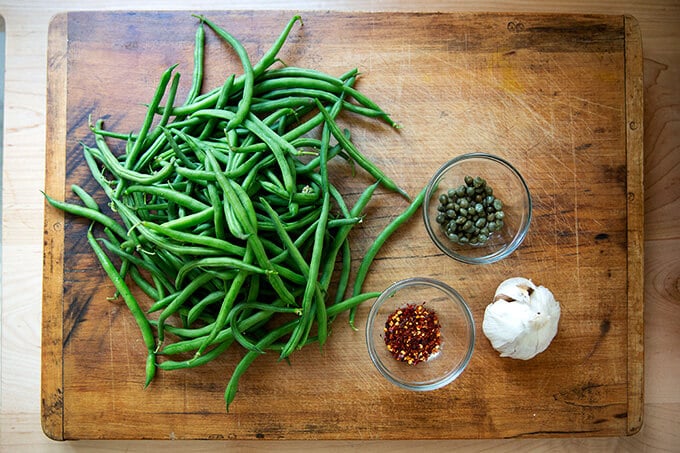
- 4 tablespoons olive oil, divided
- 6 cloves garlic, thinly sliced
- 1/2 teaspoon crushed red pepper flakes (or less if you are sensitive to heat)
- 1 tablespoon capers
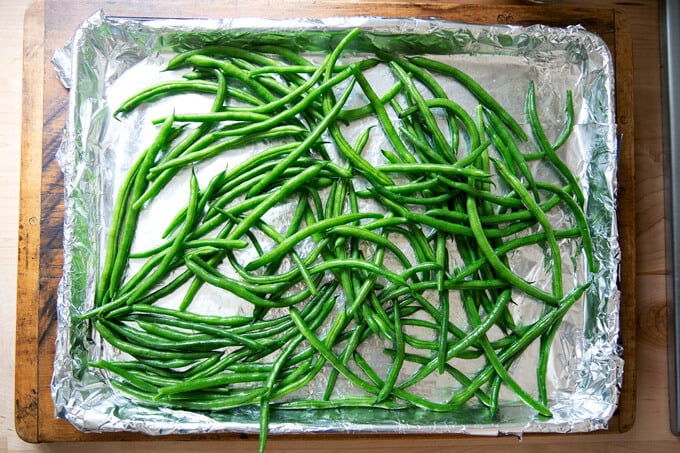
- 1 lb. green beans, stemmed
- kosher salt to taste
- Heat the broiler to high for at least 15 minutes. Line a rimmed sheet pan with aluminum foil.
- In a small skillet, place 2 tablespoons of the oil, the garlic, crushed red pepper flakes (start with a quarter teaspoon if you are sensitive to heat), and capers. Turn the heat to low and let the oil slowly infuse.
- Meanwhile, toss the green beans on the prepared sheet pan with the remaining 2 tablespoons olive oil and kosher salt to taste. Taste a green bean raw — it should taste nicely seasoned. Transfer pan to broiler and cook 2 minutes. Check. If the beans aren’t beginning to char, return for another 1 to 2 minutes. If they are charring, toss, and return to the broiler for another 2 minutes. Check again. Remove from oven if the beans are blistered to your liking, otherwise, cook for another minute or so. ( Note: When my broiler has preheated sufficiently, my beans consistently blister in 5 minutes, with one toss halfway through. Every oven is different, however, so be vigilant! )
- Transfer blistered green beans to a serving platter.
- Meanwhile, your olive oil should be gently shimmering with the garlic, capers, and pepper flakes. Turn the heat up to medium or high and keep a close watch. Stir occasionally and as soon as you see the garlic beginning to brown at the edges and crisp up, remove the pan from the burner and pour the oil over the beans.
- Gently toss. Taste. Season with more salt if desired. Serve immediately.
- Prep Time: 10 minutes
- Cook Time: 10 minutes
- Category: Side Dish
- Method: Broiler/Stovetop
- Cuisine: American
This easy recipe calls for fresh green beans and just 5 minutes under your oven’s broiler. Tossed with a garlic, chili, and caper oil, the blistered beans are irresistible! This is one of the simplest and most delicious ways to prepare fresh green beans.
When the first fresh green beans arrived in our CSA, I immediately pulled up an old Bon Appetit recipe, but took a different path: instead of deep-frying the beans in oil stovetop, I broiled them; and while the beans cooked, I infused a few tablespoons of oil in a small skillet with garlic, capers, and crushed red pepper flakes.
In just about 5 minutes, when the green beans looked blistered to my liking, I piled them onto a platter and poured the spicy, garlicky oil overtop. No joke: I ate the entire pound of green beans standing at the counter hovered over the platter.
Friends! These beans are so good. And they couldn’t be faster to prepare: don’t take an eye off your broiler — 2 minutes aside and the beans are done! For both its ease in preparation as well as its deliciousness, this is one of my to-go vegetable side dishes this time of year.
I hope you give it a go. The method has me wondering if it might work with broiled asparagus? broccoli? cauliflower? peppers? I can’t imagine a charred vegetable that wouldn’t welcome a sizzle of salty, fragrant, fiery oil.
Five More Favorite Vegetable Side Dishes
- Charred Broccoli Salad with Dates & Almonds
- Crispy, Oven-Roasted Cabbage Wedges
- Burnt Carrots with Honey & Almonds
- 4-Ingredient Balsamic-Roasted Peppers
- Blistered Poblanos Stuffed with Corn & Quinoa
Starting the oil, garlic, pepper flakes, and capers in a cold pan ensures you won’t burn the garlic. Just be patient: there’s a fine line between garlic that’s crispy and caramelized and burnt and bitter.
- 4 tablespoons olive oil, divided
- 6 cloves garlic, thinly sliced
- 1/2 teaspoon crushed red pepper flakes (or less if you are sensitive to heat)
- 1 tablespoon capers
- 1 lb. green beans, stemmed
- kosher salt to taste
- Heat the broiler to high for at least 15 minutes. Line a rimmed sheet pan with aluminum foil.
- In a small skillet, place 2 tablespoons of the oil, the garlic, crushed red pepper flakes (start with a quarter teaspoon if you are sensitive to heat), and capers. Turn the heat to low and let the oil slowly infuse.
- Meanwhile, toss the green beans on the prepared sheet pan with the remaining 2 tablespoons olive oil and kosher salt to taste. Taste a green bean raw — it should taste nicely seasoned. Transfer pan to broiler and cook 2 minutes. Check. If the beans aren’t beginning to char, return for another 1 to 2 minutes. If they are charring, toss, and return to the broiler for another 2 minutes. Check again. Remove from oven if the beans are blistered to your liking, otherwise, cook for another minute or so. ( Note: When my broiler has preheated sufficiently, my beans consistently blister in 5 minutes, with one toss halfway through. Every oven is different, however, so be vigilant! )
- Transfer blistered green beans to a serving platter.
- Meanwhile, your olive oil should be gently shimmering with the garlic, capers, and pepper flakes. Turn the heat up to medium or high and keep a close watch. Stir occasionally and as soon as you see the garlic beginning to brown at the edges and crisp up, remove the pan from the burner and pour the oil over the beans.
- Gently toss. Taste. Season with more salt if desired. Serve immediately.
Prep Time: 10 minutes
Cook Time: 10 minutes
Category: Side Dish
Method: Broiler/Stovetop
Cuisine: American
4 tablespoons olive oil, divided
6 cloves garlic, thinly sliced
1/2 teaspoon crushed red pepper flakes (or less if you are sensitive to heat)
1 tablespoon capers
1 lb. green beans, stemmed
kosher salt to taste
- Heat the broiler to high for at least 15 minutes. Line a rimmed sheet pan with aluminum foil.
- In a small skillet, place 2 tablespoons of the oil, the garlic, crushed red pepper flakes (start with a quarter teaspoon if you are sensitive to heat), and capers. Turn the heat to low and let the oil slowly infuse.
- Meanwhile, toss the green beans on the prepared sheet pan with the remaining 2 tablespoons olive oil and kosher salt to taste. Taste a green bean raw — it should taste nicely seasoned. Transfer pan to broiler and cook 2 minutes. Check. If the beans aren’t beginning to char, return for another 1 to 2 minutes. If they are charring, toss, and return to the broiler for another 2 minutes. Check again. Remove from oven if the beans are blistered to your liking, otherwise, cook for another minute or so. ( Note: When my broiler has preheated sufficiently, my beans consistently blister in 5 minutes, with one toss halfway through. Every oven is different, however, so be vigilant! )
- Transfer blistered green beans to a serving platter.
- Meanwhile, your olive oil should be gently shimmering with the garlic, capers, and pepper flakes. Turn the heat up to medium or high and keep a close watch. Stir occasionally and as soon as you see the garlic beginning to brown at the edges and crisp up, remove the pan from the burner and pour the oil over the beans.
- Gently toss. Taste. Season with more salt if desired. Serve immediately.
- Prep Time: 10 minutes
- Cook Time: 10 minutes
- Category: Side Dish
- Method: Broiler/Stovetop
- Cuisine: American
Find it online : https://alexandracooks.com/2019/08/09/spicy-blistered-green-beans-with-garlic/
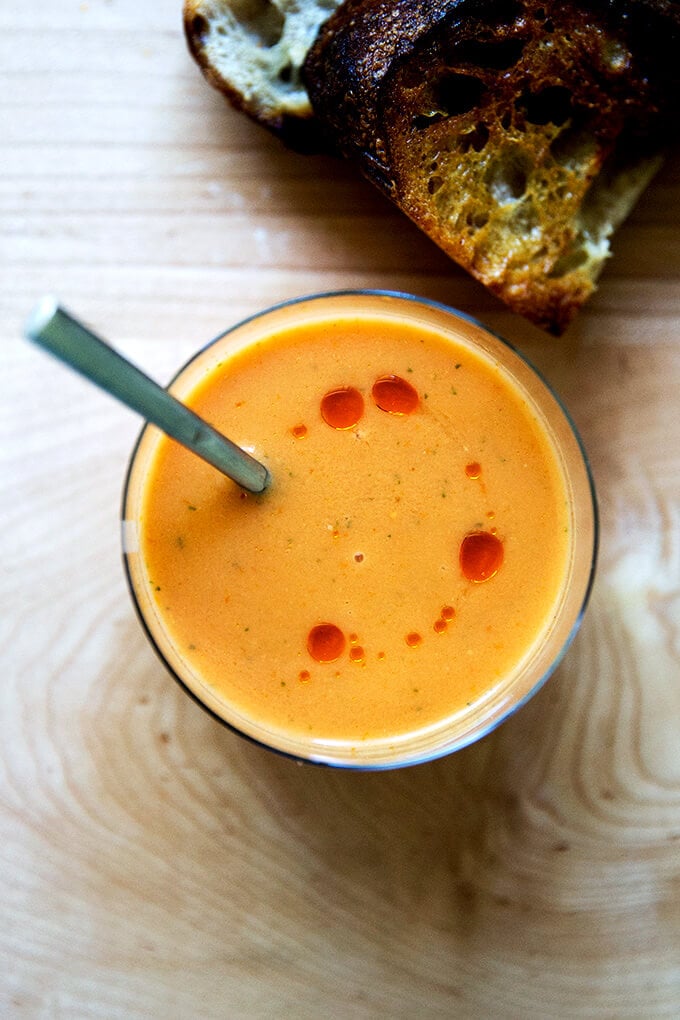
Funny story: My aunt Marcy ( the one with the dogs in Vermont ) came to visit me on Tuesday. She arrived with a bag of special Vermont plums (delicious!), a tub of pineapple tomatillos (irresistible!), and a glass pitcher filled with an orange-y hued purée I recognized instantly as Julia Moskin’s gazpacho, the one everyone is making.
Surprise Aunt Marcy: I’ve been making it too! I opened the fridge to reveal a mirror image, a glass pitcher filled with an orange-y hued purée, the silky smooth Spanish gazpacho I had blitzed on Monday evening.
Friends: have you made it? I learned about it via Jenny Rosenstrach and Cup of Jo , and I’m finding it to be as miraculous of a little recipe as promised: it takes about five minutes to whip up; it yields a huge quantity; it puts to great use so much of the peak summer produce; it’s delicious and not to mention totally refreshing and incredibly healthy. I like mine drizzled with chili oil.
Hooray: it’s tomato season! Morning- noon- and night-tomato season! But also: up-to-our-eyeballs zucchini season. And: Don’t-blink- how-did-it-pass? corn season.
So much to savor, so little time.
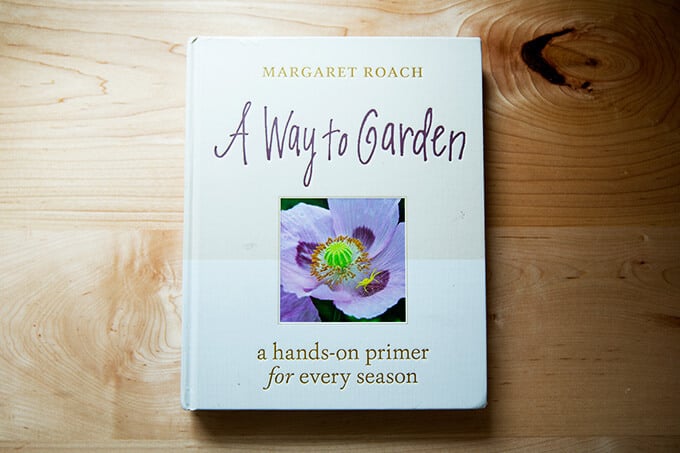
Good news: My friend, Margaret Roach of A Way to Garden , and I have some ideas. We recently chatted about all the tomato, all the zucchini, and all the corn recipes we could squeeze into 25 minutes. Margaret also shares her tips for ripening tomatoes , her method for roasting tomatoes in preparation for freezing , and her go-to, easy skins-on tomato sauce recipe .
I’ve linked to all of the recipes (and more!) below. You can listen to the podcast over on A Way to Garden and enter to win a copy of Bread Toast Crumbs there, too.
Tomato Recipes
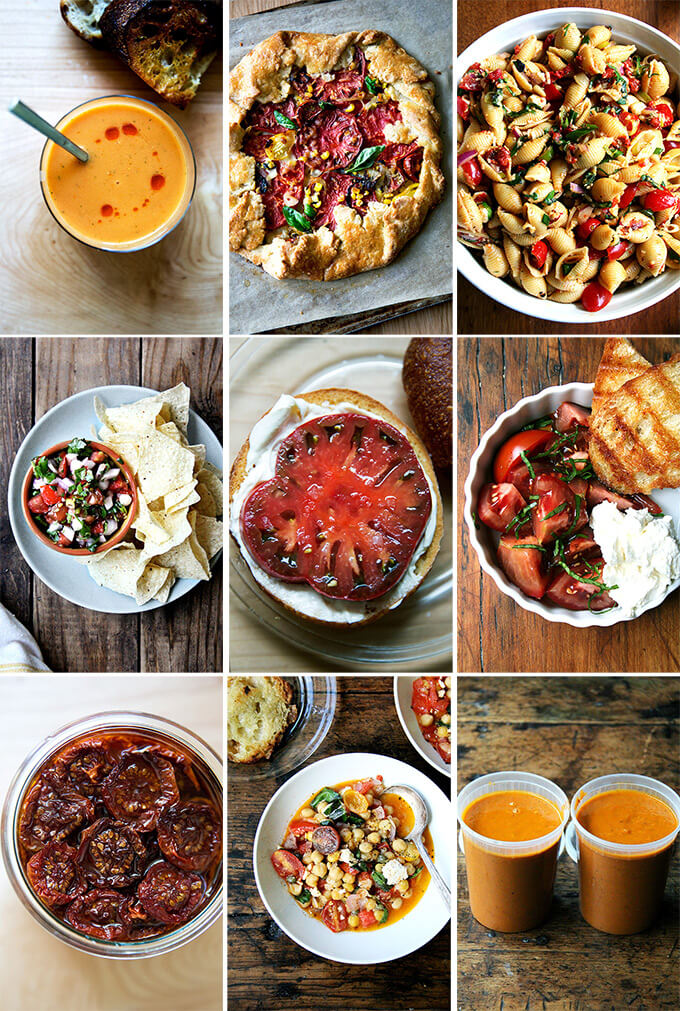
Get All the Tomato Recipes Right Here → Tomatoes
After you’ve had your fill of open-faced tomato-and-mayonnaise sandwiches, tomato-topped cream cheese-smeared bagels , BLTs, pan con tomate , simple salads , and pico de gallo , here are some ideas.
But first! Have you seen the new Alexandra’s Kitchen recipe filter? Click on “Recipes” in the top navigation bar. Then filter away!
A Few Perennial Favorites:
- Tomato and Corn Galette (I’ve been making this David Lebovitz recipe for nearly 20 years.)
- Oven-Dried Tomatoes + Bruschetta (Summer in a jar.)
- Tomato-Red Bell Pepper Sauce (My favorite summer sauce: so delicious, so fast.)
- Marcella Hazan Tomato Sauce, Simplified (No peeling!)
- Roasted Tomato and Bread Soup (If you’re feeling fall.)
From Around the Web:
- Margaret Roach’s Skins-On Tomato Sauce
- Julia Moskin’s gazpacho (A new favorite! Pictured up top.)
- Spaghetti with no-cook Puttanesca (Eager to try!)
- Margaret Roach’s Roasted Tomatoes
- Turkish Scrambled Eggs (Looks so good.)
- Naked Tomato Sauce (Long-time Smitten Kitchen favorite.)
Corn Recipes
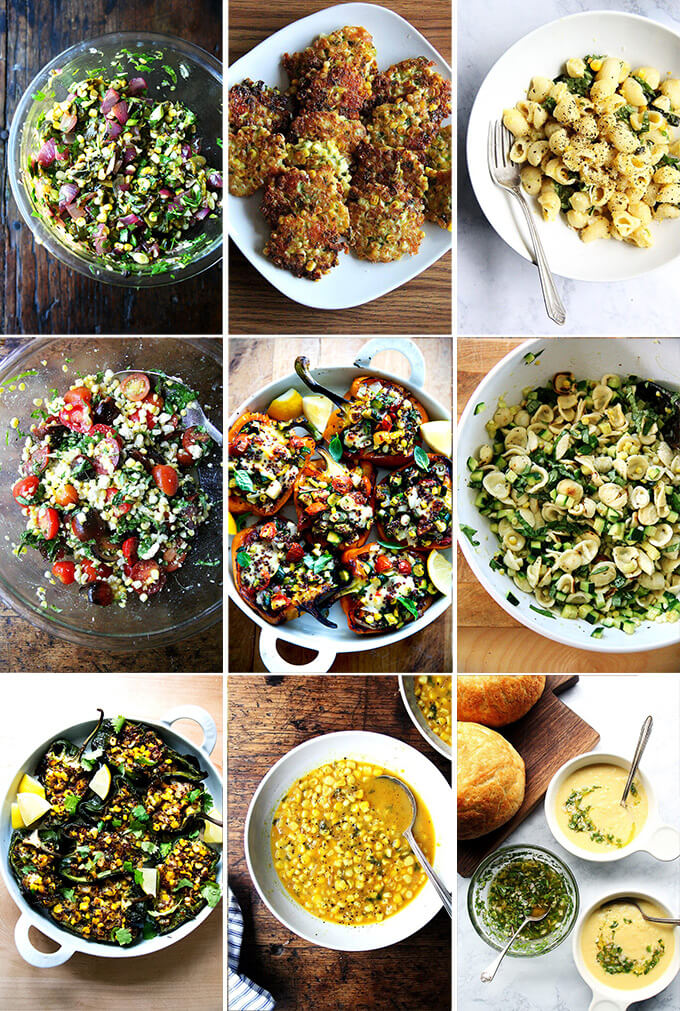
Get All the Corn Recipes Right Here → Corn
When you’ve had your fill of corn on the cob…
A Few Perennial Favorites:
- Raw Corn Salad with Tomatoes, herbs, lots of acid, and feta (Mark Bittman)
- Fresh corn polenta (A must-make once a summer.)
- Soup with a corn cob stock: Deborah Madison’s or Samin Nosrat’s
- Fritters with Cheddar and Scallions (Deborah Madison’s)
- Melissa Clark’s creamy (no cream!) corn pasta
To Try:
- Milk Street’s Pasta with Corn and Tomatoes (Eager to try!)
- Grilled Romaine and Corn Salad (Looks so good.)
Zucchini Recipes
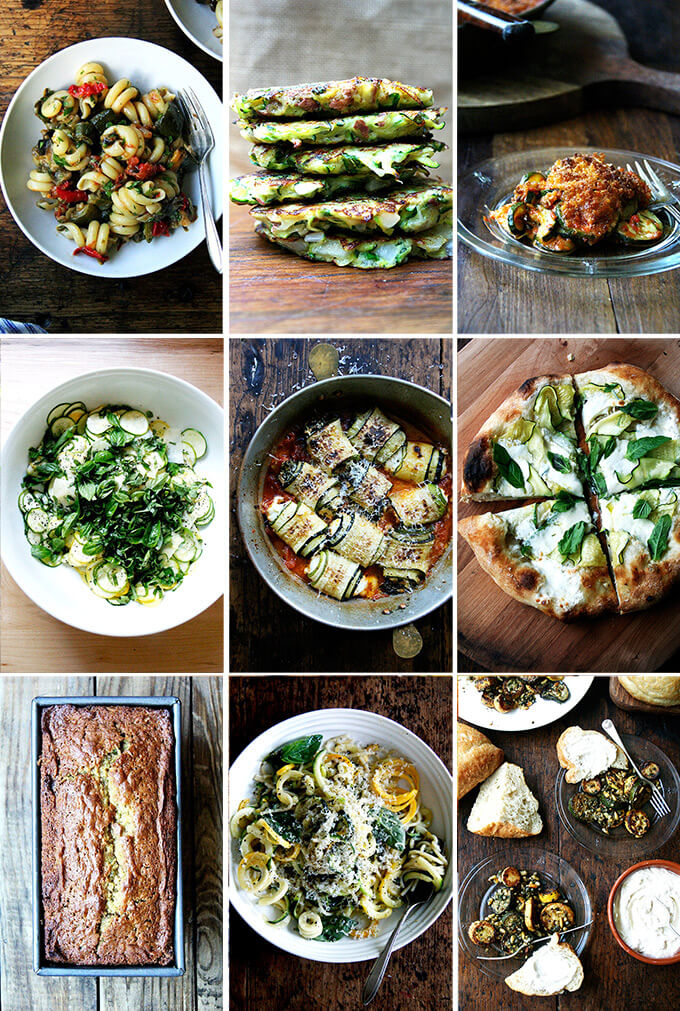
Get All the Zucchini Recipes Right Here → Zucchini
A Few Perennial Favorites:
- Summer Squash Spaghetti
- Raw salad with olive oil, lemon, parmesan
- Roasted or Sautéed with pine nuts and herbs
- Zucchini Parmesan
- Zucchini Involtini
- Zucchini Fritters
- Zucchini Bread
- Roasted Ratatouille
From Around the Web:
- Heidi Swanson’s pasta with smashed zucchini cream (Loved this one!)
- Zucchini Pickles (Zuni cafe recipe)
- Canal House’s Marinated Zucchini (Food52)
- Zucchini Butter (If you’re looking to cull your haul.)
- Zucchini quesadillas (Smitten Kitchen)
- Stuffed Globe Zucchini (Cookie + Kate)
- Oven-Baked Zucchini Fries (Marilena’s Kitchen)
Enjoy these last few weeks of summer, my Friends! Comment below for a chance to win Margaret’s beautiful book !
