In September 2008 I returned from Slow Food Nation convinced I would, by the end of the week, build a mud oven in the alleyway next to my apartment and, as a result, have wood-fired pizzas at my disposal from then on out.
I had watched volunteers at SFN stomp in the mud and cobble together an oven in two days, and I couldn’t stop dreaming about the pizzas, thin and crisp with a blistered bubbly edge, that emerged from that wood-fired oven.
After doing a little research, I made a list of supplies and stuck it to my fridge. I even bought a book: How to Build Your Own Hearth Oven . It was going to happen. I would get my wood-fired oven.
But a few weeks passed, and I never got around to building it. And before I knew it, a few years passed. And then a few children appeared. And then a few dreams disappeared.
Friends, guess what? It’s never going to happen. I am nev-er going to build that mud oven nor am I going to drop ten grand on a more professional wood-fired oven.
But guess what? It’s OK, because there is a product that will make all desires for acquiring these high-speed tools disappear. I had read about the Baking Steel in the Wall Street Journal and then in Food and Wine , but it was a post on Serious Eats that convinced me I had to buy one immediately.
The story of the Baking Steel begins with Andris Lagsdin, a passionate cook, who, after reading about the conductive properties of steel in Nathan Myhyrvold’s Modernist Cuisine , began baking pizzas at home on steel plates made at his family-run steel company, Stoughton Steel.
Pleased to discover that what he had read proved true — that because “steel is a more conductive cooking surface than stone,” pizza “cooks faster and more evenly at a lower temperature, resulting in a beautiful, thin, crispy crust” — Lagsdin initiated a Kickstarter campaign. And so was born the Baking Steel. Serious Eats’ Kenji Lopez-Alt, describes the tool as “the most impressive home pizza product [he’s] ever tested.”
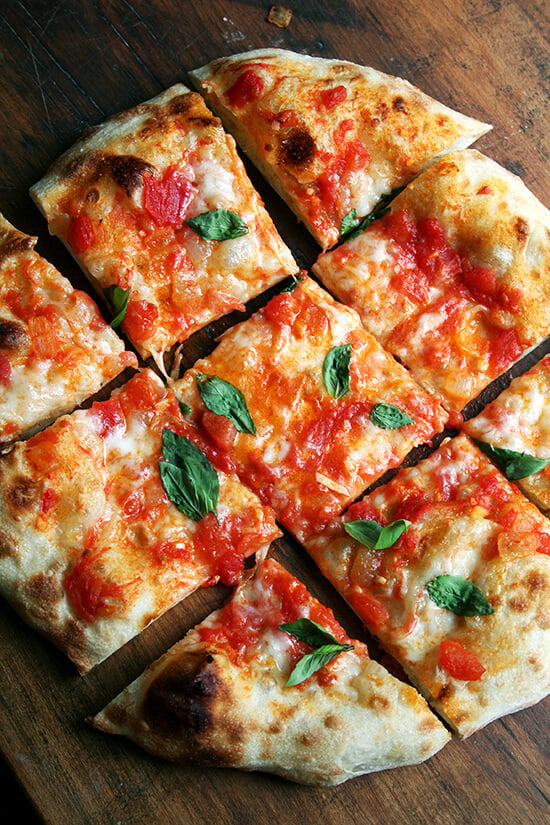
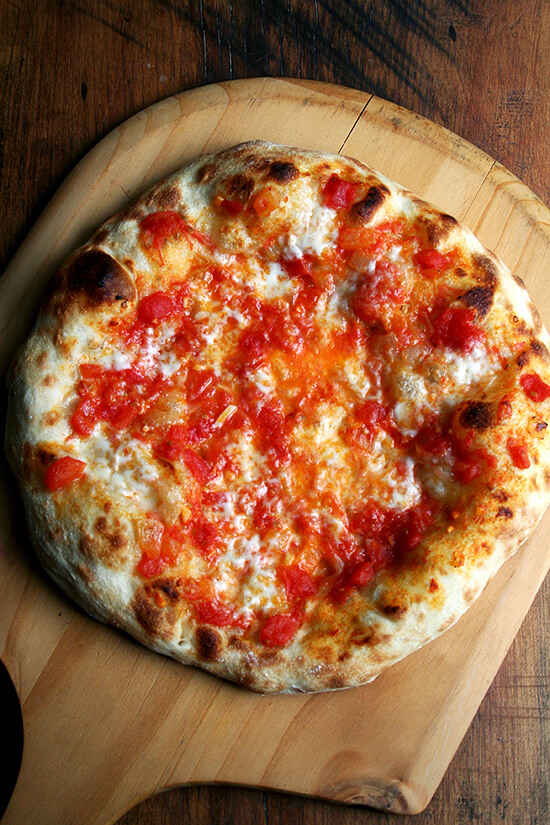
About a year ago I discovered tipo 00 flour, which, when used in the Lahey pizza dough recipe, produced the best pizzas I had ever made. Learning to shape the rounds with a delicate hand, moreover, created great bubbles throughout the pie as well as that ballooned and blistered outer edge characteristic of Neopolitan pizzas. The Baking Steel takes these bubbles to another level.
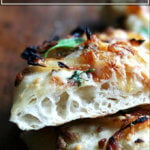
For the past month, I have been making some sort of pizza or flatbread nearly every day, and they have never tasted so good. A few pictures below capture the “oven spring” as well as the crispy, speckled “undercarriage,” the two traits that separate Baking Steel pizzas from the sheetpan pizzas I have been making for years.
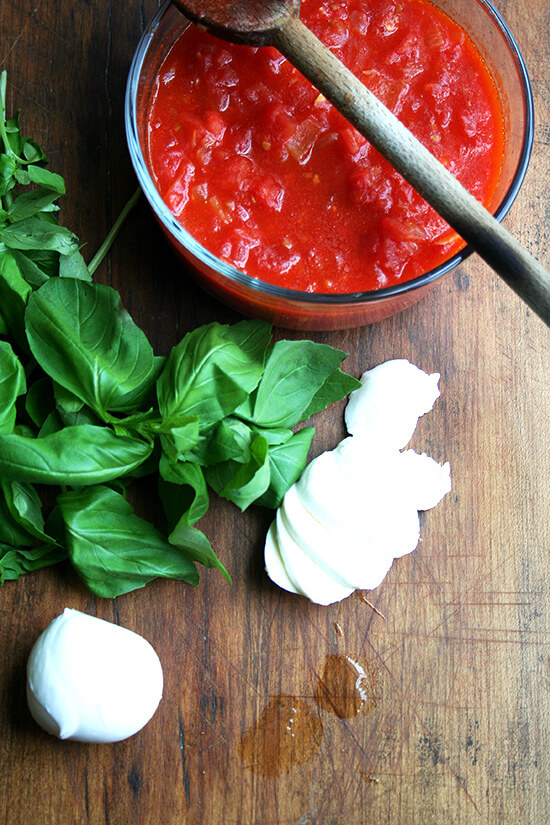
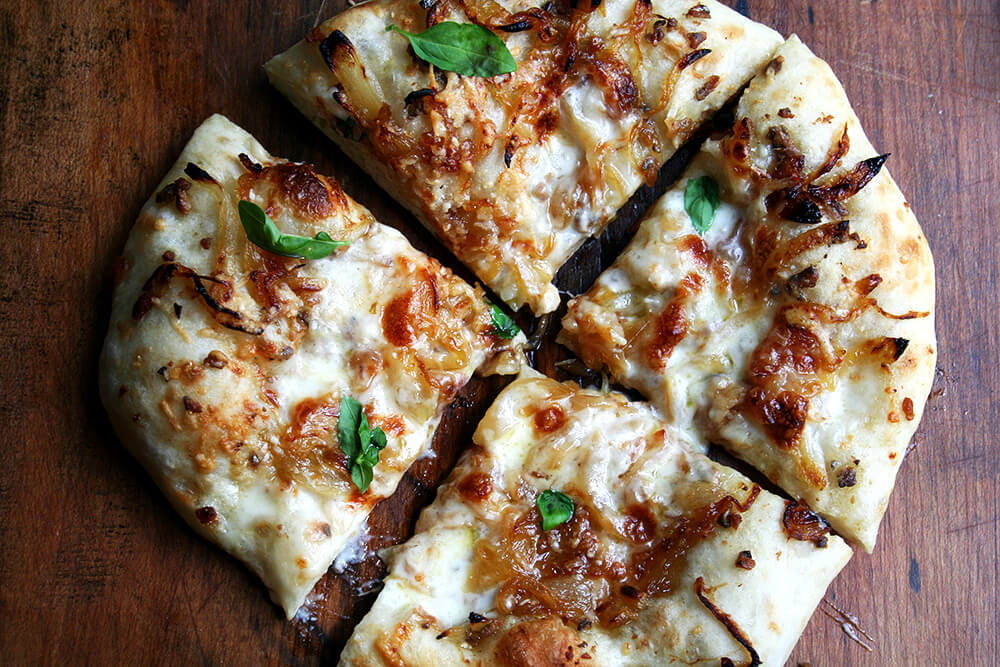
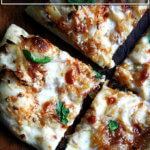
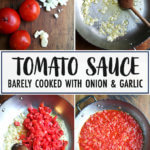
There are other virtues to the steel as well — it’s lighter and more durable than stone; it doesn’t require a supply of wood. Below are recipes for two of my favorite pizzas: margherita made with a barely cooked tomato sauce; and caramelized onion and burrata.
So, am I telling you that the next $79 you spend should be on a Baking Steel ? Yes, I am. But this is the way I see it: with the Baking Steel now a permanent fixture in my oven, I have no use for any backyard wood-fired apparatus, which means I basically just earned $10,000, which will pay for what, a week (maybe two?) of one child’s college tuition?
I know, I know, you can thank me later. Go on, order that steel and while you’re at it, crack open a few bottles of champagne. There’s never been more reason to celebrate.
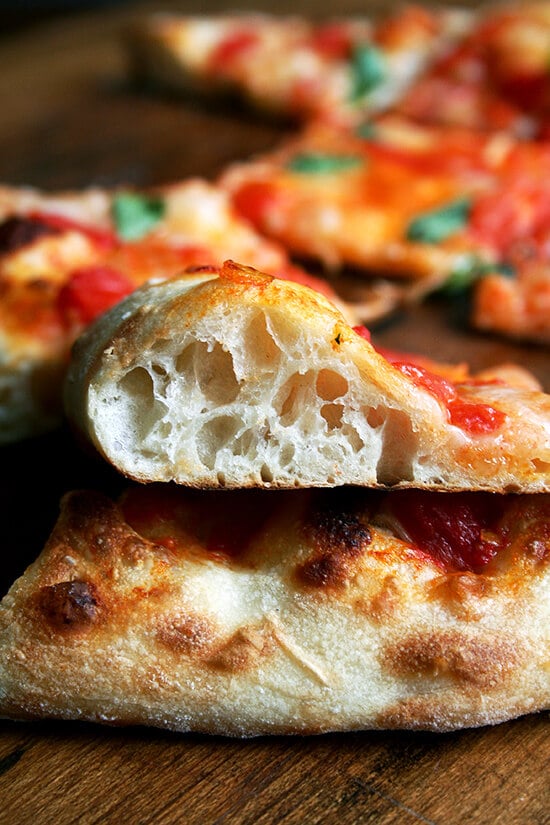
Oven spring:
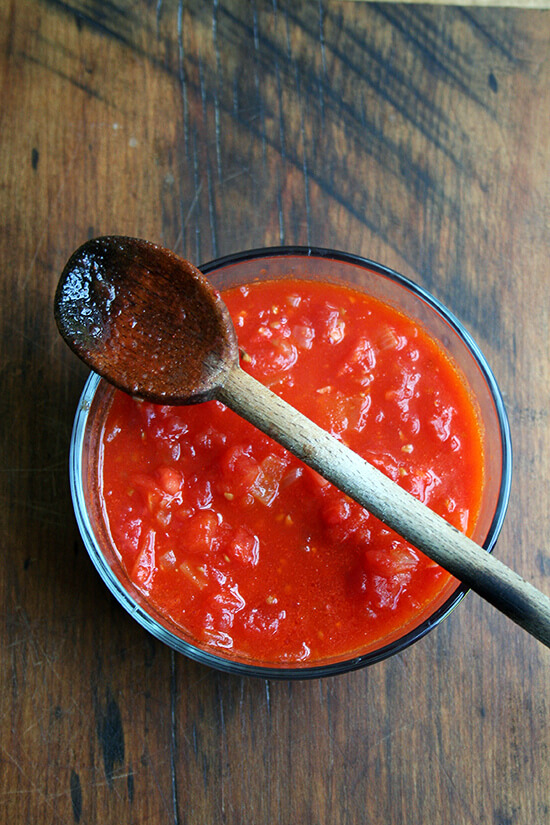
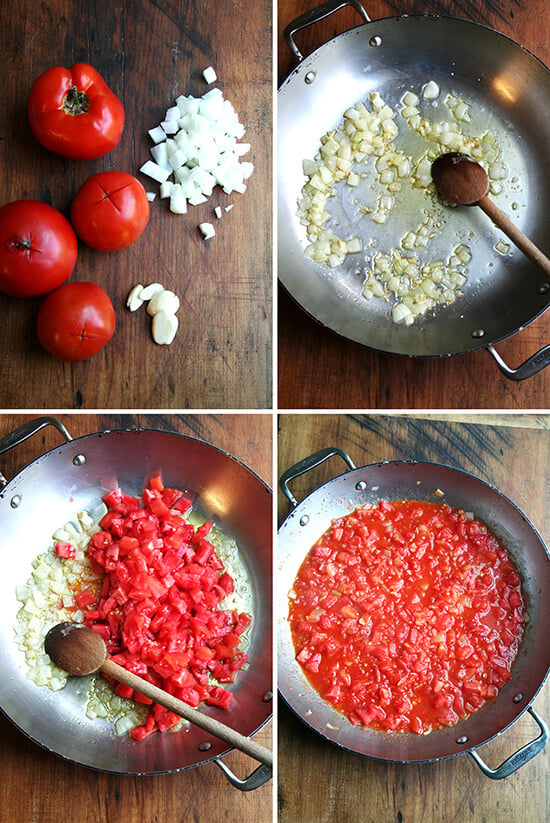
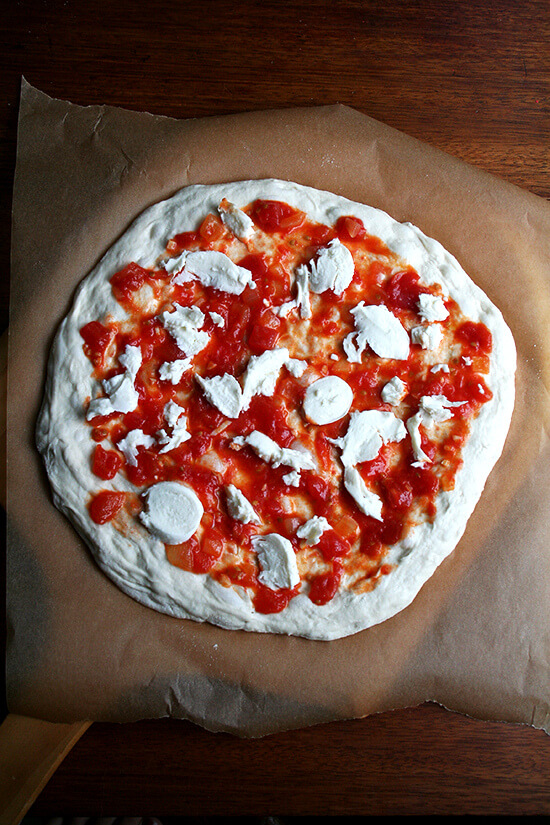
Making the sauce:
Lahey pizza dough :
I noted last week in the za’atar flatbread recipe that using parchment paper on a pizza peel is kind of wimpy. A nicely floured or cornmeal-sprinkled peel should allow a pizza to slide gracefully onto that heated surface, right? Well, in my experience, this doesn’t always happen. And pies that stick to peels can make a mess both on the steel or stone and on the floor of your oven. Moreover, flour or cornmeal that is left on a steel or a stone burns, which might fill your kitchen with smoke and cause your fire alarm to sound. And think about it: at the best pizza restaurants with those magnificent wood-fired ovens, the pizza maker is equipped with both a peel and a broom, which he/she uses to sweep away any flour, toppings, etc. left in the main cooking area. Home cooks can’t really do this. Parchment paper has solved this issue for me. The pizza-topped parchment paper slides effortlessly onto the heated stone. The presence of the paper does not affect how the pizza is cooked, and the paper can be removed (if desired) after a minute or two.

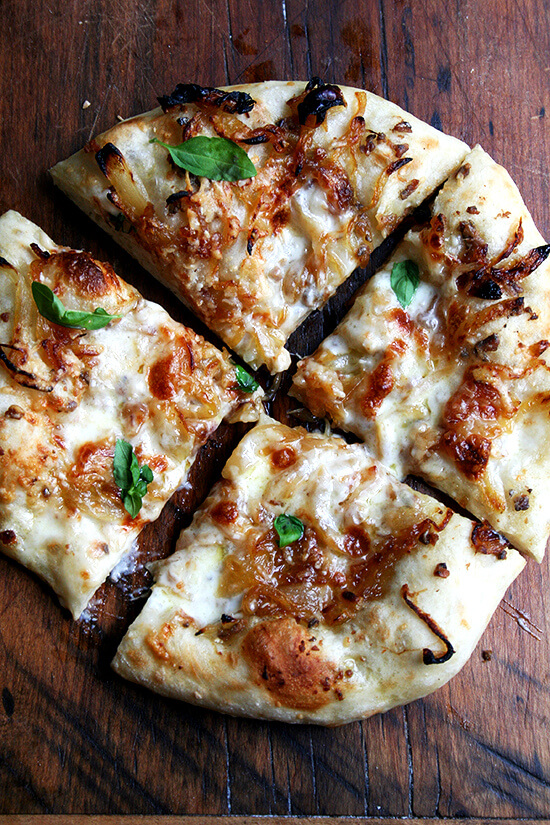
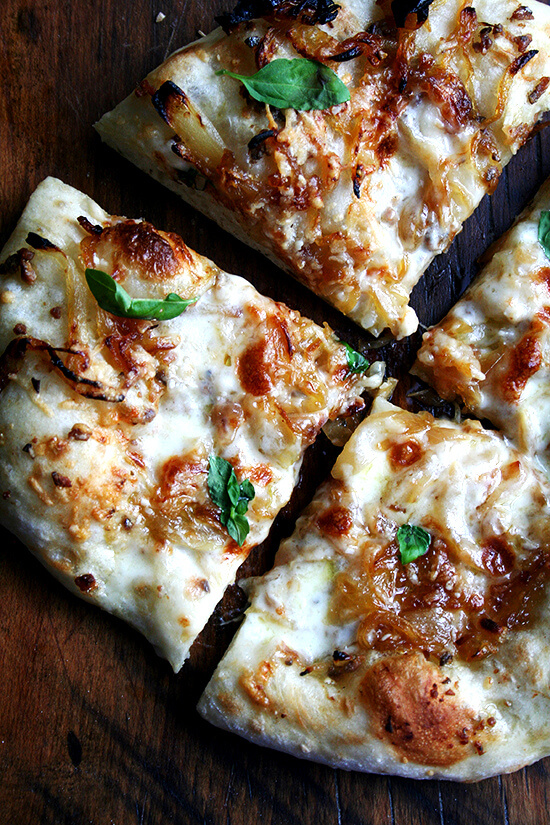
Caramelized onion & burrata pizza:
Oven spring:
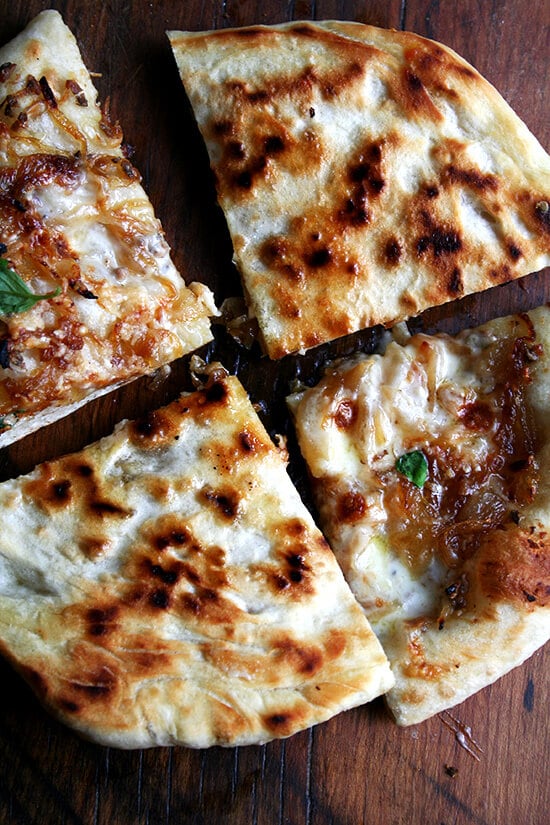
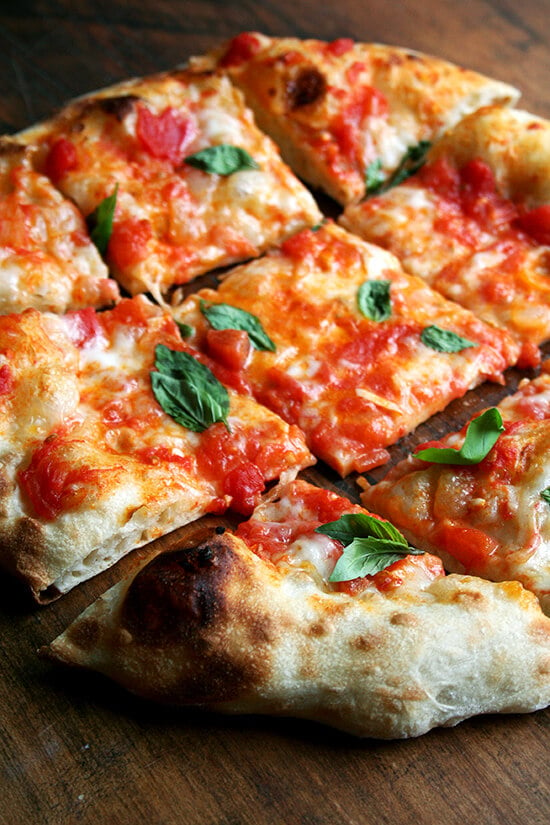
Undercarriage:
Description
Adapted from Jim Lahey’s book, My Pizza
If you buy this Tipo 00 flour , this recipe comes together in seconds — each bag conveniently weighs 1000g, which is what the recipe calls for.
Equipment: Baking Steel , pizza peel, parchment paper (optional)
- 7 1/2 cups all-purpose flour ( 1000 grams ) plus more for shaping dough
- 4 teaspoons fine sea salt
- 1/2 teaspoon active dry yeast:for this pizza you’ll need:
- tomato sauce
- fresh mozzarella (buffalo if you can find it) or burrata, sliced or roughly torn
- olive oil
- sea salt
- fresh basil
- Whisk flour, salt, and yeast in a medium bowl. Add 3 cups water; stir until well incorporated. Add more water if necessary, a tablespoon at a time — dough should not be stiff. Cover with plastic wrap and let dough rise at room temperature in a draft-free area until surface is covered with tiny bubbles and dough has more than doubled in size, about 18 hours (time will vary depending on the temperature in the room).
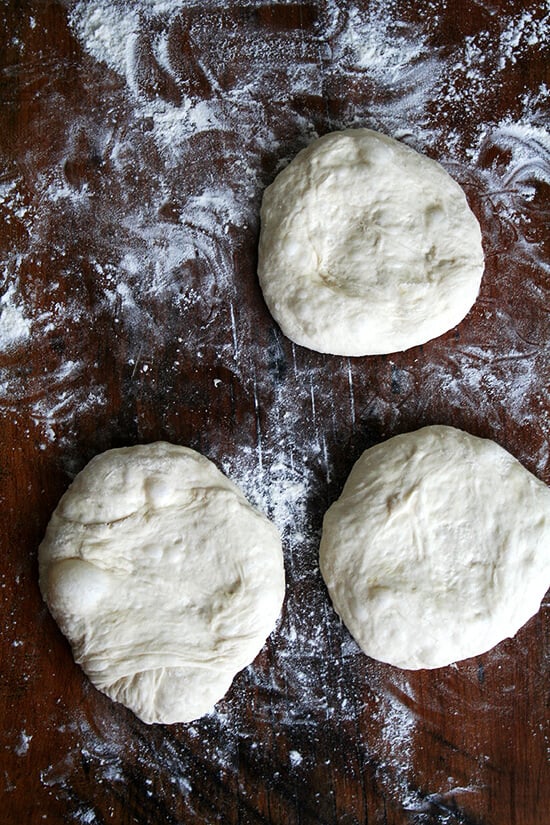
- Transfer dough to a floured work surface. Gently shape into a rough ball. Divide into 6 equal portions. Working with 1 portion at a time, quickly shape into a ball. Dust dough with flour; set aside on work surface or a floured baking sheet. Repeat with remaining portions.
- Let dough rest, covered with plastic wrap or a damp kitchen towel, until soft and pliable, about 1 hour. Proceed with recipe or transfer each to a plastic quart container, cover, and store in fridge (or wrap each dough ball separately in plastic wrap and store in fridge.)
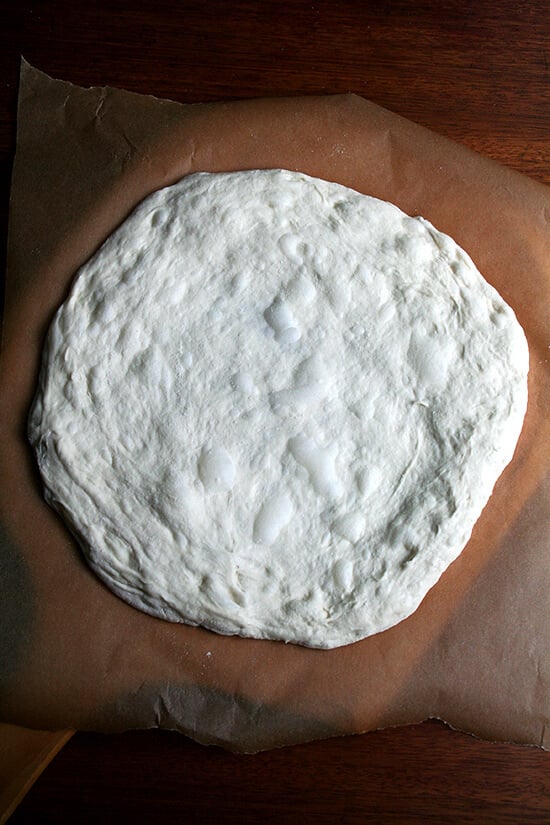
- To Make the Pizzas: Pull out a pizza round from the fridge one hour before you plan on baking. Dust dough with flour and place on a floured work surface. Place a Baking Steel or pizza stone in top third of oven and preheat oven to its hottest setting, 550°F. Gently shape dough into a 10″–12″ disk handling it as minimally as possible. Transfer dough disk to parchment-lined peel.
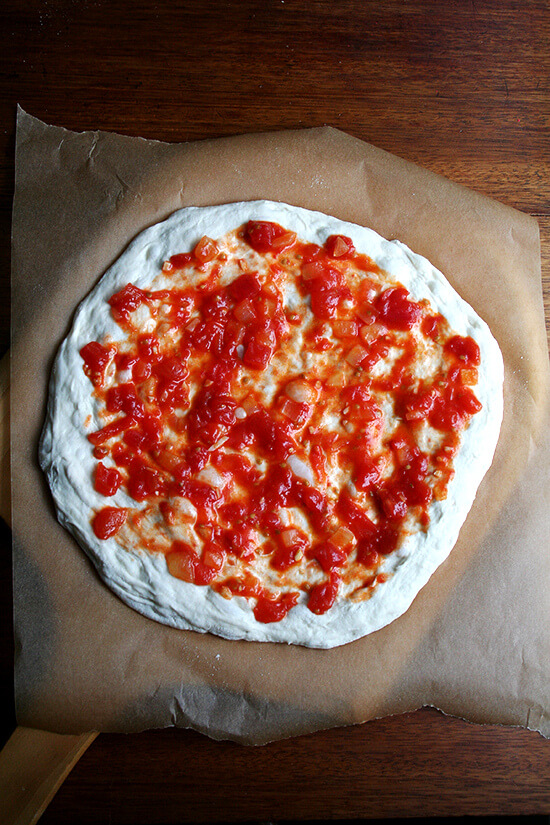
- Spoon sauce in a light layer over the dough’s surface. Top with a light layer of mozzarella cheese. Drizzle with olive oil. Sprinkle with sea salt. Shimmy topped dough parchment paper and all onto preheated Steel.
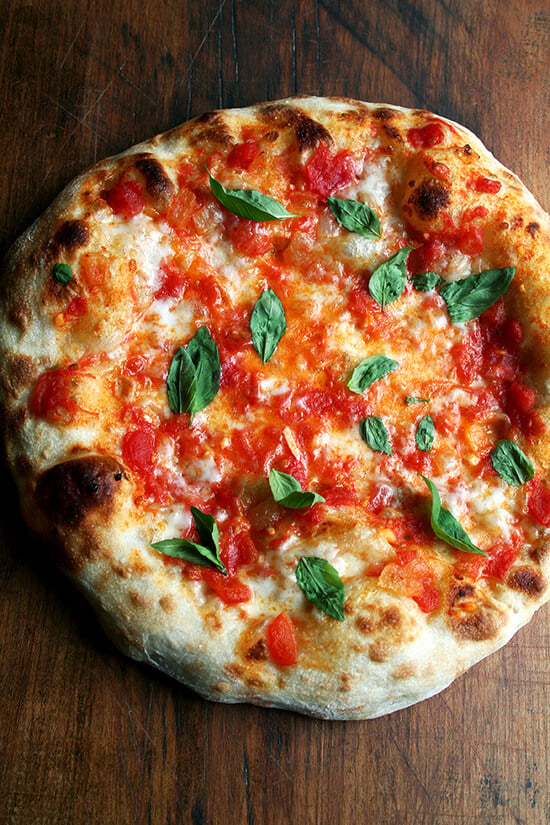
- Remove pizza from oven using your peel — a pair of tongs might help, too. Transfer pizza to cutting board. Throw basil over top. Cut and serve.
- Prep Time: 18 hours
- Cook Time: 5 minutes
- Category: Pizza
- Method: Oven, Baking Steel
- Cuisine: American, Italian
Description
- 7 1/2 cups all-purpose flour ( 1000 grams ) plus more for shaping dough
- 4 teaspoons fine sea salt
- 1/2 teaspoon active dry yeastFor this pizza you’ll need:
- caramelized onions
- burrata
- olive oil
- sea salt
- basil (optional)
- Whisk flour, salt, and yeast in a medium bowl. Add 3 cups water; stir until well incorporated. Add more water if necessary, a tablespoon at a time — dough should not be stiff. Cover with plastic wrap and let dough rise at room temperature in a draft-free area until surface is covered with tiny bubbles and dough has more than doubled in size, about 18 hours (time will vary depending on the temperature in the room).
- Transfer dough to a floured work surface. Gently shape into a rough ball. Divide into 6 equal portions. Working with 1 portion at a time, quickly shape into a ball. Dust dough with flour; set aside on work surface or a floured baking sheet. Repeat with remaining portions.
- Let dough rest, covered with plastic wrap or a damp kitchen towel, until soft and pliable, about 1 hour. Proceed with recipe or transfer each to a plastic quart container, cover, and store in fridge (or wrap each dough ball separately in plastic wrap and store in fridge.)
- To Make the Pizzas: Pull out a pizza round from the fridge one hour before you plan on baking. Dust dough with flour and place on a floured work surface. Place a Baking Steel or pizza stone in top third of oven and preheat oven to its hottest setting, 550°F. Gently shape dough into a 10″–12″ disk handling it as minimally as possible. Transfer dough disk to parchment-lined peel. Scatter caramelized onions in a light layer over the dough’s surface. Top with a light layer of sliced/spread burrata cheese.
- Shimmy the whole piece of pizza-topped parchment paper onto preheated steel or stone. Sprinkle with nice salt. Drizzle with a splash more olive oil. Shimmy dough, parchment paper and all, onto preheated Steel.
- Bake pizza until top is blistered, about 5 minutes. Transfer to a work surface. Top with basil leaves. Slice and serve.
- Prep Time: 18 hours
- Cook Time: 5 minutes
- Category: Pizza
- Method: Oven, Baking Steel
- Cuisine: American, Italian
In September 2008 I returned from Slow Food Nation convinced I would, by the end of the week, build a mud oven in the alleyway next to my apartment and, as a result, have wood-fired pizzas at my disposal from then on out.
I had watched volunteers at SFN stomp in the mud and cobble together an oven in two days, and I couldn’t stop dreaming about the pizzas, thin and crisp with a blistered bubbly edge, that emerged from that wood-fired oven.
After doing a little research, I made a list of supplies and stuck it to my fridge. I even bought a book: How to Build Your Own Hearth Oven . It was going to happen. I would get my wood-fired oven.
But a few weeks passed, and I never got around to building it. And before I knew it, a few years passed. And then a few children appeared. And then a few dreams disappeared.
Friends, guess what? It’s never going to happen. I am nev-er going to build that mud oven nor am I going to drop ten grand on a more professional wood-fired oven.
But guess what? It’s OK, because there is a product that will make all desires for acquiring these high-speed tools disappear. I had read about the Baking Steel in the Wall Street Journal and then in Food and Wine , but it was a post on Serious Eats that convinced me I had to buy one immediately.
The story of the Baking Steel begins with Andris Lagsdin, a passionate cook, who, after reading about the conductive properties of steel in Nathan Myhyrvold’s Modernist Cuisine , began baking pizzas at home on steel plates made at his family-run steel company, Stoughton Steel.
Pleased to discover that what he had read proved true — that because “steel is a more conductive cooking surface than stone,” pizza “cooks faster and more evenly at a lower temperature, resulting in a beautiful, thin, crispy crust” — Lagsdin initiated a Kickstarter campaign. And so was born the Baking Steel. Serious Eats’ Kenji Lopez-Alt, describes the tool as “the most impressive home pizza product [he’s] ever tested.”
About a year ago I discovered tipo 00 flour, which, when used in the Lahey pizza dough recipe, produced the best pizzas I had ever made. Learning to shape the rounds with a delicate hand, moreover, created great bubbles throughout the pie as well as that ballooned and blistered outer edge characteristic of Neopolitan pizzas. The Baking Steel takes these bubbles to another level.
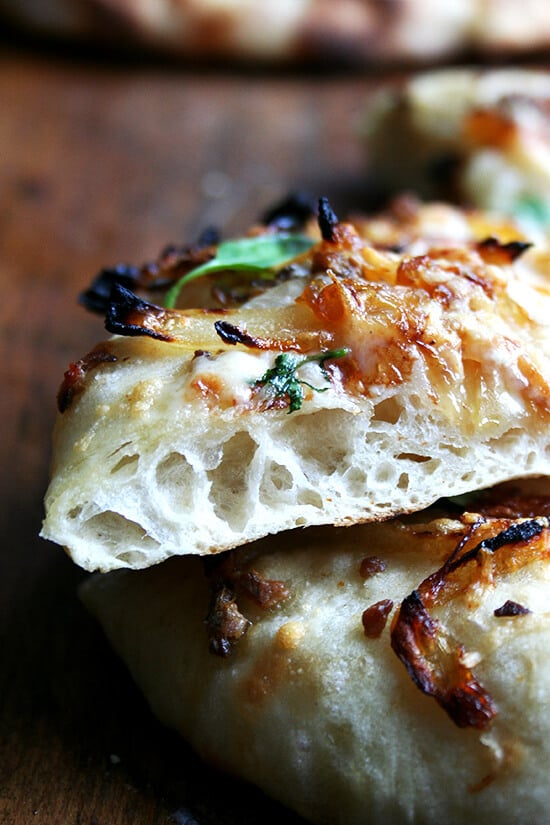
For the past month, I have been making some sort of pizza or flatbread nearly every day, and they have never tasted so good. A few pictures below capture the “oven spring” as well as the crispy, speckled “undercarriage,” the two traits that separate Baking Steel pizzas from the sheetpan pizzas I have been making for years.
There are other virtues to the steel as well — it’s lighter and more durable than stone; it doesn’t require a supply of wood. Below are recipes for two of my favorite pizzas: margherita made with a barely cooked tomato sauce; and caramelized onion and burrata.
So, am I telling you that the next $79 you spend should be on a Baking Steel ? Yes, I am. But this is the way I see it: with the Baking Steel now a permanent fixture in my oven, I have no use for any backyard wood-fired apparatus, which means I basically just earned $10,000, which will pay for what, a week (maybe two?) of one child’s college tuition?
I know, I know, you can thank me later. Go on, order that steel and while you’re at it, crack open a few bottles of champagne. There’s never been more reason to celebrate.
Oven spring:
Making the sauce:
Lahey pizza dough :
I noted last week in the za’atar flatbread recipe that using parchment paper on a pizza peel is kind of wimpy. A nicely floured or cornmeal-sprinkled peel should allow a pizza to slide gracefully onto that heated surface, right? Well, in my experience, this doesn’t always happen. And pies that stick to peels can make a mess both on the steel or stone and on the floor of your oven. Moreover, flour or cornmeal that is left on a steel or a stone burns, which might fill your kitchen with smoke and cause your fire alarm to sound. And think about it: at the best pizza restaurants with those magnificent wood-fired ovens, the pizza maker is equipped with both a peel and a broom, which he/she uses to sweep away any flour, toppings, etc. left in the main cooking area. Home cooks can’t really do this. Parchment paper has solved this issue for me. The pizza-topped parchment paper slides effortlessly onto the heated stone. The presence of the paper does not affect how the pizza is cooked, and the paper can be removed (if desired) after a minute or two.
Caramelized onion & burrata pizza:
Oven spring:
Undercarriage:
Description
Adapted from Jim Lahey’s book, My Pizza
If you buy this Tipo 00 flour , this recipe comes together in seconds — each bag conveniently weighs 1000g, which is what the recipe calls for.
Equipment: Baking Steel , pizza peel, parchment paper (optional)
- 7 1/2 cups all-purpose flour ( 1000 grams ) plus more for shaping dough
- 4 teaspoons fine sea salt
- 1/2 teaspoon active dry yeast:for this pizza you’ll need:
- tomato sauce
- fresh mozzarella (buffalo if you can find it) or burrata, sliced or roughly torn
- olive oil
- sea salt
- fresh basil
- Whisk flour, salt, and yeast in a medium bowl. Add 3 cups water; stir until well incorporated. Add more water if necessary, a tablespoon at a time — dough should not be stiff. Cover with plastic wrap and let dough rise at room temperature in a draft-free area until surface is covered with tiny bubbles and dough has more than doubled in size, about 18 hours (time will vary depending on the temperature in the room).
- Transfer dough to a floured work surface. Gently shape into a rough ball. Divide into 6 equal portions. Working with 1 portion at a time, quickly shape into a ball. Dust dough with flour; set aside on work surface or a floured baking sheet. Repeat with remaining portions.
- Let dough rest, covered with plastic wrap or a damp kitchen towel, until soft and pliable, about 1 hour. Proceed with recipe or transfer each to a plastic quart container, cover, and store in fridge (or wrap each dough ball separately in plastic wrap and store in fridge.)
- To Make the Pizzas: Pull out a pizza round from the fridge one hour before you plan on baking. Dust dough with flour and place on a floured work surface. Place a Baking Steel or pizza stone in top third of oven and preheat oven to its hottest setting, 550°F. Gently shape dough into a 10″–12″ disk handling it as minimally as possible. Transfer dough disk to parchment-lined peel.
- Spoon sauce in a light layer over the dough’s surface. Top with a light layer of mozzarella cheese. Drizzle with olive oil. Sprinkle with sea salt. Shimmy topped dough parchment paper and all onto preheated Steel.
- Remove pizza from oven using your peel — a pair of tongs might help, too. Transfer pizza to cutting board. Throw basil over top. Cut and serve.
- Prep Time: 18 hours
- Cook Time: 5 minutes
- Category: Pizza
- Method: Oven, Baking Steel
- Cuisine: American, Italian
Description
- 7 1/2 cups all-purpose flour ( 1000 grams ) plus more for shaping dough
- 4 teaspoons fine sea salt
- 1/2 teaspoon active dry yeastFor this pizza you’ll need:
- caramelized onions
- burrata
- olive oil
- sea salt
- basil (optional)
- Whisk flour, salt, and yeast in a medium bowl. Add 3 cups water; stir until well incorporated. Add more water if necessary, a tablespoon at a time — dough should not be stiff. Cover with plastic wrap and let dough rise at room temperature in a draft-free area until surface is covered with tiny bubbles and dough has more than doubled in size, about 18 hours (time will vary depending on the temperature in the room).
- Transfer dough to a floured work surface. Gently shape into a rough ball. Divide into 6 equal portions. Working with 1 portion at a time, quickly shape into a ball. Dust dough with flour; set aside on work surface or a floured baking sheet. Repeat with remaining portions.
- Let dough rest, covered with plastic wrap or a damp kitchen towel, until soft and pliable, about 1 hour. Proceed with recipe or transfer each to a plastic quart container, cover, and store in fridge (or wrap each dough ball separately in plastic wrap and store in fridge.)
- To Make the Pizzas: Pull out a pizza round from the fridge one hour before you plan on baking. Dust dough with flour and place on a floured work surface. Place a Baking Steel or pizza stone in top third of oven and preheat oven to its hottest setting, 550°F. Gently shape dough into a 10″–12″ disk handling it as minimally as possible. Transfer dough disk to parchment-lined peel. Scatter caramelized onions in a light layer over the dough’s surface. Top with a light layer of sliced/spread burrata cheese.
- Shimmy the whole piece of pizza-topped parchment paper onto preheated steel or stone. Sprinkle with nice salt. Drizzle with a splash more olive oil. Shimmy dough, parchment paper and all, onto preheated Steel.
- Bake pizza until top is blistered, about 5 minutes. Transfer to a work surface. Top with basil leaves. Slice and serve.
- Prep Time: 18 hours
- Cook Time: 5 minutes
- Category: Pizza
- Method: Oven, Baking Steel
- Cuisine: American, Italian
Description
Adapted from Jim Lahey’s book, My Pizza
If you buy this Tipo 00 flour , this recipe comes together in seconds — each bag conveniently weighs 1000g, which is what the recipe calls for.
Equipment: Baking Steel , pizza peel, parchment paper (optional)
- 7 1/2 cups all-purpose flour ( 1000 grams ) plus more for shaping dough
- 4 teaspoons fine sea salt
- 1/2 teaspoon active dry yeast:for this pizza you’ll need:
- tomato sauce
- fresh mozzarella (buffalo if you can find it) or burrata, sliced or roughly torn
- olive oil
- sea salt
- fresh basil
- Whisk flour, salt, and yeast in a medium bowl. Add 3 cups water; stir until well incorporated. Add more water if necessary, a tablespoon at a time — dough should not be stiff. Cover with plastic wrap and let dough rise at room temperature in a draft-free area until surface is covered with tiny bubbles and dough has more than doubled in size, about 18 hours (time will vary depending on the temperature in the room).
- Transfer dough to a floured work surface. Gently shape into a rough ball. Divide into 6 equal portions. Working with 1 portion at a time, quickly shape into a ball. Dust dough with flour; set aside on work surface or a floured baking sheet. Repeat with remaining portions.
- Let dough rest, covered with plastic wrap or a damp kitchen towel, until soft and pliable, about 1 hour. Proceed with recipe or transfer each to a plastic quart container, cover, and store in fridge (or wrap each dough ball separately in plastic wrap and store in fridge.)
- To Make the Pizzas: Pull out a pizza round from the fridge one hour before you plan on baking. Dust dough with flour and place on a floured work surface. Place a Baking Steel or pizza stone in top third of oven and preheat oven to its hottest setting, 550°F. Gently shape dough into a 10″–12″ disk handling it as minimally as possible. Transfer dough disk to parchment-lined peel.
- Spoon sauce in a light layer over the dough’s surface. Top with a light layer of mozzarella cheese. Drizzle with olive oil. Sprinkle with sea salt. Shimmy topped dough parchment paper and all onto preheated Steel.
- Remove pizza from oven using your peel — a pair of tongs might help, too. Transfer pizza to cutting board. Throw basil over top. Cut and serve.
- Prep Time: 18 hours
- Cook Time: 5 minutes
- Category: Pizza
- Method: Oven, Baking Steel
- Cuisine: American, Italian
Find it online : https://alexandracooks.com/2013/08/01/baking-steel-pizza-tomato-mozzarella-caramelized-onion-burrata/


Description
- 7 1/2 cups all-purpose flour ( 1000 grams ) plus more for shaping dough
- 4 teaspoons fine sea salt
- 1/2 teaspoon active dry yeastFor this pizza you’ll need:
- caramelized onions
- burrata
- olive oil
- sea salt
- basil (optional)
- Whisk flour, salt, and yeast in a medium bowl. Add 3 cups water; stir until well incorporated. Add more water if necessary, a tablespoon at a time — dough should not be stiff. Cover with plastic wrap and let dough rise at room temperature in a draft-free area until surface is covered with tiny bubbles and dough has more than doubled in size, about 18 hours (time will vary depending on the temperature in the room).
- Transfer dough to a floured work surface. Gently shape into a rough ball. Divide into 6 equal portions. Working with 1 portion at a time, quickly shape into a ball. Dust dough with flour; set aside on work surface or a floured baking sheet. Repeat with remaining portions.
- Let dough rest, covered with plastic wrap or a damp kitchen towel, until soft and pliable, about 1 hour. Proceed with recipe or transfer each to a plastic quart container, cover, and store in fridge (or wrap each dough ball separately in plastic wrap and store in fridge.)
- To Make the Pizzas: Pull out a pizza round from the fridge one hour before you plan on baking. Dust dough with flour and place on a floured work surface. Place a Baking Steel or pizza stone in top third of oven and preheat oven to its hottest setting, 550°F. Gently shape dough into a 10″–12″ disk handling it as minimally as possible. Transfer dough disk to parchment-lined peel. Scatter caramelized onions in a light layer over the dough’s surface. Top with a light layer of sliced/spread burrata cheese.
- Shimmy the whole piece of pizza-topped parchment paper onto preheated steel or stone. Sprinkle with nice salt. Drizzle with a splash more olive oil. Shimmy dough, parchment paper and all, onto preheated Steel.
- Bake pizza until top is blistered, about 5 minutes. Transfer to a work surface. Top with basil leaves. Slice and serve.
- Prep Time: 18 hours
- Cook Time: 5 minutes
- Category: Pizza
- Method: Oven, Baking Steel
- Cuisine: American, Italian
Find it online : https://alexandracooks.com/2013/08/01/baking-steel-pizza-tomato-mozzarella-caramelized-onion-burrata/
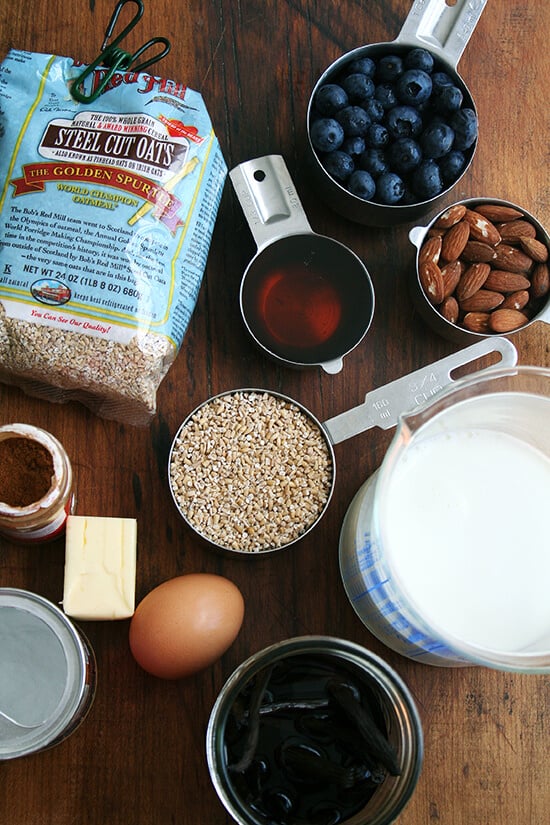
This baked steel cut oatmeal is irresistible. The whole thing can be assembled the night before or it can be assembled and baked immediately. It is infinitely customizable to your preferences — you can make it dairy-free, vegan, with or without nuts, and with any fruit your heart desires 🙂
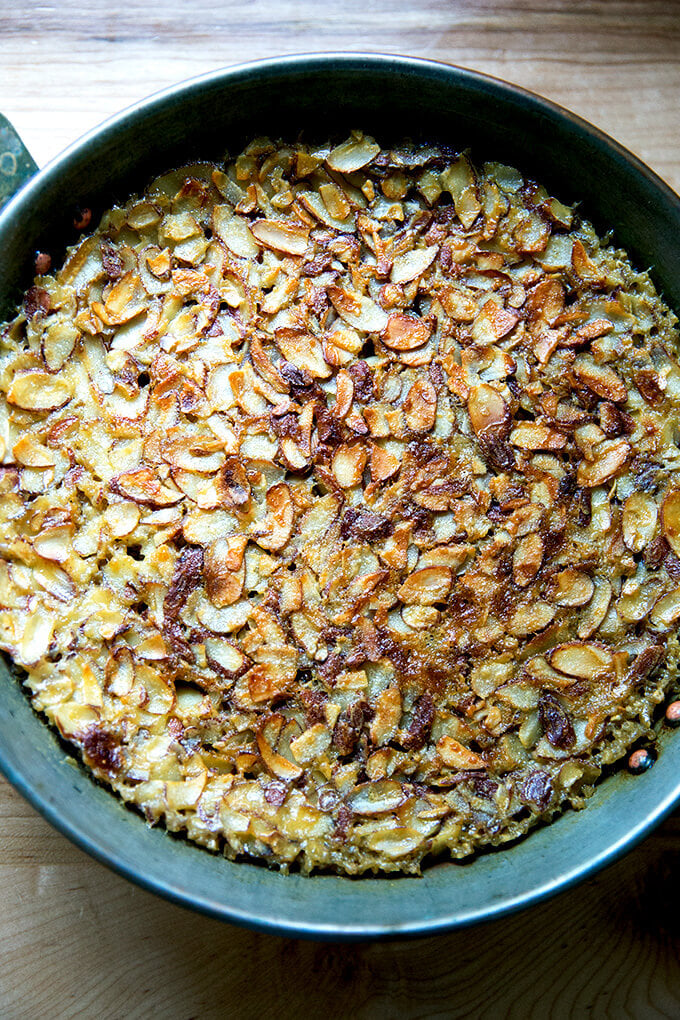
Inspired by a recipe for baked oatmeal using rolled oats, I made a variation using steel cut oats instead. What I love about using steel cut oasts is that it allows the entire dish — egg, milk, melted butter, baking powder and all — to be assembled the night before baking.
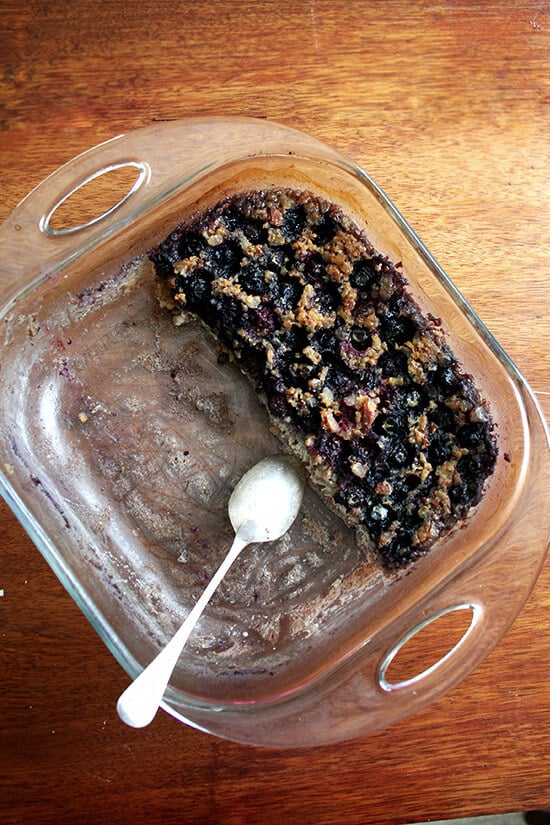
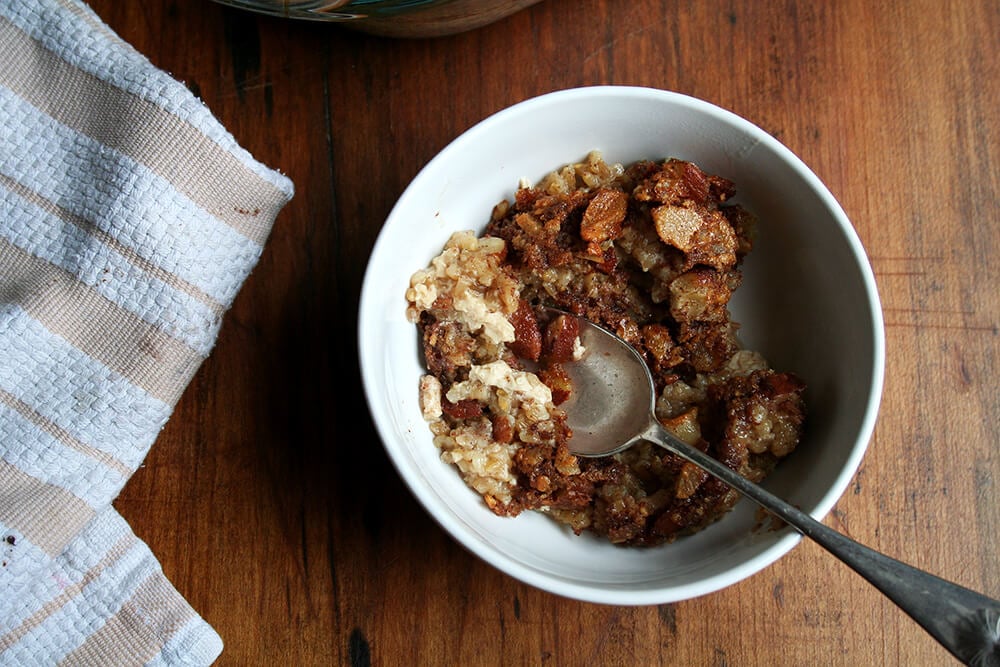
When these oats bake, the mixture separates into distinct layers, the nuts forming a crisp-like topping, the berries bobbing underneath, the creamy oats and custard forming the foundation. Flavored with cinnamon and maple, the oats remain firm and chewy and offer the loveliest texture throughout. I could eat the whole pan in one sitting.
I love these oats with berries. I love them without. I love them freshly baked. I love them cold, straight from the fridge. I like them with walnuts. I love them with almonds. I could eat them at every meal. I like them so much that when Ben tells me he can’t make it home for dinner, I think, “Yes, I get to eat my oats!”
And while these oats are the perfect kind of thing to make for a crowd, at the moment I’m not at all upset that my children don’t like them. This is the kind of dish I hope so very much you will all whisk up tonight before hitting the hay, so you, too, have something to savor, with friends or without, all Saturday morning long.
PS: Favorite Blueberry-Almond Smoothie
PPS: Apple-Pie Overnight Oats
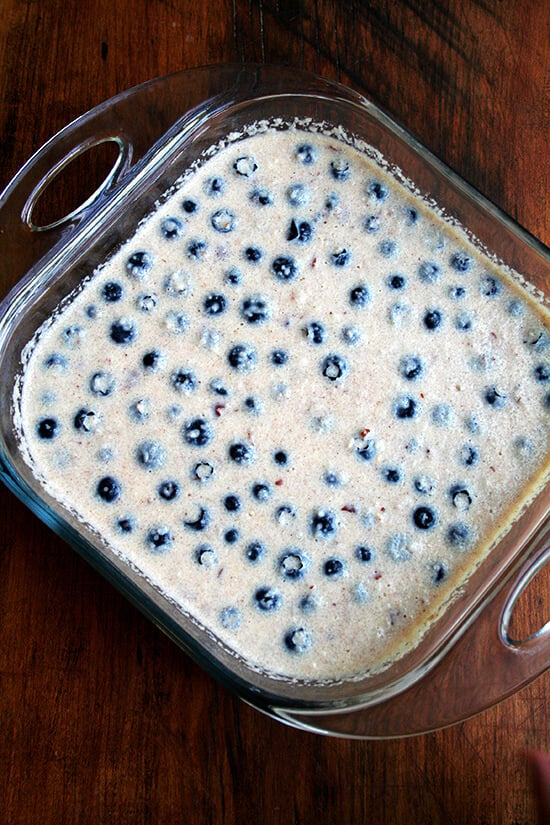
You can make these oats with or without berries:
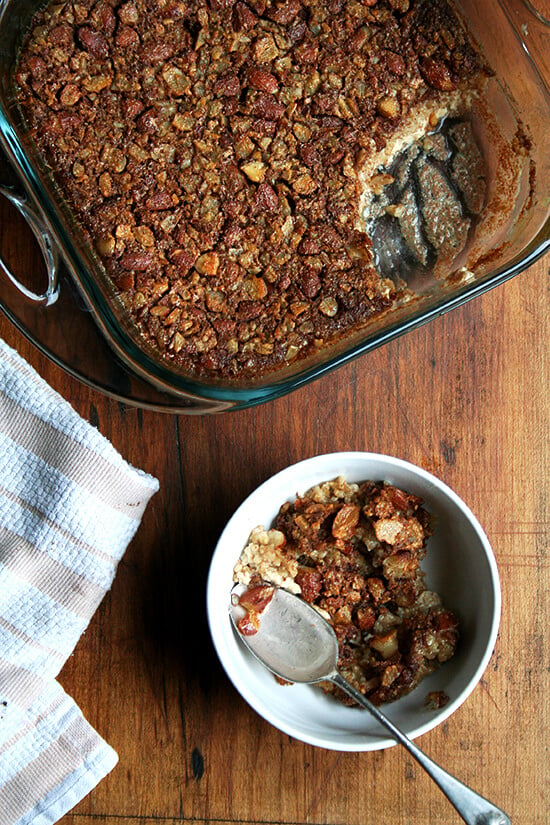
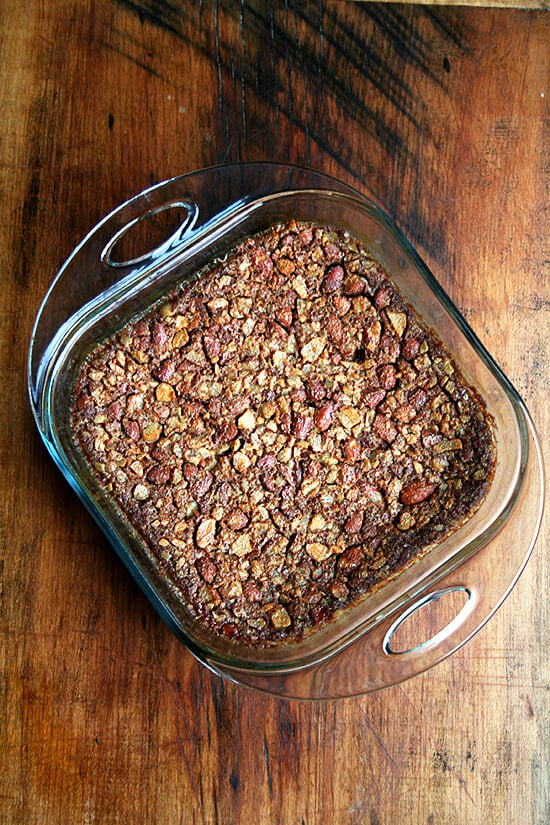
I like my Pyrex 8-inch square baking dish for this one:
By mid morning the pan usually looks like this:
By noon:
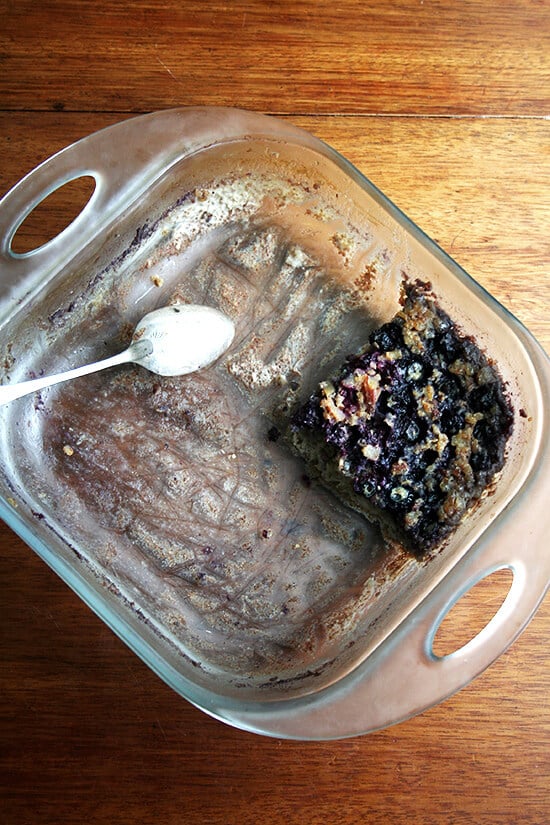
By early afternoon:
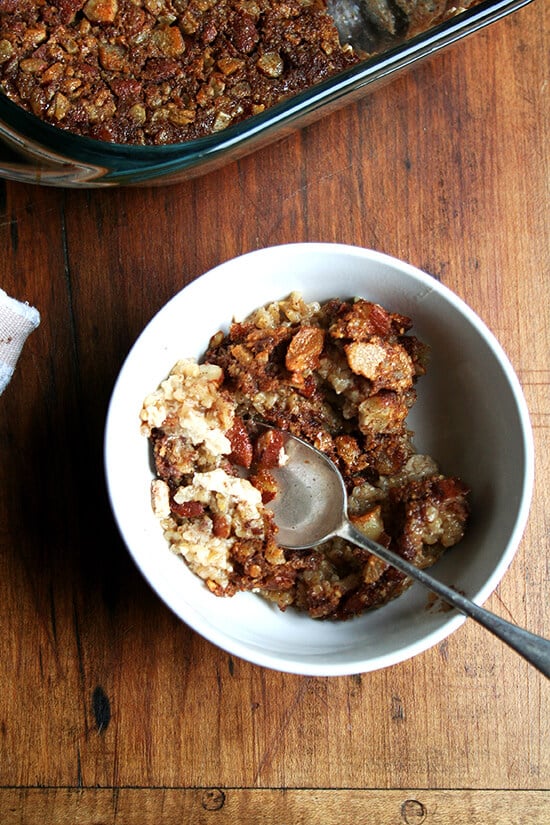
Individual bowls of steel cut oats:
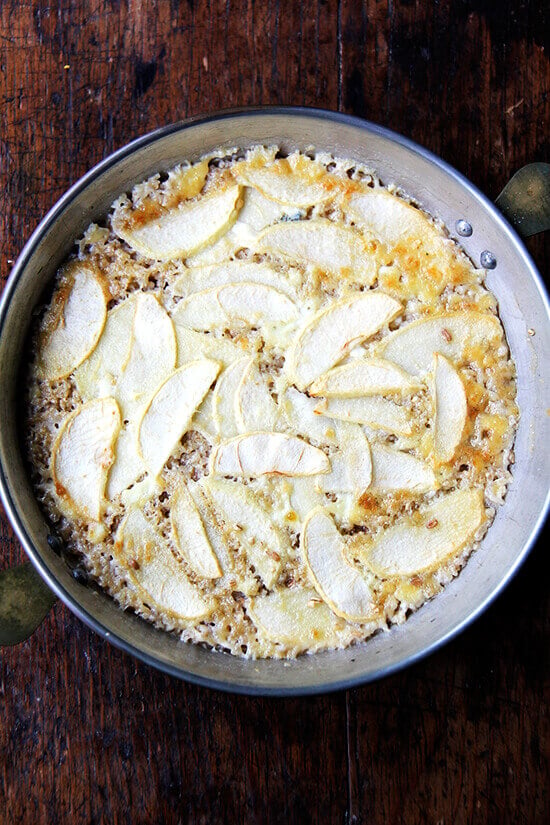
This is also delicious with apples:
Description
Inspired by Heidi Swanson’s recipe in Super Natural Every Day via Orangette
I like my Pyrex 8-inch square baking dish for this one. You can also use six 6-oz ramekins.
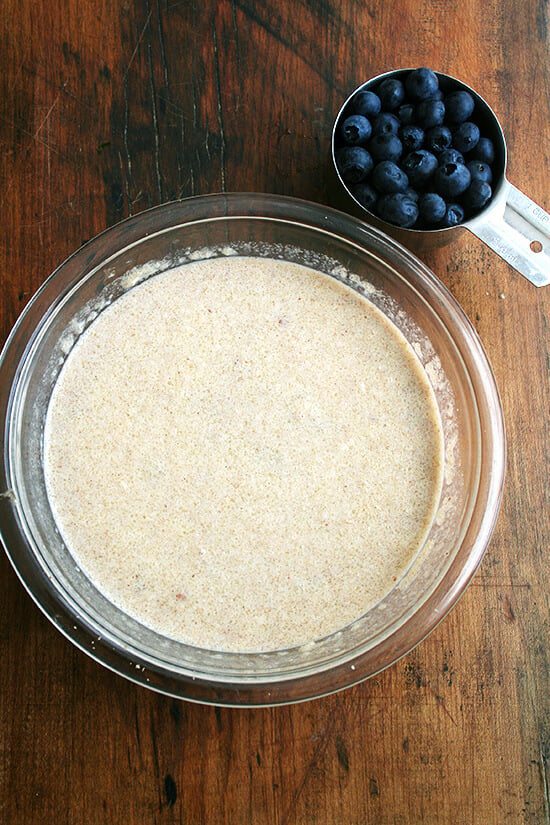
If you are mixing this at night and baking in the morning, follow the recipe through step 2, omitting the fruit. Store mixture in baking vessel or in a Tupperware. In the morning, give the mixture a stir. Scatter berries (if using) into an 8-inch baking dish. Pour milk-oat mixture over the berries; then proceed with recipe.
As I noted, I like these baked oats both with berries or other fruit and without, so don’t hesitate to make them if you don’t have any berries on hand — they are so good on their own. I have used both almonds and walnuts. I do toast the walnuts. I don’t toast the almonds — it doesn’t seem to matter. The mixture can be assembled the night before, though it doesn’t have to be.
Update, Oct 2014: Almonds are my preference. Peeled, sliced apples are also my preference. I omit the cinnamon. I also now do 1/4 cup maple syrup as opposed to 1/3 cup.
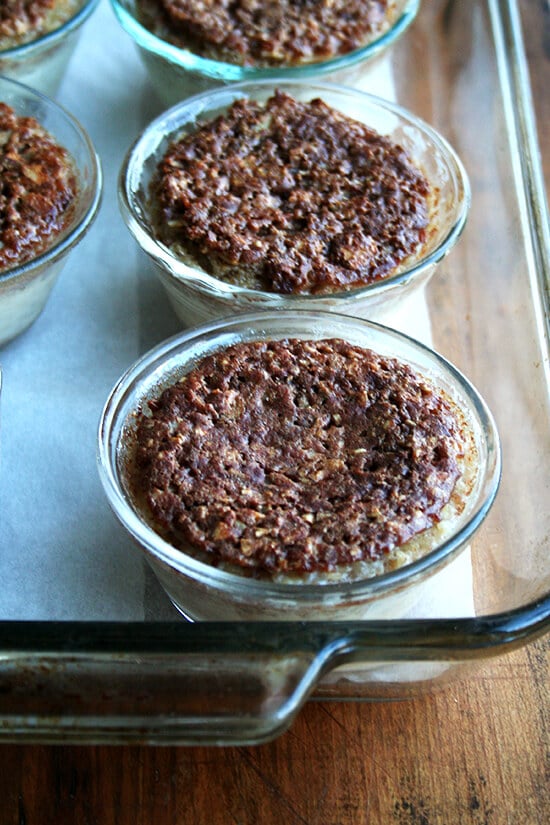
If you are making individual portions, I think the easiest method is this: mix dry ingredients as instructed in step 1; spoon about three tablespoon of the dry ingredients into six 6-oz ramekins; then pour liquid over top. The liquid will reach the top of each ramekin. To prevent a catastrophe, I suggest lining a 9×13-inch baking dish with parchment paper and placing the filled ramekins in the dish to bake.
- 3/4 cup steel cut oatmeal
- ½ cup ( 60 g ) almonds (sliced, untoasted are great) or walnuts halves, toasted and chopped
- 1 teaspoon baking powder
- 1½ teaspoons ground cinnamon, optional
- ½ teaspoon fine sea salt or kosher salt
- ¾ to 1 ½ cups ( 90 to 185 g) blueberries, optional—I like using 1 peeled, sliced apple
- 2 cups ( 475 ml) milk, 2% or whole
- 1/4 to 1/3 cup ( 80 ml) maple syrup, I find 1/4 cup to be sweet enough
- 1 large egg
- 3 tablespoons ( 45 grams ) unsalted butter, melted and cooled slightly
- 2 teaspoons vanilla extract
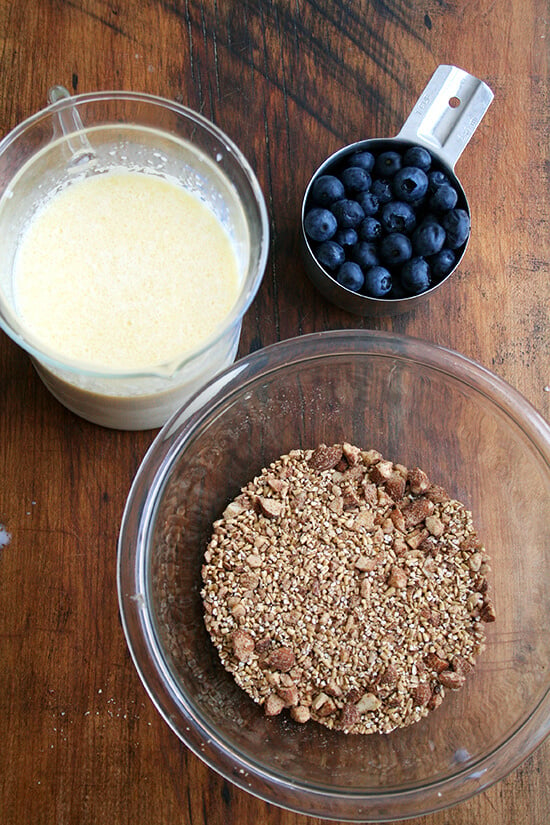
- See notes if you are refrigerating this overnight. Otherwise, preheat the oven to 375ºF. In an 8- or 9-inch baking pan, mix together the oats, the nuts, baking powder, cinnamon, if using, and salt. Place the sliced apples or berries on top.
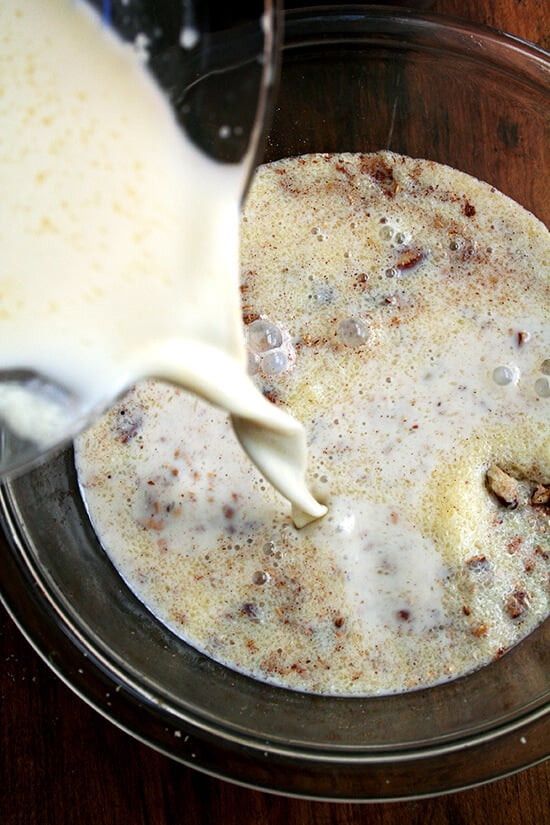
- In a medium bowl, whisk together the milk, maple syrup, egg, butter, and vanilla. Pour the milk mixture over the oat mixture, and shake the pan to distribute.
- Transfer pan to the oven and bake for 55 to 60 minutes (Note: Several commenters have had issues with browning too quickly, so I advise checking after 30 minutes, and if it looks as though it is browning quickly, turn oven down to 350 and check periodically for doneness), or until the top is golden and the oat mixture has set. Remove from the oven, and allow to cool for a few minutes before serving.
- Prep Time: 10 minutes
- Cook Time: 55 minutes
- Category: Breakfast
- Method: Oven
- Cuisine: American
