Made with only four ingredients, this peppermint bark is one of the simplest holiday cookies you could make and one of the most festive, too. What’s more, it yields a ton, making it perfect for gifting all season long. So easy, so pretty, so delicious!
When a woman commented on this chewy chocolate sugar cookie recipe saying she loved all things peppermint and was planning on rolling the unbaked cookies in “peppermint dust,” I was intrigued. Peppermint dust I quickly learned is simply candy canes that have been pulverized into “dust.”
I loved the sound of this because I, too, love all things peppermint, but I’ve never loved candy canes. A few days later, the woman wrote back saying: “Rolled the dough in the ‘dust’, baked and then sprinkled a bit more on top after baking. They are incredible.”
About this same time, the Williams-Sonoma catalog arrived, and as I flipped through it, the decorative tins of peppermint bark catching my attention, I wondered how a homemade version might taste, topped with peppermint dust as opposed to coarsely chopped candy canes.
Feeling inspired, I found a recipe online and gave it a go. Friends! I had no idea making peppermint bark was so easy! And so tasty! And so high-yielding! Like these boozy rum balls and these lemon-almond snowballs and these ugly delicious gingerbread cookie bars , peppermint bark falls into the low-effort, high-reward category of cookies we all need more of in our lives.
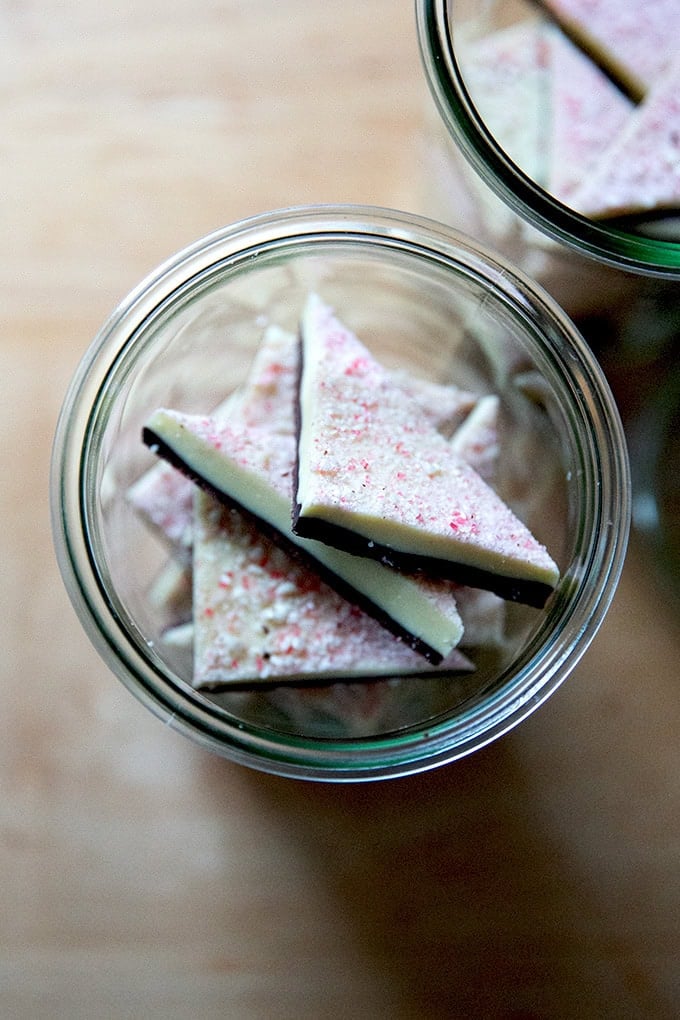
Easy, festive, tasty: what’s not to love? Pack it into jars. Wrap it in little baggies. Gift it all season long.
How to Make Peppermint Bark, Step by Step
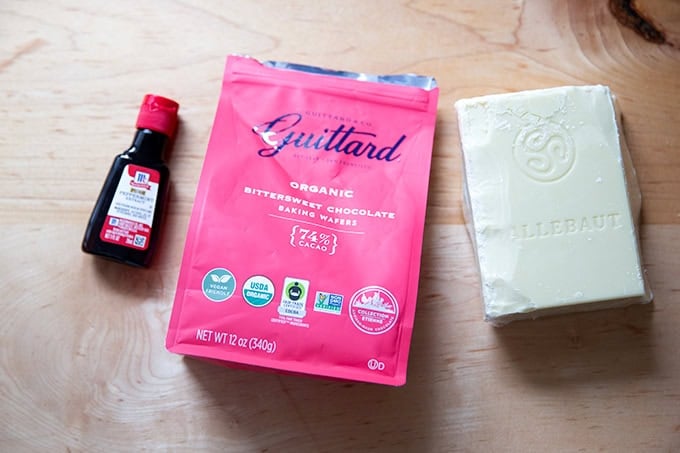
Gather your ingredients: dark chocolate, white chocolate, and peppermint extract.
You’ll also need some candy canes:
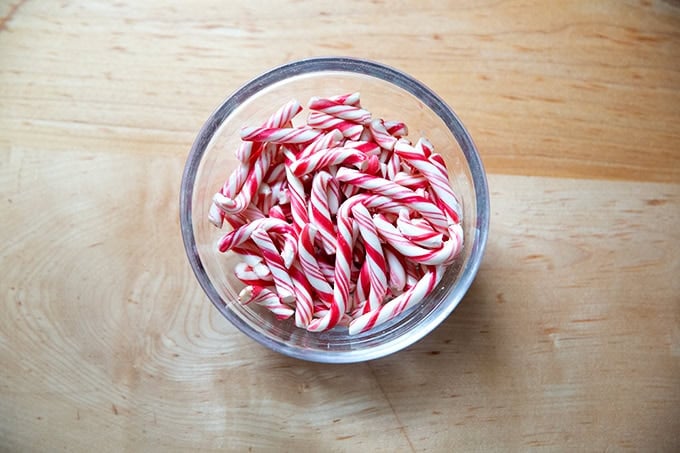
I like to blitz the candy canes into dust in the food processor, but if you prefer a coarser chop, simply place them in a ziplock bag and gently crush them using a rolling pin.

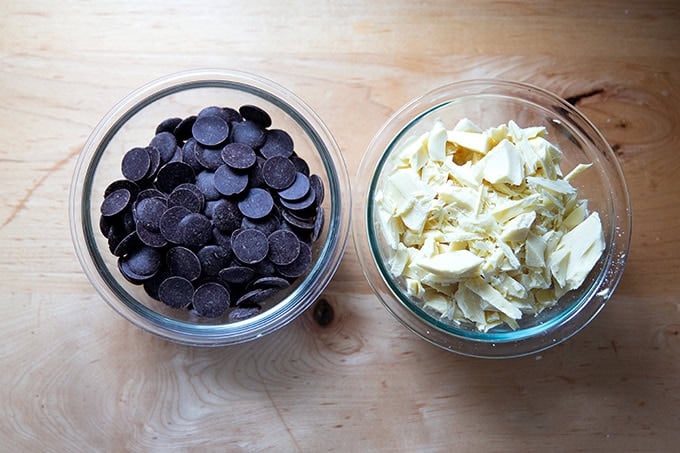
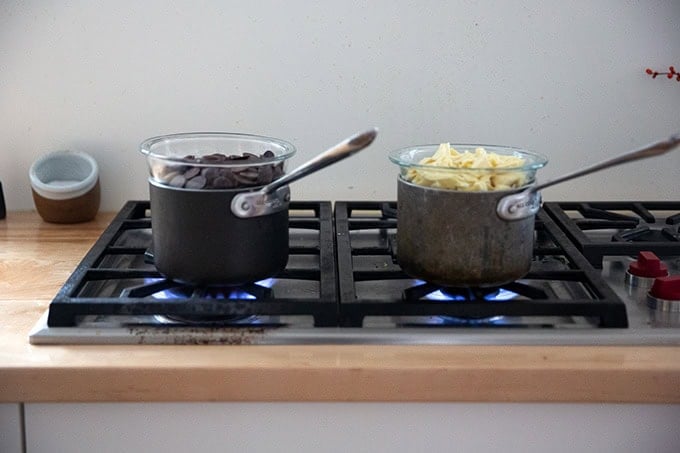
Measure out the chocolate: 12 ounces of dark chocolate and 16 ounces of white chocolate.
Set each bowl of chocolate over a pot on the stovetop: I’m using these 1-quart Pyrex bowls (which I use for the peasant bread ) and two All-Clad 2-qt saucepans (similar to this one ).
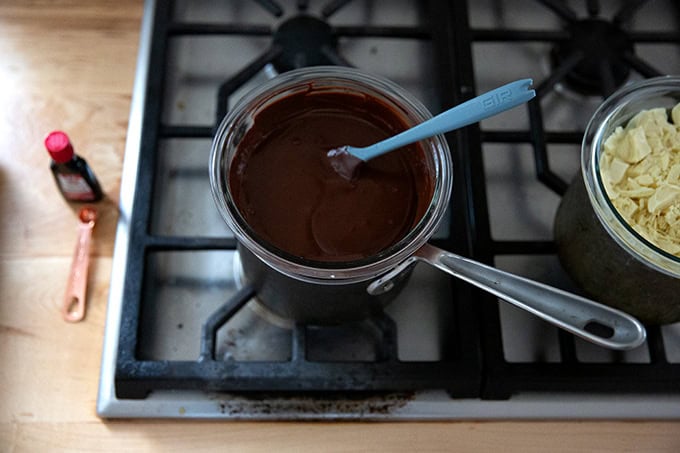
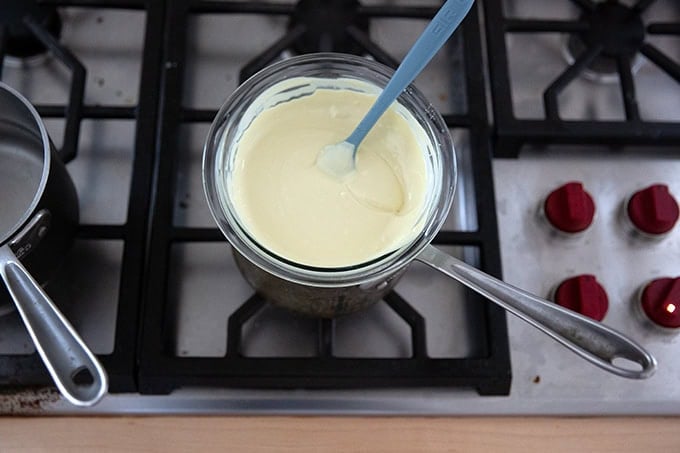
Once the dark chocolate is melted, add a quarter teaspoon of peppermint extract and stir to combine:
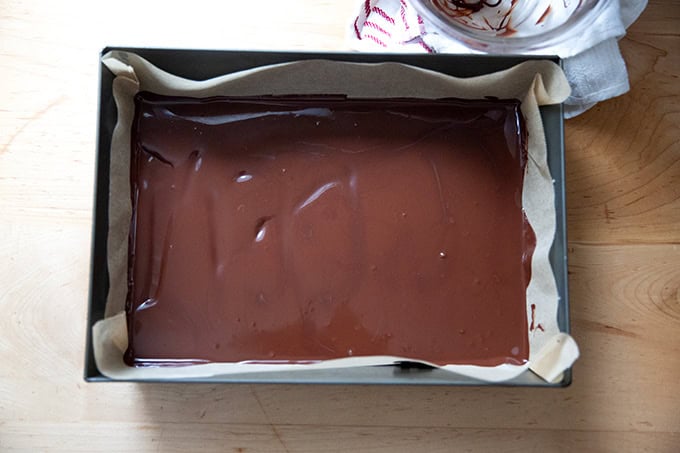
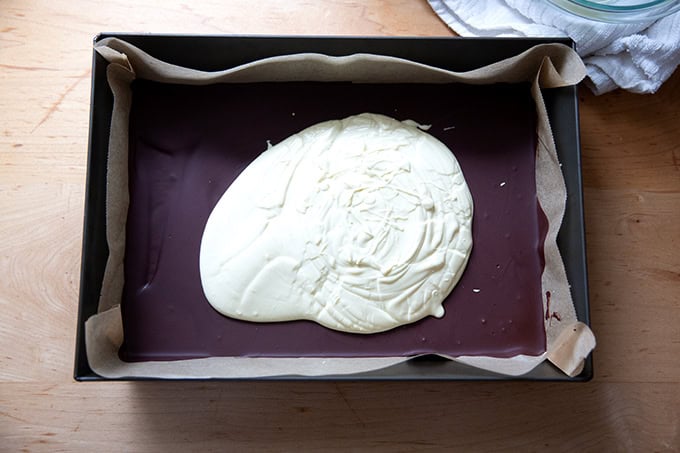
Then spread the melted chocolate into a 9×13-inch or 10×14-inch parchment-lined pan.
Transfer to the fridge for 10 minutes (or until the chocolate just sets).
Meanwhile, stir another 1/4 teaspoon of peppermint extract into the melted white chocolate:
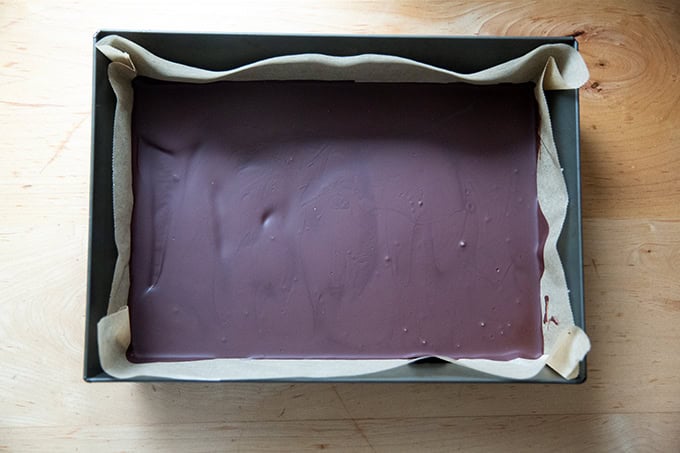
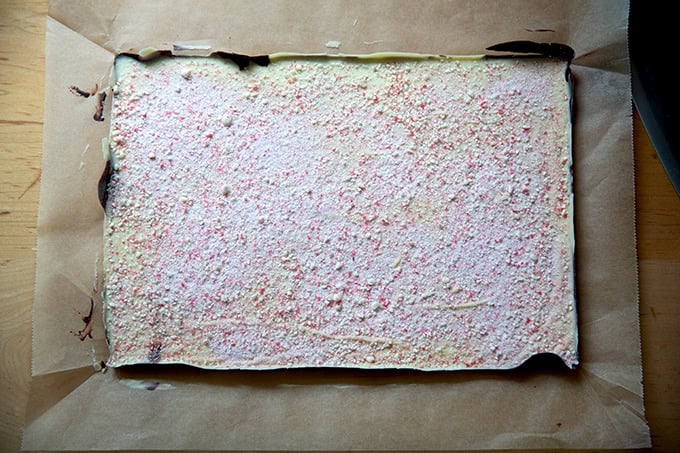
Spread the white chocolate over the top of the dark chocolate…
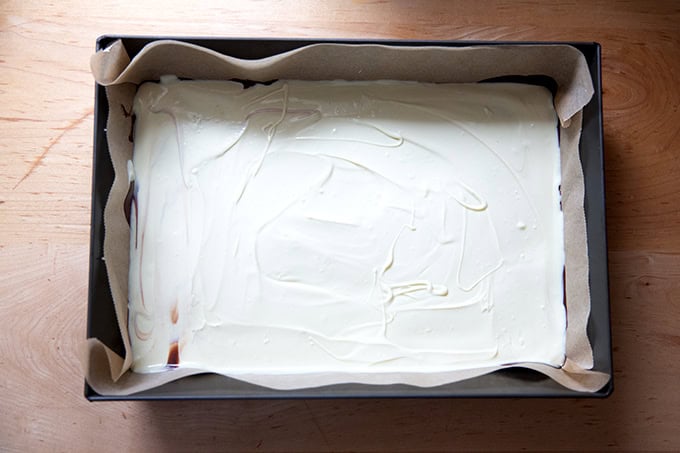
… and spread it edge to edge:
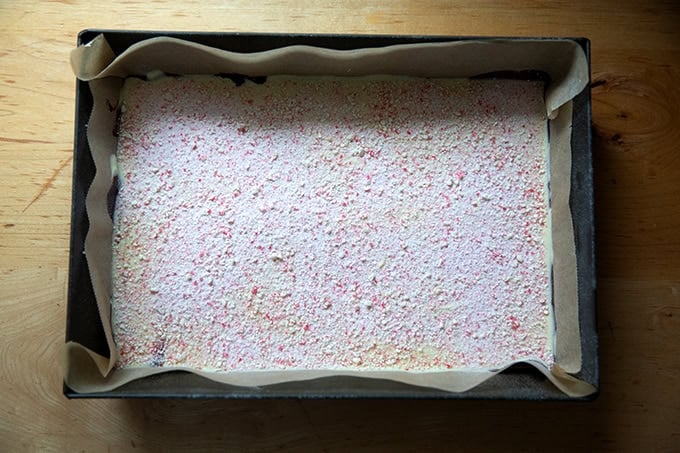
Sprinkle with the peppermint dust, then return to the fridge for another 20 minutes.
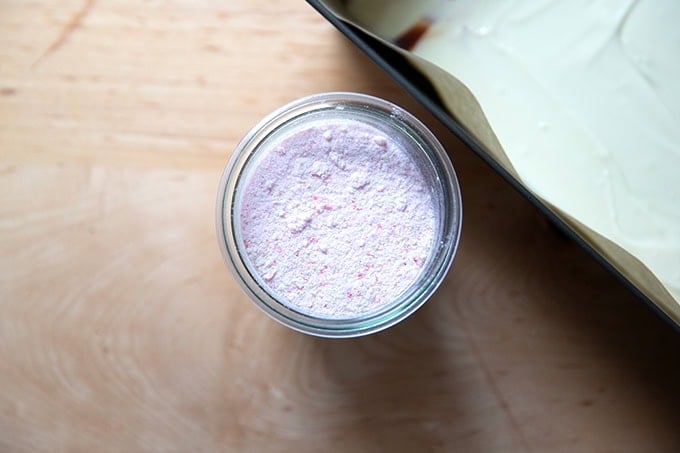
Store the remaining peppermint dust in a jar for future use:
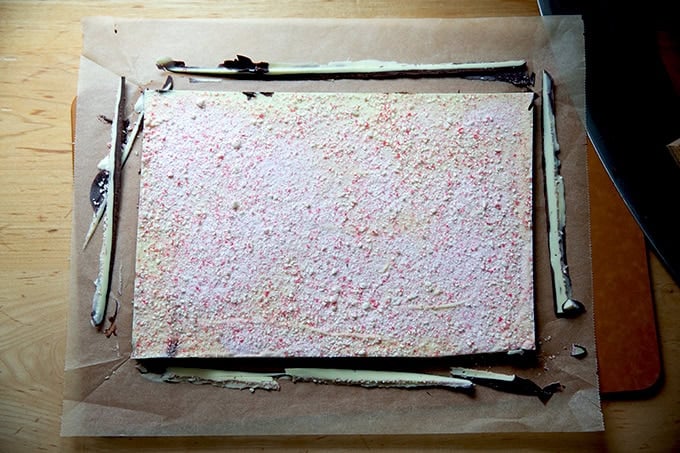
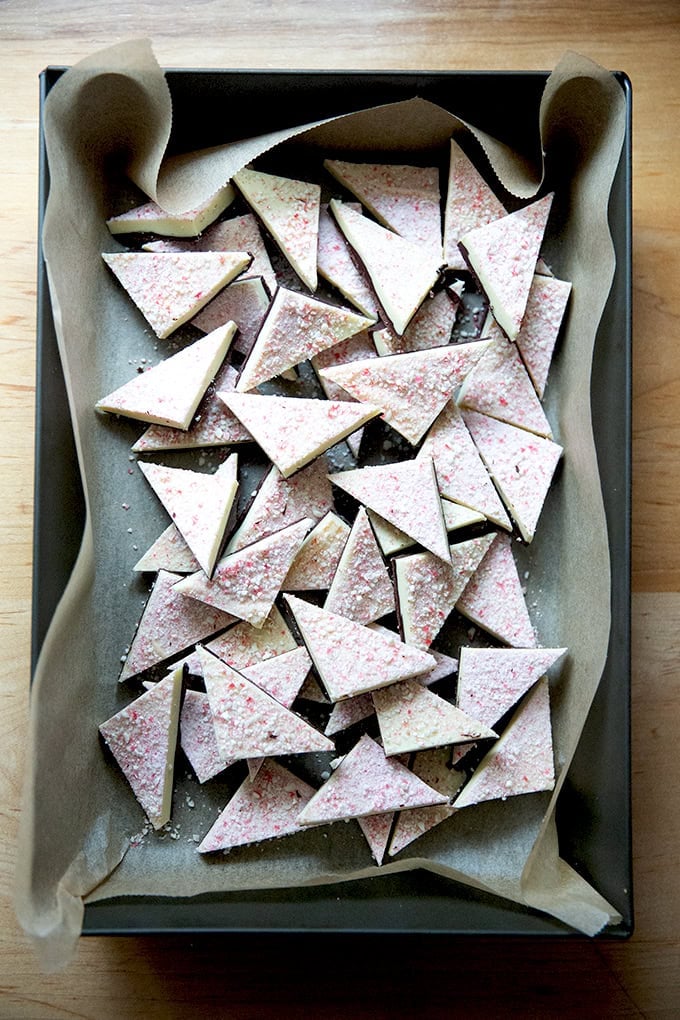
Remove the bark from the fridge, and let it sit at room temperature for another 20 minutes before cutting:
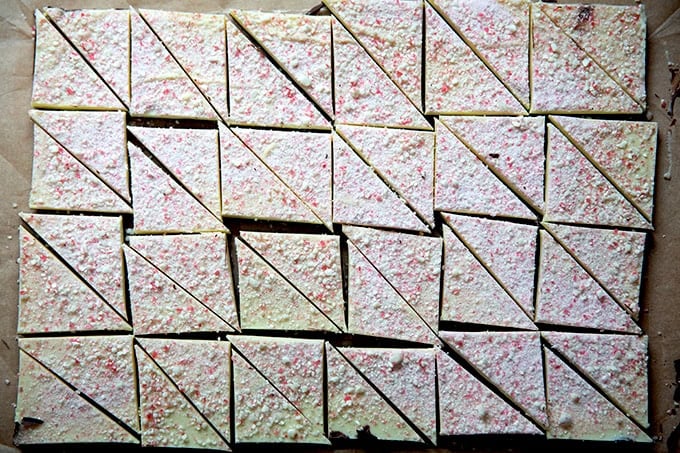
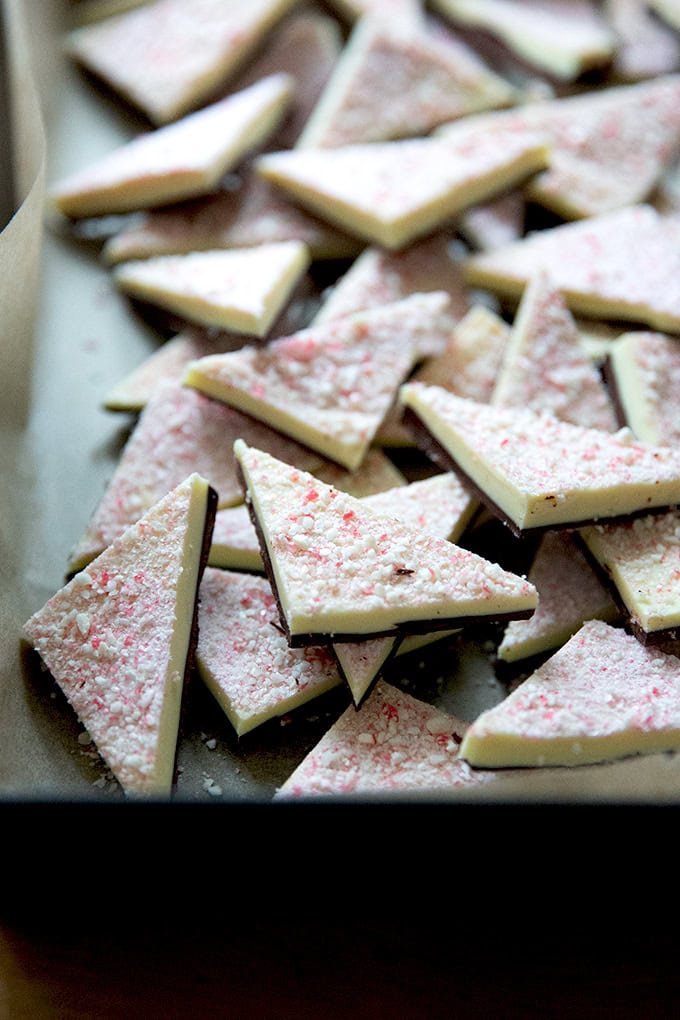
There are two approaches to cutting the bark: you can either break it into irregular shards or you can cut it into neat, even pieces, which is my preference. To do so, trim away the edges first.
Then cut into 2-inch squares…
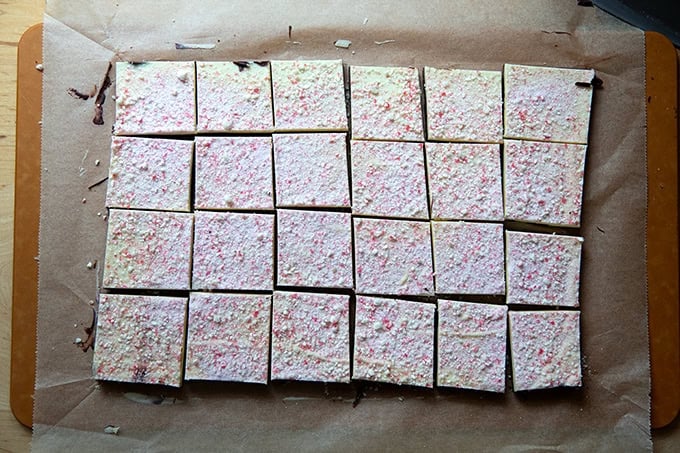
… then into triangles:
I like to return it to the fridge briefly (just an hour or so) to firm up. Then serve
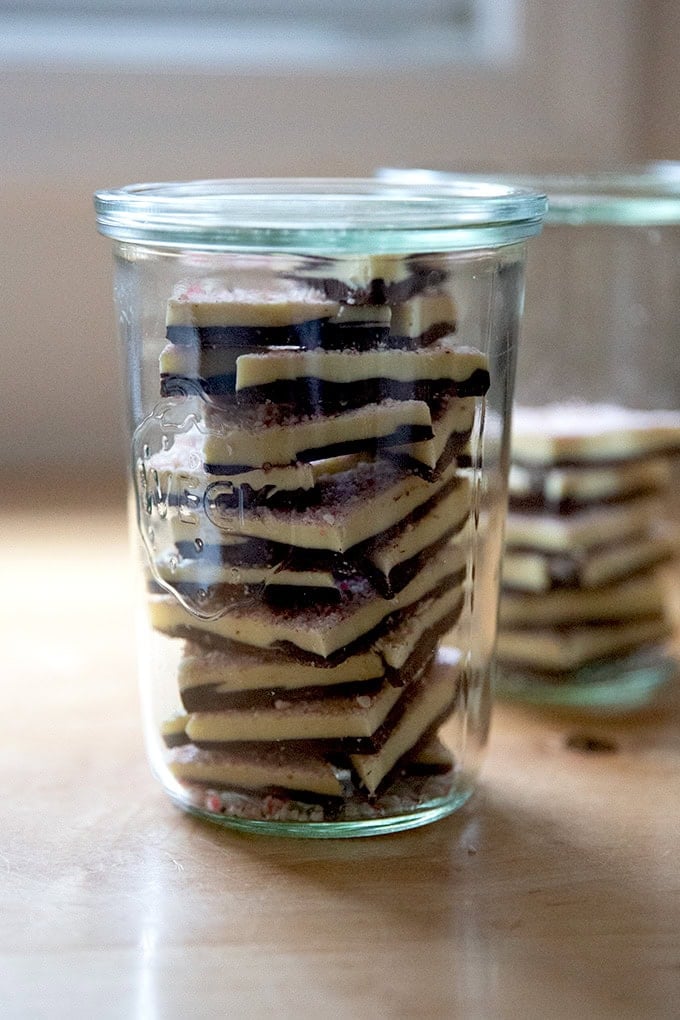
Or pack into jars . You can store the bark at room temperature or in the fridge.
Description
Made with only four ingredients, this peppermint bark is one of the simplest holiday cookies you could make and one of the most festive, too. What’s more, it yields a ton, making it perfect for gifting all season long. So easy, so pretty, so delicious!
Adapted from Dinner at The Zoo’s recipe , which I’ve made just a few small changes to, namely in the method (I use the stovetop and a double boiler to melt the chocolates) and the candy canes, which I blitz into a dust as opposed to coarsely chop.
Notes:
Chocolate: I’m using Guittard bittersweet 74% cacao chocolate wafers . I love this chocolate — it’s tasty on its own, which is important: if the chocolate tastes too dark or bitter or unpleasant, it won’t improve once it’s in bark form. As you know, it will be paired with white chocolate, which is sweet, and which will offset the bitterness somewhat. That said, you don’t want to use a chocolate that is too sweet (like milk chocolate). So pick a tasty, dark-ish chocolate.
White Chocolate: I recommend Callebaut, Valhrona, or Guittard; otherwise use what you can find. Ghirardelli is readily available and works well here, too. Do not use white chocolate chips here as they will not melt well (see video).
Candy Canes : I like to pulse the candy canes until they are blitzed into dust. You’ll need only about 4 candy canes for this recipe, but I’d recommend blitzing more so that you have the dust on hand for other purposes like more bark or rolling sugar cookies in before baking 🙂
The Pan: You need a 9×13-inch or 10×14-inch pan for this. I’ve been loving using my 10×14-inch Lloyd Detroit-Style pizza pan for this recipe.
12 ounces bittersweet chocolate, see notes above
16 ounces white chocolate, finely chopped, see notes above
1/2 teaspoon peppermint extract, divided
4 regular candy canes, see notes above
- Fill two small pots with water halfway full. Bring to a simmer.
- Place the dark chocolate in a small bowl. Place the white chocolate in a small bowl. Set each bowl over a pot and leave undisturbed until you see the chocolate beginning to melt, about 5 minutes.
- While the chocolates melt slowly on the stovetop, unwrap the candy canes, then place in a food processor. Purée until the candy canes are nearly dust or until they are chopped to a coarseness of your liking.
- Stir the dark chocolate with a spatula until smooth, then add 1/4 teaspoon of peppermint extract, and stir until completely smooth.
- Line a 9×13-inch or 10×14-inch pan with parchment paper. Spread the dark chocolate into the pan, then transfer to the fridge for 10 to 12 minutes or until the chocolate just sets — Note: due to some user reviews, you’ll want to rely on visual cues here: the chocolate should be visually set, but do start checking at 10 minutes. If you are using a glass pan, it may take longer. You do not want to leave the chocolate in the fridge much beyond the point at which it has set, otherwise you risk the white chocolate not adhering to the chocolate layer; if the bottom layer has not set, however, the white chocolate will swirl into it. It may take some trial and error to get the timing right given your fridge/pan.
- Stir the white chocolate with a spatula until smooth, then add the remaining 1/4 teaspoon of peppermint extract, and stir until completely smooth.
- Spread the melted white chocolate over the dark chocolate — you can do this with a spatula, the back of a spoon, or a small offset spatula. Sprinkle roughly 1/4 cup of the peppermint dust over the surface. You can do this with a sieve or you can simply scatter the dust over the surface with your hands.
- Return to the fridge for 20 minutes. Remove from the fridge and let sit at room temperature for another 20 minutes.
- Cut into neat triangles or break into shards. To cut into triangles, first trim away the rough edges. Then cut the bar roughly into 2-inch squares. Finally, cut each square in half on the diagonal to create triangles. Return the bark to the fridge for another 20 minutes to firm up.
- You can store the bark at room temperature in an air-tight container or in the fridge for up to 3 weeks.
- Prep Time: 5 minutes
- Cook Time: 5 minutes
- Category: Dessert
- Method: Stovetop, Fridge
- Cuisine: American
Find it online : https://alexandracooks.com/2024/12/14/homemade-peppermint-bark-with-peppermint-dust/
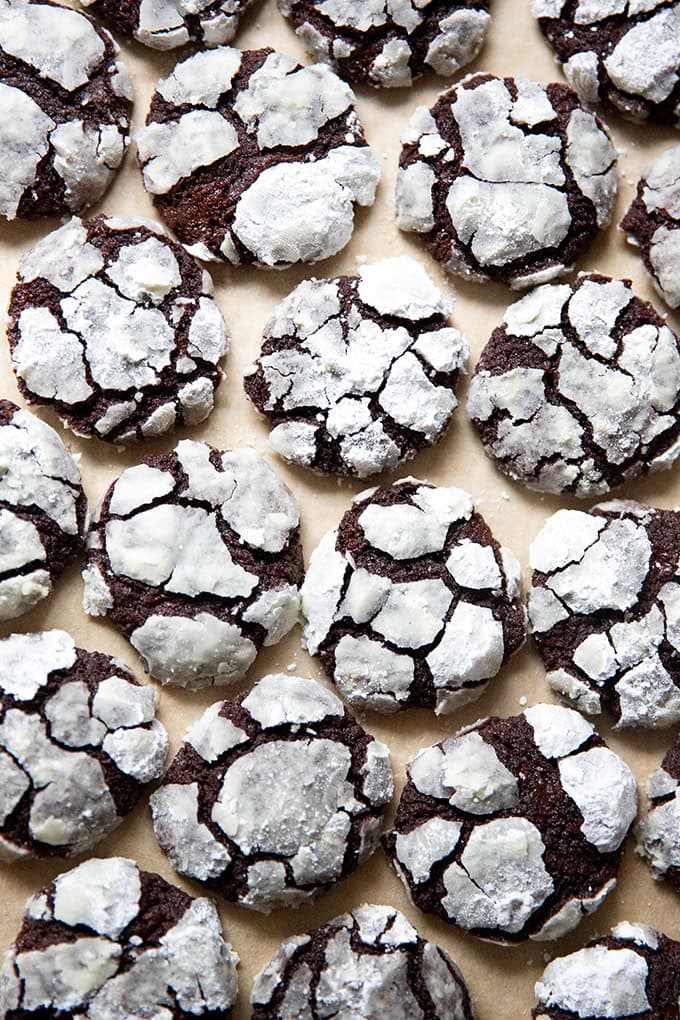
Made with both cocoa powder and bittersweet chocolate, these chocolate crinkle cookies are exceptional: intensely chocolatey, fudgy, and crunchy at the same time . Read on to learn the secret to making crinkle cookies that emerge from the oven with dramatic cracks across their surfaces!
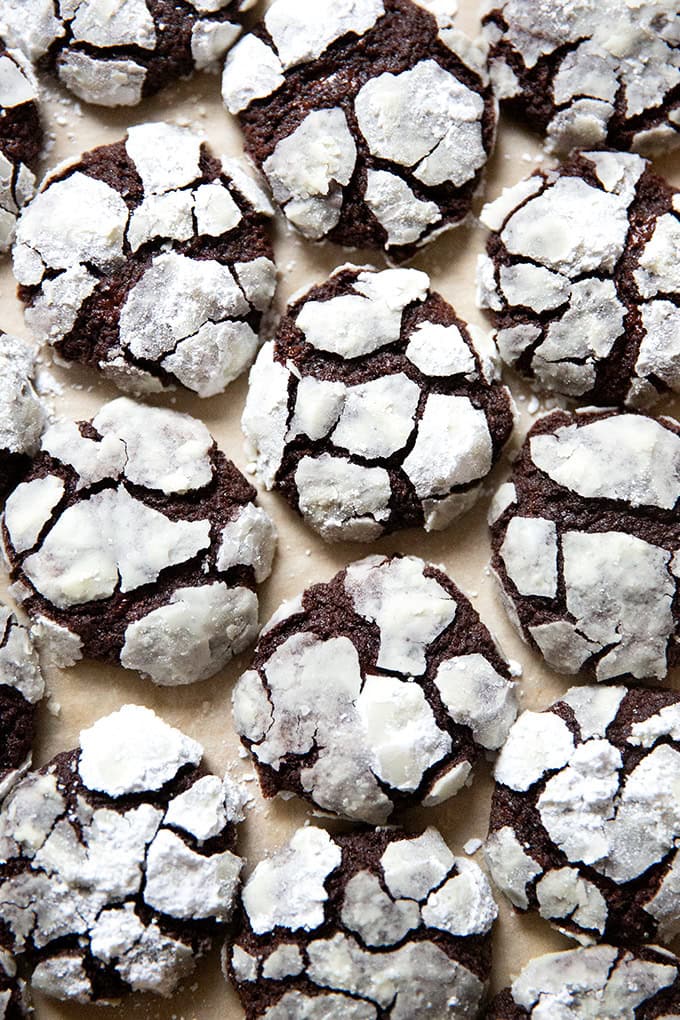
In the intro to the chocolate crinkles cookie recipe in Zoe Bakes Cookies , Zoe describes these crinkles as both “fudgy and crunchy at the same time” — a textural combination I love — so I made them immediately. Sure enough, the crinkles emerged from the oven looking just as promised: snow-capped with beautifully cracked surfaces.
Do you know the secret to creating those beautifully cracked surfaces? It’s to double-dip the dough balls, once in granulated sugar and then in confectioners’ sugar. Before making Zoe’s recipe, I had never had great success with crinkles — I had never been able to create those dramatic cracks or the texture I desired.
Friends, the flavor and texture of these cookies are exceptional: intensely chocolatey, perfectly chewy and moist, almost like a fudgy brownie in cookie form. They require a little more work than other cookies, but they are so worth the effort, especially for holidays and most especially for the chocolate lover in your life.
How to Make Chocolate Crinkles, Step by Step
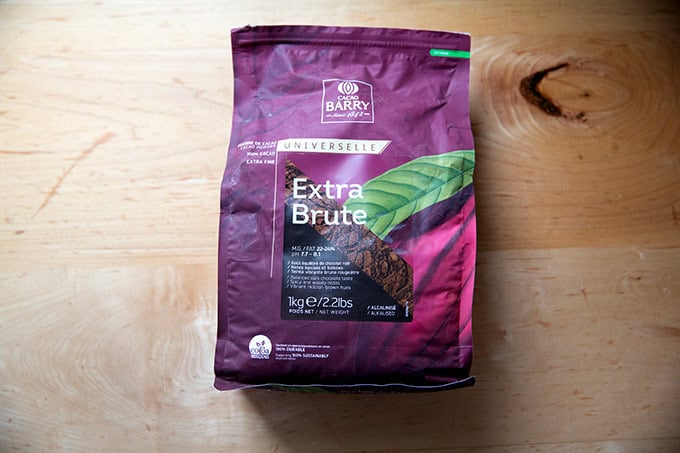
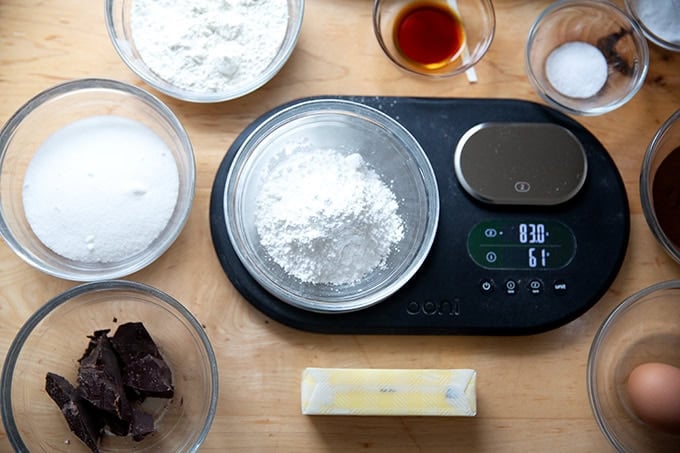
Gather your ingredients. For this recipe you’ll need Dutch-processed cocoa powder. I’m using this Cacao Barry Extra Brute , which comes highly recommended by Stella Parks of Serious Eats.
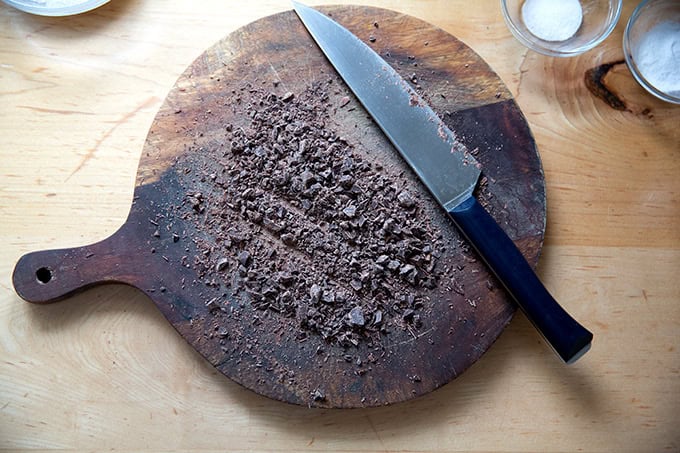
You’ll also need some bittersweet chocolate, which you will chop finely. I’m using Valrhona 70% cacao:

For best results, use a scale to measure:
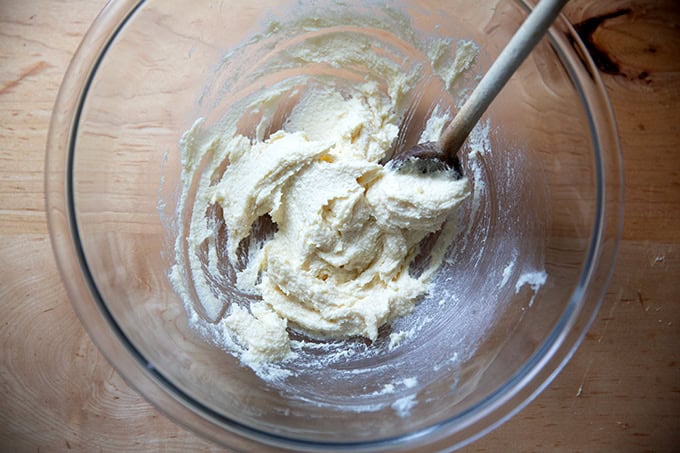
Start by combining the butter, sugar, and vanilla:

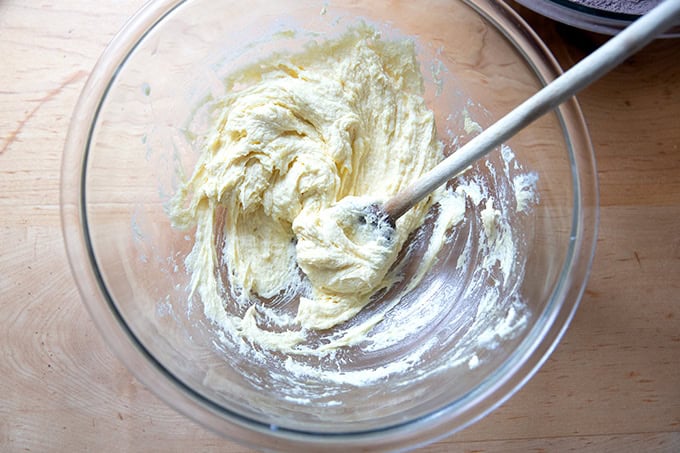
Beat until light and fluffy — you can do this in the stand mixer, too, which makes the process easier:
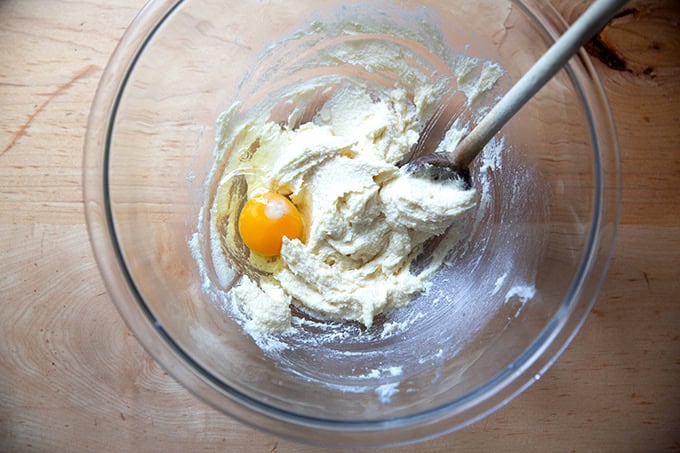
Then add an egg and beat until combined:
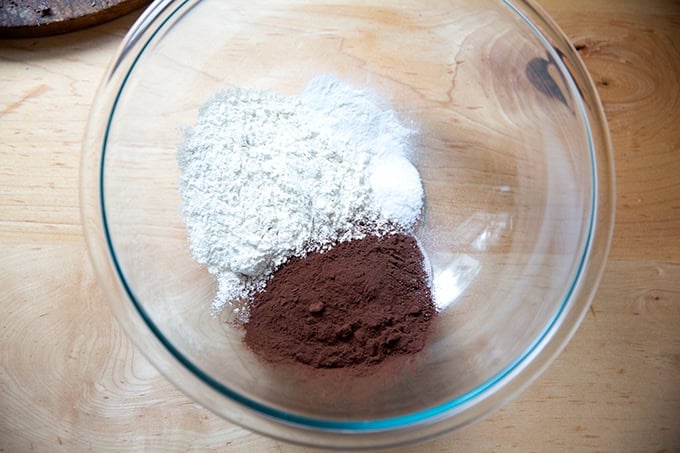
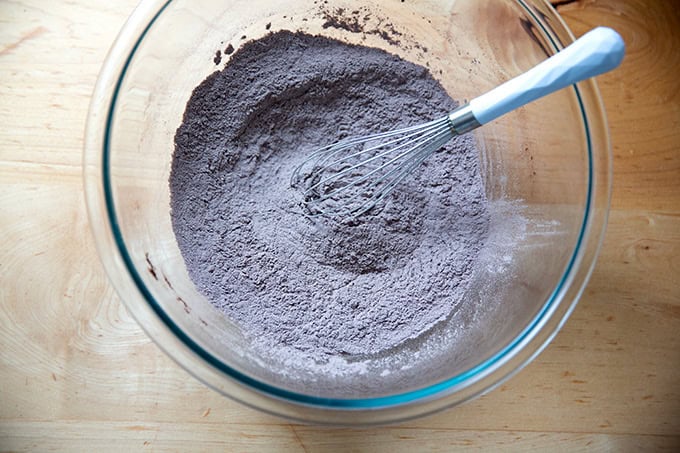
In a separate bowl, combine the flour, cocoa, salt, and baking powder:
Whisk until smooth:
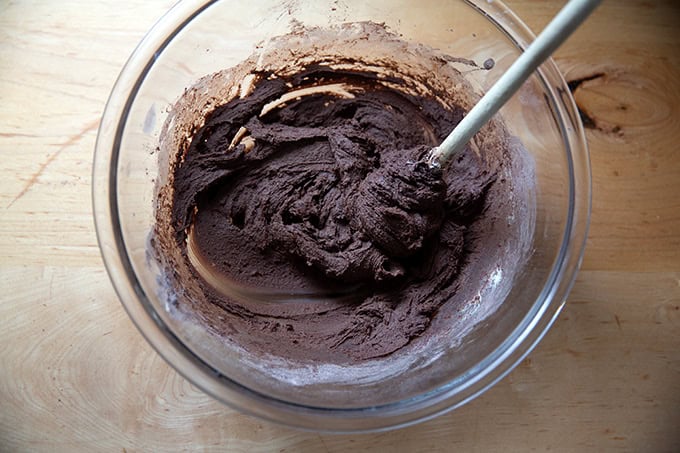
Add the dry ingredients all at once to the wet and mix to combine:
Chop the chocolate
Add it to the batter:
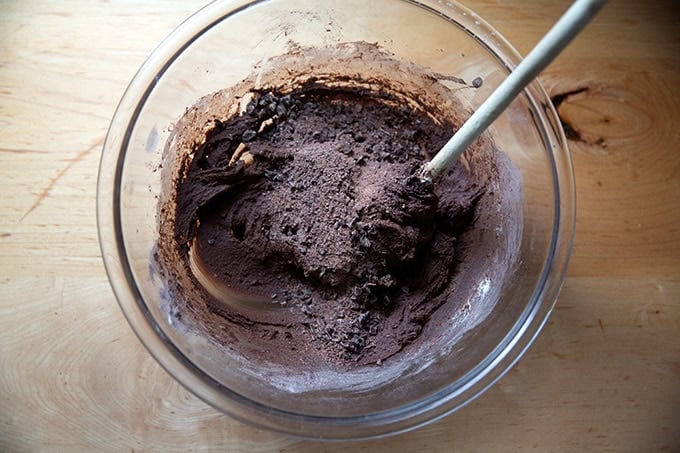
And mix until incorporated.
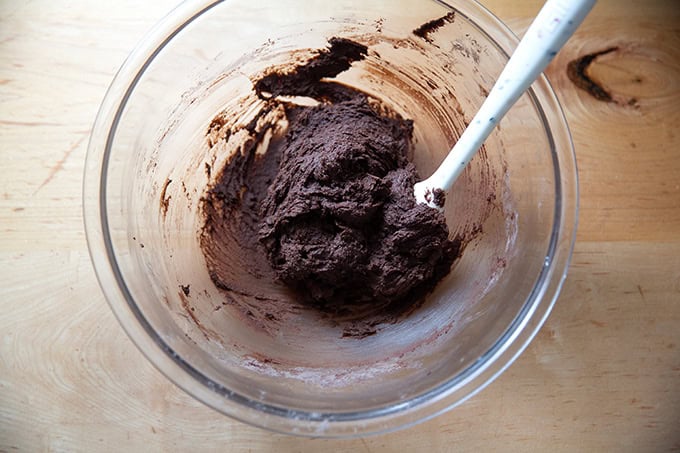
Once the batter is done, portion it into tablespoon-sized (or 22-gram) balls:
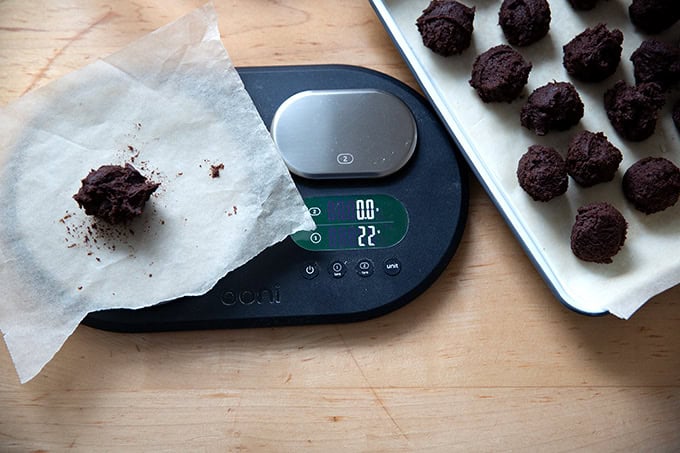
Place them on a small tray:
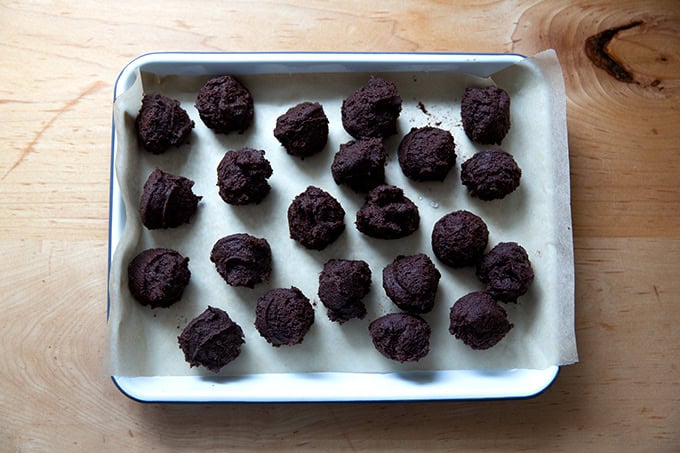
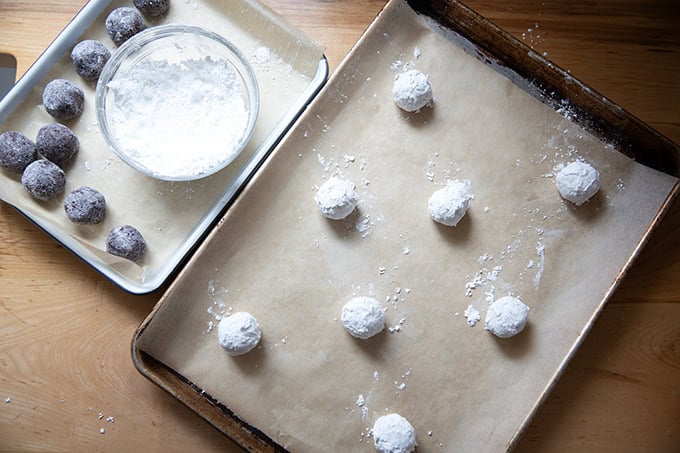
Roll the balls between your palms, then roll each ball in sugar:
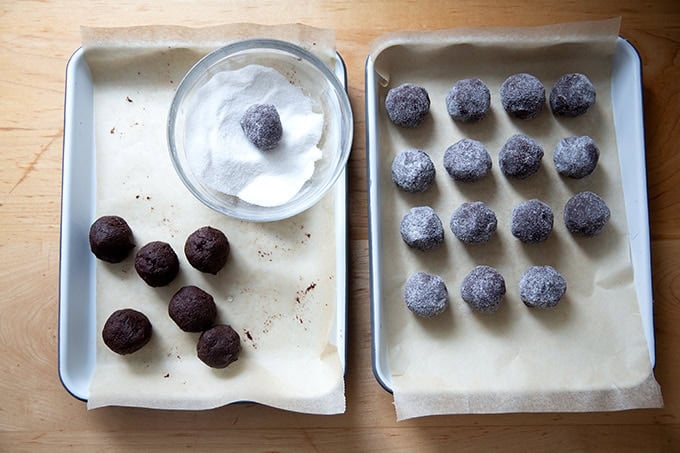
Freeze the balls for 15 minutes:
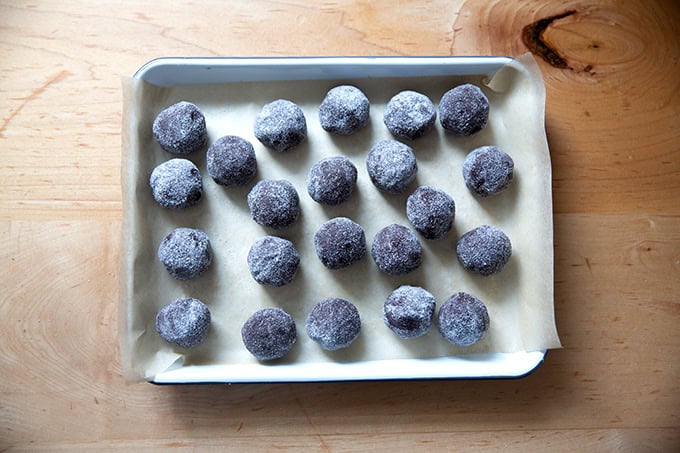
Then roll each ball in confectioners’ sugar:
Bake each tray of cookies for 8 to 10 minutes at 375ºF:
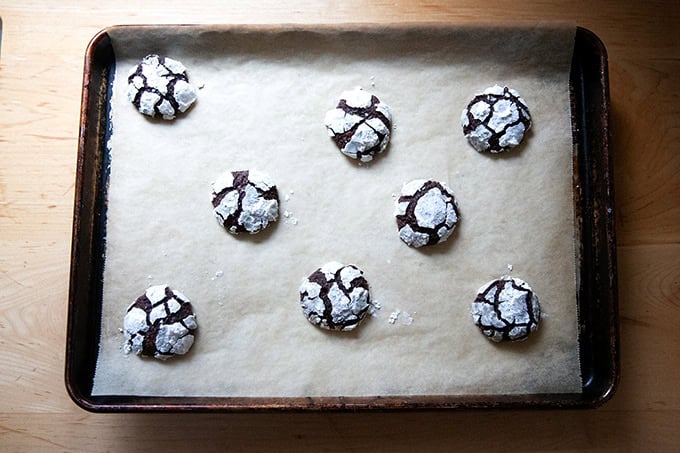
The cookies should be puffed and crinkled upon removing:
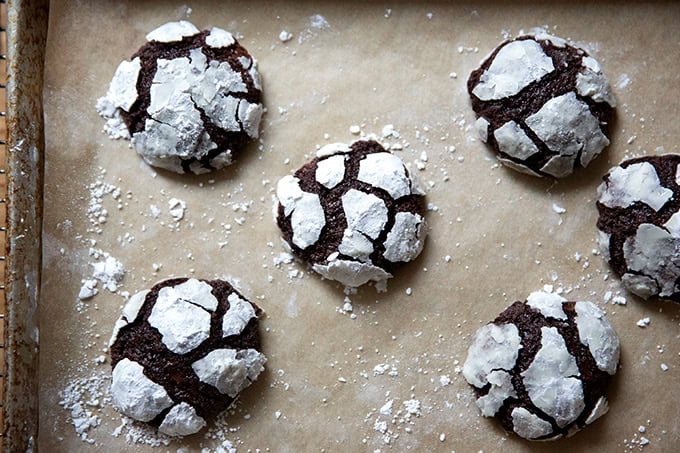
Allow them to cool completely on the sheet pan before serving or storing:
These are heavenly and taste even better on days 2 and 3, so don’t be afraid to make them ahead of time.
Description
Made with both cocoa powder and bittersweet chocolate, these chocolate crinkle cookies are exceptional: intensely chocolatey, fudgy, and crunchy at the same time .
From Zoe Bakes Cookies
Tips for Success
Use a scale to measure . This recipe calls for cocoa powder, which is very hard to measure accurately using volume measures.
Use a stand mixer if you have one. If you don’t mind getting an arm workout, you absolutely can whisk/beat by hand, but a stand mixer makes the job easier and also more effectively whips the butter into a light and airy texture.
Follow the recipe precisely. Chill the sugar-coated dough balls for no more than 15 minutes, to help ensure the cookies emerge with the white powdered sugar looking as snowy as ever.
1 cup ( 120 g ) all-purpose flour
1/2 cup ( 40 g ) Dutch-processed cocoa powder
1 1/4 tsp ( 4 g ) baking powder
1/2 tsp ( 3 g ) kosher salt
1/2 tsp ( 1 g ) espresso powder, optional
1/2 cup ( 114 g ) butter, salted or unsalted at room temperature
3/4 cup ( 150 g ) granulated sugar, plus more for rolling
2 tsp ( 8 g ) pure vanilla extract
1 egg, at room temperature
2 ounces ( 56 g ) bittersweet chocolate, finely chopped
1/2 cup ( 60 g ) confectioners’ sugar for rolling
- In a medium bowl, whisk together the flour, cocoa, baking powder, salt, and espresso powder, if using.
- In a stand mixer fitted with the paddle attachment, cream together the butter, sugar and vanilla on medium speed until light and fluffy, about 2 minutes. Scrape down the sides of the bowl with a rubber spatula. Mix in th egg until well incorporated. Scrape down the bowl again.
- Add the flour mixture all at once and mix on low speed just until it all comes together. Scrape down the bowl. Turn the speed to medium and mix for 15 seconds. Turn the speed down to low, add the chopped chocolate, and mix until just incorporated.
- Line two baking sheets with parchment paper.
- Scoop the cookie dough using a #70 (1-tablespoon) portion scoop. Alternatively weigh the dough into 22 gram portions. Roll each dough ball in the palm of your hand to make a round sphere. Roll the cookies in granulated sugar. Freeze the dough balls for about 15 minutes (they should be very cold, but not frozen solid) or refrigerate for 30 minutes.
- Preheat the oven to 375ºF.
- Dip the cookies in the confectioners’ sugar and place them on the prepared baking sheets, leaving 3 inches between each cookie.
- Bake one sheet at a time, in the middle of the oven for 8 to 10 minutes, until the cookies puff up and the sugar coating looks crinkled. (Note: My cookies consistently have been taking 10 minutes.) Don’t overbake the cookies or they will become crispy.
- Cool completely on the baking sheet before serving or storing at room temperature in an airtight vessel.
- Note: While these cookies emerge from the oven with the confectioners’ sugar looking pristine, as they cool, some of that sugar inevitably will begin to dissolve. Know that the flavor is unaffected by the “melting snow” and if anything the flavor of these cookies improves with time. I think they are perhaps best two or three days after baking.
- Prep Time: 30 minutes
- Cook Time: 10 minutes
- Category: Cookies
- Method: Stand mixer, oven
- Cuisine: American
